Profile Rail Linear Guides
Profile Rail Linear Guides
Profile Rail Linear Guides

You also want an ePaper? Increase the reach of your titles
YUMPU automatically turns print PDFs into web optimized ePapers that Google loves.
<strong>Profile</strong> <strong>Rail</strong> <strong>Linear</strong> <strong>Guides</strong><br />
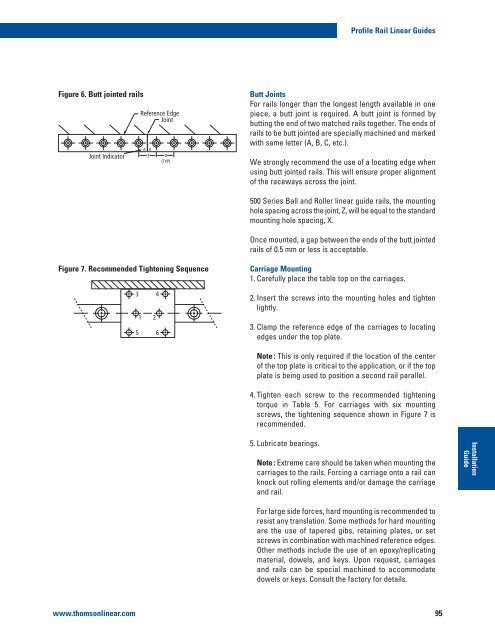
Figure 6. Butt jointed rails<br />
Joint Indicator<br />
Reference Edge<br />
Joint<br />
A A<br />
Z<br />
X<br />
(TYP)<br />
Butt Joints<br />
For rails longer than the longest length available in one<br />
piece, a butt joint is required. A butt joint is formed by<br />
butting the end of two matched rails together. The ends of<br />
rails to be butt jointed are specially machined and marked<br />
with same letter (A, B, C, etc.).<br />
We strongly recommend the use of a locating edge when<br />
using butt jointed rails. This will ensure proper alignment<br />
of the raceways across the joint.<br />
500 Series Ball and Roller linear guide rails, the mounting<br />
hole spacing across the joint, Z, will be equal to the standard<br />
mounting hole spacing, X.<br />
Once mounted, a gap between the ends of the butt jointed<br />
rails of 0.5 mm or less is acceptable.<br />
Figure 7. Recommended Tightening Sequence<br />
3 4<br />
1 2<br />
5 6<br />
Carriage Mounting<br />
1. Carefully place the table top on the carriages.<br />
2. Insert the screws into the mounting holes and tighten<br />
lightly.<br />
3. Clamp the reference edge of the carriages to locating<br />
edges under the top plate.<br />
Note : This is only required if the location of the center<br />
of the top plate is critical to the application, or if the top<br />
plate is being used to position a second rail parallel.<br />
4. Tighten each screw to the recommended tightening<br />
torque in Table 5. For carriages with six mounting<br />
screws, the tightening sequence shown in Figure 7 is<br />
recommended.<br />
5. Lubricate bearings.<br />
Note : Extreme care should be taken when mounting the<br />
carriages to the rails. Forcing a carriage onto a rail can<br />
knock out rolling elements and/or damage the carriage<br />
and rail.<br />
Installation<br />
Guide<br />
For large side forces, hard mounting is recommended to<br />
resist any translation. Some methods for hard mounting<br />
are the use of tapered gibs, retaining plates, or set<br />
screws in combination with machined reference edges.<br />
Other methods include the use of an epoxy/replicating<br />
material, dowels, and keys. Upon request, carriages<br />
and rails can be special machined to accommodate<br />
dowels or keys. Consult the factory for details.<br />
www.thomsonlinear.com 95