Sales policy for domestic USA customers.
Sales policy for domestic USA customers.
Sales policy for domestic USA customers.

Create successful ePaper yourself
Turn your PDF publications into a flip-book with our unique Google optimized e-Paper software.
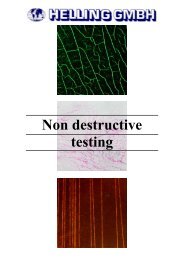
Compression Mounting Compounds<br />
Tips, Tricks & Techniques:<br />
For best per<strong>for</strong>mance of your mounting press and media:<br />
■ Do not compression mount soft, low melting point alloys, wood,<br />
plastic or very friable materials. Castable mounting media will<br />
provide better results.<br />
■ Apply Release Agent 20-8185-002 to mold <strong>for</strong> easy removal.<br />
■ To permanently label specimens when using opaque mount<br />
media, fill most of the mold cylinder with mount media be<strong>for</strong>e<br />
adding a thin layer of TransOptic media. Place a typed label<br />
over the TransOptic powder, then cover it with a second layer of<br />
TransOptic powder. When cured, this preserves the label in a<br />
clear layer of media <strong>for</strong> easy sample identification.<br />
■ To eliminate ”cotton balls” in TransOptic mounts, increase cool<br />
time and/or reduce molding temperature <strong>for</strong> improved mount<br />
clarity.<br />
■ Reheating TransOptic mounts to 110 °C <strong>for</strong> 15 – 30 minutes will<br />
allow <strong>for</strong> the removal of the sample. Wearing heat-resistant<br />
gloves, apply pressure to the media near the sample with<br />
pliers. This should flex the mount, allowing the media to break<br />
away from the sample with increasing pressure.<br />
■ Mounting samples off-center <strong>for</strong> EBSD evaluation facilitates<br />
beam positioning.<br />
Troubleshooting:<br />
■ Mount media that appears frosted or unfused from the<br />
mounting press is often a sign of insufficient molding<br />
temperatures. Check to ensure the temperature setting on<br />
the mounting press is 150 °C or higher and that the heating<br />
element is tightened on the mold cylinder. For the SimpliMet®<br />
1000 and 3000 Mounting Presses, this is done by turning<br />
the cylinder locking screw counter-clockwise until the screw<br />
is loose.<br />
■ Uncured mounts can be caused by too much moisture in<br />
the media. Ensure that containers are properly closed<br />
between uses.<br />
■ Ensure that enough mounting media is placed into mold to<br />
sufficiently cover the sample. If not enough mount media is<br />
used, the mounting media may not be compressed enough to<br />
cure properly and could cause damage to the mold cylinders<br />
and ram assembly.<br />
■ Radial splitting of cured mounts is often caused by samples<br />
with sharp corners or those that are too large <strong>for</strong> the mold size.<br />
Reducing sample size and/or grinding off sharp corners is<br />
recommended.<br />
■ Excessive shrinkage is related to the thermal expansion<br />
coefficient of the media and can be minimized by fully cooling<br />
specimens under pressure in the mounting press. To minimize<br />
shrinkage, the specimen should be cooled to room<br />
temperature be<strong>for</strong>e removal from the mounting press.<br />
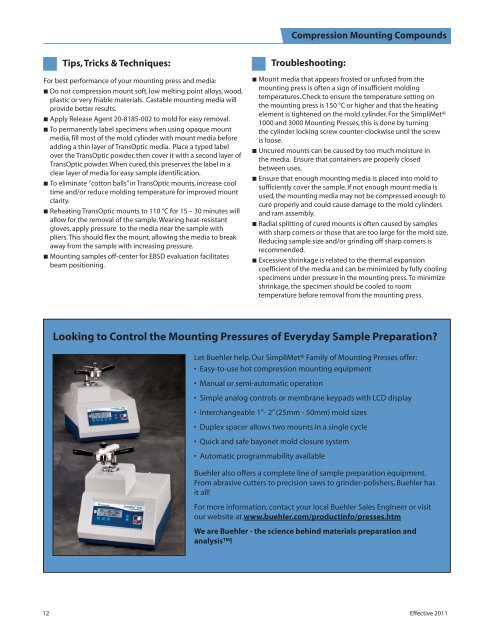
Looking to Control the Mounting Pressures of Everyday Sample Preparation?<br />
Let Buehler help. Our SimpliMet® Family of Mounting Presses offer:<br />
• Easy-to-use hot compression mounting equipment<br />
• Manual or semi-automatic operation<br />
• Simple analog controls or membrane keypads with LCD display<br />
• Interchangeable 1”- 2” (25mm - 50mm) mold sizes<br />
• Duplex spacer allows two mounts in a single cycle<br />
• Quick and safe bayonet mold closure system<br />
• Automatic programmability available<br />
Buehler also offers a complete line of sample preparation equipment.<br />
From abrasive cutters to precision saws to grinder-polishers, Buehler has<br />
it all!<br />
For more in<strong>for</strong>mation, contact your local Buehler <strong>Sales</strong> Engineer or visit<br />
our website at www.buehler.com/productinfo/presses.htm<br />
We are Buehler - the science behind materials preparation and<br />
analysis!<br />
12 Effective 2011