Big Bang Pictures Manual big_bang_pictures.pdf - Inclusive ...
Big Bang Pictures Manual big_bang_pictures.pdf - Inclusive ...
Big Bang Pictures Manual big_bang_pictures.pdf - Inclusive ...

Create successful ePaper yourself
Turn your PDF publications into a flip-book with our unique Google optimized e-Paper software.
<strong>Big</strong> <strong>Bang</strong> <strong>Pictures</strong><br />
Windows is a registered trademark of Microsoft Corporation.<br />
Macintosh is a trademark of Apple Computer, Inc.<br />
<strong>Big</strong> <strong>Bang</strong> <strong>Pictures</strong> was created Adobe Flash. Flash® is © 1993<br />
Adobe Systems Inc.<br />
<strong>Big</strong> <strong>Bang</strong> <strong>Pictures</strong> is © 2008 <strong>Inclusive</strong> Technology Ltd.<br />
Sassoon Font is © 1993 Sassoon and Williams.<br />
No part of this publication or software may be reproduced or<br />
transmitted in whole or part by any means without the written<br />
permission of the publisher. Whilst every care has been taken with<br />
this product, the author and publisher cannot be held responsible<br />
for any errors it may contain. No liability is accepted for any loss or<br />
damage resulting from the use of this product.<br />
<strong>Big</strong> <strong>Bang</strong> <strong>Pictures</strong> Software design: Rod Boyes. Project<br />
management: Paul Pearce and Rod Boyes. Programming:<br />
Zhengyi Li. Graphic design: Chris Thornton and Q&D Multimedia.<br />
Animations: Steve Blower. Audio effects: Graham Wright.<br />
Documentation: Alison Littlewood and Peter Butler.<br />
We welcome your comments on all <strong>Inclusive</strong> Technology products.<br />
<strong>Inclusive</strong> Technology Ltd<br />
Riverside Court<br />
Huddersfield Road<br />
Delph<br />
Oldham OL3 5FZ<br />
UK<br />
Tel: +44 (0)1457 819790<br />
Fax: +44 (0)1457 819799<br />
email: inclusive@inclusive.co.uk<br />
www.inclusive.co.uk<br />
<strong>Big</strong> <strong>Bang</strong> <strong>Pictures</strong><br />
1
Introduction<br />
In response to the popularity of <strong>Big</strong> <strong>Bang</strong>, <strong>Inclusive</strong> Technology<br />
has developed more software for students with severe and complex<br />
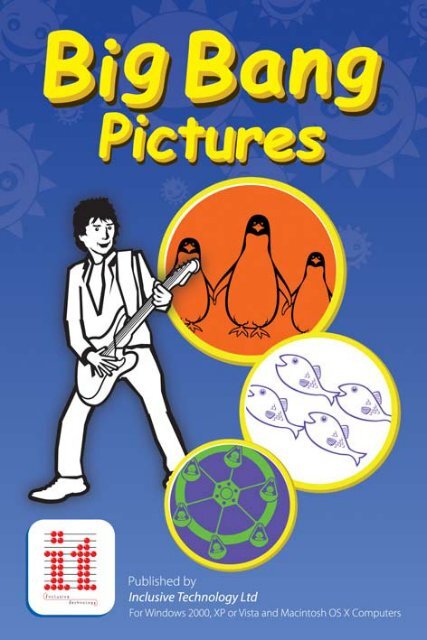
needs and very young children. <strong>Big</strong> <strong>Bang</strong> <strong>Pictures</strong> provides<br />
visually stimulating images that can be played in a sequence or<br />
used in early switch activities. There is plenty of exciting music and<br />
sound effects too or you can use your own.<br />
<strong>Big</strong> <strong>Bang</strong> <strong>Pictures</strong> has 21 simple animating <strong>pictures</strong> in two<br />
colours. These can be displayed as simple silhouettes, simple line<br />
drawings or more detailed line drawings. Many familiar objects are<br />
included, such as a bus, house, dog, flower and so on.<br />
These images allow you to assess and develop your students’<br />
visual attention skills. The more detailed line drawings may also<br />
be more appropriate for older students. All the animations make<br />
large movements that are highly attractive, accompanied by loud<br />
music and sound effects. The <strong>pictures</strong> can be displayed in black<br />
and white, or in any other combination of red blue, green, yellow,<br />
violet or orange.<br />
2 <strong>Big</strong> <strong>Bang</strong> <strong>Pictures</strong>
<strong>Big</strong> <strong>Bang</strong> <strong>Pictures</strong> can be used in five different ways:<br />
• Experiential - the student watches the animations.<br />
• Cause and effect - simply pressing a switch or touching the<br />
screen will give an animated reward with lots of music and<br />
noise.<br />
• Picture Building - build up a picture by pressing the switch.<br />
Helps to progress switch training.<br />
• Two switch picture building - introduces a second switch.<br />
Useful for turn taking as well as learning two switch skills.<br />
• Choosing with two switches - press one switch to change the<br />
picture on the screen. Press the second switch to animate the<br />
picture.<br />
The decision to use animations at three different levels of visual<br />
complexity was taken after consultation with colleagues in the VI<br />
service. It also provides opportunities to:<br />
• Identify an object.<br />
• Identify detail in an object.<br />
• Identify an object from parts.<br />
Many other options allow you to fine tune the program to your<br />
students needs and progress their development in small steps.<br />
Don’t forget to take full advantage of the built-in MP3 player to make<br />
<strong>Big</strong> <strong>Bang</strong> <strong>Pictures</strong> especially attractive to your learners. It can play<br />
their favourite music!<br />
Have you seen our other <strong>Big</strong> <strong>Bang</strong> titles?<br />
See www.inclusive.co.uk for details.<br />
<strong>Big</strong> <strong>Bang</strong> <strong>Pictures</strong><br />
3
Connecting switches<br />
Switches come in all shapes and sizes. One<br />
popular type is the “Jelly Bean” switch. This is a<br />
simple round plastic button that can be pushed<br />
down. It springs up again when you take your<br />
hand off. This means it is a “non-latching” or<br />
“momentary” switch, like a doorbell. Most<br />
switches available for special needs use are of<br />
this type.<br />
To use a switch with <strong>Big</strong> <strong>Bang</strong> <strong>Pictures</strong>, you<br />
will need to attach it to the computer using an<br />
interface box. There are a number of interface<br />
boxes available. The Simple Switch Box is<br />
inexpensive and easy to use.<br />
Just plug your switch into the interface box, then<br />
plug that into one of computer’s rectangular<br />
USB sockets.<br />
You can also use the Space bar and Enter keys on the computer<br />
keyboard with <strong>Big</strong> <strong>Bang</strong> <strong>Pictures</strong>.<br />
Above: The Simple Switch Box from <strong>Inclusive</strong>.<br />
4 <strong>Big</strong> <strong>Bang</strong> <strong>Pictures</strong>
Minimum Specification<br />
Windows<br />
OS: Windows 2000, XP and Vista<br />
Processor: 1GHZ Pentium 2<br />
RAM: 128Mb<br />
Audio: SoundBlaster compatible 16 bit sound card<br />
Apple Macintosh<br />
OS: Mac OS X 10.3.0 and above<br />
Processor: 1GHZ PowerPC G4<br />
RAM: 128Mb<br />
Installation<br />
You will need to install <strong>Big</strong> <strong>Bang</strong> <strong>Pictures</strong> before you can run it.<br />
You only need to do this once.<br />
Windows<br />
Insert the CD.<br />
If your computer is set to Auto-run CDs, just follow the on-screen<br />
instructions.<br />
Otherwise, double-click on My Computer, then double-click on the<br />
CD icon. Double-click on Setup.exe to run the installer.<br />
Apple Macintosh<br />
Insert the CD.<br />
When the <strong>Big</strong> <strong>Bang</strong> <strong>Pictures</strong> CD icon appears, double-click on it.<br />
Double-click the icon called Install <strong>Big</strong> <strong>Bang</strong> <strong>Pictures</strong> to run the<br />
installer.<br />
<strong>Big</strong> <strong>Bang</strong> <strong>Pictures</strong><br />
5
Running <strong>Big</strong> <strong>Bang</strong> <strong>Pictures</strong><br />
Windows<br />
If the <strong>Big</strong> <strong>Bang</strong> <strong>Pictures</strong> icon is on the computer screen (the<br />
desktop), double-click on it. Otherwise click on the Start button,<br />
then on Programs, then on <strong>Inclusive</strong> Technology, then on <strong>Big</strong><br />
<strong>Bang</strong> <strong>Pictures</strong>.<br />
Apple Macintosh<br />
If the <strong>Big</strong> <strong>Bang</strong> <strong>Pictures</strong> icon is on the computer screen (the<br />
desktop), double-click on it. Otherwise go to where you chose to<br />
install <strong>Big</strong> <strong>Bang</strong> <strong>Pictures</strong> to find the icon.<br />
When <strong>Big</strong> <strong>Bang</strong> <strong>Pictures</strong> begins, the title screen will appear* with<br />
a choice of 5 activities. Click an activity picture to see a description<br />
of the activity in the box at the bottom of the screen.<br />
* If this not the first time the program has been run, you will be asked if<br />
you want to use the default settings or with the settings as when <strong>Big</strong> <strong>Bang</strong><br />
<strong>Pictures</strong> was last used.<br />
<strong>Big</strong> <strong>Bang</strong> <strong>Pictures</strong> has lots of options so you can personalise it to your own<br />
needs. The options give <strong>Big</strong> <strong>Bang</strong> <strong>Pictures</strong> versatility and are its strength<br />
as a learning tool.<br />
This gives you a quick route to playing <strong>Big</strong> <strong>Bang</strong> <strong>Pictures</strong> with your options<br />
as you had them before. If you’re not sure, just click Use the default<br />
settings.<br />
6 <strong>Big</strong> <strong>Bang</strong> <strong>Pictures</strong>
On each activity title screen you will be presented with further<br />
buttons:<br />
Click on this button for further information about this<br />
activity.<br />
You can make changes to this activity to suit the needs<br />
of the individual learner. Click this button to see the<br />
changes you can make.<br />
Click on this button to start playing the selected activity.<br />
You will be offered a choice of picture styles: simple line<br />
art, silhouettes or complex line art.<br />
The Home button will return you to the title screen.<br />
A single click on one of the picture style buttons will start the activity<br />
using that style. All the activities have the same set of animating<br />
<strong>pictures</strong>.<br />
Whilst playing, you can use the left and right arrow keys<br />
on the keyboard at any time to change the picture.<br />
<strong>Big</strong> <strong>Bang</strong> <strong>Pictures</strong><br />
7
Stopping <strong>Big</strong> <strong>Bang</strong> <strong>Pictures</strong><br />
Whilst playing an activity, press the Esc key on the keyboard. This<br />
will take you back to the picture style screen.<br />
Click the Home button to go back to the title screen with<br />
the choice of activities.<br />
To exit the program completely, click on the home button,<br />
then the exit button.<br />
<strong>Big</strong> <strong>Bang</strong> <strong>Pictures</strong> Activities<br />
Experiential Activity<br />
These activities play a series of animations in sequence, without<br />
any interaction being required from the learner. They are designed<br />
to simply engage the attention and cause a reaction from those<br />
with profound and multiple difficulties. Make sure you watch the<br />
learner while the animations play. Do they respond? Check for eye<br />
movement - are they following the movement of objects around<br />
the screen? Perhaps try turning off the sound to see if they are<br />
responding to the visual or auditory stimulation.<br />
8 <strong>Big</strong> <strong>Bang</strong> <strong>Pictures</strong>
Experiential Activity - Options<br />
The Options screen allows you to tailor the activities to your<br />
learners’ needs. Click on the buttons down the left hand side of the<br />
screen to change the following:<br />
Colour<br />
Here you can change the<br />
colour of the <strong>pictures</strong> and<br />
the background. You could<br />
make them high contrast, for<br />
example, for those with visual<br />
impairment. As a default the<br />
images will appear in a variety<br />
of colours and on a black<br />
background.<br />
NOTE: if you choose the same colour for the image and the<br />
background, you won’t be able to see the animation!<br />
<strong>Pictures</strong><br />
Here you can choose which<br />
animations appear. You need to<br />
have at least one selected.<br />
<strong>Big</strong> <strong>Bang</strong> <strong>Pictures</strong><br />
9
Sequence<br />
Choose whether the animations<br />
play in a fixed sequence, or<br />
if you would like the same<br />
animation to keep playing until<br />
you press the left or right arrow<br />
keys on the keyboard to select<br />
a new one.<br />
You can also choose whether<br />
to have the name of the picture<br />
displayed at the top of the<br />
screen.<br />
Music<br />
See the Playing Your Own Music section on page 17.<br />
Action<br />
Here you can choose how long<br />
each animation lasts. You can<br />
also change the length of the<br />
pause between animations.<br />
When you have made your<br />
required changes, click on Play<br />
to view the animations or Go<br />
Back to the activity selection<br />
screen.<br />
10 <strong>Big</strong> <strong>Bang</strong> <strong>Pictures</strong>
Cause and Effect Activity<br />
In these activities the user presses a switch to get a <strong>big</strong> on-screen<br />
reward with music or sound effects. They can also use the Space<br />
bar, mouse button or simply touch a touch screen.<br />
Note that the teacher may use the left and right arrow keys at any<br />
time to change the picture.<br />
Cause and Effect Activity - Options<br />
The Cause and effect Options work in the same way as for the<br />
Experiential activities (see pages 9 to 10 for details), with the<br />
exception of:<br />
Delay<br />
The ‘pre-acceptance’ delay<br />
function is useful for students<br />
who make brief involuntary<br />
switch presses you don’t want<br />
the computer to recognise.<br />
If you set the delay to 0.3<br />
seconds, the program will only<br />
accept switch presses longer<br />
than 0.3 seconds.<br />
Action<br />
Here you can decide whether a<br />
single switch press will trigger<br />
the animation, or if the learner<br />
will need to press once to<br />
display the picture and a second<br />
time to start the animation.<br />
You can also choose how long<br />
each animation lasts.<br />
<strong>Big</strong> <strong>Bang</strong> <strong>Pictures</strong><br />
11
When you have made your required changes, click on Play to view<br />
the animations or Go Back to the activity selection screen.<br />
Picture Build Activity<br />
In this activity you press a switch a number of times to build up<br />
a picture in steps. When complete, the picture animates. You<br />
can also use the Space bar to use this activity, or click or touch<br />
anywhere on the screen.<br />
Note that the teacher may use the left and right arrow keys at any<br />
time to change the picture.<br />
12 <strong>Big</strong> <strong>Bang</strong> <strong>Pictures</strong>
Picture Build Activity - Options<br />
The Picture Build Options work in the same way as for the<br />
Experiential activities (see pages 9 to 10 for details), with the<br />
exception of the Actions section:<br />
Action<br />
Here you can decide how many<br />
switch presses will be required<br />
to build the picture and start the<br />
animation.<br />
You can also choose how long<br />
each animation lasts.<br />
When you have made your required changes, click on Play to view<br />
the animations or Go Back to the activity selection screen.<br />
<strong>Big</strong> <strong>Bang</strong> <strong>Pictures</strong><br />
13
Two Switch Play Activity<br />
This activity needs two switches. Press one switch to reveal a<br />
picture and the other switch to make it animate. Use this activity for<br />
basic two-switch training. It can also help with inattentive “switch<br />
bashing”.<br />
You can use the Space bar and the Enter key to use this activity.<br />
Otherwise use two switches connected to the computer through a<br />
“switch interface”, so that they behave like the computer’s Space<br />
bar and Enter key. See page 4 for details.<br />
Note that the teacher may use the left and right arrow keys at any<br />
time to change the picture.<br />
14 <strong>Big</strong> <strong>Bang</strong> <strong>Pictures</strong>
Two Switch Play Activity - Options<br />
The Two Switch Play Options work in the same way as for the<br />
Experiential activity (see pages 9 to 10 for details), with the<br />
exception of the Actions and Switch Colour sections:<br />
Action<br />
Here you can decide how the<br />
two switches will be used. You<br />
can also choose how long each<br />
animation lasts.<br />
Switch Colour<br />
In this activity, <strong>pictures</strong> of<br />
switches appear on the screen<br />
to indicate which switch to<br />
press. With this option you<br />
can decide what colour the<br />
on-screen switches should be,<br />
so that they match the ones<br />
you are using.<br />
When you have made your required changes, click on Play to view<br />
the animations or Go Back to the activity selection screen.<br />
<strong>Big</strong> <strong>Bang</strong> <strong>Pictures</strong><br />
15
Choosing with Two Switches<br />
This activity allows the learner to choose a picture to animate.<br />
Only one picture is shown on the screen at a time. Switch 1 (or the<br />
Space bar) is used to change the picture displayed while Switch 2<br />
(or the Enter key) makes the current picture animate. See if your<br />
learner can choose a favourite picture - though you might have to<br />
use the second switch, at least to begin with. Start with just a few<br />
<strong>pictures</strong>, by using the “<strong>Pictures</strong>” option.<br />
You can use the Space bar and the Enter key to use this activity.<br />
Otherwise use two switches connected to the computer through a<br />
“switch interface”, so that they behave like the computer’s Space<br />
bar and Enter key. See page 4 for details.<br />
Note that the teacher may use the left and right arrow keys at any<br />
time to change the picture.<br />
Choosing with Two Switches - Options<br />
The Choosing with Two Switches Options work in the same way<br />
as for the Experiential activity (see pages 9 to 10 for details), with<br />
the exception of the Actions section:<br />
Action<br />
Here you can choose how long<br />
each animation lasts. You can<br />
also decide how many steps it<br />
takes to build the picture.<br />
When you have made your<br />
required changes, click on Play<br />
to view the animations or Go<br />
Back to the activity selection<br />
screen.<br />
16 <strong>Big</strong> <strong>Bang</strong> <strong>Pictures</strong>
Playing Your Own Music<br />
<strong>Big</strong> <strong>Bang</strong> <strong>Pictures</strong> allows you to play your own MP3 music while<br />
the animations play. This can be very motivating for learners, who<br />
often have their own music preferences. Recordings of familiar<br />
people can also be very motivating.<br />
To select your own music, go to the Music section of the Options<br />
menu:<br />
This shows that the default music setting is the built-in music and<br />
sound effects. Click in the circle next to Use my own music and<br />
then click the Search button.<br />
<strong>Big</strong> <strong>Bang</strong> <strong>Pictures</strong><br />
17
You can then browse to where your MP3 files are saved and click<br />
OK*.<br />
The program will display any MP3 files in the selected folder. Click<br />
OK to continue.<br />
<strong>Big</strong> <strong>Bang</strong> <strong>Pictures</strong> will automatically select all of the tracks.<br />
You can de-select them by clicking on the tick to the left of the track<br />
name. You can select or de-select the whole list by clicking Tick<br />
all or Tick none at the bottom of the screen. Alternatively, you can<br />
click on New Search to find music elsewhere on your computer or<br />
Cancel to return to the options.<br />
If you are happy with your music selection, click Save to save your<br />
selection and return to the Music Options screen. Then you can click<br />
Play to play your activity with your chosen music.<br />
You can change your music selection at any time by returning to the<br />
Music Options menu and clicking on Edit List.<br />
* Don’t forget to plug your MP3 player into your computer’s USB port<br />
if you wish to select music from it.<br />
18 <strong>Big</strong> <strong>Bang</strong> <strong>Pictures</strong>
The <strong>Inclusive</strong> Technology<br />
Troubleshooting Guide<br />
This is a simple guide to common problems when trying to<br />
install, remove or use any new software. If you need any<br />
further assistance, please contact us. Our online support<br />
website is available at www.inclusive.co.uk (click on support),<br />
e‐mail us on support@inclusive.co.uk or telephone<br />
Technical Support on 01457 819723.<br />
1. I put my CD in and nothing happens.<br />
To install the software, do the following:<br />
• Click on ‘My Computer’. This is either on the desktop of your computer<br />
or in the Windows Start Menu.<br />
• This will open a window showing all your computer drives. Doubleclick<br />
on your CD drive (usually the D drive) and you will see a list of<br />
everything on the CD. There will be an icon called ‘Setup’. Doubleclick<br />
on this icon and the software installation will start.<br />
2. I have installed the program but no text appears in the menu.<br />
To complete the installation you must restart your machine. After a reboot, all text will<br />
appear.<br />
3. How do I set switches up?<br />
It’s a popular misconception that switches plug directly into your computer when used<br />
with switch accessible software. You actually need to plug them into a Switch Interface.<br />
These come in various shapes and sizes including switch boxes and roller/joysticks<br />
(see www.inclusive.co.uk).<br />
The most popular interfaces are dedicated devices that sit between the switch and the<br />
computer and convert the switch press into the press of a chosen keyboard key. The<br />
software recognises this key press (usually Space and/or Enter) and acts accordingly.<br />
When using two switches (one to scan, the other to select), all <strong>Inclusive</strong> Technology<br />
software uses the same key presses: Space to scan and Enter to select. Some switch<br />
interfaces are programmed using their own software; others are simply a case of plug-in<br />
and play. If you require further help regarding switch set-up, please contact us.<br />
<strong>Big</strong> <strong>Bang</strong> <strong>Pictures</strong><br />
19
4. I would like to remove the software but don’t know how.<br />
There are two ways to remove programs:<br />
a) Go to the Windows Start menu. Click Settings and then Control Panel. Double-click<br />
on ‘Add or Remove Programs’. This will bring up a window showing all software<br />
installed on your computer:<br />
Click on the Change/Remove button and follow the prompts to remove the software.<br />
b) Not all software appears in Add/Remove programs. If your software does not, follow<br />
these steps:<br />
• Open ‘My Computer’ (see Question 1).<br />
• Double-click on the C drive.<br />
• Double-click on the <strong>Inclusive</strong> folder.<br />
• Highlight the folder with the software you want to remove and press ‘Delete’.<br />
Extra help from <strong>Inclusive</strong>...<br />
Don’t forget that there are over a thousand pages of information about using technology<br />
to support your learners on our website. See: www.inclusive.co.uk<br />
We organise Information Days around the country which are packed with advice,<br />
inspiration and ideas. See: www.inclusive.co.uk/events<br />
We also organise exhibitions about ICT for special needs.<br />
See: www.inclusive.co.uk/exhibitions<br />
20 <strong>Big</strong> <strong>Bang</strong> <strong>Pictures</strong>