Hitech Pro User Manual English - Tuncmatik
Hitech Pro User Manual English - Tuncmatik
Hitech Pro User Manual English - Tuncmatik

You also want an ePaper? Increase the reach of your titles
YUMPU automatically turns print PDFs into web optimized ePapers that Google loves.
- «Dischar.» Mains failure. UPS running on back-up mode (rectifier stopped, inverter running).<br />
Origin of the output:<br />
- «OFF» No voltage supplied at the output (either EPO pressed, or severe problem on the unit).<br />
- «Invert» Inverter voltage is supplied at the output. Loads are protected<br />
-«Bypass» Bypass voltage is supplied at the output. Either the unit is manually stopped, or<br />
overloaded, or other possible problems on the inverter<br />
In the second row we have information about the configuration (single or parallel) of the unit:<br />
Configuration and status of the unit:<br />
- «Single:» “Single” connection.<br />
- «Parallel-Single» Parallel connection. Unit is on “single” state.<br />
- «Parallel-Master» Parallel connection. Unit is on “master” state.<br />
- «Parallel-Slave» Parallel connection. Unit is on “slave” state<br />
Examples:<br />
a) b)<br />
UPS: Normal, Invert.<br />
CFG: Single<br />
UPS: Shutdown, Bypass<br />
CFG: Parallel-Master<br />
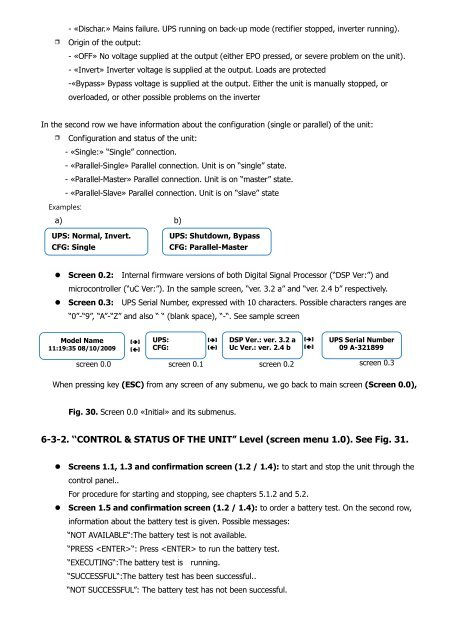
• Screen 0.2: Internal firmware versions of both Digital Signal <strong>Pro</strong>cessor (“DSP Ver:”) and<br />
microcontroller (“uC Ver:”). In the sample screen, “ver. 3.2 a” and “ver. 2.4 b” respectively.<br />
• Screen 0.3: UPS Serial Number, expressed with 10 characters. Possible characters ranges are<br />
“0”-“9”, “A”-“Z” and also “ “ (blank space), “-“. See sample screen<br />
Model Name<br />
11:19:35 08/10/2009<br />
•<br />
screen 0.0<br />
()<br />
()<br />
UPS:<br />
CFG:<br />
screen 0.1<br />
()<br />
()<br />
DSP Ver.: ver. 3.2 a<br />
Uc Ver.: ver. 2.4 b<br />
screen 0.2<br />
()<br />
()<br />
UPS Serial Number<br />
09 A-321899<br />
screen 0.3<br />
When pressing key (ESC) from any screen of any submenu, we go back to main screen (Screen 0.0),<br />
Fig. 30. Screen 0.0 «Initial» and its submenus.<br />
6-3-2. ‘‘CONTROL & STATUS OF THE UNIT” Level (screen menu 1.0). See Fig. 31.<br />
• Screens 1.1, 1.3 and confirmation screen (1.2 / 1.4): to start and stop the unit through the<br />
control panel..<br />
For procedure for starting and stopping, see chapters 5.1.2 and 5.2.<br />
• Screen 1.5 and confirmation screen (1.2 / 1.4): to order a battery test. On the second row,<br />
information about the battery test is given. Possible messages:<br />
“NOT AVAILABLE“:The battery test is not available.<br />
“PRESS “: Press to run the battery test.<br />
“EXECUTING“:The battery test is running.<br />
“SUCCESSFUL“:The battery test has been successful..<br />
“NOT SUCCESSFUL”: The battery test has not been successful.