33 12 16.26 - 001-A - Butterfly Valves - Garney Construction
33 12 16.26 - 001-A - Butterfly Valves - Garney Construction
33 12 16.26 - 001-A - Butterfly Valves - Garney Construction

Create successful ePaper yourself
Turn your PDF publications into a flip-book with our unique Google optimized e-Paper software.
<strong>Garney</strong> <strong>Construction</strong><br />
785 E Warren<br />
Gardner, KS 66030<br />
Phone: 816-278-5950<br />
Fax: 816-278-5931<br />
SUBMITTAL ITEM<br />
NO. <strong>33</strong> <strong>12</strong> 1626-<strong>001</strong><br />
PACKAGE NO: <strong>33</strong> <strong>12</strong> 1626<br />
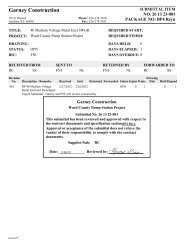
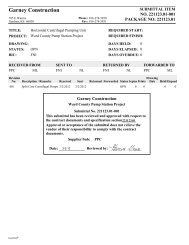
TITLE:<br />
PROJECT:<br />
<strong>Butterfly</strong> <strong>Valves</strong><br />
Ward County Pump Station Project<br />
REQUIRED START:<br />
REQUIRED FINISH:<br />
2/15/20<strong>12</strong><br />
3/7/20<strong>12</strong><br />
DRAWING:<br />
STATUS:<br />
BIC:<br />
NEW<br />
FNI<br />
DAYS HELD: 0<br />
DAYS ELAPSED: 0<br />
DAYS OVERDUE: -21<br />
RECEIVED FROM<br />
HP<br />
DB<br />
SENT TO<br />
FNI<br />
NL<br />
RETURNED BY<br />
FNI NL<br />
FORWARDED TO<br />
HP<br />
DB<br />
Revision<br />
No.<br />
Description / Remarks<br />
Received<br />
Sent<br />
Drawing<br />
Returned Forwarded Status Sepias Prints Date HeldElapsed<br />
A <strong>Butterfly</strong> <strong>Valves</strong> 2/15/20<strong>12</strong> 2/15/20<strong>12</strong> NEW 0 1 0 0<br />
Nick,<br />
Please find the attached submittal for your review and approval.<br />
Thank you,<br />
<strong>Garney</strong> <strong>Construction</strong><br />
Ward County Pump Station Project<br />
Submittal No. <strong>33</strong> <strong>12</strong> 1626-<strong>001</strong><br />
This submittal has been reviewed and approved with respect to<br />
the contract documents and specification section<strong>33</strong> <strong>12</strong> 1626<br />
Approval or acceptance of the submittal does not relieve the<br />
vendor of their responsibility to comply with the contract<br />
documents.<br />
Supplier/Sub:<br />
HP<br />
Date: ______________ Reviewed by: _________________<br />
Expedition ®
Colorado River Municipal Water District<br />
Ward County Water Supply Expansion Project<br />
Submittal <strong>33</strong> <strong>12</strong> <strong>16.26</strong> – <strong>001</strong>-A – <strong>Butterfly</strong> <strong>Valves</strong><br />
Table of Contents<br />
Page 1<br />
Page 2<br />
Page 4<br />
Page 5<br />
Page 6<br />
Page 8<br />
Page 8<br />
Page 13<br />
Page 17<br />
Page 18<br />
Page 24<br />
Page 38<br />
Page 39<br />
Page 39<br />
Page 49<br />
Page 53<br />
Page 58<br />
Page 61<br />
Page 61<br />
Page 68<br />
Page 70<br />
Page 82<br />
Page 84<br />
Page 98<br />
Page 100<br />
Page 107<br />
Page 109<br />
Page 113<br />
Page <strong>12</strong>5<br />
Page 139<br />
Page 152<br />
Page 165<br />
<strong>Garney</strong> Cover Letter<br />
<strong>Garney</strong> Table of Contents<br />
<strong>Garney</strong> Review Comments<br />
Manufacturer’s Cover Letter<br />
Manufacturer’s Table of Contents<br />
TAB 1 – General Information<br />
Scope of Supply<br />
Estimated Ship Date Schedule<br />
Valve Weights<br />
Valve Torque Calculations<br />
Electric Motor Torque Calculations<br />
Submittal Detail Highlights<br />
TAB 2 – Drawings<br />
Valve Dimensional Drawings<br />
Valve Cross Section Drawings<br />
Manual Actuator Drawings<br />
Valve Accessory Drawings<br />
TAB 3 – <strong>Valves</strong><br />
AWWA 2FII BFV 3” to 20” Brochure<br />
AWWA 2FII BFV 3” to 20” Spec Sheet<br />
AWWA BFV Segmented Seat Brochure<br />
AWWA BFW Segmented Seat Spec Sheet<br />
Triton XR-70 BFV Brochure<br />
Triton XR-70 BFV Spec Sheet<br />
HP 250 II BFV Brochure<br />
HP 250 II & 350 BFV Spec Sheet<br />
HP 350 BFV Brochure<br />
AWWA 2FII BFV 3” to 20” O&M<br />
Triton XR-70 BFV O&M<br />
HP 250 II BFV O&M<br />
HP 350 BFV O&M<br />
Diviner Position Indicator O&M
Page 173<br />
Page 174<br />
Page 179<br />
Page 179<br />
Page 189<br />
Page 203<br />
Page 204<br />
Page 207<br />
Page 209<br />
Page 210<br />
Page 211<br />
Page 2<strong>12</strong><br />
Page 213<br />
Page 214<br />
Page 244<br />
Page 268<br />
Page 300<br />
Page 300<br />
Page 307<br />
Page 311<br />
Page 318<br />
Page 319<br />
Page <strong>33</strong>9<br />
Page 425<br />
BFV Extended Storage and Installation Information<br />
BFV Liquid Epoxy Coating<br />
TAB 4 – Manual Actuators and Gearboxes<br />
MDT Manual Actuator Brochure<br />
MDT Manual Actuator O&M<br />
MDT Actuator Mounting Positions Chart<br />
AUMA Actuator Data Sheets<br />
AUMA Actuator Dimensional Drawings<br />
AUMA Actuator Output Mounting Flange Dimensions<br />
AUMA Actuator Mounting Positions Chart<br />
AUMA Limit Switch Position Indicator Drawing<br />
AUMA Limit Switch Position Indicator Wiring Diagram<br />
AUMA Limit Switch Position Indicator Specification<br />
AUMA Actuator Gearbox Catalog Valve Position Indicator<br />
AUMA Multi-Turn Bevel Gear Catalog<br />
AUMA Part-Turn Gearboxes Catalog<br />
TAB 5 – Electric Actuators & Accessories<br />
Rotork Actuator Data Sheets<br />
Rotork Actuator Wiring Diagrams<br />
Rotork Actuator Installation / Dimensional Drawings<br />
Rotork Actuator Mounting Positions Chart<br />
Rotork IQ and IQT Range Brochure<br />
Rotork IQ Range Installation, Operation and Maintenance<br />
Instructions<br />
Rotork IQ Range Basic Instructions
Colorado River Municipal Water District<br />
Ward County Water Supply Expansion Project<br />
Submittal <strong>33</strong> <strong>12</strong> <strong>16.26</strong> – <strong>001</strong>-A – <strong>Butterfly</strong> <strong>Valves</strong><br />
<strong>Garney</strong> Review Comments<br />
1. This submittal includes information on the <strong>Butterfly</strong> <strong>Valves</strong>, Gearboxes, and<br />
Actuators.<br />
2. All of the valves in this submittal will be provided with a mechanically fastened,<br />
segmented seat with the exception of OPS-PL-BFV1, OPS-PL-BFV2, OPS-PL-<br />
BFV3, OPS-PL-BFV4, and OPS-PL-BFV5.<br />
3. The following valves will be shipped prepped for long term storage; OPS-YP1-<br />
BFV, OPS-P1-BFV2, OPS-P2-BFV2, TPS-P1-BFV2, TPS-P2-BFV2, TPS-P3-<br />
BFV2, TPS-P4-BFV2, WPS-P1-BFV1, WPS-P2-BFV1, WPS-P3-BFV1, TP-<br />
BFV2, TP-BFV3, and TP-BFV4.<br />
4. OPS-YP1-BFV will be provided as a spare part to the owner.<br />
5. Per the discussion at the Pre-Submittal Meeting 4 Rotork Remote Setting Tools<br />
will be provided to the owner with these valves.<br />
6. A table showing number of turns for each of the different sizes of valves will be<br />
included in the operation and maintenance manual.<br />
7. Henry Pratt has over 10 years of successful experience manufacturing this type of<br />
valve in the sizes included in this submittal.<br />
8. Testing and conformance documentation will be provided prior to valve shipment<br />
and will be included in the Operation & Maintenance manual for these valves.<br />
9. The O&M Manual for the Segmented Seat <strong>Valves</strong> will be included in the O&M<br />
Manual.<br />
10. Concerning the limit switches for the 48” <strong>Butterfly</strong> Valve. Henry Pratt has had<br />
discussions with Auma concerning this issue and are proposing the switches as<br />
shown in the catalog beginning on page 214 of this manual. Auma has had a lot<br />
of success with this arrangement and they do not offer individual lever type limit<br />
Switches as discussed during the pre-submittal meeting. As these gear<br />
assemblies require the bevel etc. Pratt cannot modify the wormgear to add Limit<br />
Switches as this would void Auma’s product warranty. Having the self contained<br />
arrangement. This arrangement does offer some substantial benefits, see pages<br />
234 and 235 of this submittal, enclosure type ( IP 68) and lubricated for life.
Ward County Water Supply Expansion Project Transmission,<br />
Odessa and Well Field Pump Stations<br />
<strong>Butterfly</strong> <strong>Valves</strong><br />
Cover Letter<br />
Table of Contents<br />
Tab 1 - General Information<br />
Scope of Supply<br />
Estimated Ship Date Schedule<br />
Valve Weights<br />
Valve Torque Calculations<br />
Electric Motor Torque Calculations (Rotork)<br />
Submittal Detail Highlights<br />
Tab 2 - Drawings<br />
Valve Dimensional Drawings<br />
Cross Section Drawings<br />
Manual Actuator Drawings<br />
Valve Accessory Drawings<br />
Tab 3 – <strong>Valves</strong><br />
BFV Valve 2F2 Bonded Seat Brochure<br />
BFV Valve 2F2 Bonded Seat Spec Sheet<br />
BFV Segmented Seat Brochure<br />
BFV Segmented Seat Spec Sheet<br />
BFV Valve Triton XR-70 Brochure<br />
BFV Valve Triton XR-70 Spec Sheet<br />
BFV Valve HP250II Brochure<br />
BFV HP250II Spec Sheet<br />
BFV Valve HP350 Brochure<br />
BFV HP350 Spec Sheet<br />
BFV Valve 2F2 Operation and Maintenance Manual<br />
BFV Valve Triton XR-70 Operation and Maintenance Manual<br />
BFV HP250II Operation and Maintenance Manual<br />
BFV HP350 Operation and Maintenance Manual<br />
BFV Extended Storage and Installation Information<br />
BFV Valve Coating<br />
Tab 4 – Manual Actuators<br />
Manual Actuator Brochure<br />
Manual Actuator O&M Manual
Manual Actuator Mounting Positions Chart<br />
Actuator Data Sheets (Auma)<br />
Actuator Dimensional Drawings (Auma)<br />
Actuator Output Drive/Mounting Flange Drawings (Auma)<br />
Actuator Mounting Positions Chart (Auma)<br />
Limit Switch General Arrangement Drawing (Auma)<br />
Limit Switch Wiring Diagram (Auma)<br />
Limit Switch Spec (Auma)<br />
Actuator Gearbox Catalog Valve Position Indicator (Auma)<br />
Actuator Multi-turn Bevel Gears Catalog (Auma)<br />
Actuator Part-turn Gearbox Catalog (Auma)<br />
Tab 5 – Electric Actuators & Accessory<br />
Actuator Data Sheets (Rotork)<br />
Actuator Wiring Diagrams (Rotork)<br />
Actuator Installation/Dimensional Drawings (Rotork)<br />
Actuator Mounting Positions Chart (Rotork)<br />
Rotork IQ & IQT Range<br />
Rotork IQ Range Installation & Maintenance Instructions<br />
Rotork IQ Range Basic Setting Instructions
1513188 HP<br />
Page 1 of 5<br />
401 South Highland Avenue<br />
Aurora IL, 60506-5563<br />
Phone: 630-844-4000<br />
Fax: 630-844-4160<br />
Product Submittal : FEBRUARY 10, 20<strong>12</strong><br />
Customer : GARNEY COMPANIES INC<br />
Customer PO#<br />
Pratt Order #<br />
Project<br />
: LOI<br />
: 1513188 HP<br />
: WARD COUNTY<br />
SCOPE OF SUPPLY<br />
LINE QTY TAG/LOCATION DESCRIPTION<br />
1.0 4 TPS-P1-BFV1,<br />
TPS-P2-BFV1,<br />
TPS-P3-BFV1,<br />
TPS-P4-BFV1<br />
2.0 4 TPS-P1-BFV2,<br />
TPS-P2-BFV2,<br />
TPS-P3-BFV2,<br />
TPS-P4-BFV2<br />
3.0 2 OPS-P1-BFV1,<br />
OPS-P2-BFV1<br />
30 150B FLG BFV SEGMENT<br />
SEAT MDT5 OL S/S<br />
18 350 FL BFV MDT4S HW OL<br />
S/S<br />
36 150B FLG BFV SEGMENT<br />
SEAT MDT5 HW OL S/S<br />
PAINT<br />
INT/EXT/OPER: AMERCOAT<br />
370 EPOXY (A-69636A) (Min. 8<br />
MILS)<br />
INT/EXT/OPER: AMERCOAT<br />
370 EPOXY (A-69636A) (Min. 8<br />
MILS)<br />
INT/EXT/OPER: AMERCOAT<br />
370 EPOXY (A-69636A) (Min. 8<br />
MILS)<br />
DRAWING<br />
GA: GA-1<strong>12</strong>98<br />
C.S.: D71094-1<br />
C.S.: D71094-2<br />
A.C.S.: GA-11566<br />
G.A.: GA-11862<br />
C.S.: GA-11724<br />
A.C.S.: GA-11500<br />
GA: GA-1<strong>12</strong>98<br />
C.S.: D71094-1<br />
C.S.: D71094-2<br />
A.C.S.: GA-11566<br />
4.0 5 OPS-P1-BFV2,<br />
OPS-P2-BFV2,<br />
WPS-P1-BFV1,<br />
WPS-P2-BFV1,<br />
WPS-P3-BFV1<br />
18 150B FL BFV OC EMO HW<br />
OL S/S (ROTORK)<br />
INT/EXT: AMERCOAT 370<br />
EPOXY (A-69636A) (Min. 8<br />
MILS)<br />
EMO: VENDOR PAINT (Min. 4<br />
MILS)<br />
G.A.: GA-10658<br />
C.S.: GA-11486<br />
A.D.S.: 1M017701<br />
W.D.: WD21026<br />
I.D.: 1M017701-02<br />
A.C.S. Actuator Cross Section A.D. Accessory Drawing A.D.D. Actuator Dimensional Drawing<br />
A.D.S. Actuator Data Sheet AD Accessory Drawing C.S. Cross Section<br />
CS Cross Section G.A. General Arrangement GA General Arrangement<br />
I.D. Installation Drawing W.D. Wiring Diagram
1513188 HP<br />
Page 2 of 5<br />
401 South Highland Avenue<br />
Aurora IL, 60506-5563<br />
Phone: 630-844-4000<br />
Fax: 630-844-4160<br />
LINE QTY TAG/LOCATION DESCRIPTION<br />
PAINT<br />
DRAWING<br />
5.0 1 TPS-YP1-BFV1 30 150B FL BFV SEGMENT INT/EXT: AMERCOAT 370 GA: GA-<strong>12</strong>040<br />
SEAT BSN OL S/S EXS (AUMA EPOXY (A-69636A) (Min. 8 C.S.: D71094-1<br />
WORM GEAR)<br />
MILS)<br />
C.S.: D71094-2<br />
XSTEM: NONE<br />
A.D.: GA-11456<br />
WG: VENDOR PAINT (Min. 4<br />
A.D.: GA-11<strong>33</strong>9<br />
MILS)<br />
A.D.S.:<br />
A<strong>12</strong>0170-DS002<br />
A.D.D.: SD1<strong>12</strong>799<br />
A.D.D.: SK099241<br />
6.0 2 TPS-YP2-BFV1,<br />
TPS-YP3-BFV1<br />
48 150B FLG BFV SEGMENT<br />
SEAT BSN OL S/S EXS (AUMA<br />
WORM GEAR)<br />
INT/EXT: AMERCOAT 370<br />
EPOXY (A-69636A) (Min. 8<br />
MILS)<br />
XSTEM: NONE<br />
WG: VENDOR PAINT (Min. 4<br />
MILS)<br />
GA: GA-<strong>12</strong>040<br />
C.S.: D71094-1<br />
C.S.: D71094-2<br />
AD: GA-11456<br />
AD: GA-11<strong>33</strong>9<br />
A.D.S.:<br />
A<strong>12</strong>0170-SD004<br />
A.D.D.: SD1<strong>12</strong>800<br />
A.D.D.: SK099241<br />
7.0 1 TPS-YP5-BFV1 48 350 FLG BFV BSN OL S/S INT/EXT: AMERCOAT 370 GA: GA-<strong>12</strong>225<br />
EXS W/LIMIT SWITCH (AUMA EPOXY (A-69636A) (Min. 8 C.S.: GA-11<strong>33</strong>8<br />
WORK GEAR)<br />
MILS)<br />
AD: GA-11456<br />
XSTEM: NONE<br />
AD: GA-11<strong>33</strong>9<br />
WG: VENDOR PAINT (Min. 4<br />
A.D.S.:<br />
MILS)<br />
A<strong>12</strong>0170-SD004<br />
A.D.D.: SD1<strong>12</strong>800<br />
A.D.D.: SK099241<br />
8.0 0 OPS-YP1-BFV 30 150B FLG BFV SEGMENT INT/EXT: AMERCOAT 370 G.A.: GA-<strong>12</strong>040<br />
SEAT BSN OL S/S EXS (AUMA EPOXY (A-69636A) (Min. 8 CS: D71094-1<br />
WORM GEAR)<br />
MILS)<br />
CS: D71094-2<br />
DUPLICATE OF OPS-PL-BFV6<br />
XSTEM: NONE<br />
AD: GA-11456<br />
WG: VENDOR PAINT (Min. 4<br />
NOW ON LINE<br />
AD: GA-11<strong>33</strong>9<br />
MILS)<br />
A.D.S.:<br />
A<strong>12</strong>0170-DS002<br />
A.D.D.: SD1<strong>12</strong>799<br />
A.D.D.: SK099241<br />
A.C.S. Actuator Cross Section A.D. Accessory Drawing A.D.D. Actuator Dimensional Drawing<br />
A.D.S. Actuator Data Sheet AD Accessory Drawing C.S. Cross Section<br />
CS Cross Section G.A. General Arrangement GA General Arrangement<br />
I.D. Installation Drawing W.D. Wiring Diagram
1513188 HP<br />
Page 3 of 5<br />
401 South Highland Avenue<br />
Aurora IL, 60506-5563<br />
Phone: 630-844-4000<br />
Fax: 630-844-4160<br />
LINE QTY TAG/LOCATION DESCRIPTION<br />
PAINT<br />
DRAWING<br />
9.0 1 OPS-YP2-BFV1 36 150B FLG BFV SEGMENT INT/EXT: AMERCOAT 370 GA: GA-<strong>12</strong>040<br />
SEAT BSN OL S/S EXS (AUMA EPOXY (A-69636A) (Min. 8 C.S.: D71094-1<br />
WORM GEAR)<br />
MILS)<br />
C.S.: D71094-2<br />
XSTEM: NONE<br />
AD: GA-11456<br />
WG: VENDOR PAINT (Min. 4<br />
AD: GA-11<strong>33</strong>9<br />
MILS)<br />
A.D.S.:<br />
A<strong>12</strong>0170-DS003<br />
A.D.D.: SD1<strong>12</strong>799<br />
A.D.D.: SK099241<br />
<strong>12</strong>.0 2 WPS-YP1-BFV1,<br />
WPS-YP1-BFV2<br />
18 150B FL BFV OC EMO HW<br />
OL S/S TFS (ROTORK)<br />
INT/EXT: AMERCOAT 370<br />
EPOXY (A-69636A) (Min. 8<br />
MILS)<br />
TT/FLRSTD: AMERCOAT 370<br />
EPOXY (A-69636A) (Min. 8<br />
MILS)<br />
EMO: VENDOR PAINT (Min. 4<br />
MILS)<br />
G.A.: GA-10660<br />
C.S.: GA-11486<br />
A.D.S.: 1M017702<br />
W.D.: WD21025<br />
W.D.: WS21035<br />
W.D.: WS21034<br />
I.D.: 1M017702-02<br />
13.0 3 WPS-YP1-BFV3,<br />
WPS-YP2-BFV1,<br />
WPS-YP3-BFV1<br />
36 150B FLG BFV SEGMENT<br />
SEAT OC EMO HW OL S/S TFS<br />
(ROTORK)<br />
INT/EXT: AMERCOAT 370<br />
EPOXY (A-69636A) (Min. 8<br />
MILS)<br />
TT/FLRSTD: AMERCOAT 370<br />
EPOXY (A-69636A) (Min. 8<br />
MILS)<br />
EMO: VENDOR PAINT (Min. 4<br />
MILS)<br />
G.A.: GA-10769<br />
C.S.: D71094-1<br />
CS: D71094-2<br />
A.D.S.: 1M017801<br />
W.D.: WD21025<br />
W.D.: WS21035<br />
I.D.: 1M017801-02<br />
14.0 1 WPS-YP4-BFV1 20 150B FL BFV OC EMO HW INT/EXT: AMERCOAT 370 G.A.: GA-10660<br />
OL S/S TFS (ROTORK)<br />
EPOXY (A-69636A) (Min. 8 C.S.: GA-11486<br />
MILS)<br />
A.D.S.: 1M017703<br />
TT/FLRSTD: AMERCOAT 370<br />
W.D.: WD21025<br />
EPOXY (A-69636A) (Min. 8<br />
W.D.: WS21035<br />
MILS)<br />
EMO: VENDOR PAINT (Min. 4 W.D.: WS21034<br />
MILS)<br />
I.D.: 1M017703-02<br />
15.0 1 WPS-YP4-BFV2 36 150B FLG BFV SEGMENT INT/EXT: AMERCOAT 370 GA: GA-10769<br />
SEAT OC EMO HW OL S/S TFS EPOXY (A-69636A) (Min. 8 C.S.: D71094-1<br />
(ROTORK)<br />
MILS)<br />
C.S.: D71094-2<br />
TT/FLRSTD: AMERCOAT 370<br />
A.D.S.: 1M017802<br />
EPOXY (A-69636A) (Min. 8<br />
W.D.: WD21025<br />
MILS)<br />
EMO: VENDOR PAINT (Min. 4 W.D.: WS21035<br />
MILS)<br />
I.D.: 1M017802-02<br />
A.C.S. Actuator Cross Section A.D. Accessory Drawing A.D.D. Actuator Dimensional Drawing<br />
A.D.S. Actuator Data Sheet AD Accessory Drawing C.S. Cross Section<br />
CS Cross Section G.A. General Arrangement GA General Arrangement<br />
I.D. Installation Drawing W.D. Wiring Diagram
1513188 HP<br />
Page 4 of 5<br />
401 South Highland Avenue<br />
Aurora IL, 60506-5563<br />
Phone: 630-844-4000<br />
Fax: 630-844-4160<br />
LINE QTY TAG/LOCATION DESCRIPTION<br />
PAINT<br />
DRAWING<br />
16.0 1 WPS-YP5-BFV1 30 150B FLG BFV SEGMENT INT/EXT: AMERCOAT 370 GA: GA-10769<br />
SEAT OC EMO HW OL S/S TFS EPOXY (A-69636A) (Min. 8 CS: D71094-1<br />
(ROTORK)<br />
MILS)<br />
CS: D71094-2<br />
TT/FLRSTD: AMERCOAT 370<br />
A.D.S.: 1M017804<br />
EPOXY (A-69636A) (Min. 8<br />
W.D.: WD21025<br />
MILS)<br />
EMO: VENDOR PAINT (Min. 4 W.D.: WS21035<br />
MILS)<br />
I.D.: 1M017804-02<br />
17.0 1 WPS-YP5-BFV2 36 150B FLG BFV SEGMENT INT/EXT: AMERCOAT 370 G.A.: GA-10769<br />
SEAT OC EMO HW OL S/S TFS EPOXY (A-69636A) (Min. 8 C.S.: D71094-1<br />
(ROTORK)<br />
MILS)<br />
C.S.: D71094-2<br />
TT/FLRSTD: AMERCOAT 370<br />
A.D.S.: 1M017803<br />
EPOXY (A-69636A) (Min. 8<br />
W.D.: WD21025<br />
MILS)<br />
EMO: VENDOR PAINT (Min. 4 W.D.: WS21035<br />
MILS)<br />
I.D.: 1M017803-02<br />
18.0 3 WPS-YP1-BFV5,<br />
WPS-YP1-BFV6,<br />
OPS-PL-BFV6<br />
30 150B FLG BFV SEGMENT<br />
SEAT BSN OL S/S EXS (AUMA<br />
WORM GEAR)<br />
INT/EXT: AMERCOAT 370<br />
EPOXY (A-69636A) (Min. 8<br />
MILS)<br />
XSTEM: NONE<br />
WG: VENDOR PAINT (Min. 4<br />
MILS)<br />
GA: GA-<strong>12</strong>040<br />
CS: D71094-1<br />
C.S.: D71094-2<br />
AD: GA-11456<br />
AD: GA-11<strong>33</strong>9<br />
A.D.S.:<br />
A<strong>12</strong>0170-DS002<br />
A.D.D.: SD1<strong>12</strong>799<br />
A.D.D.: SK099241<br />
22.0 3 TP-BFV2,<br />
TP-BFV3,<br />
TP-BFV4<br />
48 250B FL BFV WG40-300 BSN<br />
OL S/S<br />
INT/EXT/OPER: AMERCOAT<br />
370 EPOXY (A-69636A) (Min. 8<br />
MILS)<br />
G.A.: GA-11774<br />
C.S.: GA-11<strong>33</strong>8<br />
A.C.S.: GA-11881<br />
23.0 1 OPS-PL-BFV1 30 150B FL BFV MDT5 BSN OL INT/EXT/OPER: AMERCOAT GA: GA-11304<br />
S/S<br />
370 EPOXY (A-69636A) (Min. 8 C.S.: GA-11<strong>33</strong>8<br />
MILS)<br />
A.C.S.: GA-11528<br />
24.0 1 OPS-PL-BFV2 24 150B FL BFV MDT4S BSN INT/EXT/OPER: AMERCOAT G.A.: GA-11304<br />
OL S/S<br />
370 EPOXY (A-69636A) (Min. 8 C.S.: GA-11<strong>33</strong>7<br />
MILS)<br />
A.C.S.: GA-11499<br />
A.C.S. Actuator Cross Section A.D. Accessory Drawing A.D.D. Actuator Dimensional Drawing<br />
A.D.S. Actuator Data Sheet AD Accessory Drawing C.S. Cross Section<br />
CS Cross Section G.A. General Arrangement GA General Arrangement<br />
I.D. Installation Drawing W.D. Wiring Diagram
1513188 HP<br />
Page 5 of 5<br />
401 South Highland Avenue<br />
Aurora IL, 60506-5563<br />
Phone: 630-844-4000<br />
Fax: 630-844-4160<br />
LINE QTY TAG/LOCATION DESCRIPTION<br />
25.0 3 OPS-PL-BFV3,<br />
OPS-PL-BFV4,<br />
OPS-PL-BFV5<br />
30 150B FL BFV MDT5 BSN OL<br />
S/S<br />
PAINT<br />
INT/EXT/OPER: AMERCOAT<br />
370 EPOXY (A-69636A) (Min. 8<br />
MILS)<br />
Included in Submittal:<br />
Customer to verify extension lengths on GA-10769 & GA-10660 - See Detail Highlights form.<br />
BFV Catalog Data (2F2 - Bonded Seat)<br />
BFV Catalog Data (Triton)<br />
BFV Catalog Data (HP250II)<br />
BFV Catalog Data (HP350)<br />
BFV Paint Data (A069636A)<br />
Pratt Valve Torque Calculations<br />
Rotork Electric Motor Torque Calculations<br />
O&M Manual - BFV<br />
DRAWING<br />
GA: GA-11304<br />
C.S.: GA-11<strong>33</strong>8<br />
A.C.S.: GA-11528<br />
Note:<br />
Start Up assistance not provided in this quotation.<br />
EMO and Worm Gear spare parts not included.<br />
Test Certs available at time of shipment.<br />
A.C.S. Actuator Cross Section A.D. Accessory Drawing A.D.D. Actuator Dimensional Drawing<br />
A.D.S. Actuator Data Sheet AD Accessory Drawing C.S. Cross Section<br />
CS Cross Section G.A. General Arrangement GA General Arrangement<br />
I.D. Installation Drawing W.D. Wiring Diagram
1513188 HP<br />
Page 1 of 4<br />
401 South Highland Avenue<br />
Aurora IL, 60506-5563<br />
Phone: 630-844-4000<br />
Fax: 630-844-4160<br />
Product Submittal : FEBRUARY 14, 20<strong>12</strong><br />
Customer : GARNEY COMPANIES INC<br />
Customer PO#<br />
Pratt Order #<br />
Project<br />
: LOI<br />
: 1513188 HP<br />
: WARD COUNTY<br />
SCOPE OF SUPPLY<br />
LINE QTY TAG/LOCATION DESCRIPTION<br />
1.0 4 TPS-P1-BFV1,<br />
TPS-P2-BFV1,<br />
TPS-P3-BFV1,<br />
TPS-P4-BFV1<br />
2.0 4 TPS-P1-BFV2,<br />
TPS-P2-BFV2,<br />
TPS-P3-BFV2,<br />
TPS-P4-BFV2<br />
3.0 2 OPS-P1-BFV1,<br />
OPS-P2-BFV1<br />
30 150B FLG BFV SEGMENT<br />
SEAT MDT5 OL S/S<br />
18 350 FL BFV MDT4S HW OL<br />
S/S<br />
36 150B FLG BFV SEGMENT<br />
SEAT MDT5 HW OL S/S<br />
E S D Release 2/15 E S D Release 2/29<br />
7/20/<strong>12</strong> 7/20/<strong>12</strong><br />
4/6/<strong>12</strong> 4/20/<strong>12</strong><br />
7/20/<strong>12</strong> 7/20/<strong>12</strong><br />
4.0 5 OPS-P1-BFV2,<br />
OPS-P2-BFV2,<br />
WPS-P1-BFV1,<br />
WPS-P2-BFV1,<br />
WPS-P3-BFV1<br />
18 150B FL BFV OC EMO HW<br />
OL S/S (ROTORK)<br />
6/20/<strong>12</strong> 7/<strong>12</strong>/<strong>12</strong>
1513188 HP<br />
Page 2 of 5<br />
401 South Highland Avenue<br />
Aurora IL, 60506-5563<br />
Phone: 630-844-4000<br />
Fax: 630-844-4160<br />
LINE QTY TAG/LOCATION DESCRIPTION<br />
E SD Release 2/15 E S D Release 2/29<br />
5.0 1 TPS-YP1-BFV1 30 150B FL BFV SEGMENT 7/20/<strong>12</strong> 7/20/<strong>12</strong><br />
SEAT BSN OL S/S EXS (AUMA<br />
WORM GEAR)<br />
6.0 2 TPS-YP2-BFV1,<br />
TPS-YP3-BFV1<br />
48 150B FLG BFV SEGMENT<br />
SEAT BSN OL S/S EXS (AUMA<br />
WORM GEAR)<br />
6/29/<strong>12</strong> 7/20/<strong>12</strong><br />
7.0 1 TPS-YP5-BFV1 48 350 FLG BFV BSN OL S/S 6/29/<strong>12</strong> 7/20/<strong>12</strong><br />
EXS W/LIMIT SWITCH (AUMA<br />
WORK GEAR)<br />
8.0 1 OPS-YP1-BFV 7/20/<strong>12</strong> 7/20/<strong>12</strong><br />
30 150B FLG BFV SEGMENT<br />
SEAT BSN OL S/S EXS (AUMA<br />
WORM GEAR)
1513188 HP<br />
Page 3 of 5<br />
401 South Highland Avenue<br />
Aurora IL, 60506-5563<br />
Phone: 630-844-4000<br />
Fax: 630-844-4160<br />
LINE QTY TAG/LOCATION DESCRIPTION<br />
EE S D Release 2/15 ESD Release 2/29<br />
9.0 1 OPS-YP2-BFV1 36 150B FLG BFV SEGMENT 7/20/<strong>12</strong> 7/20/<strong>12</strong><br />
SEAT BSN OL S/S EXS (AUMA<br />
WORM GEAR)<br />
<strong>12</strong>.0 2 WPS-YP1-BFV1,<br />
WPS-YP1-BFV2<br />
18 150B FL BFV OC EMO HW<br />
OL S/S TFS (ROTORK)<br />
6/20/<strong>12</strong> 7/<strong>12</strong>/<strong>12</strong><br />
13.0 3 WPS-YP1-BFV3,<br />
WPS-YP2-BFV1,<br />
WPS-YP3-BFV1<br />
36 150B FLG BFV SEGMENT<br />
SEAT OC EMO HW OL S/S TFS<br />
(ROTORK)<br />
7/27/<strong>12</strong> 7/27/<strong>12</strong><br />
14.0 1 WPS-YP4-BFV1 20 150B FL BFV OC EMO HW 6/20/<strong>12</strong> 7/<strong>12</strong>/<strong>12</strong><br />
OL S/S TFS (ROTORK)<br />
15.0 1 WPS-YP4-BFV2 7/27/<strong>12</strong> 7/27/<strong>12</strong><br />
36 150B FLG BFV SEGMENT<br />
SEAT OC EMO HW OL S/S TFS<br />
(ROTORK)
1513188 HP<br />
Page 4 of 5<br />
401 South Highland Avenue<br />
Aurora IL, 60506-5563<br />
Phone: 630-844-4000<br />
Fax: 630-844-4160<br />
LINE QTY TAG/LOCATION DESCRIPTION<br />
E S D Release 2/15 ESD Release 2/29<br />
16.0 1 WPS-YP5-BFV1 30 150B FLG BFV SEGMENT 7/27/<strong>12</strong> 7/27/<strong>12</strong><br />
SEAT OC EMO HW OL S/S TFS<br />
(ROTORK)<br />
17.0 1 WPS-YP5-BFV2 36 150B FLG BFV SEGMENT 7/27/<strong>12</strong> 7/27/<strong>12</strong><br />
SEAT OC EMO HW OL S/S TFS<br />
(ROTORK)<br />
18.0 4 WPS-YP1-BFV5,<br />
WPS-YP1-BFV6,<br />
OPS-PL-BFV5,<br />
OPS-PL-BFV6<br />
22.0 3 TP-BFV2,<br />
TP-BFV3,<br />
TP-BFV4<br />
30 150B FLG BFV SEGMENT<br />
SEAT BSN OL S/S EXS (AUMA<br />
WORM GEAR)<br />
48 250B FL BFV WG40-300 BSN<br />
OL S/S<br />
7/27/<strong>12</strong> 7/27/<strong>12</strong><br />
5/9/<strong>12</strong> 5/25/<strong>12</strong><br />
23.0 1 OPS-PL-BFV1 30 150B FL BFV MDT5 BSN OL 3/9/<strong>12</strong> 3/23/<strong>12</strong><br />
S/S<br />
24.0 1 OPS-PL-BFV2<br />
24 150B FL BFV MDT4S BSN<br />
OL S/S<br />
3/2/<strong>12</strong> 3/16/<strong>12</strong><br />
25.0 2 OPS-PL-BFV3,<br />
OPS-PL-BFV4<br />
30 150B FL BFV MDT5 BSN OL 3/9/<strong>12</strong> 3/23/<strong>12</strong><br />
S/S
Ward County Water Supply Expansion Project Transmission,<br />
Odessa and Well Field Pump Stations<br />
<strong>Butterfly</strong> Valve Weights<br />
Valve Size and Pressure Class<br />
Weight per unit<br />
18” 2FII 150B 600<br />
18” 2FII 150B w/Rotork EMO 1050<br />
18” 2FII 150B w/Rotork EMO & TT/Flrstnd 1300<br />
18” HP350 1100<br />
20” 2FII 150B w/Rotork EMO & TT/Flrstnd 1150<br />
24” Triton 150B 1050<br />
30” Triton 150B 1900<br />
30” Triton 150B w/Auma WG 2000<br />
30” Triton 150B w/Rotork EMO & TT/Flrstnd 2600<br />
36” Triton 150B 2650<br />
36” Triton 150B w/Auma WG 2700<br />
36” Triton 150B w/Rotork EMO & TT/Flrstnd 2950<br />
48” Triton 150B w/Auma WG 6000<br />
48” HP250II 4900<br />
48” HP350 w/Auma WG 8300
AWWA <strong>Butterfly</strong> <strong>Valves</strong><br />
3" – 20"<br />
Engineering Creative Solutions<br />
for Fluid Systems Since 1901
A Tradition of Excellence<br />
With the development of the first rubber seated butterfly<br />
valve more than 70 years ago, the Henry Pratt Company<br />
became a trusted name in the flow control industry,<br />
setting the standard for product quality and customer<br />
service. Today Pratt provides the following range of<br />
superior products to the water, wastewater and power<br />
generation industries.<br />
<strong>Butterfly</strong> <strong>Valves</strong>: from 3" to 162"<br />
Rectangular <strong>Valves</strong>: 1' x 1' to 14' x 16'<br />
Ball <strong>Valves</strong> —<br />
Rubber Seated: from 4" to 60"<br />
Metal Seated: from 6" to 48"<br />
Plug <strong>Valves</strong>: from 1/2" to 36", 3 ways<br />
Hydraulic Control Systems<br />
Valve Controls<br />
Energy Dissipating <strong>Valves</strong><br />
and Fixed Energy Dissipaters<br />
Cone <strong>Valves</strong><br />
Check <strong>Valves</strong><br />
A Commitment to Meeting<br />
The Customers’ Needs<br />
Henry Pratt valves represent a long-term commitment<br />
to both the customer and to a tradition of product<br />
excellence. This commitment is evident in the number<br />
of innovations we have brought to the industries we<br />
serve. In fact, the Henry Pratt Company was the first to<br />
introduce many of the flow control products in use today,<br />
including the first rubber seated butterfly valve, one of<br />
the first nuclear N-Stamp valves, and the bonded seat<br />
butterfly valve.<br />
Innovative Products<br />
For Unique Applications<br />
Though many of the standard valves we produce are<br />
used in water filtration and distribution applica tions, Pratt<br />
has built a reputation on the ability to develop specialized<br />
products that help customers to meet their individual<br />
operational challenges.<br />
Creative Engineering<br />
for Fluid Systems<br />
Pratt’s ability to provide practical solutions to complex<br />
issues is demonstrated by the following case histories.<br />
Earthquake Proof <strong>Valves</strong><br />
Pratt designed and manufactured hydraulically actuated<br />
valves for a water storage application so that the valves<br />
would automatically operate in the event of earthquakes.<br />
This lead to the development of a valve that will withstand<br />
acceleration forces of up to 6g’s.<br />
Custom Actuation/Isolation <strong>Valves</strong><br />
Pratt designed and manufactured valves that would<br />
isolate a working chamber in the event of a nuclear<br />
emergency during the decommissioning of armed<br />
nuclear warheads. The valves were able to close in<br />
a millisecond using specially designed Pratt electropneumatic<br />
actuators.<br />
<strong>Valves</strong> Designed for<br />
Harsh Environments<br />
Pratt designed and manufactured a 144" diameter<br />
butterfly valve for the emergency cooling system at<br />
a jet engine test facility. The valve was designed to supply<br />
water to help dissipate the tremen dous heat generated by<br />
the engines during testing.<br />
Through experience, commitment and creative engineering, Pratt is uniquely<br />
suited to provide superior products for our customers’ special needs.<br />
For more information, contact our corporate headquarters in Aurora, Illinois.
Scope of Line:<br />
AWWA In-Plant Rubber Seated <strong>Butterfly</strong> <strong>Valves</strong><br />
Model 2FII <strong>Butterfly</strong> Valve<br />
Model 2FII Flanged <strong>Butterfly</strong> Valve<br />
Sizes: 3 through 20 inches<br />
Body Style: Flanged x flanged ends<br />
Other Body Style Options:<br />
n Mechanical joint<br />
n Victaulic<br />
n Flanged & mechanical joint<br />
n Push-on<br />
n Push-on & flanged<br />
Pressure Class:<br />
n Class 150B per AWWA Standard C504<br />
Working Pressure: 150 psig<br />
Flanges:<br />
n Flat faced and drilled in accordance with ANSI B16.1,<br />
Class <strong>12</strong>5 standards.<br />
Rubber Seat: Bonded seat-in-body<br />
Actuation Options:<br />
n Pratt hand lever<br />
n MDT manual actuator with AWWA nut, handwheel or<br />
chainwheel<br />
n Pratt Dura-Cyl hydraulic or pneumatic cylinder<br />
n Pratt Positron electric actuator<br />
Monoflange MKII Wafer <strong>Butterfly</strong> Valve<br />
Sizes: 3 through 20 inches<br />
Body Style: Wafer-type<br />
Pressure Class:<br />
n Class 150B per AWWA Standard C504<br />
Working Pressure: 150 psig<br />
Rubber Seat:<br />
n Bonded seat-in-body extends over inner surface to<br />
form self-gasketing feature<br />
Actuation Options:<br />
n Pratt hand lever<br />
n MDT manual actuator with AWWA nut, handwheel or<br />
chainwheel<br />
n Pratt Dura-Cyl hydraulic or pneumatic cylinder<br />
n Pratt Positron electric actuator<br />
Monoflange MKII <strong>Butterfly</strong> Valve<br />
2 | Henry Pratt Company
Design Details:<br />
Models 2FII and MKII<br />
Self Adjusting Permanent Packing<br />
Chevron type packing increases sealing force<br />
as line pressure increases. The self adjusting<br />
packing bears on turned, ground and polished<br />
stainless steel, minimizing wear and assuring<br />
long life. Packing is accessible for replacement<br />
without dismantling the valve per AWWA<br />
Standard C504.<br />
Lifetime Bearings<br />
Pratt’s chemically inert nylon bearings are<br />
sized to meet or exceed AWWA specification<br />
pressure loads. They are self-lubricating,<br />
require no periodic maintenance and are<br />
designed to outlast the life of the pipeline.<br />
Corrosion Resistant Shafts<br />
The shafts in Pratt’s rubber seated butterfly<br />
valves, 3” through 20”, are constructed of<br />
centerless, ground ASTM A276 type 304 or<br />
type 316 stainless steel bar and thus are not<br />
susceptible to corrosion as are carbon steel or<br />
other similar materials. Shafts are one-piece,<br />
through-shaft construction, sized to meet or<br />
exceed the requirements of AWWA Standard<br />
C504 for Class 150B butterfly valves.<br />
Streamlined Discs<br />
Pratt’s lens-shaped discs are designed to<br />
minimize pressure drop and turbulence. In<br />
the full open position, the disc creates no<br />
more friction loss than a 45° elbow. Discs<br />
are secured to shafts by stainless steel pins<br />
to transmit required torques and withstand<br />
stresses imposed under a variety of operating<br />
conditions.<br />
Body Seat<br />
Our standard seats are constructed of Buna N<br />
rubber and bonded to the valve body in Pratt’s<br />
manufacturing facility using a unique thermal<br />
process. This molding process ensures that<br />
the disc-to-seat interference will not cause<br />
excessive wear or abrasion under normal<br />
operating conditions. On the wafer type MKII<br />
bodies, the rubber seat covers the entire inner<br />
surface plus the outside face of the valve body<br />
to provide a self-gasketing feature. Pratt’s<br />
seat-in-body design minimizes the effects of<br />
corrosive buildup on the inside of the valve<br />
because deposits are swept away by the hard<br />
sealing edge of the disc each time the valve is<br />
exercised.<br />
Heavy Duty Bodies<br />
Both Monoflange MKII and Model 2FII bodies<br />
are heavy duty cast iron. Model 2FII flanges are<br />
fully faced and drilled in accordance with ANSI<br />
B16.1, Class <strong>12</strong>5 standard for cast iron flanges.<br />
Monoflange MKII bodies incorporate an<br />
overlapping seat which also forms a gasket for<br />
the flange face. The actuator mounting trunnion<br />
is machined and drilled for a 4-bolt connection.<br />
Henry Pratt Company | 3
Features and Benefits:<br />
of Pratt Models 2FII and MKII<br />
Feature<br />
Seat-in-body design<br />
Seat molded in recessed body cavity,<br />
protected by metal on 3 sides<br />
Valve withstood proof-of-design testing<br />
of 100,000 cycles — AWWA only<br />
requires<br />
10,000 cycle proof-of-design testing<br />
Through-disc pinning<br />
Symmetrical lens-shaped disc<br />
Nonmetallic bearings<br />
Chevron V-type packing<br />
Benefit<br />
• Reduces seat failure due to corrosive buildup in the valve and<br />
pipeline. No hardware to loosen. No periodic maintenance required.<br />
Rubber protected from flow media to increase seat life.<br />
• Proven reliability over the life of the valve<br />
• Provides a tight disc-to-shaft pin connection, greatly reducing the<br />
possibility of loosening through vibration<br />
• Higher Cv : lower head loss results in energy savings for customer’s<br />
system<br />
• Prevents galvanic corrosion and provides lower coefficient of friction<br />
• Self-adjusting, lasts the life of the valve<br />
Valve<br />
Size<br />
C v<br />
Valve<br />
Size<br />
C v<br />
Valve<br />
Size<br />
3" 323 10" 4458 16" 11413<br />
4" 575 <strong>12</strong>" 6420 18" 14444<br />
6" <strong>12</strong>94 14" 8738 20" 17832<br />
8" 2300 C v values for the 2FII and MKII in the full open position<br />
C v<br />
Standard<br />
Material<br />
Body<br />
Type of Material<br />
Disc<br />
0255 Cast Iron Cast Iron<br />
316 edge<br />
0132 Ductile Iron SS 316<br />
(MKII 3" – 6")<br />
0274 Ductile Iron<br />
(MKII 8" +)<br />
Cast Iron<br />
316 edge<br />
Shaft<br />
SS,<br />
Type 304<br />
SS,<br />
Type 316<br />
SS,<br />
Type 304<br />
Specifications for<br />
Materials of <strong>Construction</strong><br />
Cast Iron:<br />
ASTM A<strong>12</strong>6, Class B (2FII Body)<br />
Ductile Iron:<br />
ASTM A536 (65-45-<strong>12</strong>) (MKII Body)<br />
4 | Henry Pratt Company
Suggested Specification for the Pratt<br />
Rubber Seated <strong>Butterfly</strong> Valve, Sizes 3 through 20 inches<br />
General<br />
<strong>Butterfly</strong> valves shall be manufactured in accordance<br />
with the latest revision of AWWA C504, Class 150B and<br />
conform to NSF Standard 61. The manufacturer shall<br />
have produced AWWA butterfly valves for a minimum of<br />
five years. All valves shall be either Henry Pratt Model 2FII<br />
or Monoflange MKII and comply with the following details.<br />
Valve Bodies<br />
Valve bodies shall be constructed of ASTM A<strong>12</strong>6, Class B<br />
cast iron for flanged valves or ASTM A536 (65-45-<strong>12</strong>) for<br />
wafer style. Flanged valves shall be fully faced and drilled<br />
in accordance with ANSI Standard B16.1, Class <strong>12</strong>5.<br />
Valve Seats<br />
Rubber body seats shall be of one piece construction,<br />
simultaneously molded and bonded into a recessed cavity<br />
in the valve body. Seats may not be located on the disc or<br />
be retained by segments and/or screws. For wafer style<br />
valves, the seat shall cover the entire inner surface of the<br />
valve body and extend over the outside face of the valve<br />
body to form a flange gasket.<br />
Valve Bearings<br />
Valve bearings shall be of a self-lubricating, nonmetallic<br />
material to effectively isolate the disc-shaft assembly from<br />
the valve body. Metal-to-metal thrust bearings in the flow<br />
stream are not allowed.<br />
Valve Disc<br />
The disc shall be a lens-shaped design to afford<br />
minimal pressure drop and line turbulence. Materials of<br />
construction shall be:<br />
• 3"-6" — ASTM A351 Gr. CF8M stainless steel disc<br />
• 8"-20" — ASTM A<strong>12</strong>6, Class B cast iron disc with a<br />
stainless steel type 316 edge<br />
Painting<br />
All surfaces of the valve interior shall be clean, dry and<br />
free from grease before painting. The valve interior and<br />
exterior, except for disc edge, rubber seat and finished<br />
portions shall be evenly coated with an NSF61 approved<br />
2-part liquid epoxy. Minimum dry film thickness shall be<br />
4-6 Mils.<br />
Testing<br />
Hydrostatic and seat leakage tests shall be conducted in<br />
strict accordance with AWWA Standard C504.<br />
Proof of Design<br />
The manufacturer furnishing valves under the<br />
specification shall be prepared to provide Proof of Design<br />
Test reports to illustrate that the valves supplied meet the<br />
design requirements of AWWA C504.<br />
Manual Actuators: Manual actuators shall be of the<br />
traveling nut, self-locking type and shall be designed<br />
to hold the valve in any intermediate position between<br />
fully open and fully closed without creeping or fluttering.<br />
Actuators shall be equipped with mechanical stop-limiting<br />
devices to prevent overtravel of the disc in the open<br />
and closed positions. Actuators shall be fully enclosed<br />
and designed to produce the specified torque with a<br />
maximum pull of 80 lb. on the handwheel or chainwheel.<br />
Actuator components shall withstand an input torque of<br />
450 Lb. Ft. at extreme operator position without damage.<br />
Manual actuators shall conform to AWWA C504 and shall<br />
be Pratt MDT or an approved equal.<br />
Powered Actuators: Refer to Pratt’s <strong>Butterfly</strong> Valve<br />
Actuator brochure for suggested specifications and<br />
detailed information regarding cylinder actuators and<br />
electric actuators.<br />
Discs shall be retained by stainless steel pins which<br />
should extend through the full diameter of the shaft to<br />
withstand the specified line pressure up to valve rating<br />
and the torque required to operate the valve. Disc stops<br />
located in the flow stream are not allowed.<br />
Valve Shafts<br />
Valve shafts shall be of stainless steel type 304. At the<br />
operator end of the valve shaft, a packing gland utilizing<br />
“V” type chevron packing shall be utilized. “O” ring and/or<br />
“U” cup packing is not allowed.<br />
Henry Pratt Company | 5
Dimensional Data:<br />
Model 2FII, Flanged <strong>Butterfly</strong> Valve<br />
E<br />
Nominal Valve<br />
Size A B C D E F G<br />
3 43⁄4 31⁄4 71⁄2 5 3⁄4 4 – 5⁄8 6<br />
4 51⁄2 31⁄2 9 5 15 ⁄16 8 – 5⁄8 71⁄2<br />
6 61⁄2 51⁄8 11 5 1 8 – 3⁄4 91⁄2<br />
8 73⁄4 61⁄2 131⁄2 6 11⁄8 8 – 3⁄4 113⁄4<br />
10 9 97⁄8 16 8 1 3 ⁄16 <strong>12</strong> – 7⁄8 141⁄4<br />
<strong>12</strong> 101⁄2 113⁄8 19 8 11⁄4 <strong>12</strong> – 7⁄8 17<br />
14 117⁄8 <strong>12</strong>3⁄4 21 8 13⁄8 <strong>12</strong> – 1 183⁄4<br />
16 131⁄2 143⁄8 231⁄2 8 1 7 ⁄16 16 – 1 211⁄4<br />
18 143⁄8 151⁄4 25 8 1 9 ⁄16 16 – 11⁄8 223⁄4<br />
20 16 167⁄8 271⁄2 8 11 1 ⁄16 20 – 11⁄8 25<br />
All dimensions shown in inches.<br />
D<br />
— Available in sizes<br />
3 through 20 inches<br />
E<br />
Dimensional Data:<br />
Monoflange MKII Wafer <strong>Butterfly</strong> Valve<br />
Nominal Valve<br />
Size A B C D<br />
3 43⁄4 31⁄4 51⁄4 2 1 ⁄16<br />
4 51⁄2 31⁄2 63⁄4 2 5 ⁄16<br />
6 61⁄2 51⁄8 85⁄8 2 15 ⁄16<br />
8 73⁄4 61⁄2 107⁄8 3 1 ⁄16<br />
10 9 97⁄8 131⁄4 3 3 ⁄16<br />
<strong>12</strong> 101⁄2 11 5 ⁄16 16 3 7 ⁄16<br />
14 117⁄8 <strong>12</strong>3⁄4 175⁄8 3 11 ⁄16<br />
16 131⁄2 143⁄8 201⁄8 4 3 ⁄16<br />
18 143⁄8 151⁄4 211⁄2 4 11 ⁄16<br />
20 16 16 13 ⁄16 2<strong>33</strong>⁄4 5 3 ⁄16<br />
All dimensions shown in inches.<br />
1/16"<br />
1/16"<br />
D<br />
VALVE<br />
SIZE<br />
(in.)<br />
DISC<br />
O.D.<br />
(in.)<br />
MINIMUM<br />
MATING PIPE I.D.<br />
(in.)*<br />
3 3.089 2.41<br />
4 4.074 3.44<br />
6 6.070 5.38<br />
8 8.078 7.53<br />
10 10.098 9.62<br />
<strong>12</strong> <strong>12</strong>.108 11.64<br />
14 13.<strong>33</strong>9 <strong>12</strong>.86<br />
16 15.<strong>33</strong>6 14.79<br />
18 17.370 16.75<br />
20 19.380 18.71<br />
6 | Henry Pratt Company
401 S. Highland Avenue<br />
Aurora, Illinois 60506<br />
P 630-844-4000 F 630-844-4160<br />
www.henrypratt.com<br />
Pratt Rubber Seated <strong>Butterfly</strong> Valve Specs, Sizes 3”-20”<br />
Tag Number(s): OPS-P1-BFV2, OPS-P3-BFV2, WPS-P1-BFV1, WPS-P2-BFV1, WPS-P3-<br />
BFV1, WPS-YP1-BFV1, WPS-YP1-BFV2, WPS-YP4-BFV1<br />
General<br />
<strong>Butterfly</strong> valves are manufactured in accordance with the latest revision of AWWA C504, Class 150B<br />
and conform to NSF Standard 61.<br />
Valve Body<br />
Valve bodies are constructed of ASTM A<strong>12</strong>6, Class B cast iron for flanged valves. Flanged valves<br />
are fully faced and drilled in accordance with ANSI Standard B16.1, Class <strong>12</strong>5.<br />
Valve Seats<br />
Rubber body seats are of one piece construction, simultaneously molded and bonded into a<br />
recessed cavity in the valve body. Seat material is Buna-N.<br />
Valve Bearings<br />
Valve bearings are of a self-lubricating, nonmetallic material to effectively isolate the disc-shaft<br />
assembly from the valve body.<br />
Valve Disc<br />
The disc is lens-shaped design to afford minimal pressure drop and line turbulence.<br />
Materials of construction is:<br />
• 8"-20" — ASTM A<strong>12</strong>6, Class B cast iron disc with a stainless steel type 316 edge<br />
Discs are retained by stainless steel pins which extend through the full diameter of the shaft to<br />
withstand the specified line pressure up to valve rating and the torque required to operate the valve.<br />
Valve Shafts<br />
Valve shafts are made of stainless steel type 304. At the operator end of the valve shaft, a packing<br />
gland of “V” type chevron packing is utilized.<br />
Painting<br />
All surfaces of the valve interior shall be clean, dry and free from grease before painting. The valve<br />
interior and exterior, except for disc edge, rubber seat and finished portions shall be evenly coated<br />
with an NSF61 approved 2-part liquid epoxy. Minimum dry film thickness shall be 8-10 Mils.
401 S. Highland Avenue<br />
Aurora, Illinois 60506<br />
P 630-844-4000 F 630-844-4160<br />
www.henrypratt.com<br />
Testing<br />
Hydrostatic and seat leakage tests will be conducted in strict accordance with AWWA Standard<br />
C504.<br />
Electric Actuator<br />
See Rotork spec sheet
AWWA <strong>Butterfly</strong> <strong>Valves</strong><br />
Engineering Creative Solutions<br />
for Fluid Systems Since 1901
3" through 20" <strong>Butterfly</strong> <strong>Valves</strong><br />
Scope of Line<br />
511A Flanged — 3" through 20" ..................................3<br />
510A Mechanical Joint — 4" through 20" ...........................3<br />
Design Details .....................................................4<br />
Features and Benefits — 20" and smaller ...........................5<br />
Cv Values — 20" and smaller .....................................5<br />
Suggested Specifications — 20" and smaller .........................6<br />
Dimensions<br />
511A Flanged — 3" through 20" ..................................7<br />
510A Mechanical Joint — 4" through 20" ...........................7<br />
Actuator Dimensional Data — 20" and smaller ...........................8<br />
Optional Accessories ................................................8<br />
24" and Larger <strong>Butterfly</strong> <strong>Valves</strong><br />
Scope of Line<br />
511 Flanged — 24" through 72" ...................................9<br />
510 Mechanical Joint — 24" through 48" ...........................9<br />
Features and Benefits — 24" and larger .................................9<br />
Dimensions<br />
511 Flanged — 24" through 72" ..................................10<br />
510 Mechanical Joint — 24" through 48" ..........................10<br />
Suggested Specifications — 24" and larger .............................11<br />
page 2
Scope of Line: AWWA Rubber Seated <strong>Butterfly</strong> <strong>Valves</strong><br />
Model 511A Flanged <strong>Butterfly</strong> Valve<br />
Sizes: 3 through 20 inches<br />
Body Style: Flanged x flanged ends<br />
Pressure Class:<br />
Class 150B per AWWA Stan dard C504<br />
Working Pressure: 150 psig<br />
Flanges:<br />
Flat faced and drilled in ac cor dance with ANSI B16.1, Class <strong>12</strong>5<br />
standards.<br />
Rubber Seat: Bonded seat-in-body<br />
Model 511A <strong>Butterfly</strong> Valve<br />
Actuation Options:<br />
MDT manual ac tu a tor with AWWA nut, handwheel or<br />
chainwheel<br />
Hydraulic or pneumatic cylinder<br />
Electric actuator<br />
Model 510A Mechanical Joint <strong>Butterfly</strong> Valve<br />
Sizes: 4 through 20 inches<br />
Body Style: MJ x MJ ends<br />
Pressure Class:<br />
Class 150B per AWWA Stan dard C504<br />
Working Pressure: 150 psig<br />
Rubber Seat:<br />
Bonded seat-in-body ex tends over inner surface to form selfgasketing<br />
feature<br />
Actuation Options:<br />
MDT manual ac tu a tor with AWWA nut<br />
Model 510A <strong>Butterfly</strong> Valve<br />
Please see the outside back cover for a listing of other Henry Pratt products<br />
page 3
Design Details: Models 511A and 510A — 20" and Smaller<br />
Self Adjusting Permanent Packing<br />
Chevron type packing increases sealing<br />
force as line pres sure increases. The self<br />
adjusting pack ing bears on turned, ground<br />
and polished stain less steel, min i miz ing<br />
wear and assuring long life. Pack ing is<br />
ac ces si ble for re place ment with out dis mantling<br />
the valve per AWWA Stan dard C504.<br />
Lifetime Bearings<br />
Chemically inert nylon bearings are sized<br />
to meet or exceed AWWA specification<br />
pres sure loads. They are self-lu bri cat ing,<br />
require no pe ri od ic main te nance and are<br />
de signed to outlast the life of the pipe line.<br />
Corrosion Resistant Shafts<br />
Shafts in rubber seated butterfly valves, 3”<br />
through 20”, are con struct ed of centerless,<br />
ground ASTM A276 type 304 or type 316<br />
stainless steel bar and thus are not sus cepti<br />
ble to corrosion as are carbon steel or other<br />
similar materials. Shafts are one-piece,<br />
through-shaft con struc tion, sized to meet or<br />
ex ceed the re quire ments of AWWA Standard<br />
C504 for Class 150B butterfly valves.<br />
Streamlined Discs<br />
The lens-shaped discs are designed to mini<br />
mize pres sure drop and turbulence. In<br />
the full open po si tion, the disc creates no<br />
more friction loss than a 45° el bow. Discs<br />
are secured to shafts by stain less steel pins<br />
to trans mit re quired torques and with stand<br />
stress es imposed under a va ri ety of op er ating<br />
con di tions.<br />
Body Seat<br />
Our standard seats are constructed of Buna<br />
N rub ber and bond ed to the valve body.<br />
This mold ing pro cess ensures that the discto-seat<br />
in ter fer ence will not cause ex ces sive<br />
wear or abrasion under normal op er at ing<br />
con di tions. The seat-in-body de sign mini<br />
miz es the ef fects of corrosive build up on<br />
the in side of the valve be cause deposits are<br />
swept away by the hard seal ing edge of the<br />
disc each time the valve is ex er cised.<br />
Heavy Duty Bodies<br />
Both Models 511A and 510A bodies are<br />
heavy duty cast iron. Model 511A flang es<br />
are fully faced and drilled in accordance<br />
with ANSI B16.1, Class <strong>12</strong>5 standard for<br />
cast iron flang es. Model 510A mechanical<br />
joint end connections are in accordance<br />
with AWWA C111 and ANSI 21.11. The<br />
actuator mounting trun nion is ma chined<br />
and drilled for a 4-bolt connection.<br />
page 4
Features and Benefits<br />
of Henry Pratt Models 511A and 510A — 20" and Smaller<br />
Feature<br />
Seat-in-body design<br />
Seat molded in recessed body cavity,<br />
protected by metal on 3 sides<br />
Valve withstood proof-of-design testing<br />
of 100,000 cycles - AWWA only requires<br />
10,000 cycle proof-of-design testing<br />
Through-disc pinning<br />
Symmetrical lens-shaped disc<br />
Nonmetallic bearings<br />
Chevron V-type packing<br />
Benefit<br />
Reduces seat failure due to corrosive buildup<br />
in the valve and pipeline. No hard ware to<br />
loosen. No periodic maintenance required.<br />
Rubber protected from flow media to increase<br />
seat life.<br />
Proven reliability over the life of the valve<br />
Provides a tight disc-to-shaft pin connection,<br />
greatly reducing the possibility of loosening<br />
through vibration<br />
Higher Cv : lower head loss results in energy<br />
savings for customer’s system<br />
Prevents galvanic corrosion and provides lower<br />
coefficient of friction<br />
Self-adjusting, lasts the life of the valve<br />
Valve<br />
Size<br />
C v<br />
Valve<br />
Size<br />
C v<br />
Valve<br />
Size<br />
3" 323 10" 4458 16" 11413<br />
4" 575 <strong>12</strong>" 6420 18" 14444<br />
6" <strong>12</strong>94 14" 8738 20" 17832<br />
8" 2300 Cv values for the 511A and 510A in the full open position<br />
C v<br />
Type of Material<br />
Valve Size Body Disc Shaft<br />
3" - 4" Ductile Iron CF-8M Type 304SS<br />
6" Cast Iron CF-8M Type 304SS<br />
8" - 20" Cast Iron Cast Iron/316SS Edge Type 304SS<br />
Other materials available upon request<br />
page 5
Suggested Specification for the Henry Pratt<br />
Rubber Seated <strong>Butterfly</strong> Valve, Sizes 3 through 20 inches<br />
General<br />
<strong>Butterfly</strong> valves shall be manufactured in accordance<br />
with the latest revision of AWWA C504, Class 150B<br />
and conform to NSF Standard 61. The manufacturer<br />
shall have produced AWWA butterfly valves for a<br />
minimum of five years. All valves shall be either 511A<br />
Flanged or 510A Mechanical Joint and comply with<br />
the following details.<br />
Valve Bodies<br />
Valve bodies shall be constructed of ASTM A<strong>12</strong>6,<br />
Class B cast iron. Flanged valves shall be fully faced<br />
and drilled in accordance with ANSI Stan dard B16.1,<br />
Class <strong>12</strong>5. Mechanical joint end connections are in<br />
accordance with AWWA C111 and ANSI 21.11.<br />
Valve Seats<br />
Rubber body seats shall be of one piece construction,<br />
si mul ta neous ly mold ed and bond ed into a recessed<br />
cavity in the valve body. Seats may not be located on<br />
the disc or be retained by segments and/or screws.<br />
Valve Bearings<br />
Valve bearings shall be of a self-lubricating, nonme<br />
tal lic material to ef fec tive ly isolate the disc-shaft<br />
as sem bly from the valve body. Metal-to-metal thrust<br />
bear ings in the flow stream are not allowed.<br />
Valve Disc<br />
The disc shall be a lens-shaped design to afford mini<br />
mal pressure drop and line turbulence. Materials of<br />
construction shall be:<br />
<br />
<br />
stainless steel type 316 edge<br />
Discs shall be re tained by stain less steel pins which<br />
extends through the full diameter of the shaft to withstand<br />
the spec i fied line pres sure up to valve rating<br />
and the torque re quired to oper ate the valve. Disc<br />
stops located in the flow stream are not allowed.<br />
Painting<br />
All surfaces of the valve interior shall be clean, dry<br />
and free from grease before paint ing. The valve<br />
interior and exterior, except for disc edge, rubber<br />
seat and finished portions shall be evenly coated with<br />
a 2-part liquid epoxy to comply with NSF61 and<br />
AWWA Standard C504.<br />
Testing<br />
Hydrostatic and seat leakage tests shall be conducted<br />
in strict accordance with AWWA Stan dard C504.<br />
Proof of Design<br />
The manufacturer furnishing valves under the spec i-<br />
fi ca tion shall be prepared to provide Proof of Design<br />
Test reports to illustrate that the valves supplied meet<br />
the design requirements of AWWA C504.<br />
Manual Actuators: Manual actuators shall be of the<br />
trav el ing nut, self-lock ing type and shall be de signed<br />
to hold the valve in any in ter me di ate position<br />
between ful ly open and ful ly closed without creeping<br />
or flut ter ing. Ac tu a tors shall be equipped with<br />
mechanical stop-limiting devices to pre vent overtravel<br />
of the disc in the open and closed po si tions. Ac tu a tors<br />
shall be ful ly en closed and de signed to produce the<br />
spec i fied torque with a max i mum pull of 80 lb. on the<br />
handwheel or chain wheel. Actuator components shall<br />
with stand an input torque of 450 Lb. Ft. at extreme<br />
op er a tor position without dam age. Manual ac tu a tors<br />
shall conform to AWWA C504 and shall be Henry<br />
Pratt MDT or an approved equal.<br />
Valve Shafts<br />
Valve shafts shall be of stainless steel type 304. At the<br />
op er a tor end of the valve shaft, a packing gland uti lizing<br />
“V” type chevron packing shall be utilized.<br />
page 6
Dimensional Data: Model 511A, Flanged <strong>Butterfly</strong> Valve 3" – 20"<br />
Nominal Valve<br />
Size A B C D E F G<br />
3 4 3 ⁄4 3 7 ⁄8 7 1 ⁄2 5 3 ⁄4 4 – 5 ⁄8 6<br />
4 5 1 ⁄2 4 1 ⁄8 9 5 1 5 ⁄16 8 – 5 ⁄8 7 1 ⁄2<br />
6 6 1 ⁄2 5 1 ⁄8 11 5 1 8 – 3 ⁄4 9 1 ⁄2<br />
8 7 3 ⁄4 6 1 ⁄2 13 1 ⁄2 6 1 1 ⁄8 8 – 3 ⁄4 11 3 ⁄4<br />
10 9 9 7 ⁄8 16 8 1 3 ⁄16 <strong>12</strong> – 7 ⁄8 14 1 ⁄4<br />
<strong>12</strong> 10 1 ⁄2 11 3 ⁄8 19 8 1 1 ⁄4 <strong>12</strong> – 7 ⁄8 17<br />
14 11 7 ⁄8 <strong>12</strong> 3 ⁄4 21 8 1 3 ⁄8 <strong>12</strong> – 1 18 3 ⁄4<br />
16 13 1 ⁄2 14 3 ⁄8 23 1 ⁄2 8 1 7 ⁄16 16 – 1 21 1 ⁄4<br />
18 14 3 ⁄8 15 1 ⁄4 25 8 1 9 ⁄16 16 – 1 1 ⁄8 22 3 ⁄4<br />
20 16 16 7 ⁄8 27 1 ⁄2 8 1 11 ⁄16 20 – 1 1 ⁄8 25<br />
All dimensions shown in inches<br />
E<br />
D<br />
— Available in sizes<br />
3 through 20 inches<br />
E<br />
Dimensional Data: Model 510A Mechanical Joint End<br />
<strong>Butterfly</strong> Valve — 4" – 20"<br />
PIPE<br />
I.D.<br />
Installation Diagram<br />
Note: The following items to<br />
be furnished by others unless<br />
otherwise specified in contract:<br />
Bolts, Glands, Nuts, Gaskets<br />
R<br />
F=NO. & SIZE OF BOLTS<br />
E E<br />
D A B<br />
X=<br />
LAYING LENGTH<br />
PIPE<br />
O.D.<br />
G=BOLT<br />
CIRCLE<br />
NOM.<br />
VALVE<br />
C<br />
SIZE<br />
See Note 1.<br />
PIPE PIPE PIPE I.D.<br />
SIZE O.D. MIN.<br />
4 4.80 3.10<br />
6 6.90 5.69<br />
8 9.05 7.65<br />
10 11.10 9.93<br />
<strong>12</strong> 13.20 11.70<br />
14 15.30 <strong>12</strong>.91<br />
16 17.40 14.91<br />
18 19.50 16.95<br />
20 21.60 18.96<br />
— Available in sizes<br />
4 through 20 inches<br />
Nominal Valve<br />
Size A B C D E F G X<br />
4 5 1 ⁄2 3 1 ⁄2 9 8 1 ⁄8 1 4 – 3 ⁄4 7 1 ⁄2 3 1 ⁄8<br />
6 6 1 ⁄2 5 1 ⁄8 11 8 1 ⁄2<br />
11 ⁄16 6 – 3 ⁄4 9 1 ⁄2 3 1 ⁄2<br />
8 7 3 ⁄4 6 1 ⁄2 13 1 ⁄4 8 5 ⁄8 1 1 ⁄8 6 – 3 ⁄4 11 3 ⁄4 3 5 ⁄8<br />
10 9 9 3 ⁄4 15 9 ⁄16 9 1 ⁄4<br />
13 ⁄16 8 – 3 ⁄4 14 4 1 ⁄4<br />
<strong>12</strong> 10 1 ⁄2 11 3 ⁄8 17 15 ⁄16 9 1 ⁄4 1 1 ⁄4 8 – 3 ⁄4 16 1 ⁄4 4 1 ⁄4<br />
14 11 7 ⁄8 <strong>12</strong> 3 ⁄4 20 5 ⁄16 11 1 ⁄2<br />
15 ⁄16 10 – 3 ⁄4 18 3 ⁄4 4 1 ⁄2<br />
16 13 1 ⁄2 14 1 ⁄2 22 9 ⁄16 <strong>12</strong> 1 3 ⁄8 <strong>12</strong> – 3 ⁄4 21 5<br />
18 14 3 ⁄8 15 3 ⁄8 24 11 ⁄16 <strong>12</strong> 1 ⁄4 1 3 ⁄8 <strong>12</strong> – 3 ⁄4 23 1 ⁄4 5 1 ⁄4<br />
20 16 17 27 3 ⁄32 <strong>12</strong> 1 ⁄2 1 1 ⁄2 14 – 3 ⁄4 25 1 ⁄2 5 1 ⁄2<br />
All dimensions shown in inches.<br />
Mechanical joint end is in compliance with ANSI 21.11.<br />
page 7
Actuator Dimensional Data for Models 511A and 510A —<br />
20" and Smaller<br />
MDT Manual Actuator<br />
J<br />
All di men sions<br />
shown in inches<br />
L<br />
Valve<br />
Size<br />
MDT<br />
Size<br />
J L M N P Q R S T V W<br />
3 to <strong>12</strong>" MDT-2 4 11 ⁄16 2 2 1 ⁄8 2 4 1 ⁄2 4 1 ⁄4 8 1 ⁄4 7 7 ⁄8 7 7 ⁄8 8 9 1 ⁄8 32<br />
14, 16" MDT-3 5 5 ⁄8 2 7 ⁄16 3 1 ⁄4 3 5 ⁄32 5 5 ⁄8 5 3 ⁄8 10 3 ⁄8 10 1 ⁄2 10 1 ⁄8 <strong>12</strong> 9 1 ⁄8 30<br />
18, 20" MDT-4 6 3 ⁄8 22 7 ⁄32 3 3 ⁄8 4 7 5 ⁄16 6 3 ⁄4 11 5 ⁄16 11 1 ⁄2 11 <strong>12</strong> 9 1 ⁄8 40<br />
# Turns<br />
to Close<br />
Optional Accessories<br />
Henry Pratt offers a variety of actuator extensions to meet our customer’s requirements. The choice of extension<br />
style is determined by the need for valve position indication, location of the actuator and application.<br />
Extension Stem with AWWA Nut<br />
Used to extend the 2” nut on a buried service<br />
actuator.<br />
Extension Bonnet<br />
Used to extend the actuator from the valve in<br />
situations when there may be space constraints, or it<br />
is not desirable to mount the actuator directly on the<br />
valve.<br />
Can be used for submerged service (such as reservoir<br />
inlet) and buried service applications.<br />
Extension Stem<br />
With 2" AWWA Nut<br />
Indicating Handwheel Floorstand, Torque Tube Floorstand,<br />
Motor Actuator on Floorstand<br />
Choice of floorstands or torque tube floorstand are determined<br />
by the need for valve position indication and angular<br />
alignment.<br />
External Packing Bonnet<br />
There are two styles offered based on valve size. Both styles<br />
serve the same purpose; to allow for the valve packing to be<br />
replaced without removing the actuator.<br />
Stem Guide<br />
A stem guide is a support designed to restrict the bending of a<br />
long vertical pipe.<br />
Extension<br />
EXTENSION<br />
Bonnet BONNET<br />
Indicating Handwheel<br />
Floorstand<br />
FLOORSTAND<br />
Torque Tube<br />
Floorstand<br />
TORQUE TUBE<br />
FLOORSTAND<br />
Motor Actuator<br />
Floorstand<br />
MOTOR OPERATOR<br />
ON FLOORSTAND<br />
Steady<br />
Bearing<br />
1"<br />
Support bracket<br />
when required<br />
* To be<br />
determined<br />
by customer<br />
when wall<br />
bracket is<br />
required.<br />
UNIVERSAL<br />
JOINT<br />
UNIVERSAL JOINT<br />
Torque tube and<br />
extension bonnet<br />
lengths to be<br />
determined by<br />
customer<br />
CLOSED<br />
UNIVERSAL JOINT<br />
<br />
<br />
page 8
Henry Pratt Model 511 Flanged/<br />
510 Mechanical Joint<br />
Sizes: 24 through 72 inches<br />
Body Styles:<br />
Flanged (24" - 72") Mechanical Joint (24" - 48")<br />
Pressure Class:<br />
Class 150B per AWWA Standard C504<br />
Actuation Options:<br />
Handwheel<br />
Electric Motor<br />
Pneumatic or<br />
Hydraulic Cylinder<br />
Buried Service<br />
Chainwheel<br />
Materials of <strong>Construction</strong>:<br />
Body – ASTM A<strong>12</strong>6 CLB cast iron<br />
Disc – ASTM A536 Ductile Iron<br />
Disc Edge – ASTM A276 Type 316 stainless steel<br />
Seat – Buna N/EPDM rubber retained in the body<br />
Seat Segments – ASTM A276 Type 316 stainless steel<br />
Shaft – ASTM A276 Type 304 stainless steel<br />
Bearings – Teflon lined fiberglass backed<br />
Packing – Buna N/EPDM – V type packing<br />
Paint – Liquid epoxy conforming to NSF 61 (lined and coated)<br />
Features and Benefits<br />
Rubber seat in body<br />
Recessed segmented seat retention<br />
Mechanically adjustable seat<br />
Epoxy paint<br />
Flow though disc design<br />
Reduces the chance of seat damage from<br />
tuberculation or other solids<br />
Allows for simple bi-directional point<br />
adjustment on rubber seat while keeping<br />
hardware out of flowstream<br />
No special tools or training required to adjust<br />
and/or replace the seat<br />
Reduces potential corrosion and extends valve<br />
life<br />
Disc design results in lower head-loss than<br />
solid or hollow disc designs<br />
page 9
Figure 511<br />
24" - 72" Class 150 B Flanged Ends<br />
Flanged End<br />
Valve<br />
Size<br />
A B C D E F G<br />
NOMINAL VALVE SIZE<br />
G = BOLT CIRCLE<br />
C = FLANGE OD<br />
A<br />
B<br />
D<br />
E<br />
24 18 5 ⁄8 16 1 ⁄2 32 8 1 7 ⁄8 20 – 1 1 ⁄4 29 1 ⁄2<br />
30 21 1 ⁄2 24 1 ⁄8 38 3 ⁄4 <strong>12</strong> 2 1 ⁄8 28 – 1 1 ⁄4 36<br />
36 25 7 ⁄16 28 46 <strong>12</strong> 2 3 ⁄8 32 – 1 1 ⁄2 42 3 ⁄4<br />
42 29 7 ⁄8 32 11 ⁄16 53 <strong>12</strong> 2 5 ⁄8 36 – 1 1 ⁄2 49 1 ⁄2<br />
48 34 1 ⁄16 36 7 ⁄8 59 1 ⁄2 15 2 3 ⁄4 44 – 1 1 ⁄2 56<br />
54 37 1 ⁄2 40 11 ⁄16 66 1 ⁄4 15 3 44 – 1 1 ⁄2 62 3 ⁄4<br />
60 41 3 ⁄4 45 3 ⁄16 73 15 3 1 ⁄8 52 – 1 3 ⁄4 69 1 ⁄4<br />
66 46 1 ⁄16 49 1 ⁄2 80 18 3 3 ⁄8 52 – 1 3 ⁄4 76<br />
72 50 53 1 ⁄8 86 1 ⁄2 18 3 1 ⁄2 60 – 1 3 ⁄4 82 1 ⁄2<br />
*Contact Henry Pratt for larger sizes<br />
Figure 510<br />
24" - 48" Class 150 B Mechanical Joint<br />
Mechanical Joint End<br />
Valve<br />
Size<br />
A B C D E F G X<br />
24 18 5 ⁄8 16 1 ⁄2 31 9 ⁄16 14 1 ⁄8 1 5 ⁄8 16 3 ⁄4 30 7 1 ⁄8<br />
30 21 1 ⁄2 24 1 ⁄8 39 20 1 13 ⁄16 20 -- 1 36 7 ⁄8 10<br />
36 25 7 ⁄16 28 45 7 ⁄8 22 2 24 -- 1 43 3 ⁄4 14<br />
42 29 7 ⁄8 <strong>33</strong> 53 22 2 28 -- 1 1 ⁄4 50 5 ⁄8 14<br />
48 34 1 ⁄16 36 7 ⁄8 59 7 ⁄8 24 2 32 -- 1 1 ⁄4 57 1 ⁄2 16<br />
*Contact Henry Pratt for larger sizes<br />
Design Detail<br />
page 10
Suggested Specification (24" and Larger)<br />
General:<br />
All butterfly valves shall be of the tight closing,<br />
rubber seat type conforming to the design standards<br />
of ANSI/AWWA C504 latest revision. <strong>Valves</strong> shall<br />
be bubble-tight at the rated pressure in either<br />
direction and shall be suitable for throttling service<br />
and/or operation after long periods of inactivity.<br />
Manufacturer shall have a minimum of five (5) years<br />
experience producing AWWA butterfly valves.<br />
Body:<br />
All valve bodies shall be constructed of ASTM A<strong>12</strong>6<br />
Class B cast iron. Flanged valves shall have ANSI<br />
B16.1 flanges with class <strong>12</strong>5# drilling. Mechanical<br />
Joint <strong>Valves</strong> shall have ends conforming to the<br />
ANSI/AWWA C111/A21.11 standard.<br />
Seat:<br />
On 24” and larger valves the seat shall be adjustable<br />
and replaceable in the field without the use of<br />
special tools. Valve seats on valves 24” and larger<br />
will be designed for bi-directional adjustment<br />
without removal of the seat. Valve designs with the<br />
rubber seat on the disc are not acceptable.<br />
Disc:<br />
The discs shall be constructed of ASTM A536<br />
Ductile Iron with a 316 stainless steel edge. 24” and<br />
larger discs will be the flow through design.<br />
Shaft:<br />
The valve shaft shall be constructed of stainless steel<br />
ASTM A276 type 304. On valves 24” and larger, a<br />
taper pin of 316 stainless steel will be used as the<br />
disc/shaft connection.<br />
Bearings:<br />
All shaft bearing shall be of the self-lubrication,<br />
corrosion-resistant sleeve type. Bearings shall be<br />
designed for horizontal and/or vertical shaft loading.<br />
Packing:<br />
On valves 24” and larger the packing will be<br />
V-type. All packing will be self adjusting and wear<br />
compensating. Valve packing arrangement shall be<br />
designed so that actuator removal will not result in<br />
packing seal failure.<br />
Paint:<br />
<strong>Valves</strong> 24” and larger will be lined and coated with<br />
a liquid epoxy conforming to AWWA C550 and<br />
NSF61. Coatings will be a minimum of 8 mils DFT.<br />
Testing:<br />
All valves shall be hydrostatic and leak tested in<br />
accordance with ANSI/AWWA C504.<br />
Manual Actuators:<br />
Manual actuators shall be AWWA approved<br />
worm gear actuators. The actuator incorporates a<br />
hardened worm with bronze heavy duty quadrant<br />
<br />
locking type and shall be designed to hold the valve<br />
in any intermediate position between fully open and<br />
fully closed without creeping or fluttering. Worm<br />
gear to be rated 450 foot pounds at the stops.<br />
<strong>Valves</strong> shall be Henry Pratt model 511/510 or<br />
approved equivalent.<br />
page 11
PRATT PRODUCT GUIDE<br />
Model<br />
2FII<br />
Monoflange<br />
MKII<br />
Plug<br />
Valve<br />
Triton ®<br />
XR70<br />
Indicating <strong>Butterfly</strong> Valve<br />
UL & FM approved<br />
Tilting Disc<br />
Check Valve<br />
Triton ®<br />
XL<br />
N-Stamp Nuclear<br />
<strong>Butterfly</strong> Valve<br />
Cone<br />
Valve<br />
Rectangular<br />
PIVA Post Indicating Valve Assembly<br />
UL & FM approved<br />
Sleeve<br />
Valve<br />
Rubber Seated<br />
Ball Valve<br />
Triton ®<br />
HP250<br />
Check<br />
Valve<br />
Groundhog ®<br />
Valve<br />
Control<br />
Systems<br />
Compact Controllable<br />
Energy Dissipater<br />
Metal Seated<br />
Ball Valve<br />
Henry Pratt Company<br />
401 South Highland Avenue<br />
Aurora, Illinois 60506-5563<br />
United States<br />
630-844-4000<br />
Fax 630-844-4160<br />
www.henrypratt.com<br />
ISO 9<strong>001</strong>: 2000 Certified<br />
©20<strong>12</strong> Henry Pratt Company | Printed in the U.S.A. | AWWA BFV 01<strong>12</strong>
401 S. Highland Avenue<br />
Aurora, Illinois 60506<br />
P 630-844-4000 F 630-844-4160<br />
www.henrypratt.com<br />
Specifications for 150B pressure class <strong>Butterfly</strong> <strong>Valves</strong><br />
24” and Larger Segmented seat design<br />
Tag numbers: TPS-P1-BFV1, P2-BFV1, P3-BFV1, P4-BFV1; OPS-P1-BFV1, P2-BFV1;<br />
TPS-YP1-BFV1, YP2-BFV1, YP3-BFV1; OPS-YP2-BFV1; WPS-YP1-BFV3,<br />
YP2-BFV1, YP3-BFV1; WPS-YP4-BFV2; WPS-YP5-BFV-1, YP5-BFV2,<br />
WPS-YP1-BFV5, YP1-BFV6; OPS-PL-BFV6<br />
General<br />
All butterfly valves are tight closing, rubber seated type and fully comply with the latest revision of<br />
AWWA Standard C504/C516 and NSF61, where applicable. <strong>Valves</strong> are bubble-tight at rated<br />
pressures in either direction, and shall be satisfactory for applications involving throttling<br />
service and for applications requiring valve actuation after long periods of inactivity. Valve discs<br />
rotate 90˚ from the full open position to the tight shut position. Regardless of valve size, angular<br />
misposition of disc can be up to 1˚ off center without leakage.<br />
Valve Body<br />
All valve bodies are cast iron ASTM A<strong>12</strong>6, Class B, narrow body design. Flange drilling is in<br />
accordance with ANSI B16.1 standard for cast iron flanges. Body thickness is in strict accordance<br />
with AWWA C504.<br />
Valve Disc<br />
All valve discs are constructed of ductile iron ASTM A536 with a stainless steel seating edge. The disc<br />
shall not have any hollow chambers that can entrap water. Disc and shaft connection are made with<br />
stainless steel pins.<br />
Valve Shaft<br />
All shafts are turned, ground, polished and constructed of ASTM A-276 Type 304 stainless steel. Shafts<br />
are of two-piece, stub type and keyed for actuator connection. Shaft diameters meet minimum<br />
requirements established by the latest revision of AWWA Standard C504 for their class.<br />
Valve Seat<br />
All seats are constructed of Buna N and suitable for bidirectional shutoff at rated pressure. Seats are<br />
retained in the valve body by recessed segmented seat retention. Seats are full 360˚ without interruption<br />
and have a plurality of grooves mating with a spherical disc edge seating surface. Valve seats are field<br />
adjustable around the full 360˚ circumference and replaceable without dismantling the actuator, disc or<br />
shaft and without removing the valve from the line.<br />
Shaft Seals<br />
The shaft seals are self adjusting “V” type chevron packing. Shaft seals are designed to allow<br />
replacement without removing the valve shaft.
401 S. Highland Avenue<br />
Aurora, Illinois 60506<br />
P 630-844-4000 F 630-844-4160<br />
www.henrypratt.com<br />
Valve Bearings<br />
All butterfly valves are fitted with sleeve-type bearings. Bearings are corrosion resistant and selflubricating.<br />
Bearing material is Teflon-lined with a special fiberglass backing. Bearing load do not exceed<br />
1⁄5 of the compressible strength of the bearing or shaft material.<br />
Manual Valve Actuator for tag #TPS-P1-BFV1, P2-BFV1, P3-BFV1, P4-BFV1; OPS-P1-BFV1,<br />
P2-BFV1<br />
Valve actuators conform to AWWA Standard C504 and are designed to hold the valve in any intermediate<br />
position between full open and fully closed without creeping or fluttering. Actuators are equipped with<br />
mechanical stop-limiting devices to prevent overtravel of the disc in the open and closed positions. The<br />
buried service MDT actuator has a mechanical stop which will withstand and input torque of 450 ft. lbs at<br />
extreme actuator position without damage.<br />
Bevel gear worm gear<br />
See actuator spec sheet<br />
Electric Valve Actuator<br />
See actuator spec sheet<br />
Painting<br />
Valve interior and exterior surfaces except for seating shall be coated with two coats of epoxy paint<br />
Amercoat 370 in accordance with TT-C-494A and AWWA C504.<br />
Testing<br />
Hydrostatic and seat leakage tests will be conducted in strict accordance with AWWA Standard C504
Triton XR-70 <strong>Butterfly</strong> Valve<br />
Engineering Creative Solutions<br />
for Fluid Systems Since 1901
A Tradition of Excellence<br />
With the development of the first rubber seated butterfly<br />
valve more than 70 years ago, the Henry Pratt Company<br />
became a trusted name in the flow control industry,<br />
setting the standard for product quality and customer<br />
service. Today Pratt provides the following range of<br />
superior products to the water, wastewater and power<br />
generation industries.<br />
<strong>Butterfly</strong> <strong>Valves</strong>: from 3" to 162"<br />
Rectangular <strong>Valves</strong>: 1' x 1' to 14' x 16'<br />
Ball <strong>Valves</strong> —<br />
Rubber Seated: from 4" to 60"<br />
Metal Seated: from 6" to 48"<br />
Plug <strong>Valves</strong>: from 1/2" to 36", 3 ways<br />
Hydraulic Control Systems<br />
Valve Controls<br />
Energy Dissipating <strong>Valves</strong><br />
and Fixed Energy Dissipaters<br />
Cone <strong>Valves</strong><br />
Check <strong>Valves</strong><br />
A Commitment to Meeting<br />
The Customers’ Needs<br />
Henry Pratt valves represent a long-term commitment<br />
to both the customer and to a tradition of product<br />
excellence. This commitment is evident in the number<br />
of innovations we have brought to the industries we<br />
serve. In fact, the Henry Pratt Company was the first to<br />
introduce many of the flow control products in use today,<br />
including the first rubber seated butterfly valve, one of<br />
the first nuclear N-Stamp valves, and the bonded seat<br />
butterfly valve.<br />
Innovative Products<br />
For Unique Applications<br />
Though many of the standard valves we produce are<br />
used in water filtration and distribution applications, Pratt<br />
has built a reputation on the ability to develop specialized<br />
products that help customers to meet their individual<br />
operational challenges.<br />
Creative Engineering<br />
for Fluid Systems<br />
Pratt’s ability to provide practical solutions to complex<br />
issues is demonstrated by the following case histories.<br />
Earthquake Proof <strong>Valves</strong><br />
Pratt designed and manufactured hydraulically actuated<br />
valves for a water storage application so that the valves<br />
would automatically operate in the event of earthquakes.<br />
This lead to the development of a valve that will withstand<br />
acceleration forces of up to 6g’s.<br />
Custom Actuation/Isolation <strong>Valves</strong><br />
Pratt designed and manufactured valves that would<br />
isolate a working chamber in the event of a nuclear<br />
emergency during the decommissioning of armed<br />
nuclear warheads. The valves were able to close in<br />
a millisecond using specially designed Pratt electropneumatic<br />
actuators.<br />
<strong>Valves</strong> Designed for<br />
Harsh Environments<br />
Pratt designed and manufactured a 144" diameter<br />
butterfly valve for the emergency cooling system at<br />
a jet engine test facility. The valve was designed to supply<br />
water to help dissipate the tremendous heat generated by<br />
the engines during testing.<br />
Through experience, commitment and creative engineering, Pratt is uniquely<br />
suited to provide superior products for our customers’ special needs.<br />
For more information, contact our corporate headquarters in Aurora, Illinois.
401 South Highland Avenue<br />
Aurora, Illinois 60506-5563<br />
www.henrypratt.com<br />
phone: 630.844.4000<br />
fax: 630.844.4160<br />
Table of Contents<br />
Pratt / Triton XR-70 <strong>Butterfly</strong> Valve<br />
Scope of Line .....................................................................................................................................................................................................2<br />
Features & Benefits .........................................................................................................................................................................................3<br />
Design Details ............................................................................................................................................................................................... 4-5<br />
E-Lok Seat Design ...........................................................................................................................................................................................6<br />
Flow Through Design .....................................................................................................................................................................................6<br />
Coatings and Rubber Linings ......................................................................................................................................................................7<br />
Water Flow Characteristics ...........................................................................................................................................................................8<br />
Valve End Types and Dimensions: Flanged End .................................................................................................................................9<br />
Valve End Types and Dimensions: Mechanical Joint End ............................................................................................................ 10<br />
Suggested Specifications for <strong>Butterfly</strong> <strong>Valves</strong> 24"<br />
and larg er Cast <strong>Construction</strong> .................................................................................................................................................................... 11<br />
Actuation ........................................................................................................................................................................................................... <strong>12</strong>
Scope of Line:<br />
Triton XR-70 <strong>Butterfly</strong> Valve<br />
Sizes: 24 through 144 inches<br />
Standard Body Styles:<br />
- Flange x flange ends<br />
- Mechanical Joint ends (24"-48")<br />
- Flange and Mechanical Joint ends (24", 30", 36")<br />
Standards:<br />
- Conforms to AWWA C504 requirements<br />
Pressure Class:<br />
- AWWA pressure classes 75B (54"-144") and 150B<br />
Seat: Rubber seat-in-body<br />
Actuation Options:<br />
- Pratt MDT manual ac tu a tor with AWWA nut,<br />
handwheel or chainwheel<br />
- Worm gear actuators<br />
- Pratt Dura-Cyl hydraulic or pneumatic cylinder<br />
Accessories/Options:<br />
Anti-cavitation device, bonnets, floorstands, lantern<br />
glands, shaft locking devices, external epoxy injection<br />
port, snubbers, expansion joints, rubber lining<br />
Consult factory for accessory details.<br />
Optional Body Styles:<br />
- Victaulic Ends<br />
- Concrete Pipe Ends<br />
Consult factory for lead times.<br />
Pratt Triton XR-70<br />
2 | Henry Pratt Company
Features and Benefits:<br />
Triton XR-70 <strong>Butterfly</strong> Valve<br />
Feature<br />
E-Lok seat in design<br />
Rubber seat located in body<br />
Optional external injection port<br />
Seat material also available in EPDM<br />
Valve cycle tested per AWWA C504 requirements<br />
Flow through disc on 30 inch and larger<br />
Nonmetallic bearings<br />
V-type shaft packing<br />
Through disc pinning<br />
Benefit<br />
– No hardware to loosen. Precision rubber seat<br />
installation and uniform interference provide long seat<br />
life. Foolproof adjustment and/or replacement (in<br />
most cases without re mov ing the valve from the line)<br />
– Reduces performance problems related to<br />
corrosive buildup in valve body and pipeline.<br />
– E-Lok seat can be adjusted and/or repaired in<br />
the field without dewatering the pipe line<br />
– Can accommodate tem per a tures up to 250 degrees F<br />
– Proven reliability over the life of the valve<br />
– More strength, less weight, greater free flow<br />
area. Higher C v : lower head loss results in<br />
energy savings for cus tom er’s system<br />
– Prevents galvanic corrosion and provides<br />
lower coefficient of friction<br />
– Self-adjusting, lasts the life of the valve<br />
– Provides a tight disc-to-shaft pin connection, greatly<br />
reducing the possibility of loosening through vibration<br />
Specifications for<br />
Materials of <strong>Construction</strong><br />
Body Material:<br />
Cast Iron (24"-48") — ASTM A<strong>12</strong>6, Class B<br />
Ductile Iron (54" & Larger) – ASTM A536,<br />
Grade 65-45-<strong>12</strong><br />
Disc Material:<br />
Ductile Iron — ASTM A536, Grade 65-45-<strong>12</strong><br />
Disc Edge:<br />
Stainless Steel – ASTM A-240 Type 316<br />
Shaft Material:<br />
304 Stainless Steel — ASTM A276 Type 304<br />
Bearing Material:<br />
TLFB — Teflon lined, Fiberglass backed<br />
Henry Pratt Company | 3
Design Details:<br />
Triton XR-70 <strong>Butterfly</strong> Valve<br />
4 | Henry Pratt Company
Design Details:<br />
Triton XR-70 <strong>Butterfly</strong> Valve<br />
1) Corrosion Resistant Shafts<br />
To prevent corrosion of a vital structural component,<br />
shafts are con struct ed of centerless ground ASTM A276<br />
type 304. This material is superior to car bon steel or<br />
similar materials that afford little protection against the<br />
harmful effects of cor ro sion. Pratt’s standard line consists<br />
of a two-piece, stub-type shaft keyed for the actuator<br />
connection.<br />
2) Packing and Packing Gland Assemblies<br />
Packing is self adjusting “V” type. The packing gland or<br />
shaft seal is uti lized only in the top trunnion of the valve<br />
body where the shaft protrudes for actuator connection.<br />
The packing as sem bly incorporates a nylon pack ing<br />
re tain er accompanied by several rings of packing. Other<br />
available packing gland ar range ments include water seals<br />
(lantern glands) for pos i tive and negative pressures, and<br />
reverse “V” type for vacuum ap pli ca tions. Where access<br />
to packing is required, open-type bonnets can be provid<br />
ed. When this option is specified, “V” type packing is<br />
held in place with a bronze retaining gland which is fastened<br />
to the valve trunnion with plated steel cap screws.<br />
3) Bearings<br />
Self-lubricating, sleeve-type bearings are used in both<br />
trun nions of the valve body. Bearings support the shaft<br />
and pro vide minimum friction during shaft rotation.<br />
Bear ing material is Teflon-lined with a special fi berglass<br />
back ing. This type of bearing offers electrical<br />
insulating qual i ties between the disc/shaft assembly<br />
and the valve body, thereby diminishing the effects of<br />
galvanic corrosion. In addition, its reduced co ef fi cient of<br />
friction requires far less torque than the metallic bear ing<br />
materials.<br />
4) Rubber Seat<br />
The multi-ridge surface of Pratt’s E-Lok seat seals a<br />
full 360˚ against a stainless steel spherical disc edge.<br />
Be cause of the laterally spaced grooves, rubber stress<br />
is sub stan tial ly reduced, resulting in less sealing torque.<br />
The grooved seat design, coupled with the wide spher i-<br />
cal ly shaped seating edge of the disc, also allows greater<br />
disc closure tolerance. Regardless of valve size, angular<br />
misposition of the disc can be 1˚ off center without<br />
leakage. The seat is mechanically retained by a unique<br />
ep oxy in jec tion process which moves the seat against the<br />
disc to conform to the exact radius of the disc with uniform<br />
con tact pressure. It is fully adjustable by local epoxy<br />
in jec tion and can be replaced in the field. As an option,<br />
valves may be pur chased with an ex ter nal in jec tion port<br />
which allows seat adjustment and repair to be performed<br />
with out re mov ing the valve or de w a ter ing the pipeline.<br />
For additional in for ma tion regarding the E-Lok seat, refer<br />
to the “E-Lok Seat Design” section of this brochure.<br />
5) Shaft Connection<br />
Disc-to-shaft connection is accomplished by<br />
conservative ly sized stainless steel or monel taper pins,<br />
threaded at one end and secured with lockwashers and<br />
nuts. On 24 inch valves, stainless steel dowel pins are<br />
used. Pratt’s through-pin design provides the tightest<br />
possible con nec tion between the shaft and disc.<br />
6) Valve Disc<br />
Pratt valve discs are constructed of the high est strengthto-weight<br />
ra tio materials available. On our 24 inch valve,<br />
the arch side of the disc is closed and the flat side is open,<br />
forming a slightly concave surface. On valves 30 inches<br />
and greater, a flow through disc design is em ployed to<br />
minimize line tur bu lence and lower head loss. The great er<br />
free flow area pro vides less pres sure drop in the full-open<br />
position than other disc shapes. For ad di tion al in for mation<br />
re gard ing Pratt’s flow through disc de sign, refer to<br />
“Flow through Design” section of this brochure.<br />
7) Valve Body<br />
The bodies of the XR-70 are constructed of heavy cast<br />
iron ASTM A<strong>12</strong>6. On flange end bod ies, flange drilling<br />
is provided in ac cor dance with ANSI B16.1 for cast iron<br />
flanges through 72 inches. Larger sizes where applicable<br />
per AWWA C207.<br />
8) Thrust Bearing Assembly<br />
The two-way thrust bearing is preset at the factory. On<br />
valves 30 inches and larger, the thrust bearing assembly<br />
consists of a stainless steel or monel stud fastened to<br />
the bottom of the valve shaft. The stud extends beyond<br />
the bottom cover. The thrust collar is threaded to the<br />
stud and pinned. On the 24 inch valve, the thrust collar<br />
is pinned to the shaft and fitted with bronze spacers. The<br />
bottom cover cap is then bolted to the bot tom cover and<br />
retains the thrust collar which, in turn, retains the position<br />
of the disc assembly. The cavity con tain ing the thrust<br />
collar is packed with grease providing lifetime lubrication<br />
of the thrust bearing assembly. The cap is fully gasketed<br />
to prevent leakage.<br />
Valve End Connection Options<br />
A wide range of valve end con nec tion options for the<br />
Pratt Triton XR-70 are available. See “Valve End Types<br />
and Dimensions” section for details.<br />
Actuation Options<br />
See “Actuation” section for Pratt actuators or refer to<br />
Pratt’s Actuator brochure for the many ac tu a tion op tions<br />
available for the Tri ton XR-70.<br />
Henry Pratt Company | 5
E-Lok Seat Design<br />
Years of Reliable Service<br />
The Triton XR-70 uti lizes the unique and patented* E-Lok<br />
seat-in-body design. With years of reliable performance,<br />
the E-Lok’s seat retention system still remains one of the<br />
most in no va tive con cepts in butterfly valve seat de sign.<br />
This design is often imitated without the superior results<br />
that only Pratt experience can deliver.<br />
How the E-Lok Seat Provides<br />
Bubble Tight Closure<br />
The rubber seat, which is mount ed in the valve body, seals<br />
a full 360˚ against a stainless steel disc edge with low<br />
torque and high tol er ance to seating angle. The ridg es<br />
molded into the seat surface greatly reduce the pos sibil<br />
i ty of the seat being over compressed and minimizes<br />
compression set of rubber. In man u fac tur ing, a two<br />
part epoxy com pound is injected into a channel behind<br />
the rub ber seat with the disc in the closed position.<br />
This ensures equal interference around the complete<br />
circumference of the disc/seat contact area. The epoxy<br />
hardens, bonding neither to the met al seat channel nor to<br />
the rubber seat, yet me chan i cal ly re tains the seat in the<br />
body. Since the seat is installed and remains in a “relaxed”<br />
state, the possibility of damaging the seat is greatly<br />
reduced as compared to a seat that is “stressed” when<br />
bolted on to a body or disc as in other designs.<br />
port, the seat can be adjusted from the out side of the valve<br />
without de wa ter ing the pipe line. The injection process can<br />
be achieved by utilizing simple tools and an in expen sive,<br />
disposable seat injection kit.<br />
Easy Seat Replacement<br />
In the unlikely event that seat replacement is required, it<br />
can be performed on valves 30 inch es and larger without<br />
re mov ing the valve from the pipeline (as long as a<br />
tech ni cian can access inside the valve), on all sizes with out<br />
re mov ing the shaft and/or disc. The original rub ber seat<br />
and hardened epoxy com pound used to retain the seat<br />
can be removed from the valve with ordinary hand tools.<br />
A re place ment seat can then be installed, re turn ing the<br />
valve to its original bubble tight condition.<br />
Flow Through Design<br />
The Triton disc design distributes material where it is<br />
need ed to resist loads, achieving more strength at less<br />
weight than any other disc design currently on the mar ket.<br />
The flow through disc has a greater free flow area than<br />
conventional lens-shaped or offset disc designs, resulting<br />
in lower pumping costs.<br />
During injection, the seat is moved against the disc as<br />
the epoxy fills the cavity to provide uni form disc-to-seat<br />
interference around the en tire seating surface. The<br />
re sult is the bub ble tight closure. This system eliminates<br />
con ven tion al seat retention hardware that can loosen and<br />
corrode, potentially damaging pumps and other costly<br />
auxiliary equipment.<br />
Simple Seat Adjustment<br />
Another significant feature of the E-Lok seat is that it can<br />
be easily adjusted or re placed in the field while the valve<br />
is installed in the line. Ad just ment is achieved by local<br />
injection of ep oxy directly through the seat material into<br />
the chan nel be hind the seat. The epoxy travels the circum<br />
fer ence of the valve body channel until it finds the void<br />
and moves the seat ma te ri al outward toward the disc edge,<br />
bringing the valve back into bubble tight condition. If the<br />
valve was supplied with the op tion al** ex ter nal in jec tion<br />
SPHERE<br />
OF CONTACT<br />
DISC<br />
METAL TO METAL<br />
CLEARANCE<br />
UP TO 1/4"<br />
SEAT<br />
CAST<br />
EPOXY<br />
* U.S. Patent Nos. 3,304,050 and 3,418,411<br />
** U.S. Patent No. 5,538,029<br />
6 | Henry Pratt Company
Coatings and Rubber Linings<br />
Withstanding Harsh Conditions<br />
and the Test of Time<br />
In many industrial facilities, valves are reg u lar ly subject ed<br />
to harsh conditions, in clud ing re cir cu lat ing wa ter loops<br />
where cor ro sive ness in creas es each time the water<br />
pass es through the sys tem, and cooling water sys tems<br />
which utilize brack ish wa ter or salt wa ter as a me di um.<br />
This is especially true at fossil and nu cle ar pow er<br />
gen erating plants, which fre quent ly use sea water as their<br />
main cooling wa ter resource.<br />
To com bat the damaging effects of these harsh<br />
condi tions, Pratt utilizes epoxy coatings and rub ber<br />
linings in conjunction with superior design fea tures to<br />
help ensure that the Triton XR-70 butterfly valves will<br />
withstand the test of time.<br />
The unique construction of the Pratt Triton rub ber seated<br />
butterfly valve makes both epoxy coatings and rubber<br />
lin ings much more ef fec tive than other butterfly valve<br />
de signs. Since all surfaces of the Triton disc are exposed,<br />
there is no possibility for corrosion to start in hidden,<br />
un pro tect ed areas like the inside of a hollow, lens-shaped<br />
offset disc. Since there is no seat retention hardware,<br />
coating and/or lining breakdown in this area is also<br />
elim i nat ed.<br />
Rubber Linings<br />
Pratt lines corrosion-susceptible surfaces with a 3 ⁄16-inch<br />
thick rubber of 60 Shore A durom e ter. The surfaces are<br />
prepared and blasted to a near- white metal finish. The<br />
linings are ap plied by the “hand-lay-up-meth od” (similar<br />
to tank lining techniques) and then cured in an open<br />
steam autoclave using 40 to 50 psig steam pres sure.<br />
Following application and curing, the linings are vi su al ly<br />
inspected for air bubbles and checked at 7,000 volts with<br />
a positive control high-volt age spark tester.<br />
Epoxy Coatings<br />
Pratt has an extensive coating facility which ap plies<br />
and cures coatings in a controlled en vi ron ment. Prior<br />
to ap pli ca tion of the epoxy, valves are sand blast ed and<br />
thoroughly cleaned to ensure a prop er bond. The in te ri or<br />
and external sur fac es of each valve are coated with a<br />
Polya mide-cured, rust inhibiting epoxy, NSF ap proved.<br />
A mag net ic dry film thickness gauge is used to con firm<br />
that the coat ing thick ness match es the project/or der<br />
spec i fi ca tion re quire ments. Electron ic test ing for pin<br />
holes (hol i days) is per formed.<br />
In applications involving salt water and/or en trained<br />
sol ids which can cause erosion, the su pe ri or i ty of rubber<br />
lining on the valve disc has been clearly demonstrated by<br />
Pratt but ter fly valves placed in service decades ago that<br />
are still providing bubble tight closure today. Both ep oxy<br />
coat ing and rub ber lin ing have also suc cess ful ly pro tect ed<br />
the valve bodies in these corrosive ser vice con di tions<br />
as illustrated by Pratt’s long track record of quality and<br />
re li abil i ty at in dus tri al facilities and power plants around<br />
the world.<br />
3/16" RUBBER<br />
Other rubber lining features include Pratt’s shaft-bearing<br />
being thor ough ly pro tect ed by rubber shaft seals to<br />
maintain bearing performance throughout the life of the<br />
valve. Also, the shaft bore in disc is sealed with a rubber<br />
seal. The juncture of the rubber liner to the rubber seat is<br />
also protected by a sealant applied under pressure.<br />
LINING<br />
CORROSION-RESISTANT<br />
DISC EDGE<br />
LINING<br />
Complete coverage of corrosion<br />
susceptible wetted surfaces is demonstrated<br />
in these drawings. Body<br />
lining in conjunction with the seat<br />
creates a water barrier and protects<br />
against corrosion.<br />
Henry Pratt Company | 7
Water Flow Characteristics<br />
Proven Performance<br />
During its product development phase, the Triton butterfly valve was test ed to en sure that it met our own rigorous<br />
standards for flow ca pac i ty. The Tri ton but ter fly valve con sis tent ly pro duced high C v values which trans lates to low er flow<br />
re sis tance, in turn, low er ing system operating costs to the user over the life of the valve.<br />
Full Open C v <strong>Valves</strong><br />
Triton XR-70 <strong>Valves</strong><br />
Class 150B<br />
10 Bar<br />
Size Flat Arch<br />
24 25380 26378<br />
30 39657 4<strong>12</strong>16<br />
36 59351 62447<br />
42 85899 89170<br />
48 1<strong>12</strong>195 116466<br />
54 141808 146563<br />
60 172343 176486<br />
66 208535 213548<br />
72 248174 254139<br />
78 29<strong>12</strong>60 298261<br />
84 <strong>33</strong>7793 3459<strong>12</strong><br />
90 387772 397093<br />
96 441199 451803<br />
102 498072 510043<br />
108 558392 571813<br />
114 622159 637113<br />
<strong>12</strong>0 689373 705942<br />
132 834171 854190<br />
144 992697 1016557<br />
8 | Henry Pratt Company
Valve End Types and Dimensions: Flanged End<br />
NOMINAL VALVE SIZE<br />
G = BOLT CIRCLE<br />
C = FLANGE OD<br />
A<br />
B<br />
D<br />
E<br />
Notes:<br />
– Dimensions shown in inches.<br />
– Size = Nominal valve size.<br />
– For bolts smaller than 1 3 ⁄4 inches in diameter, bolt holes will be 1 ⁄8 inches<br />
larger than diameter of bolts. For bolts 1 3 ⁄4 inches in diameter and larger,<br />
bolt holes will be 1 ⁄4 inches larger than diameter of bolts. Dimensions and<br />
drilling of end flanges conform to ANSI B16.1 Standard for cast iron<br />
flanges.<br />
– Allow 3 1 ⁄2 inches for thrust bearing removal.<br />
– F = Number and size of bolts. Class <strong>12</strong>5. Holes in trunnion area are<br />
tapped, see note.<br />
Note: TAPPED HOLES: “F” SIZE UNC-2B X “E” DEEP<br />
24" VALVE 4 HOLES 2 TOP & 2 BOTTOM<br />
30" & UP 8 HOLES 4 TOP & 4 BOTTOM<br />
EACH FLANGE<br />
FLANGED END DIMENSIONS<br />
SIZE A B C D E F G<br />
24 18⅝ 18⅜ 32 8 1⅞ 20-1¼ 29½<br />
30 21½ 24⅛ 38¾ <strong>12</strong> 2⅛ 28-1¼ 36<br />
36 257⁄16 28 46 <strong>12</strong> 2⅜ 32-1½ 42¾<br />
42 29⅞ 3211⁄16 53 <strong>12</strong> 2⅝ 36-1½ 49½<br />
48 341⁄16 36⅞ 59½ 15 2¾ 44-1½ 56<br />
54 37½ 4011⁄16 66¼ 15 3 44-1¾ 62¾<br />
60 41¾ 453⁄16 73 15 3⅛ 52-1¾ 69¼<br />
66 461⁄16 49½ 80 18 3⅜ 52-1¾ 76<br />
72 50 53⅛ 86½ 18 3½ 60-1¾ 82½<br />
Henry Pratt Company | 9
Valve End Types and Dimensions: Mechanical Joint End<br />
A<br />
B<br />
Notes:<br />
– Dimensions shown in inches.<br />
– Size = nominal valve size.<br />
– Bolts, nuts, glands and gaskets not furnished unless otherwise specified<br />
in contract.<br />
– Allow 31⁄2 inches for thrust bearing removal.<br />
– F = Number and size of bolts.<br />
NOMINAL VALVE SIZE<br />
G = BOLT CIRCLE<br />
C<br />
D<br />
X= LAYING<br />
LENGTH<br />
E<br />
Installation Diagram<br />
MECHANICAL JOINT END DIMENSIONS<br />
SIZE A B C D E F G X<br />
24 18⅝ 18⅜ 319⁄16 13¼ 1⅝ 16-¾ 30 6⅜<br />
30 21½ 24⅛ 39 18 113⁄16 20-1 36⅞ 10<br />
36 257⁄16 28 45⅞ 22 2 24-1 43¾ 14<br />
42 29⅞ 32¾ 53 22 2 28-1¼ 50⅝ 14<br />
48 341⁄16 36⅞ 59⅞ 24 2 32-1¼ 57½ 16<br />
10 | Henry Pratt Company
Suggested Specifications: <strong>Butterfly</strong> <strong>Valves</strong> 24"<br />
and larg er Cast <strong>Construction</strong><br />
General<br />
All butterfly valves shall be of the tight closing, rubber<br />
seated type and fully comply with the latest revision<br />
of AWWA Stan dard C504/C516 and NSF61, where<br />
applicable. <strong>Valves</strong> shall be bubble-tight at rated<br />
pressures in either direction, and shall be satisfactory<br />
for applications involving throttling service and for<br />
applications requiring valve actuation af ter long periods<br />
of inactivity. Valve discs shall rotate 90˚ from the full open<br />
position to the tight shut position. Re gard less of valve<br />
size, angular misposition of disc can be up to 1˚ off center<br />
without leakage.<br />
The manufacturer shall have manufactured tight closing,<br />
rub ber seated butterfly valves for a period of at least ten<br />
years. All valves from 24" through 144" shall be the Triton<br />
XR-70 as man u fac tured by the Henry Pratt Company or<br />
an approved equal.<br />
Valve Body<br />
All valve bodies shall be cast iron ASTM A<strong>12</strong>6, Class B,<br />
narrow body design. Flange drilling shall be in ac cordance<br />
with ANSI B16.1 standard for cast iron flanges. Body<br />
thickness shall be in strict accordance with AWWA C504<br />
where applicable.<br />
Valve Disc<br />
All valve discs shall be constructed of ductile iron ASTM<br />
A536 with a stainless steel seating edge. The disc shall<br />
not have any hollow chambers that can entrap wa ter. All<br />
surfac es shall be visually inspected and mea sur able to<br />
assure all struc tur al members are at full disc strength.<br />
Disc and shaft con nec tion shall be made with stainless<br />
steel pins.<br />
Typical Applications for Triton XR-70<br />
Thousands of Triton XR-70 but ter fly valves have<br />
been installed in plants and in dus tri al fa cil i ties<br />
around the world. Some typ i cal ap pli ca tions include<br />
the following:<br />
– Water treatment – Pumping stations<br />
– Wastewater treatment – Reservoirs<br />
– Cooling water systems – Pipelines<br />
– Circulating water systems<br />
– Nuclear, fossil fuel and cogeneration power plants<br />
Valve Shaft<br />
All shafts shall be turned, ground, polished and construct<br />
ed of ASTM A-276 Type 304 or Type 316 stainless<br />
steel. Shafts shall be two-piece, stub type and keyed for<br />
ac tu a tor connection. Shaft di am e ters shall meet minimum<br />
re quirements established by the latest revision of AWWA<br />
Standard C504 for their class, where applicable.<br />
Valve Seat<br />
All seats shall be constructed of synthetic rubber<br />
compound such as Buna N or EPDM and suitable for<br />
bi di rection al shutoff at rated pressure. Seats shall be<br />
retained in the valve body by mechanical means without<br />
re tain ing rings, segments, screws or hardware of any<br />
kind in the flow stream. Seats shall be a full 360˚ with out<br />
interruption and have a plu ral i ty of grooves mating with a<br />
spher i cal disc edge seating sur face. Valve seats shall be<br />
field ad just able around the full 360˚ circumference and<br />
re place able with out dis mantling the ac tu a tor, disc or shaft<br />
and without re mov ing the valve from the line.<br />
Valve Bearings<br />
All butterfly valves shall be fitted with sleeve-type<br />
bearings. Bearings shall be corrosion resistant and selflu<br />
bri cating. Bear ing load shall not exceed 1 ⁄5 of the compress<br />
ible strength of the bearing or shaft material.<br />
Valve Actuator<br />
Valve actuators shall conform to AWWA Standard C504<br />
and shall be designed to hold the valve in any in ter medi<br />
ate po sition between full open and fully closed without<br />
creeping or flut ter ing.<br />
Painting<br />
All surfaces of the valve shall be clean, dry and free from<br />
grease before applying paint or coating. The valve in teri<br />
or and ex te ri or surfaces, except for the seating surfac<br />
es, shall be pro vid ed with the manufacturer’s standard<br />
coating un less otherwise spec i fied by contract.<br />
Testing<br />
Hydrostatic and leakage tests shall be conducted in strict<br />
ac cor dance with AWWA Standard C504.<br />
Proof of Design<br />
The manufacturer furnishing the valves under the<br />
specification shall be prepared to show proof that the<br />
valves provided meet the design requirements of AWWA<br />
Stan dard C504.<br />
Henry Pratt Company | 11
Actuation<br />
Traveling Nut Type Manual Actuator<br />
The Pratt MDT manual compound lever-traveling nut type actuator is the ideal manual actuation option for the Triton<br />
XR-70 butterfly valve. The MDT provides characterized closure, minimizing the possibility of line shock by slowing down<br />
the valve travel as the valve disc approaches the closed position. The high input torque capacity (450 foot pound maximum<br />
and a 200 pound pull on the handwheel or chainwheel) provides inherent protection from actua tor misuse.<br />
The Pratt MDT actuator is self locking without a unidirectional sustained force from the valve. It can be relied upon to<br />
maintain exact valve position under conditions of fluctuating, turbulent and intermittent flow.<br />
Completely in conformity to the latest revision of AWWA Standard C504, the Pratt Triton valve, coupled with the MDT<br />
actuator, offers single source responsibility and reliability for both actuator and valve. To ensure that we can meet the<br />
delivery requirements of our valued customers, Pratt maintains an inventory of selected valves equipped with MDT<br />
actuators. Consult factory for availability.<br />
Chainwheel<br />
Handwheel<br />
MDT Mounting Positions<br />
M<br />
2" St’d.<br />
AWWA Nut<br />
W=<br />
DIA.<br />
V=<br />
DIA.<br />
N<br />
CLOSED<br />
OPEN<br />
PRATT<br />
P<br />
PRATT<br />
OPEN<br />
PRATT<br />
OPEN<br />
Q<br />
Spur Gear<br />
S<br />
T<br />
R<br />
End Cover<br />
Standard<br />
Position<br />
Alternate<br />
Position<br />
J<br />
L<br />
Notes:<br />
– Clockwise to close (open left) unless otherwise specified.<br />
– Spur gear and end cover apply only to MDT6S.<br />
MDT<br />
Dimensions<br />
Size J L M N P Q R S T V W<br />
MDT-3 7¾ 41⁄16 3¼ 35⁄22 5⅝ 5⅜ 9¼ 10½ 10 <strong>12</strong> 9⅛<br />
MDT-4 8 4½ 3⅜ 4 75⁄16 6¾ 10½ 11½ 11 <strong>12</strong> 9⅛<br />
MDT-5 10 5⅝ 4½ 5½ 8¾ 10½ 17 17⅛ 17⅞ 18 167⁄16<br />
MDT-5S 10¾ 6⅛ 5⅝ 7 10⅝ 1515⁄16 1911⁄16 20 20¾ 24 22¼<br />
MDT-6S <strong>12</strong>⅞ 7⅝ 7 8¼ <strong>12</strong>⅝ 18⅝ 26½ 26¾ 25 7 ⁄8 24 22¼<br />
* The Triton XR-70 can be equipped with a wide range of cylinder actuators and electric motor actuators to<br />
meet your special operating requirements. Please consult our factory for additional in formation.<br />
<strong>12</strong> | Henry Pratt Company
401 S. Highland Avenue<br />
Aurora, Illinois 60506<br />
P 630-844-4000 F 630-844-4160<br />
www.henrypratt.com<br />
Specifications for 150B pressure class <strong>Butterfly</strong> <strong>Valves</strong><br />
24” and Larger<br />
Tag numbers: OPS-PL-BFV1, OPS-PL-BFV2, OPS-PL-BFV3, BFV4, BFV5<br />
General<br />
All butterfly valves are tight closing, rubber seated type and fully comply with the latest revision of<br />
AWWA Standard C504/C516 and NSF61, where applicable. <strong>Valves</strong> are bubble-tight at rated<br />
pressures in either direction, and shall be satisfactory for applications involving throttling<br />
service and for applications requiring valve actuation after long periods of inactivity. Valve discs<br />
rotate 90˚ from the full open position to the tight shut position. Regardless of valve size, angular<br />
misposition of disc can be up to 1˚ off center without leakage.<br />
Valve Body<br />
All valve bodies are cast iron ASTM A<strong>12</strong>6, Class B, narrow body design. Flange drilling is in<br />
accordance with ANSI B16.1 standard for cast iron flanges. Body thickness is in strict accordance<br />
with AWWA C504.<br />
Valve Disc<br />
All valve discs are constructed of ductile iron ASTM A536 with a stainless steel seating edge. The disc<br />
shall not have any hollow chambers that can entrap water. Disc and shaft connection are made with<br />
stainless steel pins.<br />
Valve Shaft<br />
All shafts are turned, ground, polished and constructed of ASTM A-276 Type 304 stainless steel. Shafts<br />
are of two-piece, stub type and keyed for actuator connection. Shaft diameters meet minimum<br />
requirements established by the latest revision of AWWA Standard C504 for their class.<br />
Valve Seat<br />
All seats are constructed of synthetic rubber compound such as Buna N and suitable for bidirectional<br />
shutoff at rated pressure. Seats are retained in the valve body by mechanical means without retaining<br />
rings, segments, screws or hardware of any kind in the flow stream. Seats are full 360˚ without<br />
interruption and have a plurality of grooves mating with a spherical disc edge seating surface. Valve seats<br />
are field adjustable around the full 360˚ circumference and replaceable without dismantling the actuator,<br />
disc or shaft and without removing the valve from the line.<br />
Shaft Seals<br />
The shaft seals are self adjusting “V” type chevron packing. Shaft seals are designed to allow<br />
replacement without removing the valve shaft.<br />
Valve Bearings<br />
All butterfly valves are fitted with sleeve-type bearings. Bearings are corrosion resistant and selflubricating.<br />
Bearing material is Teflon-lined with a special fiberglass backing. Bearing load do not exceed<br />
1⁄5 of the compressible strength of the bearing or shaft material.
401 S. Highland Avenue<br />
Aurora, Illinois 60506<br />
P 630-844-4000 F 630-844-4160<br />
www.henrypratt.com<br />
Painting<br />
Valve interior and exterior surfaces except for seating shall be coated with two coats of epoxy paint<br />
Amercoat 370 in accordance with AWWA C550 and AWWA C504. Coating is NSF-61 approved.<br />
Valve Actuator<br />
Valve actuators conform to AWWA Standard C504 and are designed to hold the valve in any intermediate<br />
position between full open and fully closed without creeping or fluttering. Actuators are equipped with<br />
mechanical stop-limiting devices to prevent overtravel of the disc in the open and closed positions. The<br />
buried service MDT actuator has a mechanical stop which will withstand and input torque of 450 ft. lbs at<br />
extreme actuator position without damage.
A Tradition of Excellence<br />
With the development of the first rubber seated<br />
butterfly valve more than 70 years ago, the Henry<br />
Pratt Company became a trusted name in the flow<br />
control industry, setting the standard for product<br />
quality and customer service. Today Pratt provides the<br />
following range of superior products to the water,<br />
waste water and power generation industries.<br />
BUTTERFLY VALVES: from 3" to 162"<br />
RECTANGULAR VALVES: 1' x 1' to 14' x 16'<br />
BALL VALVES —<br />
RUBBER SEATED: from 4" to 60"<br />
METAL SEATED: from 6" to 48"<br />
PLUG VALVES: from 1/2" to 36", 3 ways<br />
HYDRAULIC CONTROL SYSTEMS<br />
VALVE CONTROLS<br />
ENERGY DISSIPATING VALVES<br />
AND FIXED ENERGY DISSIPATERS<br />
CONE VALVES<br />
CHECK VALVES<br />
A Commitment to Meeting<br />
The Customers’ Needs<br />
Henry Pratt valves represent a long-term commitment<br />
to both the customer and to a tradition of product<br />
excellence. This commitment is evident in the number<br />
of innovations we have brought to the industries we<br />
serve. In fact, the Henry Pratt Company was the first<br />
to introduce many of the flow control products in use<br />
today, including the first rubber seated butterfly valve,<br />
one of the first nuclear N-Stamp valves, and the<br />
bonded seat butterfly valve.<br />
Innovative Products<br />
For Unique Applications<br />
Though many of the standard valves we produce are<br />
used in water filtration and distribution applications,<br />
Pratt has built a reputation on the ability to develop<br />
specialized products that help customers to meet their<br />
individual operational challenges.<br />
Creative Engineering<br />
for Fluid Systems<br />
Pratt’s ability to provide practical solutions to complex<br />
issues is demonstrated by the following case histories.<br />
Earthquake Proof <strong>Valves</strong><br />
Pratt designed and manufactured hydraulically<br />
actuated valves for a water storage application so that<br />
the valves would automatically operate in the event of<br />
earthquakes. This lead to the development of a valve<br />
that will withstand forces of up to 6g’s.<br />
Custom Actuation/<br />
Isolation <strong>Valves</strong><br />
Pratt designed and manufactured valves that would<br />
isolate a working chamber in the event of a nuclear<br />
emergency during the decommissioning of armed<br />
nuclear warheads. The valves were able to close in a<br />
millisecond using specially designed Pratt electropneumatic<br />
actuators.<br />
<strong>Valves</strong> Designed for<br />
Harsh Environments<br />
Pratt designed and manufactured a 144" diameter<br />
butterfly valve for the emergency cooling system at<br />
a jet engine test facility. The valve was designed to<br />
supply water to help dissipate the tremendous heat<br />
generated by the engines during testing.<br />
Through experience, commitment and creative engineering, Pratt is uniquely<br />
suited to provide superior products for our customers’ special needs.<br />
For more information, contact our corporate headquarters in Aurora, Illinois.
SCOPE OF THE LINE: PRATT HP250II BUTTERFLY VALVE<br />
Sizes: 3" through 20" Bonded Seat<br />
24" through 48" E-Lok Seat<br />
Body Styles: End connections<br />
■ Flanged<br />
■ Mechanical Joint<br />
■ Flanged x Mechanical Joint<br />
Pressure Class:<br />
■ AWWA 250 B<br />
Actuation Options*:<br />
■ Nut<br />
■ Handwheel<br />
■ Buried Service<br />
*Consult factory for other end connections<br />
and acutation options<br />
Stainless steel shaft<br />
DESIGN AND CONSTRUCTION<br />
■<br />
Ductile iron valve body<br />
“V” type packing<br />
Ductile iron<br />
body<br />
■<br />
■<br />
■<br />
Stainless steel shaft<br />
Ductile iron disc<br />
Rubber seat<br />
Ductile iron<br />
disc<br />
Rubber seat<br />
MATING CHART<br />
Steel<br />
Cast Iron/Ductile Iron<br />
HP250 AWWA C207-01 Class F ANSI B16.1 Class 250<br />
HP250II AWWA C207-01 Class B ANSI B16.1 Class <strong>12</strong>5<br />
Class D AWWA C110 Class <strong>12</strong>5<br />
Class E<br />
MSS Sp-44 Steel C1.150<br />
ASME B16.47-96 Steel C1.150 Series A<br />
page 2<br />
Henry Pratt Company
HP250II BUTTERFLY VALVE<br />
FEATURE<br />
■ Higher Pressures<br />
■ Wide Size Range<br />
■ Low Seating/Unseating<br />
Torques<br />
■ Unique Disc Design<br />
■ Adjustable/Replaceable Seat<br />
on 24" and larger<br />
■ Choice of Valve Ends<br />
■ Actuators and Accessories<br />
BENEFIT<br />
■ Working pressures to 250 psi with<br />
temperatures to 150° F.<br />
■ Available in sizes 3" - 72" (flanged ends);<br />
6" - 48" (mechanical joint ends).<br />
■ Increases seat life and reduces actuator size.<br />
■ Provides more strength, less weight, and<br />
greater free-flow area than conventional disc<br />
designs.<br />
■ Patented E-LOK ® design retains seat in body<br />
without metal hardware. If adjustable or<br />
replacement is required, both can be done in<br />
the field utilizing simple hand tools.<br />
■ Flange and Mechanical Joint. Flanges are in<br />
full accordance with ANSI B16.1, Class <strong>12</strong>5#<br />
cast iron flanges where applicable. Mechanical<br />
joint ends conform to AWWA C111. For ANSI<br />
Class 250# Flange, see page 8.<br />
■ Available with manual traveling nut or worm<br />
gear, electric motor or cylinder actuators; plus<br />
full range of extensions, indicators, positioners,<br />
remote controls and other accessories.<br />
APROVEN STANDARD FOR BUBBLE-TIGHT CLOSURE...<br />
The patented E-LOK ® seating system features a rubber seat<br />
that provides multiple sealing lines which permit higher<br />
levels of radial compression. The multiple ridges are<br />
designed to reduce rubber stress levels for lower seating<br />
torques and better seating action. Unique epoxy injection<br />
process locks the seat against the disc with uniform<br />
pressure control around the entire periphery to provide a<br />
bubble-tight seal. Design also allows easy seat replacement<br />
without removing the valve from the line where possible.<br />
<strong>Valves</strong> for the 21st Century<br />
page 3
THE HENRY PRATT SEAT ON BODY DESIGN ADVANTAGE<br />
A key aspect of butterfly valve design relates to<br />
location of the rubber seat. Essentially the seat can be<br />
positioned on the body or on the disc per AWWA<br />
C504.<br />
But the sum of Pratt design, testing, and field<br />
experience has proven conclusively that seat on body<br />
design is preferred because it provides maximum<br />
reliability.<br />
The major advantage of seat on body design is that<br />
the risk of damage to the rubber seat is minimized<br />
because the sealing edge of the disc is much harder<br />
than any corrosion deposits built up within the valve<br />
body or pipeline. (See Figures 1 and 2) This is<br />
important because build up can interfere with the<br />
swing radius of the disc. Additionally, seats on body<br />
are recessed and thus more protected than seat on<br />
disc designs.<br />
Seat on disc designs are much more susceptible to<br />
damage because it is the relatively soft rubber seat on<br />
the disc that comes into contact with corrosion<br />
deposits and build up. Also any solid materials flowing<br />
in the fluid can impinge on a rubber seat located on<br />
the disc. (See Figure 3)<br />
Another disadvantage of seat on disc design is that<br />
since the maximum velocity in a pipeline occurs at the<br />
upstream and downstream leading edges of the disc,<br />
the rubber seat on disc designs are much more<br />
susceptible to wear, vibration and potential loosening<br />
of hardware.<br />
Conclusion: Henry Pratt seat on body designs which<br />
do not depend on retaining hardware in the waterway<br />
for seat retention have recognized these potential<br />
problems and addressed them in advance. Successful<br />
field performance has substantiated the credibility of<br />
this design approach!!<br />
Pratt – Rubber Seat on Body Designs<br />
Rubber Seat on Disc<br />
Design by Others<br />
FIGURE 1 FIGURE 2 FIGURE 3<br />
page 4<br />
Henry Pratt Company
HP250II BUTTERFLY VALVE, <strong>12</strong>5# FLANGED & MJ SPECIFICATION<br />
General<br />
<strong>Butterfly</strong> valves shall be manufactured in accordance<br />
with the latest revision of AWWA Standard C504 Class<br />
250B, shall be suitable for a differential pressure of<br />
250 psig, and be certified to NSF Standard 61. <strong>Valves</strong><br />
shall be Henry Pratt Model HP250+ and comply with<br />
the following details:<br />
Valve Bodies<br />
The body shall be constructed of Ductile Iron ASTM<br />
A536 Gr. 65-45-<strong>12</strong>, with flanged end connections drilled<br />
in accordance with ANSI B16.1, Class <strong>12</strong>5, Class 250,<br />
or Mechanical Joint ends. The body wall thickness shall<br />
be in strict accordance with AWWA C504.<br />
Valve Shafts<br />
The shaft shall be made of ASTM A-564 Type 630<br />
condition H-1150. The shaft seals shall be “V” type<br />
packing. Shaft seals shall be of a design allowing<br />
replacement without removing the valve shaft. No O-<br />
ring or “U” cup packing shall be allowed. The bearing<br />
shall be a stainless steel backed Teflon material.<br />
Bearing load shall not exceed 1/5 of the compressible<br />
strength of the bearing or shaft material.<br />
Valve Discs<br />
The disc shall utilize an on-center shaft and<br />
symmetrical design, cast from Ductile Iron ASTM A536<br />
Gr. 65-45-<strong>12</strong>. The disc edge shall be stainless steel<br />
type 316. Disc shall be retained by pins that extend<br />
thought the full diameter of the shaft. The pin material<br />
shall be the same as the shaft material. Torque plugs<br />
or tangential fasteners shall not be allowed. For valve<br />
sizes 3" through 20" the rubber seat shall be of one<br />
piece construction, simultaneously molded and bonded<br />
directly into the body. The seat material shall be either<br />
Buna-N or EPDM rubber.<br />
Valve Actuators<br />
Manual actuators shall be of the traveling nut, selflocking<br />
type and shall be designed to hold the valve in<br />
any intermediate position between fully open and fully<br />
closed without fluttering or creeping. The actuator shall<br />
have mechanical stops that will withstand and input<br />
torque of 450 ft/lb. against each stop. Manual<br />
actuators shall conform to AWWA Standard C504 and<br />
shall be Pratt MDT or an approved equal.<br />
HP250II 6"-16", DUCTILE IRON BODY, FLANGED X MJ<br />
Valve<br />
Size A B C CC D DD E EE F FF G GG X<br />
6 6-1/2 5-1/8 11 11 6-3/4 4-1/4 1-1/16 1-1/16 8-3/4 6-3/4 9-1/2 9-1/2 4-1/4<br />
8 7-3/4 6-1/2 13-1/2 13-1/4 7-5/16 4-5/16 1-1/8 1-1/8 8-3/4 6-3/4 11-3/4 11-3/4 4-13/16<br />
10 9 9-7/8 16 15-9/16 8-5/8 4-5/8 1-1/4 1-3/16 <strong>12</strong>-7/8 8-3/4 14-1/4 14 6-1/8<br />
<strong>12</strong> 10-1/2 11-3/8 19 17-15/16 8-5/8 4-5/8 1-1/4 1-1/4 <strong>12</strong>-7/8 8-3/4 17 16-1/4 6-1/8<br />
16 13-1/2 14-3/8 23-1/2 22-9/16 10 6 1-7/16 1-3/8 16-1 <strong>12</strong>-3/4 21-1/4 21 6-1/2<br />
Actuator<br />
Number<br />
Size J L M N P Q R of Turns<br />
MDT-2S 4-11/16 2 2-1/8 2 4-1/2 4-1/2 8-1/4 32<br />
MDT-3S 5-5/8 2-7/16 3-1/4 3-5/32 5-5/8 5-3/8 10-3/8 30<br />
MDT-45 6-3/8 2-27/32 3-3/8 4 7-5/16 6-3/4 11-5/16 40<br />
NOTES:<br />
1. ALL DIMENSIONS SHOWN IN INCHES.<br />
2. “D” DIMENSION ±1/16" FOR 6" THRU 10" VALVES.<br />
“D” DIMENSION ±1/8" FOR <strong>12</strong>" THRU 20" VALVES.<br />
3. FOR BOLTS SMALLER THAN 01-3/4, BOLT HOLES<br />
WILL BE 1/8" LARGER THAN DIAMETER OF BOLT.<br />
FOR BOLTS 01-3/4 OR LARGER, BOLT HOLES WILL<br />
BE 1/4" LARGER THAN DIAMETER OF BOLT.<br />
4. DIMENSIONS AND DRILLING OF END FLANGE<br />
CONFORM TO THE AMERICAN CAST IRON FLANGE<br />
STANDARDS, CLASS <strong>12</strong>5 (B16.1).<br />
5. DIMENSIONS AND DRILLING OF MECHANICAL<br />
JOINT END CONFORM TO ANSI/AWWA<br />
C111/A21/11.<br />
6. VALVES MANUFACTURED & TESTED IN<br />
ACCORDANCE WITHE AWWA SPECIFICATION C504<br />
LATEST REVISION, CLASS 250B.<br />
7. RECOMMENDATION FOR MATING FLANGES:<br />
WHERE INSULATING BUSHINGS ARE USED, IT IS<br />
NECESSARY THAT BOLT HOLES BE DRILLED<br />
OVERSIZE BY AN AMOUNT EQUAL TO TWO TIMES<br />
THE INSULATING SLEEVE THICKNESS TO<br />
MAINTAIN THE SAME MINIMUM CLEARANCE FOR<br />
BOLTS.<br />
<strong>Valves</strong> for the 21st Century<br />
page 5
HP250II 3"- 20", DUCTILE IRON BODY, ANSI <strong>12</strong>5# FLANGED ENDS<br />
Actuator Valve Number<br />
Size Size J L M N P Q R of Turns<br />
MDT-2S 3-8" 4-11/16 2 2-1/8 2 4-1/2 4-1/4 8-1/4 32<br />
MDT-3S 10-14" 5-5/8 2-7/16 3-1/4 3-5/32 5-5/8 5-3/8 10-3/8 30<br />
MDT-4S 16&18" 6-3/8 2-27/32 3-3/8 4 7-5/16 6-3/4 11-5/16 40<br />
MDT-5 20" 7-9/16 3-15/32 4-1/2 5-1/2 8-3/4 10 17 44<br />
Valve<br />
Size A B C D E F G<br />
3 4-3/4 3-3/4 7-1/2 5 3/4 4-5/8 6<br />
4 5-1/2 4-1/2 9 5 15/16 8-5/8 7-1/2<br />
6 6-1/2 5-1/2 11 5 1 8-3/4 9-1/2<br />
8 7-3/4 6-3/4 13-1/2 6 1-1/8 8-3/4 11-3/4<br />
10 9 9-11/16 16 8 1-3/16 <strong>12</strong>-7/8 14-1/4<br />
<strong>12</strong> 10-1/2 11-3/16 19 8 1-1/4 <strong>12</strong>-7/8 17<br />
14 11-7/8 <strong>12</strong>-9/16 21 8 1-3/8 <strong>12</strong>-1 18-3/4<br />
16 13-1/2 14-3/16 23-1/2 8 1-7/16 16-1 21-1/4<br />
18 14-3/8 15-1/16 25 8 1-9/16 16-1-1/8 22-3/4<br />
20 16 16-11/16 27-1/2 8 1-11/16 20-1-1/8 25<br />
NOTES:<br />
1. ALL DIMENSIONS SHOWN IN INCHES.<br />
2. “D” DIMENSION ±1/16" FOR 3" THRU 10" VALVES.<br />
“D” DIMENSION ±1/8" FOR <strong>12</strong>" THRU 20" VALVES.<br />
3. FLANGE THROUGH BOLT HOLES WILL BE 1/8" LARGER THAN DIAMETER OF BOLT.<br />
4. DIMENSIONS AND DRILLING OF END FLANGES CONFORM TO THE AMERICAN CAST IRON FLANGE<br />
STANDARDS, CLASS <strong>12</strong>5 (B16.1).<br />
5. VALVES MANUFACTURED & TESTED IN ACCORDANCE WITHE AWWA SPECIFICATION C504 LATEST<br />
REVISION, CLASS 250B.<br />
6. RECOMMENDATION FOR MATING FLANGES: WHERE INSULATING BUSHINGS ARE USED, IT IS<br />
NECESSARY THAT BOLT HOLES BE DRILLED OVERSIZE BY AN AMOUNT EQUAL TO TWO TIMES THE<br />
INSULATING SLEEVE THICKNESS TO MAINTAIN THE SAME MINIMUM CLEARANCE FOR BOLTS.<br />
HP250II 24"- 48", DUCTILE IRON BODY, ANSI <strong>12</strong>5# FLANGED ENDS<br />
Actuator<br />
Number<br />
Size J L M N P Q R of Turns<br />
MDT-5 7-9/16 3-15/32 4-1/2 5-1/2 8-3/4 10 17 44<br />
MDT-5S 8-5/16 3-15/16 5-1/2 7 10-1/2 15-15/16 19-7/8 136<br />
MDT-6S 9-7/8 5-1/16 7 8-1/4 <strong>12</strong>-5/8 14-3/16 26-1/2 215<br />
Valve<br />
Size A B C D E F G<br />
24 18-5/8 18-3/8 32 8 1-7/8 20/1-1/4 29-1/2<br />
30 21-1/2 24-1/8 38-3/4 <strong>12</strong> 2-1/8 28/1-1/4 36<br />
36 25-7/16 28 46 <strong>12</strong> 2-3/8 32/1-1/2 42-3/4<br />
42 29-7/8 32-11/16 53 <strong>12</strong> 2-5/8 36/1-1/2 49-1/2<br />
48 34-1/16 36-7/8 59-1/2 15 2-3/4 44/1-1/2 56<br />
NOTES:<br />
1. ALL DIMENSIONS SHOWN IN INCHES.<br />
2. “D” DIMENSION ±1/8" FOR 24" AND LARGER VALVES.<br />
3. FOR BOLTS SMALLER THAN 01-3/4, BOLT HOLES WILL BE 1/8" LARGER THAN DIAMETER OF BOLT. FOR<br />
BOLTS 01-3/4 OR LARGER, BOLT HOLES WILL BE 1/4" LARGER THAN DIAMETER OF BOLT.<br />
4. DIMENSIONS AND DRILLING OF END FLANGES CONFORM TO THE AMERICAN CAST IRON FLANGE<br />
STANDARDS, CLASS <strong>12</strong>5 (B16.1).<br />
5. VALVES MANUFACTURED & TESTED IN ACCORDANCE WITH AWWA SPECIFICATION C504 LATEST<br />
REVISION, CLASS 250B.<br />
6. RECOMMENDATION FOR MATING FLANGES: WHERE INSULATING BUSHINGS ARE USED, IT IS<br />
NECESSARY THAT BOLT HOLES BE DRILLED OVERSIZE BY AN AMOUNT EQUAL TO TWO TIMES THE<br />
INSULATING SLEEVE THICKNESS TO MAINTAIN THE SAME MINIMUM CLEARANCE FOR BOLTS.<br />
7. CAUTION: IT IS RECOMMENDED THAT VALVES BE INSTALLED INTO PIPING SYSTEM IN ACCORDANCE<br />
WITH AWWA M-11 TO PREVENT ANY UNDUE PIPING STRESS, DEFLECTION OR BENDING THAT MAY<br />
EFFECT THE PERFORMANCE OF THE VALVE.<br />
8. EXTENSION STEM CAN BE USED WITH STANDARD VALVE BOXES OR 5" SOIL PIPE.<br />
page 6<br />
Henry Pratt Company
401 S. Highland Avenue<br />
Aurora, Illinois 60506<br />
P 630-844-4000 F 630-844-4160<br />
www.henrypratt.com<br />
Specifications for 250B and 350# pressure class <strong>Butterfly</strong> <strong>Valves</strong><br />
Tag numbers: 250B – TP-BFV2, 3, 4<br />
350# - TPS-P1-BFV2, TPS-P2-BFV2, TPS-P3-BFV2, TPS-P4-BFV2,<br />
TPS-YP5-BFV1<br />
General<br />
All butterfly valves are tight closing, rubber seated type and fully comply with the latest revision of<br />
AWWA Standard C504/C516 and NSF61, where applicable. <strong>Valves</strong> are bubble-tight at rated<br />
pressures in either direction, and shall be satisfactory for applications involving throttling<br />
service and for applications requiring valve actuation after long periods of inactivity. Valve discs<br />
rotate 90˚ from the full open position to the tight shut position. Regardless of valve size, angular<br />
misposition of disc can be up to 1˚ off center without leakage.<br />
Valve Body<br />
All valve bodies are ductile iron ASTM A536, Class B, narrow body design. Flange drilling is ANSI<br />
Class 250 with 250# drilling pattern.<br />
Valve Disc<br />
All valve discs are constructed of ductile iron ASTM A536 with a stainless steel seating edge. The disc<br />
shall not have any hollow chambers that can entrap water. Disc and shaft connection are made with<br />
stainless steel pins.<br />
Valve Shaft<br />
All shafts are turned, ground, polished and constructed of ASTM A-564 Type 630 Condition H-1150.<br />
Shafts are of two-piece, stub type and keyed for actuator connection.<br />
Valve Seat<br />
All seats are constructed of Buna N and suitable for bidirectional shutoff at rated pressure. Seats are<br />
retained in the valve body by mechanical means without retaining rings, segments, screws or hardware of<br />
any kind in the flow stream. Seats are full 360˚ without interruption and have a plurality of grooves mating<br />
with a spherical disc edge seating surface. Valve seats are field adjustable around the full 360˚<br />
circumference and replaceable without dismantling the actuator, disc or shaft and without removing the<br />
valve from the line.<br />
Shaft Seals<br />
The shaft seals are self adjusting “V” type chevron packing. Shaft seals are designed to allow<br />
replacement without removing the valve shaft.<br />
Valve Bearings<br />
All butterfly valves are fitted with sleeve-type bearings. Bearings are corrosion resistant and selflubricating.<br />
Bearing material is Teflon-lined with a special fiberglass backing. Bearing load do not exceed<br />
1⁄5 of the compressible strength of the bearing or shaft material.
401 S. Highland Avenue<br />
Aurora, Illinois 60506<br />
P 630-844-4000 F 630-844-4160<br />
www.henrypratt.com<br />
Manual Valve Actuator for tag TPS-P1-BFV-2, P2-BFV2, P3-BFV2, P4-BFV2<br />
Valve actuators conform to AWWA Standard C504 and are designed to hold the valve in any intermediate<br />
position between full open and fully closed without creeping or fluttering. Actuators are equipped with<br />
mechanical stop-limiting devices to prevent overtravel of the disc in the open and closed positions. The<br />
buried service MDT actuator has a mechanical stop which will withstand and input torque of 450 ft. lbs at<br />
extreme actuator position without damage.<br />
Manual Valve worm gear actuator for tag TP-BFV2, BFV3, BFV4<br />
Same as above except of the worm gear type which will withstand input torque of 300 ft. lbs at extreme<br />
actuator position without damage. See worm gear technical information.<br />
Manual valve worm gear with bevel attachment for tag TPS-YP5-BFV1<br />
See AUMA spec sheet<br />
Painting<br />
Valve interior and exterior surfaces except for seating shall be coated with two coats of epoxy paint<br />
Amercoat 370 in accordance with AWWA C550 and AWWA C504. Coating is NSF-61 approved.<br />
Testing<br />
Hydrostatic and leakage tests will be conducted in strict accordance with AWWA Standard C504.
HP350<br />
401 S. Highland Avenue<br />
Aurora, Illinois 60506-5563<br />
www.henrypratt.com<br />
phone: 877.436.7977<br />
fax: 630.844.4160<br />
Scope of Line: Pratt HP350 <strong>Butterfly</strong> Valve<br />
Sizes:<br />
6" through 48"<br />
(FL ends)<br />
6" through 24"<br />
(MJ ends)<br />
Pressure:<br />
- 350 psi<br />
- 525 shell test<br />
Body Styles:<br />
- ANSI 250# with<br />
250 drilling<br />
Actuation<br />
Options:<br />
-Nut<br />
-Handwheel<br />
-Buried Service<br />
Features and Benefits:<br />
Features<br />
Benefits<br />
DESIGN AND CONSTRUCTION<br />
Higher pressures Working pressures to 350<br />
psi with temperatures to<br />
250˚F<br />
Ductile iron valve body<br />
17-4 Stainless steel shaft<br />
Ductile iron disc<br />
Wide size range and<br />
end connections<br />
Rubber seat<br />
located in body<br />
Unique Disc Design<br />
Nonmetallic bearings<br />
V-type shaft packing<br />
Actuators and<br />
Accessories<br />
Available in sizes 6"<br />
through 48" (FL x FL)<br />
and 6" through 24"<br />
(MJ x MJ)<br />
Reduces performance<br />
problems related to<br />
corrosive buildup<br />
in valve body<br />
and pipeline<br />
Provides more<br />
strength, less weight,<br />
and greater free-flow<br />
area than conventional<br />
disc design<br />
Prevents galvanic<br />
corrosion and<br />
provides lower<br />
coefficient of friction<br />
Self-adjusting, lasts<br />
the life of the valve<br />
Available with manual<br />
traveling nut or<br />
worm gear, electric<br />
motor or cylinder<br />
actuator; plus full<br />
range of extensions,<br />
indicators, positioners,<br />
remote controls and<br />
other accessories
Suggested Specification:<br />
<strong>Butterfly</strong> valves shall be manufactured for a full differential pressure of 350 psig. <strong>Valves</strong> shall be<br />
Henry Pratt Model HP350 and comply with the following details.<br />
The body shall be constructed of Ductile Iron ASTM A536 Gr. 65-45-<strong>12</strong>, with flanged end<br />
connections drilled in accordance with ANSI B16.1, Class 250, or mechanical joint ends drilled in<br />
accordance with AWWA C111. The body wall thickness shall be in strict accordance with AWWA<br />
C504. Table #1, for gray iron 250B valves.<br />
The disc shall utilize an on-center shaft and symetrical design, cast from Ductile Iron ASTM A536<br />
Gr. 65-45-<strong>12</strong>. The disc edge shall be stainless steel type 316. Discs shall be retained by pins<br />
that extend through the full diameter of the shaft. The pin material shall be the same as the shaft<br />
material. Torque plugs or tangential fasteners shall not be allowed.<br />
The shaft shall be made of ASTM A-564 Type 630 condition H-1150. The shaft seals shall be “V”<br />
type packing. Shaft seals shall be of a design allowing replacement without removing the valve<br />
shaft. No O-ring or “U” cup packing shall be allowed. The bearing shall be a stainless steel backed<br />
teflon material. Bearing load shall not exceed 1/5 of the compressible strength of the bearing or<br />
shaft material.<br />
Manual actuators shall be of the traveling nut, self-locking type and shall be designed to hold the<br />
valve in any intermediate position between fully open and fully closed without fluttering or creeping.<br />
The actuator shall have mechanical stops that will withstand an input torque of 450 lb./ ft. against<br />
each stop. Manual actuators shall conform to AWWA Standard C504 and shall be Pratt MDT or an<br />
approved equal.
6" - 48" HP350 Flanged Ends, Manual Actuator<br />
Valve<br />
Size<br />
A B C D E F G<br />
6" 7 1/4 8 3/8 <strong>12</strong> 1/2 6 1 7/16 <strong>12</strong> - 3/4 10 5/8<br />
8" 8 1/2 9 5/8 15 8 1 5/8 <strong>12</strong> - 7/8 13<br />
10" 9 3/4 11 17 1/2 8 1 7/8 16 - 1 15 1/4<br />
<strong>12</strong>" 11 1/2 <strong>12</strong> 5/8 20 1/2 8 2 16 - 1 1/8 17 3/4<br />
14" <strong>12</strong> 3/4 13 7/8 23 <strong>12</strong> 2 1/8 20 - 1 1/8 20 1/4<br />
16" 14 15 1/8 25 1/2 <strong>12</strong> 2 1/4 20- 1 1/4 22 1/2<br />
18" 15 1/4 16 3/8 28 <strong>12</strong> 2 3/8 24 - 1 1/4 24 3/4<br />
20" 17 17 5/8 30 1/2 <strong>12</strong> 2 1/2 24 - 1/14 27<br />
24" 19 3/4 20 1/4 36 <strong>12</strong> 2 3/4 24 - 1 1/2 32<br />
30" 25 5/8 26 43 <strong>12</strong> 3 28 - 1 3/4 39 1/4<br />
36" 28 1/8 31 1/8 50 15 3 3/8 32 - 2 46<br />
42" 32 1/8 35 1/8 57 15 3 11/16 36 - 2 52 3/4<br />
48" 36 1/4 39 5/8 65 15 4 40 - 2 60 3/4<br />
*See page 4 for MDT manual actuation dimensions.<br />
6" - 48" HP350 Flanged Ends, Buried Service Actuator<br />
Valve<br />
Size<br />
A B C D E F G<br />
6" 7 1/4 8 3/8 <strong>12</strong> 1/2 6 1 7/16 <strong>12</strong> - 3/4 10 5/8<br />
8" 8 1/2 9 5/8 15 8 1 5/8 <strong>12</strong> - 7/8 13<br />
10" 9 3/4 11 17 1/2 8 1 7/8 16 - 1 15 1/4<br />
<strong>12</strong>" 11 1/2 <strong>12</strong> 5/8 20 1/2 8 2 16 - 1 1/8 17 3/4<br />
14" <strong>12</strong> 3/4 13 7/8 23 <strong>12</strong> 2 1/8 20 - 1 1/8 20 1/4<br />
16" 14 15 1/8 25 1/2 <strong>12</strong> 2 1/4 20- 1 1/4 22 1/2<br />
18" 15 1/4 16 3/8 28 <strong>12</strong> 2 3/8 24 - 1 1/4 24 3/4<br />
20" 17 17 5/8 30 1/2 <strong>12</strong> 2 1/2 24 - 1/14 27<br />
24" 19 3/4 20 1/4 36 <strong>12</strong> 2 3/4 24 - 1 1/2 32<br />
30" 25 5/8 26 43 <strong>12</strong> 3 28 - 1 3/4 39 1/4<br />
36" 28 1/8 31 1/8 50 15 3 3/8 32 - 2 46<br />
42" 32 1/8 35 1/8 57 15 3 11/16 36 - 2 52 3/4<br />
48" 36 1/4 39 5/8 65 15 4 40 - 2 60 3/4<br />
*See page 4 for MDT manual actuation dimensions.
6" - 24" HP350 Mechanical Joint Ends, Manual Actuator<br />
Valve<br />
Size<br />
A B C D E F G<br />
6" 7 1/4 8 3/8 11 1/16 10 1 1/16 6 - 3/4 9 /<strong>12</strong><br />
8" 8 1/2 9 5/8 13 5/16 10 1 1/8 6 - 3/4 11 3/4<br />
10" 9 3/4 11 15 5/8 10 1 3/16 8 - 3/4 14<br />
<strong>12</strong>" 11 1/2 <strong>12</strong> 5/8 17 7/8 10 1 1/4 8 - 3/4 16 1/4<br />
14" <strong>12</strong> 3/4 13 7/8 20 1/4 <strong>12</strong> 1/2 1 5/16 10 - 3/4 18 3/4<br />
16" 14 15 1/8 22 1/2 <strong>12</strong> 1/2 1 3/8 <strong>12</strong> - 3/4 21<br />
18" 15 1/4 16 3/8 24 3/4 13 1/4 1 7/16 <strong>12</strong> - 3/4 23 1/4<br />
20" 17 17 5/8 27 13 1/4 1 1/2 14 - 3/4 25 1/2<br />
24 19 3/4 20 1/4 31 /1/2 13 1/4 1 5/8 16 - 3/4 30<br />
*See below for MDT manual actuation dimensions.<br />
MDT Manual Actuator Dimensional Data<br />
MDT<br />
Size<br />
J L M N P Q R S T V W<br />
# Turns<br />
to Close<br />
MDT-2S 4 11/16 2 2 1/8 2 4 1/2 4 1/4 8 1/4 7 7/8 7 7/8 8 9 1/8 32<br />
MDT-3S 5 5/8 2 7/16 3 1/4 3 5/32 5 5/8 5 3/8 10 3/8 10 1/2 10 1/8 <strong>12</strong> 9 1/8 30<br />
MDT-4S 6 3/8 2 27/32 3 3/8 4 7 5/16 6 3/4 11 5/16 11 1/2 11 <strong>12</strong> 9 1/8 40<br />
MDT-5 7 9/16 3 15/32 4 1/2 5 1/2 8 3/4 10 17 17 3/16 17 3/16 18 16 7/16 44<br />
Notes:<br />
1) All dimensions shown in inches<br />
2) Furnished in standard position.<br />
Contact factory for other mounting<br />
positions<br />
PRATT<br />
OPEN<br />
Q<br />
S<br />
T<br />
R<br />
J<br />
L<br />
P<br />
PRATT<br />
OPEN<br />
N<br />
V=<br />
DIA.<br />
W=<br />
DIA.<br />
Standard<br />
Position<br />
M<br />
CLOSED<br />
HANDWHEEL<br />
CHAINWHEEL<br />
HP350-0110
3”-20” 2FII &<br />
Groundhog®<br />
Bonded Seat<br />
<strong>Butterfly</strong> Valve<br />
Operation and<br />
Maintenance Manual<br />
Job Name: ____________________________<br />
Contractor: ___________________________<br />
Date: ________________________________<br />
Document #:3202FIIGD Revision Date: 7/13/10
3”-20” 2FII & Groundhog® Bonded Seat <strong>Butterfly</strong> Valve<br />
SAFETY MESSAGES<br />
All safety messages in the instructions are flagged with an exclamation symbol and the word “Warning”.<br />
These messages indicate procedures that must be followed exactly to avoid equipment damage, physical<br />
injury, or death. Safety labels on the product indicate hazards that can cause equipment damage, physical<br />
injury, or death.<br />
Personnel involved in the installation or maintenance of valves should be constantly alert to<br />
potential emission of pipeline material and take appropriate safety precautions. Always wear<br />
suitable protection when dealing with hazardous pipeline materials.<br />
PARTS<br />
WARNING<br />
Order parts from your local Henry Pratt sales representative or directly from Henry Pratt Company. When<br />
ordering parts, please include the serial number located on the valve tag.<br />
WARRANTY ISSUE<br />
Seller warrants that, at its option, it will repair, replace, or refund the unit purchase price of any products<br />
which are non-conforming due to Seller’s material or workmanship during the warranty period. The warranty<br />
period shall be twelve (<strong>12</strong>) months for parts and eighteen (18) months for all other goods after date of<br />
shipment. This shall be Buyer’s sole remedy. In order to maintain this product warranty, Buyer must give<br />
written notice to Seller’s Field Service Supervisor prior to any work being performed.<br />
IN CONSIDERATION OF THE FOREGOING, SELLER EXCLUDES ALL OTHER EXPRESS OR IMPLIED<br />
WARRANTIES, INCLUDING BUT NOT LIMITED TO MERCHANTABILITY AND FITNESS FOR A<br />
PARTICULAR PURPOSE.<br />
Seller does not warrant water operated metallic cylinders against damage caused by corrosion, electrolysis<br />
or mineral deposits. In no event shall warranty include valve removal or reinstallation.<br />
WARNING<br />
Read all applicable directions and instructions prior to any maintenance, troubleshooting or<br />
installation<br />
Document #: 3202FIIGD Revision Date: 7/13/10<br />
2
3”-20” 2FII & Groundhog® Bonded Seat <strong>Butterfly</strong> Valve<br />
Table of Contents<br />
FUNCTIONAL DESCRIPTION 4<br />
INSTALLATION 5<br />
OPERATION 8<br />
MAINTENANCE 9<br />
TROUBLESHOOTING 10<br />
CONTACTING PRATT 11<br />
PRODUCT DRAWINGS <strong>12</strong><br />
Document #: 3202FIIGD Revision Date: 7/13/10<br />
3
3”-20” 2FII & Groundhog® Bonded Seat <strong>Butterfly</strong> Valve<br />
FUNCTIONAL DESCRIPTION<br />
Round butterfly valve discs rotate 1/4 turns to provide tight shutoff in air or water pipelines. The valves can be<br />
used to regulate flow rate by positioning the disc between 15 and 90 degrees open.<br />
Manually Operated Valve<br />
Manually operated butterfly valves are powered with gear actuators, which convert multiple handwheel, chainwheel<br />
or nut input turns into 1/4 turn valve operation. The travel of the valve disc is limited by physical stops in<br />
the actuator housing.<br />
WARNING<br />
Forcing the handwheel, chainwheel or nut against the stops will not provide tighter shutoff of the valve<br />
and may damage the actuator. Only actuator adjustments will affect valve shutoff.<br />
Motor Operated <strong>Valves</strong><br />
Motor operated butterfly valves are powered with gear actuators, which convert multiple motor input turns into<br />
1/4 turn valve operation. The travel of the valve disc is limited by limit switches in the motor housing and physical<br />
stops in the actuator housing. Valve shutoff is affected by limit switch and physical stop settings.<br />
WARNING<br />
Improperly set limit switches and/or physical stops may damage the motor and/or actuator.<br />
Cylinder Operated <strong>Valves</strong><br />
Hydraulically operated butterfly valves are powered with a gear box and double acting cylinder. The linear<br />
stroke of the cylinder is converted to 1/4 turn operation by the gear box. Auxiliary controls are provided to direct<br />
hydraulic power to the cylinder and to control the operating speed of the cylinder.<br />
Document #: 3202FIIGD Revision Date: 7/13/10<br />
4
3”-20” 2FII & Groundhog® Bonded Seat <strong>Butterfly</strong> Valve<br />
INSTALLATION<br />
GENERAL<br />
<strong>Valves</strong> are a significant component of any piping system. Failure due to faulty installation, improper operation<br />
or maintenance in such systems could result in damage, down time and costly repairs. In buried underground<br />
installations, problems or malfunctions can result in extensive, costly unearthing operations to correct the problem.<br />
Many problems with valves can be traced to improper installation, operation, or maintenance procedures.<br />
UNLOADING<br />
Inspect valves on receipt for damage in shipment and conformance with quantity and description in the shipping<br />
notice and order. Carefully unload all valves to the ground without dropping using fork trucks or slings under<br />
skids. Do not lift valves with slings or chain around operating shaft, actuator, or through waterway. Instead,<br />
lift valves with eye bolts or rods through flange holes.<br />
STORAGE<br />
Whenever practical, store valves indoors. If not, protect valves and actuators from weather and accumulation<br />
of water, dirt, rocks and debris. When valves fitted with power actuators and controls are stored, energize<br />
electric actuator or otherwise protect electrical control equipment to prevent corrosion of electrical contacts due<br />
to condensation resulting from temperature variation. Do not expose rubber seats to sunlight or ozone for any<br />
extended period. <strong>Valves</strong> should be stored with the valve disc or closure member slightly open.<br />
INSPECTION PRIOR TO INSTALLATION<br />
Make sure flange faces and joint sealing surfaces, body seats and disc seats are clean. Check bolting attaching<br />
actuator to valve for loosening in transit and handling. If loose, tighten firmly. Open and close valve to make<br />
sure it operates properly and that stops or limit switches are correctly set so that the valve seats fully. Check<br />
that valve rotation direction is correct and close valve before installing.<br />
INSTALLATION<br />
The following items must be performed during installation to ensure proper function.<br />
• Carefully place valves into position avoiding contact or impact with other equipment, vault walls or trench<br />
walls.<br />
Document #: 3202FIIGD Revision Date: 7/13/10<br />
5
3”-20” 2FII & Groundhog® Bonded Seat <strong>Butterfly</strong> Valve<br />
• <strong>Valves</strong> are to be installed in accordance with the General Arrangement Drawings furnished for the order.<br />
• Foreign material in a valve can damage the rubber seat when valves are operated. Be sure valve interiors<br />
and adjacent piping are clear of foreign material prior to mating valve to pipe joint.<br />
• Prepare pipe ends and install valves in accordance with the pipe manufacturer’s instructions for the joint<br />
used. Do not deflect pipe/valve joint. Do not use valve and jack to pull pipe into alignment.<br />
• In plant piping, install so as to minimize bending of valve connection with pipe loading.<br />
• In case of wafer type butterfly valves, concentrically center the valve disc between the mating flanges.<br />
• Make sure valve disc, when opened, will not contact pipe port. This is especially necessary on pipe with linings<br />
and when wafer valves are used. Check manufacturer for minimum pipe I.D. required for clearance.<br />
WARNING<br />
It is recommended that valves be installed into piping system in accordance with AWWA M-11 in order<br />
to prevent any undue piping stress, deflection or bending that may affect the performance of the valve.<br />
WARNING<br />
Valve disc without actuator may open or close at any time and cause injury to persons or damage to<br />
valve and other property. The shaft/disc clamping device when furnished is intended for temporary use<br />
during shipping, handling and valve installation only. Do not subject valve to flow conditions before<br />
actuator is mounted and tested for performance and clamping device is removed.<br />
Buried valves installed with valve boxes must be so installed that the valve box does not transmit shock or<br />
stress to the valve actuator as a result of shifting soil or traffic load.<br />
When valves are installed in vaults, the vault design must provide space for purposes of repair. The valve<br />
opening nut should be accessible from the top opening of the vault with a tee wrench.<br />
MECHANICAL JOINT INSTALLATION<br />
The successful operation of the mechanical joint requires that the plain end be centrally located in the bell<br />
and that adequate anchorage be provided where abrupt changes in direction and dead ends occur. The rubber<br />
gasket will seal more effectively if the surfaces with which it comes in contact are thoroughly cleaned (for<br />
example, with a wire brush) just prior to assembly in order to remove all loose rust or foreign material.<br />
Document #: 3202FIIGD Revision Date: 7/13/10<br />
6
3”-20” 2FII & Groundhog® Bonded Seat <strong>Butterfly</strong> Valve<br />
Lubrication and additional cleaning should be performed by brushing both the gasket and the plain end with<br />
soapy water or pipe lubricant just prior to slipping the gasket into the plain end and assembling the joint.<br />
TESTING<br />
When rubber seated valves are used to isolate sections of line for test, it is important to realize that these<br />
valves are designed or factory adjusted to hold rated pressure only. Test pressure may cause leakage past the<br />
rubber seat or damage to the valve.<br />
In order to prevent time lost in searching for leaks, it is recommended that excavations for buried valves not be<br />
back-filled until after hydrostatic pressure tests have been made.<br />
Seat leakage can occur due to foreign material in the line. If this occurs, open valve 5 – 10 degrees to get high<br />
velocity flushing action. Close and repeat several times to clear seats for tight shutoff.<br />
Seat leakage can occur due to rotational shift in position of the disc with relation to the body seat. Readjust<br />
closing stop in accordance with manufacturer’s instructions.<br />
RECORDS<br />
Upon completion of installation, valve location, size, make, type, date of installation, number of turns to open,<br />
direction of opening and any other information deemed pertinent should be entered on the owner’s permanent<br />
records.<br />
Document #: 3202FIIGD Revision Date: 7/13/10<br />
7
3”-20” 2FII & Groundhog® Bonded Seat <strong>Butterfly</strong> Valve<br />
OPERATION<br />
Do not permit use and operation of any valve at pressure above the rated pressure of the valve.<br />
Do not exceed 300 ft-lb input torque on actuators with wrench nuts, 200 lb. rim pull input torque for handwheels<br />
or chainwheels. If portable auxiliary actuators are used, size the actuator or use a torque limiting device to<br />
prevent application of torque exceeding 300 ft-lbs. If an oversize actuator with no means of limiting torque<br />
is used, stop the actuator before valve is fully opened or closed against stops and complete the operation<br />
manually. Be sure to check actuator directional switch against direction indicated on wrench nut, handwheel or<br />
records before applying opening and closing torque.<br />
If a valve is stuck in some intermediate position between open and closed, check first for jamming in the<br />
actuator. If nothing is found, the interference is inside the valve. In this case, do not attempt to force the disc<br />
open or closed since excessive torque in this position can severely damage internal parts. Contact the Pratt<br />
Service Department.<br />
MANUAL ACTUATOR FUNCTION AND USE:<br />
The manually operated butterfly valves are operated by rotating the handwheel, chainwheel, or nut. The<br />
actuator is equipped with gearing to convert the many turns into 1/4 turn operation. Inside actuator stops that<br />
limit the travel of the valve are pre-set at the factory. Forcing the handwheel, chainwheel, or nut will not cause<br />
the valve to shut off any tighter and may cause damage to the gearing.<br />
CYLINDER ACTUATOR FUNCTION AND USE:<br />
The cylinder operated butterfly valves are operated automatically by directing hydraulic pressure to either side<br />
of the power cylinder. Solenoid valves are used to direct the fluid to the cylinder ports based on electrical<br />
power signals. In cylinder actuators, the travel stops are in the cylinder so that full hydraulic pressure can be<br />
held on the cylinder at either end of travel.<br />
MOTOR ACTUATOR FUNCTION AND USE:<br />
The motor actuator is designed to open and close the valve through its one quarter turn of rotation. It contains<br />
gearing so that hundreds of turns of the motor or handwheel will slowly move the valve from open to close<br />
position or vice versa. Electrical controls are included in the motor actuator for local electrical control.<br />
The output motion of the actuator is limited to about 100 degrees of output rotation by mechanical stops in<br />
the gearing. These are factory set and should not need adjustment. The actual positioning of the valve disc<br />
will be done by limit switches in the motor actuator. The switches are also set at the factory but adjustment<br />
is sometimes required if the motor unit is installed on a separate mounting base or floorstand. Detailed<br />
procedures are given in the motor manual if adjustment is needed for the mechanical stops or the limit<br />
switches. The wiring and power requirements are given on wiring diagrams included in this instruction manual.<br />
Document #: 3202FIIGD Revision Date: 7/13/10<br />
8
3”-20” 2FII & Groundhog® Bonded Seat <strong>Butterfly</strong> Valve<br />
MAINTENANCE<br />
Maintenance of rubber-seated valves by owner is generally limited to actuators and shaft seals. In some<br />
instances, valve design permits field adjustment or replacement of rubber seats when leakage occurs. Unless<br />
the owner has skilled personnel and proper equipment, any major rework will require removal of the valve from<br />
the line. Depending on condition, valve may require return to the manufacturer.<br />
ANNUAL MAINTENANCE<br />
1.<br />
Cycle valve to verify operation and no interference in line.<br />
2. Close valve and check for leakage. If leakage is detected, check actuator stops to verify that disc<br />
is fully closed. If leakage persists, remove valve to inspect seat. A damaged seat requires valve to be<br />
returned to the factory for repair.<br />
3.<br />
4.<br />
Check flange connections for leakage. Tighten bolts accordingly.<br />
Check top trunnion area for shaft leakage. If leakage is detected, replace valve packing.<br />
NOTE: 10” and larger valves have top and bottom packing.<br />
WARNING<br />
Removal of actuator from valve shaft will cause disc to rotate, striking persons or objects in the disc<br />
path, causing injury to persons and damage to valve. Block or lock disc before removing actuator.<br />
Typical maintenance would be shaft packing replacement and actuator adjustment. Seal leakage, broken parts<br />
and difficult operation should be discussed with Pratt’s Service Department before valve repairs are attempted.<br />
Pratt Service Engineers are available to perform or supervise valve repairs in the field.<br />
Stop line flow and isolate from line pressure prior to performing any corrective maintenance.<br />
After completing repair, cycle valve through one complete operating cycle and after line pressure has been<br />
restored, inspect for leakage.<br />
Document #: 3202FIIGD Revision Date: 7/13/10<br />
9
3”-20” 2FII & Groundhog® Bonded Seat <strong>Butterfly</strong> Valve<br />
TROUBLESHOOTING GUIDE<br />
Problem Causes Remedies<br />
Leakage between valve and<br />
actuator<br />
•Packing Leak<br />
•First, cycle the valve several<br />
times. This should adjust the<br />
packing. If this fails, clean packing<br />
bore and replace packing.<br />
Bottom trunnion leaks •Packing or gasket leak •Replace bottom shaft packing,<br />
o-ring or gasket.<br />
Valve leaks when closed<br />
•Disc not fully closed or past fully<br />
closed<br />
•Adjust actuator closed position<br />
stop.<br />
•Disc edge wear or damage<br />
•Clean and/or repair disc edge.<br />
•Rubber seat wear or damage •Replace valve seat (Bonded<br />
seat vavles 20” or below must be<br />
returned to factory for repair).<br />
Chainwheel jams •Poorly fitting chain •Replace with correct chain.<br />
Valve hard to operate<br />
•Foreign material in valve<br />
•Remove obstructions<br />
Automatic valve does not actuate<br />
•Corroded actuator parts<br />
•Loose actuator<br />
•No power source<br />
•Improper Signal<br />
•Burned out or impaired<br />
component<br />
•Clean and grease actuator<br />
•Apply Loctite or Omnifit locking<br />
compound and tighten bolts.<br />
•Check incoming power source<br />
and replace fuses or rest pressure.<br />
•Check actuating signal sequence.<br />
•Check and repair or replace<br />
solenoids, motors and relay<br />
devices.<br />
Document #: 3202FIIGD Revision Date: 7/13/10<br />
10
3”-20” 2FII & Groundhog® Bonded Seat <strong>Butterfly</strong> Valve<br />
HOW TO CONTACT PRATT<br />
HOW TO ORDER PARTS:<br />
To order parts, contact our Parts Department:<br />
Write: -<br />
Henry Pratt Company<br />
401 South Highland Avenue<br />
Aurora, IL 60506-5563<br />
Attn: Parts Manager<br />
Call - (630) 844-4144<br />
Fax - (630) 844-4191<br />
Please include valve serial number and description of part requested.<br />
HOW TO OBTAIN SERVICE:<br />
To obtain further information or secure field service, contact our Field Service Department:<br />
Write: -<br />
Henry Pratt Company<br />
401 South Highland Avenue<br />
Aurora, IL 60506-5563<br />
Attn: Field Service Manager<br />
Call - (630) 844-4163<br />
Fax - (630) 844-4160<br />
Please include the following with your inquiry for service:<br />
Henry Pratt Order Number:<br />
Henry Pratt Item Number:<br />
Valve Serial Number:<br />
Type of Service Requested<br />
Document #: 3202FIIGD Revision Date: 7/13/10<br />
11
3”-20” 2FII & Groundhog® Bonded Seat <strong>Butterfly</strong> Valve<br />
Document #: 3202FIIGD Revision Date: 7/13/10<br />
<strong>12</strong>
Triton XR-70,Triton XL &<br />
Groundhog® <strong>Butterfly</strong><br />
<strong>Valves</strong><br />
(24” & Larger)<br />
Operation and<br />
Maintenance Manual<br />
Job Name: ____________________________<br />
Contractor: ___________________________<br />
Date: ________________________________<br />
Document #: 24TRIGD Revision Date: 7/13/10
Triton XR-70,Triton XL & Groundhog®<br />
<strong>Butterfly</strong> <strong>Valves</strong> (24” & Larger)<br />
SAFETY MESSAGES<br />
All safety messages in the instructions are flagged with an exclamation symbol and the word “Warning”.<br />
These messages indicate procedures that must be followed exactly to avoid equipment damage, physical<br />
injury, or death. Safety labels on the product indicate hazards that can cause equipment damage, physical<br />
injury, or death.<br />
Personnel involved in the installation or maintenance of valves should be constantly alert to potential<br />
emission of pipeline material and take appropriate safety precautions. Always wear suitable protection when<br />
dealing with hazardous pipeline materials.<br />
PARTS<br />
WARNING<br />
Order parts from your local Henry Pratt sales representative or directly from Henry Pratt Company. When<br />
ordering parts, please include the serial number located on the valve tag.<br />
WARRANTY ISSUE<br />
Seller warrants that, at its option, it will repair, replace, or refund the unit purchase price of any products<br />
which are non-conforming due to Seller’s material or workmanship during the warranty period. The warranty<br />
period shall be twelve (<strong>12</strong>) months for parts and eighteen (18) months for all other goods after date of<br />
shipment. This shall be Buyer’s sole remedy. In order to maintain this product warranty, Buyer must give<br />
written notice to Seller’s Field Service Supervisor prior to any work being performed.<br />
IN CONSIDERATION OF THE FOREGOING, SELLER EXCLUDES ALL OTHER EXPRESS OR IMPLIED<br />
WARRANTIES, INCLUDING BUT NOT LIMITED TO MERCHANTABILITY AND FITNESS FOR A<br />
PARTICULAR PURPOSE.<br />
Seller does not warrant water operated metallic cylinders against damage caused by corrosion, electrolysis<br />
or mineral deposits. In no event shall warranty include valve removal or reinstallation.<br />
WARNING<br />
Read all applicable directions and instructions prior to any maintenance, troubleshooting or<br />
installation<br />
24TRIGD Revision Date: 7/13/10<br />
2
Triton XR-70,Triton XL & Groundhog®<br />
<strong>Butterfly</strong> <strong>Valves</strong> (24” & Larger)<br />
Table of Contents<br />
FUNCTIONAL DESCRIPTION 4<br />
INSTALLATION 5<br />
OPERATION 8<br />
MAINTENANCE 10<br />
TROUBLESHOOTING 11<br />
CONTACTING PRATT <strong>12</strong><br />
PRODUCT DRAWINGS 13<br />
24TRIGD Revision Date: 7/13/10<br />
3
Triton XR-70,Triton XL & Groundhog®<br />
<strong>Butterfly</strong> <strong>Valves</strong> (24” & Larger)<br />
Functional Description<br />
Round butterfly valve discs rotate 1/4 turns to provide tight shutoff in air or water pipelines. The valves can be<br />
used to regulate flow rate by positioning the disc between 15 and 90 degrees open.<br />
Manually Operated Valve<br />
Manually operated butterfly valves are powered with gear actuators, which convert multiple handwheel,<br />
chainwheel or nut input turns into 1/4 turn valve operation. The travel of the valve disc is limited by physical<br />
stops in the actuator housing.<br />
WARNING<br />
Forcing the handwheel, chainwheel or nut against the stops will not provide tighter shutoff of the valve<br />
and may damage the actuator. Only actuator adjustments will affect valve shutoff.<br />
Motor Operated Valve<br />
Motor operated butterfly valves are powered with gear actuators, which convert multiple motor input turns<br />
into 1/4 turn valve operation. The travel of the valve disc is limited by limit switches in the motor housing and<br />
physical stops in the actuator housing. Valve shutoff is affected by limit switch and physical stop settings.<br />
WARNING<br />
Improperly set limit switches and/or physical stops may damage the motor and/or actuator.<br />
Cylinder Operate Valve<br />
Hydraulically operated butterfly valves are powered with a gear box and double acting cylinder. The linear<br />
stroke of the cylinder is converted to 1/4 turn operation by the gear box. Auxiliary controls are provided to direct<br />
hydraulic power to the cylinder and to control the operating speed of the cylinder.<br />
24TRIGD Revision Date: 7/13/10<br />
4
Triton XR-70,Triton XL & Groundhog®<br />
<strong>Butterfly</strong> <strong>Valves</strong> (24” & Larger)<br />
INSTALLATION<br />
GENERAL<br />
<strong>Valves</strong> are a significant component of any piping system. Failure due to faulty installation, improper operation<br />
or maintenance in such systems could result in damage, down time and costly repairs. In buried underground<br />
installations, problems or malfunctions can result in extensive, costly unearthing operations to correct the<br />
problem. Many problems with valves can be traced to improper installation, operation, or maintenance<br />
procedures.<br />
UNLOADING<br />
Inspect valves on receipt for damage in shipment and conformance with quantity and description in the<br />
shipping notice and order. Carefully unload all valves to the ground without dropping using fork trucks or slings<br />
under skids. Do not lift valves with slings or chain around operating shaft, actuator, or through waterway.<br />
Instead, lift valves with eye bolts or rods through flange holes.<br />
STORAGE<br />
Whenever practical, store valves indoors. If not, protect valves and actuators from weather and accumulation<br />
of water, dirt, rocks and debris. When valves fitted with power actuators and controls are stored, energize<br />
electric actuator or otherwise protect electrical control equipment to prevent corrosion of electrical contacts due<br />
to condensation resulting from temperature variation. Do not expose rubber seats to sunlight or ozone for any<br />
extended period. <strong>Valves</strong> should be stored with the valve disc or closure member slightly open.<br />
INSPECTION PRIOR TO INSTALLATION<br />
Make sure flange faces and joint sealing surfaces, body seats and disc seats are clean. Check bolting<br />
attaching actuator to valve for loosening in transit and handling. If loose, tighten firmly. Open and close valve<br />
to make sure it operates properly and that stops or limit switches are correctly set so that the valve seats fully.<br />
Check that valve rotation direction is correct and close valve before installing.<br />
INSTALLATION<br />
The following items must be performed during installation to ensure proper function.<br />
• Carefully place valves into position avoiding contact or impact with other equipment, vault walls or<br />
trench walls.<br />
24TRIGD Revision Date: 7/13/10<br />
5
Triton XR-70,Triton XL & Groundhog®<br />
<strong>Butterfly</strong> <strong>Valves</strong> (24” & Larger)<br />
• <strong>Valves</strong> are to be installed in accordance with the General Arrangement Drawings furnished for the order.<br />
• Foreign material in a valve can damage the rubber seat when valves are operated. Be sure valve interiors<br />
and adjacent piping are clear of foreign material prior to mating valve to pipe joint.<br />
• Prepare pipe ends and install valves in accordance with the pipe manufacturer’s instructions for the joint<br />
used. Do not deflect pipe/valve joint. Do not use valve and jack to pull pipe into alignment.<br />
• In plant piping, install so as to minimize bending of valve connection with pipe loading.<br />
• Make sure valve disc, when opened, will not contact pipe port. This is especially necessary on pipe with linings.<br />
Check manufacturer for minimum pipe I.D. required for clearance.<br />
WARNING<br />
It is recommended that valves be installed into piping system in accordance with AWWA M-11 in order<br />
to prevent any undue piping stress, deflection or bending that may affect the performance of the valve.<br />
WARNING<br />
Valve disc without actuator may open or close at any time and cause injury to persons or damage to<br />
valve and other property. The shaft/disc clamping device when furnished is intended for temporary use<br />
during shipping, handling and valve installation only. Do not subject valve to flow conditions before<br />
actuator is mounted and tested for performance and clamping device is removed.<br />
Buried valves installed with valve boxes must be so installed that the valve box does not transmit shock or<br />
stress to the valve actuator as a result of shifting soil or traffic load.<br />
When valves are installed in vaults, the vault design must provide space for purposes of repair. The valve<br />
operating nut should be accessible from the top opening of the vault with a tee wrench.<br />
MECHANICAL JOINT INSTALLATION<br />
The successful operation of the mechanical joint requires that the plain end be centrally located in the bell<br />
and that adequate anchorage be provided where abrupt changes in direction and dead ends occur. The rubber<br />
gasket will seal more effectively if the surfaces with which it comes in contact are thoroughly cleaned (for<br />
example, with a wire brush) just prior to assembly in order to remove all loose rust or foreign material.<br />
24TRIGD Revision Date: 7/13/10<br />
6
Triton XR-70,Triton XL & Groundhog®<br />
<strong>Butterfly</strong> <strong>Valves</strong> (24” & Larger)<br />
Lubrication and additional cleaning should be performed by brushing both the gasket and the plain end with<br />
soapy water or pipe lubricant just prior to slipping the gasket into the plain end and assembling the joint.<br />
TESTING<br />
When rubber seated valves are used to isolate sections of line for test, it is important to realize that these<br />
valves are designed or factory adjusted to hold rated pressure only. Test pressure may cause leakage past the<br />
rubber seat or damage to the valve.<br />
In order to prevent time lost in searching for leaks, it is recommended that excavations for buried valves not be<br />
back-filled until after hydrostatic pressure tests have been made.<br />
Seat leakage can occur due to foreign material in the line. If this occurs, open valve 5 – 10 degrees to get high<br />
velocity flushing action. Close and repeat several times to clear seats for tight shutoff.<br />
Seat leakage can occur due to rotational shift in position of the disc with relation to the body seat. Readjust<br />
closing stop in accordance with manufacturer’s instructions.<br />
RECORDS<br />
Upon completion of installation, valve location, size, make, type, date of installation, number of turns to open,<br />
direction of opening and any other information deemed pertinent should be entered on the owner’s permanent<br />
records.<br />
24TRIGD Revision Date: 7/13/10<br />
7
Triton XR-70,Triton XL & Groundhog®<br />
<strong>Butterfly</strong> <strong>Valves</strong> (24” & Larger)<br />
OPERATION<br />
Do not permit use and operation of any valve at pressure above the rated pressure of the valve.<br />
Do not exceed 300 ft-lb input torque on actuators with wrench nuts, 200 lb. rim pull input torque for handwheels<br />
or chainwheels. If portable auxiliary actuators are used, size the actuator or use a torque limiting device to<br />
prevent application of torque exceeding 300 ft-lbs. If an oversize actuator with no means of limiting torque<br />
is used, stop the actuator before valve is fully opened or closed against stops and complete the operation<br />
manually. Be sure to check actuator directional switch against direction indicated on wrench nut, handwheel or<br />
records before applying opening and closing torque.<br />
If a valve is stuck in some intermediate position between open and closed, check first for jamming in the<br />
actuator. If nothing is found, the interference is inside the valve. In this case, do not attempt to force the disc<br />
open or closed since excessive torque in this position can severely damage internal parts. Contact the Pratt<br />
Service Department.<br />
MANUAL ACTUATOR FUNCTION AND USE:<br />
The manually operated butterfly valves are operated by rotating the handwheel, chainwheel, or nut. The<br />
actuator is equipped with gearing to convert the many turns into 1/4 turn operation. Inside actuator stops that<br />
limit the travel of the valve are pre-set at the factory. Forcing the handwheel, chainwheel, or nut will not cause<br />
the valve to shut off any tighter and may cause damage to the gearing.<br />
CYLINDER ACTUATOR FUNCTION AND USE:<br />
The cylinder operated butterfly valves are operated automatically by directing hydraulic pressure to either side<br />
of the power cylinder. Solenoid valves are used to direct the fluid to the cylinder ports based on electrical<br />
power signals. In cylinder actuators, the travel stops are in the cylinder so that full hydraulic pressure can be<br />
held on the cylinder at either end of travel.<br />
MOTOR ACTUATOR FUNCTION AND USE:<br />
The motor actuator is designed to open and close the valve through its one quarter turn of rotation. It contains<br />
gearing so that hundreds of turns of the motor or handwheel will slowly move the valve from open to close<br />
position or vice versa. Electrical controls are included in the motor actuator for local electrical control.<br />
The output motion of the actuator is limited to about 100 degrees of output rotation by mechanical stops in<br />
the gearing. These are factory set and should not need adjustment. The actual positioning of the valve disc<br />
will be done by limit switches in the motor actuator. The switches are also set at the factory but adjustment<br />
is sometimes required if the motor unit is installed on a separate mounting base or floorstand. Detailed<br />
procedures are given in the motor manual if adjustment is needed for the mechanical stops or the limit<br />
switches. The wiring and power requirements are given on wiring diagrams included in this instruction manual.<br />
24TRIGD Revision Date: 7/13/10<br />
8
Triton XR-70,Triton XL & Groundhog®<br />
<strong>Butterfly</strong> <strong>Valves</strong> (24” & Larger)<br />
WARNING<br />
Fluids exposed to freezing temperatures may cause valve to fail resulting in injury to persons or damage<br />
to valves and other property. Do not use in applications that are exposed to freezing temperatures<br />
unless sufficient flow is maintained through the valve to prevent freezing, or other protection is provided.<br />
WARNING<br />
IMPORTANT SAFETY NOTICE<br />
All persons who will install, operate or adjust this equipment must read the instructions and drawings<br />
carefully. Injury and property damage may occur from improper use. It is understood that this<br />
equipment will be installed by individuals with knowledge and skills in electrical equipment. The<br />
manufacturer cannot be responsible for the misuse of this information or equipment, nor can it assume<br />
any resultant liability.<br />
24TRIGD Revision Date: 7/13/10<br />
9
Triton XR-70,Triton XL & Groundhog®<br />
<strong>Butterfly</strong> <strong>Valves</strong> (24” & Larger)<br />
MAINTENANCE<br />
Maintenance of valves by owner is generally limited to actuators and shaft seals. In some instances, valve design<br />
permits field adjustment seats when leakage occurs. Unless the owner has skilled personnel and proper<br />
equipment, any major rework will require removal of the valve from the line. Depending on condition, valve may<br />
require return to the manufacturer.<br />
ANNUAL MAINTENANCE<br />
1.<br />
Cycle valve to verify operation and no interference in line.<br />
2. Close valve and check for leakage. If leakage is detected, check actuator stops to verify that disc is<br />
fully closed. If leakage persists, remove valve to inspect seat. Contact Pratt’s Field Service Deparment<br />
for information regarding adjustment or replacement of seat.<br />
3.<br />
4.<br />
Check flange connections for leakage. Tighten bolts accordingly.<br />
Check top trunnion area for shaft leakage. If leakage is detected, replace valve packing.<br />
5. If Access to the line is possible, then removal of scale that may interfere with disc travel is suggested.<br />
The seat should be inspected for wear and the taper pin nuts should be tight.<br />
NOTE: LUBRICATION IS NOT REQUIRED.<br />
WARNING<br />
Removal of actuator from valve shaft will cause disc to rotate, striking persons or objects in the disc<br />
path, causing injury to persons and damage to valve. Block or lock disc before removing actuator.<br />
Typical maintenance would be shaft packing replacement and actuator adjustment. Seal leakage, broken parts<br />
and difficult operation should be discussed with Pratt’s Service Department before valve repairs are attempted.<br />
Pratt Service Engineers are available to perform or supervise valve repairs in the field.<br />
Stop line flow and isolate from line pressure prior to performing any corrective maintenance.<br />
After completing repair, cycle valve through one complete operating cycle and after line pressure has been<br />
restored, inspect for leakage.<br />
24TRIGD Revision Date: 7/13/10<br />
10
Triton XR-70,Triton XL & Groundhog®<br />
<strong>Butterfly</strong> <strong>Valves</strong> (24” & Larger)<br />
TROUBLESHOOTING GUIDE<br />
Problem Causes Remedies<br />
Leakage between valve and<br />
actuator<br />
•Packing Leak<br />
•First, cycle the valve several<br />
times. This should adjust the<br />
packing. If this fails, clean packing<br />
bore and replace packing.<br />
Bottom trunnion leaks •Packing or gasket leak •Replace bottom shaft packing,<br />
o-ring or gasket.<br />
Valve leaks when closed<br />
•Disc not fully closed or past fully<br />
closed<br />
•Adjust actuator closed position<br />
stop.<br />
•Disc edge wear or damage<br />
•Rubber seat wear or damage<br />
•Clean and/or repair disc edge.<br />
•Adjust or replace valve seat*<br />
Chainwheel jams •Poorly fitting chain •Replace with correct chain.<br />
Valve hard to operate<br />
•Foreign material in valve<br />
•Remove obstructions<br />
Automatic valve does not actuate<br />
•Corroded actuator parts<br />
•Loose actuator<br />
•No power source<br />
•Improper Signal<br />
•Burned out or impaired<br />
component<br />
•Clean and grease actuator<br />
•Apply Loctite or Omnifit locking<br />
compound and tighten bolts.<br />
•Check incoming power source<br />
and replace fuses or reset<br />
pressure.<br />
•Check actuating signal sequence.<br />
•Check and repair or replace<br />
solenoids, motors and relay<br />
devices.<br />
* Seat replacement should not be performed by untrained/unqualified personnel. In the event that seat<br />
replacement is needed, please contact Henry Pratt Field Service.<br />
24TRIGD Revision Date: 7/13/10<br />
11
Triton XR-70,Triton XL & Groundhog®<br />
<strong>Butterfly</strong> <strong>Valves</strong> (24” & Larger)<br />
HOW TO CONTACT PRATT<br />
HOW TO ORDER PARTS:<br />
To order parts, contact our Parts Department:<br />
Write: -<br />
Henry Pratt Company<br />
401 South Highland Avenue<br />
Aurora, IL 60506-5563<br />
Attn: Parts Manager<br />
Call - (630) 844-4144<br />
Fax - (630) 844-4191<br />
Please include valve serial number and description of part requested.<br />
HOW TO OBTAIN SERVICE:<br />
To obtain further information or secure field service, contact our Field Service Department:<br />
Write: -<br />
Henry Pratt Company<br />
401 South Highland Avenue<br />
Aurora, IL 60506-5563<br />
Attn: Field Service Manager<br />
Call - (630) 844-4163<br />
Fax - (630) 844-4160<br />
Please include the following with your inquiry for service:<br />
Henry Pratt Order Number:<br />
Henry Pratt Item Number:<br />
Valve Serial Number:<br />
Type of Service Requested<br />
24TRIGD Revision Date: 7/13/10<br />
<strong>12</strong>
Triton XR-70,Triton XL & Groundhog®<br />
<strong>Butterfly</strong> <strong>Valves</strong> (24” & Larger)<br />
24” Triton Series Valve<br />
Cross Section and Parts List<br />
24TRIGD Revision Date: 7/13/10<br />
13
Triton XR-70,Triton XL & Groundhog®<br />
<strong>Butterfly</strong> <strong>Valves</strong> (24” & Larger)<br />
30” & Larger Triton Series Valve<br />
Cross Section and Parts List<br />
24TRIGD Revision Date: 7/13/10<br />
14
24”-48” HP250II<br />
<strong>Butterfly</strong> Valve<br />
Operation and<br />
Maintenance Manual<br />
Job Name: ____________________________<br />
Contractor: ___________________________<br />
Date: ________________________________<br />
Document #: 2448HP250OOOM Revision Date: 1/10/11
24”-48” HP250II <strong>Butterfly</strong> Valve<br />
SAFETY MESSAGES<br />
All safety messages in the instructions are flagged with an exclamation symbol and the word “Warning”.<br />
These messages indicate procedures that must be followed exactly to avoid equipment damage, physical<br />
injury, or death. Safety labels on the product indicate hazards that can cause equipment damage, physical<br />
injury, or death.<br />
Personnel involved in the installation or maintenance of valves should be constantly alert to potential<br />
emission of pipeline material and take appropriate safety precautions. Always wear suitable protection when<br />
dealing with hazardous pipeline materials.<br />
PARTS<br />
WARNING<br />
Order parts from your local Henry Pratt sales representative or directly from Henry Pratt Company. When<br />
ordering parts, please include the serial number located on the valve tag.<br />
WARRANTY ISSUE<br />
Seller warrants that, at its option, it will repair, replace, or refund the unit purchase price of any products<br />
which are non-conforming due to Seller’s material or workmanship during the warranty period. The warranty<br />
period shall be twelve (<strong>12</strong>) months for parts and eighteen (18) months for all other goods after date of<br />
shipment. This shall be Buyer’s sole remedy. In order to maintain this product warranty, Buyer must give<br />
written notice to Seller’s Field Service Supervisor prior to any work being performed.<br />
IN CONSIDERATION OF THE FOREGOING, SELLER EXCLUDES ALL OTHER EXPRESS OR IMPLIED<br />
WARRANTIES, INCLUDING BUT NOT LIMITED TO MERCHANTABILITY AND FITNESS FOR A<br />
PARTICULAR PURPOSE.<br />
Seller does not warrant water operated metallic cylinders against damage caused by corrosion, electrolysis<br />
or mineral deposits. In no event shall warranty include valve removal or reinstallation.<br />
WARNING<br />
Read all applicable directions and instructions prior to any maintenance, troubleshooting or<br />
installation<br />
Document #: 2448HP250IIOM Revision Date: 1/10/11<br />
2
24”-48” HP250II <strong>Butterfly</strong> Valve<br />
Table of Contents<br />
FUNCTIONAL DESCRIPTION 4<br />
INSTALLATION 5<br />
OPERATION 8<br />
MAINTENANCE 10<br />
TROUBLESHOOTING 11<br />
CONTACTING PRATT <strong>12</strong><br />
PRODUCT DRAWINGS 13<br />
Document #: 2448HP250IIOM Revision Date: 1/10/11<br />
3
24”-48” HP250II <strong>Butterfly</strong> Valve<br />
Functional Description<br />
Round butterfly valve discs rotate 1/4 turns to provide tight shutoff in air or water pipelines. The valves can be<br />
used to regulate flow rate by positioning the disc between 15 and 90 degrees open.<br />
Manually Operated Valve<br />
Manually operated butterfly valves are powered with gear actuators, which convert multiple handwheel,<br />
chainwheel or nut input turns into 1/4 turn valve operation. The travel of the valve disc is limited by physical<br />
stops in the actuator housing.<br />
WARNING<br />
Forcing the handwheel, chainwheel or nut against the stops will not provide tighter shutoff of the valve<br />
and may damage the actuator. Only actuator adjustments will affect valve shutoff.<br />
Motor Operated Valve<br />
Motor operated butterfly valves are powered with gear actuators, which convert multiple motor input turns<br />
into 1/4 turn valve operation. The travel of the valve disc is limited by limit switches in the motor housing and<br />
physical stops in the actuator housing. Valve shutoff is affected by limit switch and physical stop settings.<br />
WARNING<br />
Improperly set limit switches and/or physical stops may damage the motor and/or actuator.<br />
Cylinder Operate Valve<br />
Hydraulically operated butterfly valves are powered with a gear box and double acting cylinder. The linear<br />
stroke of the cylinder is converted to 1/4 turn operation by the gear box. Auxiliary controls are provided to direct<br />
hydraulic power to the cylinder and to control the operating speed of the cylinder.<br />
Document #: 2448HP250IIOM Revision Date: 1/10/11<br />
4
24”-48” HP250II <strong>Butterfly</strong> Valve<br />
INSTALLATION<br />
GENERAL<br />
<strong>Valves</strong> are a significant component of any piping system. Failure due to faulty installation, improper operation<br />
or maintenance in such systems could result in damage, down time and costly repairs. In buried underground<br />
installations, problems or malfunctions can result in extensive, costly unearthing operations to correct the<br />
problem. Many problems with valves can be traced to improper installation, operation, or maintenance<br />
procedures.<br />
UNLOADING<br />
Inspect valves on receipt for damage in shipment and conformance with quantity and description in the<br />
shipping notice and order. Carefully unload all valves to the ground without dropping using fork trucks or slings<br />
under skids. Do not lift valves with slings or chain around operating shaft, actuator, or through waterway.<br />
Instead, lift valves with eye bolts or rods through flange holes.<br />
STORAGE<br />
Whenever practical, store valves indoors. If not, protect valves and actuators from weather and accumulation<br />
of water, dirt, rocks and debris. When valves fitted with power actuators and controls are stored, energize<br />
electric actuator or otherwise protect electrical control equipment to prevent corrosion of electrical contacts due<br />
to condensation resulting from temperature variation. Do not expose rubber seats to sunlight or ozone for any<br />
extended period. <strong>Valves</strong> should be stored with the valve disc or closure member slightly open.<br />
INSPECTION PRIOR TO INSTALLATION<br />
Make sure flange faces and joint sealing surfaces, body seats and disc seats are clean. Check bolting<br />
attaching actuator to valve for loosening in transit and handling. If loose, tighten firmly. Open and close valve<br />
to make sure it operates properly and that stops or limit switches are correctly set so that the valve seats fully.<br />
Check that valve rotation direction is correct and close valve before installing.<br />
INSTALLATION<br />
The following items must be performed during installation to ensure proper function.<br />
• Carefully place valves into position avoiding contact or impact with other equipment, vault walls or trench<br />
walls.<br />
Document #: 2448HP250IIOM Revision Date: 1/10/11<br />
5
24”-48” HP250II <strong>Butterfly</strong> Valve<br />
• <strong>Valves</strong> are to be installed in accordance with the General Arrangement Drawings furnished for the order.<br />
• Foreign material in a valve can damage the rubber seat when valves are operated. Be sure valve interiors<br />
and adjacent piping are clear of foreign material prior to mating valve to pipe joint.<br />
• Prepare pipe ends and install valves in accordance with the pipe manufacturer’s instructions for the joint<br />
used. Do not deflect pipe/valve joint. Do not use valve and jack to pull pipe into alignment.<br />
• In plant piping, install so as to minimize bending of valve connection with pipe loading.<br />
• Make sure valve disc, when opened, will not contact pipe port. This is especially necessary on pipe with linings.<br />
Check manufacturer for minimum pipe I.D. required for clearance.<br />
WARNING<br />
It is recommended that valves be installed into piping system in accordance with AWWA M-11 in order<br />
to prevent any undue piping stress, deflection or bending that may affect the performance of the valve.<br />
WARNING<br />
Valve disc without actuator may open or close at any time and cause injury to persons or damage to<br />
valve and other property. The shaft/disc clamping device when furnished is intended for temporary use<br />
during shipping, handling and valve installation only. Do not subject valve to flow conditions before<br />
actuator is mounted and tested for performance and clamping device is removed.<br />
Buried valves installed with valve boxes must be so installed that the valve box does not transmit shock or<br />
stress to the valve actuator as a result of shifting soil or traffic load.<br />
When valves are installed in vaults, the vault design must provide space for purposes of repair. The valve<br />
operating nut should be accessible from the top opening of the vault with a tee wrench.<br />
Document #: 2448HP250IIOM Revision Date: 1/10/11<br />
6
24”-48” HP250II <strong>Butterfly</strong> Valve<br />
TESTING<br />
When rubber seated valves are used to isolate sections of line for test, it is important to realize that these<br />
valves are designed or factory adjusted to hold rated pressure only. Test pressure may cause leakage past the<br />
rubber seat or damage to the valve.<br />
In order to prevent time lost in searching for leaks, it is recommended that excavations for buried valves not be<br />
back-filled until after hydrostatic pressure tests have been made.<br />
Seat leakage can occur due to foreign material in the line. If this occurs, open valve 5 – 10 degrees to get high<br />
velocity flushing action. Close and repeat several times to clear seats for tight shutoff.<br />
Seat leakage can occur due to rotational shift in position of the disc with relation to the body seat. Readjust<br />
closing stop in accordance with manufacturer’s instructions.<br />
RECORDS<br />
Upon completion of installation, valve location, size, make, type, date of installation, number of turns to open,<br />
direction of opening and any other information deemed pertinent should be entered on the owner’s permanent<br />
records.<br />
Document #: 2448HP250IIOM Revision Date: 1/10/11<br />
7
24”-48” HP250II <strong>Butterfly</strong> Valve<br />
OPERATION<br />
Do not permit use and operation of any valve at pressure above the rated pressure of the valve.<br />
Do not exceed 300 ft-lb input torque on actuators with wrench nuts, 200 lb. rim pull input torque for handwheels<br />
or chainwheels. If portable auxiliary actuators are used, size the actuator or use a torque limiting device to<br />
prevent application of torque exceeding 300 ft-lbs. If an oversize actuator with no means of limiting torque<br />
is used, stop the actuator before valve is fully opened or closed against stops and complete the operation<br />
manually. Be sure to check actuator directional switch against direction indicated on wrench nut, handwheel or<br />
records before applying opening and closing torque.<br />
If a valve is stuck in some intermediate position between open and closed, check first for jamming in the<br />
actuator. If nothing is found, the interference is inside the valve. In this case, do not attempt to force the disc<br />
open or closed since excessive torque in this position can severely damage internal parts. Contact the Pratt<br />
Service Department.<br />
MANUAL ACTUATOR FUNCTION AND USE:<br />
The manually operated butterfly valves are operated by rotating the handwheel, chainwheel, or nut. The<br />
actuator is equipped with gearing to convert the many turns into 1/4 turn operation. Inside actuator stops that<br />
limit the travel of the valve are pre-set at the factory. Forcing the handwheel, chainwheel, or nut will not cause<br />
the valve to shut off any tighter and may cause damage to the gearing.<br />
CYLINDER ACTUATOR FUNCTION AND USE:<br />
The cylinder operated butterfly valves are operated automatically by directing hydraulic pressure to either side<br />
of the power cylinder. Solenoid valves are used to direct the fluid to the cylinder ports based on electrical<br />
power signals. In cylinder actuators, the travel stops are in the cylinder so that full hydraulic pressure can be<br />
held on the cylinder at either end of travel.<br />
MOTOR ACTUATOR FUNCTION AND USE:<br />
The motor actuator is designed to open and close the valve through its one quarter turn of rotation. It contains<br />
gearing so that hundreds of turns of the motor or handwheel will slowly move the valve from open to close<br />
position or vice versa. Electrical controls are included in the motor actuator for local electrical control.<br />
The output motion of the actuator is limited to about 100 degrees of output rotation by mechanical stops in<br />
the gearing. These are factory set and should not need adjustment. The actual positioning of the valve disc<br />
will be done by limit switches in the motor actuator. The switches are also set at the factory but adjustment<br />
is sometimes required if the motor unit is installed on a separate mounting base or floorstand. Detailed<br />
procedures are given in the motor manual if adjustment is needed for the mechanical stops or the limit<br />
switches. The wiring and power requirements are given on wiring diagrams included in this instruction manual.<br />
Document #: 2448HP250IIOM Revision Date: 1/10/11<br />
8
24”-48” HP250II <strong>Butterfly</strong> Valve<br />
WARNING<br />
Fluids exposed to freezing temperatures may cause valve to fail resulting in injury to persons or damage<br />
to valves and other property. Do not use in applications that are exposed to freezing temperatures<br />
unless sufficient flow is maintained through the valve to prevent freezing, or other protection is provided.<br />
WARNING<br />
IMPORTANT SAFETY NOTICE<br />
All persons who will install, operate or adjust this equipment must read the instructions and drawings<br />
carefully. Injury and property damage may occur from improper use. It is understood that this<br />
equipment will be installed by individuals with knowledge and skills in electrical equipment. The<br />
manufacturer cannot be responsible for the misuse of this information or equipment, nor can it assume<br />
any resultant liability.<br />
Document #: 2448HP250IIOM Revision Date: 1/10/11<br />
9
24”-48” HP250II <strong>Butterfly</strong> Valve<br />
MAINTENANCE<br />
Maintenance of valves by owner is generally limited to actuators and shaft seals. In some instances, valve design<br />
permits field adjustment seats when leakage occurs. Unless the owner has skilled personnel and proper<br />
equipment, any major rework will require removal of the valve from the line. Depending on condition, valve may<br />
require return to the manufacturer.<br />
ANNUAL MAINTENANCE<br />
1.<br />
Cycle valve to verify operation and no interference in line.<br />
2. Close valve and check for leakage. If leakage is detected, check actuator stops to verify that disc is<br />
fully closed. If leakage persists, remove valve to inspect seat. Contact Pratt’s Field Service Deparment<br />
for information regarding adjustment or replacement of seat.<br />
3.<br />
4.<br />
Check flange connections for leakage. Tighten bolts accordingly.<br />
Check top trunnion area for shaft leakage. If leakage is detected, replace valve packing.<br />
5. If Access to the line is possible, then removal of scale that may interfere with disc travel is suggested.<br />
The seat should be inspected for wear and the taper pin nuts should be tight.<br />
NOTE: LUBRICATION IS NOT REQUIRED.<br />
WARNING<br />
Removal of actuator from valve shaft will cause disc to rotate, striking persons or objects in the disc<br />
path, causing injury to persons and damage to valve. Block or lock disc before removing actuator.<br />
Typical maintenance would be shaft packing replacement and actuator adjustment. Seal leakage, broken parts<br />
and difficult operation should be discussed with Pratt’s Service Department before valve repairs are attempted.<br />
Pratt Service Engineers are available to perform or supervise valve repairs in the field.<br />
Stop line flow and isolate from line pressure prior to performing any corrective maintenance.<br />
After completing repair, cycle valve through one complete operating cycle and after line pressure has been<br />
restored, inspect for leakage.<br />
Document #: 2448HP250IIOM Revision Date: 1/10/11<br />
10
24”-48” HP250II <strong>Butterfly</strong> Valve<br />
TROUBLESHOOTING GUIDE<br />
Problem Causes Remedies<br />
Leakage between valve and<br />
actuator<br />
•Packing Leak<br />
•First, cycle the valve several<br />
times. This should adjust the<br />
packing. If this fails, clean packing<br />
bore and replace packing.<br />
Bottom trunnion leaks •Packing or gasket leak •Replace bottom shaft packing,<br />
o-ring or gasket.<br />
Valve leaks when closed<br />
•Disc not fully closed or past fully<br />
closed<br />
•Adjust actuator closed position<br />
stop.<br />
•Disc edge wear or damage<br />
•Rubber seat wear or damage<br />
•Clean and/or repair disc edge.<br />
•Adjust or replace valve seat*<br />
Chainwheel jams •Poorly fitting chain •Replace with correct chain.<br />
Valve hard to operate<br />
•Foreign material in valve<br />
•Remove obstructions<br />
Automatic valve does not actuate<br />
•Corroded actuator parts<br />
•Loose actuator<br />
•No power source<br />
•Improper Signal<br />
•Burned out or impaired<br />
component<br />
•Clean and grease actuator<br />
•Apply Loctite or Omnifit locking<br />
compound and tighten bolts.<br />
•Check incoming power source<br />
and replace fuses or reset<br />
pressure.<br />
•Check actuating signal sequence.<br />
•Check and repair or replace<br />
solenoids, motors and relay<br />
devices.<br />
* Seat replacement should not be performed by untrained/unqualified personnel. In the event that seat<br />
replacement is needed, please contact Henry Pratt Field Service.<br />
Document #: 2448HP250IIOM Revision Date: 1/10/11<br />
11
24”-48” HP250II <strong>Butterfly</strong> Valve<br />
HOW TO CONTACT PRATT<br />
HOW TO ORDER PARTS:<br />
To order parts, contact our Parts Department:<br />
Write: -<br />
Henry Pratt Company<br />
401 South Highland Avenue<br />
Aurora, IL 60506-5563<br />
Attn: Parts Manager<br />
Call - (630) 844-4000<br />
Fax - (630) 844-4191<br />
Please include valve serial number and description of part requested.<br />
HOW TO OBTAIN SERVICE:<br />
To obtain further information or secure field service, contact our Field Service Department:<br />
Write: -<br />
Henry Pratt Company<br />
401 South Highland Avenue<br />
Aurora, IL 60506-5563<br />
Attn: Field Service Manager<br />
Call - (630) 844-4163<br />
Fax - (630) 844-4160<br />
Please include the following with your inquiry for service:<br />
Henry Pratt Order Number:<br />
Henry Pratt Item Number:<br />
Valve Serial Number:<br />
Type of Service Requested<br />
Document #: 2448HP250IIOM Revision Date: 1/10/11<br />
<strong>12</strong>
24”-48” HP250II <strong>Butterfly</strong> Valve<br />
Cross Section and Parts List<br />
Document #: 2448HP250IIOM Revision Date: 1/10/11<br />
13
HP350 <strong>Butterfly</strong> Valve<br />
6”-24” (MJ x MJ)<br />
6”-48” (FLG x FLG)<br />
Operation and<br />
Maintenance Manual<br />
Job Name: ____________________________<br />
Contractor: ___________________________<br />
Date: ________________________________<br />
Document #: HP350OM Revision Date: 1/10/11
HP350 <strong>Butterfly</strong> Valve<br />
SAFETY MESSAGES<br />
All safety messages in the instructions are flagged with an exclamation symbol and the word “Warning”.<br />
These messages indicate procedures that must be followed exactly to avoid equipment damage, physical<br />
injury, or death. Safety labels on the product indicate hazards that can cause equipment damage, physical<br />
injury, or death.<br />
Personnel involved in the installation or maintenance of valves should be constantly alert to potential<br />
emission of pipeline material and take appropriate safety precautions. Always wear suitable protection when<br />
dealing with hazardous pipeline materials.<br />
PARTS<br />
WARNING<br />
Order parts from your local Henry Pratt sales representative or directly from Henry Pratt Company. When<br />
ordering parts, please include the serial number located on the valve tag.<br />
WARRANTY ISSUE<br />
Seller warrants that, at its option, it will repair, replace, or refund the unit purchase price of any products<br />
which are non-conforming due to Seller’s material or workmanship during the warranty period. The warranty<br />
period shall be twelve (<strong>12</strong>) months for parts and eighteen (18) months for all other goods after date of<br />
shipment. This shall be Buyer’s sole remedy. In order to maintain this product warranty, Buyer must give<br />
written notice to Seller’s Field Service Supervisor prior to any work being performed.<br />
IN CONSIDERATION OF THE FOREGOING, SELLER EXCLUDES ALL OTHER EXPRESS OR IMPLIED<br />
WARRANTIES, INCLUDING BUT NOT LIMITED TO MERCHANTABILITY AND FITNESS FOR A<br />
PARTICULAR PURPOSE.<br />
Seller does not warrant water operated metallic cylinders against damage caused by corrosion, electrolysis<br />
or mineral deposits. In no event shall warranty include valve removal or reinstallation.<br />
WARNING<br />
Read all applicable directions and instructions prior to any maintenance, troubleshooting or<br />
installation<br />
Document #: HP350OM Revision Date: 1/10/11<br />
2
HP350 <strong>Butterfly</strong> Valve<br />
Table of Contents<br />
FUNCTIONAL DESCRIPTION 4<br />
INSTALLATION 5<br />
OPERATION 8<br />
MAINTENANCE 10<br />
TROUBLESHOOTING 11<br />
CONTACTING PRATT <strong>12</strong><br />
PRODUCT DRAWINGS 13<br />
Document #: HP350OM Revision Date: 1/10/11<br />
3
HP350 <strong>Butterfly</strong> Valve<br />
Functional Description<br />
Round butterfly valve discs rotate 1/4 turns to provide tight shutoff in air or water pipelines. The valves can be<br />
used to regulate flow rate by positioning the disc between 15 and 90 degrees open.<br />
Manually Operated Valve<br />
Manually operated butterfly valves are powered with gear actuators, which convert multiple handwheel,<br />
chainwheel or nut input turns into 1/4 turn valve operation. The travel of the valve disc is limited by physical<br />
stops in the actuator housing.<br />
WARNING<br />
Forcing the handwheel, chainwheel or nut against the stops will not provide tighter shutoff of the valve<br />
and may damage the actuator. Only actuator adjustments will affect valve shutoff.<br />
Motor Operated Valve<br />
Motor operated butterfly valves are powered with gear actuators, which convert multiple motor input turns<br />
into 1/4 turn valve operation. The travel of the valve disc is limited by limit switches in the motor housing and<br />
physical stops in the actuator housing. Valve shutoff is affected by limit switch and physical stop settings.<br />
WARNING<br />
Improperly set limit switches and/or physical stops may damage the motor and/or actuator.<br />
Cylinder Operate Valve<br />
Hydraulically operated butterfly valves are powered with a gear box and double acting cylinder. The linear<br />
stroke of the cylinder is converted to 1/4 turn operation by the gear box. Auxiliary controls are provided to direct<br />
hydraulic power to the cylinder and to control the operating speed of the cylinder.<br />
Document #: HP350OM Revision Date: 1/10/11<br />
4
HP350 <strong>Butterfly</strong> Valve<br />
INSTALLATION<br />
GENERAL<br />
<strong>Valves</strong> are a significant component of any piping system. Failure due to faulty installation, improper operation<br />
or maintenance in such systems could result in damage, down time and costly repairs. In buried underground<br />
installations, problems or malfunctions can result in extensive, costly unearthing operations to correct the<br />
problem. Many problems with valves can be traced to improper installation, operation, or maintenance<br />
procedures.<br />
UNLOADING<br />
Inspect valves on receipt for damage in shipment and conformance with quantity and description in the<br />
shipping notice and order. Carefully unload all valves to the ground without dropping using fork trucks or slings<br />
under skids. Do not lift valves with slings or chain around operating shaft, actuator, or through waterway.<br />
Instead, lift valves with eye bolts or rods through flange holes.<br />
STORAGE<br />
Whenever practical, store valves indoors. If not, protect valves and actuators from weather and accumulation<br />
of water, dirt, rocks and debris. When valves fitted with power actuators and controls are stored, energize<br />
electric actuator or otherwise protect electrical control equipment to prevent corrosion of electrical contacts due<br />
to condensation resulting from temperature variation. Do not expose rubber seats to sunlight or ozone for any<br />
extended period. <strong>Valves</strong> should be stored with the valve disc or closure member slightly open.<br />
INSPECTION PRIOR TO INSTALLATION<br />
Make sure flange faces and joint sealing surfaces, body seats and disc seats are clean. Check bolting<br />
attaching actuator to valve for loosening in transit and handling. If loose, tighten firmly. Open and close valve<br />
to make sure it operates properly and that stops or limit switches are correctly set so that the valve seats fully.<br />
Check that valve rotation direction is correct and close valve before installing.<br />
INSTALLATION<br />
The following items must be performed during installation to ensure proper function.<br />
• Carefully place valves into position avoiding contact or impact with other equipment, vault walls or trench<br />
walls.<br />
Document #: HP350OM Revision Date: 1/10/11<br />
5
HP350 <strong>Butterfly</strong> Valve<br />
• <strong>Valves</strong> are to be installed in accordance with the General Arrangement Drawings furnished for the order.<br />
• Foreign material in a valve can damage the rubber seat when valves are operated. Be sure valve interiors<br />
and adjacent piping are clear of foreign material prior to mating valve to pipe joint.<br />
• Prepare pipe ends and install valves in accordance with the pipe manufacturer’s instructions for the joint<br />
used. Do not deflect pipe/valve joint. Do not use valve and jack to pull pipe into alignment.<br />
• In plant piping, install so as to minimize bending of valve connection with pipe loading.<br />
• Make sure valve disc, when opened, will not contact pipe port. This is especially necessary on pipe with linings.<br />
Check manufacturer for minimum pipe I.D. required for clearance.<br />
WARNING<br />
It is recommended that valves be installed into piping system in accordance with AWWA M-11 in order<br />
to prevent any undue piping stress, deflection or bending that may affect the performance of the valve.<br />
WARNING<br />
Valve disc without actuator may open or close at any time and cause injury to persons or damage to<br />
valve and other property. The shaft/disc clamping device when furnished is intended for temporary use<br />
during shipping, handling and valve installation only. Do not subject valve to flow conditions before<br />
actuator is mounted and tested for performance and clamping device is removed.<br />
Buried valves installed with valve boxes must be so installed that the valve box does not transmit shock or<br />
stress to the valve actuator as a result of shifting soil or traffic load.<br />
When valves are installed in vaults, the vault design must provide space for purposes of repair. The valve<br />
operating nut should be accessible from the top opening of the vault with a tee wrench.<br />
Document #: HP350OM Revision Date: 1/10/11<br />
6
HP350 <strong>Butterfly</strong> Valve<br />
TESTING<br />
When rubber seated valves are used to isolate sections of line for test, it is important to realize that these<br />
valves are designed or factory adjusted to hold rated pressure only. Test pressure may cause leakage past the<br />
rubber seat or damage to the valve.<br />
In order to prevent time lost in searching for leaks, it is recommended that excavations for buried valves not be<br />
back-filled until after hydrostatic pressure tests have been made.<br />
Seat leakage can occur due to foreign material in the line. If this occurs, open valve 5 – 10 degrees to get high<br />
velocity flushing action. Close and repeat several times to clear seats for tight shutoff.<br />
Seat leakage can occur due to rotational shift in position of the disc with relation to the body seat. Readjust<br />
closing stop in accordance with manufacturer’s instructions.<br />
RECORDS<br />
Upon completion of installation, valve location, size, make, type, date of installation, number of turns to open,<br />
direction of opening and any other information deemed pertinent should be entered on the owner’s permanent<br />
records.<br />
Document #: HP350OM Revision Date: 1/10/11<br />
7
HP350 <strong>Butterfly</strong> Valve<br />
OPERATION<br />
Do not permit use and operation of any valve at pressure above the rated pressure of the valve.<br />
Do not exceed 300 ft-lb input torque on actuators with wrench nuts, 200 lb. rim pull input torque for handwheels<br />
or chainwheels. If portable auxiliary actuators are used, size the actuator or use a torque limiting device to<br />
prevent application of torque exceeding 300 ft-lbs. If an oversize actuator with no means of limiting torque<br />
is used, stop the actuator before valve is fully opened or closed against stops and complete the operation<br />
manually. Be sure to check actuator directional switch against direction indicated on wrench nut, handwheel or<br />
records before applying opening and closing torque.<br />
If a valve is stuck in some intermediate position between open and closed, check first for jamming in the<br />
actuator. If nothing is found, the interference is inside the valve. In this case, do not attempt to force the disc<br />
open or closed since excessive torque in this position can severely damage internal parts. Contact the Pratt<br />
Service Department.<br />
MANUAL ACTUATOR FUNCTION AND USE:<br />
The manually operated butterfly valves are operated by rotating the handwheel, chainwheel, or nut. The<br />
actuator is equipped with gearing to convert the many turns into 1/4 turn operation. Inside actuator stops that<br />
limit the travel of the valve are pre-set at the factory. Forcing the handwheel, chainwheel, or nut will not cause<br />
the valve to shut off any tighter and may cause damage to the gearing.<br />
CYLINDER ACTUATOR FUNCTION AND USE:<br />
The cylinder operated butterfly valves are operated automatically by directing hydraulic pressure to either side<br />
of the power cylinder. Solenoid valves are used to direct the fluid to the cylinder ports based on electrical<br />
power signals. In cylinder actuators, the travel stops are in the cylinder so that full hydraulic pressure can be<br />
held on the cylinder at either end of travel.<br />
MOTOR ACTUATOR FUNCTION AND USE:<br />
The motor actuator is designed to open and close the valve through its one quarter turn of rotation. It contains<br />
gearing so that hundreds of turns of the motor or handwheel will slowly move the valve from open to close<br />
position or vice versa. Electrical controls are included in the motor actuator for local electrical control.<br />
The output motion of the actuator is limited to about 100 degrees of output rotation by mechanical stops in<br />
the gearing. These are factory set and should not need adjustment. The actual positioning of the valve disc<br />
will be done by limit switches in the motor actuator. The switches are also set at the factory but adjustment<br />
is sometimes required if the motor unit is installed on a separate mounting base or floorstand. Detailed<br />
procedures are given in the motor manual if adjustment is needed for the mechanical stops or the limit<br />
switches. The wiring and power requirements are given on wiring diagrams included in this instruction manual.<br />
Document #: HP350OM Revision Date: 1/10/11<br />
8
HP350 <strong>Butterfly</strong> Valve<br />
WARNING<br />
Fluids exposed to freezing temperatures may cause valve to fail resulting in injury to persons or damage<br />
to valves and other property. Do not use in applications that are exposed to freezing temperatures<br />
unless sufficient flow is maintained through the valve to prevent freezing, or other protection is provided.<br />
WARNING<br />
IMPORTANT SAFETY NOTICE<br />
All persons who will install, operate or adjust this equipment must read the instructions and drawings<br />
carefully. Injury and property damage may occur from improper use. It is understood that this<br />
equipment will be installed by individuals with knowledge and skills in electrical equipment. The<br />
manufacturer cannot be responsible for the misuse of this information or equipment, nor can it assume<br />
any resultant liability.<br />
Document #: HP350OM Revision Date: 1/10/11<br />
9
HP350 <strong>Butterfly</strong> Valve<br />
MAINTENANCE<br />
Maintenance of valves by owner is generally limited to actuators and shaft seals. In some instances, valve design<br />
permits field adjustment seats when leakage occurs. Unless the owner has skilled personnel and proper<br />
equipment, any major rework will require removal of the valve from the line. Depending on condition, valve may<br />
require return to the manufacturer.<br />
ANNUAL MAINTENANCE<br />
1.<br />
Cycle valve to verify operation and no interference in line.<br />
2. Close valve and check for leakage. If leakage is detected, check actuator stops to verify that disc is<br />
fully closed. If leakage persists, remove valve to inspect seat. Contact Pratt’s Field Service Deparment<br />
for information regarding adjustment or replacement of seat.<br />
3.<br />
4.<br />
Check flange connections for leakage. Tighten bolts accordingly.<br />
Check top trunnion area for shaft leakage. If leakage is detected, replace valve packing.<br />
5. If Access to the line is possible, then removal of scale that may interfere with disc travel is suggested.<br />
The seat should be inspected for wear and the taper pin nuts should be tight.<br />
NOTE: LUBRICATION IS NOT REQUIRED.<br />
WARNING<br />
Removal of actuator from valve shaft will cause disc to rotate, striking persons or objects in the disc<br />
path, causing injury to persons and damage to valve. Block or lock disc before removing actuator.<br />
Typical maintenance would be shaft packing replacement and actuator adjustment. Seal leakage, broken parts<br />
and difficult operation should be discussed with Pratt’s Service Department before valve repairs are attempted.<br />
Pratt Service Engineers are available to perform or supervise valve repairs in the field.<br />
Stop line flow and isolate from line pressure prior to performing any corrective maintenance.<br />
After completing repair, cycle valve through one complete operating cycle and after line pressure has been<br />
restored, inspect for leakage.<br />
Document #: HP350OM Revision Date: 1/10/11<br />
10
HP350 <strong>Butterfly</strong> Valve<br />
TROUBLESHOOTING GUIDE<br />
Problem Causes Remedies<br />
Leakage between valve and<br />
actuator<br />
•Packing Leak<br />
•First, cycle the valve several<br />
times. This should adjust the<br />
packing. If this fails, clean packing<br />
bore and replace packing.<br />
Bottom trunnion leaks •Packing or gasket leak •Replace bottom shaft packing,<br />
o-ring or gasket.<br />
Valve leaks when closed<br />
•Disc not fully closed or past fully<br />
closed<br />
•Adjust actuator closed position<br />
stop.<br />
•Disc edge wear or damage<br />
•Rubber seat wear or damage<br />
•Clean and/or repair disc edge.<br />
•Adjust or replace valve seat*<br />
Chainwheel jams •Poorly fitting chain •Replace with correct chain.<br />
Valve hard to operate<br />
•Foreign material in valve<br />
•Remove obstructions<br />
Automatic valve does not actuate<br />
•Corroded actuator parts<br />
•Loose actuator<br />
•No power source<br />
•Improper Signal<br />
•Burned out or impaired<br />
component<br />
•Clean and grease actuator<br />
•Apply Loctite or Omnifit locking<br />
compound and tighten bolts.<br />
•Check incoming power source<br />
and replace fuses or reset<br />
pressure.<br />
•Check actuating signal sequence.<br />
•Check and repair or replace<br />
solenoids, motors and relay<br />
devices.<br />
* Seat replacement should not be performed by untrained/unqualified personnel. In the event that seat<br />
replacement is needed, please contact Henry Pratt Field Service.<br />
Document #: HP350OM Revision Date: 1/10/11<br />
11
HP350 <strong>Butterfly</strong> Valve<br />
HOW TO CONTACT PRATT<br />
HOW TO ORDER PARTS:<br />
To order parts, contact our Parts Department:<br />
Write: -<br />
Henry Pratt Company<br />
401 South Highland Avenue<br />
Aurora, IL 60506-5563<br />
Attn: Parts Manager<br />
Call - (630) 844-4000<br />
Fax - (630) 844-4191<br />
Please include valve serial number and description of part requested.<br />
HOW TO OBTAIN SERVICE:<br />
To obtain further information or secure field service, contact our Field Service Department:<br />
Write: -<br />
Henry Pratt Company<br />
401 South Highland Avenue<br />
Aurora, IL 60506-5563<br />
Attn: Field Service Manager<br />
Call - (630) 844-4163<br />
Fax - (630) 844-4160<br />
Please include the following with your inquiry for service:<br />
Henry Pratt Order Number:<br />
Henry Pratt Item Number:<br />
Valve Serial Number:<br />
Type of Service Requested<br />
Document #: HP350OM Revision Date: 1/10/11<br />
<strong>12</strong>
HP350 <strong>Butterfly</strong> Valve<br />
Cross Section and Parts List<br />
Document #: HP350OM Revision Date: 1/10/11<br />
13
Henry Pratt<br />
Diviner Position<br />
Indicator<br />
Operation and<br />
Maintenance Manual<br />
Job Name: ____________________________<br />
Contractor: ___________________________<br />
Date: ________________________________<br />
Document #:DIVPOSNOM Revision Date: 2/9/11
Diviner Position Indicator<br />
SAFETY MESSAGES<br />
All safety messages in the instructions are flagged with an exclamation symbol and the word “Warning”.<br />
These messages indicate procedures that must be followed exactly to avoid equipment damage, physical<br />
injury, or death. Safety labels on the product indicate hazards that can cause equipment damage, physical<br />
injury, or death.<br />
Personnel involved in the installation or maintenance of valves should be constantly alert to<br />
potential emission of pipeline material and take appropriate safety precautions. Always wear<br />
suitable protection when dealing with hazardous pipeline materials.<br />
PARTS<br />
WARNING<br />
Order parts from your local Henry Pratt sales representative or directly from Henry Pratt Company. When<br />
ordering parts, please include the serial number located on the valve tag.<br />
WARRANTY ISSUE<br />
Seller warrants that, at its option, it will repair, replace, or refund the unit purchase price of any products<br />
which are non-conforming due to Seller’s material or workmanship during the warranty period. The warranty<br />
period shall be twelve (<strong>12</strong>) months for parts and eighteen (18) months for all other goods after date of<br />
shipment. This shall be Buyer’s sole remedy. In order to maintain this product warranty, Buyer must give<br />
written notice to Seller’s Field Service Supervisor prior to any work being performed.<br />
IN CONSIDERATION OF THE FOREGOING, SELLER EXCLUDES ALL OTHER EXPRESS OR IMPLIED<br />
WARRANTIES, INCLUDING BUT NOT LIMITED TO MERCHANTABILITY AND FITNESS FOR A<br />
PARTICULAR PURPOSE.<br />
Seller does not warrant water operated metallic cylinders against damage caused by corrosion, electrolysis<br />
or mineral deposits. In no event shall warranty include valve removal or reinstallation.<br />
WARNING<br />
Read all applicable directions and instructions prior to any maintenance, troubleshooting or<br />
installation<br />
Document #: DIVPOSNOM Revision Date: 2/9/11<br />
2
Diviner Position Indicator<br />
Table of Contents<br />
FUNCTIONAL DESCRIPTION 4<br />
INSTALLATION / OPERATION 5<br />
MAINTENANCE 7<br />
CONTACTING PRATT 8<br />
Document #: DIVPOSNOM Revision Date: 2/9/11<br />
3
Diviner Position Indicator<br />
FUNCTIONAL DESCRIPTION<br />
The Pratt Diviner is a valve position indicator used for buried valves to enable you to identify valve position,<br />
identification, and operating directions at a glance. It is installed in a standard 5-1/4” buried valve box just below<br />
the removable valve box cover. The Pratt Diviner is adjustable for use with valves requiring 1-150 or 150-<br />
250 turns. The working parts are non-metallic material, that are virtually indestructible and maintenance free in<br />
buried valve service.<br />
The Diviner position indicator is shipped for field assembly complete with cast iron adapter (1) and caps<br />
screws, guide bushing (2), position indicator (3), flexible washer (4), and a two-inch square AWWA nut (5) with<br />
set screw. The adapter fits a standard 5-1/4 inch valve box (6) or 5 inch cast iron soil pipe bell utilizing a cast<br />
cover with skirt depth of 1” or less (7). Extension stems (8) are supplied in 5-foot or 10-foot lengths (see Figure<br />
1).<br />
Figure 1 - Pratt Diviner<br />
Document #: DIVPOSNOM Revision Date: 2/9/11<br />
4
Diviner Position Indicator<br />
INSTALLATION / OPERATION<br />
The following procedure should be followed for ease of installation (See Figure 2).<br />
1.<br />
Establish desired finished elevation and adjust the existing valve box (5) to 3” below this elevation.<br />
2. Assemble extension stem by inserting extension shaft (3A) to the drive collar (3B) and securing by<br />
means of set screws (3C).<br />
3. Assemble extension stem assembly to operator by placing the drive collar (3B) over the AWWA nut on<br />
the operator, taking care that the drive collar is properly seated.<br />
4. Measure 1-3/4” up from the top of the adjusted valve box (5) and mark extension shaft (3A) at this<br />
point. Cut off excess shaft. De-burr.<br />
5. Place indicator adapter (2A) inside the valve box (5) and tighten hex head cap screws (2C) so that the<br />
adapter will not rotate in the valve box.<br />
6. Slip guide bushing (2B) over extension shaft and seat in indicator adapter (2A). A light coat of grease<br />
may be applied to the mating surfaces of these two parts.<br />
7.<br />
Adjust the Diviner indicator for the intended valve as follows:<br />
a. The transparent top cover of the Diviner must be clean and free of any oil or dirt. Clean with Methyl<br />
Alcohol only. Do not use grease solvents of any kind or the transparency may be destroyed. Allow to dry<br />
before proceeding.<br />
b. Position the base plate (the decal having the numbers from 0 to 102/255) on the Diviner face. While<br />
holding the decal at the top half, raise the bottom half and remove the paper backing and anchor decal to<br />
Diviner. Then remove the backing from the top half. Do not remove all the backing at one time or it will be<br />
difficult to position the decal properly. Remove any trapped air bubbles.<br />
c. Use the table below for Pratt valves with Pratt MDT Actuators.<br />
PRATT VALVE SIZE ACTUATOR NO. OF TURNS<br />
3 THRU <strong>12</strong> MDT-2S 32<br />
14 THRU 16 MDT-3S 30<br />
16 THRU 24 MDT-4S 40<br />
24 THRU 36 MDT-5 44<br />
36 THRU 48 MDT-5S 136<br />
42 THRU 72 MDT-6S 215<br />
d. Position the top plate (the decal with the “Diviner” logo) so that the window is lined up with the<br />
appropriate number of turns. Repeat the procedure described for the base plate.<br />
Document #: DIVPOSNOM Revision Date: 2/9/11<br />
5
Diviner Position Indicator<br />
INSTALLATION / OPERATION (Cont.)<br />
e. If using an actuator other than an MDT, turn the nut on the actuator until the valve is fully closed.<br />
Next, open the valve and count the number of turns required to bring the valve to the full open position.<br />
Close the valve and again count the number of turns required to fully close the valve. The number of<br />
turns to close the valve should equial the number of turns to open the valve. Record the number of turns<br />
required to open and close the valve.<br />
WARNING<br />
CAUTION: Be sure the plates are properly positioned before removing the backing paper. The<br />
adhesive is strong, making it extremely difficult to reposition after once being glued down.<br />
8. Determine whether the valve is in the open or closed position and set the position indicator (Diviner) (1)<br />
accordingly.<br />
9. Slip position indicator over the extension shaft and lower into correct position in the indicator taking care<br />
that the flat portions of the indicator flange match up with the flat keys in the indicator adapter.<br />
10. Slip the felt washer (2F) over the end of the extension shaft and on to the indicator hub.<br />
Figure 2 - Diviner<br />
Position Indicator<br />
Document #: DIVPOSNOM Revision Date: 2/9/11<br />
6
Diviner Position Indicator<br />
INSTALLATION / OPERATION (Cont.)<br />
11. Assemble 2” square nut (2D) to extension shaft and press down firmly while tightening set screws (2E).<br />
<strong>12</strong>. Replace existing valve box cover (4).<br />
13. To disassemble reverse the above procedure.<br />
MAINTENANCE<br />
The “Diviner” position indicator is a sealed, water-tight unit and is not intended for field maintenance. No attempt<br />
should be made to disassemble. Additional decals are available if the Diviner is transferred to another<br />
valve installation.<br />
Document #: DIVPOSNOM Revision Date: 2/9/11<br />
7
Diviner Position Indicator<br />
HOW TO CONTACT PRATT<br />
HOW TO ORDER PARTS:<br />
To order parts, contact our Parts Department:<br />
Write: -<br />
Henry Pratt Company<br />
401 South Highland Avenue<br />
Aurora, IL 60506-5563<br />
Attn: Parts Manager<br />
Call - (630) 844-4000<br />
Fax - (630) 844-4191<br />
Please include valve serial number and description of part requested.<br />
HOW TO OBTAIN SERVICE:<br />
To obtain further information or secure field service, contact our Field Service Department:<br />
Write: -<br />
Henry Pratt Company<br />
401 South Highland Avenue<br />
Aurora, IL 60506-5563<br />
Attn: Field Service Manager<br />
Call - (630) 844-4163<br />
Fax - (630) 844-4160<br />
Please include the following with your inquiry for service:<br />
Henry Pratt Order Number:<br />
Henry Pratt Item Number:<br />
Valve Serial Number:<br />
Type of Service Requested<br />
Document #: DIVPOSNOM Revision Date: 2/9/11<br />
8
RECOMMENDATIONS FOR EXTENDED STORAGE<br />
GEN4-0600<br />
STORAGE PROCEDURE<br />
(6 Months or Longer)<br />
Your Pratt Rubber Seated Valve has been designed to provide many years of trouble-free<br />
service. A reasonable amount of care should be exercised in storing the valve to assure<br />
trouble-free service. Following are precautions that should be followed regarding<br />
storage.<br />
Outdoor Storage:<br />
1. All exposed rubber components shall be brush coated with Chemglaze Z-307 from<br />
Lord Chemical, or with Dow Corning No. 111 Silicone Grease for potable water<br />
applications, to a thickness of 1-2 mils.<br />
2. If valves will be stored in a high humidity or corrosive environment, where bare<br />
iron or steel flanges may rust, then flanges should be coated with a rust preventive<br />
suitable for outdoor exposure such as Rust-Veto by E.F. Houghton. Clean surfaces<br />
and apply one uniform coat with a dry rag or brush.<br />
3. Valve flanges should be covered with full circle panels of ¼” exterior grade<br />
plywood or tempered hardboard. These covers shall be fastened to the valve<br />
flanges.<br />
4. Valve and operator assembly should be covered with black plastic sheeting having a<br />
minimum thickness of 4 mils.<br />
5. Electric equipment must be stored off the ground above possible water or snow<br />
level, in a position similar to the intended mounting position, and be covered with<br />
plastic sheeting having a minimum thickness of 4 mils.<br />
6. If the average mean temperatures fall below 60° F and/or the relative humidity<br />
exceeds 50%, all electrical control components and motor control compartments<br />
with internal heaters must have the heaters wired and operating. The wire entrance<br />
points must be sealed against moisture. Desiccant must be placed in those units that<br />
do not have internal heaters.<br />
7. All conduit openings shall be sealed with metal threaded pipe plugs to keep<br />
equipment free from moisture and to protect threads of conduit openings. All other<br />
openings normally sealed by the mating mounting surfaces must be covered and<br />
sealed.<br />
Indoor Storage:<br />
Indoor storage will require Steps 1, 6, and 7 listed under outdoor storage.
PAINT SYSTEM SUMMARY Page 1 of 5<br />
SYSTEM PART NO. A069636A A069636B A069636C A069636D A069636E<br />
PART NO. 2308405 2308406 2308407<br />
ALTERNATE SYSTEM NO NO NO NO NO<br />
MULTIPLE COLOR<br />
SYSTEM<br />
MANUFACTURER<br />
MANUFACTURER’S<br />
DESIGNATION<br />
NO NO NO NO NO<br />
PPG PROTECTIVE &<br />
MARINE COATINGS<br />
AMERCOAT<br />
370<br />
PPG PROTECTIVE &<br />
MARINE COATINGS<br />
AMERCOAT<br />
370<br />
PPG PROTECTIVE<br />
& MARINE<br />
COATINGS<br />
AMERCOAT<br />
370<br />
PPG PROTECTIVE<br />
& MARINE<br />
COATINGS<br />
AMERCOAT<br />
370<br />
PPG PROTECTIVE &<br />
MARINE COATINGS<br />
AMERCOAT<br />
370<br />
USE CATEGORY ALL ALL ALL ALL ALL<br />
SUBMERSIBLE 4 YES YES YES YES YES<br />
MIN. TOTAL DRY MIL<br />
THICKNESS<br />
MAXIMUM TOTAL DRY<br />
MIL THICKNESS<br />
NSF/UL<br />
RECOAT TIME<br />
NSF/UL<br />
CURING TIME<br />
SEE NOTE 1 SEE NOTE 1 SEE NOTE 1<br />
SEE NOTES<br />
1 AND 2<br />
SEE NOTE 1<br />
24 24 24 24 24<br />
1 HOUR @ 70° F 1 HOUR @ 70° F 1 HOUR @ 70° F 1 HOUR @ 70° F 1 HOUR @ 70° F<br />
7 DAYS @ 70° F 7 DAYS @ 70° F 7 DAYS @ 70° F 7 DAYS @ 70° F 7 DAYS @ 70° F<br />
SURFACE PREPARATION SSPC-SP10 SSPC-SP10 SSPC-SP10 SSPC-SP10 SSPC-SP5<br />
COLOR<br />
(IF SPECIFIED)<br />
OXIDE RED WHITE PEARL GRAY WHITE OXIDE RED<br />
CLASS I INSPECTION NO NO NO NO NO<br />
MAT’L CATEGORY PE PE PE PE PE<br />
MIN. TOTAL DRY MIL<br />
THICKNESS<br />
THEORETICAL<br />
COVERAGE<br />
SQ FT / GAL / MIL<br />
OTHER<br />
AWWA C-550<br />
NSF 61<br />
USDA<br />
NFPA CLASS 1<br />
TEMP: 200F<br />
8 8 8 8 8<br />
1011 1011 1011 1011 1011<br />
VOC 2.50-3.0 VOC 2.50-3.0<br />
LBS/GAL<br />
LBS/GAL<br />
ANSI/NSF STD 61<br />
VOS 63% +/- 3%<br />
TEMPERATURE<br />
RESIDENCE 250F<br />
DRY CONTINUOUS<br />
ANSI/NSF STD 61<br />
VOS 63% +/- 3%<br />
TEMPERATURE<br />
RESIDENCE 250F<br />
DRY CONTINUOUS<br />
VOC 2.50-3.0<br />
LBS/GAL<br />
ANSI/NSF STD 61<br />
VOS 63% +/- 3%<br />
TEMPERATURE<br />
RESIDENCE 250F<br />
DRY CONTINUOUS<br />
VOC 2.50-3.0<br />
LBS/GAL<br />
ANSI/NSF STD 61<br />
VOS 63% +/- 3%<br />
TEMPERATURE<br />
RESIDENCE 250F<br />
DRY CONTINUOUS<br />
VOC 2.50-3.0<br />
LBS/GAL<br />
ANSI/NSF STD 61<br />
VOS 63% +/- 3%<br />
TEMPERATURE<br />
RESIDENCE 250F<br />
DRY CONTINUOUS<br />
NSF – YES NSF – YES NSF – NO NSF – YES NSF - YES<br />
NOTES:<br />
1) MINIMUM THICKNESS SHALL BE PER THE SHOP ORDER JDE SCREEN AND GENERAL ARRANGEMENT DRAWING WHICH MUST<br />
INDICATE THE SAME MINIMUM NUMBER OF MILS.<br />
2) FOR MULTIPLE COLOR SYSTEMS, FIRST COLOR LISTED SHALL BE APPLIED FIRST TO A THICKNESS OF 1/2 THE TOTAL<br />
REQUIRED MIL THICKNESS, FOLLOWED BY THE SECOND COLOR MAKING UP THE SECOND 1/2 OF REQUIRED MIL<br />
THICKNESS.<br />
3) AWWA C-550 APPROVED.<br />
4) NSF-61 APPROVED VALVES ARE NOT TO BE USED SUBMERGED IN POTABLE WATER SYSTEMS.<br />
5) MAY BE THINNED WITH THINNER #65 UP TO <strong>12</strong>% BY VOLUME.<br />
UL/FM<br />
6) FOR NSF61 APPLICATIONS, ONLY 4” AND LARGE VALVES ARE ALLOWED.<br />
HENRY PRATT COMPANY<br />
PPG<br />
AMERCOAT 370<br />
(FACTORY ACCELERATED)<br />
3 4/9/08 SD SS 6<br />
2 7/1/05 SD SS 5<br />
1 10/29/03 SJR SS 4<br />
MATERIAL SPECIFICATIONS<br />
3/23/11<br />
Dry Mil<br />
Thickness to 8<br />
3/11/10<br />
Per ECO<br />
1502150<br />
Tim<br />
Fallon<br />
DRAWN SD CHKD BY SS REV DATE BY APP REV DATE BY APP<br />
SCALE DATE 4/9/08 APPROVED LAST MODIFIED<br />
RCB<br />
RCB<br />
JHW<br />
A-69636<br />
PART NO.
Page 2 of 5<br />
UL/FM<br />
HENRY PRATT COMPANY<br />
PPG<br />
AMERCOAT 370<br />
(FACTORY ACCELERATED)<br />
3 4/9/08 SD SS 6<br />
2 7/1/05 SD SS 5<br />
1 10/29/03 SJR SS 4<br />
MATERIAL SPECIFICATIONS<br />
3/23/11<br />
Dry Mil<br />
Thickness to 8<br />
3/11/10<br />
Per ECO<br />
1502150<br />
Tim<br />
Fallon<br />
DRAWN SD CHKD BY SS REV DATE BY APP REV DATE BY APP<br />
SCALE DATE 4/9/08 APPROVED LAST MODIFIED<br />
RCB<br />
RCB<br />
JHW<br />
A-69636<br />
PART NO.
Page 3 of 5<br />
UL/FM<br />
HENRY PRATT COMPANY<br />
PPG<br />
AMERCOAT 370<br />
(FACTORY ACCELERATED)<br />
3 4/9/08 SD SS 6<br />
2 7/1/05 SD SS 5<br />
1 10/29/03 SJR SS 4<br />
MATERIAL SPECIFICATIONS<br />
3/23/11<br />
Dry Mil<br />
Thickness to 8<br />
3/11/10<br />
Per ECO<br />
1502150<br />
Tim<br />
Fallon<br />
DRAWN SD CHKD BY SS REV DATE BY APP REV DATE BY APP<br />
SCALE DATE 4/9/08 APPROVED LAST MODIFIED<br />
RCB<br />
RCB<br />
JHW<br />
A-69636<br />
PART NO.
Page 4 of 5<br />
UL/FM<br />
HENRY PRATT COMPANY<br />
PPG<br />
AMERCOAT 370<br />
(FACTORY ACCELERATED)<br />
3 4/9/08 SD SS 6<br />
2 7/1/05 SD SS 5<br />
1 10/29/03 SJR SS 4<br />
MATERIAL SPECIFICATIONS<br />
3/23/11<br />
Dry Mil<br />
Thickness to 8<br />
3/11/10<br />
Per ECO<br />
1502150<br />
Tim<br />
Fallon<br />
DRAWN SD CHKD BY SS REV DATE BY APP REV DATE BY APP<br />
SCALE DATE 4/9/08 APPROVED LAST MODIFIED<br />
RCB<br />
RCB<br />
JHW<br />
A-69636<br />
PART NO.
Page 5 of 5<br />
UL/FM<br />
HENRY PRATT COMPANY<br />
PPG<br />
AMERCOAT 370<br />
(FACTORY ACCELERATED)<br />
3 4/9/08 SD SS 6<br />
2 7/1/05 SD SS 5<br />
1 10/29/03 SJR SS 4<br />
MATERIAL SPECIFICATIONS<br />
3/23/11<br />
Dry Mil<br />
Thickness to 8<br />
3/11/10<br />
Per ECO<br />
1502150<br />
Tim<br />
Fallon<br />
DRAWN SD CHKD BY SS REV DATE BY APP REV DATE BY APP<br />
SCALE DATE 4/9/08 APPROVED LAST MODIFIED<br />
RCB<br />
RCB<br />
JHW<br />
A-69636<br />
PART NO.
A Tradition of Excellence<br />
With the development of the first rubber seated<br />
butterfly valve more than 70 years ago, the Henry<br />
Pratt Company became a trusted name in the flow<br />
control industry, setting the standard for product<br />
quality and customer service. Today Pratt provides<br />
the following range of superior products to the water,<br />
wastewater and power generation industries.<br />
BUTTERFLY VALVES: from 3" to 162"<br />
RECTANGULAR VALVES: 1' x 1' to 14' x 16'<br />
BALL VALVES —<br />
RUBBER SEATED: from 4" to 60"<br />
METAL SEATED: from 6" to 48"<br />
PLUG VALVES: from 1/2" to 36", 3 ways<br />
HYDRAULIC CONTROL SYSTEMS<br />
VALVE CONTROLS<br />
ENERGY DISSIPATING VALVES<br />
AND FIXED ENERGY DISSIPATERS<br />
CONE VALVES<br />
CHECK VALVES<br />
A Commitment to Meeting<br />
The Customers’ Needs<br />
Henry Pratt valves represent a long-term commitment<br />
to both the customer and to a tradition of product<br />
excellence. This commitment is evident in the number<br />
of innovations we have brought to the industries we<br />
serve. In fact, the Henry Pratt Company was the first<br />
to introduce many of the flow control products in use<br />
today, including the first rubber seated butterfly valve,<br />
one of the first nuclear N-Stamp valves, and the<br />
bonded seat butterfly valve.<br />
Innovative Products<br />
For Unique Applications<br />
Though many of the standard valves we produce are<br />
used in water filtration and distribution applica tions,<br />
Pratt has built a reputation on the ability to develop<br />
specialized products that help customers to meet<br />
their individual operational challenges.<br />
Creative Engineering<br />
for Fluid Systems<br />
Pratt’s ability to provide practical solutions to<br />
complex issues is demonstrated by the following<br />
case histories.<br />
Earthquake Proof <strong>Valves</strong><br />
Pratt designed and manufactured hydraulically<br />
actuated valves for a water storage application so<br />
that the valves would automatically operate in the<br />
event of earthquakes. This lead to the development<br />
of a valve that will withstand forces of up to 6g’s.<br />
Custom Actuation/<br />
Isolation <strong>Valves</strong><br />
Pratt designed and manufactured valves that would<br />
isolate a working chamber in the event of a nuclear<br />
emergency during the decommissioning of armed<br />
nuclear warheads. The valves were able to close in<br />
a millisecond using specially designed Pratt electropneumatic<br />
actuators.<br />
<strong>Valves</strong> Designed for<br />
Harsh Environments<br />
Pratt designed and manufactured a 144" diameter<br />
butterfly valve for the emergency cooling system at<br />
a jet engine test facility. The valve was designed to<br />
supply water to help dissipate the tremen dous heat<br />
generated by the engines during testing.<br />
Through experience, commitment and creative engineering, Pratt is uniquely<br />
suited to provide superior products for our customers’ special needs.<br />
For more information, contact our corporate headquarters in Aurora, Illinois.
Scope of Line: VALVE ACTUATORS
MANUAL ACTUATORS<br />
<br />
<br />
<br />
<br />
<br />
<br />
<br />
<br />
<br />
<br />
<br />
<br />
Spur Gear<br />
End Cover<br />
J<br />
L<br />
<br />
<br />
<br />
<br />
<br />
<br />
<br />
<br />
<br />
<br />
<br />
<br />
<br />
<br />
<br />
<br />
<br />
<br />
<br />
<br />
<br />
<br />
PRATT<br />
Chainwheel<br />
Handwheel<br />
OPEN<br />
PRATT<br />
OPEN<br />
2" St’d.<br />
AWWA Nut<br />
W=<br />
DIA.<br />
V=<br />
DIA.<br />
N<br />
PRATT<br />
OPEN<br />
P<br />
CLOSED<br />
M<br />
S<br />
T<br />
R<br />
Q
MANUAL ACTUATORS<br />
<br />
<br />
<br />
<br />
<br />
<br />
<br />
<br />
<br />
<br />
<br />
<br />
<br />
Open 90˚<br />
80<br />
Open 90˚<br />
80<br />
DISC POSITION (in degrees)<br />
70<br />
60<br />
50<br />
40<br />
30<br />
20<br />
DISC POSITION (in degrees)<br />
70<br />
60<br />
50<br />
40<br />
30<br />
20<br />
10<br />
10<br />
Closed 0˚<br />
0% 10 20 30 40 50 60 70 80 90 100%<br />
ACTUATOR STROKE (in percent of total travel)<br />
MDT-2S<br />
Open 90˚<br />
80<br />
Closed 0˚<br />
0% 10 20 30 40 50 60 70 80 90 100%<br />
ACTUATOR STROKE (in percent of total travel)<br />
MDT-3S<br />
Open 90˚<br />
80<br />
DISC POSITION (in degrees)<br />
70<br />
60<br />
50<br />
40<br />
30<br />
20<br />
DISC POSITION (in degrees)<br />
70<br />
60<br />
50<br />
40<br />
30<br />
20<br />
10<br />
10<br />
Closed 0˚<br />
0% 10 20 30 40 50 60 70 80 90 100%<br />
ACTUATOR STROKE (in percent of total travel)<br />
MDT-4S AND MDT-5<br />
Closed 0˚<br />
0% 10 20 30 40 50 60 70 80 90 100%<br />
ACTUATOR STROKE (in percent of total travel)<br />
MDT-5S, MDT-6S<br />
<br />
<br />
<br />
<br />
<br />
<br />
<br />
<br />
<br />
<br />
<br />
<br />
<br />
<br />
<br />
<br />
<br />
<br />
<br />
K<br />
<br />
<br />
PRATT<br />
O P E N
MANUAL ACTUATORS
BURIED SERVICE ACTUATOR
FEATURES & BENEFITS<br />
OF THE TRAVELING NUT ACTUATOR<br />
<br />
<br />
<br />
<br />
<br />
<br />
<br />
<br />
<br />
<br />
<br />
<br />
<br />
<br />
<br />
<br />
<br />
<br />
<br />
<br />
<br />
<br />
OPTIONAL ACTUATOR STYLES
ACTUATOR EXTENSIONS<br />
<br />
<br />
<br />
<br />
<br />
<br />
<br />
<br />
<br />
<br />
<br />
<br />
<br />
<br />
<br />
<br />
<br />
<br />
<br />
<br />
<br />
<br />
<br />
<br />
<br />
<br />
<br />
<br />
<br />
<br />
<br />
<br />
REMOVABLE<br />
COVER<br />
3/8"<br />
<br />
<br />
OPEN<br />
<br />
<br />
FLOORSTAND<br />
<br />
<br />
MOTOR OPERATOR<br />
ON FLOORSTAND<br />
<br />
<br />
2" ST’D<br />
AWWA NUT<br />
36 1 ⁄2"<br />
1<br />
⁄2"<br />
<br />
4 1 ⁄2" DIA.<br />
36"<br />
<br />
<br />
<br />
<br />
<br />
<br />
17 7 ⁄8"<br />
UNIVERSAL<br />
JOINT<br />
14 1 ⁄2"<br />
UNIVERSAL JOINT<br />
1-1/4" SQ.<br />
SHAFT<br />
FURNISHED<br />
IN 10'-0"<br />
LENGTHS.<br />
TO BE CUT &<br />
ASSEMBLED<br />
BY CUSTOMER<br />
IN FIELD.<br />
<br />
EXTENSION<br />
<br />
BONNET<br />
1"<br />
10˚ MAX.<br />
OFFSET<br />
CLOSED<br />
<br />
<br />
TORQUE TUBE<br />
FLOORSTAND<br />
32 1 ⁄8"<br />
10˚ MAX OFFSET<br />
UNIVERSAL JOINT<br />
<br />
<br />
<br />
EXTERNAL<br />
PACKING BONNET<br />
10": VALVES TO 60"<br />
11": VALVES 66" & UP<br />
<br />
<br />
<br />
Support bracket<br />
when required<br />
2" Adjustment<br />
7"<br />
Torque tube and<br />
extensions bonnet<br />
lengths to be<br />
determined by<br />
customer<br />
1<br />
⁄2"
PRATT<br />
Henry Pratt Company<br />
TITLE: OPERATOR MOUNTING POSITION STANDARD<br />
REVISION:<br />
11<br />
DATE:<br />
8/31/11<br />
REVISED BY:<br />
Steve Smick<br />
APPROVAL:<br />
Ed Schutz<br />
EPS # 23<br />
Appendix B<br />
Page 2 of 10
AUMA Data Sheet<br />
AUMA Comm No.: A000<strong>12</strong>0170-DS002<br />
AUMA Actuators, Inc. USA<br />
www.auma-usa.com<br />
02-07-20<strong>12</strong> 13:51:22 Phone: (724) 743-2862 Fax: (724) 743-4711<br />
Customer: HENRY PRATT COMPANY AURORA Project: WARD COUNTY, ODESSA TX<br />
P.O. No: 794925 OP 1513188 HP Valve/Gate Size & Type: 30" BFV<br />
Customer Item: 5,8,10,18<br />
Part No: ZHP1513188005<br />
Qty: 9 AUMA Lines: 6, 7, 8, 9<br />
Gearbox:<br />
AUMA BEVEL GEARBOX GK14.6-2.8B<br />
IP67 (6FT FOR 30 MIN)<br />
KN CORROSION PROTECTION -STD<br />
2" NUT 30MM BORE WITHOUT HANDWHEEL<br />
AUMA STANDARD SILVER-GRAY COROTHANE<br />
VALVE MOUNTING FLANGE FA14<br />
-40F TO +175F STANDARD<br />
HOUSING MATERIAL CAST IRON-STD<br />
SA MOUNTING FLANGE FA14<br />
30MM INPUT SHAFT STAINLESS STEEL-STD<br />
B-DRIVE NUT SEPERATE<br />
Direction to close: CW<br />
Output Drive Type:<br />
MACHINED 'B' NUT - GK14.6<br />
Gearbox:<br />
AUMA WORM GEARBOX GS160.3/GZ160.3-4 - RR<br />
KN CORROSION PROTECTION -STD<br />
VALVE MOUNT FLANGE FA25-EP/- (GS160)-STD<br />
POINTER COVER IP67 STD<br />
MOUNTING FLANGE FA14 95MM GZ30-4:1<br />
HOUSING MATERIAL CAST IRON-STD<br />
WITH GZ REDUCTION GEAR STD<br />
AUMA STANDARD SILVER-GRAY COROTHANE<br />
-40F TO +175F - STANDARD<br />
WORM WHEEL DUCTILE IRON<br />
Direction to close: CW<br />
Output Drive Type:<br />
MACHINED COUPLING - GS160.3<br />
Drawings:<br />
ACTUATOR DIMENSIONAL DRAWING<br />
SD 1<strong>12</strong>799 REV-000<br />
OUTPUT DRIVE/MOUNTING FLANGE DRAWING<br />
SK 099241 REV-<strong>001</strong><br />
Operation Manuals:<br />
Worm Gearbox GS50.3 - GS250.3<br />
ba_gs3_50_250_us.pdf<br />
Bevel Gearbox GK 10.1 - 40.2<br />
ba_gk2_en.pdf<br />
Certified By: Pecora, Veronica Certified Date: 01/24/<strong>12</strong> Revision: 0
AUMA Data Sheet<br />
AUMA Comm No.: A000<strong>12</strong>0170-DS004<br />
AUMA Actuators, Inc. USA<br />
www.auma-usa.com<br />
02-07-20<strong>12</strong> 13:51:28 Phone: (724) 743-2862 Fax: (724) 743-4711<br />
Customer: HENRY PRATT COMPANY AURORA Project: WARD COUNTY, ODESSA TX<br />
P.O. No: 794925 OP 1513188 HP Valve/Gate Size & Type: 48" BFV<br />
Customer Item: 6<br />
Part No: ZHP1513188006<br />
Qty: 2 AUMA Lines: 14, 15, 16, 17<br />
Gearbox:<br />
AUMA BEVEL GEARBOX GK14.2-2.8B<br />
IP67 (6FT FOR 30 MIN)<br />
KN CORROSION PROTECTION -STD<br />
2" NUT 30MM BORE WITHOUT HANDWHEEL<br />
B-DRIVE NUT SEPERATE<br />
VALVE MOUNTING FLANGE FA14<br />
HOUSING MATERIAL CAST IRON-STD<br />
AUMA STANDARD SILVER-GRAY COROTHANE<br />
-40F TO +175F STANDARD<br />
SA MOUNTING FLANGE FA10<br />
20MM INPUT SHAFT STAINLESS STEEL-STD<br />
Direction to close: CW<br />
Output Drive Type:<br />
MACHINED 'B' NUT - GK14.2<br />
Gearbox:<br />
AUMA WORM GEARBOX GS200.3/GZ200.3-8 - RR<br />
KN CORROSION PROTECTION -STD<br />
VALVE MOUNT FLANGE FA30-EP/- (GS200)-STD<br />
-40F TO +175F - STANDARD<br />
WORM WHEEL DUCTILE IRON<br />
POINTER COVER IP67 STD<br />
HOUSING MATERIAL CAST IRON-STD<br />
AUMA STANDARD SILVER-GRAY COROTHANE<br />
WITH GZ REDUCTION GEAR STD<br />
MOUNTING FLANGE FA10 70MM GZ25-8<br />
Direction to close: CW<br />
Output Drive Type:<br />
MACHINED COUPLING - GS200.3<br />
Drawings:<br />
ACTUATOR DIMENSIONAL DRAWING<br />
SD 1<strong>12</strong>800 REV-000<br />
OUTPUT DRIVE/MOUNTING FLANGE DRAWING<br />
SK 099241 REV-<strong>001</strong><br />
Operation Manuals:<br />
Worm Gearbox GS50.3 - GS250.3<br />
ba_gs3_50_250_us.pdf<br />
Bevel Gearbox GK 10.1 - 40.2<br />
ba_gk2_en.pdf<br />
Certified By: Pecora, Veronica Certified Date: 01/24/<strong>12</strong> Revision: 0
AUMA Data Sheet<br />
AUMA Comm No.: A000<strong>12</strong>0170-DS003<br />
AUMA Actuators, Inc. USA<br />
www.auma-usa.com<br />
02-07-20<strong>12</strong> 13:51:26 Phone: (724) 743-2862 Fax: (724) 743-4711<br />
Customer: HENRY PRATT COMPANY AURORA Project: WARD COUNTY, ODESSA TX<br />
P.O. No: 794925 OP 1513188 HP Valve/Gate Size & Type: 36" BFV<br />
Customer Item: 9<br />
Part No: ZHP1513188009<br />
Qty: 1 AUMA Lines: 10, 11, <strong>12</strong>, 13<br />
Gearbox:<br />
AUMA BEVEL GEARBOX GK14.6-2.8B<br />
IP67 (6FT FOR 30 MIN)<br />
KN CORROSION PROTECTION -STD<br />
2" NUT 30MM BORE WITHOUT HANDWHEEL<br />
HOUSING MATERIAL CAST IRON-STD<br />
AUMA STANDARD SILVER-GRAY COROTHANE<br />
-40F TO +175F STANDARD<br />
SA MOUNTING FLANGE FA14<br />
30MM INPUT SHAFT STAINLESS STEEL-STD<br />
B-DRIVE NUT SEPERATE<br />
VALVE MOUNTING FLANGE FA14<br />
Direction to close: CW<br />
Output Drive Type:<br />
MACHINED 'B' NUT - GK14.6<br />
Gearbox:<br />
AUMA WORM GEARBOX GS160.3/GZ160.3-4 - RR<br />
KN CORROSION PROTECTION -STD<br />
VALVE MOUNT FLANGE FA25-EP/- (GS160)-STD<br />
-40F TO +175F - STANDARD<br />
MOUNTING FLANGE FA14 95MM GZ30-4:1<br />
HOUSING MATERIAL CAST IRON-STD<br />
WITH GZ REDUCTION GEAR STD<br />
AUMA STANDARD SILVER-GRAY COROTHANE<br />
WORM WHEEL DUCTILE IRON<br />
POINTER COVER IP67 STD<br />
Direction to close: CW<br />
Output Drive Type:<br />
MACHINED COUPLING - GS160.3<br />
Drawings:<br />
ACTUATOR DIMENSIONAL DRAWING<br />
SD 1<strong>12</strong>799 REV-000<br />
OUTPUT DRIVE/MOUNTING FLANGE DRAWING<br />
SK 099241 REV-<strong>001</strong><br />
Operation Manuals:<br />
Worm Gearbox GS50.3 - GS250.3<br />
ba_gs3_50_250_us.pdf<br />
Bevel Gearbox GK 10.1 - 40.2<br />
ba_gk2_en.pdf<br />
Certified By: Pecora, Veronica Certified Date: 01/24/<strong>12</strong> Revision: 0
GS50.3<br />
GS63.3<br />
GS80.3<br />
GS100.3<br />
GS<strong>12</strong>5.3<br />
GS160.3<br />
GS200.3<br />
GS250.3<br />
GS315<br />
GS400<br />
GS500<br />
Notes:<br />
1. All dimensions are in inches.<br />
2. Unless specified tolerance per ISO 2768-m.<br />
3. FA Flange per MSS STANDARD SP-101 unless otherwise noted.<br />
4. FA40 Thread size 1 1/2-6 not per MSS STANDARD SP-101.<br />
5. F Flange per ISO 5211.<br />
STANDARD MOUNTING FLANGE DIMENSIONS<br />
GS50.3 - GS500<br />
SK099241<br />
1
PRATT<br />
Henry Pratt Company<br />
TITLE: OPERATOR MOUNTING POSITION STANDARD<br />
REVISION:<br />
11<br />
DATE:<br />
8/31/11<br />
REVISED BY:<br />
Steve Smick<br />
APPROVAL:<br />
Ed Schutz<br />
EPS # 23<br />
Appendix B<br />
Page 4 of 10
Dimensions<br />
Valve postion indicator for worm gearboxes<br />
WSG 90.1<br />
M20x1,5<br />
M25x1,5<br />
We reserve the right to alter data according to improvements made. Previous data sheets become invalid with the issue of this data sheet.<br />
Issue 1.03<br />
Y003.285/002en
R<br />
Weggebereinheit WSG für Schneckengetriebe<br />
Valve position indicator WSG for worm gearboxes<br />
Anschlusspläne APG<br />
Terminal plans APG<br />
AP 300<br />
mit Heizung (Option) AP 301<br />
with heater (option) AP 301<br />
ZU / CLOSED Com.<br />
Endlage ZU<br />
End position CLOSED<br />
Endlage AUF<br />
End position OPEN<br />
AUF / OPEN Com.<br />
24 V DC max. 80 mA<br />
Versorgung / Supply<br />
0V<br />
Heizung<br />
Heater<br />
AUMA-Lieferumfang<br />
AUMA - supply<br />
E3<br />
E4<br />
AP 310<br />
mit Heizung (Option) AP 311<br />
with heater (option) AP 311<br />
ZU / CLOSED Com.<br />
Endlage ZU<br />
End position CLOSED<br />
Endlage AUF<br />
End position OPEN<br />
AUF / OPEN Com.<br />
24 V DC max. 80 mA<br />
Versorgung / Supply<br />
0V<br />
Heizung<br />
Heater<br />
AUMA-Lieferumfang<br />
AUMA - supply<br />
E3<br />
E4<br />
A 1 Hall-Sensoren für Endlagen Hall sensors for end positions<br />
A 2 Relais-Platine Relay board<br />
K 1 Relais Endlage ZU Relay end position CLOSED Schaltvermögen /<br />
Breaking capacity:<br />
K 2 Relais Endlage AUF Relay end position OPEN<br />
max. 250 V AC / 3 A / cos ϕ = 1<br />
min. <strong>12</strong> V / 10 mA<br />
R 1 Heizung Heater<br />
R 28 Potentiometer Potentiometer<br />
Durch die Weiterentwicklung bedingte Änderungen bleiben vorbehalten. Mit Erscheinen dieses Datenblattes verlieren frühere Ausgaben ihre Gültigkeit.<br />
We reserve the right to alter data according to improvements made. Previous data sheets become invalid with the issue of this data sheet.<br />
Ausgabe<br />
Issue 1.03<br />
Seite 1 von 2<br />
Page 1 of 2<br />
Y<strong>001</strong>.209/<strong>001</strong>/de-en
Technical data valve position indicator<br />
for gearboxes with swing angle < 180°<br />
WSG 90.1<br />
Features and functions<br />
Version<br />
Clockwise closing, counterclockwise closing<br />
Swing angle Standard: 90° adjustable within a range of ± 8 °;<br />
Set in the factory to 90°, unless ordered otherwise.<br />
Options: 34° – 50° 1) , 50° – 66°, 66° – 82°, 98° – 130°, 130° – 180°; infinitely adjustable<br />
Power supply<br />
24 V DC +/– 15 % smoothed, max. 80 mA<br />
Output signals<br />
Contactless end position switches (Hall sensors) for end positions OPEN and CLOSED<br />
Standard: 2 potential-free signal relays with one common,<br />
for signalling end position OPEN, end position CLOSED<br />
max. 250 V AC, 3 A (resistive load), min. <strong>12</strong> V, 10 mA<br />
Option: RWG with max. 250 V AC, 3 A (resistive load), min. 5 V, 10 mA<br />
Position feedback, analogue Potentiometer: Conductive layer potentiometer 5 kΩ/0,5 W/Linearity ± 0.5 %<br />
(options)<br />
Wire wound potentiometer 5 kΩ/1.5 W/Linearity ± 0.5 %<br />
Position transmitter: Electronic position transmitter RWG<br />
0/4 – 20 mA in 3- or 4-wire version<br />
4 – 20 mA in 2-wire version<br />
Technical data RWG<br />
3- or 4-wire system 2-wire system<br />
Output current I a 0 – 20 mA, 4 – 20 mA 4 – 20 mA<br />
Power<br />
U v 24 V DC 14 V DC + (I x R B ),<br />
supply<br />
max. 30 V<br />
Max.<br />
I 24 mA bei 20 mA<br />
20 mA<br />
current input Output current<br />
Max. load R B 600 Ω (Uv - 14 V)/20 mA<br />
Mechanical position indicator Standard: Continuous indication<br />
Option: Adjustable indicator disc with symbols OPEN and CLOSED<br />
Heater in switch compartment Standard: Self-regulating PTC heater, 5 – 20 W<br />
110 – 250 V DC/DC or 24 – 48 V DC/AC<br />
Electrical connection Standard: AUMA plug/socket connector with crimp type connection<br />
Threads for cable glands Standard: 1 x M 20 x 1.5, 1 x M 25 x 1.5<br />
Options: Pg-threads, NPT-threads, G-threads<br />
Terminal plan<br />
APG AP301 (basic version)<br />
Service conditions<br />
Enclosure protection according Standard: IP 68-3, dust and water tight up to max. 3 m head of water<br />
to EN 60 529 1) Options: IP 68-6, dust and water tight up to max. 6 m head of water<br />
Definition IP 68: Duration of submersion in water max. 72 hours. Up to 10<br />
operations during submersion.<br />
Corrosion protection Standard: KN Suitable for installation in industrial units, in water or power plants with<br />
a low pollutant concentration<br />
Options: KS Suitable for installation in occasionally or permanently aggressive<br />
atmosphere with a moderate pollutant concentration<br />
(e.g. in wastewater treatment plants, chemical industry)<br />
KX Suitable for installation in extremely aggressive atmosphere with high<br />
humidity and high pollutant concentration<br />
Finish coating Standard: Two-component iron-mica combination<br />
Colour Standard: grey (DB 702, similar to RAL 9007)<br />
Option: Other colours are possible on request<br />
Ambient temperature Standard: – 25 °C to + 80 °C<br />
Options: – 25 °C to + 70 °C (in combination with position transmitter RWG)<br />
Mounting to gearbox Standard: AUMA part-turn gearboxes GS/lever gearboxes GF with AUMA adapter<br />
Delivery for mounting to foreign gearbox without adapter or retrofit-kit<br />
Option: Subsequent mounting to AUMA part-turn gearboxes GS/lever gearboxes GF<br />
including AUMA retrofit-kit<br />
1) Swing angle resolution limited at potentiometer<br />
2) For version in enclosure protection IP 68, higher corrosion protection KS or KX is strongly recommended.<br />
We reserve the right to alter data according to improvements made. Previous documents become invalid with the issue of this document.<br />
Issue 1.07<br />
Page 1 of 2<br />
Y000.363/002/en
. <br />
<br />
<br />
<br />
<br />
<br />
.<br />
<br />
<br />
<br />
<br />
<br />
<br />
<br />
.
.<br />
<br />
<br />
<br />
<br />
<br />
<br />
<br />
<br />
<br />
<br />
.
.<br />
<br />
<br />
<br />
<br />
. <br />
<br />
<br />
<br />
<br />
<br />
<br />
<br />
<br />
<br />
<br />
<br />
<br />
. <br />
<br />
<br />
. <br />
<br />
<br />
<br />
<br />
<br />
<br />
<br />
<br />
<br />
<br />
<br />
<br />
<br />
<br />
<br />
<br />
<br />
<br />
<br />
<br />
.
.<br />
<br />
<br />
<br />
<br />
<br />
<br />
<br />
<br />
. <br />
<br />
<br />
. <br />
<br />
<br />
<br />
. <br />
<br />
<br />
<br />
<br />
<br />
.
. <br />
<br />
<br />
<br />
<br />
. <br />
<br />
<br />
<br />
<br />
<br />
<br />
<br />
<br />
<br />
.<br />
<br />
<br />
<br />
<br />
<br />
.
.<br />
<br />
<br />
<br />
<br />
<br />
<br />
<br />
<br />
<br />
<br />
<br />
<br />
. <br />
<br />
<br />
<br />
<br />
<br />
<br />
<br />
<br />
<br />
<br />
<br />
<br />
<br />
<br />
.
.<br />
<br />
<br />
<br />
<br />
<br />
<br />
<br />
<br />
<br />
<br />
<br />
<br />
<br />
<br />
<br />
<br />
<br />
. <br />
<br />
. <br />
.
.<br />
<br />
<br />
<br />
<br />
<br />
<br />
<br />
<br />
<br />
<br />
<br />
.
. <br />
<br />
<br />
<br />
<br />
<br />
<br />
<br />
<br />
<br />
<br />
<br />
<br />
<br />
<br />
<br />
<br />
<br />
<br />
. <br />
<br />
<br />
<br />
. <br />
<br />
<br />
<br />
<br />
<br />
<br />
<br />
<br />
<br />
<br />
<br />
.<br />
<br />
<br />
<br />
. <br />
<br />
<br />
<br />
.
.<br />
<br />
<br />
<br />
<br />
<br />
<br />
. <br />
<br />
<br />
. <br />
<br />
<br />
<br />
. <br />
<br />
<br />
<br />
<br />
<br />
<br />
<br />
<br />
<br />
<br />
.<br />
<br />
<br />
<br />
. <br />
<br />
<br />
<br />
<br />
<br />
<br />
<br />
<br />
.
. <br />
<br />
<br />
<br />
<br />
<br />
<br />
<br />
<br />
<br />
. <br />
<br />
<br />
<br />
. <br />
<br />
<br />
<br />
<br />
<br />
<br />
<br />
<br />
<br />
<br />
<br />
.<br />
<br />
<br />
<br />
. <br />
<br />
<br />
<br />
<br />
.<br />
<br />
<br />
<br />
<br />
<br />
<br />
. <br />
.
. <br />
. <br />
<br />
<br />
<br />
. <br />
<br />
<br />
<br />
<br />
<br />
<br />
<br />
<br />
<br />
<br />
.<br />
<br />
<br />
<br />
. <br />
<br />
<br />
<br />
<br />
.<br />
<br />
<br />
<br />
<br />
<br />
<br />
. <br />
.
. <br />
.
. <br />
<br />
<br />
. <br />
.
. <br />
<br />
<br />
. <br />
.
.<br />
<br />
<br />
<br />
<br />
<br />
<br />
. <br />
. <br />
<br />
<br />
<br />
<br />
<br />
<br />
<br />
<br />
<br />
<br />
<br />
.<br />
<br />
<br />
<br />
<br />
<br />
<br />
.
.<br />
<br />
<br />
<br />
<br />
<br />
<br />
. <br />
. <br />
<br />
<br />
<br />
<br />
<br />
<br />
<br />
<br />
<br />
<br />
<br />
<br />
<br />
<br />
<br />
<br />
.<br />
<br />
<br />
<br />
<br />
.
. <br />
<br />
.<br />
<br />
<br />
<br />
<br />
<br />
. <br />
<br />
<br />
<br />
<br />
<br />
<br />
<br />
. <br />
<br />
<br />
<br />
<br />
. <br />
<br />
.<br />
<br />
<br />
<br />
<br />
<br />
<br />
<br />
.<br />
<br />
<br />
.
. <br />
<br />
<br />
<br />
<br />
<br />
<br />
<br />
<br />
<br />
<br />
<br />
<br />
.<br />
<br />
<br />
<br />
<br />
<br />
<br />
<br />
.
. <br />
<br />
<br />
<br />
<br />
<br />
<br />
<br />
<br />
<br />
<br />
<br />
<br />
.<br />
<br />
<br />
<br />
<br />
<br />
<br />
<br />
.
. <br />
<br />
<br />
<br />
<br />
<br />
<br />
<br />
<br />
<br />
<br />
<br />
<br />
.<br />
<br />
<br />
<br />
<br />
<br />
<br />
<br />
.
. <br />
<br />
<br />
<br />
<br />
<br />
<br />
<br />
<br />
<br />
<br />
<br />
<br />
.<br />
<br />
<br />
<br />
<br />
<br />
<br />
<br />
.
. <br />
<br />
<br />
<br />
<br />
<br />
<br />
<br />
<br />
<br />
<br />
<br />
<br />
.<br />
<br />
<br />
<br />
<br />
<br />
<br />
<br />
.
. <br />
<br />
<br />
<br />
<br />
<br />
<br />
<br />
<br />
<br />
<br />
<br />
<br />
.<br />
<br />
<br />
<br />
<br />
<br />
<br />
<br />
.
WSG 90.1<br />
Technical data valve position indicator<br />
for gearboxes with swing angle < 180°<br />
Adapter<br />
Other information<br />
EU Directives<br />
Type Bolts Fastening torque T A [Nm]<br />
Strength class<br />
A2-70/A4-70 A2-80/A4-80<br />
Adapter M 4 2<br />
GS/GF 50.3 M 5 5<br />
GS/GF 63.3 – <strong>12</strong>5.3 M 6 8 10<br />
GS/GF 160.3 M 8 18 24<br />
GS/GF 200.3 M 10 36 48<br />
GS/GF 250.3 M <strong>12</strong> 61 82<br />
GS 315 – 500 M <strong>12</strong> 61 82<br />
Electromagnetic Compatibility (EMC): (89/<strong>33</strong>6/EEC)<br />
Low Voltage Directive: (73/23/EEC)<br />
Machinery Directive: (98/37/EC)<br />
Reference documents Product description Part-turn gearboxes GS 50.3 – GS 250.3/GS 315 – GS 500<br />
Product description Lever gearboxes GF 50.3 – GF 250.3<br />
We reserve the right to alter data according to improvements made. Previous documents become invalid with the issue of this document.<br />
Page 2 of 2<br />
Issue 1.07<br />
Y000.363/002/en
Anschlusspläne APG<br />
Terminal plans APG<br />
Weggebereinheit für Schneckengetriebe WSG<br />
Valve position indicator for worm gearboxes WSG<br />
AP 320<br />
mit Heizung (Option) AP 321<br />
with heater (option) AP 321<br />
ZU / CLOSED Com.<br />
Endlage ZU<br />
End position CLOSED<br />
Endlage AUF<br />
End position OPEN<br />
AUF / OPEN Com.<br />
24 V DC max. 80 mA<br />
Versorgung / Supply<br />
0V<br />
max. Bürde 600 Ohm<br />
max. Load 600 Ohm<br />
0/4-20 mA<br />
Heizung<br />
Heater<br />
AUMA-Lieferumfang<br />
AUMA - supply<br />
E3<br />
E4<br />
Legende / Legend<br />
A 1 Hall-Sensoren für Endlagen Hall sensors for end positions<br />
A 2 Relais-Platine Relay board<br />
B 2<br />
Elektronischer Stellungsgeber;<br />
4-Leiter-System<br />
Electronic position transmitter; 4-wire system<br />
K 1 Relais Endlage ZU Relay end position CLOSED Schaltvermögen /<br />
Breaking capacity:<br />
K 2 Relais Endlage AUF Relay end position OPEN<br />
max. 250 V AC / 3 A / cos ϕ = 1<br />
min. <strong>12</strong> V / 10 mA<br />
R 1 Heizung Heater<br />
R 28 Potentiometer Potentiometer<br />
Steckverbinder mit Crimpanschluß für flexible Aderleitungen, 40 polig; 0,75 - 1,0 mm 2 , auf Wunsch 0,5 mm 2 oder<br />
1,5 mm 2 möglich<br />
Plug socket connector with crimping connection for flexible cables, 40 poles; 0,75 - 1,0 mm 2 , on request 0,5 mm 2 or<br />
1,5 mm 2 possible<br />
Polbild<br />
Marking of terminals<br />
Durch die Weiterentwicklung bedingte Änderungen bleiben vorbehalten. Mit Erscheinen dieses Datenblattes verlieren frühere Ausgaben ihre Gültigkeit.<br />
We reserve the right to alter data according to improvements made. Previous data sheets become invalid with the issue of this data sheet.<br />
Ausgabe<br />
Issue 1.03<br />
Seite 2 von 2<br />
Page 2 of 2<br />
Y<strong>001</strong>.209/<strong>001</strong>/de-en
Multi-turn gearboxes<br />
Bevel gearboxes<br />
GK 10.2 – GK 40.2<br />
Operation instructions
Bevel gearboxes GK 10.2 – GK 40.2<br />
Operation instructions<br />
Scope of these instructions:<br />
These instructions apply to multi-turn gearboxes of type range:<br />
GK 10.2 – GK 40.2.<br />
Table of contents<br />
1. Safety instructions . . . . . . . . . . . . . . . . . . . . . . . . . . . . . . . . . . . . . . . . 3<br />
1.1 Range of application 3<br />
1.2 Maintenance 3<br />
1.3 Warnings and notes 3<br />
2. Technical data . . . . . . . . . . . . . . . . . . . . . . . . . . . . . . . . . . . . . . . . . . 4<br />
3. Transport, storage and packaging. . . . . . . . . . . . . . . . . . . . . . . . . . . . . . . . 6<br />
3.1 Transport 6<br />
3.2 Storage 6<br />
3.3 Packaging 6<br />
4. Fitting the handwheel . . . . . . . . . . . . . . . . . . . . . . . . . . . . . . . . . . . . . . 6<br />
5. Mounting multi-turn actuators SA/SAR . . . . . . . . . . . . . . . . . . . . . . . . . . . . . 7<br />
6. Mounting to valve. . . . . . . . . . . . . . . . . . . . . . . . . . . . . . . . . . . . . . . . . 9<br />
7. Operation of valves . . . . . . . . . . . . . . . . . . . . . . . . . . . . . . . . . . . . . . . 11<br />
8. Enclosure protection IP 68 . . . . . . . . . . . . . . . . . . . . . . . . . . . . . . . . . . . <strong>12</strong><br />
9. Maintenance . . . . . . . . . . . . . . . . . . . . . . . . . . . . . . . . . . . . . . . . . . . 13<br />
9.1 General references 13<br />
9.2 Change of grease 14<br />
10. Disposal and recycling . . . . . . . . . . . . . . . . . . . . . . . . . . . . . . . . . . . . . 15<br />
11. Service . . . . . . . . . . . . . . . . . . . . . . . . . . . . . . . . . . . . . . . . . . . . . . 15<br />
<strong>12</strong>. Spare parts list bevel gearboxes GK 10.2 – GK 25.2 . . . . . . . . . . . . . . . . . . . . . 16<br />
13. Spare parts list bevel gearboxes GK 30.2 – GK 40.2 . . . . . . . . . . . . . . . . . . . . . 18<br />
14. Declaration of Conformity and Declaration of Incorporation. . . . . . . . . . . . . . . . . 20<br />
Index . . . . . . . . . . . . . . . . . . . . . . . . . . . . . . . . . . . . . . . . . . . . . . . 21<br />
Addresses . . . . . . . . . . . . . . . . . . . . . . . . . . . . . . . . . . . . . . . . . . . . 22<br />
Page<br />
2
Operation instructions Bevel gearboxes GK 10.2 – GK 40.2<br />
1. Safety instructions<br />
1.1 Range of application AUMA bevel gearboxes GK 10.2 – GK 40.2 are used for the operation of<br />
valves (e.g. gate valves and globe valves).<br />
They are designed for manual operation as well as motor operation in<br />
conjunction with electric actuators.<br />
For other applications, please consult AUMA. The manufacturer is not liable<br />
for any possible damage resulting from use in other than the designated<br />
applications. Such risk lies entirely with the user.<br />
Observance of these operation instructions is considered as part of the<br />
designated use.<br />
Explosion-proof products are specially marked. The service conditions<br />
mentioned in these operation instructions and in the technical data sheet<br />
have to be respected during use. Other service conditions require explicit<br />
and written confirmation by the manufacturer.<br />
1.2 Maintenance The maintenance instructions (refer to page 13) must be observed, otherwise<br />
a safe operation of the bevel gearbox is no longer guaranteed.<br />
1.3 Warnings and notes Failure to observe the warnings and notes may lead to serious injuries or<br />
damage. Qualified personnel must be thoroughly familiar with all warnings<br />
and notes in these operation instructions.<br />
Correct transport, proper storage, mounting and installation, as well as<br />
careful commissioning are essential to ensure a trouble-free and safe<br />
operation.<br />
The following references draw special attention to safety-relevant procedures<br />
in these operation instructions. Each is marked by the appropriate<br />
pictograph.<br />
This pictograph means: Note!<br />
“Note” marks activities or procedures which have major influence on the<br />
correct operation. Non-observance of these notes may lead to consequential<br />
damage.<br />
This pictograph means: Warning!<br />
“Warning” marks activities or procedures which, if not carried out correctly<br />
can affect the safety of persons or material.<br />
3
Bevel gearboxes GK 10.2 – GK 40.2<br />
Operation instructions<br />
2. Technical data<br />
Features and functions<br />
Type of duty<br />
Short-time duty S2 - 15 min (open-close duty)<br />
Intermittent duty S4 - 25 % (modulating duty)<br />
with the following maximum input speeds:<br />
GK 10.2 – GK 16.2 ≤ 45 rpm for 50 Hz<br />
GK 25.2 – GK 30.2 ≤ 11 rpm for 50 Hz<br />
Direction of rotation Standard: Clockwise rotation at input shaft results in clockwise rotation at output shaft<br />
Option: GK 10.2 – GK 25.2<br />
Reversal of rotational direction using a reversing gearbox GW 14.1<br />
GK 30.2 – GK 40.2<br />
Alternatively, counterclockwise rotation of direction possible<br />
Stages One stage: GK 10.2 – GK 25.2<br />
Double stage: GK 30.2 – GK 40.2<br />
Input shaft GK 10.2 – GK 25.2:<br />
For standard reduction ratios, the input shaft is made of stainless steel.<br />
Standard: Cylindrical with parallel key according to DIN 6885.1<br />
Option 1) : Square: -tapered (DIN 32<strong>33</strong>)<br />
-cylindrical<br />
Output torques<br />
Type Output torque Reduction ratio Input torque 2) Factor 3)<br />
Nominal<br />
torque<br />
max. Nm<br />
Modulating<br />
torque<br />
max. Nm<br />
GK 10.2 <strong>12</strong>0 60<br />
GK 14.2 250 <strong>12</strong>0<br />
GK 14.6 500 200<br />
GK 16.2 1 000 400<br />
GK 25.2 2 000 800<br />
GK 30.2 4 000 1 600<br />
GK 35.2 8 000 –<br />
GK 40.2 16 000 –<br />
Nominal<br />
torque<br />
Nm<br />
Modulating<br />
torque<br />
Nm<br />
1 : 1 135 66 0.9<br />
2 : 1 67 <strong>33</strong> 1.8<br />
2 : 1 139 66 1.8<br />
2.8 : 1 100 48 2.5<br />
2.8 : 1 198 80 2.5<br />
4 : 1 139 55 3.6<br />
4 : 1 278 111 3.6<br />
5.6 : 1 198 80 5.0<br />
5.6 : 1 397 160 5.0<br />
8 : 1 278 111 7.2<br />
8 : 1 556 222 7.2<br />
11 : 1 404 162 9.9<br />
11 : 1 808 – 9.9<br />
16 : 1 556 – 14.4<br />
16 : 1 1,111 – 14.4<br />
22 : 1 808 – 19.8<br />
Operation<br />
Motor operation<br />
With electric multi-turn actuator, directly<br />
Flanges for mounting the multi-turn actuator, refer to separate technical data sheets.<br />
Manual operation Standard: Via handwheel, directly<br />
Type GK 10.2 GK 14.2 GK 14.6 GK 16.2 GK 25.2 GK 30.2 GK 35.2 GK 40.2<br />
Handwheel<br />
mm<br />
315/<br />
200<br />
315/<br />
250<br />
Option: Remote lever arrangement (not included within the AUMA product range)<br />
Valve attachment<br />
Output drive types A, B1, B2, B3, B4 according to EN ISO 5210<br />
A, B, D, E according to DIN 3210<br />
C according to DIN <strong>33</strong>38<br />
Special output drive types: AF, AK, AG, IB1, IB3, IB4<br />
400/<br />
315<br />
500/<br />
400<br />
630/<br />
500<br />
800 800 800<br />
1) For size, please contact AUMA<br />
2) At max. output torque<br />
3) Conversion factor for output torque to input torque<br />
4
Operation instructions Bevel gearboxes GK 10.2 – GK 40.2<br />
Service conditions<br />
Enclosure protection according<br />
to EN 60 529<br />
Standard: IP 67<br />
Options: IP 68 (also refer to page <strong>12</strong>)<br />
Corrosion protection Standard: KN Suitable for installation in industrial units,<br />
in water or power plants with a low pollutant concentration<br />
Options: KS Suitable for installation in occasionally or permanently aggressive<br />
atmosphere with a moderate pollutant concentration<br />
(e.g. wastewater treatment plants, chemical industry)<br />
KX Suitable for installation in extremely aggressive atmosphere with<br />
high humidity and high pollutant concentration<br />
Finish coating Standard: Two-component iron-mica combination<br />
Colour Standard: Grey (DB 702, similar to RAL 9007)<br />
Option: Other colours on request<br />
Ambient temperature Standard: – 25 °C to + 80 °C<br />
Options: – 40 °C to + 60 °C (low temperature), version L<br />
– 60 °C to + 60 °C (extreme low temperature), version EL<br />
– 0 °C to + <strong>12</strong>0 °C (high temperature), version H<br />
Lifetime Open-close duty: Operation (OPEN - CLOSE - OPEN) with 30 turns per stroke<br />
GK 10.2:<br />
20,000 operations<br />
GK 14.2 – 16.2: 15,000 operations<br />
GK 25.2 – 30.2: 10,000 operations<br />
GK 35.2 – 40.2: 5,000 operations<br />
Modulating duty 4) :<br />
GK 10.2:<br />
5.0 million modulating steps<br />
GK 14.2 – 16.2: 3.5 million modulating steps<br />
GK 25.2 – 30.2: 2.5 million modulating steps<br />
Accessories<br />
Limit switching<br />
Limit switching WSH for manually operated valves. For the signalisation of intermediate and<br />
end positions (refer to separate data sheet).<br />
Reversing gearboxes<br />
Reversing gearbox GW for reversing the rotation direction for manual and motor operation<br />
Special features for use in potentially explosive atmospheres<br />
Explosion protection<br />
II2G c IIC T4 in compliance with ATEX 94/9/EC<br />
Type of duty 5)<br />
During open-close duty:<br />
Short-time duty S2 - 15 min. at 50 % of maximum nominal output torque up to GK 14.6<br />
and at 35 % of maximum nominal output torque from GK 16.2<br />
During modulating duty:<br />
Intermittent duty S4 - 25 % at maximum modulating torque<br />
Ambient temperature Standard: – 20 °C to + 40 °C<br />
Options: – 40 °C to + 40 °C (low temperature)<br />
– 20 °C to + 60 °C<br />
– 40 °C to + 60 °C (low temperature)<br />
– 60 °C to + 60 °C (extreme low temperature)<br />
Combinations with actuators SAExC at ambient temperatures > 40 °C with special sizing.<br />
Further information<br />
Reference documents Product description Bevel gearboxes GK 10.2 – GK 40.2<br />
Dimension sheet GK 10.2 – GK 40.2<br />
Technical data GK 10.2 – GK 40.2<br />
Technical data SA/ SAR<br />
Technical data GW<br />
Technical data WSH<br />
4) The lifetime for modulating duty depends on the load and the number of starts. A high starting frequency will rarely improve the modulating accuracy. To reach<br />
the longest possible maintenance and fault-free operation time, the number of starts per hour chosen should be as low as permissible for the process<br />
5) The type of duty must not be exceeded.<br />
5
Bevel gearboxes GK 10.2 – GK 40.2<br />
Operation instructions<br />
3. Transport, storage and packaging<br />
3.1 Transport .<br />
Transport to place of installation in sturdy packing.<br />
If mounted together with actuator:<br />
Attach ropes or hooks for the purpose of lifting by hoist only to the gearbox<br />
and not to the actuator.<br />
3.2 Storage Store in well-ventilated, dry room.<br />
Protect against floor dampness by storage on a shelf or on a<br />
wooden pallet.<br />
.<br />
Cover to protect against dust and dirt.<br />
Apply suitable corrosion protection agent to bare surfaces.<br />
In case gearboxes are to be stored for a long period (more than 6 months),<br />
the following points must be observed additionally:<br />
Prior to storage: Protect bare surfaces, in particular the output drive parts<br />
and mounting surface, with long-term corrosion protection agent.<br />
. Check for corrosion approximately every 6 months. If first signs of corrosion<br />
show, apply new corrosion protection.<br />
3.3 Packaging Our products are protected by special packaging for the transport ex works.<br />
The packaging consists of environmentally friendly materials which can<br />
easily be separated and recycled.<br />
For the disposal of the packaging material, we recommend recycling and<br />
collection centres.<br />
We use the following packaging materials:<br />
Wooden material boards (OSB)/cardboard/paper/PE film<br />
4. Fitting the handwheel For gearboxes designed for manual operation, the handwheel is supplied<br />
separately. Fitting is done on site according to figure 1.<br />
Figure 1: Handwheel<br />
Circlip<br />
Spacer<br />
(partly required)<br />
Spacer<br />
(partly required)<br />
Circlip<br />
Ball handle<br />
(option)<br />
Gearbox input shaft<br />
Handwheel<br />
6
Operation instructions Bevel gearboxes GK 10.2 – GK 40.2<br />
5. Mounting multi-turn actuators SA/SAR<br />
When bevel gearboxes and multi-turn actuators are supplied together, the<br />
mounting can be done in the factory up to gearbox size GK 16.2, if desired.<br />
For sizes GK 25.2 and larger, the mounting of gearboxes is performed as<br />
follows.<br />
In case flange for actuator is not attached to gearbox:<br />
Thoroughly degrease the mounting faces of the gearbox and flange for<br />
actuator.<br />
.<br />
Fit flange for actuator and fasten with bolts and lock washers.<br />
Fasten bolts crosswise to the appropriate torque according to table 2.<br />
Figure 2: Mounting multi-turn actuators onto bevel gearboxes<br />
Bearing flange<br />
Flange for actuator<br />
GK 10.2 –<br />
GK 25.2<br />
GK 30.2 – GK 40.2<br />
Flange for actuator<br />
Bearing flange<br />
Mounting the multi-turn actuator:<br />
Thoroughly degrease the faces of the bearing flange at actuator and of<br />
the input flange at bevel gearbox..<br />
Place the multi-turn actuator on bevel gearbox.<br />
The multi-turn actuator can be positioned on the valve at every 90°.<br />
Ensure that the spigot mates uniformly in the recess and that the<br />
mounting faces are in complete contact.<br />
Fasten actuator with bolts and lock washers (see table 1) at the flange of<br />
the bevel gearbox.<br />
. Fasten bolts crosswise with a torque according to table 2.<br />
Do not attach ropes or hooks for the purpose of lifting the<br />
actuator by hoist to the handwheel. If multi-turn actuator is<br />
mounted on gearbox, attach ropes or hooks for the purpose<br />
of lifting by hoist to gearbox and not to multi-turn actuator.<br />
7
Bevel gearboxes GK 10.2 – GK 40.2<br />
Operation instructions<br />
Table 1: Bolts for mounting AUMA multi-turn actuators on bevel gearboxes<br />
Gearbox SA(R) 07.5-F10/ G0 SA(R) 10.1-F10/ G0 SA(R) 14.1-F14/ G½<br />
Bolt Lock washer Pcs. Bolt Lock washer Pcs. Bolt Lock washer Pcs.<br />
GK 10.2 M 10 x 25 B 10 4 M 10 x 25 B 10 4 M 16 x 40 B 16 4<br />
GK 14.2 M 10 x 25 B 10 4 M 16 x 40 B 16 4<br />
GK 14.6 M 10 x 25 B 10 4 M 16 x 40 B 16 4<br />
GK 16.2 M 16 x 40 B 16 4<br />
GK 25.2 M 16 x 40 B 16 4<br />
Gearbox SA(R) 14.5-F14/ G½ SA(R) 16.1-F16/ G3 SA(R) 25.1-F25/ G4<br />
Bolt Lock washer Pcs. Bolt Lock washer Pcs. Bolt Lock washer Pcs.<br />
GK 16.2 M 16 x 40 B 16 4<br />
GK 25.2 M 16 x 40 B 16 4<br />
GK 30.2 M 16 x 40 B 16 4 M 20 x 50 B 20 4<br />
GK 35.2 M 16 x 40 B 16 4 M 20 x 50 B 20 4<br />
GK 40.2 M 20 x 50 B 20 4 M 16 x 50 B 16 8<br />
8
Operation instructions Bevel gearboxes GK 10.2 – GK 40.2<br />
6. Mounting to valve The gearboxes can be operated in any mounting position.<br />
. Prior to mounting, the gearbox must be checked for damage.<br />
Damaged parts must be replaced by original spare<br />
parts.<br />
. After mounting to valve, touch up any possible damage to<br />
paint finish.<br />
. Check if mounting flange fits the gearbox.<br />
Spigot at flanges should be loose fit!<br />
The output drive types B1, B2, B3, or B4 (figure 3) are delivered with bore<br />
and keyway (usually according to ISO 5210).<br />
Figure 3<br />
Output drive type B1/B2<br />
Plug sleeve<br />
Output drive type B3/B4<br />
Bore with keyway<br />
For output drive type A (figure 4), the internal thread of the stem nut must<br />
match the thread of the valve stem. If not ordered explicitly with thread, the<br />
stem nut is unbored or with pilot bore when delivered. For finish machining<br />
of stem nut, refer to next page.<br />
Check whether bore and keyway match the input shaft of valve.<br />
Thoroughly degrease mounting faces of gearbox and valve.<br />
.<br />
Apply a small quantity of grease to input shaft of valve.<br />
Place gearbox on valve and fasten. Fasten bolts (quality min. 8.8, refer to<br />
table 2) evenly crosswise.<br />
Table 2: Fastening torques for bolts<br />
Fastening torque T A [Nm]<br />
Strength class<br />
Thread<br />
8.8 A2-70/A4-70 A2-80/A4-80<br />
M 8 25 18 24<br />
M 10 50 36 48<br />
M <strong>12</strong> 87 61 82<br />
M 16 214 150 200<br />
M 20 431 294 392<br />
M 30 1 489 564 –<br />
M 36 2 594 – –<br />
9
Bevel gearboxes GK 10.2 – GK 40.2<br />
Operation instructions<br />
Finish machining of stem nut (output drive type A):<br />
Figure 4<br />
80.3<br />
80.01/80.02<br />
Output drive type A<br />
Plug sleeve<br />
80.2<br />
The output drive flange does not have to be removed from the gearbox.<br />
Remove spigot ring (80.2, figure 4) from mounting flange.<br />
Take off stem nut (80.3) together with thrust bearing (80.01) and thrust<br />
bearing races (80.02).<br />
Remove thrust bearing and thrust bearing races from stem nut.<br />
Drill and bore stem nut and cut thread.<br />
When fixing in the chuck, make sure stem nut runs true!<br />
Clean the machined stem nut.<br />
Apply Lithium soap EP multi-purpose grease to thrust bearing and races,<br />
then place them on stem nut.<br />
Re-insert stem nut with thrust bearings into the mounting flange. Ensure<br />
that dogs are placed correctly in the slots of the hollow shaft.<br />
.<br />
Screw in spigot ring until it is firm against the shoulder.<br />
Press Lithium soap EP multi-purpose grease on mineral oil base into the<br />
grease nipple with a grease gun (for quantities, please refer to table):<br />
Table 3: Grease quantities bearings output drive type A<br />
Output<br />
drive<br />
A 07.2 A 10.2 A 14.2 A 16.2 A 25.2 A 30.2 A 35.2 A 40.2<br />
Qty 1) 1.5 g 2 g 3 g 5 g 10 g 14 g 20 g 25 g<br />
1) For grease with density ρ = 0.9 kg/dm³<br />
Protection tube for rising valve stem<br />
Seal thread of protection tube with hemp, Teflon tape, or thread sealing<br />
material.<br />
Screw protection tube (1) into thread (figure 5) and tighten it firmly.<br />
.<br />
Push down the sealing (2) to the housing.<br />
Check whether cap (3) is available and without damage.<br />
Figure 5: Protection tube for rising valve stem<br />
3<br />
1<br />
2<br />
10
Operation instructions Bevel gearboxes GK 10.2 – GK 40.2<br />
7. Operation of valves<br />
The max. output torque (refer to technical data, page 4 or name plate) refers<br />
to the peak values and should not be applied over the whole travel.<br />
Clockwise rotation at input shaft results in clockwise rotation at output drive<br />
For motor operation:<br />
.<br />
Observe operation instructions pertaining to multi-turn actuator.<br />
The setting of the torque switching within the multi-turn actuator may not<br />
exceed the max. permissible input torque for both directions (refer to technical<br />
data, page 4, or name plate).<br />
. Set the torque switching within the multi-turn actuator to the following<br />
value to prevent any damage to the valve:<br />
T Torque switch =<br />
T Valve<br />
Factor<br />
Factor = Conversion factor from output torque to input torque.<br />
Refer to values in technical data, page 4.<br />
11
Bevel gearboxes GK 10.2 – GK 40.2<br />
Operation instructions<br />
8. Enclosure protection IP 68<br />
Definition<br />
Inspection<br />
According to EN 60 529, the conditions for meeting the requirements of<br />
enclosure protection IP 68 are to be agreed between manufacturer and<br />
user.<br />
AUMA gearboxes in enclosure protection IP 68 fulfil the following requirements<br />
in compliance with AUMA definitions:<br />
. Head of water max. 6 m.<br />
If submersed in other media, additional measures for corrosion protection<br />
may be necessary; please consult AUMA. Submersion in aggressive media,<br />
e.g. acids or alkaline solutions, is not permitted.<br />
AUMA gearboxes in enclosure protection IP 68 undergo a routine testing for<br />
tightness in the factory.<br />
After submersion<br />
.<br />
Check gearbox.<br />
In case of ingress of water, dry actuator correctly and check for proper<br />
function.<br />
Notes<br />
The enclosure protection IP 68 refers to the interior of the gearbox.<br />
If the gearboxes are likely to be repeatedly submersed, a higher corrosion<br />
protection KS or KX is required.<br />
We strongly recommend to select the higher corrosion protection KS or<br />
KX for gearboes for buried service.<br />
Use suitable sealing material between valve flange and gearbox.<br />
Stem protection tubes and telescopic protection tubes should not be used<br />
during submersion, instead use a screw plug made of aluminium.<br />
. When using output drive types A and AF (stem nut), it cannot be<br />
prevented that during submersion water enters the bore of the hollow shaft<br />
along the thread of the valve stem. This leads to corrosion. The water also<br />
enters the thrust bearings of output drive type A, causing corrosion and<br />
damage of the bearings. The output drive types A and AF should therefore<br />
not be used for gearboxes in enclosure protection IP 68.<br />
For submersion in water, AUMA recommends to use grease suitable for<br />
use in drinking water.<br />
. For continuous submersion, the seals should be changed at shorter intervals.<br />
<strong>12</strong>
Operation instructions Bevel gearboxes GK 10.2 – GK 40.2<br />
9. Maintenance<br />
9.1 General references After commissioning, check gearbox for damage to paint finish.<br />
Do a thorough touch-up to prevent corrosion.<br />
Original paint in small quantities can be suppled by AUMA.<br />
AUMA gearboxes require only very little maintenance.<br />
To ensure that the gearbox is always ready to operate, we recommend –<br />
provided that on an average not more than 10 operations are performed per<br />
year – the following measures:<br />
. Approximately six months after commissioning and then every year check<br />
bolts between multi-turn actuator, gearbox, and valve for tightness. If<br />
required, tighten applying the torques given in table 2, (page 9).<br />
Perform a test run as well as a visual inspection for grease leakage every<br />
six months.<br />
Carry out a detailed functional test for each gearbox every 5 years.<br />
Record the results for future reference.<br />
For gearboxes permanently exposed to ambient temperatures above<br />
40 °C, maintenance must be performed at shorter intervals.<br />
. For gearboxes with output drive type A: At intervals of approx. six months<br />
from commissioning, press in Lithium soap EP multi-purpose grease on<br />
mineral oil base at the grease nipple with grease gun (for quantity, refer to<br />
table 3, page 10).<br />
Seals:<br />
The seals must be changed when changing the grease.<br />
Seal kits may be obtained from AUMA.<br />
Grease:<br />
A grease and seal change is recommended after the following operation<br />
times:<br />
.<br />
if operated seldom, after 10 – <strong>12</strong> years<br />
if operated frequently, after 6 – 8 years<br />
Only original AUMA grease must be used.<br />
.<br />
For the grease type, refer to name plate.<br />
Lubricants should not be mixed.<br />
Table 4: Grease quantities for bevel gearboxes<br />
GK 10.2 14.2 14.6 16.2 25.2 30.2 35.2 40.2<br />
Qty dm³ 0.<strong>33</strong> 0.66 0.66 1.1 4.1 14.1 20.0 22.2<br />
Weight1) kg 0.3 0.6 0.6 1.0 3.7 <strong>12</strong>. 18.2 20.2<br />
1) for ρ = approx. 0.9 kg / dm 3<br />
The removed lubricant and the cleaning agent used must be<br />
disposed of according to the relevant regulations.<br />
For safe operation of explosion-proof products, the gear<br />
housing has to be lubricated in compliance with the<br />
manuacturer specifications. In the event of lubricant loss,<br />
repair measures habe to be initiated without delay.<br />
13
Bevel gearboxes GK 10.2 – GK 40.2<br />
Operation instructions<br />
9.2 Change of grease .<br />
For gearboxes with multi-turn actuator: Remove multi-turn actuator.<br />
Remove gearbox from valve:<br />
During this time, the valve/ pipeline must not be under pressure!<br />
. Mark position of the gearbox on the valve, loosen connecting bolts to the<br />
valve and remove the gearbox.<br />
Remove old grease:<br />
Grease type, see name plate; grease quantities see page 13, table 4.<br />
The numbers used in the following text refer to the spare parts list(s) of<br />
these operation instructions.<br />
Remove bolts at bearing flange (002.1).<br />
.<br />
Remove bearing flange with hollow shaft (002.2) from housing.<br />
Remove old grease completely from the housing and the individual parts<br />
and clean gear housing. For this purpose, kerosene or a similar cleaning<br />
agent may be used.<br />
Replace seals S1(008, 009, 0<strong>12</strong>, 016 or 007, 008, 010, 013) by new ones.<br />
Clean mounting faces at housing and bearing flange and apply a small<br />
quantity of grease.<br />
. Mount bearing flange (002.1) with hollow shaft (002.2) into housing, whilst<br />
paying attention to the O-ring S1(008 or 009) at bearing flange and O-ring<br />
S1(0<strong>12</strong> or 013) in the housing.<br />
Screw in bolts with lock washers and fasten them evenly crosswise to the<br />
appropriate torque according to table 2, page 9.<br />
Fill with new grease f:<br />
Remove screw plug (539.0) at housing.<br />
.<br />
Fill with new grease.<br />
Clean mounting faces at housing and insert screw plug (539.0) with new<br />
sealing S1(014) and fasten them to the appropriate torque according to<br />
table 2, page 9.<br />
After maintenance:<br />
Fasten gearbox to valve again.<br />
.<br />
If applicable, mount multi-turn actuator.<br />
For gearboxes with multi-turn actuator, check the setting of the limit<br />
switching according to the operation instructions for multi-turn actuators; if<br />
required, re-set.<br />
.<br />
Perform test run to ensure proper function.<br />
Check the gearbox for damage to paint finish. Do a thorough touch-up to<br />
prevent corrosion. Original paint in small quantities can be supplied by<br />
AUMA.<br />
14
Operation instructions Bevel gearboxes GK 10.2 – GK 40.2<br />
10. Disposal and recycling<br />
AUMA gearboxes have an extremely long lifetime. However, they have to be<br />
replaced at one point in time.<br />
Our gearboxes have a modular design and may therefore easily be disassembled,<br />
separated and sorted according to materials, i.e.:<br />
. various metals<br />
.<br />
plastics<br />
greases and oils<br />
The following generally applies:<br />
Collect greases and oils during disassembly. As a rule, these substances<br />
are hazardous to water and must not be released into the environment.<br />
Arrange for controlled waste disposal of the disassembled material or for<br />
separate recycling according to materials.<br />
. Observe the national regulations for waste disposal.<br />
11. Service AUMA offers extensive services such as maintenance and inspection for<br />
gearboxes. Addresses can be found on page 22 et seqq. and on the Internet<br />
(www.auma.com).<br />
15
Bevel gearboxes GK 10.2 – GK 40.2<br />
Operation instructions<br />
<strong>12</strong>. Spare parts list bevel gearboxes GK 10.2 – GK 25.2<br />
514.1<br />
514.2<br />
514.1<br />
A<br />
514.0<br />
D<br />
516.0<br />
002.0<br />
B3 / B4 / E<br />
515.0<br />
002.1<br />
002.2<br />
002.3<br />
S1(008)<br />
S1(009)<br />
B1 / C<br />
160.2<br />
160.1<br />
160.3<br />
<strong>001</strong>.0<br />
S1(0<strong>12</strong>)<br />
S1(016)<br />
S1(009)<br />
539.0<br />
S1(014)<br />
003.1<br />
513.1<br />
511.0<br />
539.0<br />
003.0<br />
S1(007)<br />
5<strong>12</strong>.0<br />
16
Operation instructions Bevel gearboxes GK 10.2 – GK 40.2<br />
Note: Please state type and commission no. of the device (see name plate) when ordering spare parts. Only original<br />
AUMA spare parts may be used. Delivered spare parts may slightly vary from the representation in these instructions.<br />
No.<br />
Designation<br />
<strong>001</strong>.0 Housing Sub-assembly<br />
002.0 Output drive Sub-assembly<br />
002.1 Bearing flange Sub-assembly<br />
002.2 Hollow shaft<br />
002.3 Ball bearing<br />
003.0 Input shaft Sub-assembly<br />
003.1 Input drive shaft Sub-assembly<br />
160.1 Stem protection tube (without cap)<br />
160.2 Cap for spindle protection tube<br />
160.3 V-seal<br />
511.0 Screw plug Sub-assembly<br />
5<strong>12</strong>.0 Flange for actuator Sub-assembly<br />
513.1 Grub screw<br />
514.0 Output drive A (stem nut without thread) Sub-assembly<br />
514.1 Needle roller thrust bearing Sub-assembly<br />
514.2 Stem nut (without thread)<br />
515.0 Output drive B3/ B4/ E Sub-assembly<br />
516.0 Output drive D Sub-assembly<br />
539.0 Screw plug Sub-assembly<br />
S1 Seal kit Set<br />
17
Bevel gearboxes GK 10.2 – GK 40.2<br />
Operation instructions<br />
13. Spare parts list bevel gearboxes GK 30.2 – GK 40.2<br />
514.1<br />
514.2<br />
514.1<br />
A<br />
514.0<br />
D<br />
516.0<br />
002.0<br />
B3 / B4 / E<br />
515.0<br />
002.1<br />
002.2<br />
002.3<br />
S1(007)<br />
S1(008)<br />
B1 / C<br />
160.2<br />
160.1<br />
160.3<br />
<strong>001</strong>.0<br />
S1(013)<br />
S1(010)<br />
511.0<br />
S1(025)<br />
513.1<br />
539.0<br />
005.1<br />
<strong>001</strong>.1<br />
<strong>001</strong>.2<br />
S1(009)<br />
005.0<br />
S1(006)<br />
018.0<br />
5<strong>12</strong>.0<br />
18
Operation instructions Bevel gearboxes GK 10.2 – GK 40.2<br />
Note: Please state type and commission no. of the device (see name plate) when ordering spare parts. Only original<br />
AUMA spare parts may be used. Delivered spare parts may slightly vary from the representation in these instructions.<br />
No.<br />
Designation<br />
<strong>001</strong>.0 Housing Sub-assembly<br />
<strong>001</strong>.1 Ring nut<br />
<strong>001</strong>.2 Grub screw<br />
002.0 Output drive Sub-assembly<br />
002.1 Bearing flange Sub-assembly<br />
002.2 Hollow shaft<br />
002.3 Ball bearing<br />
005.0 Input shaft Sub-assembly<br />
005.1 Input drive shaft Sub-assembly<br />
018.0 Intermediate stage Sub-assembly<br />
160.1 Stem protection tube (without cap)<br />
160.2 Cap for spindle protection tube<br />
160.3 V-seal<br />
511.0 Screw plug Sub-assembly<br />
5<strong>12</strong>.0 Flange for actuator Sub-assembly<br />
513.1 Grub screw<br />
514.0 Output drive A (stem nut without thread) Sub-assembly<br />
514.1<br />
Needle roller thrust bearing, as from GK 35.2 as individual part, axial cylinder<br />
roller bearing<br />
Sub-assembly<br />
514.2 Stem nut (without thread)<br />
515.0 Output drive B3/ B4/ E Sub-assembly<br />
516.0 Output drive D Sub-assembly<br />
539.0 Screw plug Sub-assembly<br />
S1 Seal kit Set<br />
19
Bevel gearboxes GK 10.2 – GK 40.2<br />
Operation instructions<br />
14. Declaration of Conformity and Declaration of Incorporation<br />
20
Operation instructions Bevel gearboxes GK 10.2 – GK 40.2<br />
Index<br />
B<br />
Bolts for mounting multi-turn<br />
actuator 8<br />
C<br />
Corrosion protection 6<br />
D<br />
Declaration of Conformity 22<br />
Declaration of Incorporation 22<br />
Direction of rotation 4<br />
Disposal and recycling 15<br />
E<br />
Enclosure protection IP 68 <strong>12</strong><br />
F<br />
Finish machining of stem nut 10<br />
Fitting the handwheel 6<br />
H<br />
Handwheel 6<br />
L<br />
Lubricant 14<br />
M<br />
Maintenance 3,13<br />
Motor operation 11<br />
Mounting multi-turn actuators 7<br />
Mounting to valve 9<br />
O<br />
Output drive types 4,9<br />
Output torques 4<br />
P<br />
Packaging 6<br />
Protection tube 10<br />
S<br />
Safety instructions 3<br />
Service 15<br />
Spare parts lists<br />
GK 10.2 – GK 25.2 18<br />
GK 30.2 – GK 40.2 20<br />
Storage 6<br />
T<br />
Technical data 4<br />
Transport 6<br />
Type of duty 4<br />
21
AUMA – wordwide<br />
Europe<br />
AUMA Riester GmbH & Co. KG<br />
Factory Müllheim<br />
DE-79373 Müllheim<br />
Tel +49 7631 809 - 0<br />
Tax +49 7631 809 - <strong>12</strong>50<br />
riester@auma.com<br />
www.auma.com<br />
Factory Ostfildern-Nellingen<br />
DE-73747 Ostfildern<br />
Tel +49 711 34803 - 0<br />
Tax +49 711 34803 - 3034<br />
riester@wof.auma.com<br />
Service Centre Cologne<br />
DE-50858 Köln<br />
Tel +49 2234 2037 - 9000<br />
Tax +49 2234 2037 - 9099<br />
Service@sck.auma.com<br />
Service Centre Magdeburg<br />
DE-39167 Niederndodeleben<br />
Tel +49 39204 759 - 0<br />
Tax +49 39204 759 - 9429<br />
Service@scm.auma.com<br />
Service Centre Bavaria<br />
DE-85386 Eching<br />
Tel +49 81 65 9017- 0<br />
Tax +49 81 65 9017- 2018<br />
Riester@scb.auma.com<br />
AUMA Armaturenantriebe GmbH<br />
AT-25<strong>12</strong> Tribuswinkel<br />
Tel +43 2252 82540<br />
Tax +43 2252 8254050<br />
office@auma.at<br />
www.auma.at<br />
AUMA (Schweiz) AG<br />
CH-8965 Berikon<br />
Tel +41 566 400945<br />
Tax +41 566 400948<br />
RettichP.ch@auma.com<br />
AUMA Servopohony spol. s.r.o.<br />
CZ-10200 Praha 10<br />
Tel +420 272 700056<br />
Tax +420 272 704<strong>12</strong>5<br />
auma-s@auma.cz<br />
www.auma.cz<br />
OY AUMATOR AB<br />
FI-02270 Espoo<br />
Tel +35 895 84022<br />
Tax +35 895 8402300<br />
auma@aumator.fi<br />
AUMA France S.A.R.L.<br />
FR-95157 Taverny Cédex<br />
Tel +<strong>33</strong> 1 39327272<br />
Tax +<strong>33</strong> 1 39321755<br />
stephanie.vatin@auma.fr<br />
www.auma.fr<br />
AUMA ACTUATORS Ltd.<br />
GB- Clevedon North Somerset BS21 6QH<br />
Tel +44 <strong>12</strong>75 871141<br />
Tax +44 <strong>12</strong>75 875492<br />
mail@auma.co.uk<br />
www.auma.co.uk<br />
AUMA ITALIANA S.r.l. a socio unico<br />
IT-20023 Cerro Maggiore (MI)<br />
Tel +39 0<strong>33</strong>1 51351<br />
Tax +39 0<strong>33</strong>1 517606<br />
info@auma.it<br />
www.auma.it<br />
AUMA BENELUX B.V.<br />
NL-2314 XT Leiden<br />
Tel +31 71 581 40 40<br />
Tax +31 71 581 40 49<br />
office@benelux.auma.com<br />
www.auma.nl<br />
AUMA Polska Sp. z o.o.<br />
PL-41-310 Dabrowa Górnicza<br />
Tel +48 32 26156 68<br />
Tax +48 32 26148 23<br />
R.Ludzien@auma.com.pl<br />
www.auma.com.pl<br />
OOO Priwody AUMA<br />
RU-141400 Moscow region for mail:<br />
<strong>12</strong>4365 Moscow a/ya 11<br />
Tel +7 495 221 64 28<br />
Tax +7 495 221 64 38<br />
aumarussia@auma.ru<br />
www.auma.ru<br />
ERICHS ARMATUR AB<br />
SE-20039 Malmö<br />
Tel +46 40 311550<br />
Tax +46 40 945515<br />
info@erichsarmatur.se<br />
www.erichsarmatur.se<br />
GRØNBECH & SØNNER A/S<br />
DK-2450 København SV<br />
Tel +45 <strong>33</strong> 26 63 00<br />
Tax +45 <strong>33</strong> 26 63 21<br />
GS@g-s.dk<br />
www.g-s.dk<br />
IBEROPLAN S.A.<br />
ES-28027 Madrid<br />
Tel +34 91 3717130<br />
Tax +34 91 7427<strong>12</strong>6<br />
iberoplan@iberoplan.com<br />
D. G. Bellos & Co. O.E.<br />
GR-13671 Acharnai Athens<br />
Tel +30 210 2409485<br />
Tax +30 210 2409486<br />
info@dgbellos.gr<br />
SIGURD SØRUM A. S.<br />
NO-1301 Sandvika<br />
Tel +47 67572600<br />
Tax +47 67572610<br />
post@sigurd-sorum.no<br />
INDUSTRA<br />
PT-2710-297 Sintra<br />
Tel +351 2 1910 95 00<br />
Tax +351 2 1910 95 99<br />
jpalhares@tyco-valves.com<br />
MEGA Endüstri Kontrol Sistemieri Tic. Ltd.<br />
Sti.<br />
TR-06810 Ankara<br />
Tel +90 3<strong>12</strong> 242 18 88 pbx<br />
Tax +90 3<strong>12</strong> 242 18 00<br />
megaendustri@megaendustri.com.tr<br />
CTS Control Limited Liability Company<br />
UA-02099 Kiyiv<br />
Tel +38 044 566-9971, -8427<br />
Tax +38 044 566-9384<br />
v_polyakov@cts.com.ua<br />
Africa<br />
AUMA South Africa (Pty) Ltd.<br />
ZA-1560 Springs<br />
Tel +27 11 3632880<br />
Tax +27 11 8185248<br />
aumasa@mweb.co.za<br />
A.T.E.C.<br />
EG- Cairo<br />
Tel +20 2 3599680 - 3590861<br />
Tax +20 2 3586621<br />
atec@intouch.com<br />
America<br />
AUMA ACTUATORS INC.<br />
US-PA 15317 Canonsburg<br />
Tel +1 724-743-AUMA (2862)<br />
Tax +1 724-743-4711<br />
mailbox@auma-usa.com<br />
www.auma-usa.com<br />
AUMA Chile Respresentative Office<br />
CL- Buin<br />
Tel +56 2 821 4108<br />
Tax +56 2 281 9252<br />
aumachile@adsl.tie.cl<br />
LOOP S. A.<br />
AR-C1140ABP Buenos Aires<br />
Tel +54 11 4307 2141<br />
Tax +54 11 4307 86<strong>12</strong><br />
contacto@loopsa.com.ar<br />
Asvotec Termoindustrial Ltda.<br />
BR-13190-000 Monte Mor/ SP.<br />
Tel +55 19 3879 8735<br />
Tax +55 19 3879 8738<br />
atuador.auma@asvotec.com.br<br />
TROY-ONTOR Inc.<br />
CA-L4N 5E9 Barrie Ontario<br />
Tel +1 705 721-8246<br />
Tax +1 705 721-5851<br />
troy-ontor@troy-ontor.ca<br />
MAN Ferrostaal de Colombia Ltda.<br />
CO- Bogotá D.C.<br />
Tel +57 1 401 1300<br />
Tax +57 1 416 5489<br />
dorian.hernandez@manferrostaal.com<br />
www.manferrostaal.com<br />
PROCONTIC Procesos y Control Automático<br />
EC- Quito<br />
Tel +593 2 292 0431<br />
Tax +593 2 292 2343<br />
info@procontic.com.ec<br />
IESS DE MEXICO S. A. de C. V.<br />
MX-C.P. 02900 Mexico D.F.<br />
Tel +52 55 55 561 701<br />
Tax +52 55 53 563 <strong>33</strong>7<br />
informes@iess.com.mx<br />
Corsusa S.A.C.<br />
PE- Miralflores - Lima<br />
Tel +511444-<strong>12</strong>00 / 0044 / 2321<br />
Tax +511444-3664<br />
corsusa@corsusa.com<br />
www.corsusa.com<br />
PASSCO Inc.<br />
PR-00936-4153 San Juan<br />
Tel +18 09 78 77 20 87 85<br />
Tax +18 09 78 77 31 72 77<br />
Passco@prtc.net<br />
Suplibarca<br />
VE- Maracaibo Estado, Zulia<br />
Tel +58 261 7 555 667<br />
Tax +58 261 7 532 259<br />
suplibarca@intercable.net.ve<br />
Asia<br />
AUMA Actuators (Tianjin) Co., Ltd.<br />
CN-300457 Tianjin<br />
Tel +86 22 6625 1310<br />
Tax +86 22 6625 1320<br />
mailbox@auma-china.com<br />
www.auma-china.com<br />
AUMA (INDIA) PRIVATE LIMITED<br />
IN-560 058 Bangalore<br />
Tel +91 80 2839 4655<br />
Tax +91 80 2839 2809<br />
info@auma.co.in<br />
www.auma.co.in<br />
AUMA JAPAN Co., Ltd.<br />
JP-210-0848 Kawasaki-ku, Kawasaki-shi<br />
Kanagawa<br />
Tel +81 44 329 1061<br />
Tax +81 44 366 2472<br />
mailbox@auma.co.jp<br />
22
AUMA ACTUATORS (Singapore) Pte Ltd.<br />
SG-569551 Singapore<br />
Tel +65 6 4818750<br />
Tax +65 6 4818269<br />
sales@auma.com.sg<br />
www.auma.com.sg<br />
Al Ayman Industrial. Eqpts<br />
AE- Dubai<br />
Tel +971 4 3682720<br />
Tax +971 4 3682721<br />
auma@emirates.net.ae<br />
PERFECT CONTROLS Ltd.<br />
HK- Tsuen Wan, Kowloon<br />
Tel +852 2493 7726<br />
Tax +852 2416 3763<br />
joeip@perfectcontrols.com.hk<br />
DW Controls Co., Ltd.<br />
KR-153-803 Seoul Korea<br />
Tel +82 2 2113 1100<br />
Tax +82 2 2113 1088/1089<br />
sichoi@actuatorbank.com<br />
www.actuatorbank.com<br />
AL-ARFAJ Eng. Company W. L. L.<br />
KW-22004 Salmiyah<br />
Tel +965 4817448<br />
Tax +965 4817442<br />
arfaj@qualitynet.net<br />
Petrogulf W.L.L<br />
QA- Doha<br />
Tel +974 4350 151<br />
Tax +974 4350 140<br />
pgulf@qatar.net.qa<br />
Sunny <strong>Valves</strong> and Intertrade Corp. Ltd.<br />
TH-10<strong>12</strong>0 Yannawa Bangkok<br />
Tel +66 2 2400656<br />
Tax +66 2 2401095<br />
sunnyvalves@inet.co.th<br />
www.sunnyvalves.co.th/<br />
Top Advance Enterprises Ltd.<br />
TW- Jhonghe City Taipei Hsien (235)<br />
Tel +886 2 2225 1718<br />
Tax +886 2 8228 1975<br />
support@auma-taiwan.com.tw<br />
www.auma-taiwan.com.tw<br />
Australia<br />
BARRON GJM Pty. Ltd.<br />
AU-NSW 1570 Artarmon<br />
Tel +61 294361088<br />
Tax +61 294393413<br />
info@barron.com.au<br />
www.barron.com.au<br />
2006-<strong>12</strong>-08<br />
23
AUMA Riester GmbH & Co. KG<br />
P.O.Box 1362<br />
D-79373 Müllheim<br />
Tel +49 7631 809 - 0<br />
Fax+49 7631 809 - <strong>12</strong>50<br />
riester@auma.com<br />
www.auma.com<br />
Certificate Registration No.<br />
<strong>12</strong> 100/104 4269<br />
For detailed information on AUMA products refer to the Internet: www.auma.com<br />
Y000.328/003/en/1.07
Part-turn gearboxes<br />
Worm gearboxes<br />
GS 50.3 – GS 250.3<br />
for flange types FA<br />
Operation instructions
Worm gearboxes GS 50.3 – GS 250.3<br />
Operation instructions<br />
Scope of these instructions:<br />
These operation instructions are valid for worm gearboxes of the type range<br />
GS 50.3 – GS <strong>12</strong>5.3 with primary reduction gearings VZ 2.3 – VZ 4.3. and GS<br />
160.3 – GS 250.3 with primary reduction gearings GZ 160.3 – GZ 250.3.<br />
Table of contents<br />
Page<br />
1. Safety instructions 3<br />
1.1 Range of application 3<br />
1.2 Maintenance 3<br />
1.3 Warnings and notes 3<br />
2. Technical data 4<br />
3. Transport, storage and packaging 7<br />
3.1 Transport 7<br />
3.2 Storage 7<br />
3.3 Packaging 7<br />
4. Fitting the handwheel 7<br />
5. Mounting positions of the different versions 8<br />
6. Mounting multi-turn actuators SA/SAR 9<br />
7. Mounting to valve 11<br />
8. Setting the end stops for manual operation <strong>12</strong><br />
8.1 Worm gearboxes on butterfly valves <strong>12</strong><br />
8.2 Worm gearboxes on ball valves 13<br />
9. Setting the end stops with mounted multi-turn electric actuator 13<br />
9.1 Worm gearboxes on butterfly valves 13<br />
9.2 Worm gearboxes on ball valves 14<br />
10. Changing the swing angle 16<br />
10.1 Changing the swing angle for sizes GS 50.3 – GS <strong>12</strong>5.3 (option) 16<br />
10.2 Changing the swing angle for sizes GS 160.3 – GS 250.3 17<br />
11. Enclosure protection IP 68 18<br />
<strong>12</strong>. Maintenance 19<br />
<strong>12</strong>.1 General notes 19<br />
<strong>12</strong>.2 Grease change for worm gearboxes GS 50.3 – GS <strong>12</strong>5.3 and primary reduction gearing<br />
VZ 2.3 – VZ 4.3 20<br />
<strong>12</strong>.2.1 Worm gearboxes 20<br />
<strong>12</strong>.2.2 Primary reduction gearing 20<br />
<strong>12</strong>.3 Grease change for worm gearboxes GS 160.3 – GS 250.3 and primary reduction gearing<br />
GZ 160.3 – GZ 250.3 21<br />
<strong>12</strong>.3.1 Worm gearboxes 21<br />
<strong>12</strong>.3.2 Single-stage reductions gearings GZ 160.3 – GZ 250.3 (reduction ratios 4:1 and 8:1) 21<br />
<strong>12</strong>.3.3 Double-stage primary reduction gearing GZ 200.3 – GZ 250.3 (reduction ratio 16:1) 22<br />
<strong>12</strong>.4 After maintenance 22<br />
13. Disposal and recycling 23<br />
14. Service 23<br />
15. Spare parts list worm gearboxes GS 50.3 – GS <strong>12</strong>5.3 and reduction gearing<br />
VZ 2.3 – VZ 4.3 24<br />
16. Spare parts list worm gearboxes GS 160.3 – GS 250.3 26<br />
17. Spare parts list reduction gearings GZ 160.3 – GZ 250.3 (reduction ratios 4:1, 8:1 and 16:1) 28<br />
Index 31<br />
Addresses of AUMA offices and representatives 32<br />
2
Operation instructions Worm gearboxes GS 50.3 – GS 250.3<br />
1. Safety instructions<br />
1.1 Range of application AUMA worm gearboxes GS 50.3 – GS 250.3 are used for the operation of valves<br />
(e.g. butterfly valves and ball valves).<br />
They are designed for manual operation as well as motor operation in conjunction<br />
with electric actuators.<br />
For other applications, please consult us. The manufacturer is not liable for any<br />
possible damage resulting from use in other than the designated applications.<br />
Such risk lies entirely with the user.<br />
Observance of these operation instructions is considered as part of the gearboxes’<br />
designated use.<br />
1.2 Maintenance The maintenance instructions (refer to page 19) must be observed, otherwise a<br />
safe operation of the worm gearbox is no longer guaranteed.<br />
1.3 Warnings and notes Non-observance of the warnings and notes may lead to serious injuries or<br />
damage. Qualified personnel must be thoroughly familiar with all warnings and<br />
notes in these operation instructions.<br />
Correct transport, proper storage, mounting and installation, as well as careful<br />
commissioning are essential to ensure a trouble-free and safe operation.<br />
The following references draw special attention to safety-relevant procedures in<br />
these operation instructions. Each is marked by the appropriate pictograph.<br />
This pictograph means: Note!<br />
“Note” marks activities or procedures which have major influence on the correct<br />
operation. Non-observance of these notes may lead to consequential damage.<br />
This pictograph means: Warning!<br />
“Warning” marks activities or procedures which, if not carried out correctly, can<br />
affect the safety of persons or material.<br />
3
Worm gearboxes GS 50.3 – GS 250.3<br />
Operation instructions<br />
2. Technical data<br />
Features and functions<br />
Version<br />
Housing material<br />
Self-locking<br />
Output torques<br />
End stops<br />
Strength of end stop<br />
Standard: clockwise rotation RR, counterclockwise rotation LL, option: RL or LR<br />
Standard: cast iron (GJL-250), Option: spheroidal cast iron (GJS-400-15)<br />
The gearboxes are self-locking when at stand-still under normal service conditions; strong<br />
vibrations may cancel the self-locking effect. While in motion, safe breaking is not guaranteed. If<br />
this is required, a separate brake must be used.<br />
Type<br />
Output torques<br />
100 % 140 % 175 % 1) 200 % 1) Modulating torque 2)<br />
max. ft lbs. max. ft lbs. max. ft lbs. max. ft lbs. max. ft lbs.<br />
GS 50.3 184 258 – 369 92<br />
GS 63.3 369 516 – 738 184<br />
GS 80.3 738 1,0<strong>33</strong> – 1,475 369<br />
GS 100.3 1,475 2,065 – 2,950 738<br />
GS <strong>12</strong>5.3 2,950 4,130 – 5,900 1,475<br />
GS 160.3 5,900 8,298 10,326 – 2,950<br />
GS 200.3 11,801 16,595 20,652 – 5,900<br />
GS 250.3 23,602 32,822 41,303 – 16,000<br />
Positive for both end positions by traveling nut, sensitive adjustment<br />
Guaranteed strength of end stop (in ft lbs.) for input side operation<br />
Type GS 50.3 GS 63.3 GS 80.3 GS 100.3 GS <strong>12</strong>5.3<br />
Reduction gearing – – – VZ 2.3 VZ 3.3 VZ 4.3 VZ 2.3 VZ 3.3 VZ 4.3<br />
ft lbs. 185 <strong>33</strong>0 <strong>33</strong>0 370 185 370 185<br />
Swing angle<br />
GS 50.3 – GS <strong>12</strong>5.3<br />
Swing angle<br />
GS 160.3 – GS 250.3<br />
Standard: Fixed swing angle up to max. 100°; set in the factory to 92° unless ordered otherwise.<br />
Options: Adjustable in steps of:<br />
10°– 35°, 35° – 60°, 60° – 80°, 80° – 100°, 100° – <strong>12</strong>5°, <strong>12</strong>5° – 150°,<br />
150° – 170°, 170° – 190°<br />
For version with worm wheel made of bronze: swing angle > 190°,<br />
Multi-turn version without end stops, version GSD 3)<br />
Standard: Adjustable 80° – 100°; set in the factory to 92° unless ordered otherwise.<br />
Options: Adjustable in steps of: 20° – 40°, 40° – 60°, 60° – 80°,<br />
For version with worm wheel made of bronze: swing angle > 100°,<br />
‘ Multi-turn version without end stops, version GSD 3)<br />
Mechanical position indicator Standard: Pointer cover for continuous position indication<br />
Options: Sealed pointer cover for horizontal outdoor installation 4)<br />
Protection cover for buried service instead of pointer cover<br />
Input shaft Cylindrical with parallel key according to DIN 6885.1<br />
Operation<br />
Motor operation<br />
Type of duty<br />
Manual operation 5)<br />
Type GS 160.3 GS 200.3 GS 250.3<br />
Reduction gearing GZ 160.3 GZ 200.3 GZ 250.3<br />
Reduction ratio 4:1 8:1 4:1 8:1 16:1 4:1 8:1 16:1<br />
ft lbs. 370 <strong>33</strong>0 370 370<br />
With electric multi-turn actuator, directly or through primary reduction gearing VZ/GZ<br />
Flanges for mounting of actuator, refer also to separate technical data sheets.<br />
According to actuator<br />
Via handwheel, directly or through primary reduction gearing VZ/GZ<br />
Available handwheel diameters, selection according to the max. output torque:<br />
Type GS 50.3 GS 63.3 GS 80.3 GS 100.3 GS <strong>12</strong>5.3<br />
Reduction gearing – – – – VZ 2.3 VZ 3.3 VZ 4.3 – VZ 2.3 VZ 3.3 VZ 4.3<br />
Handwheel Ø<br />
mm<br />
160<br />
200<br />
250<br />
250<br />
315<br />
25.4 mm correspond to 1 inch<br />
1) With worm wheel made of spheroidal cast iron<br />
2) Requires worm wheel made of bronze<br />
3) Special sizing is required<br />
4) For gas applications with sealed pointer cover, an air vent in the pointer cover or venting grooves in the valve mounting flange must be provided<br />
5) Handwheel sizes shown reflect general industrial selection criteria. For information on gearbox/handwheel selection in accordance with AWWA Standard C504, please<br />
refer to separate selection list/chart.<br />
315<br />
400<br />
400<br />
500<br />
Type GS 160.3 GS 200.3 GS 250.3<br />
Reduction gearing – GZ 160.3 – GZ 200.3 – GZ 250.3<br />
Handwheel Ø<br />
mm<br />
630<br />
800<br />
400 315 – 500<br />
630<br />
400 315 – 800 500<br />
630<br />
400<br />
315<br />
400<br />
315<br />
400<br />
250<br />
315<br />
500<br />
630<br />
800<br />
400<br />
500<br />
400<br />
500<br />
315<br />
400<br />
4
Operation instructions Worm gearboxes GS 50.3 – GS 250.3<br />
Primary reduction gearing<br />
Primary reduction gearing Planetary gear with various reduction ratios for reducing the input torques<br />
Valve attachment<br />
Valve attachment Dimensions according to SP 101<br />
Standard: GS 50.3 – GS <strong>12</strong>5.3:<br />
GS 160.3 – GS 250.3:<br />
without spigot<br />
without spigot<br />
Options: GS 50.3 – GS <strong>12</strong>5.3:<br />
GS 160.3 – GS 250.3:<br />
with spigot<br />
with spigot<br />
Splined coupling for connection<br />
to the valve shaft<br />
Standard: without bore or pilot bore from GS 160.3<br />
Worm gearbox can be repositioned 4 x 90° on coupling<br />
Options: Machined with bore and keyway, square bore or bore with two-flats<br />
Service conditions<br />
Enclosure protection according Standard: IP 68-3, dust and water tight up to max. 3 m head of water<br />
to EN 60 529 6) Options 7) : IP 68-6, dust and water tight up to max. 6 m head of water<br />
IP 68-10, dust and water tight up to max. 10 m head of water<br />
IP 68-20, dust and water tight up to max. 20 m head of water<br />
Corrosion protection Standard: KN Suitable for installation in industrial units, in water or power plants<br />
with a low pollutant concentration<br />
Options: KS Suitable for installation in occasionally or permanently aggressive<br />
atmosphere with a moderate pollutant concentration<br />
(e.g. in wastewater treatment plants, chemical industry)<br />
KX Suitable for installation in extremely aggressive atmosphere<br />
with high humidity and high pollutant concentration<br />
Paint Standard: GS 50.3 – GS <strong>12</strong>5.3:<br />
GS 160.3 – GS 250.3:<br />
Two-component iron-mica combination<br />
Two-component iron-mica combination<br />
Color Standard: Grey (DB 702, similar to RAL 9007)<br />
Option: Other colors on request<br />
Ambient temperature Standard: – 20 °F to + 175 °F/ – 25 °C to + 80 °C<br />
Options: – 40 °F to + 140 °F/ – 40 °C to + 60 °C (low temperature), version L<br />
– 75 °F to + 140 °F/ – 60 °C to + 60 °C (extreme low temperature), version EL<br />
+ 32 °F to + 250 °F/ – 0 °C to + <strong>12</strong>0 °C (high temperature), version H<br />
Lifetime<br />
Open-close duty: The lifetime is based on a load profile typical for part-turn valves<br />
Type<br />
Operating cycles (OPEN - CLOSE - OPEN)<br />
for swivel movements of 90° (max. 100°)<br />
and a maximum output torque of<br />
100 % 140 % 175 % 8) 200 % 9)<br />
GS 50.3 15,000 5,000 – 1,000<br />
GS 63.3 15,000 5,000 – 1,000<br />
GS 80.3 15,000 5,000 – 1,000<br />
GS 100.3 15,000 5,000 – 1,000<br />
GS <strong>12</strong>5.3 15,000 5,000 – 1,000<br />
GS 160.3 15,000 5,000 1,000 –<br />
GS 200.3 15,000 5,000 1,000 –<br />
GS 250.3 10,000 3000 750 –<br />
Modulating duty: min. 2.5 million operations 8)<br />
6) Refer to section enclosure protection IP 68<br />
7) Not available for GS 50.3<br />
8) With worm wheel made of spheroidal cast iron<br />
9) The lifetime for modulating duty depends on the load and the number of starts. A high starting frequency will rarely improve the modulating accuracy. To reach the<br />
longest possible maintenance and fault-free operation time, the number of starts per hour chosen should be as low as permissible for the process<br />
5
Worm gearboxes GS 50.3 – GS 250.3<br />
Operation instructions<br />
Accessories<br />
Valve position indicators<br />
Limit switching<br />
Valve position indicator WSG for the signalization of intermediate and end positions for precise<br />
and low-backlash feedback for swing angles ranging from 82° – 98°<br />
(refer to separate data sheet)<br />
Valve position indicator WGD for signalization of intermediate and end positions for swing<br />
angles > 180° (refer to separate data sheet)<br />
Limit switching WSH for manually operated valves. For the signalization of intermediate and<br />
end positions (refer to separate data sheet)<br />
Further information<br />
Reference documents Product description Worm gearboxes GS 50.3 – GS 250.3 /GS 315 – GS 500<br />
Dimension sheets GS 50.3 – GS <strong>12</strong>5.3, GS 160.3 – GS 250.3<br />
Technical data GS 50.3 – GS <strong>12</strong>5.3, GS 160.3 – GS 250.3<br />
Technical data SA, SAR, WSG, WGD, WSH<br />
Lever gearboxes<br />
See separate documents<br />
6
Operation instructions Worm gearboxes GS 50.3 – GS 250.3<br />
3. Transport, storage and packaging<br />
. If mounted together with actuator:<br />
Attach ropes or hooks for the purpose of lifting by hoist only to the gearbox and<br />
not to the actuator.<br />
. If eyebolts are supplied with the gearbox, they should be used to lift the gearbox<br />
only and not the valve<br />
3.1 Transport . Transport to place of installation in sturdy packing.<br />
3.2 Storage Store in well-ventilated, dry room.<br />
Protect against floor dampness by storage on a shelf or on a<br />
wooden pallet.<br />
.<br />
Cover to protect against dust and dirt.<br />
Apply suitable corrosion protection agent to bare surfaces.<br />
In case worm gearboxes are to be stored for a long period<br />
(more than 6 months), the following points must be observed additionally:<br />
Prior to storage: Protect bare surfaces, in particular the output drive parts and<br />
mounting surface, with long-term corrosion protection agent.<br />
. Check for corrosion approximately every 6 months. If first signs of corrosion<br />
show, apply new corrosion protection.<br />
3.3 Packaging Our products are protected by special packaging for the transport ex works. The<br />
packaging consists of environmentally friendly materials which can easily be<br />
separated and recycled.<br />
For the disposal of the packaging material, we recommend recycling and collection<br />
centers.<br />
4. Fitting the handwheel For worm gearboxes designed for manual operation the handwheel may be<br />
supplied separately. Fitting is done on site according to figure A.<br />
Figure A: Handwheel<br />
Circlip<br />
Spacer<br />
(may be required)<br />
Spacer<br />
(may be required)<br />
Circlip<br />
Ball handle<br />
(option)<br />
Worm shaft<br />
gearbox<br />
Handwheel<br />
7
Worm gearboxes GS 50.3 – GS 250.3<br />
Operation instructions<br />
5. Mounting positions of the different versions<br />
RR LL RL LR<br />
Description of the 4 versions (viewed at the pointer cover):<br />
Code Direction of rotation at input shaft Position of worm shaft Direction of rotation at output drive<br />
RR clockwise Right side clockwise<br />
LL clockwise Left side counterclockwise<br />
RL clockwise Right side counterclockwise<br />
LR clockwise Left side clockwise<br />
Mounting positions of AUMA multi-turn actuator with AUMA worm gearbox (please indicate when ordering)<br />
GS versions RR / RL<br />
RR<br />
RR<br />
RR<br />
RR<br />
RL<br />
RL<br />
RL<br />
RL<br />
A<br />
B<br />
C<br />
D<br />
GS versions LL / LR<br />
LL<br />
LL<br />
LL<br />
LL<br />
LR<br />
LR<br />
LR<br />
LR<br />
A<br />
B<br />
Mounting positions can easily be changed at a later date.<br />
C<br />
D<br />
Limitation: For SA/SAR 14.1/14.5 with GS <strong>12</strong>5.3, mounting position “C” in version RR/RL and “A” in version LL/LR is<br />
only possible for a handwheel diameter up to <strong>12</strong>.4 ”.<br />
Up to size GS <strong>12</strong>5.3, the actuator-gearbox combination is delivered in the ordered mounting position. For packing<br />
reasons, actuator and gearbox is delivered separately from size GS 160.3.<br />
8
Operation instructions Worm gearboxes GS 50.3 – GS 250.3<br />
6. Mounting multi-turn actuators SA/SAR<br />
When gearboxes and multi-turn actuators are supplied together, the mounting has<br />
been done in the factory up to gearbox size GS <strong>12</strong>5.3. For sizes GS 160.3 and<br />
larger, the mounting of gearboxes is performed as follows.<br />
In case flange for actuator is not attached to gearbox or<br />
reduction gearing:<br />
Thoroughly degrease the mounting faces of the gearbox or reduction gearing as<br />
well as the flange for actuator.<br />
For GS 100.3 – GS 250.3:<br />
Insert pin in the corresponding groove of the bearing cover.<br />
.<br />
Fit flange for actuator and fasten with bolts and lock washers.<br />
Fasten bolts crosswise with a torque according to table 2.<br />
Figure B: Mounting multi-turn actuator to worm gearbox<br />
Flange for actuator<br />
Bearing flange<br />
Flange for actuator<br />
Primary<br />
reduction<br />
gearing<br />
Bearing flange<br />
Mounting the multi-turn actuator:<br />
Thoroughly degrease the faces of the flange for actuator at the gearbox or<br />
reduction gearing as well as the actuator’s bearing flange.<br />
. Place the multi-turn actuator on the worm gearbox or reduction gearing. The<br />
multi-turn actuator can be mounted on the valve at every 90°<br />
(see page 8, mounting positions).<br />
Ensure that the spigot mates uniformly in the recess and that the mounting faces<br />
are in complete contact.<br />
Fasten actuator with bolts and lock washers (see table 1) at the flange of the<br />
worm gearbox.<br />
. Fasten bolts crosswise with a torque according to table 2.<br />
Do not attach ropes or hooks for the purpose of lifting the actuator<br />
by hoist to the handwheel. If multi-turn actuator is mounted on<br />
gearbox, attach ropes or hooks for the purpose of lifting by hoist<br />
to gearbox and not to multi-turn actuator.<br />
9
Worm gearboxes GS 50.3 – GS 250.3<br />
Operation instructions<br />
Table 1:<br />
Bolts for mounting AUMA actuators to worm gearboxes/ primary reduction gearing<br />
(strength class min. 8.8)<br />
Worm gearbox/<br />
primary<br />
reduction gearing<br />
SA(R) 07.1-FA10<br />
Bolt<br />
(UNC)<br />
Lock<br />
washer<br />
Qty.<br />
GS 50.3 3/8-16x1 3/8 4<br />
SA(R) 07.5-FA10<br />
Bolt<br />
(UNC)<br />
Lock<br />
washer<br />
Qty.<br />
GS 63.3 3/8-16x1 3/8 4 3/8-16x1 3/8 4<br />
GS 80.3 3/8-16x1 3/8 4<br />
GS 100.3<br />
GS 100.3/VZ 3/8-16x1 3/8 4 3/8-16x1 3/8 4<br />
GS <strong>12</strong>5.3<br />
GS <strong>12</strong>5.3/VZ 3/8-16x1 3/8 4<br />
GS 160.3<br />
GS 160.3/GZ 3/8-16x1 3/8 4 3/8-16x1 3/8 4<br />
GS 200.3<br />
GS 200.3/GZ 3/8-16x1 3/8 4 3/8-16x1 3/8 4<br />
Worm gearbox/<br />
primary<br />
reduction gearing<br />
SA(R) 10.1-FA10 SA(R) 14.1-FA14 SA(R) 14.5-FA14 SA(R) 16.1-FA16<br />
Bolt<br />
(UNC)<br />
Lock<br />
washer<br />
Qty.<br />
GS 63.3 3/8-16x1 3/8 4<br />
GS 80.3 3/8-16x1 3/8 4<br />
Bolt<br />
(UNC)<br />
Lock<br />
washer<br />
GS 100.3 3/8-16x1 3/8 4 5/8-11x1 1 2 5/8 4<br />
GS 100.3/VZ 3/8-16x1 3/8 4<br />
Qty.<br />
Bolt<br />
(UNC)<br />
Lock<br />
washer<br />
GS <strong>12</strong>5.3 5/8-11x1 1 2 5/8 4 5/8-11x1 1 2 5/8 4<br />
GS <strong>12</strong>5.3/VZ 3/8-16x1 3/8 4 5/8-11x1 1 2 5/8 4<br />
Qty.<br />
Bolt<br />
(UNC)<br />
Lock<br />
washer<br />
GS 160.3 5/8-11x1 1 2 5/8 4<br />
3 4 -10x2 3/4 4<br />
GS 160.3/GZ 3/8-16x1 3/8 4 5/8-11x1 1 2 5/8 4<br />
GS 200.3<br />
3 4 -10x2 3/4 4<br />
GS 200.3/GZ 3/8-16x1 3/8 4 5/8-11x1 1 2 5/8 4 5/8-11x1 1 2 5/8 4<br />
GS 250.3<br />
GS 250.3/GZ 3/8-16x1 3/8 4 5/8-11x1 1 2 5/8 4 5/8-11x1 1 2 5/8 4<br />
3 4 -10x2 3/4 4<br />
Qty.<br />
Worm gearbox/<br />
primary<br />
reduction gearing<br />
GS 160.3<br />
GS 160.3/GZ<br />
SA(R) 25.1-FA25<br />
Bolt<br />
(UNC)<br />
Lock<br />
washer<br />
Qty.<br />
GS 200.3 5/8-11x2 5/8 8<br />
GS 200.3/GZ<br />
SA(R) 30.1-FA30<br />
Bolt<br />
(UNC)<br />
Lock<br />
washer<br />
GS 250.3 5/8-11x2 5/8 8<br />
3 4 -10x2 3/4 8<br />
GS 250.3/GZ<br />
Qty.<br />
10
Operation instructions Worm gearboxes GS 50.3 – GS 250.3<br />
7. Mounting to valve AUMA worm gearboxes GS and primary reduction gearings VZ/GZ can be<br />
operated in any mounting position.<br />
. For butterfly valves, the recommended mounting position is end position<br />
CLOSED<br />
(Prior to mounting, bring the gearbox to the mechanical end stop CLOSED by<br />
turning the handwheel clockwise).<br />
. For ball valves, the recommended mounting position is end position OPEN<br />
(Prior to mounting, bring the gearbox to the mechanical end stop OPEN by<br />
turning the handwheel counterclockwise).<br />
Alternatively, the limit stop housing can be turned up to the end position of the<br />
respective valve.<br />
Thoroughly degrease mounting faces of gearbox and valve.<br />
Place coupling sleeve onto valve shaft and secure (refer to figure C, detail A or B),<br />
ensure that dimensions X, Y, and Z are observed (refer to table 2).<br />
Apply non-acidic grease at splines of coupling.<br />
Mount gearbox on valve. Ensure that the spigot (if provided) mates uniformly in the<br />
recess and that the mounting faces are in complete contact.<br />
.<br />
Fasten gearbox with bolts (quality min. 8.8) and lock washers.<br />
Fasten bolts crosswise with a torque according to table 2.<br />
Figure C<br />
Coupling<br />
A<br />
B<br />
Grub screw<br />
Z<br />
X<br />
Y<br />
Valve<br />
Table 2: Standard dry fastening torques for bolts<br />
Gearbox Dimensions Bolts Strength class<br />
Grade 5<br />
Flange type<br />
X<br />
max<br />
Y max Z max Qty. x threads<br />
(UNC)<br />
Fastening torque T A<br />
[Ft lbs.]<br />
GS 50.3-FA10 14 5 61 4 x 3 8 - 16 <strong>33</strong><br />
GS 63.3-FA10 7 18 73 4 x 3 8 - 16 <strong>33</strong><br />
GS 63.3-FA<strong>12</strong> 10 13 76 4 x 1 2 - 13 78<br />
GS 80.3-FA14 23 5 88 4 x 5 8 - 11 155<br />
GS 100.3-FA14 22 13 <strong>12</strong>3 4 x 5 8 - 11 155<br />
GS 100.3-FA16 22 8 <strong>12</strong>3 4 x 3 4 - 10 257<br />
GS <strong>12</strong>5.3-FA16 17 35 <strong>12</strong>6 4 x 3 4 - 10 257<br />
GS <strong>12</strong>5.3-FA25 17 27 <strong>12</strong>6 8 x 5 8 - 11 155<br />
GS 160.3-FA25 15 11 130 8 x 5 8 - 11 155<br />
GS 160.3-FA30 30 0 140 8 x 3 4 - 10 255<br />
GS 200.3-FA30 19 19 160 8 x 3 4 - 10 255<br />
GS 200.3-FA35 44 0 190 8 x 1 - 8 590<br />
GS 250.3-FA35 8 8 220 8 x 1 - 8 590<br />
GS 250.3-FA40 13 0 230 8 x 1 1 4 - 7 1,200<br />
Note:<br />
Experience showed that it is very difficult to fasten bolts or nuts of 1-8 UNC or<br />
larger with the defined torques. The worm gearbox may be moved radially against<br />
the valve flange by accident.<br />
To improve adhesion between valve and gearbox, we recommend to apply<br />
Loctite 243 (or similar products) on mounting faces.<br />
11
Worm gearboxes GS 50.3 – GS 250.3<br />
Operation instructions<br />
8. Setting the end stops for manual operation<br />
If worm gearboxes GS are supplied on a valve the end stops are<br />
already set by the valve manufacturer.<br />
8.1 Worm gearboxes on butterfly valves<br />
Setting end position CLOSED. Remove all bolts (03) at limit stop housing (figures D, E).<br />
Turn valve manually to end position CLOSED.<br />
In case limit stop housing (10) has not yet rotated, turn it clockwise up to the<br />
stop.<br />
If the holes of limit stop housing (10) do not align with the threads of the housing<br />
(1), take off the limit stop housing (10) and replace it in the required position.<br />
.<br />
Fasten bolts (03) with lock washers (04).<br />
Fasten bolts crosswise with a torque according to table 3.<br />
Table 3<br />
Gearbox<br />
End stops fastened<br />
with<br />
bolts (03)<br />
Material<br />
Protective cap<br />
fastened with<br />
bolts (054)<br />
Material<br />
Fastening torque<br />
T A [Nm]<br />
GS 50.3 M 8 A2-80 24<br />
GS 63.3 M 8 A2-80 24<br />
GS 80.3 M 8 A2-80 24<br />
GS 100.3 M <strong>12</strong> A2-80 82<br />
GS <strong>12</strong>5.3 M <strong>12</strong> A2-80 82<br />
GS 160.3 M 10 A2-80 M 6 A2-80 48<br />
GS 200.3 M <strong>12</strong> A2-80 M 6 A2-80 82<br />
GS 250.3 M 16 A2-80 M 6 A2-80 200<br />
Conversion factor: 1 Nm corresponds to 0.74 ft lbs.<br />
Figure D: End stop up to GS <strong>12</strong>5.3<br />
Figure E: End stop from GS 160.3<br />
03/04<br />
03/04<br />
10 1<br />
10 1<br />
. If the position of the pointer cover does not correspond to the symbol CLOSED,<br />
slightly loosen the screws of the pointer cover. Turn the pointer cover to the<br />
CLOSED symbol and fasten the screws again.<br />
Setting end position OPEN<br />
The end stop need not be set since the required swing angle has been set in the<br />
factory.<br />
If the swing angle does not match, refer to section 10.<br />
<strong>12</strong>
Operation instructions Worm gearboxes GS 50.3 – GS 250.3<br />
8.2 Worm gearboxes on ball valves<br />
In case end stops require adjustment, set end position OPEN first.<br />
If the exact end position of the valve cannot be seen through a<br />
position marking at the valve shaft, the setting may have to be<br />
done with the valve removed.<br />
Setting end position OPEN<br />
Remove all bolts (03) at limit stop housing (10) (figures D, E).<br />
Turn valve manually to end position OPEN.<br />
In case limit stop housing (10) has not yet rotated, turn it counterclockwise up to<br />
the stop.<br />
If the holes of limit stop housing (10) do not align with the threads of the housing<br />
(1), take off the limit stop housing (10) and replace it in the required position.<br />
.<br />
Fasten bolts crosswise with a torque according to table 3.<br />
If the position of the pointer cover does not correspond to the symbol OPEN,<br />
slightly loosen the screws of the pointer cover. Turn the pointer cover to the<br />
OPEN symbol and fasten the screws again.<br />
Setting end position The end stop need not be set since the required swing angle has been set in the<br />
CLOSED<br />
factory.<br />
If the swing angle does not match, refer to section 10.<br />
9. Setting the end stops with mounted multi-turn electric actuator<br />
. If worm gearboxes GS and multi-turn actuators are supplied on a<br />
valve, the end stops as well as limit and torque switching should<br />
already have been set by the valve manufacturer.<br />
. If the limit and torque switching have not yet been set, they have<br />
to be set according to the operation instructions SA/SAR and the<br />
specifications of the valve manufacturer.<br />
. The valve manufacturer states whether the valve should be limit<br />
or torque seated.<br />
9.1 Worm gearboxes on butterfly valves<br />
. Determine the overrun of the multi-turn actuator for both directions, i. e. how much<br />
does the valve move after the motor has been switched off?<br />
Setting end position CLOSED. Remove all bolts (03) at limit stop housing (figures D, E).<br />
Change actuator to manual drive and move the valve manually to end position<br />
CLOSED.<br />
In case limit stop housing (10) has not yet rotated, turn it clockwise up to the<br />
stop.<br />
. Turn limit stop housing (10) back counterclockwise by ½ turn. This ensures that<br />
the mechanical end stop is not reached in electric operation and thus the valve<br />
can close tightly, provided that torque seating has been specified.<br />
. If the fixing holes of limit stop housing (10) do not align with the threads of the<br />
housing (1), take off the limit stop housing (10) and replace it in required<br />
position.<br />
Fasten bolts (03) with lock washers (04).<br />
.<br />
Fasten bolts crosswise with a torque according to table 3.<br />
If the position of the pointer cover does not correspond to the symbol CLOSED,<br />
slightly loosen the screws of the pointer cover. Turn the pointer cover to the<br />
CLOSED symbol and fasten the screws again.<br />
13
Worm gearboxes GS 50.3 – GS 250.3<br />
Operation instructions<br />
Limit seating in end position CLOSED<br />
Turn back the valve from the end position by an amount equal to the overrun.<br />
.<br />
Set limit switching according to the operation instructions SA/SAR.<br />
Check torque switching for end position CLOSED according to the operation<br />
instructions SA/SAR, and, if necessary, set to the required value.<br />
Setting end position OPEN<br />
Torque seating in end position CLOSED<br />
Turn handwheel counterclockwise by approx. 4 – 6 turns.<br />
Set limit switching for the end position CLOSED according to the operation<br />
instructions SA/SAR (for actuator indication).<br />
. Check torque switching for end position CLOSED or set to the required value.<br />
The end stop need not be set since the required swing angle has been set in the<br />
factory.<br />
. Move gearbox to the end stop in position OPEN.<br />
The last part of the travel has to be made manually.<br />
. To turn the valve back manually from the end position by an amount equal to the<br />
overrun, proceed as follows:<br />
For actuators mounted directly:<br />
by approx. 4 to 6 turns at the handwheel.<br />
With mounted primary reduction gearing VZ/GZ:<br />
by approx. 10 to 15 turns at the handwheel, according to the reduction ratio of<br />
the primary reduction gearing.<br />
. Set limit switching in actuator for the end position OPEN according to the<br />
operation instructions SA/SAR.<br />
If the swing angle does not match, refer to section 10.<br />
Figure F: End stop up to GS <strong>12</strong>5.3<br />
Figure G: End stop from GS 160.3<br />
03/04<br />
03/04<br />
10 1<br />
10 1<br />
9.2 Worm gearboxes on ball valves<br />
In case end stops require adjustment, set end position OPEN first.<br />
If the exact end position of the valve cannot be seen through a<br />
position marking at the valve shaft, the setting may have to be<br />
done with the valve removed.<br />
. Determine overrun of the actuator for both directions, i. e. how much does the valve<br />
move after the motor has been switched off?<br />
14
Operation instructions Worm gearboxes GS 50.3 – GS 250.3<br />
Setting end position OPEN<br />
Remove all bolts (03) at limit stop housing (10) (figures F, G).<br />
Change to manual drive and move the valve manually to end position OPEN.<br />
In case limit stop housing (10) has not yet rotated, turn it counterclockwise up to<br />
the stop.<br />
Turn limit stop housing (10) back by ½ turn clockwise. This ensures that the<br />
mechanical end stop is not reached in electric operation.<br />
. If the holes of limit stop housing (10) do not correspond to the threads of the<br />
housing (1), take off the limit stop housing (10) and replace it in the required<br />
position.<br />
Fasten bolts (03) with lock washers (04).<br />
.<br />
Fasten bolts crosswise with a torque according to table 3.<br />
If the position of the pointer cover does not align with the symbol OPEN, slightly<br />
loosen the screws of the pointer cover. Turn the pointer cover to the OPEN<br />
symbol and fasten the screws again.<br />
. Turn back the valve from the end position by an amount equal to the overrun.<br />
Switching off in end position<br />
OPEN<br />
Setting end position<br />
CLOSED<br />
. Set limit switching according to the operation instructions SA/SAR.<br />
The end stop need not be set since the required swing angle has been set in the<br />
factory.<br />
. Move gearbox to the end stop in position CLOSED.<br />
The last part of the travel has to be made manually.<br />
. To turn the valve back manually from the end position by an amount equal to the<br />
overrun, proceed as follows:<br />
For actuators mounted directly:<br />
by approx. 4 to 6 turns at the handwheel.<br />
With mounted primary reduction gearing VZ/GZ:<br />
by approx. 10 to 15 turns at the handwheel, according to the reduction ratio of<br />
the primary reduction gearing.<br />
. Set limit switching in actuator for the end position CLOSED according to the<br />
operation instructions SA/SAR.<br />
If the swing angle does not match, refer to section 10.<br />
15
Worm gearboxes GS 50.3 – GS 250.3<br />
Operation instructions<br />
10. Changing the swing<br />
angle<br />
The adjustment is made in end position OPEN.<br />
Optional for size GS 50.3 – GS <strong>12</strong>5.3<br />
Standard for size GS 160.3 – GS 250.3<br />
Accuracy:<br />
GS 50.3 – GS <strong>12</strong>5.3: 0.6°<br />
GS 160.3 – GS 250.3: 0.11° to 0.14°<br />
10.1 Changing the swing angle for sizes GS 50.3 – GS <strong>12</strong>5.3 (option)<br />
.<br />
Unscrew protective cap (16) at limit stop housing (10) (figure H).<br />
Remove roll pin (020) with appropriate tool (available from AUMA).<br />
Increasing the swing angle<br />
. Turn end stop nut (15) back counterclockwise.<br />
When turning back the end stop nut (015), make sure the roll pin<br />
(020) can still be tapped in within the oblong hole.<br />
.<br />
Move valve into the desired end position.<br />
Turn end stop nut (15) clockwise until it is tight up to the stop nut (7).<br />
Reducing the swing angle<br />
.<br />
Move valve into the desired end position.<br />
Turn end stop nut (15) clockwise until it is tight up to the stop nut (7).<br />
The end stop nut (15) must entirely cover the roll pin (020).<br />
Figure H: End stop up to GS <strong>12</strong>5.3<br />
Figure J: End stop from GS 160.3<br />
082/083<br />
058<br />
03/04<br />
16 020 15 08 10 7<br />
. Tap in roll pin (020) with tool. If slot in end stop nut (15) does not align with the<br />
hole in the worm shaft, turn end stop nut (15) slightly counterclockwise until it is<br />
in alignment, then tap in roll pin.<br />
16<br />
34 15<br />
054<br />
055<br />
056<br />
10 7<br />
Check O-ring (08) and replace, if damaged.<br />
.<br />
Replace protective cap (16).<br />
If gearbox is mounted to a multi-turn actuator, set limit switching again for the<br />
end position OPEN according to the operation instructions SA/SAR. Allow for<br />
overrun.<br />
16
Operation instructions Worm gearboxes GS 50.3 – GS 250.3<br />
10.2 Changing the swing angle for sizes GS 160.3 – GS 250.3<br />
Remove all bolts (054) and pull off protective cap (16)<br />
(figure J).<br />
. Remove screw (082) with washer (058) and setting ring (34).<br />
Increasing the swing angle<br />
Turn end stop nut (15) back counterclockwise.<br />
.<br />
Move valve into the desired end position.<br />
Turn end stop nut (15) clockwise until it is tight up to the stop nut (7).<br />
Reducing the swing angle<br />
Move valve into the desired end position.<br />
Turn end stop nut (15) clockwise until it is tight up to the stop nut (7).<br />
Place setting ring (34), secure with washer (058) and screw (082).<br />
Check O-ring (056) and replace, if damaged.<br />
Place protective cap (16), fasten bolts (054) with lock washers (055).<br />
.<br />
Fasten bolts crosswise with a torque according to table 3.<br />
If gearbox is mounted to a multi-turn actuator, set limit switching again for the<br />
end position OPEN according to the operation instructions SA/SAR. Allow for<br />
overrun.<br />
17
Worm gearboxes GS 50.3 – GS 250.3<br />
Operation instructions<br />
11. Enclosure protection IP 68<br />
Definition<br />
According to EN 60 529, the conditions for meeting the requirements of enclosure<br />
protection IP 68 (requirements exceed those of IP 67) are to be agreed between<br />
manufacturer and user. AUMA worm gearboxes and primary reduction gearings in<br />
enclosure protection IP 68 meet the following requirements according to AUMA:<br />
. IP 68-3, submersible in water up to 3 m head of water<br />
IP 68-6, submersible in water up to 6 m head of water<br />
.<br />
IP 68-10, submersible in water up to 10 m head of water<br />
IP 68-20, submersible in water up to 20 m head of water<br />
For size GS 50.3, only enclosure protection IP 68-3 is available.<br />
If submersed in other media, additional measures for corrosion protection may be<br />
necessary; please consult AUMA. Submersion in aggressive media, e.g. acids or<br />
alkaline solutions, is not permitted.<br />
Review<br />
Gearboxes in enclosure protection IP 68-3 were type tested in the factory.<br />
Gearboxes in enclosure protection IP 68-6, IP 68-10 and IP 68-20 undergo a<br />
routine testing for tightness in the factory.<br />
Note:<br />
The enclosure protection IP 68 refers to the interior of the gearboxes, but not to<br />
the coupling compartment.<br />
If the gearboxes are likely to be repeatedly submersed, a higher corrosion<br />
protection KS or KX is required.<br />
. For gearboxes intended for buried service we strongly recommend to use the<br />
higher corrosion protection KS or KX.<br />
. For horizontal outdoor installation of the gearboxes, a sealed pointer cover<br />
should be used.<br />
For gas applications with sealed pointer cover, an air vent in the pointer cover or<br />
venting grooves in the valve mounting flange must be provided.<br />
. In case of permanent submersion of the gearboxes or for buried service, a<br />
protection cover must be fitted instead of a pointer cover. This will be taken into<br />
account in the factory if indicated on the purchase order. Subsequent exchange<br />
of the pointer cover for the protection cover is possible.<br />
.<br />
Use suitable sealing material between valve flange and gearbox.<br />
Water can enter into the coupling compartment along the valve shaft. This would<br />
lead to corrosion of hub and coupling. Therefore a suitable anticorrosive (or<br />
sticky grease) must be applied to the hub and coupling of the gearbox before<br />
mounting.<br />
. With corrosion protection KX, the hub and coupling are provided with a high<br />
quality corrosion protection as standard.<br />
18
Operation instructions Worm gearboxes GS 50.3 – GS 250.3<br />
<strong>12</strong>. Maintenance<br />
<strong>12</strong>.1 General notes After commissioning, check worm gearbox for damage to paint finish.<br />
Do a thorough touch-up to prevent corrosion.<br />
Original paint in small quantities can be supplied by AUMA.<br />
AUMA worm gearboxes require only very little maintenance.<br />
To ensure that the worm gearbox is always ready to operate, we recommend for<br />
gearboxes operated less than 10 times per year, the following measures:<br />
. Approximately six months after commissioning and every year after check bolts<br />
between multi-turn actuator, worm gearbox, and valve for tightness. If required,<br />
tighten applying the torques given in table 2 (page 11).<br />
Perform a test run every six months.<br />
Perform a visual inspection for grease leakage on each gearbox every<br />
2 years.<br />
Carry out a detailed functional test for each gearbox every 5 years. Record the<br />
results for future reference.<br />
. For gearboxes permanently exposed to ambient temperatures above<br />
104 °F, maintenance must be performed at shorter intervals.<br />
Seals:<br />
Seals made of elastomeric materials are subject to ageing. The theoretical usable<br />
lifetime of the seals made of NBR is 13.5 years from the date of manufacture.<br />
These figures are based on an average ambient temperature of 104 °F. Seal kits<br />
may be obtained from AUMA.<br />
Grease:<br />
A grease and seal change is recommended after the following operation time:<br />
if operated seldom after 10 – <strong>12</strong> years<br />
.<br />
if operated frequently, after 6 – 8 years<br />
in modulating duty after 4 – 6 years<br />
Only original AUMA grease must be used.<br />
.<br />
For the grease type, refer to the name plate.<br />
Lubricants should not be mixed.<br />
Table 4: Grease quantities for worm gearboxes and primary reduction gearings<br />
GS 50.3 63.3 80.3 100.3 <strong>12</strong>5.3 160.3 200.3 250.3<br />
Qty dm³ 0.1 0.3 0.4 1.0 1.3 3.3 6.6 <strong>12</strong>.2<br />
Weight1) g 90 270 360 900 1,170 3,000 6,000 11,000<br />
Primary<br />
VZ<br />
GZ<br />
reduction 2.3 3.3 4.3 160.3 200.3 250.3<br />
gearing<br />
4:1/8:1 16:1 4:1/8:1 16:1<br />
Quantity dm³ 0.35 0.35 0.35 1.0 1.5 2.0 2.2 2.8<br />
Weight1) g 320 320 320 900 1,400 1,800 2,000 2,250<br />
1) for ρ = approx. 900 g/dm3; conversion factor: 1 oz corresponds to 28.35 g<br />
The removed lubricant and the cleaning agent used must be<br />
disposed of according to the relevant regulations.<br />
19
Worm gearboxes GS 50.3 – GS 250.3<br />
Operation instructions<br />
<strong>12</strong>.2 Grease change for worm gearboxes GS 50.3 – GS <strong>12</strong>5.3 and primary reduction gearing VZ 2.3 – VZ 4.3<br />
.<br />
For gearboxes with multi-turn actuator: Remove multi-turn actuator.<br />
Remove gearbox from the valve:<br />
During this time, the valve/pipeline must not be under pressure!<br />
<strong>12</strong>.2.1 Worm gearboxes Refer to spare parts list GS 50.3 – GS <strong>12</strong>5.3, page 24.<br />
Grease type, see name plate; grease quantities, see page 19, table 4.<br />
Mark position of the gearbox on the valve, loosen connecting bolts to the valve<br />
and remove the worm gearbox.<br />
Remove fastening bolts with lock washers from the housing cover (518.0) and<br />
take off housing cover.<br />
. Remove bolts with lock washers from the bearing cover (522.0). Lift worm wheel<br />
carefully from the housing. For this, the worm shaft must be pulled from the<br />
bearings and tilted slightly in the worm channel.<br />
Remove old grease completely from the housing and the individual parts and<br />
clean gear housing. For this purpose, a suitable cleaning agent should be used.<br />
Clean mounting faces at housing and housing cover (518.0). Replace O-rings at<br />
the worm wheel (010, 011) by new ones.<br />
Re-insert worm wheel carefully and bring worm shaft into correct position, fasten<br />
bearing cover (522.0) at housing with bolts and lock washers.<br />
.<br />
Fill with new grease.<br />
Place housing cover (518.0) on housing, while ensuring the proper position of<br />
the O-rings (010, 011) at the worm wheel. Place bolts with lock washers and<br />
fasten them evenly crosswise.<br />
– Thoroughly degrease mounting faces at mounting flange.<br />
– Apply non-acidic grease at splines of coupling<br />
– Mount worm gearbox to valve, ensure correct position,<br />
observe mark made in previous step<br />
– Fasten with bolts of minimum quality 8.8 using lock washers, fasten bolts<br />
crosswise to the appropriate torque according to table 2, page 11.<br />
Gearbox without primary reduction gearing: Continue with section “After<br />
maintenance”.<br />
. Gearbox with reduction gearings VZ 2.3 – VZ 4.3: Perform grease change at the<br />
reduction gearing according to the following subsection.<br />
<strong>12</strong>.2.2 Primary reduction gearing Refer to spare parts list VZ 2.3 – VZ 4.3., page 24.<br />
Grease type, see name plate; grease quantities, see page 19, table 4.<br />
Remove bolts with lock washers from housing cover (020.0) and pull off housing<br />
cover (020.0) with the complete input drive shaft (021.0).<br />
Take off plate with internal teeth (045.0) and planet carrier (022.0) with the<br />
planet wheels.<br />
Remove old grease completely from the housing and the individual parts and<br />
clean them. For this purpose, a suitable cleaning agent should be used.<br />
Clean mounting faces at housing (019.0), housing cover (020.0) and plate with<br />
internal teeth (045.0). Replace O-rings by new ones.<br />
Insert planet carrier (022.0) with planet wheels.<br />
.<br />
Fill with new grease.<br />
Place plate with internal teeth (045.0) and insert the input drive shaft (021.0)<br />
completely. Screw in bolts with lock washers and fasten them evenly crosswise to<br />
the appropriate torque according to table 2, page 11.<br />
. Continue with section “After maintenance”, page 22.<br />
20
Operation instructions Worm gearboxes GS 50.3 – GS 250.3<br />
<strong>12</strong>.3 Grease change for worm gearboxes GS 160.3 – GS 250.3 and primary reduction gearing<br />
GZ 160.3 – GZ 250.3<br />
. For gearboxes with multi-turn actuator: Remove multi-turn actuator.<br />
. Remove gearbox from the valve:<br />
During this time, the valve/pipeline must not be under pressure!<br />
<strong>12</strong>.3.1 Worm gearboxes Refer to spare parts list GS 160.3 – GS 250.3, page 26.<br />
Grease type, see name plate; grease quantities, see page 19, table 4.<br />
Tools: Lock nut tool, can be obtained from AUMA.<br />
Mark position of the gearbox on the valve, loosen connecting bolts to the valve<br />
and remove the worm gearbox.<br />
Remove bolts with lock washers from the housing cover (518.0) and take off<br />
housing cover.<br />
. Remove bolts with lock washers from the bearing cover (522.0). Take off bearing<br />
lock nut (537.0) by loosening the grub screw. Remove protective cap (536.0), pull<br />
off snap ring from end nut (526.0). Remove end stop (523.0). Lift worm wheel<br />
carefully from the housing. For this, the worm shaft must be pulled from the<br />
bearings and tilted slightly in the worm channel.<br />
Pull out worm shaft from housing in direction of the input shaft.<br />
Remove old grease completely from the housing and the individual parts and<br />
clean gear-housing. For this purpose, a suitable cleaning agent should be used.<br />
Clean mounting faces at housing and housing cover (518.0). Replace O-rings at<br />
the worm wheel (010, 011) by new ones.<br />
. Re-insert worm wheel carefully and bring worm shaft into correct position. Screw<br />
in bearing lock nut (537.0) and secure with grub screw. Fasten bearing cover<br />
(522.0) at the housing with bolts and lock nuts.<br />
.<br />
Fill with new grease.<br />
Place housing cover (518.0) on housing, while ensuring the proper position of<br />
the O-rings (010, 011) at the worm wheel. Place bolts with lock washers and<br />
fasten them evenly crosswise.<br />
– Thoroughly degrease mounting faces at mounting flange and valve.<br />
– Apply non-acidic grease at splines of coupling.<br />
– Mount worm gearbox to valve, ensure correct position, observe mark.<br />
– Fasten with bolts of minimum quality 8.8 using lock washers, fasten bolts<br />
crosswise to the appropriate torque according to table 2, page 11.<br />
Gearbox without primary reduction gearing: Continue with section “After<br />
maintenance”.<br />
. Gearbox with reduction gearings GZ 160.3 – GZ 250.3: Perform grease change<br />
at the reduction gearing according to the following sections.<br />
<strong>12</strong>.3.2 Single-stage reductions gearings GZ 160.3 – GZ 250.3 (reduction ratios 4:1 and 8:1)<br />
Refer to spare parts list GZ 160.3 – GZ 250.3, page 28.<br />
Grease type, see name plate; grease quantities, see page 19, table 4.<br />
Remove bolts with lock washers at housing cover (002.0) and pull off housing<br />
cover (002.0) with the input drive shaft (003.0) and the plate with internal teeth).<br />
Remove screws from the plate with internal teeth and separate the plate with<br />
internal teeth from the input drive shaft.<br />
Remove old grease completely from the housing and the individual parts and<br />
clean them.<br />
For this purpose, a suitable cleaning agent should be used.<br />
Clean mounting faces at housing (<strong>001</strong>.0), housing cover (002.0) and plate with<br />
internal teeth. Replace O-rings by new ones.<br />
.<br />
Fill housing cover (002) with new grease.<br />
Fix plate with internal teeth (006.0) with screws at housing cover.<br />
21
Worm gearboxes GS 50.3 – GS 250.3<br />
. Fill housing (<strong>001</strong>.0) with remaining grease and fit the complete housing cover<br />
with input drive shaft (003.0). Screw in bolts with lock washers and fasten them<br />
evenly crosswise to the appropriate torque according to table 2, page 11.<br />
. Continue with section “After maintenance”, page 22.<br />
<strong>12</strong>.3.3 Double-stage primary reduction gearing GZ 200.3 – GZ 250.3 (reduction ratio 16:1)<br />
Refer to spare parts list GZ 160.3 – GZ 250.3, page 28.<br />
Grease type, see name plate; grease quantities, see page 19, table 4.<br />
Remove bolts with lock washers from housing cover (002.0) and pull off housing<br />
cover with the complete input drive shaft (003.0).<br />
Take off screws with lock washers from housing frame (010.0) and remove<br />
housing frame with planet carrier and hollow wheel.<br />
Remove screws from the plate with internal teeth and separate the plate with<br />
internal teeth from the input drive shaft (003.0).<br />
Remove screws (021) from the second stage of the plate with internal teeth and<br />
separate it from the pinion (011.1).<br />
Remove old grease completely from the housing and the individual parts and<br />
clean them. For this purpose, a suitable cleaning agent should be used.<br />
Clean mounting faces at housing (<strong>001</strong>.0), housing frame, housing cover (002.0)<br />
and hollow wheels. Replace O-rings by new ones.<br />
Fill housing (<strong>001</strong>.0) with new grease.<br />
Fix second stage of the plate with internal teeth on housing frame (010.0).<br />
Replace complete housing frame. Screw in bolts with lock washers and fasten<br />
them evenly crosswise to the appropriate torque according to table 2, page 11.<br />
Fill housing frame (010.0) and housing cover (002.0) with the remaining grease.<br />
.<br />
Fix first stage of the plate with internal teeth on the housing cover (002.0).<br />
Place complete housing cover with input drive shaft onto housing frame. Screw<br />
in bolts with lock washers and fasten them evenly crosswise to the appropriate<br />
torque according to table 2, page 11.<br />
. Reset the end stops.<br />
. For gearboxes with multi-turn actuator, check the setting of the limit switching<br />
according to the operation instructions for multi-turn actuators; if required, reset.<br />
<strong>12</strong>.4 After maintenance . If applicable, mount multi-turn actuator.<br />
. Perform test run to ensure the proper function.<br />
Operation instructions<br />
. Check worm gearbox for damage to paint finish. Do a thorough touch-up to<br />
prevent corrosion. Original paint in small quantities can be supplied by AUMA.<br />
22
Operation instructions Worm gearboxes GS 50.3 – GS 250.3<br />
13. Disposal and recycling<br />
AUMA gearboxes have an extremely long lifetime. However, they have to be<br />
replaced at one point in time.<br />
Our gearboxes have a modular design and may therefore easily be disassembled,<br />
separated and sorted according to materials, i.e.:<br />
. various metals<br />
. plastics<br />
. greases and oils<br />
The following generally applies:<br />
Collect greases and oils during disassembly. As a rule, these substances are<br />
hazardous to water and must not be released into the environment.<br />
Send disassembled material to a sound disposal or to separate recycling center<br />
according to materials.<br />
. Observe the local regulations for waste disposal.<br />
14. Service AUMA offers extensive services such as maintenance and inspection for<br />
gearboxes.<br />
The AUMA service department can be reached at:<br />
phone: 724-743-AUMA (2862)<br />
fax: 724-743-4711<br />
email: mailbox@auma-usa.com<br />
www.auma-usa.com or www.auma.com.<br />
23
Worm gearboxes GS 50.3 – GS 250.3<br />
Operation instructions<br />
15. Spare parts list worm gearboxes GS 50.3 – GS <strong>12</strong>5.3 and reduction gearing<br />
VZ 2.3 – VZ 4.3<br />
5<strong>12</strong>.0<br />
5<strong>12</strong>.0<br />
020.0<br />
522.0<br />
S1(009)<br />
S1(034)<br />
522.0<br />
S1(017)<br />
S1(009)<br />
5<strong>12</strong>.0<br />
S1(017)<br />
S1(009)<br />
S1(017)<br />
534.0<br />
021.0<br />
520.0<br />
520.0<br />
520.0<br />
S1(0<strong>33</strong>)<br />
524.0<br />
521.1<br />
045.0<br />
S1(0<strong>33</strong>)<br />
S1(011)<br />
S1(0<strong>12</strong>)<br />
526.0<br />
S1(010)<br />
519.1<br />
S1(010)<br />
525.0<br />
022.0<br />
517.0<br />
518.0<br />
S1(009)<br />
523.0<br />
019.0<br />
S1(076)<br />
S1(009)<br />
S1(073)<br />
527.0<br />
24
Operation instructions Worm gearboxes GS 50.3 – GS 250.3<br />
Note: Please state type and commission no. of the device (see name plate) when ordering spare parts. Only original<br />
AUMA spare parts should be used. Delivered spare parts may slightly vary from the representation<br />
in these instructions.<br />
No. Designation Type<br />
019.0 Housing VZ Sub-assembly<br />
020.0 Housing cover VZ Sub-assembly<br />
021.0 Input drive shaft VZ Sub-assembly<br />
022.0 Planet carrier VZ Sub-assembly<br />
045.0 Plate with internal teeth VZ Sub-assembly<br />
5<strong>12</strong>.0 Flange for actuator Sub-assembly<br />
517.0 Housing Sub-assembly<br />
518.0 Housing cover Sub-assembly<br />
519.1 Worm wheel Component<br />
520.0 Worm shaft Sub-assembly<br />
521.1 Travelling nut Component<br />
522.0 Bearing cover Sub-assembly<br />
523.0 Limit stop housing Sub-assembly<br />
524.0 Pointer cover Sub-assembly<br />
525.0 Coupling Sub-assembly<br />
526.0 End stop nut Sub-assembly<br />
527.0 Protection cover Sub-assembly<br />
534.0 Input shaft Sub-assembly<br />
536.0 Cap Sub-assembly<br />
S1 Seal kit Set<br />
25
Worm gearboxes GS 50.3 – GS 250.3<br />
Operation instructions<br />
16. Spare parts list worm gearboxes GS 160.3 – GS 250.3<br />
537.0<br />
5<strong>12</strong>.0<br />
520.0<br />
522.0<br />
S1(009)<br />
S1(017)<br />
521.1<br />
538.0<br />
538.1<br />
526.0<br />
524.0<br />
518.0<br />
S1(011)<br />
S1(0<strong>12</strong>)<br />
517.0<br />
S1(009)<br />
513.1<br />
S1(010)<br />
519.1<br />
S1(010)<br />
525.0<br />
523.0<br />
S1(056)<br />
536.0<br />
S1(073)<br />
527.0<br />
26
Operation instructions Worm gearboxes GS 50.3 – GS 250.3<br />
Note: Please state type and commission no. of the device (see name plate) when ordering spare parts. Only original<br />
AUMA spare parts should be used.<br />
Delivered spare parts may slightly vary from the representation in these instructions.<br />
No. Designation Type<br />
5<strong>12</strong>.0 Flange for actuator Sub-assembly<br />
513.0 Grub screw Component<br />
517.0 Housing Sub-assembly<br />
518.0 Housing cover Sub-assembly<br />
519.1 Worm wheel Component<br />
520.0 Worm shaft Sub-assembly<br />
521.1 Travelling nut Component<br />
522.0 Bearing cover Sub-assembly<br />
523.0 Limit stop housing Sub-assembly<br />
524.0 Pointer cover Sub-assembly<br />
525.0 Coupling Sub-assembly<br />
526.0 End stop nut Sub-assembly<br />
527.0 Protection cover Sub-assembly<br />
536.0 Cap Sub-assembly<br />
538.0 Input shaft Sub-assembly<br />
538.1 Input shaft Sub-assembly<br />
S1 Seal kit Set<br />
27
Worm gearboxes GS 50.3 – GS 250.3<br />
Operation instructions<br />
17. Spare parts list reduction gearings GZ 160.3 – GZ 250.3 (reduction ratios 4:1, 8:1 and 16:1)<br />
GZ 200.1 – GZ 250.1<br />
16:1<br />
GZ 160.1 – GZ 250.1<br />
4:1 / 8:1<br />
006.0<br />
S1(003) 006.0<br />
S1(003)<br />
S1(003)<br />
S1(003)<br />
003.0<br />
S1(004)<br />
S1(009)<br />
<strong>001</strong>.0<br />
S1(004)<br />
S1(009)<br />
<strong>001</strong>.0<br />
S1(029)<br />
S1(029)<br />
003.0<br />
003.3<br />
S1(014)<br />
5<strong>12</strong>.0<br />
002.0<br />
003.3<br />
011.1<br />
010.0<br />
013.0<br />
S1(014)<br />
002.0<br />
5<strong>12</strong>.0<br />
GZ 200.1 – GZ 250.1<br />
16:1<br />
006.0<br />
S1(003)<br />
S1(003)<br />
003.0<br />
S1(004)<br />
S1(009)<br />
<strong>001</strong>.0<br />
S1(029)<br />
S1(029)<br />
003.3<br />
S1(014)<br />
5<strong>12</strong>.0<br />
002.0<br />
011.1<br />
013.0<br />
010.0<br />
28
Operation instructions Worm gearboxes GS 50.3 – GS 250.3<br />
Note:<br />
Please state type and commission no. of the device (see name plate) when ordering spare parts. Only original AUMA<br />
spare parts should be used. Delivered spare parts may slightly vary from the representation in these instructions.<br />
No.<br />
Designation<br />
<strong>001</strong>.0 Housing Sub-assembly<br />
002.0 Housing cover Sub-assembly<br />
003.0 Housing cover Sub-assembly<br />
003.3 Input drive shaft Sub-assembly<br />
006.0 Planetary gear Sub-assembly<br />
010.0 Housing frame Sub-assembly<br />
011.1 Pinion Sub-assembly<br />
013.0 Planetary gear 1st stage Sub-assembly<br />
5<strong>12</strong>.0 Flange for actuator Sub-assembly<br />
S1 Seal kit Set<br />
29
Worm gearboxes GS 50.3 – GS 250.3<br />
Operation instructions<br />
Notes<br />
30
Operation instructions Worm gearboxes GS 50.3 – GS 250.3<br />
Index<br />
B<br />
Bolts for mounting actuators 10<br />
C<br />
Changing the swing angle 16<br />
Corrosion protection 7<br />
D<br />
Disposal and recycling 23<br />
E<br />
Enclosure protection IP 68 18<br />
F<br />
Fitting the handwheel 7<br />
H<br />
Handwheel 7<br />
L<br />
Lubricant 19<br />
M<br />
Maintenance 3,19<br />
Manual operation <strong>12</strong><br />
Motor operation 13<br />
Mounting positions 8<br />
Mounting the multi-turn actuators 9<br />
Mounting to valve 11<br />
P<br />
Packaging 7<br />
R<br />
Range of application 3<br />
S<br />
Safety instructions 3<br />
Service support/ Parts 23<br />
Setting the end stop<br />
with mounted<br />
multi-turn actuator 13<br />
Setting the end stops<br />
for manual operation <strong>12</strong><br />
Spare parts list<br />
GS 50.3 - GS <strong>12</strong>5.3 24,25<br />
GS 160.3 - GS 250.3 26,27<br />
GZ 160.3 - GZ 250.3<br />
(4:1/8:1/16:1) 28,29<br />
Storage 7<br />
T<br />
Technical data 4<br />
Transport 7<br />
31
North American Sales and Service:<br />
US Headquarters and Factory:<br />
AUMA Actuators, Inc.<br />
100 Southpointe Blvd.<br />
Canonsburg PA 15317<br />
Tel: 724-743-AUMA (2862)<br />
Fax: 724-743-4711<br />
email: mailbox@auma-usa.com<br />
www.auma-usa.com<br />
Regional Offices:<br />
Northeast (Maryland and New York)<br />
Southeast (South Carolina)<br />
Midwest (Illinois)<br />
Midwest (Kansas)<br />
Houston (Texas)<br />
West Coast (Northern and Southern California)<br />
Representatives and Distributors<br />
Anchorage<br />
Atlanta<br />
Baltimore<br />
Baton Rouge<br />
Birmingham<br />
Boston<br />
Charlotte<br />
Chicago<br />
Cincinatti<br />
Corpus Christi<br />
Dallas<br />
Denver<br />
Detroit<br />
Hawaii<br />
Houston<br />
Indianapolis<br />
Kansas City<br />
Los Angeles<br />
Mexicali (Mexico)<br />
Mexico City<br />
Milwaukee<br />
Minneapolis<br />
Montana<br />
Monterrey (Mexico)<br />
New York<br />
Omaha<br />
Orlando<br />
Philadelphia<br />
Phoenix<br />
Pittsburgh<br />
Rochester<br />
Salt Lake City<br />
San Diego<br />
San Francisco<br />
San Juan<br />
Seattle<br />
St. Louis<br />
Toronto<br />
Tulsa<br />
International Headquarters:<br />
AUMA Riester GmbH & Co. KG<br />
Müllheim/ Germany<br />
www.auma.com<br />
International Sales and Service:<br />
South America:<br />
Argentina<br />
Brazil<br />
Chile<br />
Colombia<br />
Peru<br />
Venezuela<br />
Europe:<br />
Austria<br />
Benelux<br />
Czech Republic<br />
Denmark<br />
Finland<br />
France<br />
Greece<br />
Hungary<br />
Italy<br />
Norway<br />
Poland<br />
Portugal<br />
Russia<br />
Spain<br />
Sweden<br />
Switzerland<br />
Turkey<br />
Ukraine<br />
United Kingdom<br />
Africa<br />
Egypt<br />
South Africa<br />
Asia, Australia<br />
Australia<br />
China<br />
Hong Kong<br />
India<br />
Japan<br />
Korea<br />
Kuwait<br />
Oman<br />
Qatar<br />
Singapore<br />
Taiwan<br />
Thailand<br />
UAE<br />
For the name and phone number of the office<br />
nearest you, call us at 724-743-2862 or visit our<br />
website at www.auma-usa.com/saleserv.htm<br />
2005-06-27<br />
Y003.822/031/us/1.06
IQ Electric Motor Actuator Data Sheet<br />
Job Number<br />
Contract Eng.:<br />
Project:<br />
Consultant:<br />
MOV Tag No.'s:<br />
Shop Drawing:<br />
CUSTOMER DATA<br />
Cust. Part Number:<br />
ACTUATOR DATA<br />
Model No.:<br />
Base:<br />
Actuator/Gear Weight:<br />
Enclosure:<br />
Rated Torque:<br />
Stall Torque Range:<br />
Wiring Diagram:<br />
WARD COUNTY WWTP<br />
HENRY PRATT PO#790944OP, PRATT PART# ZHP151388004<br />
1M017701<br />
Name: HENRY PRATT Make:<br />
P.O. No.:<br />
790944OP<br />
Size:<br />
P.O. Item:<br />
4<br />
Type:<br />
Operating Time:<br />
MOTOR DATA<br />
Locked Rotor Amps:<br />
Rated Load Amps:<br />
*Nominal Load Amps:<br />
*Nom. Motor HP:<br />
1M0177 Line: 1<br />
ZHP151388004<br />
IQ10FA10B4<br />
FA10<br />
427 lbs<br />
NEMA 4/6<br />
25 lbft<br />
VALVE DATA<br />
Class:<br />
Handwheel Type:<br />
Paint Spec.:<br />
Conduit 2:<br />
Conduit 4:<br />
TOP<br />
ASA 1.5''<br />
None<br />
35 - 60 lbft Lubrication:<br />
SAE80EP<br />
WD21026<br />
2.16<br />
0.5<br />
0.4 A<br />
0.09<br />
*Nominal HP and Run Load Amps are at 1/3 full rated torque output.<br />
SECONDARY GEARBOX DATA<br />
Model Number/Size:<br />
Ratio:<br />
Combined Torque:<br />
343 sec<br />
IW72R<br />
480:1'<br />
4725 lbft<br />
Date:<br />
Conduit 1 & 3:<br />
Operating Temp.:<br />
Supply V/Ph/Hz:<br />
Insulation Class/Duty:<br />
Service Factor<br />
Type:<br />
Make:<br />
Lubrication:<br />
Gearbox Base:<br />
2/10/20<strong>12</strong><br />
Polyester Powder Coating<br />
ASA 1.0''<br />
-30C TO +70C<br />
480V / 3Ph / 60Hz<br />
H / 30 min<br />
1<br />
Totally Enclosed Non-Ventilated<br />
Rotork Gears<br />
Grease<br />
FA25
IQ Electric Motor Actuator Data Sheet<br />
Job Number 1M0177 Line: 2<br />
Contract Eng.: Date: 2/10/20<strong>12</strong><br />
Project:<br />
WARD COUNTY WWTP<br />
Consultant:<br />
MOV Tag No.'s: PRATT PO# 790944OP, PRATT PART# ZHP15131880<strong>12</strong><br />
Shop Drawing: 1M017702<br />
CUSTOMER DATA<br />
Name: HENRY PRATT Make:<br />
P.O. No.: 790944OP Size:<br />
P.O. Item: 4 Type:<br />
Cust. Part Number: ZHP1513880<strong>12</strong> Class:<br />
ACTUATOR DATA<br />
VALVE DATA<br />
Model No.: IQ10NRB4 Handwheel Type: TOP<br />
Base: NR Paint Spec.: Polyester Powder Coating<br />
Actuator/Gear Weight: 191 lbs. Conduit 1 & 3: ASA 1.0''<br />
Enclosure: NEMA 4/6 Conduit 2: ASA 1.5''<br />
Rated Torque: 25 lbft Conduit 4: None<br />
Stall Torque Range: 35 - 60 lbft Lubrication: SAE80EP<br />
Wiring Diagram: WD21025 Operating Temp.: -30C TO +70C<br />
Operating Time:<br />
181 sec<br />
MOTOR DATA<br />
Locked Rotor Amps: 2.16 Supply V/Ph/Hz: 480V / 3Ph / 60Hz<br />
Rated Load Amps: 0.55 Insulation Class/Duty: H / 30 min<br />
*Nominal Load Amps: 0.5 A Service Factor 1<br />
*Nom. Motor HP: 0.11 Type: Totally Enclosed Non-Ventilated<br />
*Nominal HP and Run Load Amps are at 1/3 full rated torque output.<br />
SECONDARY GEARBOX DATA<br />
Model Number/Size: IWD5R Make: Rotork Gears<br />
Ratio:<br />
350:1'<br />
Lubrication:<br />
Grease<br />
Combined Torque: 2750 lbft Gearbox Base: FA16
IQ Electric Motor Actuator Data Sheet<br />
Job Number 1M0177 Line: 3<br />
Contract Eng.: Date: 2/10/20<strong>12</strong><br />
Project:<br />
WARD COUNTY WWTP<br />
Consultant:<br />
MOV Tag No.'s: PRATT PAO# 790944OP, PRATT PART# ZHP1513188014<br />
Shop Drawing: 1M017703<br />
CUSTOMER DATA<br />
Name: HENRY PRATT Make:<br />
P.O. No.: 790944OP Size:<br />
P.O. Item: 14 Type:<br />
Cust. Part Number: ZHP151388014 Class:<br />
ACTUATOR DATA<br />
VALVE DATA<br />
Model No.: IQ10NRB4 Handwheel Type: TOP<br />
Base: NR Paint Spec.: Polyester Powder Coating<br />
Actuator/Gear Weight: 191 lbs. Conduit 1 & 3: ASA 1.0''<br />
Enclosure: NEMA 4/6 Conduit 2: ASA 1.5''<br />
Rated Torque: 25 lbft Conduit 4: None<br />
Stall Torque Range: 35 - 60 lbft Lubrication: SAE80EP<br />
Wiring Diagram: WD21025 Operating Temp.: -30C TO +70C<br />
Operating Time:<br />
181 sec<br />
MOTOR DATA<br />
Locked Rotor Amps: 2.16 Supply V/Ph/Hz: 480V / 3Ph / 60Hz<br />
Rated Load Amps: 0.55 Insulation Class/Duty: H / 30 min<br />
*Nominal Load Amps: 0.5 A Service Factor 1<br />
*Nom. Motor HP: 0.11 Type: Totally Enclosed Non-Ventilated<br />
*Nominal HP and Run Load Amps are at 1/3 full rated torque output.<br />
SECONDARY GEARBOX DATA<br />
Model Number/Size: IWD5R Make: Rotork Gears<br />
Ratio:<br />
350:1'<br />
Lubrication:<br />
Grease<br />
Combined Torque: 2750 lbft Gearbox Base: FA16
IQ Electric Motor Actuator Data Sheet<br />
Job Number<br />
Contract Eng.:<br />
Project:<br />
Consultant:<br />
MOV Tag No.'s:<br />
Shop Drawing:<br />
CUSTOMER DATA<br />
Cust. Part Number:<br />
ACTUATOR DATA<br />
Model No.:<br />
Base:<br />
Actuator/Gear Weight:<br />
Enclosure:<br />
Rated Torque:<br />
Stall Torque Range:<br />
Wiring Diagram:<br />
WARD COUNTY WWTP<br />
PRATT PO# 790945OP, PRATT PART# ZHP1513188013<br />
1M017801<br />
Name: HENRY PRATT Make:<br />
P.O. No.:<br />
790945OP<br />
Size:<br />
P.O. Item:<br />
13<br />
Type:<br />
Operating Time:<br />
MOTOR DATA<br />
Locked Rotor Amps:<br />
Rated Load Amps:<br />
*Nominal Load Amps:<br />
*Nom. Motor HP:<br />
1M0178 Line: 1<br />
ZHP1513188013<br />
IQ<strong>12</strong>FA10B4<br />
FA10<br />
427 lbs<br />
NEMA 4/6<br />
60 lbft<br />
VALVE DATA<br />
Class:<br />
Handwheel Type:<br />
Paint Spec.:<br />
Conduit 2:<br />
Conduit 4:<br />
TOP<br />
ASA 1.5''<br />
None<br />
84 - 144 lbft Lubrication:<br />
SAE80EP<br />
WD21025<br />
5.35<br />
1.7<br />
1.2 A<br />
0.34<br />
*Nominal HP and Run Load Amps are at 1/3 full rated torque output.<br />
SECONDARY GEARBOX DATA<br />
Model Number/Size:<br />
Ratio:<br />
Combined Torque:<br />
188 sec<br />
IW72R<br />
540:1'<br />
<strong>12</strong>840 lbft<br />
Date:<br />
Conduit 1 & 3:<br />
Operating Temp.:<br />
Supply V/Ph/Hz:<br />
Insulation Class/Duty:<br />
Service Factor<br />
Type:<br />
Make:<br />
Lubrication:<br />
Gearbox Base:<br />
2/10/20<strong>12</strong><br />
Polyester Powder Coating<br />
ASA 1.0''<br />
-30C TO +70C<br />
480V / 3Ph / 60Hz<br />
H / 30 min<br />
1<br />
Totally Enclosed Non-Ventilated<br />
Rotork Gears<br />
Grease<br />
FA25
IQ Electric Motor Actuator Data Sheet<br />
Job Number 1M0178 Line: 2<br />
Contract Eng.: Date: 2/10/20<strong>12</strong><br />
Project:<br />
WARD COUNTY WWTP<br />
Consultant:<br />
MOV Tag No.'s: PRATT PO# 790945OP, PRATT PART# ZHP1513188015<br />
Shop Drawing: 1M017802<br />
CUSTOMER DATA<br />
Name: HENRY PRATT Make:<br />
P.O. No.: 790945OP Size:<br />
P.O. Item: 15 Type:<br />
Cust. Part Number: ZHP1513188015 Class:<br />
ACTUATOR DATA<br />
VALVE DATA<br />
Model No.: IQ<strong>12</strong>FA10B4 Handwheel Type: TOP<br />
Base: FA10 Paint Spec.: Polyester Powder Coating<br />
Actuator/Gear Weight: 427 lbs Conduit 1 & 3: ASA 1.0''<br />
Enclosure: NEMA 4/6 Conduit 2: ASA 1.5''<br />
Rated Torque: 60 lbft Conduit 4: None<br />
Stall Torque Range: 84 - 144 lbft Lubrication: SAE80EP<br />
Wiring Diagram: WD21025 Operating Temp.: -30C TO +70C<br />
Operating Time:<br />
188 sec<br />
MOTOR DATA<br />
Locked Rotor Amps: 5.35 Supply V/Ph/Hz: 480V / 3Ph / 60Hz<br />
Rated Load Amps: 1.7 Insulation Class/Duty: H / 30 min<br />
*Nominal Load Amps: 1.2 A Service Factor 1<br />
*Nom. Motor HP: 0.34 Type: Totally Enclosed Non-Ventilated<br />
*Nominal HP and Run Load Amps are at 1/3 full rated torque output.<br />
SECONDARY GEARBOX DATA<br />
Model Number/Size: IW72R Make: Rotork Gears<br />
Ratio:<br />
540:1'<br />
Lubrication:<br />
Grease<br />
Combined Torque: <strong>12</strong>840 lbft Gearbox Base: FA25
IQ Electric Motor Actuator Data Sheet<br />
Job Number 1M0178 Line: 3<br />
Contract Eng.: Date: 2/10/20<strong>12</strong><br />
Project:<br />
WARD COUNTY WWTP<br />
Consultant:<br />
MOV Tag No.'s: PRATT PO# 790945OP, PRATT PART# ZHP1513188017<br />
Shop Drawing: 1M017803<br />
CUSTOMER DATA<br />
Name: HENRY PRATT Make:<br />
P.O. No.: 790945OP Size:<br />
P.O. Item: 17 Type:<br />
Cust. Part Number: ZHP1513188017 Class:<br />
ACTUATOR DATA<br />
VALVE DATA<br />
Model No.: IQ<strong>12</strong>FA10B4 Handwheel Type: TOP<br />
Base: FA10 Paint Spec.: Polyester Powder Coating<br />
Actuator/Gear Weight: 427 lbs Conduit 1 & 3: ASA 1.0''<br />
Enclosure: NEMA 4/6 Conduit 2: ASA 1.5''<br />
Rated Torque: 60 lbft Conduit 4: None<br />
Stall Torque Range: 84 - 144 lbft Lubrication: SAE80EP<br />
Wiring Diagram: WD21025 Operating Temp.: -30C TO +70C<br />
Operating Time:<br />
188 sec<br />
MOTOR DATA<br />
Locked Rotor Amps: 5.35 Supply V/Ph/Hz: 480V / 3Ph / 60Hz<br />
Rated Load Amps: 1.7 Insulation Class/Duty: H / 30 min<br />
*Nominal Load Amps: 1.2 A Service Factor 1<br />
*Nom. Motor HP: 0.34 Type: Totally Enclosed Non-Ventilated<br />
*Nominal HP and Run Load Amps are at 1/3 full rated torque output.<br />
SECONDARY GEARBOX DATA<br />
Model Number/Size: IW72R Make: Rotork Gears<br />
Ratio:<br />
540:1'<br />
Lubrication:<br />
Grease<br />
Combined Torque: <strong>12</strong>840 lbft Gearbox Base: FA25
IQ Electric Motor Actuator Data Sheet<br />
Job Number 1M0178 Line: 4<br />
Contract Eng.: Date: 2/10/20<strong>12</strong><br />
Project:<br />
WARD COUNTY WWTP<br />
Consultant:<br />
MOV Tag No.'s: PRATT PO# 790945OP, PRATT PART# ZHP1513188016<br />
Shop Drawing: 1M017804<br />
CUSTOMER DATA<br />
Name: HENRY PRATT Make:<br />
P.O. No.: 790945OP Size:<br />
P.O. Item: 16 Type:<br />
Cust. Part Number: ZHP1513188016 Class:<br />
ACTUATOR DATA<br />
VALVE DATA<br />
Model No.: IQ<strong>12</strong>FA10B4 Handwheel Type: TOP<br />
Base: FA10 Paint Spec.: Polyester Powder Coating<br />
Actuator/Gear Weight: 405 lbs Conduit 1 & 3: ASA 1.0''<br />
Enclosure: NEMA 4/6 Conduit 2: ASA 1.5''<br />
Rated Torque: 60 lbft Conduit 4: None<br />
Stall Torque Range: 84 - 144 lbft Lubrication: SAE80EP<br />
Wiring Diagram: WD21025 Operating Temp.: -30C TO +70C<br />
Operating Time:<br />
186 sec<br />
MOTOR DATA<br />
Locked Rotor Amps: 4.1 Supply V/Ph/Hz: 480V / 3Ph / 60Hz<br />
Rated Load Amps: 1 Insulation Class/Duty: H / 30 min<br />
*Nominal Load Amps: 0.9 A Service Factor 1<br />
*Nom. Motor HP: 0.26 Type: Totally Enclosed Non-Ventilated<br />
*Nominal HP and Run Load Amps are at 1/3 full rated torque output.<br />
SECONDARY GEARBOX DATA<br />
Model Number/Size: IW72R Make: Rotork Gears<br />
Ratio:<br />
360:1'<br />
Lubrication:<br />
Grease<br />
Combined Torque: 8520 lbft Gearbox Base: FA25
NOT ROTORK SUPPLY<br />
X<br />
ACTUATOR TERMINALS<br />
1<br />
2<br />
3<br />
3 PHASE SUPPLY<br />
E<br />
+24VDC SUPPLY<br />
STOP / MAINTAIN<br />
OPEN<br />
CLOSE<br />
-24VDC SUPPLY<br />
20-60VDC OR VAC COMMON<br />
MAKE AT FULLY<br />
CLOSED<br />
S1<br />
5<br />
34<br />
35<br />
<strong>33</strong><br />
4<br />
36<br />
6<br />
7<br />
+24 VDC CUSTOMER SUPPLY<br />
REMOTE STOP/MAINTAIN COMMAND<br />
REMOTE OPEN COMMAND<br />
REMOTE CLOSE COMMAND<br />
-24VDC CUSTOMER SUPPLY<br />
REMOTE COMMON<br />
OPEN/CLOSE/STOP/MAINTAIN<br />
COMMAND SIGNALS<br />
LS1 START PERMISSIVE N/C<br />
BREAK AT FULLY<br />
OPEN<br />
S2<br />
8<br />
9<br />
LS2 VALVE CLOSED N/C<br />
MAKE AT FULLY<br />
OPEN<br />
S3<br />
10<br />
11<br />
LS3 VALVE OPEN N/O<br />
BREAK AT 5%<br />
OPEN<br />
S4<br />
<strong>12</strong><br />
13<br />
LS4 VALVE FAILURE N/C<br />
MAKE AT 5%<br />
OPEN<br />
S5<br />
14<br />
16<br />
LS5 PUMP START/STOP COMMAND N/O<br />
BREAK AT FULLY<br />
OPEN<br />
S6<br />
17<br />
19<br />
LS6 VALVE CLOSED N/C<br />
MAKE AT FULLY<br />
OPEN<br />
S7<br />
20<br />
24<br />
LS7 VALVE OPEN N/O<br />
BREAK AT TORQUE<br />
TRIP OPEN<br />
S8<br />
30<br />
47<br />
Iss Date Chkd Revision Details<br />
01 0209<strong>12</strong> RAR FIRST ISSUE<br />
www.<br />
ROTORK CONTROLS LTD<br />
BATH, BA1 3JQ<br />
ENGLAND<br />
Tel:0<strong>12</strong>25-7<strong>33</strong>200<br />
.com<br />
ROTORK CONTROLS INC<br />
ROCHESTER<br />
NY 14624, USA<br />
Tel:585-247-2304<br />
WD21025 HOOKUP DIAGRAM<br />
Drawn by: RAR<br />
Date : 0209<strong>12</strong><br />
Base WD: 3000-000<br />
1M0177<br />
MI No : --<br />
Circuit Diagram No<br />
Issue<br />
No<br />
Job No : WS21035 01
NOT ROTORK SUPPLY<br />
X<br />
ACTUATOR TERMINALS<br />
1<br />
2<br />
3<br />
3 PHASE SUPPLY<br />
E<br />
+24VDC SUPPLY<br />
STOP / MAINTAIN<br />
OPEN<br />
CLOSE<br />
-24VDC SUPPLY<br />
20-60VDC OR VAC COMMON<br />
BREAK AT FULLY<br />
OPEN<br />
S1<br />
5<br />
34<br />
35<br />
<strong>33</strong><br />
4<br />
36<br />
6<br />
7<br />
+24 VDC CUSTOMER SUPPLY<br />
REMOTE STOP/MAINTAIN COMMAND<br />
REMOTE OPEN COMMAND<br />
REMOTE CLOSE COMMAND<br />
-24VDC CUSTOMER SUPPLY<br />
REMOTE COMMON<br />
OPEN/CLOSE/STOP/MAINTAIN<br />
COMMAND SIGNALS<br />
LS1 VALVE OPEN N/C<br />
BREAK AT FULLY<br />
CLOSED<br />
S2<br />
8<br />
9<br />
LS2 VALVE CLOSED N/O<br />
BREAK AT FULLY<br />
OPEN<br />
S3<br />
10<br />
11<br />
LS3 VALVE OPEN N/C<br />
BREAK AT FULLY<br />
CLOSED<br />
S4<br />
<strong>12</strong><br />
13<br />
LS4 VALVE CLOSED N/O<br />
Iss Date Chkd Revision Details<br />
01 0209<strong>12</strong> RAR FIRST ISSUE<br />
www.<br />
ROTORK CONTROLS LTD<br />
BATH, BA1 3JQ<br />
ENGLAND<br />
Tel:0<strong>12</strong>25-7<strong>33</strong>200<br />
.com<br />
ROTORK CONTROLS INC<br />
ROCHESTER<br />
NY 14624, USA<br />
Tel:585-247-2304<br />
WD21025 HOOKUP DIAGRAM<br />
Drawn by: RAR<br />
Date : 0209<strong>12</strong><br />
Base WD: 3000-000<br />
1M0177<br />
MI No : --<br />
Circuit Diagram No<br />
Issue<br />
No<br />
Job No : WS21034 01
PRATT<br />
Henry Pratt Company<br />
TITLE: OPERATOR MOUNTING POSITION STANDARD<br />
REVISION:<br />
11<br />
DATE:<br />
8/31/11<br />
REVISED BY:<br />
Steve Smick<br />
APPROVAL:<br />
Ed Schutz<br />
EPS # 23<br />
Appendix B<br />
Page 6 of 10
Control and monitoring facilities<br />
IQ & IQT Range<br />
electric valve actuators<br />
with intelligent technology<br />
Publication E<strong>12</strong>0E issue 07/03
Introduction<br />
Rotork’s proven IQ range of actuators is now<br />
further enhanced with the addition of alternative<br />
actuator power supplies and a dedicated part-turn<br />
actuator - IQT.<br />
IQ and IQT range actuators are self-contained,<br />
non-intrusive units for local and remote electrical<br />
operation of valves.<br />
IQ Multi-turn actuator range<br />
●<br />
●<br />
●<br />
IQ - 3 phase power supplies<br />
IQS - single phase power supplies<br />
IQD - DC power supplies<br />
IQT Quarter-turn actuator range<br />
●<br />
●<br />
●<br />
Intelligent, non-intrusive quarter-turn actuator<br />
incorporating all the benefits of standard IQ control<br />
and indication features<br />
Suitable for 3 phase, single phase and 24V DC<br />
power supplies<br />
Operating speed can be varied<br />
Contents<br />
IQ – In control 3<br />
Actuator electrical specification 4<br />
Control specification 7<br />
Indication, Monitoring<br />
and Data Logging 9<br />
Fieldbus Systems 11<br />
Actuator circuit diagrams <strong>12</strong><br />
ESD and interlock control circuits 15<br />
Remote control circuits 16<br />
Analogue control circuits 18<br />
Refer to publication E110E for IQ and IQT range<br />
performance and specification.<br />
The IQ and IQT ranges comprise of an electric motor,<br />
reduction gearing, reversing starter with local controls,<br />
position and torque limitation with electronic logic<br />
controls and monitoring facilities, all housed in a doublesealed<br />
watertight enclosure to IP68 (7 metres - 72 hours),<br />
NEMA 4 and 6.<br />
All settings including torque, limit and indication contacts<br />
are made using the non-intrusive, hand held, infra-red IQ<br />
Setting Tool, included with each order.<br />
Rotork Controls Ltd, Bath, UK<br />
2<br />
The following specification covers standard and optional<br />
features. Options selected must be specified with order.<br />
Rotork Controls Inc, Rochester, USA
IQ – In control<br />
IQ – the first valve actuator you can commission and interrogate without<br />
removing electrical covers.<br />
With the infra-red IQ Setting Tool and PC based IQ-Insight, commissioning<br />
and analysis of IQ actuators is simple, fast and convenient.<br />
IQ Setting Tool<br />
The Setting Tool enables the user to<br />
view all functions via the actuator<br />
display window using a non-intrusive<br />
infra-red link. As each function is<br />
viewed its setting can be checked<br />
and, if required, changed. Setting of<br />
torque levels, position limits and all<br />
other control and indication functions<br />
can be made even in hazardous<br />
locations.<br />
Settings can be protected using a<br />
customer-selected password. As the<br />
Setting Tool is separate to the<br />
actuator, access to the tool and<br />
therefore the configured settings can<br />
be controlled by “permit to work”<br />
systems or allocation only to<br />
authorised technicians.<br />
The Setting procedure is divided into<br />
two stages:<br />
1. Primary functions –<br />
Settings for end of travel limit or<br />
torque action, torque switch values,<br />
limit positions etc.<br />
2. Secondary functions -<br />
Settings covering the control,<br />
indication and optional equipment<br />
functions.<br />
All IQ actuator functions are<br />
configured before dispatch to Rotork<br />
standard default settings, unless<br />
alternatives have been specified with<br />
the order.<br />
Actuator display indication of<br />
instantaneous torque and position<br />
can be monitored with a simple key<br />
press of the Setting Tool.<br />
The Setting Tool can be used to<br />
access real time, grouped Help<br />
displays of control inputs, indication<br />
outputs and actuator status.<br />
Setting Tool Specification<br />
Waterproof IP67, Certified EEx ia<br />
IIC T4 (intrinsically safe).<br />
Power Supply 9V Battery<br />
(supplied & fitted).<br />
Operating range 0.75m from actuator<br />
display window.<br />
Setting Tool(s) are dispatched with<br />
each order. Setting Tools are suitable<br />
for use with any IQ or IQT range<br />
actuator.<br />
For more information on Setting Tool<br />
and commissioning, refer to<br />
publications E170E - IQ range &<br />
E175E - IQT range.<br />
IQ-Insight - Actuator<br />
configuration and<br />
analysis tool for PC<br />
IQ-Insight PC software allows the<br />
actuator set-up, status and data<br />
logger to be reviewed analysed and<br />
reconfigured over a non-intrusive<br />
IrDA interface.<br />
The visually interactive application is<br />
browser based running under<br />
Microsoft Internet Explorer 4+.<br />
All the benefits of Internet browser<br />
systems such as linking, bookmarking,<br />
“back” and “forward” controls along<br />
with file storage make analysing the<br />
data from an IQ simple and fast.<br />
Laptop PC’s with IrDA interface (or<br />
RS232- IrDA serial link) running<br />
IQ-Insight can be “connected” directly<br />
to an actuator located in the field.<br />
Alternatively IQ Pocket-Insight<br />
software allows the actuator to be<br />
configured and data upload/<br />
download in the field using a hand<br />
held personal digital assistant (PDA).<br />
For up to date information on IQ-<br />
Insight and IQ Pocket-Insight visit<br />
www.rotork.com<br />
IQ Communicator II<br />
The intrinsically safe IQ Communicator<br />
II can be used for actuators located in<br />
hazardous areas. The Communicator II<br />
allows the configuration, status and<br />
data logger of the actuator to be<br />
accessed, analysed and reconfigured.<br />
The Communicator II can be used to<br />
transport actuator files to a safe area<br />
where they can be downloaded and<br />
analysed on a PC with IQ-Insight.<br />
3
Actuator electrical specification<br />
Power supply<br />
The electrical supply type and nominal<br />
operating voltage must be specified at<br />
time of order.<br />
Actuator performance is guaranteed<br />
with a voltage tolerance +/-10% and<br />
frequency tolerance +/-2Hz. Actuators<br />
are capable of starting and running up<br />
to speed with a maximum 15% volt<br />
drop.<br />
Non-standard tolerances<br />
Where voltage and/or frequency<br />
variations may be experienced outside<br />
those quoted below, or where<br />
operation under large volt drop<br />
conditions may be required, please<br />
apply to Rotork.<br />
IQ range power supplies<br />
IQ - 3 phase power supplies<br />
IQ actuators are available for operation<br />
with the following standard three<br />
phase, three wire, nominal power<br />
supplies:<br />
50Hz<br />
220, 240, 380, 400, 415, 440, 460,<br />
500, 525, 550, 660 and 690 volts<br />
60Hz<br />
208, 220, 230, 240, 380, 440, 460,<br />
480, 575 and 600 volts<br />
Refer to publication E110E for IQ<br />
performance summary and E130E for<br />
IQ - 3 phase power supply rating data.<br />
Refer to publication E110E for IQD<br />
performance summary and E131E for<br />
IQD DC power supply rating data.<br />
*limited by actuator size - refer to<br />
E110E IQD performance summary.<br />
IQT range power supplies<br />
IQT range of actuators is available for<br />
the following power supplies without<br />
change in performance**.<br />
Refer to publication E110E for IQT<br />
performance summary and E135E<br />
IQT range power supply rating data.<br />
IQT - 3 phase power supplies<br />
Actuators are suitable for operation<br />
with the following standard three<br />
phase, three wire, nominal power<br />
supplies:<br />
50Hz<br />
200 220, 240, 380, 400, 415, 440,<br />
480, 500, 550, 660 and 690 volts<br />
60Hz<br />
200, 208, 220, 230, 240, 380, 400,<br />
440, 460, 480, 575, 590, 600, 660<br />
and 690 volts<br />
IQT - single phase power supplies<br />
50Hz<br />
110,115, <strong>12</strong>0, 220, 230, 240 volts<br />
60Hz<br />
100, 110, 115, <strong>12</strong>0, 208, 220, 230,<br />
240 volts<br />
Conduit entries<br />
IQ and IQT range actuators have a<br />
separately sealed terminal<br />
compartment incorporating<br />
a segregated terminal block and<br />
cable/conduit entries.<br />
It is the responsibility of the installer<br />
to ensure the appropriate cable/<br />
conduit adaptors, glands and<br />
blanking plugs are fitted in order to<br />
maintain hazardous area certification<br />
and ingress protection rating.<br />
Certified adaptors and blanking plugs<br />
are available as optional extras.<br />
IQ Range<br />
Three threaded conduit entries are<br />
provided, tapped: 1 x 1 1 /2” and 2 x<br />
1”ASA NPT. Unless otherwise<br />
specified, actuator will be dispatched<br />
with adaptors: 1 x M40 and 2 x M25<br />
metric to BS3643, “Ex” certified or as<br />
an alternative, 1 x PG29 and 2 x PG16.<br />
Options<br />
If specified with order, a fourth<br />
conduit entry can be provided,<br />
tapped 1” ASA NPT with adaptor to<br />
M25 or as an alternative, PG16.<br />
4<br />
IQS - single phase power supplies<br />
IQS actuators are available for standard<br />
nominal voltages:<br />
50Hz<br />
110, 220, 240<br />
60Hz<br />
110, 220, 230<br />
Refer to publication E110E for IQS<br />
performance summary and E131E for<br />
IQ single phase power supply rating<br />
data.<br />
IQD - DC power supplies<br />
IQD actuators are available for<br />
standard nominal voltages:<br />
24V*, 48V*, 110V DC<br />
IQT - DC power supplies<br />
24V DC*<br />
** IQT - 24V DC: speed may vary with<br />
load.<br />
Non-standard voltages<br />
Actuators can be supplied to operate<br />
on power supply voltages other than<br />
those quoted above.<br />
Please apply to Rotork.<br />
Uninterruptible power supplies<br />
Standard actuators can be operated<br />
on UPS systems providing the above<br />
specified tolerances are not exceeded<br />
and waveforms, harmonics, spikes<br />
etc. adhere to recognised supply<br />
standards such as EN50160.<br />
For more information please refer to<br />
publication E130E.<br />
IQT Range<br />
Two threaded conduit entries are<br />
provided tapped M25. When<br />
requested, 2 x 3 /4” ASA NPT<br />
adaptors will be provided.<br />
Options<br />
Adaptors are available to convert<br />
standard conduit entries to the<br />
following: 1”, 1 1 /4”, 1 1 /2” - ASA NPT<br />
or metric M20. Two additional<br />
conduit entries can be provided when<br />
specified, sizes as above.<br />
Terminals<br />
The IQ and IQT range actuators<br />
incorporate a terminal block<br />
containing segregated metric screw<br />
terminal inserts. M5 pan head<br />
terminal screws are provided for<br />
power terminals and M4 pan head<br />
terminal screws for control and<br />
indication. The terminal box cover<br />
carries a terminal identification code<br />
card. Each actuator is supplied with<br />
instruction book and wiring diagram.
Wiring<br />
Jig built harnesses of individually<br />
numbered stranded conductors,<br />
tropical grade PVC insulated, connect<br />
internal components to the sealed<br />
terminal block. All internal control<br />
connections to the printed circuit<br />
boards are via plugs and sockets.<br />
Wiring of contacts to outgoing<br />
terminals is size 1.2mm 2 (18AWG).<br />
Motor<br />
IQ - 3 phase<br />
Class F insulated, squirrel cage motor<br />
of special high torque low inertia<br />
design. 15 minute rated with cyclic<br />
duration factor of 25% at <strong>33</strong>% of<br />
actuator output rated torque giving a<br />
temperature rise not exceeding that<br />
permitted for Class B insulation at<br />
standard nominal voltage. Actuator<br />
rated up to 60 starts per hour at a<br />
rate not exceeding 600 starts per hour.<br />
Burnout protection by embedded<br />
thermostats, with facility for bypassing<br />
under emergency shutdown control.<br />
Motors conform to IEC34, NEMA MG1<br />
and BS4999.<br />
IQS Single Phase<br />
Single phase capacitor start/run<br />
squirrel cage induction motor. Class F<br />
insulated, special high torque, low<br />
inertia design. Rating, protection and<br />
compliance as 3 phase specification<br />
above.<br />
IQD DC<br />
Class F insulated, permanent magnet<br />
DC motor. Rating, protection and<br />
compliance as 3 phase specification<br />
above.<br />
IQT<br />
The IQT utilises a 24V permanent<br />
magnet DC motor 15 minute rated<br />
with cyclic duration factor of 20% at<br />
75% of actuator rated torque.<br />
Actuator rated up to 60 starts per<br />
hour at a rate not exceeding 600 starts<br />
per hour. Thermostat protection<br />
coupled to transformer rectifier<br />
package allowing complete power<br />
supply and motor protection.<br />
Note: On AC power supplies the<br />
24V DC supply for the motor is<br />
produced internally by a transformer<br />
rectifier assembly.<br />
Motor options<br />
IQ Range<br />
Class H, 30 minute rated motors<br />
are available for certain applications.<br />
Please apply to Rotork.<br />
Modulating<br />
For applications requiring more than<br />
60 starts/hour please refer to IQM<br />
publication E410E.<br />
Electrical Control<br />
Module – ECM<br />
Control PCB<br />
Incorporating a single integrated<br />
circuit, hard-wired logic control for<br />
the actuator together with infra-red<br />
(IrDA) interface. On board data<br />
logger records operational data, valve<br />
torque/position profiles and statistical<br />
information, all time and date stamped.<br />
Torque Switch and Position Control<br />
Position and torque are adjustable as<br />
follows:<br />
● IQ Range<br />
Position setting range: 2.5 to<br />
100,000 turns, with a minimum<br />
angular resolution of 15° at the<br />
output.<br />
● IQT Range<br />
Position setting range: 80 -100°<br />
(mechanical stops), resolution 0.1°<br />
of full 90° travel.<br />
● Torque switch setting<br />
40% to 100%<br />
For IQ range, output torque is<br />
obtained via measurement of<br />
wormshaft displacement under load<br />
and is independent of voltage,<br />
frequency and temperature<br />
fluctuations. In the case of IQT range,<br />
torque is derived from motor current<br />
by the motor controller and is<br />
independent of speed and supply<br />
voltage.<br />
“Torque off” during unseating or<br />
during starting/reversing in mid travel<br />
against high inertia loads can be<br />
inhibited. A “jammed valve”<br />
protection circuit de-energises the<br />
motor if no movement occurs after<br />
receipt of a signal to open or close.<br />
The IQ and IQT ranges incorporate a<br />
battery to update and maintain both<br />
local LCD and remote “S” contact<br />
indication of actuator/valve status<br />
when power to the actuator is isolated.<br />
Should manual operation of the valve<br />
take place during a power supply<br />
interruption, both local and remote<br />
indication is updated. Unlike other<br />
actuator makes, a secondary low<br />
voltage power supply is not required<br />
to update local and remote valve<br />
position indication.<br />
Expected battery life is 5 years.<br />
The status of the battery is indicated<br />
by the actuator display. Remote<br />
indication of battery status is available<br />
with actuator “S” contact indication.<br />
All actuator configured settings are<br />
stored in non-volatile EEPROM<br />
(Electrically Erasable, Programmable<br />
Read Only Memory). EEPROM does<br />
not require any power supply to<br />
maintain the stored configured<br />
settings and is therefore completely<br />
independent of the battery.<br />
5
Actuator electrical specification<br />
Protection features<br />
The IQ and IQT range includes the<br />
following protection features:<br />
Torque protection<br />
If the torque produced in operating<br />
the valve when closing or opening<br />
reaches that set for the active torque<br />
switch, the motor will be de-energised.<br />
The torque switches are independently<br />
configurable in the range 40 - 100%<br />
of rated torque. In addition the open<br />
torque switch can be configured to<br />
“boost”, allowing the motor to<br />
generate torque in excess of rated<br />
torque to enable operation of “sticky”<br />
valves. Local and remote indication of<br />
torque trip is provided.<br />
Motor over temperature protection<br />
For IQ range two thermostats are<br />
located within the motor stator. IQT<br />
thermostats are located within the<br />
motor supply torroidal power<br />
transformer for AC supply and on the<br />
motor polarity protection bridge<br />
rectifier for 24V DC supply. This<br />
arrangement provides comprehensive<br />
protection for both the power supply<br />
circuitry and the motor. In both cases<br />
the thermostats will trip and<br />
de-energise the motor if the<br />
temperature exceeds its rating. Local<br />
and remote indication of thermostat<br />
tripped is available. The thermostat<br />
can be overridden during an ESD<br />
operation.<br />
Automatic phase rotation<br />
correction<br />
The actuator will always run in the<br />
correct direction regardless of the<br />
sequence of power supply connection.<br />
Lost phase protection<br />
If any one or more power supply<br />
phases are lost, the motor cannot be<br />
energised. Local and remote indication<br />
of lost phase is available.<br />
Instantaneous reversal protection<br />
The motor control logic introduces a<br />
delay in switching the motor as a<br />
response to instant reversal of control<br />
signals, preventing contact damage to<br />
the contactors. Overtorque transients<br />
due to switching high inertia loads are<br />
prevented from causing a torque trip<br />
by the motor control logic.<br />
ASTD Automatic Self Test and<br />
Diagnosis<br />
On power up the actuator<br />
automatically tests its vital operational<br />
circuits and memory devices to ensure<br />
correct operation. In the unlikely event<br />
of a device problem the IQ diagnoses<br />
the cause and will automatically<br />
present this information in the form<br />
of a display icon. Electrical operation<br />
can be inhibited to prevent possible<br />
damage to the actuator and valve.<br />
The problem can then be accurately<br />
investigated and corrected by<br />
maintenance personnel. Local and<br />
remote indication of ASTD Fault is<br />
available.<br />
Power module<br />
The power module incorporates a<br />
mechanically and electronically<br />
interlocked reversing contactor<br />
starter.* For IQ and IQT ranges on AC<br />
supplies the control supply transformer,<br />
fed from two phases of the incoming<br />
power supply, provides internal control<br />
circuit supplies and an isolated,<br />
nominal 24V DC supply rated at 5W<br />
for actuator fed remote control<br />
circuits. The transformer is of a “split<br />
bobbin” double insulated design and<br />
incorporates short circuit and overload<br />
protection. For IQD and IQT-24V DC<br />
the control circuit and customer<br />
supplies are provided via DC/DC<br />
converters. The Rotork Syncrophase<br />
circuit provides automatic phase<br />
rotation correction and lost phase<br />
protection where applicable.<br />
Option<br />
Actuator fed remote control supply:<br />
Nominal <strong>12</strong>0V AC supply, rated at<br />
15VA. (not available with IQD and IQT<br />
24V DC power supply).<br />
6<br />
Jammed valve protection<br />
Should the actuator stall when<br />
attempting to unseat a valve stuck in<br />
its seat, the motor will be de-energised<br />
within 7 seconds, preventing damage.<br />
Local and remote indication of<br />
jammed valve is available.<br />
* IQS Single Phase, IQT and IQM modulating<br />
units utilise a solid state motor starter.
Control specification<br />
Local Control<br />
Non-intrusive selectors are provided<br />
on the actuator electrical control cover,<br />
one for Local/Stop/Remote selection,<br />
pad-lockable in each position, and the<br />
other Open/Close control. Local<br />
control may be configured for<br />
maintained or inching operation.<br />
Controls may be rotated to suit<br />
actuator orientation.<br />
Local control may be selected to<br />
operate using the supplied IQ Setting<br />
Tool. The Setting Tool incorporates<br />
dedicated Open, Stop and Close<br />
buttons and will operate over a<br />
nominal distance of 0.75 metres from<br />
the display window.<br />
Vandal Resistant Local Control<br />
Option<br />
Control selectors removed, indication<br />
window with or without removable<br />
cover, control of Local, Stop and<br />
Remote selection and local Open<br />
and Closed control is via the IQ<br />
Setting Tool.<br />
Remote Control<br />
There are six control inputs for remote<br />
control:<br />
● Open, closed, stop/maintain<br />
● Emergency shut down (ESD)<br />
● Open interlock and closed interlock<br />
Control can be connected for<br />
maintained or push to run, “inching”<br />
control. Refer to pages 15-18 for<br />
remote control circuit schematics.<br />
Remote control inputs are optoisolated<br />
interfaces with a surge<br />
immunity of 2kV. Standard control is<br />
positive switching (negative switching<br />
is available if specified).<br />
The standard IQ actuator can be<br />
controlled using remote control signals<br />
defined as follows:<br />
Customer fed control circuit supply:<br />
Within the ranges, 20-60V AC/DC<br />
or 60-<strong>12</strong>0V AC.<br />
Actuator fed control circuit supply:<br />
24V DC. (<strong>12</strong>0V AC available if<br />
specified).<br />
The current drawn for each control<br />
input:<br />
5mA at 24V DC, <strong>12</strong>mA at <strong>12</strong>0V AC<br />
Minimum “ON” voltage: 20V,<br />
Maximum “OFF”: 3V.<br />
Minimum signal duration: 300ms.<br />
Maximum remote control cable<br />
capacitance: 2µF core to core.<br />
IQD - DC actuator remote control<br />
Remote control is available within the<br />
ranges 20-<strong>12</strong>0V AC, 20 - 60V DC, only.<br />
Note: for IQD at 110V DC power<br />
supply, the maximum remote control<br />
input voltage is 60V DC.<br />
For applications where the actuator is<br />
powered from a power supply of<br />
limited capacity such as solar power<br />
charged, direct current UPS system,<br />
power conservation is of prime<br />
importance. The IQD includes a “solar”<br />
feature* to minimise power<br />
consumption when not operating,<br />
reducing the current drawn by the<br />
actuator control to 10mA (maximum).<br />
Applying a remote “open”, “close” or<br />
“ESD” control signal or a discreet<br />
“wake up” signal causes the actuator<br />
to power up its control circuits and<br />
after a delay of up to 1 second,<br />
respond to the remote control signal.<br />
Between 3 and 6 seconds after the<br />
control signal is removed, the actuator<br />
returns to the low current “solar” state.<br />
As part of this routine, in order to<br />
save power, the actuator fed 24V DC<br />
remote control supply is disabled when<br />
in solar mode (note that actuator 24V<br />
DC fed remote control supply is<br />
unavailable for applying a signal to<br />
power up the actuator control when<br />
operation is required and therefore a<br />
discreet externally fed “wake up”<br />
signal or externally powered control<br />
signals must be used).<br />
Two modes of control are available:<br />
● Standard - sleep function disabled,<br />
24V DC remote control supply<br />
available at all times<br />
● “Solar” sleep function enabled, 24V<br />
DC remote control supply disabled<br />
when asleep<br />
Unless otherwise specified, the<br />
actuator will be dispatched configured<br />
in the “solar” mode of control.<br />
Remote control signals must therefore<br />
be a minimum of 1.5 second duration.<br />
The 2 wire remote control form is not<br />
available (refer to page 17). For<br />
Fieldbus system control please apply<br />
to Rotork.<br />
In local control and when “awake”,<br />
the actuator will draw approximately<br />
100mA ( with 24V DC Power Supply)<br />
from the supply in the quiescent state.<br />
Remote control option<br />
For customer fed remote control in the<br />
range 60-<strong>12</strong>5V DC and 230V AC an<br />
alternative control circuit is available<br />
(note: IQD is limited to 20-60V DC and<br />
20 - <strong>12</strong>0V AC only). Remote control<br />
voltages between 150V and 300V AC<br />
must be derived from a designated<br />
Installation Category II supply as<br />
defined in BSEN/IEC61010.<br />
Emergency Shut Down –<br />
ESD<br />
An active ESD signal will override any<br />
local or remote control signal. The<br />
ESD input operates from a separate<br />
common to that used for open, close,<br />
and stop remote control signals. Refer<br />
to page 15 for ESD circuit options.<br />
The following ESD options can be<br />
configured:<br />
● ESD Signal<br />
Active high (contact making)<br />
Active low (contact breaking)<br />
● ESD Action<br />
Close, open, stayput<br />
● ESD Override<br />
Motor thermostat**, local stop,<br />
active interlocks, interrupter timer<br />
option<br />
Unless specified with order, the<br />
actuator will be dispatched set for<br />
the following:<br />
Active high signal (contact making),<br />
Close on ESD. ESD will not override<br />
motor thermostat, local stop, active<br />
interlock or interrupter timer.<br />
* Factory configured.<br />
** Bypassing the motor thermostat will invalidate<br />
hazardous area certification.<br />
7
Control specification<br />
Interlocks<br />
External hardwired interlocks for<br />
opening, closing or both directions<br />
can be configured to inhibit local and<br />
remote operation until the external<br />
contacts are made. Interlock circuits<br />
may be added with any of the remote<br />
control circuits. The interlock inputs<br />
operate from a separate common<br />
allowing for isolation between the<br />
safety system and operation control<br />
system. Refer to page 15 for standard<br />
interlock circuit options.<br />
Conditional control<br />
For applications where a high level of<br />
control integrity is required the IQ can<br />
be configured for “conditional control”.<br />
In this mode, operation is conditional<br />
on two discrete signals being<br />
applied. Looking at an example of a<br />
“close valve” command, by applying a<br />
signal to the “remote close input” and<br />
“close interlock input” simultaneously<br />
the actuator will operate and close the<br />
valve. If only one signal is applied or a<br />
signal is lost, the actuator will failsafe<br />
by staying put or stopping. When<br />
conditional remote control is configured<br />
the interlock inputs are not<br />
required for local operation.<br />
Remote control options<br />
Analogue Control -<br />
Folomatic Option<br />
The IQ Folomatic proportional<br />
controller enables the actuator to<br />
automatically position a valve in<br />
proportion to an analogue current,<br />
voltage or potentiometric signal. A<br />
signal derived from the actuator noncontacting<br />
position sensor is<br />
electronically compared with a signal<br />
proportional to the input signal. The<br />
difference between them (error)<br />
triggers the open or close contactor<br />
via logic circuits to drive the actuator<br />
in the direction that will cancel the<br />
error. Valve position is therefore<br />
automatically adjusted in proportion to<br />
analogue signal. Unnecessarily<br />
frequent operation can be prevented<br />
by the adjustable Folomatic deadband<br />
and the Motion Inhibit Timer features.<br />
Positioning can take place over the<br />
whole valve stroke or if required, a set<br />
portion of stroke. By incorporating a<br />
remote manual/auto selector,<br />
proportional control can be overridden<br />
allowing standard remote control to<br />
take place when manual intervention<br />
is required.<br />
Application<br />
Reversing motor-driven electromechanical<br />
actuators are suitable for<br />
proportional control in automatic<br />
control loops in which the system rate<br />
of change is relatively slow, and high<br />
accuracy continuous modulation is not<br />
essential; level controls in water and<br />
sewage treatment plants are typical<br />
applications. Motor operated<br />
regulating valves and sluice gates are<br />
driven through nut and screw or<br />
wormgear mechanisms which must be<br />
self-locking and are therefore<br />
mechanically inefficient. Frequent<br />
operation will cause rapid wear of<br />
these components. The control<br />
systems should therefore be designed<br />
to avoid this. Stem nut life will be<br />
maximised if the valvemaker uses a<br />
stem thread with a lead of one third<br />
of the diameter.<br />
Standard IQ actuators are suitable for<br />
regulating applications requiring up to<br />
60 starts/hour providing the average<br />
torque required by the valve in mid<br />
stroke does not exceed <strong>33</strong>% of the<br />
rated torque of the selected actuator.<br />
Where modulating applications require<br />
increased rates of starts per hour, the<br />
IQM and IQML actuator ranges can<br />
be operated up to a rate of <strong>12</strong>00<br />
starts/hour and include configurable<br />
DC injection motor breaking to reduce<br />
overrun.<br />
For more information please refer to<br />
publication E410E.<br />
Accuracy<br />
The Folomatic positioner accuracy is<br />
1%. Because of the backlash in nuts,<br />
screws and gearing of industrial valves,<br />
overall accuracy may not be quantified<br />
prior to the valve and actuator being<br />
put into service. To optimise positional<br />
accuracy, actuator output speeds<br />
should be kept as low as practicable.<br />
Rotork do not recommend output<br />
speeds in excess of 29rpm. The<br />
maximum signal change required to<br />
cause response in the same direction<br />
(ie. not through deadband) is 1%.<br />
Output resolution will be a function of<br />
actuator speed and valve stem thread<br />
or gearing backlash.<br />
Folomatic Configuration<br />
The Folomatic can be configured to<br />
suit signals within the following<br />
ranges:<br />
Analogue signals/input impedance:<br />
0-5mA/1k ohm 0-5V/1M ohm<br />
0-10mA/500 ohm 0-10V/78k ohm<br />
0-20mA/250 ohm 0-20V/52k ohm<br />
4-20mA/250 ohm<br />
Position corresponding to low<br />
input signal:<br />
Closed limit, or percentage open, or<br />
Open limit.<br />
Position corresponding to high<br />
input signal:<br />
Closed limit, or percentage open, or<br />
Open limit.<br />
Deadband:<br />
0-9.9% of travel between Open and<br />
Closed limit positions.<br />
Motion inhibit time:<br />
2-99 sec between actuator movements.<br />
Action on loss of input signal:<br />
Stay-put, move to high or low signal<br />
position. Available for minimum set<br />
“low” signal of 0.5mA. Response on<br />
loss of signal will occur if signal falls<br />
below 50% of set “low” signal.<br />
Connections<br />
For analogue control connections,<br />
and analogue control connections with<br />
remote manual override, refer to<br />
page 18.<br />
8
Indication, monitoring and data logging<br />
Reduced speed,<br />
hydraulic shock and<br />
surge protection -<br />
Interrupter Timer option<br />
Where the operating time of the valve<br />
must be reduced to prevent hydraulic<br />
shock or “water hammer”, or to<br />
prevent surges, the Interrupter Timer<br />
option can be included. Pulsed<br />
operation with independently<br />
adjustable “on” and “off” time<br />
periods in the range 1-99 seconds can<br />
be selected to operate over any<br />
portion of the closing or opening valve<br />
stroke. On/Off time period range may<br />
be extended when configuration is<br />
carried out with the IQ-Insight tool.<br />
The interrupter timer is active for both<br />
local and remote control.<br />
Local Position and<br />
Local Monitoring Indication<br />
A back-lit liquid crystal display gives<br />
digital indication from fully Open to<br />
fully Closed in 1% increments. Three<br />
LED’s coloured red, green and yellow<br />
for indication of Open, Close and<br />
intermediate positions respectively are<br />
also provided. The display includes<br />
four icons for rapid diagnosis of valve<br />
alarm, actuator alarm, control system<br />
alarm and actuator battery status.<br />
With the IQ setting tool, actuator<br />
torque can also be displayed allowing<br />
the valve torque against position to be<br />
monitored in real time.<br />
Help screen diagnosis is available for<br />
monitoring valve, actuator and control<br />
system status. The local display can be<br />
rotated to suit actuator orientation.<br />
LED colours can be reversed. Please<br />
specify at time of order.<br />
Remote position and<br />
monitoring indication<br />
Four latching, volt free, single pole<br />
contacts, S1, S2, S3 and S4 are<br />
provided, each one independently<br />
configurable using the IQ Setting Tool<br />
to signal one of the following:<br />
● Status<br />
Valve opening, closing, moving<br />
(continuous or pulsing signal), local<br />
stop selected, local selected, remote<br />
selected, open or close interlock<br />
active, ESD active<br />
● Valve Alarms<br />
Motor tripped on torque in mid<br />
travel, motor tripped on torque<br />
going open, going closed, valve<br />
jammed, actuator being operated<br />
by handwheel.<br />
● Actuator Alarms<br />
Lost phase, customer 24V DC (<strong>12</strong>0V<br />
AC) supply lost, battery low, internal<br />
failure detected, thermostat tripped.<br />
Each contact can be configured to<br />
either “normally open” or “normally<br />
closed”. Contacts are rated at 5mA to<br />
5A, <strong>12</strong>0V AC, 30V DC.<br />
Unless otherwise specified S contacts<br />
will be configured as follows:<br />
● S1 – contact makes at fully Closed<br />
● S2 – contact makes at fully Open<br />
● S3 – contact breaks at fully Closed<br />
● S4 – contact breaks at fully Open<br />
Monitor Relay<br />
An independent relay with a volt-free<br />
changeover contact for monitoring<br />
actuator electrical availability. Contact<br />
rating 5mA to 5A, <strong>12</strong>0V AC, 30V DC.<br />
The relay will de-energise under any<br />
one, or combination, of the following<br />
conditions:<br />
● Loss of one or more of the power<br />
supply phases<br />
● Loss of control circuit supply<br />
● Local control selected<br />
● Local stop selected<br />
● Motor thermostat tripped<br />
Data Logger<br />
The on board data logger allows<br />
infra-red, IrDA download of<br />
historical actuator/valve performance<br />
to PC or PDA. For hazardous areas the<br />
intrinsically safe Rotork IQ<br />
Communicator tool is available. Rotork<br />
IQ-Insight PC software allows data<br />
logger information of operational<br />
events and statistics all time and date<br />
stamped plus valve torque/position<br />
profiles, to be analysed.<br />
● Valve Position<br />
Fully Open, fully Closed (exact) or<br />
any intermediate positions<br />
(0-99% open)<br />
9
Indication options<br />
Indication Options<br />
Remote Valve Position Analogue<br />
Indication - CPT<br />
The Current Position Transmitter<br />
(CPT) provides a non-contacting<br />
internally fed 4-20mA analogue<br />
signal proportional to valve position.<br />
Selectable for minimum signal<br />
corresponding to fully Closed or fully<br />
Open position with automatic zero<br />
and span setting. Available at terminals<br />
22(+ve) and 23(-ve), the maximum<br />
external impedance that may be<br />
connected to the signal is 500 ohms<br />
at nominal supply voltage.<br />
Repeatability is within ± 1% and<br />
linearity ± 1% of total valve travel.<br />
Auxiliary Powered CPT<br />
(not available with IQD)<br />
The auxiliary powered CPT maintains<br />
analogue position indication when the<br />
mains power is switched off. An<br />
auxiliary 24V DC supply is permanently<br />
connected to the actuator, which is<br />
automatically switched in to provide<br />
power to the CPT on mains failure.<br />
On re-instating the mains, the auxiliary<br />
supply is automatically switched out.<br />
Note: on mains failure, a surge of up<br />
to 1 Amp is required to switch in the<br />
auxiliary supply. The “power off”<br />
quiescent load is nominally 180mA,<br />
but will depend on the options fitted.<br />
It is recommended that the 24V<br />
auxiliary supply is permanently applied<br />
to the actuator to limit switch surge<br />
current.<br />
Extra indication contacts<br />
(not available with IQD)<br />
The extra indication contacts option<br />
provides four additional changeover<br />
contacts, S5, S6, S7 and S8. Each<br />
contact is latching, volt free and rated<br />
at 5mA to 5A, <strong>12</strong>0V AC, 30V DC. The<br />
extra indication contact functions are<br />
independently configurable in the<br />
same way as the standard contacts<br />
using the IQ Setting Tool. The extra<br />
indication contact functions are shown<br />
below:<br />
● Valve Position<br />
fully open, fully closed or<br />
intermediate positions (0-99% open).<br />
● Status<br />
Valve opening, closing, moving<br />
(continuous or pulsing signal), local<br />
stop selected, local selected, remote<br />
selected, open or close interlock<br />
active, ESD active.<br />
● Valve Alarms<br />
Motor tripped on torque in mid<br />
travel, motor tripped on torque<br />
going open, going closed, valve<br />
jammed, actuator being operated by<br />
hand wheel.<br />
● Actuator alarms<br />
Lost phase, customer 24V DC<br />
(<strong>12</strong>0V AC) supply lost, battery low,<br />
internal failure detected, thermostat<br />
tripped.<br />
Remote Valve Torque Analogue<br />
Indication - CTT<br />
The Current Torque Transmitter (CTT)<br />
provides a non-contacting internally<br />
fed 4-20mA analogue signal<br />
proportional to actuator output torque<br />
(0-<strong>12</strong>0% of rated torque). When<br />
stationary the CTT output will continue<br />
to indicate the current torque.<br />
10
Fieldbus systems<br />
Pakscan<br />
Rotork’s own 2 wire system for control<br />
and data transmission to and from the<br />
actuators.<br />
An internally mounted Pakscan field<br />
unit connects the actuator to the field<br />
network. By arranging the field cable<br />
in a loop the system automatically<br />
provides a fault tolerant redundant<br />
path for the data signals. The<br />
communication distance may be up to<br />
20km in length without the need for<br />
repeaters, up to 240 actuators may be<br />
connected to the loop and a master<br />
station supervises the system.<br />
Communication from the master<br />
station to the host uses Modbus<br />
protocol over RS232 and RS485.<br />
System settings for the actuator are<br />
programmable over the infra-red<br />
data link.<br />
Please refer to publication S000E.<br />
Modbus<br />
Single or dual Modbus Modules may<br />
be included in the IQ actuator to<br />
provide remote serial communication<br />
to the control functions and for status<br />
feedback data. The field network uses<br />
an RS485 data highway, either 2 or<br />
4 wire, and can be duplicated<br />
where redundancy is required. The<br />
communication is half duplex and the<br />
protocol used is Modbus RTU with<br />
data rates up to 38 K baud. The<br />
actuator variables necessary to set up<br />
the system are programmable over the<br />
infra-red data link.<br />
Please refer to publication E<strong>12</strong>1E.<br />
Profibus<br />
Profibus connectivity is possible by<br />
fitting the Profibus DP interface<br />
module within the IQ actuator. This<br />
allows the IQ to be integrated into a<br />
standard Profibus network. Full<br />
compatibility with the fieldbus<br />
standard EN 50170 is provided and<br />
the module carries Profibus<br />
certification for inter-operability. The<br />
network allows full control of the<br />
actuator and feedback of status data<br />
to the host. The Rotork Profibus<br />
module has two communication ports<br />
to facilitate redundant fieldbus wiring<br />
where reliability is paramount, data<br />
rates up to 1.5 M baud are supported.<br />
Please refer to publication S113E.<br />
Foundation Fieldbus<br />
IQ actuators may be connected to a<br />
Foundation Fieldbus network (H1) by<br />
the inclusion of a Rotork FF-01<br />
module. The device complies with<br />
fieldbus standard IEC 61158-2, using<br />
a 2 wire electrical connection to the<br />
highway and has been certified for<br />
inter-operability. The Foundation<br />
highway exchanges data and control<br />
between devices and full actuator<br />
functionality is available. Each actuator<br />
has full link scheduler capability and<br />
function blocks for analogue and<br />
digital inputs and outputs and the<br />
standard transducer block. Foundation<br />
fieldbus networks are capable of<br />
operating without a host system as a<br />
supervisor, the field devices<br />
communicating directly between<br />
themselves.<br />
Please refer to publication S114E.<br />
Additional Inputs and Outputs<br />
When used in conjunction with a<br />
fieldbus network the actuator can also<br />
collect additional feedback information<br />
from other devices in the field such as<br />
level switches or proximity detectors.<br />
It is also possible with some systems<br />
to provide additional output control<br />
functions to operate remote<br />
equipment, pump starters etc. In order<br />
to provide these features the actuator<br />
requires the Fieldbus Remote I/0 option<br />
which includes 4 digital inputs for<br />
feedback data and 4 dry contact relay<br />
outputs for control. The availability of<br />
these functions is indicated in the<br />
table below:<br />
Fieldbus Remote I/0 option fitted<br />
Fieldbus Option<br />
4 digital inputs 4 digital outputs<br />
Pakscan<br />
Yes<br />
No<br />
Single Modbus Module<br />
Yes<br />
Yes<br />
Dual Modbus Module<br />
Yes<br />
No<br />
Profibus<br />
Yes<br />
Yes<br />
Foundation Fieldbus<br />
Yes<br />
Yes<br />
11
Actuator circuit diagram – basic<br />
IQ Actuator Basic Circuit Diagram 3000-000, drawn in mid-travel, power off<br />
Motor<br />
Thermostat<br />
Motor<br />
Switching<br />
Module<br />
FS1<br />
3<br />
1<br />
2<br />
E<br />
Actuator Power Supply<br />
Refer to page 4<br />
(power supply connections will vary with<br />
actuator type. Connections shown are<br />
for IQ 3 phase only).<br />
Position &<br />
Torque/Limit<br />
Control<br />
–<br />
+<br />
PS1<br />
4<br />
5<br />
Isolated, nominal 24V DC, 5W<br />
Power Supply (<strong>12</strong>0V AC 15VA option)<br />
Available for actuator fed remote control.<br />
Refer to page 6<br />
Local Indication<br />
Refer to page 9<br />
Remote Indication<br />
MONITOR<br />
RELAY<br />
42<br />
43<br />
44<br />
Monitor Relay Monitors actuator<br />
availability (shown de-energised –<br />
unavailable). Refer to page 9<br />
9V<br />
INFRA RED<br />
%<br />
OPEN<br />
Local and Remote<br />
Position Indication<br />
Back-up Supply<br />
(Main Power Off)<br />
Make at Fully Shut<br />
Make at Fully Open<br />
Break at Fully Shut<br />
Break at Fully Open<br />
S1<br />
S2<br />
S3<br />
S4<br />
6<br />
7<br />
8<br />
9<br />
10<br />
11<br />
<strong>12</strong><br />
13<br />
Indication Contacts<br />
Shown in default configuration.<br />
Configuration can be changed using<br />
the IQ Setting Tool to indicate any<br />
valve position, status and alarm<br />
settings. Refer to page 9<br />
Local Controls<br />
Refer to page 7<br />
Close – Open<br />
Stop<br />
Local – Remote<br />
Remote Controls<br />
Close<br />
Stop/Maintain<br />
Open<br />
Common –ve 20–60V AC/DC<br />
Common –ve 60–<strong>12</strong>0V AC<br />
ESD<br />
Open Interlock<br />
Close Interlock<br />
Common –ve 20–60V AC/DC<br />
Common –ve 60–<strong>12</strong>0V AC<br />
<strong>33</strong><br />
34<br />
35<br />
36<br />
40<br />
25<br />
37<br />
38<br />
31<br />
32<br />
Remote Control Inputs<br />
Refer to pages 15 and 16 for<br />
control circuit types.<br />
Valve<br />
Data<br />
Data Logger/IrDA (page 3)<br />
Condition<br />
Monitoring<br />
Actuator<br />
Configuration<br />
Infra-red/IrDA interface<br />
Optional Control<br />
and Indication Equipment<br />
For applicable Circuit Diagram<br />
refer to the Matrix on page 14<br />
The Infra-red Setting Tool enables<br />
options to be configured<br />
<strong>12</strong>
Actuator circuit diagram – options<br />
Optional control and indication equipment<br />
Close Limit<br />
Open Limit<br />
Torque Trip Mid-Travel<br />
Remote Selected<br />
S5<br />
S6<br />
S7<br />
S8<br />
14<br />
15<br />
16<br />
17<br />
18<br />
19<br />
20<br />
21<br />
24<br />
30<br />
46<br />
47<br />
Extra Indication Contacts<br />
Shown in default configuration.<br />
Configuration can be changed using<br />
the IQ Setting Tool to indicate various<br />
valve and actuator position, status<br />
and alarm settings. Contacts are<br />
shown in not true state.<br />
Refer to page 10<br />
Manual/Auto<br />
–24V DC<br />
Common<br />
–110V AC<br />
Analogue Position Control<br />
Folomatic<br />
26<br />
27<br />
28<br />
29<br />
39<br />
41<br />
45<br />
}<br />
}<br />
Analogue Input Signal<br />
for Folomatic<br />
For manual/auto<br />
connections refer to<br />
page 18<br />
Valve Position – CPT<br />
<strong>12</strong>V nominal<br />
4–20mA<br />
23<br />
A<br />
22<br />
Valve Torque – CTT<br />
<strong>12</strong>V nominal<br />
4–20mA<br />
29<br />
A<br />
28<br />
Pakscan<br />
2 Wire Loop<br />
Profibus<br />
RS485 Highway<br />
Care should be taken to ensure that circuits connected<br />
to terminals 4 or 5 are not connected directly or<br />
indirectly to ground.<br />
29<br />
24<br />
26<br />
Screen<br />
Profibus 1–B<br />
Profibus1–A<br />
26<br />
27<br />
28<br />
29<br />
2 Wire 'A' (In)<br />
2 Wire 'B' (Out)<br />
2 Wire 'C' Common<br />
Screen<br />
27<br />
28<br />
45<br />
Profibus 2–B<br />
Profibus 2–A<br />
Screen<br />
Modbus<br />
2 Wire/4 Wire RS485 Highway<br />
Foundation Fieldbus<br />
IEC61158–2 Highway<br />
24<br />
26<br />
27<br />
28<br />
23<br />
29<br />
Field Connection '1A'<br />
Field Connection '1B'<br />
Field Connection '2A'<br />
Field Connection '2B'<br />
Common<br />
Screen<br />
27<br />
28<br />
29<br />
Field Connection '+'<br />
Field Connection '–'<br />
Screen<br />
13
Actuator circuit diagrams – number code<br />
Standard Control and Indication Options<br />
Basic IQ range actuator circuit diagram 3000-000 and IQT range circuit diagram 6000-000 include local control and indication<br />
station, remote open/stop/close ESD and interlock control and 4 configurable indication contacts.<br />
-<br />
IQ<br />
Type<br />
Remote<br />
Digital Indication<br />
Remote<br />
Analogue<br />
Indication<br />
Actuator<br />
Power Supply<br />
Control Polarity<br />
Analogue Control<br />
Speed Control<br />
Actuator Fed<br />
Control Supply<br />
3 IQ, IQS, IQD<br />
5 IQM - Modulating – refer to publication E420E<br />
6 IQT<br />
0 Basic contacts S1 - S4<br />
1 S1 - S4 + Extra indication contacts S5 - S8*<br />
0 No remote analogue indication<br />
1 Valve Position - Internally fed 4-20mA CPT<br />
2 Valve Torque - Internally fed 4-20mA CTT**<br />
3 Valve Position + Valve Torque CPT + CTT**<br />
4 Auxiliary Powered CPT<br />
0 3 - Phase - IQS and IQT<br />
1 Single Phase - IQS only<br />
2 DC - IQD only<br />
- Positive switching control (neg common)<br />
N Negative switching control (pos common)<br />
0 No analogue control<br />
1 Analogue proportional control - Folomatic<br />
0 Single speed<br />
1 2 - Speed control - Interrupter Timer<br />
0 Basic: 24V DC actuator fed remote control supply<br />
1 <strong>12</strong>0V AC actuator fed remote control supply***<br />
* Extra contacts S5 - S8 with Analogue control - Folomatic will be limited due to terminal availability -<br />
Extra contacts S5 -S8 are not available with IQD contact Rotork.<br />
** CTT is not available with Analogue control - Folomatic.<br />
*** <strong>12</strong>0V AC actuator fed remote control supply not available with IQD actuators and IQT 24V DC<br />
powered actuators.<br />
Fieldbus System Control Options<br />
All Fieldbus systems include basic hardwired remote control: Open/Stop/Close, ESD and interlocks.<br />
IQ<br />
Type<br />
Aux<br />
Digital Output<br />
3 IQ, IQS, IQD<br />
5 IQM - Modulating – refer to publication E420E<br />
6 IQT<br />
0 No Auxiliary digital output<br />
3 Auxiliary digital output<br />
0<br />
-<br />
Actuator<br />
Power Supply<br />
Fieldbus<br />
System<br />
0 3 - Phase - IQ and IQT<br />
1 Single Phase - IQS only<br />
2 DC - IQD only<br />
2 Pakscan<br />
3 Pakscan + Analogue Input<br />
4 Modbus<br />
5 Dual Redundant Modbus<br />
6 Profibus<br />
8 Foundation Fieldbus<br />
Speed Control<br />
0 Single speed<br />
1 2 - Speed control - Interrupter Timer<br />
14<br />
Actuator Fed<br />
Control Supply<br />
0 Basic: 24V DC actuator fed control supply
Emergency Shut Down ESD<br />
and Interlock control circuits<br />
ESD and Interlock control<br />
circuits may be added to any of<br />
the Remote or Analogue circuits<br />
shown on pages 16-18.<br />
Emergency Shut Down ESD signal<br />
will override any existing local or<br />
remote signal. The actuator can be<br />
configured to open, close or stayput<br />
as a response to an ESD signal. ESD<br />
signals must be derived from a<br />
latching contact. The actuator can be<br />
configured to respond to an ESD from<br />
a “making” or “breaking” contact.<br />
If required, ESD operation can be<br />
configured to override the motor<br />
thermostat, local stop, active<br />
interlocks or Interrupter Timer option.<br />
Overriding the motor thermostat<br />
during ESD will invalidate hazardous<br />
area certification.<br />
Unless specified with order the<br />
actuator will be dispatched set for<br />
the following: Active high signal<br />
(contact making), Close on ESD. ESD<br />
will not override motor thermostat,<br />
local stop, active interlock or<br />
interrupter timer.<br />
Changes in ESD configuration are made<br />
using the supplied IQ Setting Tool.<br />
ESD Control Circuits<br />
▲<br />
4<br />
31<br />
32<br />
37<br />
38<br />
25<br />
5<br />
Form 1F<br />
Customer<br />
fitted link<br />
ESD<br />
(Stayput)<br />
ESD - Internally fed ▲<br />
Interlock Control<br />
Circuits<br />
▲<br />
4<br />
31<br />
32<br />
37<br />
38<br />
25<br />
5<br />
Customer<br />
fitted link<br />
Open<br />
permissive<br />
Close<br />
permissive<br />
Open/Close Interlock ▲<br />
active – Internally fed<br />
4<br />
31<br />
32<br />
37<br />
Customer<br />
fitted link<br />
Interlock circuit control<br />
The default setting is for the interlock<br />
function turned OFF. If interlock<br />
facilities are required the IQ Setting<br />
Tool can be used to configure the<br />
interlocks ON.<br />
Interlocks are active in both local and<br />
remote control. If only one interlock is<br />
required, the other must be linked<br />
out as shown.<br />
Traditional hardwired interlock<br />
systems between actuators such as<br />
“Main and Bypass” in steam plant<br />
can be easily arranged using the IQ<br />
“S” contacts to derive the permissive<br />
control signal.<br />
Key<br />
4<br />
31<br />
24V DC -ve<br />
ESD/IL Common 20-60V AC/DC<br />
4<br />
31<br />
32<br />
37<br />
38<br />
25<br />
5<br />
Form 2F<br />
ESD<br />
(Stayput)<br />
Line/+ve<br />
Common 60-<strong>12</strong>0V AC<br />
Common 20-60V AC/DC<br />
38<br />
25<br />
5<br />
Close<br />
permissive<br />
▲ Close Interlock ▲<br />
active – Internally fed<br />
4<br />
31<br />
32<br />
37<br />
Open<br />
permissive<br />
38<br />
Close<br />
permissive<br />
25<br />
32<br />
ESD/IL Common 60-<strong>12</strong>0V AC<br />
5<br />
37<br />
38<br />
25<br />
5<br />
Open Interlock<br />
Close Interlock<br />
ESD/Thermostat bypass<br />
24V DC +ve<br />
▲<br />
ESD - Externally fed ▲<br />
▲<br />
Line/+ve<br />
Common 60-<strong>12</strong>0V AC<br />
Common 20-60V AC/DC<br />
Open/Close Interlock ▲<br />
active – Externally fed<br />
15
Remote control circuits<br />
Remote control system wiring<br />
schematics for standard IQ are<br />
shown opposite.<br />
Open/Close push-to-run<br />
control.<br />
Standard actuators are dispatched<br />
without terminal links.<br />
A commissioning bag located in the<br />
terminal compartment includes<br />
terminal screws, spare cover “O”<br />
rings, actuator circuit diagram, and<br />
the Installation and Maintenance<br />
instruction, publication E170E.The<br />
actuator including the IQ Setting Tool<br />
will be indicated with a yellow label<br />
on the terminal compartment cover.<br />
Remote control inputs are optoisolated<br />
interfaces with a surge<br />
immunity of 2kV. Standard control is<br />
positive switching (negative switching<br />
is available if specified)<br />
Internal supply -ve (zero) ➤<br />
Common for remote controls<br />
on 20V to 60V DC or AC ➤<br />
Common for remote controls<br />
on 60V to <strong>12</strong>0V AC ➤<br />
Close ➤<br />
Stop/maintain ➤<br />
4<br />
36<br />
40<br />
<strong>33</strong><br />
34<br />
Form 1A<br />
Close<br />
The standard IQ actuator can be<br />
controlled using remote control<br />
signals defined as follows:<br />
Open ➤<br />
Internal 24V DC supply +ve<br />
(or internal <strong>12</strong>0V AC) ➤<br />
35<br />
5<br />
Open<br />
Customer fed control circuit supply:<br />
Within the ranges, 20-60V AC/DC<br />
or 60-<strong>12</strong>0V AC<br />
Actuator fed control circuit supply:<br />
24V DC, 5W rated. (<strong>12</strong>0V AC, 15VA<br />
available if specified)<br />
Internal supply -ve (zero) ➤<br />
4<br />
Form 2A<br />
The current drawn for each control<br />
input:<br />
5mA at 24V DC, <strong>12</strong>mA at <strong>12</strong>0V AC<br />
Minimum “ON” voltage: 20V,<br />
Maximum “OFF”: 3V.<br />
Minimum signal duration: 300ms.<br />
Maximum remote control cable<br />
capacitance: 2µF core to core.<br />
Common for remote controls<br />
on 20V to 60V DC or AC ➤<br />
Common for remote controls<br />
on 60V to <strong>12</strong>0V AC ➤<br />
Close ➤<br />
36<br />
40<br />
<strong>33</strong><br />
Close<br />
Stop/maintain ➤<br />
34<br />
Open ➤<br />
35<br />
Open<br />
Internal 24V DC supply +ve<br />
(or internal <strong>12</strong>0V AC) ➤<br />
5<br />
Line/+ve<br />
Zero/-ve<br />
16
Open/Close maintained<br />
control with mid-travel<br />
reverse.<br />
Open/Stop/Close<br />
maintained control.<br />
Two-wire control; energize to<br />
Open, de-energize to Close.<br />
(Configure for Open priority).<br />
Customer to link 5 - <strong>33</strong>.<br />
Two-wire control; energize to<br />
Close, de-energize to Open.<br />
(Configure for Close priority).<br />
Customer to link 5 - 35.<br />
Form 1B Form 1C Form 1D Form 1E<br />
4<br />
4<br />
4<br />
4<br />
36<br />
36<br />
36<br />
36<br />
40<br />
<strong>33</strong><br />
34<br />
35<br />
Close<br />
Open<br />
40<br />
<strong>33</strong><br />
34<br />
35<br />
Close<br />
Open<br />
40<br />
<strong>33</strong><br />
34<br />
35<br />
Close<br />
Open<br />
40<br />
<strong>33</strong><br />
34<br />
35<br />
Open<br />
Close<br />
▲ Internally fed circuits ▲<br />
5<br />
5<br />
5<br />
5<br />
Stop<br />
Form 2B Form 2C Form 2D Form 2E<br />
4<br />
4<br />
4<br />
4<br />
36<br />
36<br />
36<br />
Zero/-ve<br />
36<br />
Zero/-ve<br />
40<br />
<strong>33</strong><br />
34<br />
35<br />
Close<br />
Open<br />
40<br />
<strong>33</strong><br />
34<br />
35<br />
Close<br />
Open<br />
40<br />
<strong>33</strong><br />
34<br />
35<br />
Close<br />
Open<br />
40<br />
<strong>33</strong><br />
34<br />
35<br />
Open<br />
Close<br />
▲ Externally fed circuits ▲<br />
5<br />
Line/+ve<br />
5<br />
Stop<br />
5<br />
5<br />
Line/+ve<br />
Zero/-ve<br />
Zero/-ve<br />
Line/+ve<br />
Zero/-ve<br />
Line/+ve<br />
Zero/-ve<br />
Max 60VAC or DC (for higher<br />
voltages, apply to Rotork)<br />
Max 60VAC or DC (for higher<br />
voltages, apply to Rotork)<br />
17
Analogue control circuits<br />
Analogue Folomatic control only<br />
Analogue Folomatic control with<br />
internally fed remote manual override<br />
26<br />
27<br />
Customer analogue<br />
output signal<br />
26<br />
27<br />
Customer analogue<br />
output signal<br />
Manual<br />
5<br />
5<br />
4<br />
41<br />
Customer<br />
fitted links<br />
4<br />
36<br />
Auto<br />
Customer<br />
fitted links<br />
39<br />
41<br />
39<br />
<strong>33</strong><br />
Close contact<br />
35<br />
Open contact<br />
34<br />
Stop/maintain<br />
(optional)<br />
Key<br />
Analogue Folomatic control with<br />
externally fed remote manual override<br />
26<br />
27<br />
5<br />
4<br />
Folomatic +ve<br />
Folomatic -ve<br />
24V DC +ve<br />
24V DC -ve<br />
26<br />
27<br />
36<br />
Customer analogue<br />
output signal<br />
36<br />
40<br />
Control Common 20-60V AC/DC<br />
Control Common 60-<strong>12</strong>0V AC<br />
40<br />
41<br />
Common 20-60V AC or DC<br />
41<br />
Folomatic Common 20-60V AC/DC<br />
45<br />
Common 60-<strong>12</strong>0V AC<br />
45<br />
39<br />
Folomatic Common 60-<strong>12</strong>0V AC<br />
Folomatic manual/auto<br />
39<br />
<strong>33</strong><br />
Manual<br />
Auto<br />
Line/+ve<br />
Close contact<br />
<strong>33</strong><br />
Remote manual Close<br />
35<br />
Open contact<br />
35<br />
34<br />
Remote manual Open<br />
Remote manual Stop/Maintain<br />
34<br />
Stop/maintain<br />
(optional)<br />
18
IQ<br />
IQT
UK head office<br />
Rotork Controls Limited<br />
tel: +44 (0)<strong>12</strong>25 7<strong>33</strong>200<br />
fax: +44 (0) <strong>12</strong>25 <strong>33</strong>3467<br />
mail@rotork.co.uk<br />
USA head office<br />
Rotork Controls Inc<br />
tel: +1 585 328 1550<br />
fax: +1 585 328 5848<br />
info@rotork.com<br />
Rotork Controls Ltd, Bath, UK<br />
Rotork Controls Inc, Rochester, USA<br />
Australia<br />
tel: +61 353 381566<br />
fax: +61 353 381570<br />
mail@rotork.com.au<br />
Germany<br />
tel: +49 2103 95876<br />
fax: +49 2103 54090<br />
info@rotork.de<br />
Italy (Fluid System)<br />
tel: +39 0583 94811<br />
fax: +39 0583 403482<br />
fluid@fluidsystem.it<br />
Russia<br />
tel: +7 0952292463<br />
fax: +7 503 2349<strong>12</strong>5<br />
rotork.russia@mtu-net.ru<br />
Thailand<br />
tel: +66 2 2727165<br />
fax: +66 2 2727167<br />
mail@rotork.co.th<br />
Canada<br />
tel: +1 403 5699455<br />
fax: +1 403 5699414<br />
info@rotork.ca<br />
Hong Kong<br />
tel: +852 25202390<br />
fax: +852 2 5289746<br />
eric.li@rotork.com.cn<br />
Japan<br />
tel: +81 3 5632 2941<br />
fax: +81 3 5632 2942<br />
mail@rotork.co.jp<br />
Saudi Arabia<br />
tel: +966 3 8<strong>33</strong> 1661<br />
fax: +966 3 8<strong>33</strong> 9369<br />
pknair@alhugayet.com<br />
U.K. (Electrics)<br />
tel: +44 <strong>12</strong>25 7<strong>33</strong> 200<br />
fax: +44 <strong>12</strong>25 <strong>33</strong>3 467<br />
mail@rotork.co.uk<br />
China (Shanghai)<br />
tel: +86 21 64785015<br />
fax: +86 21 64785035<br />
crouse.shen@rotork.com.cn<br />
India<br />
tel: +91 44 6254219<br />
fax: +91 44 6257108<br />
rotork@rotork.co.in<br />
Korea (South)<br />
tel: +82 31 2650962<br />
fax: +82 31 2651369<br />
ykkim@rotork.co.kr<br />
Singapore<br />
tel: +65 645 7<strong>12</strong><strong>33</strong><br />
fax: +65 645 76011<br />
philip.seah@rotork.com.sg<br />
U.K. (Fluid System)<br />
tel: +44 113 2057 223<br />
fax: +44 113 2363 310<br />
mark.thomas@fluidsystem.co.uk<br />
China (Beijing)<br />
tel: +86 10 64974142<br />
fax: +86 10 64994591<br />
simon.yang@rotork.com.cn<br />
Indonesia<br />
tel: +62 21 580 6764<br />
fax: +62 21 581 2757<br />
rotork@indosat.net.id<br />
Malaysia<br />
tel: +60 3 7880 9198<br />
fax: +60 3 7880 9189<br />
rotork@rotork.com.my<br />
South Africa<br />
tel: +27 11 4539741<br />
fax: +27 11 4539894<br />
howard.mutters@rotork.co.za<br />
USA<br />
tel: +1 585 3281550<br />
fax: +1 585 328 5848<br />
info@rotork.com<br />
France<br />
tel: +<strong>33</strong> 1 43 111550<br />
fax: +<strong>33</strong> 1 48 354254<br />
mail@rotork.fr<br />
Italy (Electrics)<br />
tel: +39 0245 70<strong>33</strong>00<br />
fax: +39 0245 70<strong>33</strong>01<br />
rotork.italia@rotork.it<br />
Netherlands<br />
tel: +31 10 4146911<br />
fax: +31 10 4144750<br />
sales@rotork.nl<br />
Spain<br />
tel: +34 94 6766011<br />
fax: +34 94 6766018<br />
rotork@rotork.es<br />
Venezuela<br />
tel: +58 2<strong>12</strong> 2855232<br />
fax: +58 2<strong>12</strong> 2858050<br />
rotorkvz@cantv.net<br />
A full listing of our worldwide<br />
sales and service network is<br />
available on our website at<br />
www.rotork.com<br />
As part of a process of on-going product development, Rotork reserves the right to amend and change<br />
specifications without prior notice. Published data may be subject to change. For the very latest version<br />
release, visit our website at www.rotork.com<br />
The name Rotork is a registered trademark. Rotork recognizes all registered trademarks.<br />
Published and produced in the UK by Rotork Controls Limited.
IQ Range<br />
Installation and<br />
Maintenance Instructions<br />
Please ensure that this publication is thoroughly read and understood<br />
Publication number E170E2<br />
Date of issue 01/05
The Rotork Setting Tool allows actuator control, indication and protection functions<br />
to be configured to suit site requirements. It is essential that all the actuator<br />
settings are checked for compatibility with the process and control system<br />
requirements before the actuator is put into service. Please read this publication.<br />
When Rotork personnel or nominated agents are contracted to carry out site<br />
commissioning and/or acceptance, documentation of commissioned actuator<br />
configuration can be made available for customer records.
This manual provides instruction on:<br />
* Manual and electrical (local and remote) operation.<br />
* Preparation and installation of the actuator onto<br />
the valve.<br />
* Subsequent commissioning and adjustment of the<br />
Primary Settings for correct valve operation.<br />
* Commissioning and adjustment of the Secondary<br />
Settings to suit site-specific control and indication<br />
requirements.<br />
* Maintenance – Troubleshooting.<br />
* Sales and Service.<br />
Refer to Publication E180E2 for repair, overhaul and<br />
spare part instructions.<br />
THE ROTORK IQ RANGE – THE FIRST VALVE ACTUATOR THAT YOU<br />
CAN COMMISSION AND INTERROGATE WITHOUT REMOVING<br />
ELECTRICAL COVERS.<br />
Using the supplied infra-red Setting Tool to access the actuator set up<br />
procedures, “point and shoot” setting of torque levels, position limits and<br />
all other control and indication functions can be made safely, quickly and<br />
conveniently, even in hazardous locations. The IQ allows commissioning<br />
and adjustment to be carried out with the main power supply to the<br />
actuator switched on or off.<br />
Standard diagnostics access information about the control system, valve<br />
and actuator status in the form of display icons and help screens.<br />
Instantaneous valve torque and position can be monitored on the actuator<br />
with a single key press of the Setting Tool.<br />
The on board Datalogger captures operational and valve torque data<br />
enabling informed maintenance choices to be made. IQ Insight software<br />
for PC and PDA allows the Datalogger to be interrogated, as well as the<br />
complete actuator set up to be configured and recorded.<br />
The actuator containing the Setting Tool will be identified with a yellow<br />
label on the terminal cover.<br />
Visit our web site at www.rotork.com for more information on the IQ and<br />
other Rotork actuator ranges.
CONTENTS<br />
Page<br />
1 Health and Safety 2<br />
3<br />
2 Storage 3<br />
3 Operating your IQ Actuator 3<br />
3.1 Operating by Hand 3<br />
3.2 Operating Electrically 3<br />
3.3 Display – 4<br />
Local Indication<br />
3.4 Display – Alarm Indication 5<br />
4 Preparing Drive Bush 7<br />
4.1 IQ10 to IQ35 7<br />
Thrust Base Types A and Z<br />
4.2 IQ10 to IQ35 8<br />
Non-Thrust Base Type B<br />
4.3 IQ40 to IQ95 8<br />
Thrust Base Types A and Z<br />
4.4 IQ40 to IQ95 9<br />
Non-Thrust Base Type B<br />
5 Mounting the Actuator 10<br />
5.1 Rising Stem <strong>Valves</strong> – 11<br />
Top Mounting<br />
5.2 Valve with Gearbox – 11<br />
Side Mounting<br />
5.3 Non-Rising Stem <strong>Valves</strong> – 11<br />
Top Mounting<br />
Page<br />
5.4 Handwheel Sealing 11<br />
5.5 IQM Modulating Actuators <strong>12</strong><br />
5.6 IQML Linear Drive Unit <strong>12</strong><br />
5.7 IQML Adjusting Linear Stroke <strong>12</strong><br />
6 Cable Connections 14<br />
6.1 Earth/Ground Connections 14<br />
6.2 Removing Terminal Cover 14<br />
6.3 Cable Entry 14<br />
6.4 Connecting to Terminals 15<br />
6.5 Replacing Terminal Cover 15<br />
7 Commissioning 16<br />
7.1 The Setting Procedure 16<br />
7.2 The Setting Tool 17<br />
7.3 Entering the Actuator 18<br />
Setting Procedure<br />
7.4 Setting Mode – Password 18<br />
7.5 New Password 18<br />
7.6 Checking Mode 18<br />
7.7 Procedure Branch – 19<br />
Crossroad<br />
7.8 The Actuator Display – 19<br />
Setting/Checking Mode<br />
7.9 Returning to Valve 19<br />
Position Display<br />
Page<br />
8 Commissioning –<br />
Primary Functions 20<br />
Primary Functions Contents 21<br />
9 Commissioning –<br />
Secondary Functions 29<br />
Secondary Functions Contents 31<br />
Default Options 63<br />
10 Maintenance, Monitoring<br />
and Troubleshooting 65<br />
10.1 Help Screens 67<br />
10.2 IrDA Diagnostics & Configuration 72<br />
11 Weights and Measures 74<br />
Binary, Hexadecimal and Decimal 75<br />
Conversion Table<br />
<strong>12</strong> IQ Approvals 76<br />
1
1<br />
Health and Safety<br />
2<br />
This manual is produced to enable a<br />
competent user to install, operate,<br />
adjust and inspect Rotork IQ range<br />
valve actuators.<br />
The electrical installation, maintenance<br />
and use of these actuators should be<br />
carried out in accordance with the<br />
National Legislation and Statutory<br />
Provisions relating to the safe use of<br />
this equipment, applicable to the site of<br />
installation.<br />
For the UK: Electricity at Work<br />
Regulations 1989 and the guidance<br />
given in the applicable edition of the<br />
“IEE Wiring Regulations’’ should be<br />
applied. Also the user should be fully<br />
aware of his duties under the Health<br />
and Safety Act 1974.<br />
For the USA: NFPA70, National Electrical<br />
Code ® is applicable.<br />
The mechanical installation should be<br />
carried out as outlined in the manual<br />
and also in accordance with relevant<br />
standards such as British Standard<br />
Codes of Practice. If the actuator has<br />
nameplates indicating that it is suitable<br />
for installation in Hazardous Gas Areas<br />
then the actuator is suitable for use in<br />
Zone 1 and Zone 2 (or Div 1 and Div 2)<br />
explosive atmospheres only. It should<br />
not be installed in atmospheres where<br />
gases are present with an ignition<br />
temperature less than 135°C, unless<br />
suitability for lower ignition<br />
temperatures has been indicated on the<br />
actuator nameplate.<br />
Any test instruments applied to the<br />
actuator should be of equivalent<br />
certification. The electrical installation,<br />
maintenance and the use of the<br />
actuator should be carried out in<br />
accordance with the code of practice<br />
relevant for that particular Hazardous<br />
Gas Area certification.<br />
No inspection or repair should be<br />
undertaken unless it conforms to the<br />
specific Hazardous Gas Area<br />
certification requirements. Under no<br />
circumstances should any modification<br />
or alteration be carried out on the<br />
actuator as this could invalidate the<br />
conditions under which its certification<br />
was granted.<br />
Access to live electrical conductors is<br />
forbidden in the hazardous area unless<br />
this is done under a special permit to<br />
work, otherwise all power should be<br />
isolated and the actuator moved to a<br />
non-hazardous area for repair or<br />
attention.<br />
Only persons competent by virtue of<br />
their training or experience should be<br />
allowed to install, maintain and repair<br />
Rotork actuators. Work undertaken<br />
must be carried out in accordance with<br />
instructions in the manual. The user<br />
and those persons working on this<br />
equipment should be familiar with their<br />
responsibilities under any statutory<br />
provisions relating to the Health and<br />
Safety of their workplace.<br />
WARNING:<br />
Motor Temperature<br />
With excessive use the motor surface<br />
temperature could reach 132ºC (270ºF).<br />
Thermostat Bypass<br />
If the actuator is configured to bypass<br />
the motor thermostat, when using the<br />
ESD function, the hazardous area<br />
certification will be invalidated.<br />
Control and Indication<br />
Where the actuator build allows remote<br />
control and indication supplies higher<br />
than 150V a.c. but below 300V a.c.<br />
(refer to actuator wiring diagram) the<br />
remote control and indication supplies<br />
must be derived from a supply which is<br />
designated as installation category<br />
(overvoltage category) ll as defined in<br />
BSEN 61010 (Safety Requirements For<br />
Electrical Equipment for measurement,<br />
control and laboratory use).<br />
Enclosure Materials<br />
IQ10 to IQ35 are manufactured from<br />
aluminium alloy with stainless steel<br />
fasteners and the thrust bases are<br />
manufactured in cast iron. IQ40 to IQ95<br />
enclosures are manufactured in<br />
aluminium alloy and cast iron with<br />
stainless steel fasteners and the thrust<br />
bases are manufactured in cast iron.<br />
The user must ensure that the<br />
operating environment and any<br />
materials surrounding the actuator<br />
cannot lead to a reduction in the safe<br />
use of, or the protection afforded by,<br />
the actuator. Where appropriate the<br />
user must ensure the actuator is<br />
suitably protected against it’s operating<br />
environment.<br />
Should further information and<br />
guidance relating to the safe use of the<br />
Rotork IQ range of actuators be<br />
required, it will be provided on request.<br />
WARNING: Operating by Hand<br />
With respect to handwheel operation<br />
of Rotork electric actuators, see<br />
warning on p3.
2<br />
Storage<br />
3 Operating your<br />
IQ Actuator<br />
3<br />
If your actuator cannot be installed<br />
immediately store it in a dry place until<br />
you are ready to connect incoming<br />
cables.<br />
If the actuator has to be installed but<br />
cannot be cabled it is recommended<br />
that the plastic transit cable entry plugs<br />
are replaced with metal plugs which are<br />
sealed with PTFE tape.<br />
The Rotork double-sealed construction<br />
will preserve internal electrical<br />
components perfectly if left<br />
undisturbed.<br />
It is not necessary to remove any<br />
electrical compartment covers in order<br />
to commission the IQ actuator.<br />
Rotork cannot accept responsibility for<br />
deterioration caused on-site once the<br />
covers are removed.<br />
Every Rotork actuator has been fully<br />
tested before leaving the factory to give<br />
years of trouble free operation,<br />
providing it is correctly commissioned,<br />
installed and sealed.<br />
3.1 Operating by Hand<br />
WARNING<br />
With respect to handwheel<br />
operation of Rotork electric<br />
actuators, under no circumstances<br />
should any additional lever<br />
device such as a wheel-key or<br />
wrench be applied to the<br />
handwheel in order to develop<br />
more force when closing or<br />
opening the valve as this may<br />
cause damage to the valve and/or<br />
actuator or may cause the valve<br />
to become stuck in the<br />
seated/backseated position.<br />
Fig. 3<br />
To engage handwheel drive depress the<br />
Hand/Auto lever into “Hand” position<br />
and turn the handwheel to engage the<br />
clutch. The lever can now be released<br />
when it will return to its original<br />
position. The handwheel will remain<br />
engaged until the actuator is operated<br />
electrically when it will automatically<br />
disengage and return to motor drive. If<br />
required the Hand/Auto lever can be<br />
locked in either position using a<br />
padlock with a 6.5mm hasp.<br />
3.2 Operating Electrically<br />
Check that power supply voltage agrees<br />
with that stamped on the actuator<br />
nameplate. Switch on power supply. It<br />
is not necessary to check phase<br />
rotation.<br />
Do not operate the actuator<br />
electrically without first checking,<br />
using the infra-red Setting Tool,<br />
that at least the Primary Settings<br />
have been made (refer to Section 8<br />
page 20).<br />
Selecting Local/Stop/Remote<br />
Operation<br />
The red selector enables either Local or<br />
Remote control, lockable in each position<br />
using a padlock with a 6.5mm hasp.<br />
When the selector is locked in the Local<br />
or Remote positions the Stop facility is<br />
still available. The selector can also be<br />
locked in the Stop position to prevent<br />
electrical operation by Local or Remote<br />
control.<br />
Fig. 3.1<br />
Local Control<br />
With the red selector positioned at<br />
Local (anti-clockwise) the adjacent black<br />
knob can be turned to select Open or<br />
Close. For Stop, turn red knob<br />
clockwise.<br />
Remote Control<br />
Rotate the red selector to the Remote<br />
position (clockwise), this gives remote
4<br />
control only for Open and Close but<br />
local Stop can still be used by turning<br />
the red knob anti-clockwise.<br />
3.3 Display–Local Indication<br />
3<br />
2<br />
4<br />
1<br />
The liquid crystal display screen has 2<br />
modes of position indication:<br />
1. Valve position – power on<br />
2. Valve position – power off<br />
On power up the actuator’s liquid<br />
crystal display screen is back-lit with a<br />
“soft amber” light and one of the<br />
indicator lamps will be on, dependent<br />
on position. The display screen will<br />
show percentage open or an end of<br />
travel symbol. (See Figs 3.3, 3.4 and<br />
3.5)<br />
As standard, red lamp signifies valve<br />
open, yellow intermediate, and green<br />
lamp signifies valve closed. Open and<br />
closed colour functions can be reversed<br />
on request.<br />
Open<br />
Red indicator and open symbol<br />
displayed<br />
Closed<br />
Green indicator and closed symbol<br />
displayed<br />
5<br />
Fig. 3.2 The Actuator Display<br />
The display consists of:<br />
1. Red – position indication lamp<br />
2. Yellow – position indication lamp<br />
3. Green – position indication lamp<br />
4. Liquid crystal display screen (LCD)<br />
5. Infra-red sensors<br />
6. Infra-red signal confirmation<br />
indicator (Red)<br />
6<br />
Fig. 3.3<br />
Mid Travel<br />
Yellow indicator and percentage open<br />
value displayed<br />
Fig. 3.5<br />
With the main power supply switched<br />
off, the liquid crystal display screen is<br />
powered by a battery and continues to<br />
display actuator position. However, the<br />
battery does not support screen backlighting,<br />
or position indicator lamps.<br />
Fig. 3.4
5<br />
3.4 Display–Alarm Indication<br />
The IQ display incorporates valve,<br />
control system, actuator and battery<br />
alarm indication in the form of four<br />
display icons. Located in the top portion<br />
of the display, each icon represents<br />
certain alarm conditions. Standard help<br />
screens are also available to assist in<br />
determining the actuator operational<br />
and alarm status (refer to Help Screens<br />
page 67).<br />
Fig. 3.6<br />
Valve Alarm<br />
The valve alarm icon, Fig 3.6, is<br />
displayed when a valve problem causes<br />
the actuator to “trip-off’’ due to the<br />
configured torque value being<br />
developed (refer to [tC]/[tO] pages<br />
25/26).The possible causes are:<br />
• Valve tight or obstructed in mid travel.<br />
• Valve stuck or jammed<br />
• Valve process conditions changed<br />
(increase in pressure, flow etc.)<br />
Once the actuator has tripped off on<br />
torque, electrical operation in the same<br />
direction is inhibited. The icon will<br />
remain displayed until movement in the<br />
opposite direction takes place.<br />
The valve alarm icon will not be<br />
displayed when stopping at end of<br />
travel for valves configured to torque<br />
seat or torque back seat at end of<br />
travel (refer to [C2]/[C3] pages 23/24).<br />
Try handwheel operation of the valve to<br />
‘‘feel’’ for stiffness (refer to page 3).<br />
Control Alarm<br />
Fig. 3.7<br />
The control system alarm icon, Fig 4.5,<br />
is displayed when the remote control<br />
system maintains an active ESD or<br />
interlock signal (the ESD, interlock<br />
function or conditional control having<br />
been enabled.)<br />
Local and Remote operation will be<br />
inhibited while an active ESD or<br />
interlock signal is present (refer to [A1]<br />
ESD Action page 34, [A8] External<br />
Interlocks page 36 and Conditional<br />
Control [A9] page 36.)<br />
Investigate the operational conditions<br />
of the actuator remote control system.
6<br />
Actuator Alarm<br />
Fig. 3.8<br />
The actuator alarm icon, Fig. 3.8, is<br />
displayed when an active actuator<br />
alarm is present.<br />
Electrical operation will be inhibited<br />
while an alarm is present. The possible<br />
causes are:<br />
• Transformer thermostat tripped<br />
• Battery low on power up*<br />
• Power supply fault<br />
*see Battery Alarm<br />
(To identify the specific cause of the<br />
alarm refer to Help Screens pages<br />
67-71).<br />
Battery Alarm<br />
Fig. 3.9<br />
The battery alarm icon, Fig. 3.9, is<br />
displayed when the actuator detects its<br />
battery as being low, discharged or<br />
missing.<br />
If, on power up, the actuator detects a<br />
discharged battery and actuator power<br />
loss inhibit feature [OS] is enabled<br />
(refer to page 62), both battery and<br />
actuator alarm icons (Fig.3.8 and 3.9)<br />
will be displayed. Electrical operation<br />
will be inhibited.<br />
When the battery alarm icon<br />
is displayed, the battery should be<br />
replaced immediately (refer to page 65).<br />
The actuator checks the battery status<br />
at approximately 10 minute intervals.<br />
After replacing a battery the alarm icon<br />
will continue to be displayed until the<br />
next check indicates the battery is<br />
healthy. This may take up to 10<br />
minutes.
4<br />
Preparing Drive Bush<br />
7<br />
4.1 IQ10 to IQ35<br />
Thrust Base Types A and Z<br />
Removal of Drive Bush for<br />
Machining<br />
Fig. 4 Bronze Drive Bush Fitted into<br />
Thrust Taking Base<br />
Turn actuator onto its side, remove the<br />
two cap-headed screws holding base<br />
plate onto thrust base, pull out the<br />
drive bush complete with its bearing<br />
assembly.<br />
Before machining the drive bush the<br />
thrust bearing must be removed.<br />
IQ10, IQ<strong>12</strong> and IQ18 actuators have a<br />
sealed thrust bearing located on the<br />
drive bush and retained by the steel<br />
Fig. 4.1 Components of Type A<br />
Thrust Base<br />
bearing stop ring. The bearing stop ring<br />
is locked with one socket set screw.<br />
IQ20, IQ25 and IQ35 have a thrust race<br />
ball bearing within the steel bearing<br />
housing, located on the drive bush and<br />
retained by the steel bearing stop ring.<br />
The bearing is sealed within its housing<br />
by O-rings located on the drive bush<br />
and on the bearing stop ring. The<br />
bearing stop ring is locked with two<br />
socket set screws.<br />
1. Locate and loosen the locking socket<br />
set screw(s) in the bearing stop ring.<br />
2. Unscrew the bearing stop from the<br />
drive bush. Slide the bearing off the<br />
drive bush. Keep the drive bush and<br />
stop ring in a safe clean place.<br />
3. For all sizes ensure the drive bush<br />
male thread (stop ring) is not<br />
damaged during machining. For sizes<br />
IQ20, IQ25 & IQ35, ensure the O-ring<br />
located in the drive bush is not<br />
damaged during machining. Machine<br />
drive bush to suit the valve stem,<br />
allowing generous clearance on the<br />
screw thread for rising stem valves.<br />
Re-assembly<br />
1. Remove all swarf from the drive<br />
bush, ensuring the O rings on the<br />
drive bush and bearing stop ring<br />
(where fitted) are undamaged, clean<br />
and greased.<br />
2. Slide the bearing assembly onto the<br />
drive bush and ensure it is fitted<br />
down to the drive bush shoulder.<br />
3. Screw the stop ring with the locking<br />
socket set screw(s) uppermost on to<br />
the drive bush until it comes to a<br />
stop – hand tight and lock with the<br />
locking socket set screws. The<br />
locking socket set screws must be<br />
done up tight to prevent the<br />
assembly working loose, as shown in<br />
Fig 4.2. Refer to the table below for<br />
required tightening torques.<br />
Socket set Allen key Torque Torque<br />
screw size bit size Nm lbs/ft<br />
M4 M2 2.2 1.62<br />
M6 M3 7.8 5.75<br />
Fig. 4.2<br />
4. Refit the drive bush assembly into<br />
the base casting on the actuator,<br />
ensuring that the slots in the drive<br />
bush are located into the drive dogs<br />
of the hollow output shaft.<br />
5. Refit the base plate and secure with<br />
cap-headed screws.
8<br />
4.2 IQ10 to IQ35<br />
Non-Thrust Base Type B<br />
Undo the four set screws securing the<br />
base plate to the gearcase and remove<br />
the base plate.<br />
The drive bush and its retaining clip can<br />
now be seen.<br />
Types B3 and B4 removal:<br />
(refer to Fig. 4.3)<br />
Using external circlip pliers, expand the<br />
circlip while pulling on the drive bush.<br />
The drive bush will detach from the<br />
actuator centre column with the circlip<br />
retained in its groove.<br />
Fig. 4.4<br />
Type B1<br />
(Refer to Fig. 4.4)<br />
The procedure for removal and refitting<br />
of the B1 drive bush is the and same as<br />
for B3 and B4, However the circlip is<br />
replaced with a custom spring clip. The<br />
spring clip operates in the same manner<br />
as the B3/B4 circlip but is expanded<br />
using long-nose pliers.<br />
Fig. 4.5 Locating Set Screw<br />
Loosen set screw and unscrew retainer<br />
using hammer and punch. Remove<br />
drive bush and machine to suit valve<br />
stem or gearbox input shaft.<br />
Allow generous clearance on screw<br />
thread for rising stem valves.<br />
Fig. 4.7 Type A Drive Bush<br />
If the actuator has a type A drive bush<br />
(Fig. 4.7) this can be fitted in position 1<br />
or 2 to suit the position of the valve<br />
mounting flange.<br />
4.3 IQ40 to IQ95<br />
Thrust Base Types A and Z<br />
Removal of Drive Bush for<br />
Machining<br />
Engage “hand” and turn handwheel<br />
until retainer set screw is visible through<br />
hole in actuator base.<br />
Fig. 4.3<br />
Fig. 4.8 Type A Drive Bush in<br />
Position 1<br />
Fig. 4.6 Removal of Retainer
9<br />
Fig. 4.9 Type A Drive Bush in<br />
Position 2<br />
If the actuator has a type Z3 drive bush<br />
(Fig. 4.10) this can only be fitted below<br />
the actuator base (Fig. 4.11).<br />
Fig. 4.10 Type Z3 Drive Bush<br />
Fig. 4.11 Type Z3 Drive Bush in<br />
Position 3<br />
Re-Assembly<br />
Having confirmed the position required,<br />
insert the machined drive bush ensuring<br />
that the actuator output shaft dogs are<br />
in full engagement with the bush. Fit<br />
drive bush retainer securely, turning<br />
clockwise until fully tightened using<br />
hammer and punch. Rotate by hand<br />
wheel to align retainer set screw with<br />
hole in the side of base and tighten.<br />
4.4 IQ40 to IQ95<br />
Non-Thrust Base Type B<br />
Type B1<br />
Output shaft bored and keyed to ISO<br />
5210 standard. There is no drive bush<br />
to machine.<br />
Fig. 4.<strong>12</strong> Tightening Retainer Set<br />
Screw<br />
Types B3 and B4<br />
Identical drive bushes secured by cap<br />
headed screws.<br />
B3 is supplied pre-machined to ISO<br />
5210 standard.<br />
B4 is supplied blank and must be<br />
machined to suit the input shaft of the<br />
gearbox or valve that it will drive.<br />
Fig. 4.13 B3/B4 Drive Bush<br />
Fig. 4.14 B3/B4 Drive Bush in Situ
5<br />
Mounting the Actuator<br />
10<br />
(Refer to Weights and Measures page 74 for actuator weight.)<br />
Ensure the valve is secure before fitting the actuator as the combination may be top<br />
heavy and therefore unstable.<br />
If it is necessary to lift the actuator using mechanical lifting equipment certified<br />
slings should be attached as indicated in Fig.5 for vertical valve shafts and Fig.5.1<br />
for horizontal shafts.<br />
At all times trained and experienced personnel should ensure safe lifting,<br />
particularly when mounting actuators.<br />
WARNING:<br />
The actuator should be fully supported until full valve shaft<br />
engagement is achieved and the actuator is secured to the valve<br />
flange.<br />
A suitable mounting flange conforming to ISO 5210 or USA Standard MSS SP101<br />
must be fitted to the valve.<br />
Actuator to valve fixing must conform to Material Specification ISO Class 8.8, yield<br />
strength 628 N/sq mm.<br />
WARNING:<br />
Do not lift the actuator and valve combination via the actuator. Always<br />
lift the valve/actuator assembly via the valve.<br />
Each assembly must be assessed on an individual basis for safe lifting.<br />
Fig. 5<br />
Fig. 5.1
11<br />
5.1 Rising Stem <strong>Valves</strong> –<br />
Top Mounting<br />
a) Fitting the Actuator and<br />
Base as a Combined Unit –<br />
All Actuator Sizes<br />
Fit the machined drive bush into the<br />
thrust base as previously described,<br />
lower the actuator onto the threaded<br />
valve stem, engage “hand” and wind<br />
the handwheel in the opening direction<br />
to engage the drive bush onto the<br />
stem. Continue winding until the<br />
actuator is firmly down on the valve<br />
flange. Wind two further turns, fit<br />
securing bolts and tighten fully.<br />
5.2 Valve with Gearbox –<br />
Side Mounting<br />
Check that the mounting flange is at<br />
right angles to the input shaft, and that<br />
the drive bush fits the shaft and key<br />
with adequate axial engagement.<br />
Engage “hand”, offer up actuator to<br />
the input shaft and turn handwheel to<br />
align keyway and key. Tighten<br />
mounting bolts.<br />
Fig. 5.2<br />
b) Fitting Thrust Base to Valve –<br />
Actuator Sizes 10 to 35 only<br />
Fit the machined drive bush into the<br />
thrust base as previously described.<br />
Remove the thrust base from the<br />
actuator, place it on the threaded valve<br />
stem with the slotted end of the drive<br />
bush uppermost and turn it in the<br />
opening direction to engage the thread.<br />
Continue turning until the base is<br />
positioned onto the valve flange. Fit<br />
securing bolts but do not tighten at this<br />
stage. Lower the actuator onto the<br />
thrust base and rotate the complete<br />
actuator until the drive dogs on the<br />
actuator output shaft engage into the<br />
drive bush. Actuator flange should now<br />
be flush with base flange.<br />
Fig. 5.3<br />
Continue to turn actuator until fixing<br />
holes align. Using bolts supplied fix<br />
actuator to thrust base and tighten<br />
down. Open valve by two turns and<br />
firmly tighten down fixings onto valve<br />
flange.<br />
5.3 Non-Rising Stem <strong>Valves</strong> –<br />
Top Mounting<br />
Treat as for side mounting except that<br />
when thrust is taken in the actuator, a<br />
thrust nut must be fitted above the<br />
drive bush and securely tightened.<br />
5.4 Handwheel Sealing<br />
Ensure that sealing plug in centre of<br />
handwheel (or spindle cover tube<br />
depending on which is fitted) is sealed<br />
with PTFE tape and fully tightened,<br />
ensuring that moisture does not pass<br />
down the centre column of the<br />
actuator.
<strong>12</strong><br />
5.5 IQM Modulating Actuators<br />
The IQM range of actuators are suitable<br />
for modulating control duty of up to<br />
<strong>12</strong>00 starts per hour in accordance with<br />
IEC 34-1 to S4 50%.<br />
IQM actuators have a dynamic braking<br />
facility as standard. If mechanical<br />
overrun of the actuator and valve prove<br />
to be excessive for accurate control, the<br />
brake can be enabled by fitting a link to<br />
the actuator terminal block as indicated<br />
by the wiring diagram. With dynamic<br />
braking enabled, motor heating effects<br />
increase and therefore the number of<br />
actuator starts should be reduced to<br />
prevent motor thermostat tripping<br />
(refer to publication E 410E for more<br />
information).<br />
Commissioning of IQM range actuators<br />
is identical to the standard IQ (refer to<br />
Sections 7, 8 and 9 commencing on<br />
page 16).<br />
5.6 IQML Linear Drive Unit<br />
Consists of a lead screw assembly<br />
arrangement attached to the base of<br />
the actuator in order to provide a linear<br />
output stroke between 8mm ( 3 /8 in)<br />
minimum and <strong>12</strong>0mm (4 3 /4in)<br />
maximum.<br />
The IQML can be supplied with or<br />
without a yoke mounting adaptor.<br />
This adaptor consists of four pillars and<br />
a base flange to suit the valve.<br />
Fig. 5.5 IQML without Yoke<br />
5.7 IQML Adjusting Linear Stroke<br />
With actuator securely fitted to valve,<br />
but with the linear drive disconnected,<br />
ensure valve is at its fully closed (down)<br />
position.<br />
Remove cover tube from actuator<br />
handwheel, locate the down stop<br />
adjustment on the linear drive unit and<br />
with two spanners loosen the lock nut,<br />
run the lock nut and tubular down stop<br />
to the end of the thread.<br />
Fig. 5.6 Down Stop two Spanners<br />
Fig. 5.4 IQML with Yoke
13<br />
5.7 IQML Adjusting Linear Stroke<br />
continued<br />
Turn the actuator handwheel clockwise,<br />
linear drive will move down towards<br />
the valve spindle, couple linear drive to<br />
valve spindle.<br />
Turn the tubular down stop clockwise<br />
into the actuator until it comes to a<br />
mechanical stop. If the valve must close<br />
onto its seat by “TORQUE ACTION”<br />
then back off (anti-clockwise) the down<br />
stop by one third of one turn<br />
(equivalent to 1mm). Run the lock nut<br />
down ontothe tubular down stop and<br />
tighten with two spanners. There is no<br />
“up stop” (open) on the linear drive<br />
unit, the mechanical stop in the valve<br />
will give this position. Refit the top<br />
cover tube to the handwheel using<br />
PTFE tape to seal the thread.<br />
The linear drive unit is pre-packed with<br />
grease type Rocol MTS 1000, use this<br />
or an equivalent high temperaturebearing<br />
grease.<br />
A grease nipple is situated in the base<br />
of the actuator to enable lubrication of<br />
the lead screw. Periodically, depending<br />
on usage and temperature, apply two<br />
pumps of a grease gun.
6<br />
Cable Connections<br />
14<br />
WARNING:<br />
Ensure all power supplies are<br />
isolated before removing<br />
actuator covers.<br />
Check that the supply voltage agrees<br />
with that stamped on actuator<br />
nameplate.<br />
A switch or circuit breaker must be<br />
included in the wiring installation of the<br />
actuator. The switch or circuit breaker<br />
shall be mounted as close to the<br />
actuator as possible and shall be<br />
marked to indicate that it is the<br />
disconnecting device for that particular<br />
actuator. The actuator must be<br />
protected with overcurrent protection<br />
devices rated in accordance with Rotork<br />
publication No. E130E Electric motor<br />
performance data for IQ range<br />
actuators.<br />
WARNING:<br />
Actuators for use on phase to<br />
phase voltages greater than 600V<br />
a.c.must not be used on supply<br />
systems such as floating, or<br />
earth-phase systems, where<br />
phase to earth voltages in excess<br />
of 600V a.c. could exist.<br />
6.1 Earth/Ground Connections<br />
A lug with a 6mm diameter hole is cast<br />
adjacent to the conduit entries for<br />
attachment of an external protective<br />
earthing strap by a nut and bolt. An<br />
internal earth terminal is also provided,<br />
however it must not be used alone as<br />
the protective Earth Connection.<br />
6.2 Removing Terminal Cover<br />
Using a 6mm Allen key loosen the four<br />
captive screws evenly. Do not attempt<br />
to lever off the cover with a screwdriver<br />
as this will damage the “O” ring seal<br />
and may damage the flamepath on a<br />
certified unit.<br />
Fig. 6<br />
Actuators containing a Setting Tool<br />
fitted to the inside of the terminal<br />
compartment cover are identified with<br />
a self-adhesive yellow label on the<br />
outside of the terminal compartment<br />
cover.<br />
The wiring code card fixed in the cover<br />
is particular to each actuator and must<br />
not be interchanged with any other<br />
actuator. If in doubt check the serial<br />
number on the code card with that of<br />
the actuator.<br />
Fig. 6.1<br />
A plastic bag in the terminal<br />
compartment contains:<br />
Terminal screws and washers.<br />
Spare cover “O” ring seal.<br />
Wiring diagram.<br />
Instruction book.<br />
Fig. 6.2<br />
6.3 Cable Entry<br />
Only appropriate certified Explosion-<br />
Proof entry reducers, glands or conduit<br />
may be used in hazardous locations.<br />
Remove red plastic transit plugs. Make<br />
cable entries appropriate to the cable<br />
type and size. Ensure that threaded<br />
adaptors, cable glands or conduit are<br />
tight and fully waterproof. Seal unused<br />
cable entries with a steel or brass<br />
threaded plug. In hazardous areas an<br />
appropriately certified threaded<br />
blanking plug must be used.
15<br />
6.4 Connecting to Terminals<br />
On EExde enclosure units connections<br />
to the power and control terminals<br />
must be made using AMP type 160292<br />
ring tabs for power and earth terminals<br />
and AMP type 34148 ring tabs for the<br />
control terminals.<br />
Refer to the wiring diagram inside the<br />
terminal cover to identify functions of<br />
terminals. Check that supply voltage is<br />
the same as that marked on the<br />
actuator nameplate.<br />
Remove power terminal screen.<br />
Begin by connecting these cables and<br />
replace screen.<br />
When all connections are made ensure<br />
wiring diagram is replaced in the<br />
terminal compartment.<br />
6.5 Replacing Terminal Cover<br />
Ensure cover “O” ring seal and spigot<br />
joint are in good condition and lightly<br />
greased before re-fitting cover.
7<br />
Commissioning<br />
16<br />
7.1 The Setting Procedure<br />
The Rotork IQ range of actuators is the<br />
first that enables commissioning to be<br />
carried out without removing covers.<br />
Setting torque, limit and other<br />
functions is achieved by using the Infra-<br />
Red Setting Tool. The Setting Tool is<br />
certified Intrinsically Safe to allow<br />
commissioning in hazardous areas.<br />
All the commissioning functions are<br />
stored in non-volatile memory in the<br />
actuator. The Setting Tool enables the<br />
user to view all the functions in turn via<br />
the actuator display window. As each<br />
function is viewed its setting can be<br />
checked and, if required, changed<br />
within the bounds of that function.<br />
Commissioning may be carried out with<br />
main power switched on or off. Refer<br />
to page 20 for Power Off Setting.<br />
The setting procedure is divided into<br />
two stages:<br />
1. Primary Functions<br />
Settings for end of travel limit<br />
actions, torque values, limit<br />
positions etc.<br />
2. Secondary Functions<br />
Settings covering the control,<br />
indication and optional<br />
equipment functions.<br />
All IQ actuator functions are<br />
configured before dispatch to<br />
Rotork standard default settings<br />
unless alternatives have been<br />
specified with the order. Should<br />
difficulty be encountered during<br />
commissioning the default<br />
settings can be reinstated,<br />
returning the actuator<br />
configuration to its original<br />
manufactured state. Site<br />
commissioning can then begin<br />
again (refer to Section 9.16 page 63).<br />
The default function should be used<br />
with caution as settings selected after<br />
manufacture may be essential for the<br />
safe operation of the valve and/or<br />
plant.<br />
Actuator Display<br />
Position Display 50 This may be an open or closed symbol<br />
◗<br />
or a percentage open value.<br />
Torque and Position Refer to Section 10.<br />
◗<br />
Password P? ❖ PC ❖ Ir ❖ Ic<br />
◗<br />
Setting Branch cr ❖<br />
(crossroad)<br />
◗<br />
Note: The Primary Functions<br />
must be commissioned first.<br />
Primary Functions<br />
Direction<br />
Limit Actions<br />
Torque Values<br />
Limit Positions<br />
Secondary Functions<br />
Indication Contacts<br />
Control Mode<br />
Options<br />
Help Screens<br />
Defaults
17<br />
7.2 The Setting Tool<br />
Specification<br />
Enclosure IP67<br />
Certification EEx ia IIC T4 (intrinsically safe)<br />
FM, INT SAFE, Class I & II Div 1 Groups A B C D E F G, T4A<br />
CSA, Exia, Class I, II Div 1 Groups A B C D<br />
Power supply 9V Battery (supplied and fitted)<br />
Operating range 0.75m (from actuator display window)<br />
Name<br />
Instruction<br />
1. ◗ Key* Display next function down<br />
2. ❖ Key* Display next function across<br />
3. - Key Decrease/change displayed function’s value or option setting<br />
4. + Key Increase/change displayed function’s value or option setting<br />
5. Key Enter displayed value or option setting<br />
* Pressing the two arrow keys together returns the actuator display to the position<br />
indication mode<br />
Infra-red local operation (when enabled)<br />
5. Key Stop actuator<br />
6. Key Open actuator<br />
7. Key Close actuator<br />
8. Infra-red Transmitter Window<br />
8 2<br />
1<br />
3<br />
5<br />
Fig. 7 The Setting Tool<br />
7<br />
4<br />
Setting Tool Battery Replacement<br />
Battery status can be checked by looking at the Infra-red transmitter window while<br />
depressing any Setting Tool button. A flashing red indicator should be seen.<br />
Battery replacement must be carried out in a safe area. To replace the battery<br />
remove the six caphead screws in the back of the Setting Tool. Remove the back<br />
cover to expose the battery.<br />
In order to maintain hazardous area certification fit only Duracell MN1604 or<br />
Rayovac Alkaline Maximum NoAL-9V battery types. Refit cover ensuring red<br />
indicator LED faces the transmitter window in the back cover.<br />
When a button is depressed the Setting Tool transmits the relevant instruction to<br />
the actuator by infra-red pulses and must therefore be directly in front of the<br />
actuator indicator window and at a distance no greater than 0.75m.<br />
6
18<br />
7.3 Entering the Actuator<br />
Setting Procedure<br />
With the actuator securely mounted on<br />
the valve, the mains supply on and<br />
Local control or Stop selected.<br />
PRESS THE ◗ KEY.<br />
The actuator display will change and<br />
the Torque & Position display will be<br />
seen. (For instantaneous torque &<br />
position monitoring, refer to Section<br />
10, page 66.)<br />
PRESS THE ◗ KEY.<br />
The actuator display will change and<br />
the password protection display will<br />
be seen.<br />
The Actuator Function Settings<br />
can be protected by the Use<br />
of a Password<br />
7.4 Setting Mode – Password<br />
To enable setting and adjustment of the<br />
actuator functions the correct password<br />
must be entered. The factory set (default)<br />
password is [ld]. If the actuator has<br />
previously been set with a site password<br />
this must be displayed.<br />
Use the + or - keys to scroll through the<br />
available passwords 00–FF (hexadecimal).<br />
With the correct password displayed press<br />
the enter key.<br />
PRESS THE KEY.<br />
Two “setting” bars will appear and will<br />
remain visible on every function display<br />
screen.<br />
Default Password,<br />
Setting Mode Enabled<br />
7.5 New Password [PC]<br />
To configure a new password, the<br />
actuator must be in setting mode with<br />
the password display – setting mode<br />
enabled – showing,<br />
PRESS THE ❖ KEY.<br />
The display will change to [PC]. Using the<br />
+ or - key scroll through the available<br />
passwords until the desired password is<br />
displayed.<br />
PRESS THE KEY.<br />
Password Changed to [IE]<br />
NOTE: The new password becomes<br />
effective the next time setting mode is<br />
entered.<br />
7.6 Checking Mode<br />
The actuator function settings can be<br />
checked without entering the correct<br />
password. The settings can only be<br />
viewed and not altered. The setting bars<br />
will not be seen.<br />
Password Display, Checking Mode<br />
Once the procedure has been entered in<br />
the required mode<br />
PRESS THE ◗ KEY.<br />
The procedure branch [Cr] (crossroad)<br />
display can now be seen (refer to Section<br />
7.7 page 19).
19<br />
7.7 Procedure Branch –<br />
Crossroad [Cr]<br />
To access the Primary Function settings<br />
press the arrow ◗ key (refer to<br />
Section 8 Commissioning Primary<br />
Functions page 20).<br />
To access the Secondary Function<br />
settings press the arrow ❖ key (refer<br />
to Section 9 Commissioning Secondary<br />
Functions page 31).<br />
7.8 The Actuator Display –<br />
Setting/Checking Mode<br />
Actuator functions as laid out in the<br />
Primary and Secondary commissioning<br />
stages, can be individually displayed by<br />
using the Setting Tool arrow keys.<br />
The ◗ arrow key will always display<br />
the FIRST function on the next level<br />
DOWN within the procedure.<br />
The ❖ arrow key will always display<br />
the NEXT function on the SAME level<br />
and will wrap around the functions on<br />
the same level.<br />
The actuator display indicator lamps will<br />
continue to indicate valve position.<br />
Actuator functions are displayed in<br />
code form in the top portion of the<br />
liquid crystal display screen.<br />
The setting for the displayed function is<br />
shown in the lower portion of the<br />
screen. Depending on the actuator<br />
function displayed, its setting may be<br />
an option or a value. In setting mode<br />
the Setting<br />
Tool + or - keys will cause the setting<br />
to be changed. In checking mode the<br />
settings cannot be altered.<br />
In setting mode, once displayed, a new<br />
setting can be entered into the actuator<br />
memory by pressing the key.<br />
The setting will flash off and back on,<br />
confirming its selection.<br />
TOP PORTION<br />
Function e.g.<br />
tC = Torque Close<br />
LOWER PORTION<br />
Function Setting<br />
e.g. Value = 40%<br />
Typical Actuator Function Display<br />
Setting Mode Enabled<br />
7.9 Returning to<br />
Valve Position Display<br />
There are four ways of returning to<br />
valve position display:<br />
1. Approximately 5 minutes after the<br />
last Setting Tool operation the<br />
display will automatically return to<br />
position display.<br />
2. Press the ◗ and ❖ arrow keys<br />
together.<br />
3. Press the ◗ arrow key until the<br />
display returns to position.<br />
4. With any actuator function screen<br />
displayed, select Remote control<br />
using the red Local/Stop/Remote<br />
selector.
Fig. 8<br />
8 Commissioning –<br />
Primary Functions<br />
The actuator’s Primary Function settings<br />
affect the correct operation of the valve<br />
by the actuator. If the actuator has<br />
been supplied with the valve, the valve<br />
maker or supplier may have already<br />
made these settings.<br />
ELECTRICAL OPERATION MUST NOT<br />
TAKE PLACE UNTIL THE PRIMARY<br />
SETTINGS HAVE BEEN MADE AND<br />
CHECKED.<br />
This instruction assumes setting mode<br />
has been entered (refer to section 7.4<br />
page 18).<br />
Viewing the Primary<br />
Function Settings<br />
With the actuator mounted on the<br />
valve, the power supply on and Local or<br />
Stop control selected, point the Setting<br />
Tool at the actuator indicator window<br />
from a distance of no more than<br />
0.75m. By pressing the ◗ key and,<br />
when appropriate, the ❖ key, it is<br />
possible to move through the<br />
procedure, displaying the various<br />
functions and their settings as shown in<br />
Fig. 8.1 (refer to page 21).The righthand<br />
side of Fig.8.1 explains the<br />
function of each LCD display.<br />
20<br />
Power Off Setting<br />
IQ allows settings to be viewed and set<br />
without main power. To enable this<br />
function, engage handwheel drive and<br />
rotate until the output drive moves<br />
(refer to page 3). The Setting Tool can<br />
now be used. As long as a Setting Tool<br />
key press takes place within the 30<br />
seconds timeout period, Power Off<br />
Setting will remain enabled. If no infrared<br />
Setting Tool communication takes<br />
place the display will return to<br />
indicating position. The actuator must<br />
then be operated by handwheel to<br />
re-enable Power Off Setting.<br />
Settings and operation must be<br />
verified by electric operation and<br />
function test of the actuator to<br />
ensure correct operation.
21<br />
Viewing the Primary Function Settings<br />
Position Display<br />
50 (This may be an open or closed symbol or a % open value.) Refer to Section 7<br />
◗ ◗ Commissioning<br />
◗<br />
Torque and Position Display<br />
◗<br />
P? ❖ PC ❖ Ir ❖ Ic Password ❖ Password Change ❖ IrDA ❖ Cell Phone<br />
◗<br />
◗<br />
cr<br />
◗<br />
c1 ❖ c2 ❖ c3<br />
◗<br />
tC ❖ tO<br />
◗<br />
LC ❖ LO<br />
◗<br />
Procedure Branch (crossroad)<br />
◗<br />
Direction to Close ❖ Close Action ❖ Open Action<br />
◗<br />
Torque Value Closing ❖ Torque Value Opening<br />
◗<br />
Limit Closed ❖ Limit Open<br />
◗<br />
50 Position Display<br />
Fig. 8.1 Primary Setting Function Displays<br />
PRIMARY FUNCTIONS CONTENTS<br />
page<br />
C1 Direction to Close 22<br />
C2 Close Action 23<br />
C3 Open Action 24<br />
tC Torque Value Closing 25<br />
tO Torque Value Opening 26<br />
LC Set Limit Closed 27<br />
LO Set Limit Open 27<br />
The actuator can be configured to be clockwise or anti-clockwise to close.
C1<br />
Direction to Close<br />
22<br />
Manually operate actuator and valve to<br />
establish correct closing direction. If the<br />
handwheel labelling is found to be<br />
incorrect please apply to Rotork for<br />
conversion labels.<br />
50<br />
◗<br />
◗<br />
P? ❖ PC ❖ Ir ❖ Ic<br />
◗<br />
cr<br />
◗<br />
c1 ❖ c2 ❖ c3<br />
◗<br />
tC ❖ tO<br />
◗<br />
LC ❖ LO<br />
◗<br />
50<br />
Using the + or - key, display character<br />
conforming to correct closing direction.<br />
[C] in the Setting Field Indicating<br />
Clockwise to Close<br />
[A] in the Setting Field Indicating<br />
Anti-clockwise to Close<br />
Having ensured that the display<br />
corresponds to the established<br />
closing direction<br />
PRESS THE KEY.<br />
The displayed option will flash,<br />
indicating that it has been set.<br />
PRESS THE ❖ KEY.
C2<br />
Close Action<br />
23<br />
The actuator can be configured to close<br />
on torque for seating valves and limit<br />
for non-seating valves.<br />
(Refer to valve manufacturer for<br />
recommended selection).<br />
In the absence of valvemaker<br />
instructions refer to the following table<br />
Using the + or - key, display the<br />
desired option.<br />
NOTE: When set to close on torque,<br />
the actuator will apply the value of<br />
torque as set for [tC] in seating the<br />
valve (refer to [tC] page 25).<br />
50<br />
◗<br />
◗<br />
P? ❖ PC ❖ Ir ❖ Ic<br />
◗<br />
cr<br />
◗<br />
Valve type Close Open<br />
Wedge gate “torque” “limit”<br />
Globe “torque” “limit”<br />
<strong>Butterfly</strong> “limit” “limit”<br />
Thru conduit “limit” “limit”<br />
Ball “limit” “limit”<br />
Plug “limit” “limit”<br />
Sluice gate “limit” “limit”<br />
Penstock “limit” “limit”<br />
Parallel slide “limit” “limit”<br />
[Ct] in the Setting Field Indicating<br />
Close on Torque - defualt setting.<br />
c1 ❖ c2 ❖ c3<br />
◗<br />
[CL] in the Setting Field Indicating<br />
Close on Limit<br />
tC ❖ tO<br />
◗<br />
LC ❖ LO<br />
◗<br />
50<br />
Having selected the required option<br />
PRESS THE KEY.<br />
The displayed option will flash,<br />
indicating that it has been set.<br />
PRESS THE ❖ KEY.
C3<br />
Open Action<br />
24<br />
The actuator can be configured to<br />
open on torque for back seating valves<br />
or limit for non back seating valves.<br />
Refer to valve manufacturer for<br />
recommended setting. In the<br />
absence of valvemaker instructions<br />
set “Open Limit”.<br />
Using the + or - key display the desired<br />
option.<br />
NOTE: When set to open on torque,<br />
the actuator will apply the value of<br />
torque as set for [tO] in back seating<br />
the valve (refer to [tO] page 26).<br />
50<br />
◗<br />
[Ot] in the Setting Field Indicates<br />
Open on Torque - defualt setting.<br />
◗<br />
P? ❖ PC ❖ Ir ❖ Ic<br />
◗<br />
cr<br />
◗<br />
c1 ❖ c2 ❖ c3<br />
◗<br />
tC ❖ tO<br />
◗<br />
LC ❖ LO<br />
◗<br />
50<br />
[OL] in the Setting Field Indicates<br />
Open on Limit<br />
PRESS THE KEY.<br />
The displayed option will flash,<br />
indicating that it has been set.<br />
PRESS THE ❖ KEY.
tC<br />
Torque Value Closing<br />
25<br />
The value of torque available in the<br />
close direction can be configured. Refer<br />
to valve manufacturer for<br />
recommended value.<br />
The closing torque value can be varied<br />
between 40% and Rated, in 1%<br />
increments.<br />
50<br />
◗<br />
◗<br />
P? ❖ PC ❖ Ir ❖ Ic<br />
◗<br />
cr<br />
◗<br />
c1 ❖ c2 ❖ c3<br />
◗<br />
tC ❖ tO<br />
◗<br />
LC ❖ LO<br />
◗<br />
50<br />
Using the + and - keys display<br />
recommended value. In the absence of<br />
a recommended torque value, try a low<br />
setting and increase until satisfactory<br />
valve operation is achieved.<br />
PRESS THE KEY.<br />
The displayed value will flash, indicating<br />
that it has been set.<br />
Should the set value of torque be<br />
developed in closing, the actuator will<br />
torque trip and stop.<br />
PRESS THE ❖ KEY.<br />
NOTE: Rated torque is quoted on the<br />
actuator nameplate.<br />
40% of Rated Torque<br />
99% of Rated Torque<br />
Rated Torque
tO<br />
Torque Valve Opening<br />
26<br />
The value of torque available in the<br />
open direction can be configured. Refer<br />
to valve manufacturer for<br />
recommended value.<br />
The opening torque value can be varied<br />
between 40% and Rated, in 1%<br />
increments. In addition “Boost” can be<br />
configured when no open torque<br />
protection is required.<br />
Should the set value of torque be<br />
developed in opening, the actuator will<br />
torque trip and stop.<br />
PRESS THE ◗ KEY.<br />
50<br />
◗<br />
◗<br />
P? ❖ PC ❖ Ir ❖ Ic<br />
◗<br />
cr<br />
◗<br />
c1 ❖ c2 ❖ c3<br />
◗<br />
tC ❖ tO<br />
◗<br />
LC ❖ LO<br />
◗<br />
50<br />
BOOST SHOULD NOT BE<br />
SELECTED WHEN THE ACTUATOR<br />
HAS BEEN CONFIGURED TO OPEN<br />
ON TORQUE (refer to [C3] page 24)<br />
unless back seating at Rated torque is<br />
acceptable.<br />
Using the + and - keys display the<br />
recommended torque value.<br />
In the absence of a recommended<br />
torque value, try a low setting and<br />
increase until satisfactory valve<br />
operation is achieved.<br />
NOTE: Rated torque is quoted on the<br />
actuator nameplate. Boost torque is at<br />
least 140% of Rated torque.<br />
PRESS THE KEY.<br />
The displayed value will flash, indicating<br />
that it has been set.<br />
40%<br />
99%<br />
Rated<br />
Boost<br />
In checking mode, on pressing the ◗<br />
key after reviewing open torque setting,<br />
the display will revert to valve position.
LC<br />
Set Limit Closed<br />
LO<br />
Set Limit Open<br />
27<br />
NOTE: It is possible to set the Open<br />
Limit Position [LO] first.<br />
With [LC] displayed<br />
50<br />
◗<br />
With [LO] displayed<br />
50<br />
◗<br />
◗<br />
P? ❖ PC ❖ Ir ❖ Ic<br />
◗<br />
cr<br />
◗<br />
c1 ❖ c2 ❖ c3<br />
◗<br />
tC ❖ tO<br />
◗<br />
LC ❖ LO<br />
◗<br />
50<br />
Limit Closed<br />
Move valve manually to the closed<br />
position. Allow for overrun by winding<br />
actuator output open by two<br />
handwheel turns.<br />
PRESS THE KEY.<br />
The two bars will flash and the closed<br />
indicator lamp will illuminate, indicating<br />
closed limit position has been set.<br />
PRESS THE ❖ KEY.<br />
To check closed limit position hand<br />
wind valve open until the amber lamp<br />
illuminates. Wind valve back closed<br />
until the closed lamp illuminates.<br />
◗<br />
P? ❖ PC ❖ Ir ❖ Ic<br />
◗<br />
cr<br />
◗<br />
c1 ❖ c2 ❖ c3<br />
◗<br />
tC ❖ tO<br />
◗<br />
LC ❖ LO<br />
◗<br />
50<br />
NOTE: When in checking mode Set<br />
Limit Open [LO] does not appear.<br />
Limit Open<br />
Move valve manually to the open<br />
position. Allow for overrun by winding<br />
actuator output closed by two<br />
handwheel turns.<br />
PRESS THE KEY.<br />
The two bars will flash and the open<br />
indicator lamp will illuminate, indicating<br />
open limit position has been set.<br />
PRESS THE ◗ KEY.<br />
The open symbol (refer to Fig. 3.3.<br />
page 4) should now appear.<br />
NOTE: When in checking mode Set<br />
Limit Closed [LC] does not appear.
Return to<br />
Positional Display<br />
28<br />
50<br />
◗<br />
◗<br />
P? ❖ PC ❖ Ir ❖ Ic<br />
◗<br />
cr<br />
◗<br />
c1 ❖ c2 ❖ c3<br />
◗<br />
tC ❖ tO<br />
◗<br />
LC ❖ LO<br />
◗<br />
50<br />
If the procedure has been followed as<br />
described, the positional display will<br />
indicate that the actuator is in the open<br />
position.<br />
Select Remote control momentarily,<br />
using the red selector to exit setting<br />
procedure and then select required<br />
control: Local, Stop or Remote.<br />
With the correct settings made electric<br />
operation can now be carried out<br />
safely.
Fig. 9<br />
9 Commissioning –<br />
Secondary Functions<br />
The Secondary Functions can be<br />
configured to suit site control and<br />
indication requirements. It is important<br />
that Primary Functions such as limits<br />
and torque switch settings are set<br />
before work commences on<br />
commissioning the Secondary Functions<br />
(refer to page 20). The layout of the<br />
Secondary Functions accessed with the<br />
Setting Tool are detailed in Fig. 9.1. To<br />
successfully commission the Secondary<br />
Functions, information about the site or<br />
process control system will be required.<br />
The supplied actuator Wiring Diagram<br />
details control and indication devices<br />
fitted to the actuator along with<br />
terminal connection detail and standard<br />
remote control wiring systems.<br />
29<br />
Power Off Setting<br />
IQ allows settings to be viewed and set<br />
without main power. To enable this<br />
function, engage handwheel drive and<br />
rotate until the output drive moves by<br />
one turn (refer to page 3).The<br />
Setting Tool can now be used. As long<br />
as a Setting Tool key press takes place<br />
within the 30 seconds timeout period,<br />
Power Off Setting will remain enabled.<br />
If no infra-red Setting Tool<br />
communication takes place the display<br />
will return to indicating position. The<br />
actuator must then be operated by<br />
handwheel to re-enable Power Off<br />
Setting.<br />
Settings and operation must be<br />
verified by electric operation and<br />
function test of the actuator to<br />
ensure correct operation.
30<br />
50<br />
◗<br />
Positional Display<br />
IrDA Cell<br />
◗<br />
comms Phone<br />
P? ❖ PC ❖ Ir ❖ Ic<br />
◗ Contact Function Value Contact Form<br />
cr ❖ Contact S1 r1 ❖ r1 ❖ r1<br />
◗<br />
Primary<br />
Functions<br />
◗<br />
Contact S2 r2 ❖ r2 ❖ r2<br />
◗<br />
Contact S3 r3 ❖ r3 ❖ r3<br />
◗<br />
Contact S4 r4 ❖ r4 ❖ r4<br />
◗ ESD ESD Thermostat ESD Overide ESD Override Maintained 2-wire External Conditional Torque Switch<br />
ESD Action Contact Type Bypass Interlocks Local Stop Local Control Control Interlocks Control Bypass<br />
Control Mode<br />
Configuration<br />
A1 ❖ A2 ❖ A3 ❖ A4 ❖ A5 ❖ A6 ❖ A7 ❖ A8 ❖ A9 ❖ At<br />
◗<br />
Extra Indication Folomatic Remote Bus Interrupter Setting Tool Power Loss<br />
Contacts CPT Remote Control Control Source System Timer Local Control Inhibit<br />
Option Selection OE ❖ OI ❖ OF ❖ Od ❖ OP ❖ OJ ❖ Or ❖ OS<br />
Option Functions<br />
◗<br />
- If OE, OF, OP, or OJ are fitted and selected “ON” their appropriate set-up screens will be inserted here.<br />
◗<br />
Help Screens H1 ❖ H2 ❖ H3 ❖ H4 ❖ H5 ❖ H6 ❖ H7 ❖ H8 ❖ H9<br />
◗<br />
Default Option d1 ❖ d2<br />
◗<br />
Return to Positional Display<br />
Fig. 9.1 Secondary Functions
SECONDARY FUNCTIONS CONTENTS<br />
page<br />
9.1 Accessing the Secondary Settings 31<br />
9.2 Indication Contacts S1, S2, S3 and S4 32<br />
9.3 Control Mode Configuration 34<br />
9.4 Option Extra Indication Contacts S5–S8 37<br />
9.5 Option CPT (Current Position Transmitter) 38<br />
9.6 Option Folomatic Remote Control 39<br />
9.7 Remote Control Source 42<br />
9.8 Bus System Option Pakscan 43<br />
9.9 Bus System Option Modbus 47<br />
9.10 Bus System Option Profibus DP 51<br />
9.11 Bus System Option DeviceNet 55<br />
9.<strong>12</strong> Bus System Positioning Control Settings 58<br />
9.13 Option Interrupter Timer 60<br />
9.14 Setting Tool Local Control 62<br />
9.15 Inhibit Operation After Power Loss 62<br />
9.16 Default Options 63<br />
9.17 Default Options 64<br />
10.1 Help Screens 67<br />
10.2 IrDA Diagnostics and Configuration 72<br />
Having established that the Primary<br />
Functions have been correctly set, the<br />
Secondary Functions can now be<br />
configured to suit site control and<br />
indication requirements.<br />
It is possible to move through the<br />
various Secondary Functions as shown<br />
in Fig. 9.1 using the ❖☎and ◗ keys.<br />
The actuator wiring diagram will<br />
indicate any options fitted.<br />
Options Setting Tool Local Control [Or]<br />
and Power Loss Inhibit [OS] are<br />
standard features, their use being<br />
optional.<br />
9.1<br />
Accessing the<br />
Secondary Functions<br />
31<br />
In order to display the Secondary<br />
Functions it is necessary to press the<br />
◗☎key until [Cr] appears.<br />
If you have chosen to enter Secondary<br />
Functions in the checking mode the<br />
display will be as Fig. 9.2.<br />
If you have chosen to enter Secondary<br />
Functions in the setting mode the<br />
display will be as Fig. 9.3 (refer to<br />
Section 7).<br />
Fig. 9.2 Fig. 9.3<br />
PRESS THE ❖ KEY.
9.2 Indication Contacts<br />
S1, S2, S3 and S4<br />
r1<br />
Contact S1 - Function<br />
32<br />
Indication contacts S1 [r1], S2 [r2], S3<br />
[r3] and S4 [r4] may each be set to trip<br />
for any one of the following functions:<br />
Code Function<br />
[CL] closed end position<br />
[OP] open end position<br />
[Po] intermediate position<br />
[tC] torque trip close<br />
[tO] torque trip open<br />
[tt] torque trip any position<br />
[tl] torque trip mid travel<br />
[dC] actuator closing<br />
[dO] actuator opening<br />
[d?] actuator rotating<br />
[St] motor stalled<br />
[bA] battery low<br />
[HA] hand operation<br />
[bL] blinker<br />
[LS] local stop<br />
[Ol] open interlock<br />
[Cl] close interlock<br />
[lL] interlock active<br />
[ES] ESD signal<br />
[LP] lost phase **<br />
[Lo] local selected<br />
[rE] remote selected<br />
[AA] actuator alarm *<br />
[24] 24V power failure ***<br />
[rr] motor running<br />
[UA] Valve alarm*<br />
[Ht] thermostat tripped<br />
[CA] Control alarm*<br />
[rP] relay parity<br />
The S contact form can be set normally<br />
open [no] or normally closed [nc].<br />
The procedures for setting up contacts<br />
S2, S3 and S4 are the same as those<br />
shown for S1.<br />
Unless specified with order, the<br />
default settings for indication<br />
contacts are as follows:<br />
S1 – [CL] closed end position [no]<br />
S2 – [OP] open end position [no]<br />
S3 – [CL] closed end position [nc]<br />
S4 – [OP] open end position [nc]<br />
* Contact alarm indication will operate<br />
under the same conditions as the<br />
display alarm indication icons (refer to<br />
page 5 for information).<br />
** [LP] Function not available for<br />
phases 1 & 2, only for phase 3. For<br />
phase loss detection on phase 1 & 2<br />
please use monitor relay<br />
*** [24] Function not available if the 3<br />
phase supply is lost.<br />
Using the + or - key display the desired<br />
function.<br />
PRESS THE KEY.<br />
The displayed function will flash<br />
indicating that it has been set.<br />
Contact S1 Configured to Trip<br />
at Valve Closed Limit<br />
PRESS THE ❖ KEY.
1<br />
Contact S1 - Value<br />
r1<br />
Contact S1<br />
Contact Form<br />
<strong>33</strong><br />
When the S contact function is set to<br />
[P0], the required intermediate position<br />
value must be set.<br />
No other contact function requires<br />
a value to be set.<br />
The value can be set from 1% open to<br />
99% open in 1% increments.<br />
Using the + or - key, display the<br />
required value.<br />
PRESS THE<br />
KEY.<br />
The displayed value will flash indicating<br />
that it has been set.<br />
Value Set to Indicate<br />
25% Open<br />
PRESS THE ❖ KEY.<br />
Use the + or - keys to select between<br />
[nO] (normally open) and [nC]<br />
(normally closed).<br />
PRESS THE KEY.<br />
The displayed option will flash<br />
indicating that it has been set.<br />
Contact S1 Configured as a<br />
Normally Open Contact<br />
NOTE: If function [PO] is selected and<br />
it is configured as a normally open<br />
contact it will make at the set value<br />
with the actuator moving in the open<br />
direction.<br />
To access S2–S4<br />
PRESS THE ◗ KEY.
9.3<br />
Control Mode<br />
Configuration<br />
A1<br />
ESD Action<br />
A2<br />
ESD Contact Type<br />
A3<br />
ESD Thermostat<br />
Bypass<br />
34<br />
The Control Mode Configuration affects<br />
how the actuator will respond under<br />
conditions of emergency shut down,<br />
local control, remote control interlocks,<br />
and 2-wire remote control. Also<br />
included is an unseating torque switch<br />
bypass function. Unless specified with<br />
order, the control mode configuration<br />
will be set as shown for default<br />
configuration on page 63.<br />
If it is necessary to change the<br />
configuration follow the instructions in<br />
this section.<br />
There are 10 configurable control<br />
functions:<br />
A1 ESD action<br />
A2 ESD contact type<br />
A3 ESD thermostat bypass<br />
A4 ESD override interlock<br />
A5 ESD override local stop<br />
A6 Maintained local control<br />
A7 2-wire remote control<br />
A8 External interlocks<br />
A9 Conditional Control<br />
At Torque switch bypass.<br />
An active ESD signal applied to the<br />
actuator will override any existing or<br />
applied local or remote control signal.<br />
ESD can be configured to override the<br />
transformer thermostat, active<br />
interlocks or local stop selection. Refer<br />
to A3, A4 and A5.<br />
The default action under an active ESD<br />
signal is to stay put [SP].<br />
Press the + or - key to select the<br />
required ESD action:<br />
[CL] Close on ESD<br />
[SP] Stay put on ESD<br />
[OP] Open on ESD<br />
PRESS THE<br />
KEY.<br />
The displayed option will flash<br />
indicating that it has been set.<br />
ESD Set to Close<br />
The default setting for ESD Contact<br />
Type is [nO].<br />
The actuator responds to a remote<br />
control ESD signal derived from a<br />
normally open contact making. For ESD,<br />
where a remote control ESD signal is<br />
derived from a normally closed contact<br />
breaking, the signal being removed,<br />
press the + or - key.<br />
The display will change to [nC].<br />
PRESS THE<br />
KEY.<br />
The displayed option will flash<br />
indicating that it has been set.<br />
Actuator Responds to a Remote,<br />
Normally Open ESD Contact<br />
Making (Signal Applied)<br />
Note: If Folomatic analogue control is<br />
required A2 must be set to [nO].<br />
The default setting for Motor<br />
Thermostat Bypass is [OF] during ESD.<br />
The thermostats remain in circuit and<br />
enabled during ESD.<br />
The motor thermostats can be bypassed<br />
during ESD as a factory set, hard-wired<br />
option only. Contact Rotork for<br />
information.<br />
Danger: Actuator hazardous area<br />
certification is invalidated while<br />
the thermostats are bypassed.<br />
A3 should be set to reflect the factory<br />
set configuration of thermostat bypass.<br />
During an ESD event:<br />
[A3]=[OF] thermostats enabled<br />
[A3]=[On] thermostats bypassed<br />
Thermostats Enabled During ESD
A4<br />
ESD Override<br />
Interlocks<br />
A5<br />
ESD Override<br />
Local Stop<br />
A6<br />
Maintained<br />
Local Control<br />
A7<br />
2-wire Remote<br />
Control<br />
35<br />
The default setting for ESD Override<br />
Interlocks is [OF]. ESD action will not<br />
override an active interlock applied to<br />
the actuator.<br />
If an applied ESD signal is required to<br />
override active interlocks causing the<br />
ESD action as set for A1, press the + or<br />
- key. The display will change to [On].<br />
PRESS THE<br />
KEY.<br />
The displayed option will flash<br />
indicating that it has been set.<br />
ESD Override Interlock – Off<br />
The default setting for ESD Override<br />
Local Stop is [OF]. ESD will not override<br />
local stop when selected.<br />
If an applied ESD signal is required to<br />
override local stop causing the ESD<br />
action as set for A1, press the + or -<br />
key. The display will change to [On].<br />
PRESS THE<br />
KEY.<br />
The displayed option will flash<br />
indicating that it has been set.<br />
ESD Override Local Stop – Off<br />
The default setting for Local Actuator<br />
Pushbutton control is self-maintained<br />
[On].<br />
If non-maintained actuator pushbutton<br />
control is required (jogging, inching,<br />
push to run), press the + or - key. The<br />
display will change to [OF].<br />
PRESS THE<br />
KEY.<br />
The displayed option will flash<br />
indicating that it has been set.<br />
Self-Maintained Local Control<br />
The default setting for 2-wire Remote<br />
Control is Stayput [SP]. If a open and<br />
closed remote control signal are applied<br />
simultaneously the actuator will stayput<br />
(stop if running). Refer to actuator<br />
wiring diagram or publication E<strong>12</strong>0E.<br />
Use the + or - key to select the<br />
required priority:<br />
[OP] Open<br />
[SP] Stay put<br />
[CL] Close<br />
PRESS THE<br />
KEY.<br />
The displayed option will flash<br />
indicating that it has been set.<br />
2-wire Control – Stayput Priority
A8<br />
External Interlocks<br />
A9<br />
Conditional Control<br />
At<br />
Torque Switch Bypass<br />
36<br />
Actuators are delivered with the<br />
interlock facility disabled [OF] Refer to<br />
the actuator wiring diagram or<br />
publication E<strong>12</strong>0E for interlock control<br />
circuits.<br />
To enable remote external interlocks<br />
press the + or - key.<br />
The display will change to [On].<br />
PRESS THE<br />
KEY.<br />
The displayed option will flash<br />
indicating that it has been set.<br />
Interlocks Disabled<br />
Note: If interlocking is required in only<br />
one direction, it will be necessary to<br />
connect a link between the actuator<br />
terminals associated with the other<br />
direction.<br />
Where a high level of safety integrity is<br />
required, Conditional Control can be<br />
configured. In this mode two discreet<br />
signals are required for remote<br />
operation. Remote control will be<br />
conditional on both a control signal<br />
(open or close) and the appropriate<br />
interlock signal being applied<br />
simultaneously. Failure of either or a<br />
spurious signal will not cause operation.<br />
Interlocks [A8] must be set [On].<br />
Interlock signals are not required for<br />
local operation.<br />
The default setting for conditional<br />
control is [OF]. To enable conditional<br />
control press the + or - key.The display<br />
will change to [On].<br />
PRESS THE<br />
KEY.<br />
The displayed option will flash<br />
indicating that it has been set.<br />
The default setting for Torque Switch<br />
Bypass is [OF], the torque switches are<br />
not bypassed during the unseating<br />
movement.<br />
To bypass the torque switches during<br />
the unseating movement press the + or<br />
- key.<br />
The display will change to [On].<br />
PRESS THE<br />
KEY.<br />
The displayed option will flash<br />
indicating that it has been set.<br />
The torque switches will be bypassed<br />
from closed limit to 5% open when<br />
opening and from open limit to 95%<br />
when closing. Bypassing the torque<br />
switches makes torque in excess of<br />
rated and up to actuator stall available<br />
for unseating a ‘‘sticky’’ valve. Outside<br />
these positions the torque setting will<br />
revert to the values set for [tC], see<br />
page 25 and [tO] page 26.<br />
Conditional Control Off<br />
Torque Switch Bypass Off
9.4 Option Extra<br />
Indication Contacts<br />
OE<br />
Display Extra Contact<br />
Set-up Screens<br />
37<br />
Extra indication contacts S5 [r5], S6<br />
[r6], S7 [r7] and S8 [r8] are available as<br />
an option.<br />
Check actuator circuit diagram for<br />
inclusion.<br />
When the Extra Contact Option is<br />
included the set-up procedure and<br />
available contact functions for S5 – S8<br />
are identical to S1–S4 (refer to Section<br />
9.2 page 32).<br />
Unless specified with order the default<br />
setting for the extra indication contacts<br />
will be as follows:<br />
S5 [r5] Close limit indication<br />
S6 [r6] Open limit indication<br />
S7 [r7] Torque trip mid travel<br />
S8 [r8] Remote control selected<br />
NOTE: If the Extra Contact Option is<br />
not included in the actuator build, any<br />
settings made for S5–S8 will have no<br />
effect on the indication output of the<br />
actuator.<br />
The action of turning on the Extra<br />
Contact Option makes an additional<br />
series of set-up screens available<br />
Enabled Disabled<br />
Extra Contact Set-up Displays<br />
Press the + or - key to select the Extra<br />
Contact Option set-up screens [On].<br />
PRESS THE<br />
KEY.<br />
The displayed option will flash<br />
indicating that it has been set.<br />
PRESS THE ◗ KEY TO ACCESS S5<br />
TO S8 SET-UP DISPLAYS.<br />
The procedure for setting S5 to S8<br />
is the same as that for S1 to S4<br />
(refer to Section 9.2 page 32).
9.5 Option CPT [OI]<br />
(Current Position Transmitter)<br />
38<br />
Setting instructions for actuators<br />
including a CPT providing 4-20<br />
mA analogue position feedback.<br />
The CPT is an optional extra. It may be<br />
internally or externally powered.<br />
Check wiring diagram for inclusion and<br />
connection details.<br />
NOTE: If the actuator has options<br />
Folomatic and CPT, redefining the CPT,<br />
will require the Folomatic to be<br />
recommissioned (refer to Section 9.6<br />
Folomatic [OI] page 39).<br />
With [HI] Displayed, the (CPT)<br />
20mA Output will Correspond to<br />
Actuator Fully Open<br />
If 20mA is required to correspond to<br />
actuator closed use the + or - key to<br />
change to [LO].<br />
PRESS THE<br />
KEY.<br />
The displayed option will flash<br />
indicating that the option has been set.
9.6 Option Folomatic<br />
Remote Control<br />
Folomatic Feedback<br />
OI OF Display Folomatic<br />
Set-up Screens<br />
39<br />
Setting instructions for actuators<br />
including a Folomatic<br />
(proportional) Controller for use<br />
in (analogue) valve position<br />
control.<br />
The Folomatic is an optional<br />
control device. Check actuator<br />
wiring diagram for inclusion.<br />
This instruction lists the Folomatic<br />
function displays in their sequence and<br />
assumes that all Folomatic functions are<br />
to be checked/set.<br />
The actuator should be selected in Local<br />
or Stop with the set point signal<br />
connected to terminals 26(+ve) and<br />
27(–ve) (refer to wiring diagram).<br />
Before commissioning of the Folomatic<br />
functions can begin, the Folomatic<br />
Feedback must be set to suit the<br />
applied set point signal.<br />
The action of turning on the Folomatic<br />
option makes an additional series of<br />
settings available.<br />
Before setting the parameters for<br />
Option Folomatic ensure Remote<br />
Control Source [Od] has been<br />
selected to [bo] in Section 9.7.<br />
Folomatic set-up screens can be turned<br />
OFF to provide extra security.<br />
Once selected ON the option function<br />
displays allow commissioning of the<br />
Folomatic to be undertaken.<br />
NOTE: Turning ON/OFF the Folomatic<br />
set-up screens (when fitted) does not<br />
affect its operation.<br />
With [HI] displayed, an increasing set<br />
point signal will correspond to valve<br />
opening.<br />
If a high set point signal is required to<br />
correspond to valve closing use the + or<br />
- key to change to [LO].<br />
PRESS THE<br />
KEY.<br />
The displayed option will flash<br />
indicating that it has been set.<br />
If setting [OI] is modified after<br />
commissioning the Folomatic, it will be<br />
necessary to recommission the<br />
Folomatic.<br />
Press the ❖ key to access the<br />
Folomatic set-up display [OF].<br />
Folomatic Folomatic<br />
Set-up Screens Set-up Screens<br />
OFF<br />
ON<br />
Use the + or - key to select Folomatic<br />
Display [On].<br />
PRESS THE<br />
KEY.<br />
The displayed option will flash<br />
indicating that it has been set.<br />
Press the ◗ key to access the<br />
Folomatic set-up displays.
FI<br />
Set Point<br />
Signal Type<br />
Fr<br />
Set Point<br />
Signal Range<br />
FL<br />
Valve Position<br />
LOW Set Point<br />
FH<br />
Valve Position<br />
HIGH Set Point<br />
40<br />
Using the + or - key select [ l] for<br />
current set point signal or [ U] for<br />
voltage set point signal.<br />
PRESS THE<br />
Current Mode Selected<br />
KEY.<br />
The displayed option will flash<br />
indicating that it has been set.<br />
Press the ❖ key to display [Fr].<br />
Using the + or - key select [05], [10] or<br />
[20] to correspond with the set point<br />
signals within the range of 0–5mA or<br />
volts, 0–10mA or volts or 0–20mA or<br />
volts (i.e. 4–20mA).<br />
0–20mA or Voltage<br />
Range Selected<br />
PRESS THE KEY.<br />
The displayed option will flash<br />
indicating that it has been set.<br />
Press the ❖ key to display [FL].<br />
APPLY MINIMUM<br />
SET POINT SIGNAL<br />
Using the + or - key select:<br />
[ ][] = valve closed<br />
[00] to [99] = percent open<br />
[ ] = valve open<br />
to correspond with the LOW set point<br />
signal.<br />
Valve Closed<br />
on LOW Signal<br />
PRESS THE KEY.<br />
The displayed value will flash indicating<br />
that it has been set.<br />
Press the ❖ key to display [FH].<br />
APPLY MAXIMUM<br />
SET POINT SIGNAL<br />
Using the + or - key select:<br />
[ ][] = valve closed<br />
[00] to [99] = percent open<br />
[ ] = valve open<br />
to correspond with the HIGH set point<br />
signal.<br />
Valve Open<br />
on HIGH Signal<br />
PRESS THE KEY.<br />
The displayed value will flash indicating<br />
that it has been set.<br />
Press the ❖ key to display [Fd].
Fd<br />
Deadband<br />
Adjustment<br />
Ft<br />
Motion Inhibit<br />
Timer Adjustment<br />
FA<br />
Action On Loss of<br />
Set Point Signal<br />
FF<br />
Failsafe Action<br />
41<br />
If the actuator hunts or responds<br />
unnecessarily to a fluctuating set point<br />
signal the deadband must be increased.<br />
If more accurate control is required the<br />
deadband may be decreased.<br />
Use the + or - key to select the<br />
deadband width. Range 00–99<br />
corresponds to 0–9.9% of setpoint<br />
signal.<br />
NOTE: Maximum deadband is 9.9% of<br />
valve stroke. Normally minimum<br />
deadband should not be less than 1%.<br />
The motion inhibit timer introduces a<br />
delay in the actuator response to a<br />
rapidly fluctuating set point signal,<br />
preventing unnecessary movement.<br />
Once the system stabilises the actuator<br />
will respond to steady changes in the<br />
set point signal as necessary.<br />
Use + or - key to adjust motion inhibit<br />
time in seconds: range 0–99. Normally<br />
it is recommended that motion inhibit<br />
time should not be set to less than 5<br />
seconds (refer to note on page 62).<br />
Use + or - key to enable [On] or disable<br />
[OF] action on loss of set point signal.<br />
[On] – Failsafe as determined by [FF].<br />
[OF] – Failsafe to position<br />
corresponding to low set point.<br />
Failsafe action when [FA] enabled.<br />
Use + or - key to select, on loss of set<br />
point signal:<br />
[Lo] – move valve to position<br />
corresponding to minimum set<br />
point.<br />
[SP] – stayput on loss of set point.<br />
[Hl] – move valve to position<br />
corresponding to maximum set<br />
point.<br />
Enabled<br />
Deadband Set to 1.2%<br />
of Valve Stroke<br />
PRESS THE KEY.<br />
The displayed value will flash indicating<br />
that it has been set.<br />
Press the ❖ key to display [Ft].<br />
PRESS THE<br />
Motion Inhibit<br />
Time Set to 5 Seconds<br />
KEY.<br />
The displayed value will flash indicating<br />
that it has been set.<br />
Press the ❖ key to display [FA].<br />
PRESS THE<br />
KEY.<br />
The displayed option will flash<br />
indicating that it has been set.<br />
NOTE: Failsafe action “ON” will be<br />
effective only for systems using an<br />
offset or live zero signal range, for<br />
example 4–20 mA.<br />
Press the ❖ key to display [FF].<br />
PRESS THE KEY.<br />
The displayed option will flash<br />
indicating that it has been set.<br />
Commissioning of the Folomatic is now<br />
complete. Remote control may be<br />
selected.
9.7<br />
Remote Control Source<br />
Od<br />
Remote Control Source<br />
42<br />
The available forms of remote control<br />
are listed below:<br />
Standard hardwired control<br />
Analogue control-Option Folomatic<br />
Network control including:<br />
Option Pakscan<br />
Option Modbus<br />
Option Profibus<br />
The setting for Remote Control Source<br />
will depend on the type of remote<br />
control required and the option<br />
specified and fitted. Check actuator<br />
circuit diagram for remote control form.<br />
The setting of Remote Control Source<br />
will be determined by the option that<br />
has been fitted, if any.<br />
[rE] Standard hardwired remote<br />
control.<br />
[bo] Option Folomatic.<br />
[oP] Options Pakscan, Profibus,<br />
Modbus, Foundation Fieldbus<br />
or DeviceNet.<br />
[OF] All remote control disabled<br />
(Actuator available for local<br />
control only).<br />
To change the remote source press the<br />
+ or - key until the required setting is<br />
displayed.<br />
PRESS THE KEY.<br />
The displayed option will flash<br />
indicating that it has been set.<br />
Standard Hardwired<br />
Remote Control
9.8 Bus System<br />
Option Pakscan [OP]<br />
Pakscan Address<br />
PA Pb Pakscan<br />
Baud Rate<br />
43<br />
Setting instructions for actuators<br />
including an optional Pakscan Field<br />
Control Unit – check wiring diagram for<br />
inclusion.<br />
Before setting the parameters for<br />
Option Pakscan ensure Remote<br />
Control Source [Od] has been<br />
selected to [oP] in Section 9.7.<br />
(refer to page 42)<br />
Pakscan set-up screens can be turned<br />
off to provide extra security. The action<br />
of turning screens on or off does not<br />
affect its operation.<br />
Use the + or - key to turn on Pakscan<br />
set-up screens.<br />
Pakscan Set-up Screens ON<br />
PRESS THE<br />
KEY.<br />
The displayed option will flash<br />
indicating that it has been set.<br />
Press the ◗ key to display the Pakscan<br />
set-up screens.<br />
The actuator Pakscan Field Control Unit<br />
must be allocated a unique loop<br />
address.<br />
The actuator must be in “Loopback”<br />
for its address to be set or changed.<br />
Loopback can be achieved in two ways:<br />
1. Turn OFF the master station.<br />
2. Isolate the actuator from the<br />
2-wire control loop.<br />
Using the + or - keys display the<br />
required loop address.<br />
Address to be set within the range<br />
01–F0 Hexadecimal. (refer to table on<br />
page 75).<br />
The actuator Pakscan Field Control Unit<br />
baud rate must be set to the loop baud<br />
rate. For a Pakscan 2-wire control loop<br />
the selected baud rate must be common<br />
to the master station and all the field<br />
control units included in the loop.<br />
The actuator must be in “Loopback”<br />
for its baud rate to be set or changed.<br />
Loopback can be achieved in two ways:<br />
1. Turn OFF the master station.<br />
2. Isolate the actuator from the<br />
2-wire control loop.<br />
PRESS THE<br />
KEY.<br />
The displayed option will flash<br />
indicating that it has been set.<br />
Press the ❖ key to display [Pb].<br />
Continued
Pb<br />
Pakscan Baud Rate<br />
PF<br />
Pakscan Remote<br />
Auxiliary Input<br />
44<br />
Using the + or - keys display the<br />
required baud rate.<br />
01 = 110 baud<br />
03 = 300 baud<br />
06 = 600 baud<br />
<strong>12</strong> = <strong>12</strong>00 baud<br />
24 = 2400 baud<br />
PRESS THE<br />
2400 baud rate set<br />
KEY.<br />
The displayed option will flash<br />
indicating that it has been set.<br />
Press the ❖ key to display [PF].<br />
The IQ actuator has the facility to accept 4 auxiliary inputs (AUX1–AUX4). These are<br />
used when supplementary remote control or digital auxiliary inputs are required in<br />
addition to the standard control and feedback features incorporated into the<br />
Pakscan card. It is also possible to have a combination of both remote control and<br />
volt-free inputs to provide, for example, open and close control as well as a high<br />
and low tank level alarm indication, supplied via an external transducer.<br />
The hexadecimal number displayed under PF can be considered as a ‘‘software<br />
mask’’. It is this mask that tells the Pakscan card what type of input to expect,<br />
control or input signal, and what form the input will be, normally open or normally<br />
closed (refer to page 75 for Binary, Hexadecimal and Decimal Conversion Table).<br />
To decipher the mask the number needs to be split into two separate hexadecimal<br />
characters, each of which can be sub-divided into 4 binary bits. The first 4 bits<br />
represent the function and the second 4 represent the input source (known as<br />
invert). Pictorially this can be represented as:<br />
Left side hex character Right side hex character<br />
Aux 4 to 1 (function)<br />
AUX 4 to 1 (Invert)<br />
Bits 4 3 2 1 4 3 2 1<br />
When used for remote control of the actuator bits 4 to 1 of the function character<br />
have been designated as follows:<br />
Bit 4 (AUX4) – ESD<br />
Bit 3 (AUX3) – Stop/Maintain<br />
Bit 2 (AUX2) – Close<br />
Bit 1 (AUX1) – Open<br />
(When used for digital signal inputs they are simply designated as AUX 4 to AUX 1)
PF<br />
Pakscan Remote<br />
Auxiliary Input<br />
45<br />
Rules<br />
1. Function bit set to ‘‘0’’<br />
Any function bit set to ‘‘0’’ indicates that the particular aux input is to be treated as<br />
a digital signal for field status reporting, e.g. a level switch or motor running status.<br />
If the corresponding invert bit is set to a ‘‘0’’, an open contact is reported as a logic<br />
"1" and a closed contact is reported as a logic ‘‘0’’ (i.e. this will invert the input).<br />
If the corresponding invert bit is set to a ‘‘1’’, an open contact is reported as a logic<br />
"0" and a closed contact is reported as a logic ‘‘1’’ (i.e. this gives a noninverting<br />
input).<br />
2. Function bit set to ‘‘1’’<br />
Any function bit set to ‘‘1’’ indicates that the particular aux input is to be treated as<br />
a digital command to operate the actuator.<br />
When the corresponding invert bit is set to a ‘‘0’’ this represents an N.C. contact as<br />
being the command source, i.e. a closing contact de-energises the input and an<br />
opening contact energises the input.<br />
When the corresponding invert bit is set to a ‘‘1’’, this represents an N.O. contact as<br />
being the command source, i.e. a closing contact energises the input and an<br />
opening contact de-energises the input.<br />
3. ESD Control<br />
When using ESD (aux input 4), the ESD contact mode setting [A2] should be set to<br />
the default value of [nO]. The [A1]–ESD direction setting should be set to either<br />
Open or Close the valve (refer to page 34).<br />
4. Stop/Maintain Control<br />
When energised this will make the Aux input Open/Close/ESD control push-to-run,<br />
(non-maintained).<br />
When de-energised, the Aux input Open/Close/ESD control will be maintained.<br />
5. Remote I/P Setting<br />
Ensure that the correct [Od] setting is selected (refer to page 42).<br />
For Pakscan this is [oP].<br />
The factory default for [PF] is [OF].<br />
Examples<br />
1. The full range of remote controls is needed. Open and Close are NO and ESD<br />
and Stop/maintain is NC.<br />
Aux I/P 4 3 2 1<br />
Function 1 1 1 1 = F<br />
Invert 0 0 1 1 = 3 i.e. set [PF] to [F3]<br />
2. Open and close control is required along with 2 inverted digital signal inputs<br />
(Note that with this setting the open and close commands will be maintained.)<br />
Aux I/P 4 3 2 1<br />
Function 0 0 1 1 = 3<br />
Invert 0 0 1 1 = 3 i.e. set [PF] to [<strong>33</strong>]<br />
3. Only an ESD input is needed. The requirement is for push to run control with a<br />
NO contact input.<br />
Aux I/P 4 3 2 1<br />
Function 1 1 0 0 = C<br />
Invert 1 0 0 0 = 8 i.e. set [PF] to [C8]
PF<br />
Pakscan Remote<br />
Auxiliary Input<br />
PP<br />
46<br />
Using the + or - keys display the<br />
required mask setting.<br />
Setting [PP] is not used by<br />
Pakscan. Entered settings will be<br />
ignored.<br />
Auxiliary Input Mask [OF]<br />
PRESS THE<br />
KEY.<br />
The displayed option will flash<br />
indicating that it has been set.<br />
If Pakscan positioning control is<br />
required, return to the position display<br />
by pressing ◗ and ❖ keys together.<br />
Display [OF] (refer to page 58).
9.9 Bus System<br />
Option Modbus [OP]<br />
PA<br />
Modbus Address<br />
Pb<br />
Modbus Baudrate<br />
47<br />
Setting instructions for actuators<br />
including an optional Modbus RTU<br />
module – check wiring diagram for<br />
inclusion.<br />
Before setting the parameters for<br />
Option Modbus ensure Remote<br />
Control Source [Od] has been<br />
selected to [oP] in Section 9.7.<br />
(refer to page 42).<br />
Modbus module set-up screens can be<br />
turned off to provide extra security. The<br />
action of turning screens on or off does<br />
not affect its operation.<br />
Use the + or - keys to turn on Modbus<br />
set-up screens.<br />
Modbus Set-up Screens [On]<br />
PRESS THE<br />
KEY.<br />
The displayed option will flash<br />
indicating that it has been set.<br />
Press the ◗ key to display the Modbus<br />
set-up screens.<br />
The Modbus module must be allocated<br />
a unique address.<br />
To set the address the Modbus module<br />
must be isolated from the host by<br />
disconnecting the RS485 highway or<br />
turning off the host device.<br />
Using the + or - keys display the<br />
required address.<br />
Address to be set within the range 01<br />
to F7 Hexadecimal (refer to page 75 for<br />
conversion). If an address value outside<br />
this range is entered, the address set<br />
will revert to 01 (for 00) or F7 (for value<br />
above F7).<br />
The Modbus module must be set to the<br />
RS485 highway baudrate. To set the<br />
baudrate the Modbus module must be<br />
isolated from the host by disconnecting<br />
the RS485 highway or turning off the<br />
host device.<br />
Using the or keys display the required<br />
baudrate:<br />
[01] 110<br />
[03] 300 [06] 600<br />
[<strong>12</strong>] <strong>12</strong>00 [24] 2400<br />
[48] 4800 [96] 9600<br />
[19] 19200 [38] 38400<br />
PRESS THE KEY.<br />
The displayed option will flash<br />
indicating that it has been set.<br />
Press the ❖ key to display [Pb].<br />
PRESS THE<br />
2400 Baud<br />
KEY.<br />
The displayed option will flash<br />
indicating that it has been set.<br />
Press the ❖ key to display [PF].
PF<br />
Modbus Remote<br />
Auxiliary Input<br />
48<br />
The IQ actuator has the facility to accept 4 auxiliary inputs (AUX1 – AUX4). These<br />
are used when supplementary remote control or digital auxiliary inputs are required<br />
in addition to the standard control and feedback features incorporated into the<br />
Modbus module. It is also possible to have a combination of both remote control<br />
and volt-free inputs to provide, for example, open and close control as well as a<br />
high and low tank level alarm indication, supplied via an external transducer.<br />
The hexadecimal number displayed under PF can be considered as a ‘‘software<br />
mask’’. It is this mask that tells the Modbus module what type of input to expect,<br />
control or input signal, and what form the input will be, normally open or normally<br />
closed (refer to page 75 for Binary, Hexadecimal and Decimal Conversion Table).<br />
To decipher the mask the number needs to be split into two separate hexadecimal<br />
characters, each of which can be sub-divided into 4 binary bits. The first 4 bits<br />
represent the function and the second 4 represent the input source (known as<br />
invert). Pictorially this can be represented as:<br />
Left side hex character Right side hex character<br />
Aux 4 to 1 (function)<br />
AUX 4 to 1 (Invert)<br />
Bits 4 3 2 1 4 3 2 1<br />
When used for remote control of the actuator bits 4 to 1 of the function character<br />
have been designated as follows:<br />
Bit 4 (AUX4) – ESD<br />
Bit 3 (AUX3) – Stop/Maintain<br />
Bit 2 (AUX2) – Close<br />
Bit 1 (AUX1) – Open<br />
(When used for digital signal inputs they are simply designated as AUX 4 to AUX 1.)<br />
Rules<br />
1. Function bit set to ‘‘0’’<br />
Any function bit set to ‘‘0’’ indicates that the particular aux input is to be treated as<br />
a digital signal for field status reporting, e.g. a level switch or motor running status.<br />
If the corresponding invert bit is set to a ‘‘0’’, an open contact is reported as a logic<br />
‘‘1’’ and a closed contact is reported as a logic ‘‘0’’ (i.e. this will invert the input).<br />
If the corresponding invert bit is set to a ‘‘1’’, an open contact is reported as a logic<br />
"0" and a closed contact is reported as a logic ‘‘1’’ (i.e. this gives a noninverting<br />
input).<br />
2. Function bit set to ‘‘1’’<br />
Any function bit set to ‘‘1’’ indicates that the particular aux input is to be treated as<br />
a digital command to operate the actuator.<br />
When the corresponding invert bit is set to a ‘‘0’’ this represents an N.C. contact as<br />
being the command source, i.e. a closing contact de-energises the input and an<br />
opening contact energises the input.<br />
When the corresponding invert bit is set to a ‘‘1’’, this represents an N.O. contact as<br />
being the command source, i.e. a closing contact energises the input and an<br />
opening contact de-energises the input.<br />
3. ESD Control<br />
When using ESD (aux input 4), the ESD contact mode setting [A2] should be set to<br />
the default value of [nO]. The [A1]–ESD direction setting should be set to either<br />
Open or Close the valve (refer to page 34).
PF<br />
Modbus Remote<br />
Auxiliary Input<br />
PP<br />
Modbus Parity<br />
49<br />
4. Stop/Maintain Control<br />
When energised this will make the Aux input Open/Close control push-to-run.<br />
When de-energised, the Aux input Open/Close control will be maintained. ESD is<br />
always push to run (non maintained).<br />
5. Remote I/P Setting<br />
Ensure that the correct [Od] setting is selected (refer to page 42).<br />
For Modbus this is [rE].<br />
The factory default for [PF] is [OF].<br />
Examples<br />
1. The full range of remote controls is needed. Open and Close are NO and ESD<br />
and Stop/maintain is NC.<br />
Aux I/P 4 3 2 1<br />
Function 1 1 1 1 = F<br />
Invert 0 0 1 1 = 3 i.e. set [PF] to [F3]<br />
2. Open and close control is required along with 2 inverted digital signal inputs.<br />
(Note that with this setting the open and close commands will be maintained.)<br />
Aux I/P 4 3 2 1<br />
Function 0 0 1 1 = 3<br />
Invert 0 0 1 1 = 3 i.e. set [PF] to [<strong>33</strong>]<br />
3. Only an ESD input is needed. The requirement is for push to run control with a<br />
NO contact input.<br />
Aux I/P 4 3 2 1<br />
Function 1 1 0 0 = C<br />
Invert 1 0 0 0 = 8 i.e. set [PF] to [C8]<br />
Using the or keys display the required<br />
mask setting.<br />
Auxiliary Input Mask [OF]<br />
PRESS THE<br />
KEY.<br />
The displayed option will flash<br />
indicating that it has been set.<br />
Press the ❖ key to display [PP].<br />
Where Modbus parity bit detection is<br />
used the module must be set with the<br />
parity bit setting of the host.<br />
Using the + or - keys display the<br />
required parity bit:<br />
[no] No parity bit<br />
[En] Even parity bit<br />
[Od] Odd parity bit<br />
PRESS THE<br />
No Parity Bit<br />
KEY.<br />
The displayed option will flash<br />
indicating that it has been set.<br />
Continued
50<br />
For Modbus module positioning<br />
settings and action on loss of signal<br />
setting [OF] (refer to page 58).<br />
If Modbus positioning control and<br />
action on loss of communication are<br />
required, return to the position display<br />
by pressing ◗ and ❖ keys together.<br />
Display [OF] (refer to page 58).
9.10 Bus System<br />
Option Profibus DP [OP]<br />
PA<br />
Profibus Address<br />
51<br />
Setting instructions for actuators<br />
including an optional Profibus DP<br />
module – check wiring diagram for<br />
inclusion.<br />
Before setting the parameters for<br />
Option Profibus ensure Remote<br />
Control Source [Od] has been<br />
selected to [oP] in Section 9.7.<br />
(refer to page 42).<br />
Profibus module set-up screens can be<br />
turned off to provide extra security. The<br />
action of turning screens on or off does<br />
not affect its operation.<br />
Use the + or - keys to turn on Profibus<br />
set-up screens.<br />
Profibus set-up screens [On]<br />
PRESS THE<br />
KEY.<br />
The displayed option will flash<br />
indicating that it has been set.<br />
Press the ◗ key to display the Profibus<br />
set-up screens.<br />
The Profibus DP module must be<br />
allocated a unique address.<br />
To set the address the Profibus module<br />
must be isolated from the host by<br />
disconnecting the RS485 highway or<br />
turning off the host device.<br />
Using the + or - keys display the<br />
required address.<br />
Address to be set within the range 01<br />
to 7E Hexadecimal (refer to page 75 for<br />
conversion). If an address value outside<br />
this range is entered, the address set<br />
will revert to 01 (for 00) or 7E (for value<br />
above 7E).<br />
PRESS THE KEY.<br />
The displayed option will flash<br />
indicating that it has been set.<br />
Press the ❖ to display [Pb].
PF<br />
Profibus Remote<br />
Auxiliary Input<br />
52<br />
The IQ actuator has the facility to accept 4 auxiliary inputs (AUX1–AUX4). These are<br />
used when supplementary remote control or digital auxiliary inputs are required in<br />
addition to the standard control and feedback features incorporated into the<br />
Profibus module. It is also possible to have a combination of both remote control<br />
and volt-free inputs to provide, for example, open and close control as well as a<br />
high and low tank level alarm indication, supplied via an external transducer.<br />
The hexadecimal number displayed under PF can be considered as a ‘‘software<br />
mask’’. It is this mask that tells the Profibus module what type of input to expect,<br />
control or input signal, and what form the input will be, normally open or normally<br />
closed (refer to page 75 for Binary, Hexadecimal and Decimal Conversion Table).<br />
To decipher the mask the number needs to be split into two separate hexadecimal<br />
characters, each of which can be sub-divided into 4 binary bits. The first 4 bits<br />
represent the function and the second 4 represent the input source (known as<br />
invert). Pictorially this can be represented as:<br />
Left side hex character Right side hex character<br />
Aux 4 to 1 (function)<br />
AUX 4 to 1 (Invert)<br />
Bits 4 3 2 1 4 3 2 1<br />
When used for remote control of the actuator bits 4 to 1 of the function character<br />
have been designated as follows:<br />
Bit 4 (AUX4) – ESD<br />
Bit 3 (AUX3) – Stop/Maintain<br />
Bit 2 (AUX2) – Close<br />
Bit 1 (AUX1) – Open<br />
(When used for digital signal inputs they are simply designated as AUX 4 to AUX 1.)
PF<br />
Profibus Remote<br />
Auxiliary Input<br />
53<br />
Rules<br />
1. Function bit set to ‘‘0’’<br />
Any function bit set to ‘‘0’’ indicates that the particular aux input is to be treated as<br />
a digital signal for field status reporting, e.g. a level switch or motor running status.<br />
If the corresponding invert bit is set to a ‘‘0’’, an open contact is reported as a logic<br />
‘‘1’’ and a closed contact is reported as a logic "0" (i.e. this will invert the input).<br />
If the corresponding invert bit is set to a ‘‘1’’, an open contact is reported as a logic<br />
‘‘0’’ and a closed contact is reported as a logic ‘‘1’’ (i.e. this gives a noninverting<br />
input).<br />
2. Function bit set to ‘‘1’’<br />
Any function bit set to ‘‘1’’ indicates that the particular aux input is to be treated as<br />
a digital command to operate the actuator.<br />
When the corresponding invert bit is set to a ‘‘0’’ this represents an N.C. contact as<br />
being the command source, i.e. a closing contact de-energises the input and an<br />
opening contact energises the input.<br />
When the corresponding invert bit is set to a ‘‘1’’, this represents an N.O. contact as<br />
being the command source, i.e. a closing contact energises the input and an<br />
opening contact de-energises the input.<br />
3. ESD Control<br />
When using ESD (aux input 4), the ESD contact mode setting [A2] should be set to<br />
the default value of [nO]. The [A1]–ESD direction setting should be set to either<br />
open or close the valve (refer to page 34).<br />
5. Remote Source Setting [Od]<br />
Ensure that the correct [Od] setting is selected (refer to page 42).<br />
For Profibus this is [OP].<br />
The factory default for [PF] is [OF]<br />
Examples<br />
1. The full range of remote controls is needed. Open and Close are NO and ESD<br />
and Stop/maintain is NC.<br />
Aux I/P 4 3 2 1<br />
Function 1 1 1 1 = F<br />
Invert 0 0 1 1 = 3 i.e. set [PF] to [F3]<br />
2. Open and close control is required along with 2 inverted digital signal inputs.<br />
(Note that with this setting the open and close commands will be maintained.)<br />
Aux I/P 4 3 2 1<br />
Function 0 0 1 1 = 3<br />
Invert 0 0 1 1 = 3 i.e. set [PF] to [<strong>33</strong>]<br />
3. Only an ESD input is needed. The requirement is for push to run control with a<br />
NO contact input.<br />
Aux I/P 4 3 2 1<br />
Function 1 1 0 0 = C<br />
Invert 1 0 0 0 = 8 i.e. set [PF] to [C8]<br />
4. Stop/Maintain Control<br />
When energised this will make the Aux input Open/Close control push to run When<br />
de-energised, the Aux input Open/Close control will be maintained. ESD is always<br />
push to run (non maintained).
PF<br />
Profibus Remote<br />
Auxiliary Input<br />
PP<br />
54<br />
Using the + or - keys display the<br />
required mask setting.<br />
Setting [PP] is not used by<br />
Profibus. Entered settings will<br />
be ignored.<br />
PRESS THE<br />
Auxiliary Input Mask OF<br />
KEY.<br />
The displayed option will flash<br />
indicating that it has been set.<br />
If Profibus positioning control and<br />
action on loss of communication are<br />
required, return to the position display<br />
by pressing ◗ and ❖ keys together.<br />
Display [OF] (refer to page 58).
9.11<br />
Option DeviceNet<br />
PA<br />
DeviceNet Address<br />
Pb<br />
DeviceNet Baudrate<br />
55<br />
Setting instructions for actuators<br />
including an optional DeviceNet DFU<br />
module – check wiring diagram for<br />
inclusion.<br />
DeviceNet module set up screens can<br />
be turned off to provide extra security.<br />
The action of turning screens on or off<br />
does not effect its operation.<br />
Use the + or - key to turn on<br />
DeviceNet set up screens.<br />
The DeviceNet module must be<br />
allocated a unique address.<br />
Using the + or - keys display the<br />
required address.<br />
Address to be set within the range 01<br />
to 3F Hexadecimal. See page 72 for<br />
conversion. If an address value outside<br />
this range is entered, the address set<br />
will revert to 01 (for 00) or 3F (for value<br />
above 3F).<br />
The DeviceNet module must be set to<br />
the DeviceNet highway baudrate.<br />
Using the + or - keys display the<br />
required baudrate:<br />
[01] <strong>12</strong>5 k baud<br />
[03] 250 k baud<br />
[06] 500 k baud<br />
DeviceNet Set-up Screens ON<br />
PRESS THE<br />
KEY.<br />
The displayed option will flash<br />
indicating that it has been set.<br />
Press the ◗ key to display the<br />
DeviceNet set up displays.<br />
PRESS THE KEY.<br />
The displayed option will flash<br />
indicating that it has been set.<br />
Press the ❖ key to display [Pb].<br />
PRESS THE KEY.<br />
The displayed option will flash<br />
indicating that it has been set.<br />
Press the ❖ key to display [PF].
PF<br />
DeviceNet Remote<br />
Auxiliary Input<br />
56<br />
Press the ❖ key to display [PF].<br />
The IQ actuator has the facility to accept 4 auxiliary inputs (AUX1–AUX4). These are<br />
used when supplementary remote control or volt free digital auxiliary inputs are<br />
required in addition to the standard control and feedback features incorporated<br />
into the DeviceNet module. It is also possible to have a combination of both remote<br />
control and volt free inputs to provide, for example, open and close control as well<br />
as a high and low tank level alarm indication, supplied via an external transducer.<br />
The hexadecimal number displayed under PF can be considered as a ‘‘software<br />
mask’’. It is this mask that tells the DeviceNet module what type of input to expect,<br />
control or input signal, and what form the input will be, normally open or normally<br />
closed.<br />
To decipher the mask the number needs to be split into two separate hexadecimal<br />
characters, each of which can be sub-divided into 4 binary bits. The first 4 bits<br />
represent the function and the second 4 represent the input source (known as<br />
invert). Pictorially this can be represented as:<br />
Left side hex character Right side hex character<br />
Aux 4 to 1 (function)<br />
AUX 4 to 1 (Invert)<br />
Bits 4 3 2 1 4 3 2 1<br />
When used for remote control of the actuator bits 4 to 1 of the function character<br />
have been designated as follows:<br />
Bit 4 (AUX4) – ESD<br />
Bit 3 (AUX3) – Stop/Maintain<br />
Bit 2 (AUX2) – Close<br />
Bit 1 (AUX1) – Open<br />
(When used for digital signal inputs they are simply designated as AUX 4 to AUX 1.)<br />
Rules<br />
1. Function bit set to ‘‘0’’<br />
Any function bit set to ‘‘0’’ indicates that the particular aux input is to be treated as<br />
a digital signal for field status reporting, e.g. a level switch or motor running<br />
status.If the corresponding invert bit is set to a "0", an open contact is reported as<br />
a logic ‘‘1’’ and a close contact is reported as a logic ‘‘0’’ (i.e. this will invert the<br />
input).<br />
If the corresponding invert bit is set to a ‘‘1’’, an open contact is reported as a logic<br />
"0" and a close contact is reported as a logic ‘‘1’’ (i.e. this gives a non-inverting<br />
input).<br />
2. Function bit set to ‘‘1’’<br />
Any function bit set to ‘‘1’’ indicates that the particular aux input is to be treated as<br />
a digital command to operate the actuator.<br />
When the corresponding invert bit is set to a "0" this represents an N.C. contact as<br />
being the command source, i.e. a closing contact de-energises the input and an<br />
opening contact energises the input.<br />
When the corresponding invert bit is set to a ‘‘1’’, this represents an N.O. contact as<br />
being the command source, i.e. a closing contact energises the input and an<br />
opening contact de-energises the input.<br />
3. ESD Control<br />
When using ESD (aux input 4), the ESD contact mode setting [A2] should be set to<br />
the default value of [nO]. The [A1]–ESD direction setting should be set to either<br />
open or close the valve (refer to page 34).
PF<br />
DeviceNet Remote<br />
Auxiliary Input (continued)<br />
PP<br />
DeviceNet Parity<br />
57<br />
4. Stop/Maintain Control<br />
When energised this will make the Aux input Open/Close control push-to-run.<br />
When de-energised, the Aux input Open/Close control will be maintained. ESD is<br />
always push to run (non maintained).<br />
5. Remote I/P Setting<br />
Ensure that the correct “Od” setting is selected (refer to page 42).<br />
For DeviceNet this is [OP].<br />
The factory default for [PF] is [OF].<br />
Examples<br />
1. The full range of remote controls is needed. Open and Close are NO and ESD<br />
and Stop/maintain is NC.<br />
Aux I/P 4 3 2 1<br />
Function 1 1 1 1 = F<br />
Invert 0 0 1 1 = 3 i.e. set [PF] to [F3]<br />
2. Open and close control is required along with 2 inverted digital signal inputs.<br />
(Note that with this setting the open and close commands will be maintained.)<br />
Aux I/P 4 3 2 1<br />
Function 0 0 1 1 = 3<br />
Invert 0 0 1 1 = 3 i.e. set [PF] to [<strong>33</strong>]<br />
3. Only an ESD input is needed. The requirement is for push to run control with a<br />
NO contact input.<br />
Aux I/P 4 3 2 1<br />
Function 1 1 0 0 = C<br />
Invert 1 0 0 0 = 8 i.e. set [PF] to [C8]<br />
Using the + or - keys display the<br />
required mask setting.<br />
PRESS THE<br />
Auxiliary Input Mask OF<br />
KEY.<br />
The displayed option will flash<br />
indicating that it has been set.<br />
Press the ❖ key to display [PP].<br />
This option is not used by the<br />
DeviceNet DFU Module.<br />
PRESS THE<br />
No Parity Bit<br />
KEY.<br />
The displayed option will flash<br />
indicating that it has been set.
9.<strong>12</strong> Bus System Positioning<br />
Control Settings<br />
OF<br />
Display Bus System<br />
Positioning Set-up Screens<br />
FL<br />
Bus System Valve<br />
Position at 0% DV<br />
FH<br />
Bus System Valve<br />
Position at 100% DV<br />
58<br />
If the system control strategy for<br />
Pakscan, Modbus or Profibus requires<br />
intermediate valve travel positioning,<br />
certain control parameters need to be<br />
checked: the Limited Range Position<br />
Settings, the Motion Inhibit Time and<br />
its Deadband. There are an additional<br />
two ‘‘Action on Loss of Signal’’<br />
parameters relating only to Modbus<br />
and Profibus systems that also need to<br />
be checked.<br />
Limited Range Positioning is a selectable<br />
option whereby positioning limits, 0%<br />
and 100%, can be at different positions<br />
to those used for digital Closed and<br />
Open limit commands. Limited range<br />
positioning can be set using the [FL]<br />
and [FH] screens.<br />
It should be noted that the actuator will<br />
respond to a digital Open or Close host<br />
command by moving the valve to the<br />
set limits irrespective of settings made<br />
for positioning control.<br />
Settings for Deadband and Motion<br />
Inhibit Time affect accuracy and<br />
response time.<br />
Bus system positioning control set-up<br />
screens can be suppressed to provide<br />
extra security.<br />
Use the + or - key to turn on the<br />
positioning set-up screens.<br />
Bus System Positioning Control<br />
Screens [On]<br />
PRESS THE<br />
KEY.<br />
The displayed option will flash<br />
indicating that it has been set.<br />
Press the ◗ key to display Bus System<br />
Positioning Control Settings.<br />
Once [FI] is displayed, press the ❖ key<br />
to display [FL].<br />
[FL] is the position to which the<br />
actuator will move if a 0% command is<br />
sent and is the position at which the<br />
actuator will report 0% to the host.<br />
The default setting is for 0% to be the<br />
Close limit.<br />
If altered, it is possible that the position<br />
indicated by the actuator display will<br />
differ to that indicated by the host.<br />
Use the + or - key to select the desired<br />
valve position for a 0% command.<br />
PRESS THE<br />
0% DV = Valve Closed<br />
KEY.<br />
The displayed option will flash<br />
indicating that it has been set.<br />
Press the ❖ key to display [FH].<br />
[FH] is the position to which the<br />
actuator will move if a 100% command<br />
is sent and is the position at which the<br />
actuator will report 100% to the host.<br />
The default setting is for 100% to be<br />
the Open limit.<br />
If altered, it is possible that the position<br />
indicated by the actuator display will<br />
differ to that indicated by the host.<br />
Use the + or - key to select the desired<br />
valve position for a 100% command.<br />
PRESS THE<br />
100% DV = Valve Open<br />
KEY.<br />
The displayed option will flash<br />
indicating that it has been set.<br />
Press the ❖ key to display [Fd].
Fd<br />
All positioning commands are subject to<br />
a deadband tolerance.<br />
The deadband sets the expected<br />
positioning accuracy of the actuator<br />
and is dependent on various factors<br />
including, actuator output speed,<br />
number of turns and valve torque. If<br />
the deadband is set too low the valve<br />
may ‘‘hunt’’ around the set point.<br />
Use the + or - key to display the<br />
required setting:<br />
[00] to [99] – 0% to 9.9% of valve<br />
stroke.<br />
PRESS THE<br />
Bus System Deadband<br />
Adjustment<br />
2.5% Deadband<br />
KEY.<br />
The displayed option will flash<br />
indicating that it has been set.<br />
Press the ❖ key to display [Ft].<br />
Ft<br />
MIT sets the minimum time between<br />
successive position commands being<br />
actioned. It is used in situations to<br />
reduce the number of starts per hour<br />
and to smooth out fluctuations if<br />
continuous positioning is implemented.<br />
Setting the longest possible time while<br />
maintaining acceptable control will<br />
maximise the life of the motorised<br />
valve.<br />
Use the + or - key to display the<br />
required setting:<br />
[02] to [99] – 2 to 99 seconds.<br />
PRESS THE<br />
Bus System<br />
Motion Inhibit Time (MIT)<br />
5 Second MIT<br />
KEY.<br />
The displayed option will flash<br />
indicating that it has been set.<br />
Press the ❖ key to display [FA].<br />
FA Modbus, Profibus &<br />
DeviceNet<br />
Action on Loss of Signal<br />
Modbus, Profibus & DeviceNet modules<br />
can be set to respond on loss of host<br />
communication by positioning the<br />
valve. Modbus checks for a loss of<br />
general highway communications<br />
whereas Profibus checks for a loss of<br />
communications addressed specifically<br />
to itself.<br />
The default setting is off [OF] and the<br />
default timeout is 255 sec.<br />
Use the + or - key to display the<br />
required setting:<br />
[On] Failsafe determined by setting [FF]<br />
[OF] No failsafe action<br />
PRESS THE<br />
Failsafe Action Enabled<br />
KEY.<br />
The displayed option will flash<br />
indicating that it has been set.<br />
Press the ❖ key to display [FF].<br />
59<br />
FF Modbus, Profibus<br />
& DeviceNet<br />
Failsafe Action<br />
Modbus, Profibus & DeviceNet failsafe<br />
action when [FA] is enabled.<br />
Use the + or - key to display the<br />
required setting:<br />
[Lo] Close valve<br />
[SP] Stay put<br />
[HI] Open valve<br />
PRESS THE<br />
Failsafe Close<br />
KEY.<br />
The displayed option will flash<br />
indicating that it has been set.
9.13 Option<br />
Interrupter Timer<br />
Setting instructions for actuator<br />
including an interrupter timer.<br />
The interrupter timer enables pulsed<br />
“stop/start” operation by the actuator<br />
as a response to local and remote<br />
control commands.<br />
This effectively increases the valve<br />
stroke time and can be adjusted to<br />
prevent hydraulic shock (water<br />
hammer) and flow surges in pipelines.<br />
The interrupter timer is an optional<br />
extra – check wiring diagram for<br />
inclusion.<br />
OJ<br />
Interrupter Timer<br />
Enabled/Disabled<br />
When fitted, the timer will be<br />
made available for operation.<br />
The Interrupter cannot be<br />
enabled or disabled using the<br />
Setting Tool.<br />
Interrupter Timer Interrupter Timer<br />
Disabled Enabled<br />
When the timer option is available an<br />
additional series of settings can be<br />
accessed by pressing the ◗ key.<br />
NOTE: If the timer option is not<br />
available pressing the ◗ key will not<br />
access setting.<br />
Press the ◗ key to display interrupter<br />
timer set-up screens.<br />
Jd<br />
The default for timer direction is [CL],<br />
timer operation will start in closing<br />
and stop in opening – pulsing<br />
operation around the close position.<br />
If pulsing operation is required to stop<br />
in closing and start in opening – around<br />
the open position, use the + or - key.<br />
The display will change to [OP].<br />
PRESS THE<br />
Interrupter Timer<br />
Direction<br />
KEY.<br />
The displayed option will flash<br />
indicating that it has been set.<br />
Pulsed Operation Around the<br />
Closed Position<br />
NOTE: Instructions [JC] and [JO] are for<br />
timer operation around the Closed<br />
position. For timing around the Open<br />
position, read stop for start [JC] and<br />
start for stop [JO].<br />
Press the ❖ key to display [JC].<br />
JC<br />
60<br />
Position in Valve<br />
Closing Stroke for<br />
Timer to Start<br />
Using the + or - key select the position<br />
for the TIMER TO START WHEN THE<br />
VALVE IS CLOSING.<br />
[ ][] = valve closed<br />
[00] to [99] = percentage open<br />
[ ] = valve open<br />
Timer Set to Start Pulsing when<br />
Closing Valve Reaches 25% Open<br />
PRESS THE KEY.<br />
The displayed option will flash<br />
indicating that it has been set.<br />
If the timing is not required in the<br />
closing stroke select [JC] to [ ][] valve<br />
closed position.<br />
Press the ❖ key to display [JO].
JO<br />
Position in Valve Opening<br />
Stroke for Timer to Stop<br />
Jn<br />
Contactor On Time<br />
Contactor Off Time<br />
JF JE ESD Override<br />
Interrupter Timer<br />
61<br />
Using the + or - key select the position<br />
for the TIMER TO STOP WHEN THE<br />
VALVE IS OPENING.<br />
[ ][] = valve closed<br />
[00] to [99] = percentage open<br />
[ ] = valve open<br />
Timer Set to Stop Pulsing<br />
when Opening Valve<br />
Reaches 25% Open<br />
PRESS THE KEY.<br />
The displayed option will flash<br />
indicating that it has been set.<br />
If timing is not required in the opening<br />
stroke select [JO] to [ ][].<br />
Press the ❖ key to display [Jn].<br />
Using the + or - key select the actuator<br />
run period in the range 1–99 seconds.<br />
Actuator Run Period<br />
Set for 5 Seconds<br />
PRESS THE KEY.<br />
The displayed option will flash<br />
indicating that it has been set.<br />
Press the ❖ key to display [JF].<br />
Using the + or - key select the actuator<br />
stop period in the range 1–99 seconds.<br />
Actuator OFF Period<br />
Set for 25 Seconds<br />
PRESS THE KEY.<br />
The displayed option will flash<br />
indicating that it has been set.<br />
Press the ❖ key to display [JE] (refer<br />
to note on Page 62).<br />
The interrupter timer may be overridden<br />
when the actuator is under ESD signal<br />
command. This will mean the actuator<br />
will run to limit without “stop/start”<br />
action under ESD command.<br />
Refer to A1–A3 (refer to page 34 for<br />
ESD settings).<br />
The default for ESD override interrupter<br />
timer is [OF]. The interrupter timer will<br />
continue “stop/start” action during ESD<br />
action.<br />
If ESD must override the timer use the<br />
+ or - to display [On].<br />
PRESS THE<br />
ESD Override Timer OFF<br />
KEY.<br />
The displayed option will flash<br />
indicating that it has been set.
Example<br />
Note<br />
9.14 Setting Tool<br />
Local Control [Or]<br />
9.15 Inhibit Operation<br />
After Power Loss [OS]<br />
62<br />
An actuator fitted with the interrupter<br />
timer and set as the example shown in<br />
these instructions would operate at:<br />
Rated speed from full Open to 25%<br />
Open.<br />
1<br />
/6 rated speed from 25% Open to Fully<br />
Closed and from Fully Closed to 25%<br />
Open.<br />
Rated speed from 25% Open to Fully<br />
Open.<br />
With a Folomatic option fitted and the<br />
Interrupter Timer enabled, the<br />
Folomatic Motion Inhibit Timer must be<br />
adjusted to the same time as that set<br />
for the Interrupter Timer “contactor<br />
off”.<br />
Failure to do so will cause the actuator<br />
response to defer to the lower time<br />
which may cause control or process<br />
problems.<br />
For “ON” and “OFF” times in excess of<br />
99 seconds apply to Rotork.<br />
The default setting for Setting Tool<br />
Local Control is [OF].<br />
To enable Setting Tool Control press the<br />
+ or - key to select [On].<br />
PRESS THE<br />
KEY.<br />
The displayed option will flash<br />
indicating that it has been set.<br />
With the red control selector in Local,<br />
the Setting Tool control keys are active<br />
(refer to page 17).<br />
The default setting for this protection option<br />
is disabled [OF]. When disabled it is<br />
important that the actuator is not manually<br />
operated during a power failure if the battery<br />
is low as changes in position cannot be<br />
tracked - refer to page 6 for battery level<br />
status display. Should this occur the limits<br />
must be reset before electric operation takes<br />
place- refer to LC/LO page 27. Locking the<br />
hand auto lever can prevent manual<br />
operation - refer to 3.1 page 2.<br />
Local Setting Tool Control Enabled<br />
Vandal resistant actuators ONLY<br />
(red/black selectors not supplied).<br />
For control, the selection of [Or] is as<br />
follows:<br />
[On] Local Setting Tool control only.<br />
[OF] Local/Remote Control disabled.<br />
[rE] Remote Control only.<br />
The protection may be enabled by using the<br />
+ or - key to select [On]<br />
PRESS THE<br />
KEY.<br />
The displayed option will flash indicating that<br />
it has been set.<br />
When protection is enabled, on power up if a<br />
low battery is detected, the actuator will<br />
inhibit electrical operation and display Power<br />
Loss Inhibit via actuator alarm display (refer<br />
to page 6) and the monitor relay will deenergise.<br />
Limits must reset and the battery<br />
replaced – refer to page 65.
9.16 Default Options<br />
[d1] and [d2]<br />
All IQ functions are configured to a set of Rotork default (standard) settings before<br />
despatch, see the table opposite. When requested, alternative settings specified<br />
with the order will be used. When site commissioning takes place, entered settings<br />
overwrite Rotork defaults and these ‘‘current’’ settings are used for operation along<br />
with the remaining unadjusted defaults.<br />
Should difficulty be encountered during commissioning the default settings can be<br />
reinstated, returning the actuator configuration to its original manufactured state.<br />
Site commissioning must then begin again.<br />
There are two levels of default:<br />
d1 Rotork standard or customer specified primary and secondary settings.<br />
d2 Limit positions only – factory set limits.<br />
NOTE: Settings associated with control options Folomatic, Pakscan, Modbus<br />
Profibus and Foundation Fieldbus are not affected by d1 or d2.<br />
Functions will remain as set.<br />
If d1 is entered, all Primary and Secondary Functions except limit positions<br />
will return to their default setting. See the table opposite for Rotork<br />
standard settings. Primary setting (except limits) and secondary settings<br />
must then be checked and reset as required (refer to Primary Functions page 15<br />
and Secondary Functions page 29).<br />
If d2 is entered the limits will be reset, with the actuator positioned at<br />
50%. Limits must then be reset to the suit the valve (refer to Primary<br />
Functions page 20).<br />
Rotork standard [d1] Default settings for IQ:<br />
Function<br />
[d1] Default Setting<br />
[P?] Password Unaffected – will remain as set<br />
[Ir] IrDA – Insight [On] IrDA Enabled<br />
[Ic] Cell Phone [OF] Disabled<br />
Primary Functions<br />
[C1] Close Direction [C] Clockwise<br />
[C2] Close Action [Ct] Close Torque<br />
[C3] Open Action [Ot] Open Torque<br />
[tC] Close Torque [40] 40% of rated<br />
[tO] Open Torque [40] 40% of rated<br />
Secondary Functions<br />
[r1] Indication Contact S1 [CI]/[nO] Close, Normally Open<br />
[r2] Indication Contact S2 [OP]/[nO] Open, Normally Open<br />
[r3] Indication Contact S3 [CI]/[nC] Close, Normally Closed<br />
[r4] Indication Contact S4 [OP]/[nO] Open, Normally Closed<br />
[A1] ESD Action [SP] Stay put on ESD<br />
[A2] ESD Contact Type [nO] Normally Open (make for ESD)<br />
[A3] ESD Thermostat Override [OF] Thermostats Active during ESD<br />
[A4] ESD Override Interlocks [OF] Interlocks Active during ESD<br />
[A5] ESD Override Local Stop [OF] Local Stop Active during ESD<br />
[A6] Maintained Local Control [On] Maintains in Local Control<br />
63
9.17 Default Options<br />
[d1] and [d2]<br />
Rotork standard [d1] Default settings continued:<br />
Function [d1] Default Setting<br />
[A7] 2-wire Remote Control [SP] Stayput on 2-wire signal<br />
[A8] Interlocks [OF] I/L function disabled<br />
[A9] Conditional Control [OF] Function disabled<br />
[AE] Torque Switch Bypass [OF] Function disabled<br />
[OE] Option Extra Indication Contacts [OF] Unless fitted. See wiring diagram<br />
[OI] Option CPT [HI] 4mA at Closed<br />
[OF] Option Folomatic [OF] Unless fitted. See wiring diagram<br />
[Od] Remote Source [rE] Unless option fitted<br />
(refer to 9.7 page 42.)<br />
[OP] Option Bus System Control [OF] Unless fitted. See wiring diagram<br />
[OJ] Option Interrupter Timer [OF] Unless fitted. See wiring diagram<br />
[Or] Setting Tool Local Control [OF] Setting Tool Control disabled<br />
[OS] Power Loss Inhibit [OF] Protection off<br />
64<br />
The Rotork standard default settings are subject to change without notice.<br />
If specified with order, [d1] settings will be configured as requested.<br />
To reinstate [d1] settings, with [d1] displayed.<br />
PRESS THE KEY.<br />
The setting bars will flash, indicating the [d1] default settings have been reinstated.<br />
To reinstate factory set limits (actuator positioned at 50%) with [d2] displayed,<br />
PRESS THE KEY.<br />
The setting bars will flash, indicating the [d2] default limits have been reinstated.<br />
[d1] Displayed<br />
[d2] Displayed<br />
Option Extra Indication Contacts (when fitted) - refer to wiring diagram<br />
[r5] Indication Contact S5 [CI]/[nO] Close, normally open<br />
[r6] Indication Contact S6 [OP]/[nO] Open, normally open<br />
[r7] Indication Contact S7 [tI]/[nO] Torque Trip Mid Travel,<br />
normally open<br />
[r8] Indication Contact S8 [rE]/[nO] Remote Selected,<br />
normally open
10 Maintenance, Monitoring<br />
and Troubleshooting<br />
65<br />
Maintenance<br />
Every Rotork actuator has been fully<br />
tested before dispatch to give years of<br />
trouble-free operation providing it is<br />
installed, sealed and commissioned in<br />
accordance with the instructions given<br />
in this publication.<br />
The IQ actuator’s unique double sealed,<br />
non-intrusive enclosure provides<br />
complete protection for the actuator<br />
components.<br />
Covers should not be removed for<br />
routine inspection as this may be<br />
detrimental to the future reliability of<br />
the actuator.<br />
The electrical control module cover is<br />
bonded by the Rotork quality control<br />
seal. It should not be removed as the<br />
module contains no site-serviceable<br />
components.<br />
All electrical power supplies to the<br />
actuator must be isolated before any<br />
maintenance or inspection is carried<br />
out, except replacement of the battery.<br />
Electrical supplies must be isolated<br />
before actuator covers are removed<br />
refer to Battery replacement<br />
instructions.<br />
Routine maintenance should include<br />
the following:<br />
* Check actuator to valve fixing bolts<br />
for tightness.<br />
* Ensure valve stems and drive nuts are<br />
clean and properly lubricated.<br />
* If the motorised valve is rarely<br />
operated, a routine operating<br />
schedule should be set up.<br />
* Replace actuator battery every<br />
5 years.<br />
* Check the actuator enclosure for<br />
damage, loose or missing fasteners.<br />
* Ensure there is not an excessive<br />
build up of dust or contaminant<br />
on the actuator.<br />
* Check for any loss of lubricant.<br />
The Actuator Battery<br />
The battery supports the actuator<br />
position updating circuits and the<br />
position (LCD) display when the main<br />
power supply is turned off. It ensures<br />
the current position is updated and<br />
displayed when manual operation takes<br />
place with the main power turned off.<br />
The battery is not required to retain any<br />
actuator settings.<br />
WARNING:<br />
The battery holder in the actuator<br />
gearcase also protects the user from<br />
the hazardous live connections<br />
inside the actuator and therefore it<br />
must not be damaged. The actuator<br />
must be isolated or disconnected if<br />
the battery holder has to be<br />
removed from the actuator<br />
gearcase.<br />
A unique circuit has been incorporated<br />
into the battery function of the IQ,<br />
effectively reducing the overall drain<br />
and significantly increasing the battery<br />
life.<br />
In normal circumstances battery<br />
replacement interval should not<br />
exceed 5 years. Ambient<br />
temperature and plant operating<br />
conditions may affect battery life.<br />
Battery level status is indicated by an<br />
icon on the actuator display, refer to<br />
Section 3.4 Alarm Indication (refer to<br />
page 5).<br />
If the battery icon is displayed the<br />
battery must be replaced.<br />
Battery Replacement<br />
If the actuator is located within a<br />
hazardous area permission must be<br />
obtained in the form of a ‘‘hot work<br />
permit’’ or other local regulation before<br />
removal and/or replacement of the<br />
battery.<br />
Removal of the battery with the main<br />
electrical power switched off will result<br />
in stored Datalogger records being lost.<br />
It is therefore recommended that the<br />
battery is replaced with the main<br />
electrical supply to the actuator<br />
switched on.<br />
If main electrical power is not available<br />
or if main power has been switched off<br />
while the battery was discharged, it is<br />
recommended that the actuator limits<br />
be checked after battery replacement<br />
(refer to Section 8 Commissioning<br />
Primary Functions, page 20).<br />
Battery Removal<br />
The actuator must be selected to Stop<br />
using the red selector (refer to page 3).<br />
Access to the battery is via a labelled<br />
sealing plug situated on the main<br />
gearcase near the handwheel hub.
10 Maintenance, Monitoring<br />
and Troubleshooting cont.<br />
66<br />
Use an 8mm Allen key to remove the<br />
sealing plug, ensuring the ‘‘O’’ ring seal<br />
remains on the plug. Disconnect the<br />
battery wiring loom from the battery<br />
terminals. Using the black pull strap, lift<br />
the battery out of the rubber sealing<br />
pocket.<br />
Fig. 10<br />
Battery Types<br />
For European hazardous area certified<br />
actuators (ATEX) use an Ultralife U9VL<br />
lithium manganese dioxide battery only.<br />
For FM and CSA certified enclosures<br />
use an Ultralife U9VL lithium<br />
manganese dioxide battery. Equivalent,<br />
UL recognised, batteries may be used.<br />
For watertight (WT) actuator enclosures<br />
use an Ultralife U9VL lithium<br />
manganese dioxide battery or any<br />
equivalent 9V battery.<br />
If in doubt regarding the correct battery<br />
type, contact Rotork.<br />
Fitting Replacement Battery<br />
Fit the pull strap around the<br />
replacement battery and insert into the<br />
rubber sealing pocket. Reconnect the<br />
battery wiring loom to the battery<br />
terminals. Refit the battery sealing plug<br />
ensuring ‘‘O’’ ring is in good condition<br />
and correctly fitted. Hand tighten<br />
sealing plug using an 8mm Allen key.<br />
Oil<br />
Unless specially ordered for extreme<br />
climatic conditions, Rotork actuators are<br />
dispatched with gearcases filled with<br />
SAE 80EP oil which is suitable for<br />
ambient temperatures ranging from<br />
–22°F / –30°C to 160°F / 70°C.<br />
IQ actuators do not require regular oil<br />
changes (refer to Weights and<br />
Measures Section 11, page 74).<br />
Torque and Position Monitoring<br />
The IQ range of actuators incorporate<br />
real time, instantaneous Torque &<br />
Position monitoring as standard.<br />
Torque & Position can be used to<br />
monitor valve performance during<br />
operation. The effect of process<br />
changes (differential pressure etc.) can<br />
be evaluated. Tight spots in valve travel<br />
can be pinpointed as well as gauging<br />
torque developed through stroke for<br />
torque value setting (refer to pages 25,<br />
26).<br />
Using the Setting Tool, the display can<br />
be set to indicate Torque and Position<br />
as follows:<br />
With the actuator displaying Current<br />
Position and selected to Local or Stop,<br />
using the Setting Tool,<br />
PRESS THE KEY.<br />
The display will split, the top indicating<br />
the instantaneous torque (as a % of<br />
rated), the bottom indicating the<br />
measured position (% open).<br />
Example shows 19% (of rated) torque<br />
at 50% open position. Display torque<br />
range: [00] to [99]% of rated torque in<br />
1% increments. For values of torque<br />
above 99% the display will indicate [HI].<br />
Display position range:<br />
[ ][] = valve closed<br />
[00] to [99] = percentage open<br />
[ ] = valve open<br />
For a stationary actuator the display will<br />
indicate the actual torque value as<br />
applied by the actuator.<br />
To keep the torque + position display<br />
active press the + or - keys. The display<br />
will remain active for approximately 5<br />
minutes from the last key operation.
10 Maintenance, Monitoring<br />
and Troubleshooting cont.<br />
10.1<br />
Help Screens<br />
67<br />
Troubleshooting<br />
The IQ range of actuators is the world’s<br />
first that can be commissioned and<br />
interrogated without removing electrical<br />
covers. Help Screen diagnostics enable<br />
fast and complete fault finding to be<br />
carried out.<br />
With power off, the actuator<br />
display is not backlit. Position<br />
indicator lamp not illuminated.<br />
With mains power on, the actuator’s<br />
display should be backlit (refer to<br />
Section 3.3 page 4 – The Actuator<br />
Display).<br />
Check that 3 phase supply is available<br />
and is of the correct voltage as stated<br />
on the actuator nameplate. Measure<br />
voltage phase to phase across terminals<br />
1, 2 and 3 of the actuator terminal<br />
bung.<br />
With power Off, the actuator does<br />
not display position.<br />
With mains power off the actuator<br />
battery supports position indication<br />
liquid crystal display only.<br />
(Refer to Section 3.3 page 4 – The<br />
Actuator Display).<br />
If the display is blank the actuator<br />
battery must be replaced and the limits<br />
of travel reset (refer to Section 10 page<br />
65 – The Actuator Battery).<br />
With the actuator powered up and<br />
Local or Stop selected, eight Help<br />
Screens can be accessed using the<br />
Setting Tool (refer to Fig. 9.1 page 30<br />
for their location).<br />
With Remote selected press the ◗ key<br />
on the Setting Tool twice. The Help<br />
Screens will displayed.<br />
Each screen uses bars to indicate the<br />
status of a particular control or<br />
indication function. Each bar reacts to<br />
changes in the status of its actuator<br />
function by turning ‘‘on’’ or ‘‘off’’.<br />
For troubleshooting, access the<br />
following Help Screens and refer to<br />
text:<br />
H1 – Factors inhibiting electrical<br />
operation.<br />
H2 – Monitor battery level and ESD<br />
control input.<br />
H3 – Monitor the position limit and<br />
actuator power supply status.<br />
H4 – Monitor remote control inputs to<br />
the actuator.<br />
H5 – Monitor remote interlocks local<br />
control inputs and motor<br />
thermostats.<br />
H6 – Monitor torque switch status and<br />
IR Setting Tool communication for<br />
vandal proof applications.<br />
H7 – Monitor travel limits, centre<br />
column and position limit status.<br />
H8 – Monitor the actuator’s positionsensing<br />
devices.<br />
H9 – Rotork use only.<br />
Help screen bars shown<br />
are undefined and may be ON, OFF or<br />
flashing.
H1<br />
Factors Inhibiting<br />
Electrical Operation<br />
Phase<br />
Loss<br />
H1<br />
Position<br />
Error<br />
Local<br />
Controls<br />
Error<br />
Battery Low<br />
on<br />
Power-up<br />
Help Screen 1<br />
POSITION ERROR<br />
Bar ON = Current Position Error<br />
Present.<br />
During power up the actuator position<br />
processor compares the current position<br />
to that stored in the Eeprom. If there is<br />
a discrepancy this is shown as a current<br />
position error.<br />
Re-setting of both actuator limits<br />
should now be carried out (refer to<br />
page 27).<br />
BATTERY LOW ON POWER UP<br />
Bar ON = Low battery detected On<br />
Power Up.<br />
If [OS] is selected [On] (set as default )<br />
the actuator operation will be inhibited<br />
when powered up with a discharged<br />
battery (refer to [OS] page 58).<br />
The battery should be replaced at the<br />
earliest opportunity (refer to page 65).<br />
LOCAL CONTROLS ERROR<br />
Bar ON = Invalid Local Control<br />
Signals Detected.<br />
For example if a Local Open and Close<br />
signal is detected at the same time this<br />
would be classed as an invalid or fault<br />
condition.<br />
PHASE LOSS<br />
Bar ON = Phase Lost (3 Phase<br />
Actuators Only).<br />
Loss of third monitored power supply<br />
phase connected to actuator terminal 3.<br />
H2<br />
Low<br />
Battery<br />
Battery<br />
Discharged<br />
Battery Level and<br />
ESD Control Input<br />
H2<br />
ESD<br />
Active<br />
Help Screen 2<br />
BATTERY DISCHARGED<br />
Bar ON = Battery Discharged.<br />
Bar ON when the battery is no longer<br />
able to support actuator functions<br />
under loss of power conditions.<br />
The battery must be replaced (refer to<br />
Section 10 page 65) and limit positions<br />
reset (refer to [LC] and [LO] page 27).<br />
68<br />
LOW BATTERY<br />
Bar ON = Battery level low.<br />
Bar OFF = Battery OK.<br />
Bar ON when the battery is low but still<br />
able to support the necessary actuator<br />
functions.<br />
The battery should be replaced at the<br />
earliest possible opportunity.<br />
ESD SIGNAL ACTIVE<br />
Bar ON = ESD Signal is present.<br />
When applied, an Emergency<br />
Shutdown Signal will override any<br />
existing local or remote control signal,<br />
causing the actuator to respond in the<br />
direction selected for ESD.<br />
The ESD function will be determined by<br />
the settings on Control Mode<br />
Configuration screens [A1] to [A5]<br />
(refer to Section 9.3 page 34).<br />
The actuator will not respond to any<br />
local or remote control while an ESD<br />
signal is maintained.
H3<br />
Factors Inhibiting<br />
Electrical Operation<br />
H3<br />
Clockwise<br />
Limit<br />
H4<br />
Remote Control<br />
Inputs<br />
H4<br />
Remote Remote<br />
Maintain 2 Open 1<br />
REMOTE CLOSE 1<br />
Bar OFF = Remote Close Signal<br />
Present.<br />
ESD 1<br />
Bar OFF = ESD signal present.<br />
H5<br />
Remote Interlocks,<br />
Local Control<br />
Inputs, & T/stat<br />
Local Stop<br />
not<br />
Selected<br />
H5<br />
Open<br />
Interlock<br />
69<br />
Inhibit<br />
Help Screen 3<br />
CLOCKWISE LIMIT<br />
Bar ON = Actuator has reached<br />
clockwise limit of travel.<br />
ANTI-CLOCKWISE LIMIT<br />
Bar ON = Actuator has reached<br />
Anti-clockwise limit.<br />
INHIBIT<br />
Bar ON = Actuator inhibited.<br />
Possible Causes:<br />
Phase Loss (3 phase only).<br />
Power Loss Inhibit (page 62).<br />
Internal Failure.<br />
Anti<br />
Clockwise<br />
Limit<br />
ESD 2<br />
Remote<br />
Close 1<br />
Remote<br />
Close 2 ESD 1<br />
Remote Remote<br />
Open 2 Maintain 1<br />
Help Screen 4<br />
All remote signals designated with ‘1’<br />
are standard hard wired remote inputs.<br />
When a Pakscan, Profibus or<br />
Foundation Fieldbus card is fitted,<br />
remote control inputs are designated<br />
with a ‘2’.<br />
REMOTE OPEN 1<br />
Bar OFF = Remote Open Signal<br />
Present.<br />
REMOTE MAINTAIN 1<br />
Bar OFF = Remote Maintain<br />
signal present.<br />
Bar ON = Remote Maintain not<br />
present and/or Remote Stop<br />
active.<br />
REMOTE OPEN 2<br />
Bar OFF = Remote Open signal<br />
present from BUS option pcb.<br />
REMOTE CLOSE 2<br />
Bar OFF = Remote Close signal<br />
present from BUS option pcb.<br />
ESD 2<br />
Bar OFF = ESD signal present<br />
from BUS option pcb.<br />
REMOTE MAINTAIN 2<br />
Bar OFF = Remote Maintain<br />
signal present from BUS option<br />
pcb.<br />
Thermostat<br />
Tripped<br />
Local Open<br />
not Present<br />
Local Close Remote<br />
not not<br />
Present Selected<br />
Help Screen 5<br />
Close<br />
Interlock<br />
Local not<br />
Selected<br />
OPEN INTERLOCK<br />
Bar ON = Open Interlock Active.<br />
(Actutator disabled)<br />
Unauthorised Open electrical operation<br />
can be prevented by interlocking the<br />
actuator (Open) control with an<br />
external interlock contact.<br />
If external interlocks are not required<br />
the interlock function must be selected<br />
OFF.
H5<br />
Remote Interlocks,<br />
Local Control Inputs,<br />
& T/stat continued<br />
CLOSE INTERLOCK<br />
Bar ON = Close Interlock Active.<br />
(Actuator disabled)<br />
Unauthorised Close electrical operation<br />
can be prevented by interlocking the<br />
actuator (Close) control with an<br />
external interlock contact.<br />
If external interlocks are not required<br />
the interlock function must be selected<br />
OFF.<br />
REMOTE NOT SELECTED<br />
Bar ON = Remote control not selected.<br />
Bar OFF = Remote control selected.<br />
LOCAL CLOSE NOT PRESENT<br />
Bar ON = Local Close signal not present.<br />
Bar OFF = Local Close signal present.<br />
LOCAL OPEN NOT PRESENT<br />
Bar ON = Local Open signal not present.<br />
Bar OFF = Local Open signal present.<br />
THERMOSTAT TRIPPED<br />
Bar ON = Thermostat tripped.<br />
The actuator motor is protected by<br />
thermostats.<br />
Should the motor become overheated<br />
the thermostats will trip and the<br />
actuator will stop. On cooling the<br />
thermostat will automatically reset,<br />
enabling operation. See the actuator<br />
nameplate for the motor rating.<br />
LOCAL STOP NOT SELECTED<br />
Bar ON = Local Stop not selected.<br />
Bar OFF = Local stop selected.<br />
LOCAL NOT SELECTED<br />
Bar ON = Local control not selected.<br />
Bar OFF = Local control selected.<br />
H6<br />
IR Local<br />
Control<br />
Disabled<br />
Torque Switch Status & IR<br />
Setting Tool Comms for<br />
Vandal Proof Applications<br />
H6<br />
IR Remote<br />
Control not<br />
Selected<br />
Local<br />
Controls<br />
not Fitted<br />
IR Closed<br />
Signal not<br />
Present<br />
IR Open Torque<br />
Signal not Switch<br />
Present Tripped<br />
Help Screen 6<br />
When actuators are supplied for Vandal<br />
Proof applications the local control<br />
knobs are removed to prevent<br />
unauthorised operation.<br />
The local control functions are then<br />
carried out by using the Infra-red<br />
Setting Tool.<br />
LOCAL CONTROLS NOT FITTED<br />
Bar OFF = Local controls fitted<br />
(standard).<br />
Bar ON = Local controls not fitted<br />
(vandal proof).<br />
70<br />
TORQUE SWITCH TRIPPED<br />
Bar OFF = Torque switch tripped.<br />
When the actuator generates a value of<br />
torque equal to that set for Open<br />
(when opening) or Close (when closing)<br />
it will stop, protecting itself and the<br />
valve from damage. This feature is<br />
known as Over Torque Protection.<br />
Once a torque trip has occurred further<br />
operation IN THE SAME DIRECTION is<br />
prevented.<br />
This ‘‘latching’’ of the event protects the<br />
actuator and valve from repeated<br />
“hammering” against the obstruction<br />
as a response to a maintained control<br />
signal.<br />
To ‘‘de-latch’’ the actuator it must be<br />
reversed.<br />
(For actuator torque adjustment, refer<br />
to [tC ] and [tO] pages 25 and 26)
H6<br />
Torque Switch Status &<br />
IR Setting Tool Comms for<br />
Vandal Proof Applications cont.<br />
IR OPEN SIGNAL NOT PRESENT<br />
Bar OFF = IR Open signal present.<br />
IR CLOSE SIGNAL NOT PRESENT<br />
Bar OFF = IR Close signal present.<br />
IR LOCAL CONTROL DISABLED<br />
Bar OFF = IR Local control enabled.<br />
To operate the actuator locally with the<br />
IR Setting Tool refer to the option<br />
selection screen [Or] Section 9.14 page<br />
62.<br />
[Or] must be selected to [On].<br />
IR REMOTE CONTROL NOT<br />
SELECTED<br />
Bar OFF = IR Remote control<br />
selected (vandal-proof units only).<br />
When actuator is supplied without local<br />
controls for vandal proof applications<br />
the option selection screen [Or] must<br />
be set to [rE] for<br />
Remote operation (refer to Section 9.14<br />
page 62).<br />
H7<br />
Relay 3<br />
Relay 2<br />
Travel Limits,<br />
Centre Column &<br />
Remote Indication Outputs<br />
Relay 4<br />
Relay 1<br />
H7<br />
Open<br />
Limit<br />
Help Screen 7<br />
Close<br />
Actuator<br />
Moving<br />
OPEN LIMIT<br />
Bar ON = Actuator has reached<br />
open limit.<br />
CLOSE LIMIT<br />
Bar ON = Actuator has reached<br />
Close limit.<br />
ACTUATOR MOVING<br />
Bar ON = Actuator moving.<br />
SWITCH CONTACTS S1, S2, S3, S4<br />
Bar ON = S contact is close circuit.<br />
Bar indication is real time and reactive<br />
(refer to Section 9.2 [r1] page 32 for<br />
configuration of ‘‘ S’’contacts).<br />
H3<br />
Actuator Position<br />
Sensing Devices<br />
H8<br />
Position<br />
Sensor A<br />
Help Screen 8<br />
Position<br />
Sensor B<br />
POSITION SENSOR A<br />
Senses output rotation. Used for the<br />
position sensing circuit. Correct<br />
operation of the sensor is indicated by<br />
the bar being ON (and OFF) <strong>12</strong> times<br />
per output revolution. When the motor<br />
is running, ON and OFF bit duration<br />
should be equal.<br />
POSITION SENSOR B<br />
Senses output rotation. Used for the<br />
position sensing circuit. Correct<br />
operation of the sensor is indicated by<br />
the bar being ON (and OFF) <strong>12</strong> times<br />
per output revolution.<br />
When the motor is running, ON and<br />
OFF bit duration should be equal.<br />
For the two sensors, A and B, correct<br />
operation is indicated by the following<br />
truth table.<br />
To observe this function, select manual<br />
operation and turn the actuator<br />
handwheel clockwise, starting with all<br />
sensors OFF:<br />
CLOCKWISE 30 Deg.<br />
Sensor B 0 1 1 0 0<br />
Sensor A 0 0 1 1 0<br />
71
10.2<br />
IrDA Diagnostics &<br />
Config. IQ Insight –<br />
IrDA Comms [Ir]<br />
10.2<br />
IrDA Diagnostics &<br />
Config. IQ Insight –<br />
Cell Phone [Ic]<br />
72<br />
IQ Insight software tool for PC has been<br />
developed to enable the actuator<br />
configuration and onboard datalogger<br />
to be reconfigured and analysed.<br />
To enable communication with IQ<br />
Insight the actuator IrDA interface must<br />
be enabled.<br />
A PC running IQ Insight software may<br />
be located at the actuator or, using a<br />
cell phone link, at a remote site (for<br />
information on IQ Insight see<br />
www.rotork.com).<br />
The default setting for IQ IrDA is [On],<br />
enabling IrDA.<br />
To disable IrDA use the + or - key. The<br />
display will change to [OF].<br />
PRESS THE<br />
KEY.<br />
The displayed option will flash<br />
indicating it has been set.<br />
IQ Insight – IrDA Communication<br />
Enabled.<br />
Using IQ Insight software tool, remote<br />
diagnostics can be enabled using a cell<br />
phone located at the actuator to<br />
transmit and receive data to and from a<br />
remote PC running IQ Insight software.<br />
The cell phone must be IrDA<br />
compatible and have access to a<br />
transmit/receive data line (contact your<br />
cell phone manufacturer and service<br />
provider).<br />
(For information on IQ Insight software<br />
refer to publication E111E).<br />
The actuator IrDA feature must be<br />
enabled (refer to [Ir] IQ Insight – IrDA<br />
Comms).<br />
Before starting, the cell phone must be<br />
configured for "data" as opposed to<br />
‘‘voice’’ and be positioned in direct line<br />
of sight to the actuator display, no<br />
more than 0.5m (2ft) from the display.<br />
The default setting for IQ Insight – Cell<br />
Phone is [OF].<br />
To enable remote diagnostics use the +<br />
or - key. The display will change to<br />
[On].<br />
PRESS THE<br />
KEY.<br />
The actuator display will automatically<br />
return to indicating the current<br />
position.<br />
The actuator will search for a<br />
compatible IrDA device within range for<br />
approximately 30 seconds.<br />
On establishing communication, the<br />
actuator display will indicate the symbol<br />
shown below.
10.2<br />
IrDA Diagnostics &<br />
Config. IQ Insight –<br />
Cell Phone [Ic] cont.<br />
The cell phone must be kept within<br />
range for the duration of the remote<br />
diagnostic session.<br />
If communication is not established or<br />
is lost, after 30 seconds the actuator<br />
will stop searching.<br />
To resume remote cell phone<br />
diagnostics the process outlined above<br />
must be started again.<br />
IQ Insight software is available free of<br />
charge from the Rotork web site,<br />
www.rotork.com, or for sale as a ‘‘pak’’<br />
which includes an IrDA serial link for<br />
convenient connection when using a<br />
notebook PC in the field.<br />
NOTE: The use of a notebook PC or<br />
cell phone with actuators located in<br />
hazardous areas will be subject to local<br />
regulations.<br />
It is the responsibility of the user to<br />
seek guidance and permission.<br />
The IQ Setting Tool is certified<br />
Intrinsically Safe (IS) and therefore can<br />
be used in defined hazardous areas<br />
(refer to page 17).<br />
Diagnostic devices are available for local<br />
configuration, analysis and<br />
transportation of actuator data to other<br />
areas.<br />
Contact Rotork for further information.<br />
73
11<br />
Weights and Measures<br />
74<br />
Oil<br />
Unless specially ordered for extreme<br />
climatic conditions, Rotork actuators<br />
are dispatched with gearcases filled<br />
with SAE 80EP oil suitable for ambient<br />
temperatures ranging from –22°F/<br />
–30°C to 160°F/70°C.<br />
NOTE: Excludes second stage gearbox<br />
if fitted.<br />
Food grade lubricating oil is available<br />
as an alternative: contact Rotork.<br />
Actuator Size Nett Weight Oil Capacity<br />
kg/lbs<br />
litres/pt.-US<br />
IQ10 32/70 0.3/0.63<br />
IQ<strong>12</strong> 32/70 0.3/0.63<br />
IQ18 32/70 0.3/0.63<br />
IQ20 52/115 0.8/1.7<br />
IQ25 52/115 0.8/1.7<br />
IQ35 75/165 1.1/2.3<br />
IQ40 200/441 7.5/15.8<br />
IQ70 215/474 7.0/14.7<br />
IQ90 230/507 7.0/14.7<br />
IQ91 220/485 7.0/14.7<br />
IQ95 230/507 7.0/14.7
BHD<br />
Binary, Hexadecimal and<br />
Decimal Conversion Table<br />
75<br />
BINARY HEX DEC BINARY HEX DEC BINARY HEX DEC BINARY HEX DEC BINARY HEX DEC BINARY HEX DEC BINARY HEX DEC BINARY HEX DEC<br />
0000 0000 00 0 <strong>001</strong>0 0000 20 32 0100 0000 40 64 0110 0000 60 96 1000 0000 80 <strong>12</strong>8 1010 0000 A0 160 1100 0000 C0 192 1110 0000 E0 224<br />
0000 0<strong>001</strong> 01 1 <strong>001</strong>0 0<strong>001</strong> 21 <strong>33</strong> 0100 0<strong>001</strong> 41 65 0110 0<strong>001</strong> 61 97 1000 0<strong>001</strong> 81 <strong>12</strong>9 1010 0<strong>001</strong> A1 161 1100 0<strong>001</strong> C1 193 1110 0<strong>001</strong> E1 225<br />
0000 <strong>001</strong>0 02 2 <strong>001</strong>0 <strong>001</strong>0 22 34 0100 <strong>001</strong>0 42 66 0110 <strong>001</strong>0 62 98 1000 <strong>001</strong>0 82 130 1010 <strong>001</strong>0 A2 162 1100 <strong>001</strong>0 C2 194 1110 <strong>001</strong>0 E2 226<br />
0000 <strong>001</strong>1 03 3 <strong>001</strong>0 <strong>001</strong>1 23 35 0100 <strong>001</strong>1 43 67 0110 <strong>001</strong>1 63 99 1000 <strong>001</strong>1 83 131 1010 <strong>001</strong>1 A3 163 1100 <strong>001</strong>1 C3 195 1110 <strong>001</strong>1 E3 227<br />
0000 0100 04 4 <strong>001</strong>0 0100 24 36 0100 0100 44 68 0110 0100 64 100 1000 0100 84 132 1010 0100 A4 164 1100 0100 C4 196 1110 0100 E4 228<br />
0000 0101 05 5 <strong>001</strong>0 0101 25 37 0100 0101 45 69 0110 0101 65 101 1000 0101 85 1<strong>33</strong> 1010 0101 A5 165 1100 0101 C5 197 1110 0101 E5 229<br />
0000 0110 06 6 <strong>001</strong>0 0110 26 38 0100 0110 46 70 0110 0110 66 102 1000 0110 86 134 1010 0110 A6 166 1100 0110 C6 198 1110 0110 E6 230<br />
0000 0111 07 7 <strong>001</strong>0 0111 27 39 0100 0111 47 71 0110 0111 67 103 1000 0111 87 135 1010 0111 A7 167 1100 0111 C7 199 1110 0111 E7 231<br />
0000 1000 08 8 <strong>001</strong>0 1000 28 40 0100 1000 48 72 0110 1000 68 104 1000 1000 88 136 1010 1000 A8 168 1100 1000 C8 200 1110 1000 E8 232<br />
0000 1<strong>001</strong> 09 9 <strong>001</strong>0 1<strong>001</strong> 29 41 0100 1<strong>001</strong> 49 73 0110 1<strong>001</strong> 69 105 1000 1<strong>001</strong> 89 137 1010 1<strong>001</strong> A9 169 1100 1<strong>001</strong> C9 201 1110 1<strong>001</strong> E9 2<strong>33</strong><br />
0000 1010 0A 10 <strong>001</strong>0 1010 2A 42 0100 1010 4A 74 0110 1010 6A 106 1000 1010 8A 138 1010 1010 AA 170 1100 1010 CA 202 1110 1010 EA 234<br />
0000 1011 0B 11 <strong>001</strong>0 1011 2B 43 0100 1011 4B 75 0110 1011 6B 107 1000 1011 8B 139 1010 1011 AB 171 1100 1011 CB 203 1110 1011 EB 235<br />
0000 1100 0C <strong>12</strong> <strong>001</strong>0 1100 2C 44 0100 1100 4C 76 0110 1100 6C 108 1000 1100 8C 140 1010 1100 AC 172 1100 1100 CC 204 1110 1100 EC 236<br />
0000 1101 0D 13 <strong>001</strong>0 1101 2D 45 0100 1101 4D 77 0110 1101 6D 109 1000 1101 8D 141 1010 1101 AD 173 1100 1101 CD 205 1110 1101 ED 237<br />
0000 1110 0E 14 <strong>001</strong>0 1110 2E 46 0100 1110 4E 78 0110 1110 6E 110 1000 1110 8E 142 1010 1110 AE 174 1100 1110 CE 206 1110 1110 EE 238<br />
0000 1111 0F 15 <strong>001</strong>0 1111 2F 47 0100 1111 4F 79 0110 1111 6F 111 1000 1111 8F 143 1010 1111 AF 175 1100 1111 CF 207 1110 1111 EF 239<br />
0<strong>001</strong> 0000 10 16 <strong>001</strong>1 0000 30 48 0101 0000 50 80 0111 0000 70 1<strong>12</strong> 1<strong>001</strong> 0000 90 144 1011 0000 B0 176 1101 0000 D0 208 1111 0000 F0 240<br />
0<strong>001</strong> 0<strong>001</strong> 11 17 <strong>001</strong>1 0<strong>001</strong> 31 49 0101 0<strong>001</strong> 51 81 0111 0<strong>001</strong> 71 113 1<strong>001</strong> 0<strong>001</strong> 91 145 1011 0<strong>001</strong> B1 177 1101 0<strong>001</strong> D1 209 1111 0<strong>001</strong> F1 241<br />
0<strong>001</strong> <strong>001</strong>0 <strong>12</strong> 18 <strong>001</strong>1 <strong>001</strong>0 32 50 0101 <strong>001</strong>0 52 82 0111 <strong>001</strong>0 72 114 1<strong>001</strong> <strong>001</strong>0 92 146 1011 <strong>001</strong>0 B2 178 1101 <strong>001</strong>0 D2 210 1111 <strong>001</strong>0 F2 242<br />
0<strong>001</strong> <strong>001</strong>1 13 19 <strong>001</strong>1 <strong>001</strong>1 <strong>33</strong> 51 0101 <strong>001</strong>1 53 83 0111 <strong>001</strong>1 73 115 1<strong>001</strong> <strong>001</strong>1 93 147 1011 <strong>001</strong>1 B3 179 1101 <strong>001</strong>1 D3 211 1111 <strong>001</strong>1 F3 243<br />
0<strong>001</strong> 0100 14 20 <strong>001</strong>1 0100 34 52 0101 0100 54 84 0111 0100 74 116 1<strong>001</strong> 0100 94 148 1011 0100 B4 180 1101 0100 D4 2<strong>12</strong> 1111 0100 F4 244<br />
0<strong>001</strong> 0101 15 21 <strong>001</strong>1 0101 35 53 0101 0101 55 85 0111 0101 75 117 1<strong>001</strong> 0101 95 149 1011 0101 B5 181 1101 0101 D5 213 1111 0101 F5 245<br />
0<strong>001</strong> 0110 16 22 <strong>001</strong>1 0110 36 54 0101 0110 56 86 0111 0110 76 118 1<strong>001</strong> 0110 96 150 1011 0110 B6 182 1101 0110 D6 214 1111 0110 F6 246<br />
0<strong>001</strong> 0111 17 23 <strong>001</strong>1 0111 37 55 0101 0111 57 87 0111 0111 77 119 1<strong>001</strong> 0111 97 151 1011 0111 B7 183 1101 0111 D7 215 1111 0111 F7 247<br />
0<strong>001</strong> 1000 18 24 <strong>001</strong>1 1000 38 56 0101 1000 58 88 0111 1000 78 <strong>12</strong>0 1<strong>001</strong> 1000 98 152 1011 1000 B8 184 1101 1000 D8 216 1111 1000 F8 248<br />
0<strong>001</strong> 1<strong>001</strong> 19 25 <strong>001</strong>1 1<strong>001</strong> 39 57 0101 1<strong>001</strong> 59 89 0111 1<strong>001</strong> 79 <strong>12</strong>1 1<strong>001</strong> 1<strong>001</strong> 99 153 1011 1<strong>001</strong> B9 185 1101 1<strong>001</strong> D9 217 1111 1<strong>001</strong> F9 249<br />
0<strong>001</strong> 1010 1A 26 <strong>001</strong>1 1010 3A 58 0101 1010 5A 90 0111 1010 7A <strong>12</strong>2 1<strong>001</strong> 1010 9A 154 1011 1010 BA 186 1101 1010 DA 218 1111 1010 FA 250<br />
0<strong>001</strong> 1011 1B 27 <strong>001</strong>1 1011 3B 59 0101 1011 5B 91 0111 1011 7B <strong>12</strong>3 1<strong>001</strong> 1011 9B 155 1011 1011 BB 187 1101 1011 DB 219 1111 1011 FB 251<br />
0<strong>001</strong> 1100 1C 28 <strong>001</strong>1 1100 3C 60 0101 1100 5C 92 0111 1100 7C <strong>12</strong>4 1<strong>001</strong> 1100 9C 156 1011 1100 BC 188 1101 1100 DC 220 1111 1100 FC 252<br />
0<strong>001</strong> 1101 1D 29 <strong>001</strong>1 1101 3D 61 0101 1101 5D 93 0111 1101 7D <strong>12</strong>5 1<strong>001</strong> 1101 9D 157 1011 1101 BD 189 1101 1101 DD 221 1111 1101 FD 253<br />
0<strong>001</strong> 1110 1E 30 <strong>001</strong>1 1110 3E 62 0101 1110 5E 94 0111 1110 7E <strong>12</strong>6 1<strong>001</strong> 1110 9E 158 1011 1110 BE 190 1101 1110 DE 222 1111 1110 FE 254<br />
0<strong>001</strong> 1111 1F 31 <strong>001</strong>1 1111 3F 63 0101 1111 5F 95 0111 1111 7F <strong>12</strong>7 1<strong>001</strong> 1111 9F 159 1011 1111 BF 191 1101 1111 DF 223 1111 1111 FF 255
<strong>12</strong><br />
IQ Approvals<br />
76<br />
Refer to actuator nameplate for unit specific approval details<br />
European – Hazardous area<br />
EExd IIB T4. ATEX (94/9/EC) II 2GD<br />
CENELEC Norm EN5<strong>001</strong>4 and EN5<strong>001</strong>8<br />
Temperature -20°C to +70°C (-4°F to +158°F).<br />
*Option -30°C to +70°C (-22°F to +158°F).<br />
*Option -40°C to +70°C (-40°F to +158°F).<br />
*Option -50°C to +40°C (- 58°F to +104°F).<br />
EExd IIC T4. ATEX (94/9/EC) II 2GD<br />
CENELEC Norm EN5<strong>001</strong>4 and EN5<strong>001</strong>8.<br />
Temperature -20°C to +70°C (-4°F to +158°F).<br />
EExde IIB T4. ATEX (94/9/EC) II 2GD<br />
CENELEC Norm EN5<strong>001</strong>4, EN5<strong>001</strong>8 and EN5<strong>001</strong>9.<br />
Temperature -20°C to 70°C (-4°F to +158°F).<br />
*Option -30°C to +70°C (-22°F to +158°F).<br />
*Option -40°C to +70°C (-40°F to +158°F).<br />
*Option -50°C to +40°C (-58°F to +104°F).<br />
EExde IIC T4. ATEX (94/9/EC) II 2GD<br />
CENELEC Norm EN5<strong>001</strong>4, EN5<strong>001</strong>8 and EN5<strong>001</strong>9.<br />
Temperature -20°C to +70°C (-4°F to +158°F).<br />
International – Hazardous area<br />
IEC. Exd IIB T4<br />
IEC60079-0 and IEC60079-1 for Exd IIB T4<br />
Temperature -20°C to +60°C (-4°F to +140°F)<br />
IEC. Exd IIC T4<br />
IEC60079-0 and IEC60079-1 for Exd IIC T4<br />
Temperature -20°C to +60°C (-4°F to +140°F)<br />
USA – hazardous Area<br />
FM. Class 1, Division 1, Groups C, D, E, F, G hazardous areas.<br />
Factory Mutual - Explosionproof to NEC Article 500.<br />
Temperature -30°C to +60°C (-22°F to +140°F).<br />
*Option -40°C to +60°C (-40°F to +40°F).<br />
*Alternative for Group B hazardous area. Temperatures as for Groups C and D.<br />
Canada – hazardous Area<br />
CSA EP. Class 1, Division 1, Groups C and D hazardous areas.<br />
Canadian Standard Association - Explosionproof<br />
Temperature -30°C to +70°C -22°F to +158°F).<br />
*Option -50°C to +40°C (-58°F to +104°F).<br />
*Alternative for Group B hazardous area. Temperatures as for Groups C and D.<br />
International Non hazardous<br />
WT: Standard watertight, BS EN 60529 :1992, IP68, 7 metres/72 hours.<br />
Temperature -30°C to +70°C (-22°F to +158°F).<br />
*Option -40°C to +70°C (-40°F to +158°F).<br />
*Option -50°C to +40°C (-58°F to +104°F).<br />
US – Non hazardous<br />
NEMA 4, 4X and 6.<br />
Temperature -30°C to +70°C (-22°F to +158°F).<br />
*Option -40°C to +70°C (-40°F to +158°F).<br />
*Option -50°C to +40°C (-58°F to +104°F).<br />
Canada – Non hazardous<br />
CSA WT: Canadian Standard Association –Watertight.<br />
Wiring and components complying with CSA Enclosure 4 and 4X.<br />
Temperature -30°C to +70°C (-22°F to +158°F).<br />
*Option -40°C to +70°C (-40°F to +158°F).<br />
*Option -50°C to +40°C (-58°F to +104°F).<br />
Rotork can supply actuators to national standards not listed above.<br />
For details please contact Rotork.
If your Rotork actuator has been correctly<br />
installed and sealed, it will give years of<br />
trouble-free service.<br />
Should you require technical assistance or<br />
spares, Rotork guarantees the best service<br />
in the world. Contact your local Rotork<br />
representative or the factory direct at the<br />
address on the nameplate, quoting the<br />
actuator type and serial number.<br />
Algeria<br />
Tel: + 213 6 37 4854<br />
Fax: + 213 6 37 2613<br />
E-Mail:<br />
Argentina<br />
Tel: +54 11 4755 5560/4753 75<strong>33</strong><br />
Fax: +54 11 4755 5560/4753 75<strong>33</strong><br />
E-Mail: metalart@ciudad.com.ar<br />
Australia<br />
Rotork Company HQ<br />
Tel: +61 3 53 381566<br />
Fax: +61 3 53 381570<br />
E-Mail: mail@rotork.com.au<br />
Australia<br />
Brisbane<br />
Rotork Company<br />
Tel: +61 7 <strong>33</strong>73 2050<br />
Fax: +61 7 3255 5388<br />
E-Mail:<br />
Australia<br />
Sydney<br />
Rotork Company<br />
Tel: +61 2 9 567 2735<br />
Fax: +61 2 9 567 2739<br />
E-Mail:<br />
Australia<br />
Western Australia Agent<br />
Tel: +61 8 9314 1827<br />
Fax: +61 8 9314 1837<br />
E-Mail: sales@pipact.com.au<br />
Austria<br />
Agent<br />
Tel: +43 7224 66008<br />
Fax: +43 7224 66008<br />
E-Mail: kilches_keg@magnet.at<br />
Bahrain<br />
Rotork Regional Office<br />
Tel: +973 791 976<br />
Fax: +973 791 976<br />
E-Mail: hmrotork@batelco.com.bh<br />
Bahrain<br />
Agent<br />
Tel: +973 727790<br />
Fax: +973 727811<br />
E-Mail: aeradio@batelco.com.bh<br />
Belgium<br />
Agent<br />
Tel: +32 2 726<strong>33</strong>00<br />
Fax: +32 2 72636<strong>33</strong><br />
E-Mail: prodim@brutele.be<br />
Bolivia<br />
Agent<br />
Tel: +591 3 532615<br />
Fax: +591 3 552528<br />
E-Mail: inca@roble.entelnet.bo<br />
Brazil<br />
Agent<br />
Tel: +55 71 235 6588<br />
Fax: +55 71 235 3299<br />
E-Mail: bahia@fluxopet.com.br<br />
Brunei<br />
Agent<br />
Tel: +673 3 <strong>33</strong>6<strong>12</strong>2<br />
Fax: +673 3 <strong>33</strong>6142<br />
E-Mail: cnets@brunet.bn<br />
Canada<br />
Rotork Company HQ<br />
Tel: +1 403 569 9455<br />
Fax: +1 403 569 9414<br />
E-Mail: info@rotork.ca<br />
Canada<br />
Edmonton<br />
Rotork Company<br />
Tel: +1 780 449 6663<br />
Fax: +1 780 449 6578<br />
E-Mail: info@rotork.ca<br />
Canada<br />
Montreal<br />
Rotork Company<br />
Tel: +1 514 355 3003<br />
Fax: +1 514 355 0024<br />
E-Mail: info@rotork.ca<br />
Canada<br />
S.W. Ontario<br />
Rotork Company<br />
Tel: +1 519 <strong>33</strong>7 9190<br />
Fax: +1 519 <strong>33</strong>7 <strong>001</strong>7<br />
E-Mail: info@rotork.ca<br />
Canada<br />
Toronto<br />
Rotork Company<br />
Tel: +1 905 602 5665<br />
Fax: +1 905 602 5669<br />
E-Mail: info@rotork.ca<br />
Caribbean (Puerto Rico)<br />
Agent<br />
Tel: +1 787 751 4415<br />
Fax: +1 787 250 1842<br />
E-Mail:<br />
Chile<br />
Agent<br />
Tel: +56 2 441 10<strong>33</strong>/699 2<strong>001</strong><br />
Fax: +56 2 441 1023<br />
E-Mail: valvulas@ineco.cl<br />
China<br />
North/Beijing<br />
Rotork Company<br />
Tel: +86 10 6497 4142/94590<br />
Fax: +86 10 6499 4591<br />
E-Mail: rotorkbj@public3.bta.net.cn<br />
China<br />
Shanghai<br />
Rotork Company<br />
Tel: +86 21 6478 5015<br />
Fax: +86 21 6478 5035<br />
E-Mail: rotorksh@public6.sta.net.cn<br />
China<br />
Sichuan<br />
Rotork Branch<br />
Tel: +86 28 6521191<br />
Fax: +86 28 6521056<br />
E-Mail: rotorkcd@mail.sc.cninfo.net<br />
China (South)<br />
Guangzhou<br />
Rotork Branch<br />
Tel: +86 20 81320500<br />
Fax: +86 20 81320499<br />
E-Mail:<br />
rotorkgz@public.guangzhou.gd.cn<br />
China<br />
Hong Kong<br />
Rotork Company<br />
Tel: +852 2520 2390<br />
Fax: +852 2528 9746<br />
E-Mail:rotorkhk@netvigator.com<br />
Colombia<br />
Agent Main Office<br />
Tel: +57 1 621 27 40<br />
Fax: +57 1 621 25 61<br />
E-Mail: autom2@col1.telecom.com.co<br />
Costa Rica<br />
Agent<br />
Tel: +506 228 8630/1<br />
Fax: +506 289 4350<br />
E-Mail:eiomega@sol.racsa.co.cr<br />
Croatia<br />
Agent<br />
Tel: +385 1 4 577 217<br />
Fax: +385 1 4 577 220<br />
E-Mail:<br />
Cyprus<br />
Agent<br />
Tel: +357 2 434131<br />
Fax: +357 2 4<strong>33</strong>416<br />
E-Mail: ltdinfo@stavrinides.com.cy<br />
Czech Republic<br />
Agent<br />
Tel: +420 5 48321534<br />
Fax: +420 5 48216240<br />
E-Mail:
Denmark<br />
Agent<br />
Tel: +45 32531777<br />
Fax: +45 32530504<br />
E-Mail:<br />
Ecuador<br />
Agent<br />
Tel: +593 2 222 585<br />
Fax: +593 2 569 950<br />
E-Mail: ecuador@cadrai.com<br />
Egypt<br />
Agent<br />
Tel: +20 2 2574830/2573456<br />
Fax: +20 2 2575695<br />
E-Mail: mamer@pyramid.com.eg<br />
Finland<br />
Agent<br />
Tel: +358 9 350 7410<br />
Fax: +358 9 374 3590<br />
E-Mail:<br />
France<br />
Rotork Company<br />
Tel: +<strong>33</strong> 1 43 11 15 50<br />
Fax: +<strong>33</strong> 1 48 35 42 54<br />
E-Mail: (name)@rotork.fr<br />
Germany<br />
Rotork Company<br />
Tel: +49 2103 95876<br />
Fax: +49 2103 54090<br />
E-Mail: info@rotork.de<br />
Greece<br />
Agent<br />
Tel: +30 1 65494<strong>33</strong>/6536610<br />
Fax: +30 1 6517810<br />
E-Mail: melco@otenet.gr<br />
Hungary<br />
Agent<br />
Tel: +36 76 495932<br />
Fax: +36 76 495936<br />
E-Mail: galatea@externet.hu<br />
India<br />
Bangalore<br />
Rotork Factory<br />
Tel: +91 80 8395576<br />
Fax: +91 80 8391601<br />
E-Mail: rotorkblr@vsnl.com<br />
India<br />
Calcutta<br />
Rotork Branch<br />
Tel: +91 <strong>33</strong> 282 <strong>33</strong>06<br />
Fax: +91 <strong>33</strong> 282 3473<br />
E-Mail: rotorkcal@vsnl.com<br />
India<br />
Chennai<br />
Rotork Company<br />
Tel: +91 44 625 4219/625 8136<br />
Fax: +91 44 625 7108<br />
E-Mail: rotork@vsnl.com<br />
India<br />
Mumbai<br />
Rotork Branch<br />
Tel +91 22 5584578<br />
Fax: +91 22 5584540<br />
E-Mail: rotorkbom@vsnl.com<br />
India<br />
New Delhi<br />
Rotork Branch<br />
Tel +91 11 5616305<br />
Fax: +91 11 5502840<br />
E-Mail: rotorkdel@vsnl.com<br />
Indonesia<br />
Rotork Company<br />
Tel +62 21 5806764<br />
Fax: +62 21 58<strong>12</strong>757<br />
E-Mail: rotork@indosat.net.id<br />
Ireland (Northern)<br />
Agent<br />
Tel: +44 28 90 841004<br />
Fax: +44 28 90 841007<br />
E-Mail: flotecsales@aol.com<br />
Ireland (Southern)<br />
Dublin Agent<br />
Tel: +353 1 2952182<br />
Fax: +353 1 2953713<br />
E-Mail: pkelly@pli.ie<br />
Italy<br />
Rotork Company<br />
Tel: +39 02 4570<strong>33</strong>00<br />
Fax: +39 02 4570<strong>33</strong>01<br />
E-Mail: rotork.italia@rotork.it<br />
Japan<br />
Osaka<br />
Rotork Company<br />
Tel: +81 728 35 7555<br />
Fax: +81 728 35 7548<br />
E-Mail:<br />
Japan<br />
Tokyo<br />
Rotork Company HQ<br />
Tel: +81 3 3294 8551<br />
Fax: +81 3 3294 6460<br />
E-Mail: mail@rotork.co.jp<br />
Jordan<br />
Agent<br />
Tel: +962 6 581 9982<br />
Fax: +962 6 582 5818<br />
E-Mail: tcops@go.com.jo<br />
Korea (South)<br />
Rotork Company<br />
Tel: +82 <strong>33</strong>1 265 0962<br />
Fax: +82 <strong>33</strong>1 265 1369<br />
E-Mail: rotork@unitel.co.kr<br />
Kuwait<br />
Agent<br />
Tel: +965 241 5921<br />
Fax: +965 241 2485<br />
E-Mail: Unetcon@hotmail.com<br />
Latvia<br />
Agent<br />
Tel: +371 7 315086/315087<br />
Fax: +371 7 315084<br />
E-Mail: rino@mailbox.neonet.lv<br />
Libya<br />
Agent<br />
Tel: +218 21 47 72628/78598<br />
Fax: +218 21 47 72782<br />
E-Mail: cpsi@go.com.jo<br />
Lithuania<br />
Agent<br />
Tel: +370 7 202410<br />
Fax: +370 7 207414<br />
E-Mail: agava@kaunas.aiva.lt<br />
Malaysia<br />
East Malaysia<br />
Agent<br />
Tel: +60 85 410079<br />
Fax: +60 85 419484<br />
E-Mail:<br />
Malaysia<br />
West Malaysia<br />
Rotork Company<br />
Tel: +60 3 7880 9198<br />
Fax: +60 3 7880 9189<br />
E-Mail: rotork@rotork.com.my<br />
Mexico<br />
Agent<br />
Tel: +52 5 559 2959/2777<br />
Fax: +52 5 575 1092<br />
E-Mail: rotork@iwm.com.mx<br />
Netherlands<br />
Rotork Company<br />
Tel: +31 10 414 6911<br />
Fax: +31 10 414 4750<br />
E-Mail: sales@rotork.nl<br />
New Zealand<br />
Auckland<br />
Agent North Island<br />
Tel: +64 9 634 0456<br />
Fax: +64 9 625 2678<br />
E-Mail:<br />
New Zealand<br />
Christchurch<br />
Agent South Island –<br />
Head Office<br />
Tel: +64 3 353 4665<br />
Fax: +64 3 353 4666<br />
E-Mail:
New Zealand<br />
Wellington<br />
Agent North Island<br />
Tel: +64 4 477 5070<br />
Fax: +64 4 477 5049<br />
E-Mail:<br />
Nigeria<br />
Agent<br />
Tel: +234 1 4522955/523225<br />
Fax: +234 1 4522887<br />
E-Mail: cakasa3@linkserve.com.ng<br />
Norway<br />
Stavanger<br />
Agent HQ<br />
Tel: +47 51 844204<br />
Fax: +47 51 844102<br />
E-Mail:<br />
Norway<br />
Bergen<br />
Agent Sales Office/Workshop<br />
Tel: +47 56 3<strong>12</strong>900<br />
Fax: +47 56 3<strong>12</strong>910<br />
E-Mail:<br />
Norway<br />
Oslo<br />
Agent Sales Office<br />
Tel: +47 67 906<strong>12</strong>0<br />
Fax: +47 67 906472<br />
E-Mail:<br />
Oman<br />
Agent<br />
Tel: +968 601438<br />
Fax: +968 699446<br />
E-Mail:techsales@gpsoman.com<br />
Pakistan<br />
Agent<br />
Tel: +92 21 5861509/5861510<br />
Fax: +92 21 5874674<br />
E-Mail: tumair@attglobal.net<br />
Peru<br />
Agent<br />
Tel: +51 1 <strong>33</strong>0 7728<br />
Fax: +51 1 <strong>33</strong>0 7728<br />
E-Mail:<br />
autinsa@mail.cosapidata.com.pe<br />
Philippines<br />
Manila Agent<br />
Tel: +63 2 73<strong>12</strong>610/7326<strong>12</strong>5<br />
Fax: +63 2 73<strong>12</strong>610<br />
E-Mail:resi@evoserve.com<br />
Poland<br />
Agent<br />
Tel: +48 22 723 1770<br />
Fax: +48 22 723 1780<br />
E-Mail:<br />
Portugal<br />
Agent<br />
Tel: +351 21 486 43 25<br />
Fax: +351 21 483 57 17<br />
E-Mail:Lca.Lcaeng@clix.pt<br />
Qatar<br />
Agent<br />
Tel: +974 44 19603<br />
Fax: +974 44 19604<br />
E-Mail:petrotec@qatar.net.qa<br />
Romania<br />
Agent<br />
Tel: +40 44 114187/114664<br />
Fax: +40 44 114664 Manual<br />
E-Mail:technoplus@technoplus.ro<br />
Russia<br />
Rotork Company<br />
Tel: +7 095 229 24 63<br />
Fax: +7 503 234 91 25<br />
E-Mail: rotork.russia@mtu-net.ru<br />
Saudi Arabia<br />
Agent/J.V.<br />
Tel: +966 3 8<strong>33</strong> 1661<br />
Fax: +966 3 8<strong>33</strong> 9369<br />
E-Mail:<br />
Saudi Arabia<br />
Rotork Company<br />
Tel: +966 3 858 1464<br />
Fax: +966 3 858 1464<br />
E-Mail: rotork@concept.net.sa<br />
Singapore<br />
Rotork Company<br />
Tel: +65 457<strong>12</strong><strong>33</strong><br />
Fax: +65 4576011<br />
email:<br />
South Africa<br />
Rotork Company<br />
Tel: +27 11 453 9741-3<br />
Fax: +27 11 453 9894<br />
E-Mail:<br />
Spain<br />
Rotork Company<br />
Tel: +34 94 676 60 11<br />
Fax: +34 94 676 60 18<br />
E-Mail:rotork@rotork.es<br />
Sweden<br />
Partille<br />
Agent Head Office<br />
Tel: +46 53 3763952<br />
Fax: +46 53 3763955<br />
E-Mail:alnab@alnab.se<br />
Sweden<br />
Saffle<br />
Agent Local Office<br />
Tel: +46 5<strong>33</strong> 763952<br />
Fax: +46 5<strong>33</strong> 763955<br />
E-Mail:alnab@alnab.se<br />
Syria<br />
Agent<br />
Tel: +963 31 230 289<br />
Fax: +963 31 237 867<br />
E-Mail:<br />
Taiwan<br />
Agent<br />
Tel: +886 2 2577-1717<br />
Fax: +886 2 2577-5588<br />
E-Mail:jerdiing@ms24.hinet.net<br />
Thailand<br />
Rotork Company<br />
Tel: +66 2 272 7165-6<br />
Fax: +66 2 272 7167<br />
E-Mail:mail@rotork.co.th<br />
Trinidad<br />
Agent<br />
Tel: +1 868 6524889/6523422<br />
Fax: +1 868 6522651<br />
E-Mail:trinval@tstt.net.tt<br />
Turkey<br />
Agent<br />
Tel: +90 216 327 34 71<br />
Fax: +90 216 327 34 72<br />
E-Mail:orhant@omasteknik.com<br />
U.K.<br />
Head Office,<br />
Tel: +44 <strong>12</strong>25 7<strong>33</strong>200,<br />
Fax +44 <strong>12</strong>25 <strong>33</strong>3467<br />
E-mail: mail@rotork.co.uk<br />
United Arab Emirates<br />
Agent<br />
Tel: +971 2 632 5111<br />
Fax: +971 2 621 1934<br />
E-Mail: unitech@emirates.net.ae<br />
United States of America<br />
Rotork Company HQ<br />
Rochester<br />
Tel: +1 716 328 1550<br />
Fax: +1 716 328 5848<br />
E-Mail:info@rotork.com<br />
United States of America<br />
Rotork Company<br />
Duluth<br />
Tel: +1 770 623 6301<br />
Fax: +1 770 623 6<strong>12</strong>4<br />
E-Mail:miguel.lopez@rotork.com<br />
United States of America<br />
Chicago & Mid West<br />
Rotork Company<br />
Tel: +1 815 436 1710<br />
Fax: +1 815 436 1789<br />
E-Mail:
United States of America<br />
Houston<br />
Rotork Company<br />
Tel: +1 713 7825888<br />
Fax: +1 713 7828524<br />
E-Mail:<br />
United States of America<br />
New York City<br />
Rotork Company<br />
Tel: +1 716 328 1550<br />
Fax: +1 716 328 5848<br />
E-Mail:dave.littlejohns@rotork.com<br />
United States of America<br />
North East<br />
Rotork Company<br />
Tel: +1 814 835 8349<br />
Fax: +1 814 835 8909<br />
E-Mail:<br />
United States of America<br />
Northern California<br />
Rotork Company<br />
Tel: +1 707 769 4880<br />
Fax: +1 707 769 4888<br />
E-Mail:<br />
United States of America<br />
Northwest Area<br />
Rotork Company<br />
Tel: +1 253 838 5500<br />
Fax: +1 253 838 5400<br />
E-Mail: info@rotork.com<br />
United States of America<br />
Philadelphia<br />
Rotork Company<br />
Tel: +1 609 223 1926<br />
Fax: +1 609 223 90<strong>12</strong><br />
E-Mail: charlie.haynes@rotork.com<br />
United States of America<br />
South Central Region<br />
Rotork Company<br />
Tel: +1 972 459 4957<br />
Fax: +1 972 745 2041<br />
E-Mail: skip.kuehn@rotork.com<br />
United States of America<br />
Southern California<br />
Rotork Company<br />
Tel: +1 949 348 2913<br />
Fax: +1 707 769 4888<br />
E-Mail:<br />
Venezuela & N. Antilles<br />
Rotork Company HQ<br />
Tel: +58 2 2<strong>12</strong> 5232/4208<br />
Fax: +58 2 2<strong>12</strong> 8050<br />
E-Mail: rotorkvz@cantv.net<br />
Venezuela & N. Antilles<br />
Cagua<br />
Rotork Company<br />
Tel: +58 4 4635911<br />
Fax: +58 4 4635911<br />
E-Mail:<br />
Venezuela & N. Antilles<br />
Maracaibo<br />
Rotork Company<br />
Tel: +58 61 579315/492611<br />
Fax: +58 61 579315<br />
E-Mail:rotorkvgz@cantv.net<br />
Venezuela & N. Antilles<br />
Puerto La Cruz<br />
Rotork Company<br />
Tel: +58 281 268 0759<br />
Fax: +58 281 266 3554<br />
E-Mail:<br />
Vietnam<br />
Agent<br />
Tel: + 84 8 84 62525<br />
Fax: + 84 8 8423218<br />
E-Mail:info@vam-net.com<br />
Yemen<br />
Agent<br />
Tel: +967 1 272988<br />
Fax: +967 1 271890<br />
E-Mail:ssl@y.net.ye
Heading<br />
ATTENTION: RED PLASTIC PLUGS IN CONDUIT ENTRIES ARE FOR TRANSIT ONLY.<br />
FOR LONG TERM PROTECTION FIT SUITABLE METAL PLUGS.<br />
ATTENZIONE: I TAPPI IN PLASTICA ROSSA PER L'ENTRATA CAVI SONO SOLO<br />
TEMPORANEI. PER UNA PROTEZIONE PERMANENTE PREGO SOSTITUIRLI CON<br />
APPOSITI TAPPI METALLICI.<br />
ATENCION: LOS TAPONES ROJOS DE PLASTICO EN LAS ENTRADAS DE CABLE<br />
SON UNICAMENTE PARA TRANSPORTE. PARA PROTECCION PERMANENTE<br />
COLOCAR TAPONES METALICOS APROPIADOS.<br />
ACHTUNG: DIE ROTEN PLASTIKSTOPFEN SIND NUR FÜR DEN TRANSPORT<br />
GEEIGNET. FÜR DAVERHAFTEN SCHUTZ SIND DIESE GEGEN GEEIGNETE<br />
BLINDSTOPFEN AUSZÜTAUSCHEN.<br />
ATTENTION: LES BOUCHONS PLASTIQUES ASSURENT UNE PROTECTION<br />
TEMPORAIRE. POUR UNE PROTECTION DEFINITIVE UTILISER DES BOUCHONS<br />
METALLIQUES.<br />
As we are continually developing our products,<br />
the design of Rotork actuators is subject to<br />
change without notice. The latest product and<br />
technical information is available at our<br />
website: www.rotork.com.<br />
The name Rotork is a registered trade mark.<br />
Rotork recognises all registered trade marks.<br />
Published and produced in the U.K. by Rotork Controls Ltd.