
You also want an ePaper? Increase the reach of your titles
YUMPU automatically turns print PDFs into web optimized ePapers that Google loves.
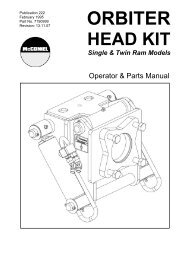
Publication No. 438<br />
September 2003<br />
Part No. 41570.38<br />
McCONNEL<br />
Dynatronic & Hydraulic<br />
FRONT-END LOADERS<br />
<strong>Operator</strong>’s Instruction Manual
IMPORTANT<br />
VERIFICATION OF WARRANTY REGISTRATION<br />
(Applies to UK Machines only)<br />
UK DEALER WARRANTY INFORMATION & REGISTRATION VERIFICATION<br />
It is imperative that the selling dealer registers this machine with <strong>McConnel</strong> Limited within 7<br />
days of delivery to the end user – failure to do so may affect the validity of the machine<br />
warranty.<br />
To register a machine go to the <strong>McConnel</strong> Limited web site at www.mcconnel.com, log on<br />
to ‘DEALER INSIDE’ and select the ‘Machine Registration button’ which can be found in<br />
the Service Section of the site. Confirm to the customer that the machine has been<br />
registered in the section below.<br />
Should you experience any problems registering a machine in this manner please contact<br />
the <strong>McConnel</strong> Service Department on 01584 875848.<br />
Registration Verification (UK Machines)<br />
Dealer Name:<br />
Dealer Address:<br />
……………………………………………………………………………………..<br />
…………………………………………………………………………………..<br />
Customer Name:<br />
…………………………………………………………………………………<br />
Date of Warranty Registration:<br />
……/……/...…… Dealer Signature: ………………………<br />
NOTE TO CUSTOMER / OWNER<br />
Please ensure that the above section above has been completed and signed by the selling<br />
dealer to verify that your machine has been registered with <strong>McConnel</strong> Limited.
EC DECLARATION OF CONFORMITY<br />
Conforming to EEC Directive 98/37/EC*<br />
We,<br />
McCONNEL LIMITED,<br />
Temeside Works, Ludlow,<br />
Shropshire, SY8 1JL. England.<br />
Declare under our sole responsibility that:<br />
Tractor Mounted Front-end Loader<br />
The product (type) ……………………………………………………………………<br />
………………………………………………………………………………………….<br />
Product Code …………………………………………………………………………..<br />
FX01, FX02, FX03, FX04, FX05, FX08, FX10, FX12, FX15, FX45, FX65, FX85<br />
Serial No. & Date ……………………………………. Type …………………………<br />
Manufactured by the above company/* ………………………………………<br />
………………………………………………………………………………………….<br />
(* insert business name and full address if not stated above)<br />
Complies with the required provisions of the Machinery Directive 98/37/EC*,<br />
previously Directive 89/392/EEC as amended by Directives 91/368/EEC, 93/44/EEC<br />
and 93/68/EEC.<br />
The machinery directive is supported by;<br />
• BS EN ISO 12100:2003 Safety of Machinery. This standard is made up of two<br />
parts; Part 1 Terminology, methodology, Part 2 Technical Specifications.<br />
• BS EN 1050 Safety of machinery - Principles of risk assessment.<br />
• and other national standards associated with its design and construction as<br />
listed in the Technical File.<br />
The Machinery Directive is fully implemented into UK law by means of the Supply<br />
of Machinery (Safety) Regulations 1992 (SI 1992/3073) as amended by The Supply<br />
of Machinery (Safety) (Amendment) Regulations 1994 (SI 1994/2063).<br />
Signed …………………………..……………………………………………………...<br />
on behalf of McCONNEL LIMITED<br />
Responsible Person<br />
………………………………………………………………………………………….<br />
General Manager January 2005<br />
Status<br />
Date
Contents<br />
Page No.<br />
Introduction 1.<br />
Features – ‘S’ Series Models 2.<br />
Features – ‘Prestige’ Series Models 3.<br />
Specifications 4.<br />
Safety Information 5.<br />
Storage of the Loader 9.<br />
Tractor & Loader Stability 9.<br />
Lifting of the Machine 10.<br />
Fitting Kits 11.<br />
Loader Parts 12.<br />
Operating ‘Do’s and Don’ts’ 13.<br />
High Voltage Cable 14.<br />
Overhead Obstructions 14.<br />
Working on Public Highways 14.<br />
Maintenance 15.<br />
Operation of the Loader – Dynatronic Models 16.<br />
Operation of the Loader– Hydraulic Models 17.<br />
Fitting the Loader to the Tractor 18.<br />
Fitting Problems 19.<br />
Changing Implements – Disconnection 19.<br />
Changing Implements – Connection 20.<br />
Carriage Linkage 21.<br />
Implement Usage – Bale Handling 21.<br />
Disconnecting the Loader from the Tractor 22.<br />
Problems – Causes and Solutions 23.<br />
Fitting of Accessories and Options 25.
Introduction<br />
Thank you for purchasing a <strong>McConnel</strong>-Faucheux Loader.<br />
Over 30 years experience in Handling Equipment Manufacturing has gone into the<br />
design, development and building of this machine to ensure you receive many years<br />
of reliable service.<br />
Manufactured in a modern factory using high performance production equipment this<br />
machine has undergone stringent individual quality checks at the end of the assembly<br />
line in order to guarantee you total quality.<br />
Before using your loader, read this Instruction Manual carefully – it has been<br />
designed to provide you with all the important information you need to work in a safe<br />
and efficient manner to get optimum performance from your machine.<br />
The endurance tests to which our loaders have been subjected have allowed us to<br />
grant you a:<br />
• 1-year guarantee against any damage to the loader’s arm under normal<br />
usage.<br />
• 1-year guarantee for mechanical parts.<br />
• 1-month guarantee for hydraulic parts.<br />
This guarantee takes effect from the date the loader is received by the customer<br />
provided that: -<br />
− Only original <strong>McConnel</strong>/Faucheux parts and implements have been used.<br />
− A fitting reference has been agreed by <strong>McConnel</strong>.<br />
− Only ‘normal usage’ of equipment has taken place.<br />
If parts are exchanged, the expenses incurred in fitting and for carriage both to and<br />
from the destination will be charged to the customer. In the case of litigation, the<br />
Courts of England and Wales shall have exclusive jurisdiction.<br />
1
Features – ‘S’ Series<br />
Standard Features -<br />
● Available in 3 models – 45s, 65s & 85s.<br />
● Suitable for tractors from 40hp to 95hp.<br />
● Non-parallel Boom Arm.<br />
● Lift Capacity from 1050kg to 2000kg.<br />
● Lift Heights of 3.2m to 3.85m.<br />
● Joystick Control.<br />
● Adjustable Parking Legs.<br />
● Level Indicator.<br />
● Drive in / Drive out pick up hitch.<br />
● Tractor fitting kit.<br />
● 2 in 1 Fitting Kit.<br />
● Subframe to rear axle.<br />
● Optimum visibility of Implement.<br />
● Easy access to engine.<br />
● Quick attachment hitch.<br />
● High Tensile steel beam.<br />
● Double wired hoses for reliability.<br />
● Quick dump rams, constant speed.<br />
Optional Features -<br />
HYDRAULIC OPTIONS:<br />
■ 3 rd Service.<br />
■ 4 th Service.<br />
■ 5 th Service.<br />
CONTROL OPTIONS:<br />
■ Pro-glide.<br />
■ Electro-glide.<br />
■ Auto-glide.<br />
■ Dynafix.<br />
LOADER OPTIONS:<br />
■ Acti Soft.<br />
■ Hydro Doc.<br />
■ Multicoupler.<br />
2
Features – Prestige Series<br />
Standard Features -<br />
● Available in 4 models – P80, P100, P120 & P150.<br />
● Suitable for tractors from 60hp to 170hp.<br />
● Lift Capacity from 1500kg to 2900kg.<br />
● Lift Heights of 3.88m to 4.30m.<br />
● Parallel lift system.<br />
● Joystick Control.<br />
● Pivot post with latch, self-automatic locking system.<br />
● Adjustable Parking Legs.<br />
● Level Indicator.<br />
● Automatic Drive in / Drive out.<br />
● Tractor fitting kit.<br />
● 2 in 1 Fitting Kit.<br />
● Subframe to rear axle.<br />
● Optimum visibility of Implement.<br />
● Easy access to engine.<br />
● High Tensile steel beam.<br />
● Double wired hoses for reliability.<br />
● Quick dump rams, constant speed.<br />
Optional Features -<br />
HYDRAULIC OPTIONS:<br />
■ 3 rd Service.<br />
■ 4 th Service.<br />
■ 5 th Service.<br />
CONTROL OPTIONS:<br />
■ Pro-glide.<br />
■ Electro-glide.<br />
■ Auto-glide.<br />
■ Dynafix.<br />
LOADER OPTIONS:<br />
■ Acti Soft.<br />
■ Hydro Doc.<br />
■ Multicoupler.<br />
3
Specifications<br />
‘S’ Series Loaders<br />
45s 65s 85s<br />
Tractor (hp) 40-65 50-85 65-95<br />
Lift Height (m) A 3.20 3.70 3.85<br />
Dump Angle B 60° 70° 80°<br />
Crowd Angle C 45° 40° 45°<br />
Lift capacity (kg) Q¹ 1050 1500 2000<br />
Tear out Force (kg) Q² 1300 2000 2300<br />
Digging Depth (m) D 0.15 0.15 0.15<br />
Prestige Series Loaders<br />
P80 P100 P120 P150<br />
Tractor (hp) 60-85 80-110 90-130 110-170<br />
Lift Height (m) A 3.88 3.90 4.10 4.30<br />
Dump Angle B 55° 50° 55° 54°<br />
Crowd Angle C 50° 46° 47° 45°<br />
Lift capacity (kg) Q¹ 1500 2000 2500 2900<br />
Tear out Force (kg) Q² 1990 2700 2350 3200<br />
Digging Depth (m) D 0.15 0.15 0.15 0.15<br />
4
SAFETY<br />
INFORMATION<br />
Safety Advice<br />
Please ensure you read and fully understand the following information<br />
regarding the safe use of this loader, it is your responsibility to ensure not only<br />
your own safety but also the safety of others. Failure to observe and adhere to<br />
these instructions will discharge <strong>McConnel</strong> Limited from any responsibility in<br />
the event of an accident and may result in the cancellation of any guarantee.<br />
Although the information given here covers a wide range of safety subjects, it is<br />
impossible to predict every eventuality that can occur under differing circumstances<br />
whilst operating this machine. No advice given here can replace ‘good common<br />
sense’ and ‘total awareness’ at all times, but will go a long way towards the safe use<br />
of your <strong>McConnel</strong> machine.<br />
5
BEFORE USING THIS MACHINE YOU MUST:<br />
▲ ALWAYS ensure you have read and fully understood the <strong>Operator</strong>’s Manual<br />
before attempting to operate the machine.<br />
▲ ALWAYS ensure all operators are suitably qualified in the safe use and operation<br />
of this machine and that they have read and fully understood all information<br />
contained in this <strong>manual</strong>.<br />
▲ ALWAYS inspect the machine on every occasion prior to use to ensure all<br />
attachments, implements and hydraulic fittings are fitted correctly and securely.<br />
Visually inspect the hydraulic hoses for signs of wear or damage – replace<br />
immediately if damage is found. DANGER; Never check for oil leaks in hydraulic<br />
hoses with your hand – use a piece of cardboard.<br />
▲ ALWAYS be aware of the height and reach capability of the machine - especially<br />
when working near bridges, buildings and power lines etc.<br />
▲ ALWAYS adhere to the recommended tyre pressures stated by the manufacturer.<br />
▲ To improve the stability of the tractor and the usefulness of the loader, the use of<br />
rear ballast of a maximum weight of 500kg is advised.<br />
Rear ballast weight on hydraulic lifting or on fixed arms.<br />
Inflating the tyres with water, weighting wheels, twin<br />
wheels.<br />
▲ ALWAYS ensure a safe working environment:<br />
Inspect the working area carefully before beginning work - take note of any<br />
possible hazards in the area such as electric wires, telephone wires, beams, posts,<br />
roofs, etc. and ensure the machine is kept at a safe distance from these hazards<br />
especially in the case of electric wires and Overhead Power Lines – it is<br />
recommended that you contact the Health & Safety Executive and/or your Local<br />
Electricity Company to seek advice on ’Safe Working Distances’ before<br />
attempting to work in the vicinity of Power Lines.<br />
▲ ALWAYS sit in the driving seat before starting the tractor and working the loader.<br />
▲ ALWAYS ensure the loader is empty and in the raised position when transporting<br />
the machine on the road or Public Highway and that the tines on the fork are<br />
covered with a protective sleeve. DANGER: Operate with extreme caution when<br />
transporting under low bridges.<br />
▲ ALWAYS ensure that bystanders and passers-bys’ are kept at a safe distance. In<br />
some cases this may be necessitate stopping work whilst they pass and only<br />
recommence once they are at a safe distance.<br />
6
▲ ALWAYS lower the arms and implements of the machine to rest on the ground<br />
when the loader is not being used – even for a short period of time.<br />
▲ Work with extreme care when handling loose materials such as; rocks, roots,<br />
boxes, tins, tree trunks, etc.<br />
▲ ALWAYS lower the loader as close as possible to the ground when travelling on<br />
rough terrain or steep ground, with or without a load.<br />
▲ ALWAYS ensure before you attempt any repairs or maintenance on the tractor<br />
that the engine is switched off, the key pocketed, and the hydraulic circuit between<br />
the tractor and the loader is disconnected.<br />
▲ ALWAYS work on the tractor with the loader lowered and the implement resting<br />
on level firm ground without any pressure being exerted on it – if the loader gets<br />
in the way, remove it, disconnection and reconnection is a simple rapid procedure.<br />
▲ ALWAYS ensure after changing an implement that you ‘crowd’ it fully and<br />
double check that the pins of the frame are firmly attached to it.<br />
▲ ALWAYS ensure before disconnecting the loader and that the implement is firmly<br />
attached, the ground is level and firm, and that the implement is positioned flat<br />
and resting against a block to facilitate ease of reconnection.<br />
▲ Long-term storage of the loader should be on firm level ground, preferably in a<br />
clean dry location. Put all the ram rods back in, remove the loader and lift from<br />
behind to put the jacks in and move them to the transport position, the loader can<br />
then be put onto the ground taking care not to crush or trap the hoses and electric<br />
wires.<br />
▲ ALWAYS work with extreme care near ‘Overhead Power Lines’ - some of our<br />
machines are capable of reach well in excess of 8 metres (26 feet) this means they<br />
have the potential to well exceed, by possibly 3 metres (9’ 9”), the lowest legal<br />
minimum height of 5.2 metres from the ground for 11,000 and 33,000 volt power<br />
lines. It cannot be stressed enough the dangers that surround this capability, it is<br />
therefore vital that the operator is fully aware of the maximum height and reach of<br />
the machine, and that they are fully conversant with all aspects regarding the safe<br />
minimum distances that apply when working with machines in close proximity to<br />
Power Lines. (Further information on this subject can be obtained from the Health<br />
& Safety Executive or your Local Power Company).<br />
7
WHEN USING THIS MACHINE YOU MUST:<br />
▲ NEVER remove or cover any of the safety decals - in the event of them being lost<br />
or damaged they should be replace immediately.<br />
Positions of Safety Decals<br />
A. – Fitting & Disconnecting Loader.<br />
B. – Using Linkage point for dump rams, with or<br />
without parallel linkage.<br />
C. – Do not stand under load.<br />
▲ NEVER modify the track width of the tractor without checking whether or not it<br />
has repercussions on the tyres - especially on the front when braking with<br />
maximum load on the loader.<br />
▲ NEVER use the loader to lift people.<br />
▲ NEVER use a machine for something it was not designed for.<br />
▲ NEVER permit people to ride on the loader.<br />
▲ NEVER walk or stand under the raised loader.<br />
▲ NEVER permit persons to stand near to the loader whilst working or lifting.<br />
▲ NEVER permit children or inexperienced persons to operate this equipment.<br />
▲ NEVER permit children to play on or around this equipment.<br />
▲ NEVER park or leave a loader with the arms in the raised position.<br />
▲ NEVER exceed the loader’s lift capacity – this would be both hazardous to the<br />
operator and may cause damage to your machine (see specifications page for<br />
details of the lift capacity of specific loaders).<br />
▲ NEVER attempt to work the lever on the frame that unhooks the implement when<br />
the loader is disconnected. Place electric wire and hoses on their brackets after<br />
wiping the valves and putting the protective stoppers on them.<br />
WARNING: The standard ‘roll over’ protection structure of tractors will only provide<br />
partial protection from a load falling onto the driving position – additional protection<br />
from this danger can only be achieved by the use of attachments specifically designed<br />
to prevent a load from falling onto the driving position of the tractor.<br />
8
Storage of the Loader<br />
Long-term storage of the loader should be on firm level ground, preferably in a clean<br />
dry location. Put all the ram rods back in, remove the loader and lift from behind to<br />
put the jacks in and move them to the transport position, the loader can then be put<br />
onto the ground taking care not to crush or trap the hoses and electric wires.<br />
Tractor and Loader Stability<br />
Front-end loaders are used in a variety of roles in many industries to handle various<br />
types of materials such as feed, manure, soil, and gravel to name just a few. The<br />
versatility of this type of machine allows an operator to load, lift, transport and dump<br />
materials simply and efficiently.<br />
As with all machinery, safe use of this equipment is primarily down to the operator<br />
and his knowledge - not only of the loader’s capabilities, but also of its stability as a<br />
unit with the tractor. A heavy load that is raised too high will alter the centre of<br />
gravity of the tractor, thus reducing the stability of the unit. This will affect both the<br />
balance and handling of the tractor and can easily lead to a situation where it will<br />
cause the tractor to tip over.<br />
The following rules can help prevent such accidents from occurring:<br />
● Keep the loader implement as low as possible when transporting loads, especially<br />
on rough terrain or uneven surfaces.<br />
● Avoid travelling downhill with loads.<br />
● Restrict your speed when travelling with a load – additional weight on the loader<br />
adds to the momentum of the tractor.<br />
● Do not overload the equipment and keep the load as even as possible.<br />
● Restrict your speed when making turns with a load and avoid making sharp turns.<br />
● Avoid travelling across a slope.<br />
The addition of ballast will increase stability of the unit – extra ballast will help to<br />
counter-balance the extra weight of the load being carried and therefore will reduce<br />
rollover potential. Other factors that will increase stability include: adjusting the<br />
wheel width and employing the use of wider tyres. Refer to your tractors handbook or<br />
contact the manufacturer or dealer for additional information on this subject.<br />
9
Lifting of the Machine<br />
The machine should be lifted using suitable<br />
Sling here<br />
slings and overhead lifting equipment with a<br />
minimum safe lifting capacity in excess of<br />
the machines weight.<br />
Slings should be placed under the boom at<br />
the location indicated (see diagram opposite)<br />
and its position and placement adjusted to<br />
ensure a ‘balanced’ lift of the machine.<br />
The exact position of the lifting sling will<br />
vary dependant on what implements (if any) are fitted to the machine.<br />
Locate slings in a position that will ensure the machine remains balanced when lifting.<br />
Keep all bystanders at a safe distance and always ensure that the machine is placed<br />
down on a firm level site.<br />
10
Fitting Kits<br />
Each make and model of tractor requires a specific fitting kit that will comprise of the<br />
following components:<br />
A. Mechanical Parts<br />
1) Rear Brackets – Right & Left Hand.<br />
2) Rear Ramps – Right & Left Hand.<br />
3) Intermediary Brackets – Right & Left Hand or single part fixed across the bonnet.<br />
4) Top Strut.<br />
5) Bottom Strut – dependant on make/model.<br />
6) Front Ramps – Right & Left Hand.<br />
7) Front Brackets – Right & Left Hand.<br />
8) Radiator Grill Protectors – Right & Left Hand.<br />
B. Hydraulic Parts<br />
‘Dynatronic’<br />
B. 2 Feed Pipes – Flow & Return direct from the loader with double acting spool<br />
valve.<br />
‘Hydraulic’<br />
9) 3 Feed Pipes – direct from loader – 1 single acting for lifting & 2 double acting for<br />
bucket with 1 single acting & 1 double acting spool valve from the tractor.<br />
or<br />
9) 4 Feed Pipes – direct from the loader – 2 double acting for lifting & 2 double<br />
acting for bucket.<br />
C. Electrical Parts<br />
‘Dynatronic’<br />
10) 1 Electric Control Lever with 9 functions.<br />
11) 1 Electric Plug with 5 female pins for complete control of loader and implement.<br />
‘Hydraulic’<br />
12) 1 Electric Control Lever with 6 functions.<br />
13) 1 Electric Plug with 5 female pins.<br />
NOTE<br />
Items 10 & 11 are standard equipment whilst items 12 & 13 are optional equipment<br />
for controlling implement.<br />
11
Loader Parts<br />
Each loader delivered consists of:<br />
A. Mechanical Parts<br />
13) Boom.<br />
14) Vertical Mounts.<br />
15) Lift Rams.<br />
16) Rods and moving parts of Parallel Linkage.<br />
17) Bucket Ram (double acting).<br />
18) Implement Tipping Arms.<br />
19) Frame with automatic coupling.<br />
20) Jacks.<br />
21) Intermediary Arms.<br />
22) Locking Security System on Lift Ram.<br />
B. Hydraulic Parts<br />
‘Dynatronic’<br />
23) 2 Feed Pipes direct from spool valve.<br />
‘Hydraulic’<br />
23) 3 Feed Pipes direct from loader & single acting lever (lifting) & 2 double acting<br />
for bucket.<br />
or<br />
23) 4 Feed Pipes direct – 2 double acting – lifting (double acting lift rams optional) &<br />
2 double acting for bucket.<br />
C. Electrical Parts<br />
‘Dynatronic’<br />
24) 1 Electric Plug with 5 male terminals for complete control of the loader and the<br />
implement.<br />
25) Box of spool valves for lifting and for bucket.<br />
- optional 3 rd & 4 th Function – ‘quick dump’ & ‘float’.<br />
‘Hydraulic’<br />
24) 1 Electric Plug with 5 male terminals solely for controlling implements with their<br />
own rams.<br />
25) Optional spool valves box for the sole control of an implement with its own rams:<br />
3 rd & 4 th function – float.<br />
26) Manufacturer’s plate mounted on inside of the left arm – indicates serial number.<br />
12
Operating – Do’s and Don’ts<br />
13
High Voltage Cables<br />
It cannot be stressed enough the dangers involved when working near high voltage<br />
electricity cables - before attempting to work in these areas ensure you have read and<br />
fully understood the safety section at the beginning of this <strong>manual</strong> which includes<br />
information on this subject.<br />
ALWAYS MAINTAIN A MINIMUM CLEARANCE DISTANCE OF 1.5 M<br />
WHEN OPERATING NEAR HIGH VOLTAGE CABLES<br />
We recommend that you consult either the Health & Safety Executive or your Local<br />
Power Company to obtain detailed information regarding the safe procedure for<br />
working in this type of environment.<br />
Overhead Obstructions<br />
Always be aware of the height of the loader especially when raised, take care when<br />
maneuvering near or under bridges, buildings, power cables or any other obstacles<br />
you may encounter when moving your machine.<br />
Working On Public Highways<br />
When working on the public highway it is the operators responsibility to familiarise<br />
themselves with any national and local regulations concerning this type of activity,<br />
and ensure that they are abided at all times..<br />
In inhabited areas, work should only proceed with extreme caution and care, all<br />
bystanders must be kept away from the potential danger area - it is your responsibility<br />
to protect the safety of others in the vicinity.<br />
14
Maintenance<br />
1. After the first 10 hours of operation, and after that at regular intervals, the loader<br />
should be inspected and checked to ensure all bolts, hydraulic couplings and<br />
implement tines remain tight.<br />
2. Clean and grease the loader regularly, especially the linkage points where<br />
implements are attached – refer to diagram below for greasing point locations.<br />
3. If cleaning with a high-pressure washer never aim the jet of water under the<br />
protective cover of the spool valves to avoid causing damage.<br />
4. Always clean and grease the loader prior to storage of the machine.<br />
5. The location of greasing points are indicated in the diagram below:<br />
15
Operation<br />
A tractor equipped with a loader will be visually the same within the operator’s cab<br />
environment with the exception of the control lever for the loader, which will be<br />
mounted to the right-hand side of the driver’s position.<br />
1. Loaders - Dynatronic<br />
Uses one ‘double acting’ spool valve from the<br />
tractor. The lever has been equipped with a knob<br />
with a range of electric switches – the ‘Control<br />
Lever’.<br />
Use of the Control Lever with 9 Functions<br />
To control movements without using the electric<br />
switches:<br />
1. Pulling lever raises the loader.<br />
2. Pushing lever lowers the loader.<br />
Controlling movements with Electric Switches<br />
A/1 - Pull lever to ‘crowd’ implement.<br />
A/2 - Push lever to empty implement.<br />
B/1 - No function associated to pulling lever in position B/1<br />
B/2 - Push lever for rapid emptying.<br />
C/1 - Pull lever to open Crocodile or raise Canybal.<br />
C/2 - Push lever to close Crocodile or lower Canybal.<br />
D/1 - Pull lever to open Canybal jaws.<br />
D/2 - Push lever to close Canybal jaws.<br />
Important<br />
To change movement, press the appropriate switch.<br />
To release the hydraulic pressure, lower to the ground, stop the engine and move the<br />
lever to positions 1 and 2, then repeat the operation pressing each of the switches.<br />
16
2 Loaders - Hydraulic<br />
Using 2 existing tractor control valves<br />
- 1 single acting:<br />
3. Pull lever to raise loader.<br />
4. Push lever to lower loader.<br />
- 1 double acting:<br />
5. Pull lever to ‘crowd’ implement.<br />
6. Push lever to empty implement.<br />
Important<br />
Additional functions are obtained by making the lever double acting by adding a<br />
control knob with electric switches, the ‘Control Lever’.<br />
Use of the control lever with 6 functions:<br />
C/5 - Pull lever to open Crocodile or raise Canybal.<br />
C/6 - Push lever to close Crocodile or lower Canybal.<br />
D/5 - Pull lever to open Canybal jaws.<br />
D/6 - Push lever to close Canybal jaws.<br />
17
Fitting the Loader to the Tractor<br />
The procedure for fitting the loader to the tractor is as<br />
follows:<br />
1. Clean and lightly grease the attachment point on the<br />
vertical posts.<br />
2. Check the position on the loader of the:<br />
- hoses and electric wires should be in their bracket<br />
forming a loop above the loader’s arm.<br />
- jacks at the same height, not any lower (soft<br />
ground).<br />
- lever on quick-attach frame must be horizontal with<br />
the implement well attached.<br />
- cam levers in the top position.<br />
3. Drive the tractor slowly forward ensuring it is evenly<br />
centred between the loader’s arms.<br />
4. Just before the point of connection, let the clutch up<br />
sharply: the cam levers will automatically fall into<br />
position – Refer to note 14 on following page.<br />
5. Stop the engine and apply the handbrake.<br />
6. Release the hydraulic pressure.<br />
7. Connect up the hydraulic valves by the coloured<br />
stoppers.<br />
8. Connect the electric plug.<br />
9. Check that the cam levers are locked in the down<br />
position.<br />
10. Start the tractor.<br />
11. Raise the loader slightly to lift the jacks off the<br />
ground.<br />
12. Remove retaining clip and raise the extending tube.<br />
13. Remove locking pin and swing the stand to the<br />
working position and replace retaining clip.<br />
Important: Never grease the jacks<br />
18
Important – Fitting Problems<br />
14. If the cam levers fail to come down fully, as<br />
referred to in paragraphs 4 & 9 of this section,<br />
do not use a hammer or any other tool to<br />
force them. The paint on the machine can<br />
cause them to stick the first few times the<br />
loader is attached. Move forward into the<br />
loader a little further whilst turning the wheels<br />
first to the right and then to the left, the cams<br />
will eventually fit into their proper place after<br />
raising and lowering the empty loader a few<br />
times.<br />
15. If the loader has been left disconnected for a long period of time, and the jacks<br />
have sunk into the ground, it will need to be lifted from the rear and either<br />
‘blocked’ under the jacks using suitable strong blocks or the jacks extended<br />
further to reposition the loader at the correct height for reconnecting to the tractor.<br />
Warning: Always use safe recommended lifting equipment when lifting<br />
machinery of any kind and ensure you keep yourself and bystanders at a safe<br />
distance to avoid accidents.<br />
16. If the connecting arms on the vertical mounts of the loader and the front arms on<br />
the tractor are not parallel their position will have to be rectified in order to fit the<br />
loader.<br />
- Move the tractor forward as far as possible between the loader’s arms.<br />
- Stop the engine and apply the handbrake.<br />
- Release the hydraulic pressure.<br />
- Connect the hydraulic valves and the electric plug.<br />
- Start the tractor.<br />
- At the same time as moving the tractor forward reposition the vertical<br />
mounts of the loader by moving the lifting rams.<br />
Changing Implements - Disconnection<br />
1. Lower the loader down flat to the ground, without<br />
exerting pressure, resting it against a suitable block to<br />
facilitate re-attachment.<br />
2. Move the lever of the quick-attach frame from the<br />
horizontal position to the vertical position to disengage<br />
the tipping mechanism. The lever remains in position<br />
automatically.<br />
If the implement/tool has its own rams such as:<br />
Crocodile, Pelican, Canybal, Rotocanybal, etc. –<br />
3. Stop the tractor engine and apply the handbrake.<br />
4. Release the hydraulic pressure.<br />
19
5. Disconnect the valves and remove the hoses from their brackets on the front beam<br />
of the loader.<br />
6. Wipe the valves and put on their protective stoppers.<br />
7. Roll up the hoses neatly and stow them on the implement in a position where they<br />
unlikely to get damaged.<br />
8. Start up the tractor and slowly reverse back<br />
(straight), lowering the front of the quick-attach<br />
frame to disengage the hooks on the top of the<br />
implement.<br />
Changing Implements - Connection<br />
9. Drive the tractor and loader forward to the<br />
connection point on the implement.<br />
10. Check that the lever on the quick-attach frame is in<br />
the vertical position.<br />
11. Move the quick-attach frame forwards so that the<br />
hooks on the top of the implement are higher than<br />
the round bar of the quick-attach frame onto which<br />
they fit.<br />
12. Raise the loader beam so that the round bar on the<br />
quick-attach frame fits into the hooks on the<br />
implement/tool.<br />
13. Crowd the implement as much as possible.<br />
14. The lever on the quick-attach frame comes to rest on<br />
the front beam of the loader and is released<br />
automatically.<br />
15. With the lever on the quick-attach frame in a<br />
horizontal position, check that the loader is properly<br />
attached to the lower holes in the bracket on the<br />
implement.<br />
If the implement has its own rams, such as:<br />
Crocodile, Pelican, Canybal, Rotocanybal, etc. –<br />
16. Stop the tractor engine and apply the handbrake.<br />
17. Release the hydraulic pressure.<br />
18. Place the hoses in their brackets.<br />
19. Remove the protective stoppers from the valves.<br />
20. Connect up the hydraulic valves by their coloured stoppers.<br />
20
Carriage Linkage<br />
IMPORTANT NOTE FOR<br />
‘PRESTIGE’ MODELS ONLY<br />
On ‘Prestige’ models the loader’s<br />
linkage bracket pivots must only be<br />
attached to the carriage at position<br />
‘A’ shown in the picture opposite -<br />
NEVER use position ‘B’ as this<br />
may lead to failure or damage to the<br />
machine.<br />
The fitting of ‘third party’ carriages is not recommended.<br />
If ‘third party’ carriages are fitted to the loader these should be checked (without<br />
load) to ensure that the loader’s ‘lift’ and ‘crowd’ operations function correctly, and<br />
that the operation of the machine is not restricted or overloaded in any way. A<br />
suitably qualified person should carry out these checks as damage may occur when<br />
fitting such equipment incorrectly.<br />
<strong>McConnel</strong> Limited accepts no responsibility for machines that have been fitted with<br />
‘third party’ carriages or for the resultant damage that may occur to the tractor,<br />
loader or user.<br />
Implement Usage – Bale Handling<br />
Using the Canybal for round bale handling:<br />
• Never empty the implement abruptly or rapidly<br />
when loaded and raised.<br />
• Never exert pressure on the implement or on the<br />
tines of the implement to relieve pressure on the<br />
front of the tractor.<br />
Using the Rotocanybal for square bale handling:<br />
• Never empty the implement abruptly or rapidly<br />
when loaded and raised.<br />
• Never exert pressure on the implement or on the<br />
tines of the implement to relieve pressure on the<br />
front of the tractor.<br />
21
Disconnecting the Loader from the Tractor<br />
The procedure for disconnection the loader from the tractor is as follows:<br />
1. Select a suitable safe location on which to leave the loader - this should be on firm<br />
level ground. If long-term storage is anticipated it is preferable that this is in a<br />
clean, dry environment in order to protect the machine from the elements.<br />
2. Drive the tractor and loader forward into position.<br />
3. Lower the loader and implement down flat to the<br />
ground without exerting any pressure, resting it<br />
against a block to facilitate the release of the cam<br />
levers and the refitting of the loader.<br />
4. Engage the handbrake and stop the engine.<br />
5. Release the hydraulic pressure.<br />
6. Release retaining clip and locking pin, swing stand<br />
to the ‘park’ position and secure in place with the<br />
locking pin.<br />
7. Extend the stand fully to the ground and lock<br />
retaining clip in an appropriate hole in the extending<br />
tube. (Refit procedure is the reverse of above.<br />
8. Disconnect the hydraulic valves, wipe them clean<br />
and put on their protective stoppers. Place them in<br />
the bracket on the pivot post.<br />
9. Disconnect the electric plug and place in the bracket<br />
with the hoses.<br />
10. Check that the implement is well attached to the<br />
frame with the pins firmly fixed into the brackets of<br />
the implement and the lever horizontal.<br />
View from rear of implement<br />
22
Problems – Causes and Solutions<br />
1. The Loader will not lift:<br />
- Check oil level and condition of filters – pump pressure (possibly requires<br />
cleaning).<br />
- Check that all valves are well connected and clean.<br />
- Check electric plug connection and condition of the fuse; look at the electrical<br />
junction of the plug, spool valves and control lever.<br />
- Consult your Dealer.<br />
2. The Loader rises in ‘jerks’:<br />
- See above<br />
- Check that the flow of oil being fed from the tractor hydraulic pump is not<br />
blocked or has an ‘air lock’.<br />
3. The Loader rises slowly:<br />
- See above<br />
- Check the quality of the oil (viscosity), in cold weather allow the tractor engine<br />
to run for several minutes to warm the oil before operating the loader.<br />
4. The Loader will not go down:<br />
- See above<br />
- Consult your tractor <strong>manual</strong> on use of loaders (possibly in the slow position).<br />
5. The Loader goes down on its own accord or fails to repeat a movement:<br />
- Check the condition of the ram seals.<br />
- Check the parts of the spool valves: valves, seals, etc.<br />
- Consult your Dealer.<br />
6. Movements are opposite to what they should be:<br />
- Check valve connections.<br />
- Check wires and cables leading off from the spool valves and control levers.<br />
- Consult your Dealer.<br />
7. Only ‘Upward’ & ‘Downward’ movement – no Implement movement:<br />
- Check and clean the contacts of the electrical switches on the control lever.<br />
- Check protective covers are properly seated over the switches.<br />
- Consult your Dealer.<br />
8. Uncontrollable movements – Raising & Lowering causes Implement to move:<br />
- Check the spool valve of the implement - may be contaminated with dirt.<br />
→ Stop the tractor engine and apply handbrake.<br />
→ Release the hydraulic pressure.<br />
→ Undo the screw at base of part.<br />
→ Clean Electro Shuttle Valve.<br />
→ Refit Valve.<br />
→ Consult your Dealer.<br />
23
9. Oil leaking from Rams:<br />
- Check the Seals and the condition of the Ram Rod - inspect for scratches.<br />
- New loaders may experience a slight seepage of oil but this should disappear<br />
after several hours of use.<br />
WARNING<br />
Never disconnect the valves before having stopped the tractor engine and<br />
releasing the hydraulic pressure, residual pressure in the loader circuits must be<br />
eliminated before attempting to disconnect any valves.<br />
24
Fitting of Accessories and Options<br />
Fitting Fork Tines<br />
1. Place tine in the hole on tine-frame.<br />
2. Place the centering bush with the smallest diameter<br />
of the cone on the other side of the tine-frame<br />
3. Attach the nut, with the conical end in the centering<br />
bush, do not fully tighten at this stage.<br />
4. Attach all tines in the same manner.<br />
5. Place the first tine at right angles to the tine-frame, by turning the centering bush,<br />
and fully tighten the nut.<br />
6. Align and tighten the other tines in the same manner.<br />
7. Check the tightness of the tines frequently.<br />
Fitting of Implement Position Guide<br />
On F1-F2-F3 (Option)<br />
1. Place Implement flat on the ground.<br />
2. Centre the top of the Rod (1), on the Guide (3),<br />
which is attached to the bracket for the hydraulic<br />
hoses.<br />
3. Extend the Rod a further 100 mm down from the<br />
Rod Support point (2) and cut it off at that point.<br />
Fitting the Floating Position<br />
A device acting on the lifting rams of the loader that<br />
allows the ‘double-acting’ circuit to be converted to<br />
‘single-acting’. This system makes it possible to carry out<br />
levelling work.<br />
Installation is very simple on the Spool Valve Control<br />
Box.<br />
Fitting the Circuit Selector<br />
A handle with one electric switch, which<br />
can be fitted onto any single or double<br />
acting spool valve lever to double the<br />
number of hydraulic circuits of the tractor.<br />
25
<strong>McConnel</strong> Limited, Temeside Works, Ludlow, Shropshire SY8 1JL. England.<br />
Telephone: 01584 873131. Facsimile: 01584 876463. www.mcconnel.com