SA-VK61DGS
SA-VK61DGS
SA-VK61DGS

Create successful ePaper yourself
Turn your PDF publications into a flip-book with our unique Google optimized e-Paper software.
<strong>SA</strong>-<strong>VK61DGS</strong><br />
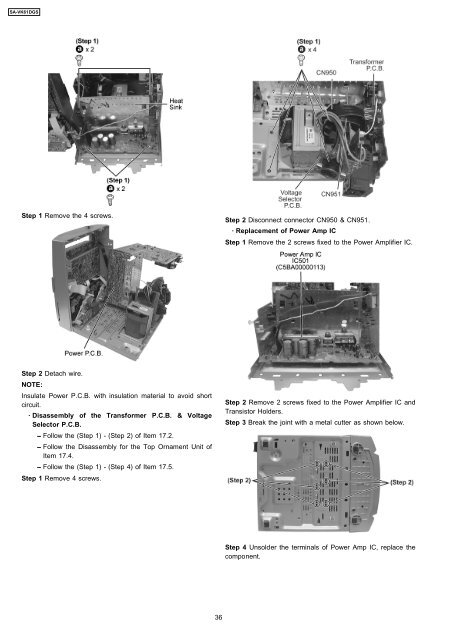
Step 1 Remove the 4 screws.<br />
Step 2 Disconnect connector CN950 & CN951.<br />
· Replacement of Power Amp IC<br />
Step 1 Remove the 2 screws fixed to the Power Amplifier IC.<br />
Step 2 Detach wire.<br />
NOTE:<br />
Insulate Power P.C.B. with insulation material to avoid short<br />
circuit.<br />
· Disassembly of the Transformer P.C.B. & Voltage<br />
Selector P.C.B.<br />
− Follow the (Step 1) - (Step 2) of Item 17.2.<br />
− Follow the Disassembly for the Top Ornament Unit of<br />
Item 17.4.<br />
− Follow the (Step 1) - (Step 4) of Item 17.5.<br />
Step 1 Remove 4 screws.<br />
Step 2 Remove 2 screws fixed to the Power Amplifier IC and<br />
Transistor Holders.<br />
Step 3 Break the joint with a metal cutter as shown below.<br />
Step 4 Unsolder the terminals of Power Amp IC, replace the<br />
component.<br />
36