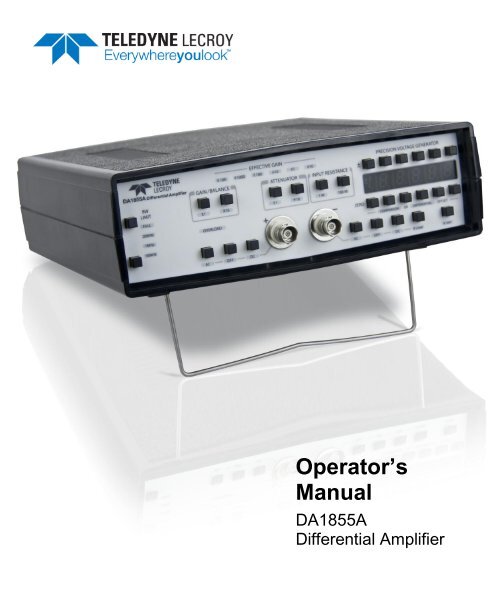
DA 1855A - Operator's Manual - Teledyne LeCroy
DA 1855A - Operator's Manual - Teledyne LeCroy
DA 1855A - Operator's Manual - Teledyne LeCroy

You also want an ePaper? Increase the reach of your titles
YUMPU automatically turns print PDFs into web optimized ePapers that Google loves.
Operator’s<br />
<strong>Manual</strong><br />
<strong>DA</strong><strong>1855A</strong><br />
Differential Amplifier
<strong>DA</strong><strong>1855A</strong> Differential Amplifier<br />
Operator’s <strong>Manual</strong><br />
February 2013
© 2013 <strong>Teledyne</strong> <strong>LeCroy</strong>, Inc. All rights reserved.<br />
Unauthorized duplication of <strong>Teledyne</strong> <strong>LeCroy</strong> documentation materials other than for internal sales<br />
and distribution purposes is strictly prohibited. However, clients are encouraged to distribute and<br />
duplicate <strong>Teledyne</strong> <strong>LeCroy</strong> documentation for their own internal educational purposes.<br />
<strong>Teledyne</strong> <strong>LeCroy</strong> is a registered trademark of <strong>Teledyne</strong> <strong>LeCroy</strong>, Inc. Windows is a registered<br />
trademark of Microsoft Corporation. Other product or brand names are trademarks or requested<br />
trademarks of their respective holders. Information in this publication supersedes all earlier<br />
versions. Specifications are subject to change without notice.<br />
Warranty<br />
<strong>Teledyne</strong> <strong>LeCroy</strong> warrants this oscilloscope accessory for normal use and operation within<br />
specification for a period of one year from the date of shipment. Spare parts, replacement parts and<br />
repairs are warranted for 90 days.<br />
In exercising its warranty, <strong>Teledyne</strong> <strong>LeCroy</strong>, at its option, will either repair or replace any assembly<br />
returned within its warranty period to the Customer Service Department or an authorized service<br />
center. However, this will be done only if the product is determined by <strong>Teledyne</strong> <strong>LeCroy</strong>’s<br />
examination to be defective due to workmanship or materials, and the defect is not caused by<br />
misuse, neglect, accident, abnormal conditions of operation, or damage resulting from attempted<br />
repair or modifications by a non-authorized service facility.<br />
The customer will be responsible for the transportation and insurance charges for the return of<br />
products to the service facility. <strong>Teledyne</strong> <strong>LeCroy</strong> will return all products under warranty with<br />
transportation charges prepaid.<br />
This warranty replaces all other warranties, expressed or implied, including but not limited to any<br />
implied warranty of merchantability, fitness or adequacy for any particular purposes or use.<br />
<strong>Teledyne</strong> <strong>LeCroy</strong> shall not be liable for any special, incidental, or consequential damages, whether in<br />
contract or otherwise.<br />
922258-00 Rev A<br />
February 2013
Operator’s <strong>Manual</strong><br />
Table of Contents<br />
Safety Instructions ................................................................................................................... 1<br />
Symbols .............................................................................................................................. 1<br />
Precautions ......................................................................................................................... 1<br />
Operating Environment ....................................................................................................... 2<br />
Cooling ................................................................................................................................ 2<br />
Cleaning .............................................................................................................................. 2<br />
Calibration ........................................................................................................................... 3<br />
Power.................................................................................................................................. 3<br />
Specifications ........................................................................................................................... 4<br />
Nominal Characteristics ...................................................................................................... 4<br />
Warranted Characteristics .................................................................................................. 6<br />
Typical Characteristics ........................................................................................................ 7<br />
Physical Characteristics ...................................................................................................... 8<br />
Overview ................................................................................................................................... 9<br />
Model Description ............................................................................................................. 10<br />
Rack Mount Versions ........................................................................................................ 10<br />
Power Cable Option .......................................................................................................... 10<br />
Standard Accessories ....................................................................................................... 10<br />
Optional Accessories ........................................................................................................ 11<br />
Operation ................................................................................................................................ 11<br />
General Information .......................................................................................................... 11<br />
Dynamic Range ................................................................................................................ 11<br />
Front Panel ....................................................................................................................... 12<br />
Rear Panel ........................................................................................................................ 17<br />
Instrument Settings ........................................................................................................... 20<br />
General Operating Information ............................................................................................. 23<br />
Power Connection ............................................................................................................ 24<br />
Comparator Mode ............................................................................................................. 24<br />
Differential Mode ............................................................................................................... 24<br />
Setting Up the Oscilloscope with ProBus Interface ........................................................... 25<br />
Setting up the Oscilloscope without ProBus Interface....................................................... 30<br />
Determining the Proper Offset Mode ................................................................................ 35<br />
Avoiding Common Problems ............................................................................................ 35<br />
Care and Maintenance ........................................................................................................... 38<br />
Cleaning ............................................................................................................................ 38<br />
Calibration Interval ............................................................................................................ 38<br />
Service Strategy ............................................................................................................... 38<br />
Troubleshooting ................................................................................................................ 38<br />
Returns ............................................................................................................................. 38<br />
Applications ........................................................................................................................... 39<br />
922258-00 Rev A i
<strong>DA</strong><strong>1855A</strong> Differential Amplifier<br />
Introduction ....................................................................................................................... 39<br />
Voltage Measurements ..................................................................................................... 39<br />
Measuring Current ............................................................................................................ 39<br />
Effects of Probes on Saturation Voltage Measurements ................................................... 40<br />
Saturation Voltage Measurement ...................................................................................... 43<br />
Gate Drive Voltage ............................................................................................................ 44<br />
Upper and Lower Gate Drive ............................................................................................ 45<br />
Avoiding Measurement Errors ........................................................................................... 45<br />
Remote Control Commands .................................................................................................. 46<br />
Command List ................................................................................................................... 46<br />
Gain Control Mode ............................................................................................................ 47<br />
Attenuation ........................................................................................................................ 47<br />
Auto-Zero .......................................................................................................................... 48<br />
Bandwidth Limit ................................................................................................................. 48<br />
Coupling ............................................................................................................................ 49<br />
Gain .................................................................................................................................. 50<br />
Offset ................................................................................................................................ 51<br />
Input-Resistance ............................................................................................................... 52<br />
Probe Attenuation ............................................................................................................. 53<br />
Precision Voltage Generator ............................................................................................. 54<br />
Volt / DIV ........................................................................................................................... 55<br />
Performance Verification ....................................................................................................... 56<br />
Test Equipment Required ................................................................................................. 56<br />
Preliminary Procedure ...................................................................................................... 58<br />
Functional Check .............................................................................................................. 59<br />
Verification Procedure ....................................................................................................... 60<br />
Performance Verification Test Record .............................................................................. 77<br />
Reference ................................................................................................................................ 80<br />
Differential Mode and Common Mode .............................................................................. 80<br />
Differential Mode Range and Common Mode Range ....................................................... 80<br />
Common Mode Rejection Ratio ........................................................................................ 80<br />
Certifications ..................................................................................................................... 82<br />
Returning a Product .......................................................................................................... 85<br />
Contact <strong>Teledyne</strong> <strong>LeCroy</strong> ................................................................................................. 86<br />
ii<br />
922258-00 Rev A
Operator’s <strong>Manual</strong><br />
Safety Instructions<br />
This section contains instructions that must be observed to keep this oscilloscope accessory<br />
operating in a correct and safe condition. You are required to follow generally accepted safety<br />
procedures in addition to the precautions specified in this section. The overall safety of any system<br />
incorporating this accessory is the responsibility of the assembler of the system.<br />
Symbols<br />
These symbols appear on the instrument's front or rear panels and in its documentation to alert you<br />
to important safety considerations.<br />
CAUTION of potential damage to instrument, or WARNING of potential bodily injury.<br />
Attend to the accompanying information to protect against personal injury or damage.<br />
Do not proceed until conditions are fully understood and met.<br />
High voltage. Risk of electric shock.<br />
Measurement ground connection.<br />
Safety (protective) ground connection.<br />
Alternating Current.<br />
I<br />
Power On; connected to AC mains.<br />
Power Off; disconnected from AC mains.<br />
Precautions<br />
Use proper power cord. Use only the power cord shipped with this instrument and certified<br />
for the country of use.<br />
Maintain ground. This product is grounded through the power cord grounding conductor. To<br />
avoid electric shock, connect only to a grounded mating outlet.<br />
Connect and disconnect properly. Do not connect/disconnect probes or test leads while they<br />
are connected to a voltage source.<br />
Observe all terminal ratings. Do not apply a voltage to any input that exceeds the maximum<br />
rating of that input. Refer to the specifications for maximum input ratings.<br />
Use only within operational environment listed. Do not use in wet or explosive atmospheres.<br />
922258-00 Rev A 1
<strong>DA</strong><strong>1855A</strong> Differential Amplifier<br />
Use indoors only.<br />
Keep product surfaces clean and dry.<br />
Do not block the cooling vents. Leave a minimum six-inch (15 cm) gap between the<br />
instrument and the nearest object. Keep the underside clear of papers and other objects.<br />
Do not remove the covers or inside parts. Refer all maintenance to qualified service<br />
personnel.<br />
Do not operate with suspected failures. Do not use the product if any part is damaged.<br />
Obviously incorrect measurement behaviors (such as failure to calibrate) might indicate<br />
impairment due to hazardous live electrical quantities. Cease operation immediately and<br />
sequester the instrument from inadvertent use.<br />
Operating Environment<br />
Temperature: 0 to 50 °C.<br />
Humidity: Maximum relative humidity 80 % for temperatures up to 31 °C decreasing linearly to 50 %<br />
relative humidity at 50 °C.<br />
Altitude: Up to 2,000 m (6,562 ft).<br />
Cooling<br />
The instrument relies on forced air cooling with internal fans and vents. Take care to avoid<br />
restricting the airflow to any part of the amplifier. Around the sides and rear, leave a minimum of 15<br />
cm (6 inches) between the instrument and the nearest object. At the bottom, the amplifier feet (up<br />
or down) provide adequate clearance.<br />
CAUTION. Do not block vents. Always keep the area beneath the amplifier clear of paper and<br />
other items.<br />
The instrument also has internal fan control circuitry that regulates the fan speed based on the<br />
ambient temperature. This is performed automatically after start-up.<br />
Cleaning<br />
Clean only the exterior of the amplfier using a damp, soft cloth. Do not use harsh chemicals or<br />
abrasive elements. Under no circumstances submerge the instrument or allow moisture to<br />
penetrate it. Avoid electric shock by unplugging the power cord from the AC outlet before cleaning.<br />
CAUTION. Do not attempt to clean internal parts. Refer to qualified service personnel.<br />
2 922258-00 Rev A
Operator’s <strong>Manual</strong><br />
Calibration<br />
The amplifier is calibrated at the factory prior to being shipped. The recommended calibration<br />
interval is one year. Calibration should be performed by qualified personnel only. Schedule an<br />
annual factory calibration as part of your regular maintenance. Extended warranty, calibration, and<br />
upgrade plans are available for purchase. Contact your <strong>Teledyne</strong> <strong>LeCroy</strong> sales representative or<br />
customersupport@teledynelecroy.com to purchase a service plan.<br />
Power<br />
AC Power Source<br />
100 to 240 VAC (±10%) at 50/60 Hz (± 10%).<br />
<strong>Manual</strong> voltage selection is not required because the instrument automatically adapts to line<br />
voltage.<br />
Power Consumption<br />
<strong>DA</strong><strong>1855A</strong>: 28 Watts (39 VA)<br />
<strong>DA</strong><strong>1855A</strong>-PR2: 56 Watts (78 VA)<br />
Power and Ground Connections<br />
The amplifier is provided with a 10A/250V 18AWG rated grounded cord set containing a molded<br />
three-terminal polarized plug and a standard IEC320 (Type C13) connector for making line voltage<br />
and safety ground connections.<br />
The AC inlet ground is connected directly to the frame of the instrument. For adequate protection<br />
again electric shock, connect to a mating outlet with a safety ground contact.<br />
WARNING. Interrupting the protective conductor inside or outside the device, or<br />
disconnecting the safety ground terminal, creates a hazardous situation. Intentional<br />
interruption is prohibited.<br />
Power On/Off<br />
The Power On/Off switch on the back of the amplifier controls the operational state of the device.<br />
Press the side of the switch closest to either On or Off.<br />
922258-00 Rev A 3
<strong>DA</strong><strong>1855A</strong> Differential Amplifier<br />
Specifications<br />
These specifications are valid for instruments when the following conditions have been met:<br />
• The instrument is being operated from a power source, which meets the line voltage and<br />
frequency specifications.<br />
• The instrument has been operating for at least 20 minutes in an environment, which is<br />
within the operating environmental specifications.<br />
• The instrument has been calibrated within the last 12 months. Calibration was performed in<br />
a controlled environment of 25° C ± 5° C.<br />
Nominal Characteristics<br />
Nominal characteristics describe parameters and attributes which are guaranteed by design, but do<br />
not have associated tolerances.<br />
General<br />
Input Configuration<br />
Offset Capability<br />
+Input Coupling Selections<br />
–Input Coupling Selection<br />
Input Connectors<br />
Maximum Input Voltage<br />
Output Configuration<br />
Output Impedance<br />
Intended Output Load<br />
Output Connector<br />
Amplifier Gain<br />
True Differential, + and – Inputs Precision Voltage Generator<br />
can be selected as – input source in V COMP mode.<br />
The Precision Voltage Generator can be used to provide true<br />
differential offset.<br />
AC, Off (Precharge), DC<br />
AC, Off (Precharge), DC, V COMP<br />
BNC (+Input incorporates Probe Attenuation Coding sensing<br />
connector)<br />
Withstand up to ± 200 Vp continuous. Automatic input<br />
disconnect with manual reset.<br />
Single ended, Ground referenced<br />
50 Ω<br />
50 Ω<br />
BNC<br />
X1 or X10<br />
Input Attenuation ÷1 or ÷10<br />
Bandwidth Limit Filters<br />
(Low Pass)<br />
100 kHz, 1 MHz, 20 MHz or<br />
None (full bandwidth)<br />
Bandwidth Limit Filter Characteristics<br />
3-pole Bessel, 18 dB/octave<br />
4 922258-00 Rev A
Operator’s <strong>Manual</strong><br />
General, continued<br />
Auto Zero<br />
Effective Gain Indicator<br />
Amplifier initiates an automatic balance cycle, when either gain<br />
button is depressed, to remove output offset drift<br />
Indicators show the effective system gain or attenuation, factoring<br />
Probe Attenuation, Attenuator and gain settings. (Probe must have<br />
coding connectors. ÷1, ÷10, ÷100 and ÷1000 probes are<br />
recognized)<br />
Dynamic Ranges<br />
Maximum Differential Mode Range<br />
X10 Gain, ÷1 Attenuator ± 50 mV1<br />
X1 Gain, ÷1 Attenuator ± 0.5 V1<br />
X10 Gain, ÷10 Attenuator ± 0.5 V1<br />
X1 Gain, ÷10 Attenuator ± 5 V1<br />
Maximum Input Slew Rate<br />
÷1 Attenuator ± 0.15 V/μsec<br />
÷10 Attenuator ± 1.5 V/μsec<br />
Maximum Common Mode Range<br />
÷1 Attenuator ± 15.5 V 1<br />
÷10 Attenuator ± 155 V 1<br />
Differential Offset Range (V DIFF mode referred to input)<br />
X10 Gain, ÷1 Attenuator ± 1 V 1<br />
X1 Gain, ÷1 Attenuator ± 10 V 1<br />
X10 Gain, ÷10 Attenuator ± 10 V 1<br />
X1 Gain, ÷10 Attenuator ± 100 V 1<br />
Comparison Offset Range (V COMP mode, referred to input)<br />
÷1 Attenuator ± 15.5 V 1<br />
÷10 Attenuator ± 155 V 1<br />
1 Voltages are referred to the amplifier input connector. Multiply by probe attenuation factor to obtain value referred to<br />
probe input (e.g. ± 50 mV becomes ± 0.5 V at the probe tip when using a ÷10probe.)<br />
922258-00 Rev A 5
<strong>DA</strong><strong>1855A</strong> Differential Amplifier<br />
Precision Voltage Generator<br />
Output Range<br />
Output Impedance<br />
Resolution<br />
Control<br />
Reference Type<br />
Output Routing<br />
± 15.5 V<br />
≈ 10 Ω<br />
100 μV<br />
Individual increment and decrement digits<br />
carry over to the next decade<br />
Oven stabilized buried zener diode<br />
Can be applied to –Input and available at<br />
rear panel BNC connector<br />
Power Requirements<br />
Line Voltage Range<br />
90 - 264 VAC<br />
Line frequency Range<br />
45 - 66 Hz<br />
Warranted Characteristics<br />
Warranted characteristics describe parameters which have guaranteed performance. Unless<br />
otherwise noted, tests are provided on page 60, Performance Verification, for all warranted<br />
specifications.<br />
Gain Accuracy<br />
Bandwidth (-3 dB) x1 Gain<br />
Rise Time<br />
Common Mode Rejection<br />
± 1% + uncertainty of termination resistance<br />
> 100 MHz<br />
< 3.5 nsec (Calculated from bandwidth)<br />
x1 or x10, ÷1 attenuation<br />
70 Hz ≥50,000:1 (94 dB)<br />
100 kHz ≥50,000:1 (94 dB)<br />
10 MHz ≥316:1 (50 dB)<br />
Precision Voltage Generator<br />
± 0.05% of reading + 500 Μv Accuracy<br />
(15° C to 45° C)<br />
6 922258-00 Rev A
Operator’s <strong>Manual</strong><br />
Typical Characteristics<br />
Typical characteristics describe parameters, which do not have guaranteed performance. Tests for<br />
typical characteristics are not provided in the Performance Verification Procedure.<br />
Input Resistance<br />
÷1 Attenuator 1 MΩ or 100 MΩ 1 MΩ only when used with<br />
attenuating probe<br />
÷10 Attenuator 1 MΩ<br />
Input Capacitance<br />
AC Input Coupling Capacitance<br />
Differential Offset Accuracy<br />
20 pF<br />
0.1 μF<br />
÷10 Attenuator Accuracy 0.05%<br />
Bandwidth, x10 Gain<br />
100 MHz<br />
Common Mode Rejection Ratio Refer to Figure 22<br />
Input Noise<br />
Overdrive recovery<br />
Output Zero 1<br />
Refer to Figure 23<br />
(With DXC100A probe, 100 Ω between tip and<br />
ground)<br />
In X10 gain, settles within 1 mV referred to input<br />
within 100 nsec from 4 V input (8000% overdrive)<br />
≤ 2 mV referred to input<br />
Input Leakage Current
<strong>DA</strong><strong>1855A</strong> Differential Amplifier<br />
Physical Characteristics<br />
Height <strong>DA</strong><strong>1855A</strong> 7.29 cm (2.87 inch)<br />
<strong>DA</strong><strong>1855A</strong>-PR2 8.75 cm (3.4 inch)<br />
Width <strong>DA</strong><strong>1855A</strong> 21.2 cm (8.36 inch)<br />
<strong>DA</strong><strong>1855A</strong>-PR2 43.9 cm (17.3 inch)<br />
Depth <strong>DA</strong><strong>1855A</strong> 23.2 cm (9.12 inch)<br />
<strong>DA</strong><strong>1855A</strong>-PR2 42.5 cm (16.7 inch)<br />
Weight <strong>DA</strong><strong>1855A</strong> 2.15 kg (4 lbs 12 oz.)<br />
<strong>DA</strong><strong>1855A</strong>-PR2 9.5 kg (21 lbs)<br />
Shipping Weight <strong>DA</strong><strong>1855A</strong> 3.12 kg (6 lbs 14 oz.)<br />
<strong>DA</strong><strong>1855A</strong>-PR2<br />
11.3 kg (25 lbs)<br />
8 922258-00 Rev A
Operator’s <strong>Manual</strong><br />
Overview<br />
The <strong>DA</strong><strong>1855A</strong> is a stand-alone high performance 100 MHz differential amplifier. It is intended to act<br />
as signal conditioning preamplifier for oscilloscopes, spectrum analyzers and other instruments,<br />
providing differential measurement capability to instruments having only a single-ended input.<br />
When used with a <strong>DA</strong><strong>1855A</strong>, high quality oscilloscopes can obtain common mode rejection and<br />
overdrive recovery performance that was previously unobtainable in any product.<br />
When used with a <strong>Teledyne</strong> <strong>LeCroy</strong> oscilloscope equipped with ProBus interface, the <strong>DA</strong><strong>1855A</strong> can<br />
be controlled through the oscilloscope user interface or remote commands.<br />
When used with non ProBus oscilloscopes, the <strong>DA</strong><strong>1855A</strong> settings can be controlled directly through<br />
the front panel controls.<br />
Amplifier gain may be set to 1 or 10. A built-in input attenuator may be separately set to attenuate<br />
signals by a factor of 10, allowing gains of 10, 1, or 0.1 and common mode dynamic range of ± 15.5 V<br />
(÷1) or ± 155 V (÷10). Optional probes increase the maximum input signal and common mode ranges<br />
in proportion to their attenuation ratio, but not exceeding their maximum input voltage rating.<br />
Effective gain of the <strong>DA</strong><strong>1855A</strong>, including probe attenuation, amplifier gain and attenuator settings, is<br />
automatically displayed.<br />
The <strong>DA</strong><strong>1855A</strong> has a bandwidth of 100 MHz, but any one of the three 3-pole bandwidth limit filters<br />
may be selected to reduce bandwidth to 20 MHz, 1 MHz or 100 kHz to limit noise above the<br />
frequency of interest.<br />
The <strong>DA</strong><strong>1855A</strong> output is limited at ± 500 mV so that the oscilloscope is not overdriven by large inputs.<br />
This allows an oscilloscope to directly measure the settling of D/A converters with 14 bit (60ppm)<br />
precision.<br />
The <strong>DA</strong><strong>1855A</strong> features a built-in Precision Voltage Generator (PVG) that can be set to any voltage<br />
between ± 15.5 Volt (± 10 Volt in Differential Offset mode) with 5-1/2 digit resolution. Each digit of<br />
the voltage generator output can be individually incremented or decremented. Positive or negative<br />
polarity can be selected. The PVG’s output can be selected as an input to the inverting (–) input of<br />
the amplifier for operation as a differential comparator or applied internally as a true differential<br />
offset voltage. The voltage is also available to be used externally through a rear panel connector.<br />
To maintain the amplifier’s high Common Mode Rejection performance, special differential probes<br />
such as the <strong>Teledyne</strong> <strong>LeCroy</strong> model DXC series are recommended and are available as optional<br />
accessories.<br />
922258-00 Rev A 9
<strong>DA</strong><strong>1855A</strong> Differential Amplifier<br />
Model Description<br />
The <strong>DA</strong><strong>1855A</strong> series is comprised of 2 models which differ in physical configuration. Both contain<br />
the same 100 MHz differential amplifier which provides high common mode rejection, extremely<br />
fast overdrive recovery, selectable ÷1 or ÷10 attenuation, selectable X1 or X10 gain, a 5-1/2 digit<br />
Precision Voltage Generator (PVG), selectable upper bandwidth limiting filters, and effective gain<br />
display. and ± 500 mV output swing limiting. The PVG is provides a calibrated reference for<br />
Differential Offset or Comparison modes. The PVG reference voltage is also available through a BNC<br />
connector on the rear panel.<br />
<strong>DA</strong><strong>1855A</strong>:<br />
<strong>DA</strong><strong>1855A</strong>-PR2:<br />
Single channel unit packaged in a convenient desk top housing.<br />
Two independent model <strong>DA</strong><strong>1855A</strong> amplifiers packaged in one housing with one<br />
line power input connection. The housing is intended for desk top use, where it<br />
can be placed under an oscilloscope.<br />
Rack Mount Versions<br />
Rack mounted versions available for models:<br />
<br />
<br />
<strong>DA</strong><strong>1855A</strong>-RM: Single channel rack mounted version.<br />
<strong>DA</strong><strong>1855A</strong>-PR2-RM: Dual channel rack mounted version.<br />
Power Cable Option<br />
(One must be specified at time of order)<br />
<br />
<br />
<br />
<br />
<br />
Option – P01: 120 V North America / Japan<br />
Option – P02: United Kingdom<br />
Option – P03: Universal Europe<br />
Option – P04: Australia / New Zealand<br />
Option – P05: Switzerland<br />
Standard Accessories<br />
Each <strong>DA</strong><strong>1855A</strong> Differential Amplifier is packaged for shipment with the following items:<br />
• Power cable, as specified by power cable option.<br />
• ProBus interface cable with BNC signal cable. (-PR2 models include 2 ProBus cables)<br />
• Certificate of Calibration traceable to NIST (United States National Institute of Standards and<br />
Technology)<br />
• Operator’s <strong>Manual</strong>, which includes a Performance verification Procedure.<br />
10 922258-00 Rev A
Operator’s <strong>Manual</strong><br />
Optional Accessories<br />
• Service <strong>Manual</strong>, containing adjustments, repair and replacement part information P/N:<br />
<strong>DA</strong><strong>1855A</strong>-SM-E.<br />
• DXC100A, ÷10 / ÷100 Passive Differential Probe.<br />
• DXC200, ÷1 Passive Differential Probe.<br />
• DXC5100, ÷100 2.5 K Passive Differential Probe Pair<br />
• <strong>DA</strong>101, External ÷10 Attenuator.<br />
Operation<br />
General Information<br />
The <strong>DA</strong><strong>1855A</strong> has been designed to be used with oscilloscopes equipped with a ProBus interface.<br />
Connecting the Differential Amplifier to the oscilloscope through the ProBus interface will<br />
automatically control all the required settings from the oscilloscope and will lock-out the <strong>DA</strong><strong>1855A</strong><br />
front panel controls. All front panel controls are now accessible through the oscilloscope user<br />
interface. The <strong>DA</strong><strong>1855A</strong> user interface can be viewed from the Channel setup dialog for the channel<br />
to which it is connected. The <strong>DA</strong><strong>1855A</strong> front panel controls will operate manually when the<br />
Differential Amplifier is connected to an oscilloscope not provided with a ProBus interface.<br />
NOTE: Removing the ProBus interface cable with the differential amplifier still powered up, requires<br />
the <strong>DA</strong><strong>1855A</strong> to be turned OFF and ON to access the front panel controls.<br />
Dynamic Range<br />
The basic amplifier dynamic range in X1 Gain and ÷1 Attenuation is ± 0.500 V. Changing the gain and<br />
or attenuation will affect both the Differential Mode and Common Mode ranges.<br />
The Differential Mode range is scaled by both gain and attenuation, while the Common Mode range<br />
is scaled by attenuation only.<br />
Gain<br />
Atten*<br />
Differential<br />
Mode*<br />
Common Mode*<br />
1 ÷1 ± 0.5 V ± 15.5 V<br />
1 ÷10 ± 5.0 V ± 155 V<br />
10 ÷1 ± 50 mV ± 15.5 V<br />
10 ÷10 ± 0.5 V ± 155 V<br />
* Attenuation, Common Mode and Differential Mode ranges are scaled with external probe attenuation. A ÷10<br />
probe will increase all these values by a factor of 10.<br />
922258-00 Rev A 11
<strong>DA</strong><strong>1855A</strong> Differential Amplifier<br />
Front Panel<br />
Input Connectors<br />
Signals applied to the +INPUT and the –INPUT are connected either directly to the <strong>DA</strong><strong>1855A</strong><br />
amplifier’s inputs or to the input attenuators. Maximum input voltage is ±200 Vp<br />
A signal connected to the +INPUT will remain its polarity at the output connector. A signal<br />
connected to the –INPUT will be inverted in polarity.<br />
Attenuators<br />
The input attenuators are passive networks which divide each signal by ten.<br />
In ÷1 mode the front panel input connectors are directly connected to the <strong>DA</strong><strong>1855A</strong> amplifier's<br />
differential inputs.<br />
In ÷10 mode each front panel input connector is connected to a passive 1 MΩ attenuator. The<br />
attenuator output is connected to the <strong>DA</strong><strong>1855A</strong> amplifier's corresponding differential input. The<br />
signal at each input is attenuated by a factor of ten.<br />
Gain<br />
The <strong>DA</strong><strong>1855A</strong> amplifier gain (amplification) is selectable between X1 and X10. The amplified signal<br />
appears at the rear panel AMPLIFIER OUTPUT connector.<br />
Gain will affect the differential mode output signal by amplifying the signal difference between the<br />
+INPUT and the –INPUT, but will not affect the common mode signal, the signal common to the<br />
+INPUT and them –INPUT.<br />
Output Termination<br />
Proper gain is obtained when the <strong>DA</strong><strong>1855A</strong> drives a 50 Ω load such as an oscilloscope with input<br />
impedance set to 50 Ω. Automatic 50 Ω termination is obtained when the <strong>DA</strong><strong>1855A</strong> is connected to<br />
a <strong>Teledyne</strong> <strong>LeCroy</strong> oscilloscope through the ProBus interface.<br />
An instrument with only a 1 MΩ input impedance available should have a 50 Ω coaxial termination<br />
placed on its input connector. The <strong>DA</strong><strong>1855A</strong> is then connected to the oscilloscope through the<br />
coaxial termination.<br />
Input Resistance<br />
When the input ATTENUATOR is set to ÷1 and no attenuating probe is connected, the input<br />
resistance can be increased from 1 MΩ to 100 MΩ. This is advantageous when measuring high<br />
impedance circuits or when AC coupling is needed with a very low frequency cut off. When the input<br />
ATTENUATOR is set to ÷10 or an attenuating probe with read out capability is attached, 1 MΩ (1M)<br />
input resistance is automatically selected.<br />
12 922258-00 Rev A
Operator’s <strong>Manual</strong><br />
Unbalanced source impedances can have an adverse effect on common mode rejection. For<br />
example, a differential source with impedances of 1000 and 2000 Ω, each loaded with 1 MΩ will<br />
have a common mode rejection ratio (CMRR) of 1000 to 1. The common mode rejection ratio can be<br />
improved to 100,000 to 1 by using 100 MΩ input resistance.<br />
Auto Zero<br />
Auto Zero is a feature invoked from the Channel setup dialog when the amplifier is connected via<br />
the ProBus interface. If the Differential Amplifier is not connected through a ProBus interface, push<br />
either the X1 or X10 button, even if a different gain is not selected. Auto Zero momentarily sets the<br />
input coupling to OFF and determines the offset necessary to set the output at 0 Volt. During this<br />
process the front panel input signal to the amplifier is interrupted. When the Auto Zero cycle is<br />
completed, the input coupling returns to its previous state. Auto Zero usually takes less than one<br />
second to complete. This feature allows you to DC balance the <strong>DA</strong><strong>1855A</strong> simply by pushing the GAIN<br />
button which is already illuminated. When changing gains, the Auto Zero feature is automatically<br />
invoked, adjusting the amplifier’s DC balance.<br />
+ Input Coupling (AC – OFF – DC)<br />
In OFF mode, the input connector is disconnected from the amplifier input, and the amplifier input<br />
is connected to ground. The AC coupling capacitor is connected between the +INPUT and ground<br />
through 1 MΩ resistor, independent of the INPUT RESISTANCE setting. In this mode, the AC coupling<br />
capacitor is quickly charged to the average DC input voltage. OFF mode is also referred to as<br />
precharge mode. Precharge is particularly useful prior to selecting AC coupling when the input<br />
voltage has a DC component in excess of 19 V. The <strong>DA</strong><strong>1855A</strong> input coupling is set to OFF and<br />
connected to the circuit under test. When the +INPUT is changed from OFF to AC mode, the<br />
coupling capacitor is already charged, and the trace properly centered on the oscilloscope screen.<br />
Additionally, the risk of tripping the input overload detector and automatically disconnecting the<br />
input is eliminated.<br />
In the AC mode, the +INPUT is connected through an AC coupling capacitor to the amplifier input or<br />
the input attenuator. The coupling capacitor retains its charge when the input is switched to DC,<br />
making it possible to return to the same circuit without the precharge time. But this also makes it<br />
possible to discharge the coupling capacitor into another circuit under test if its DC voltage differs by<br />
more than approximately 19 V from the voltage on the coupling capacitor.<br />
NOTE: The discharge current from the AC coupling capacitor is limited to about 70 mA. In some<br />
situations this could damage sensitive circuits. To avoid the inrush current transient, it is therefore<br />
recommended that the +INPUT coupling first be changed to the OFF (precharge) when measuring a<br />
new circuit point. This will safely recharge the AC coupling capacitor in less than 0.3 seconds.<br />
DC and low frequencies are attenuated by the AC coupling capacitor and the input resistance. With<br />
the ATTENUATOR set to ÷10, or set to ÷1 with the INPUT RESISTANCE<br />
cut off (-3dB point) is approximately 1.6 Hz. When the input attenuator is set to ÷1, the INPUT<br />
922258-00 Rev A 13
<strong>DA</strong><strong>1855A</strong> Differential Amplifier<br />
–3 dB point is 0.016 Hz. This extremely low frequency<br />
cut off is useful for observing low frequency noise riding on larger DC voltages.<br />
In the DC mode, the +INPUT connector is connected to the amplifier either directly or through the<br />
input attenuator, and the AC and DC attenuation are the same.<br />
- Input Coupling (AC–OFF – DC – VCOMP)<br />
The –INPUT has the same coupling modes as the +INPUT plus one additional option, VCOMP<br />
(comparison voltage).<br />
The <strong>DA</strong><strong>1855A</strong> contains a precision DC voltage source which is controlled by the oscilloscope OFFSET<br />
control. (When the amplifier is used stand alone, without ProBus interface to a <strong>Teledyne</strong> <strong>LeCroy</strong><br />
oscilloscope, the voltage is controlled by the push buttons above and below the front panel<br />
numerical display.) This voltage source is called the Precision Voltage Generator (PVG).<br />
The <strong>DA</strong><strong>1855A</strong>'s amplifier subtracts the voltage applied to its inverting input from the voltage applied<br />
to its non-inverting input. The <strong>DA</strong><strong>1855A</strong> output is therefore zero whenever these two voltages are<br />
equal. For this reason, the voltage applied to the inverting input is called a comparison voltage,<br />
VCOMP. Stated another way, the value of the horizontal center line in the oscilloscope graticule is<br />
the voltage read in the PVG display. Each graticule line above or below the center line will add or<br />
subtract the Volts/div value from the PVG setting. Refer to Error! Reference source not found.<br />
where the horizontal center line represents a power supply voltage of 5.030 V, the next higher line<br />
5.050 V and the line below the center line 5.010 V. In this figure noise on a + 5.030 V signal is easily<br />
displayed using 5.030 Volt offset and a vertical scale factor of 20 mV/div.<br />
VCOMP can be used to make precise measurements of large signals by comparing the accurately<br />
known VCOMP with the unknown signal. It can also be used to measure the actual voltage at any<br />
point of a waveform.<br />
Since the amplifier’s gain and input attenuator are individually selectable, the comparison range can<br />
be changed from ± 15.500 V to ± 155.000 V by changing the ATTENUATION from ÷1 to ÷10, while<br />
the overall gain can still be set either to 1 or 0.1 by selecting either X10 or X1 GAIN.<br />
NOTE: While in V COMP mode, the amplifier is configured for single ended measurements. The –INPUT<br />
connector is not usable when V COMP is selected. The input signal applied to the + INPUT is referenced<br />
to ground offset by the value set by the Precision Voltage Generator. Large calibrated offsets can be<br />
obtained while making differential measurements by using V DIFF mode.<br />
Precision Voltage Generator<br />
The PVG generates the voltage which is used in the V COMP and V DIFF modes and appears at the rear<br />
panel OFFSET VOLTAGE (PVG) output connector for use as a reference voltage.<br />
The Precision Voltage Generator (PVG) output range is ± 15.500 Volt. The PVG is never attenuated<br />
by the input attenuator. Attenuation of the +INPUT signal by the ÷10 input attenuator will cause the<br />
14 922258-00 Rev A
Operator’s <strong>Manual</strong><br />
PVG to null out an input voltage up to ± 155.00 Volt which is ten times larger than the actual PVG<br />
voltage.<br />
The increase in common mode voltage range also applies when using attenuating probes.<br />
When the <strong>DA</strong><strong>1855A</strong> is used with attenuating probes that feature readout, the PVG display is<br />
changed to indicate the voltage at the +INPUT probe tip which will bring the amplifier output to<br />
zero.<br />
When connected to a <strong>Teledyne</strong> <strong>LeCroy</strong> oscilloscope via the ProBus interface, the oscilloscope<br />
OFFSET control increments or decrements the PVG’s output voltage and the offset value will be<br />
shown on the six PVG front panel indicators. The new offset value will also be displayed on the<br />
oscilloscope’s screen for a few seconds after a change has been made.<br />
When connected to an oscilloscope not provided with a ProBus interface, the PVG can be accessed<br />
by means of push buttons. Above each digit is a push button which increments the corresponding<br />
digit by one when pushed. When held, the digit continues to increment, eventually incrementing the<br />
next higher digit.<br />
Similarly, below each digit is a push button which decrements the corresponding digit.<br />
The ± button above the left-most digit changes the PVG output polarity. The ZERO button below the<br />
left-most digit sets the output to zero and invokes the PVG's Auto Zero function. PVG absolute<br />
mode: <strong>DA</strong>1855 PVG increment and decrement buttons always function to increment or decrement<br />
the voltage display respectively. When decrementing from a positive voltage, the display always<br />
stops at zero. To obtain negative voltages, the ±± button must be pushed, and the increment button<br />
is used to increase the magnitude of the negative voltage. This operation is natural if simply setting<br />
a voltage, but unnatural if moving a displayed oscilloscope waveform. This is known as the PVG<br />
absolute mode, and the only mode available in the original <strong>DA</strong>1855, (non “A” model). The <strong>DA</strong><strong>1855A</strong><br />
retains the option of operating in this same manner as well as supporting PVG roll through zero<br />
mode.<br />
NOTE: When the <strong>DA</strong><strong>1855A</strong> is controlled remotely through a <strong>Teledyne</strong> <strong>LeCroy</strong> oscilloscope, neither<br />
PVG absolute or PVG roll through zero modes apply. When operated remotely, the PVG value is<br />
controlled with the use of the OFFSET knob on the oscilloscope, when in effect, operates in the roll<br />
through mode.<br />
PVG roll through zero mode: The <strong>DA</strong><strong>1855A</strong> increment buttons are oscilloscope waveform related by<br />
factory default. The increment buttons move a displayed oscilloscope waveform upward and the<br />
decrement buttons move the waveform downward independent of the PVG polarity. Decrements<br />
from a positive voltage will roll smoothly through zero. This is known as roll through zero mode.<br />
Toggle PVG modes: To change from roll through zero to absolute mode of operation hold the PVG<br />
ZERO button and press the ± button. Change back to the roll through zero mode by repeating the<br />
same operation.<br />
922258-00 Rev A 15
<strong>DA</strong><strong>1855A</strong> Differential Amplifier<br />
Differential Offset<br />
V DIFF (differential offset voltage) is an instrument mode rather than a type of input coupling. The V DIFF<br />
mode allows the PVG to inject a calibrated offset signal into the <strong>DA</strong><strong>1855A</strong> while still using both<br />
inputs for full differential operation. This mode can be used as a position control to move the trace<br />
on the oscilloscope screen in preference to using the oscilloscope's position or offset control. The<br />
oscilloscope's position and offset controls should always be set to zero so that the <strong>DA</strong><strong>1855A</strong>'s<br />
dynamic range is properly centered. (This is done automatically when using a <strong>Teledyne</strong> <strong>LeCroy</strong><br />
oscilloscope with ProBus interface.) When the oscilloscope is set to greater sensitivities (lower<br />
Volts/Div settings), the Differential offset provides much greater range than the conventional<br />
position control. For example, at 50 mV/div, the V DIFF mode provides up to ± 200 divisions of range.<br />
Operation of the <strong>DA</strong><strong>1855A</strong> using the V DIFF function is the same as V COMP except for the following:<br />
<br />
<br />
The –INPUT remains active, allowing full use of the <strong>DA</strong><strong>1855A</strong> as a differential amplifier.<br />
The maximum range of the PVG is ±10.000 Volt in X1 GAIN and ±1.0000 Volt in X10 GAIN.<br />
The effects of the ÷10 input ATTENUATOR and probe attenuation are the same as when<br />
using VCOMP, i.e., any input attenuation multiplies the effective offset.<br />
The <strong>DA</strong><strong>1855A</strong>'s PVG display is changed to indicate the voltage that, if applied between the +INPUT<br />
and –INPUT, would bring the amplifier output to zero. When the <strong>DA</strong><strong>1855A</strong> is used with attenuating<br />
probes which feature readout, the PVG display is scaled to include the effect of probe attenuation.<br />
Effective Gain<br />
Six indicators (LEDs) across the top of the <strong>DA</strong><strong>1855A</strong> front panel show the total gain from the<br />
instrument input to output. Logic within the amplifier includes the gain, internal attenuation, and<br />
probe attenuation factors (when readout encoded probes are used) to determine the effective gain.<br />
When the X1 light is ON, the overall amplifier voltage gain (amplification) is unity. Similarly, X10<br />
indicates an overall amplification of ten times, ÷10 Indicates the voltage amplification is 0.1, etc.<br />
The <strong>DA</strong><strong>1855A</strong> communicates the effective gain information to the <strong>Teledyne</strong> <strong>LeCroy</strong> oscilloscope<br />
when the ProBus interface is used. This corrects the scale factor of the displayed waveforms, cursors<br />
and measurements.<br />
When <strong>Teledyne</strong> <strong>LeCroy</strong> DXC series or other readout encoded probes are used, the effective gain<br />
includes the probe’s attenuator factor.<br />
BW Limit<br />
FULL<br />
The <strong>DA</strong><strong>1855A</strong> amplifier's full bandwidth, over 100MHz, is passed to the<br />
oscilloscope, spectrum analyzer or digitizer. Frequency response and<br />
transient response are essentially independent of the oscilloscope’s input<br />
impedance.<br />
20 MHz A 20MHz three pole (18dB/octave) filter allows the <strong>DA</strong><strong>1855A</strong> to reduce<br />
extraneous noise. This filter is a passive LC design and is intended to drive a<br />
16 922258-00 Rev A
Operator’s <strong>Manual</strong><br />
50 Ω load. Without the load, the filter's frequency response and transient<br />
response are altered.<br />
1 MHz The 1MHz filter is of the same design as the 20 MHz filter, and the same<br />
remarks apply.<br />
100 kHz The 100kHz filter is an active filter with a 50 Ω output impedance. Transient<br />
and frequency response are independent of the load impedance.<br />
Overload<br />
When a signal, which could damage the <strong>DA</strong><strong>1855A</strong>, has been applied to either input connector, the<br />
<strong>DA</strong><strong>1855A</strong> protects itself by disconnecting the signal. The input coupling mode changes to OFF, and<br />
the OVERLOAD light is turned on.<br />
To reset the amplifier to normal operation, remove the offending input, press any of the input<br />
coupling modes (AC, OFF, or DC). The Overload light will turn off indicating the amplifier is reset.<br />
When the ATTENUATOR is set to ÷1, an input signal of approximately ±19 Volt will activate the<br />
overload protection circuit. Fast transients will draw up to about 70 mA of input current for a brief<br />
period before the input coupling relay acts to disconnect the input.<br />
CAUTION. Inputs in excess of 250 Volt may cause permanent damage to the <strong>DA</strong><strong>1855A</strong>.<br />
The input is not disconnected when the ATTENUATOR is set to ÷10. The input attenuator can<br />
withstand up to 200 Volt continuous input.<br />
Rear Panel<br />
Power<br />
Normal instrument operation is obtained with the power switch in the 1 (ON) position. The<br />
instrument can be used immediately, however it requires a 30 minute warm up period to reach<br />
specified performance. Prior to reaching operating temperature, the amplifier offset will drift and<br />
the output from the Precision Voltage Generator may not be within specification. In high humidity<br />
environments the time to stabilize may be much longer. In high humidity environments or when<br />
warm-up time inhibits power switch left in the 1 (ON) position.<br />
Power Up Indicator<br />
Upon turn-on, the model number and firmware version are briefly displayed in the PVG readout. For<br />
example, 1855.12 indicates that the instrument is a model <strong>DA</strong><strong>1855A</strong> and the firmware version is 1.2.<br />
922258-00 Rev A 17
<strong>DA</strong><strong>1855A</strong> Differential Amplifier<br />
Precision Voltage Generator Offset Voltage<br />
The rear panel OFFSET VOLTAGE BNC (PVG) output connector, is a monitor of the Precision Voltage<br />
Generator (PVG). The voltage present on this connector is the same voltage as that applied to the –<br />
INPUT when the –INPUT coupling is set to VCOMP or internally to the <strong>DA</strong><strong>1855A</strong> when VDIFF is<br />
selected. The OFFSET VOLTAGE output can be used to monitor the PVG with a digital Voltmeter<br />
(DVM). A low pass filter between the PVG output and the –INPUT removes radio frequency<br />
interference (RFI) from the signal. This filter does not attenuate the PVG signal.<br />
The PVG output is not attenuated by the input attenuator or probes, whereas the input signal is.<br />
Therefore the effective range of V COMP is increased by a factor of 10 when the ÷10 ATTENUATOR is<br />
selected or a ÷10 attenuating probe is used to attenuate the input signal. The PVG numerical display<br />
reflects the attenuator setting and probe attenuation when the probe is readout encoded. As an<br />
example, if there are no probes attached, the ÷10 ATTENUATOR is selected and the display is set to<br />
read –155.000, the PVG output will actually be –15.5 Volt.<br />
The decimal in the display will be in the correct location to indicate the voltage at the PVG output<br />
when no probes are attached and ÷1 ATTENUATOR and X1 GAIN are selected.<br />
The OFFSET VOLTAGE BNC (PVG) output also presents the same voltage used internally for<br />
differential offset when V DIFF is selected. Because the PVG is applied to the amplifier to create a true<br />
differential offset, the relationship between V DIFF and the voltage at the OFFSET VOLTAGE BNC (PVG)<br />
output (changes with the amplifier gain selection according to the following table:<br />
The maximum V DIFF is multiplied by any probe attenuation factor. The <strong>DA</strong><strong>1855A</strong> front panel displays<br />
the correct offset referred to the instrument input.<br />
Table 1, V DIFF Range for Different Gain and Attenuator Settings<br />
Gain Attenuation Max. V DIFF<br />
X1 ÷1 ± 10 V<br />
X1 ÷10 ± 100 V<br />
X10 ÷1 ± 1 V<br />
X10 ÷10 ± 10 V<br />
When using readout encoded probes which the <strong>DA</strong><strong>1855A</strong> senses, the PVG readout calculates the<br />
effective differential offset at the probe tip. Of course, both probes must have the same attenuation<br />
factor.<br />
In the V COMP mode, the maximum OFFSET VOLTAGE input is limited by the <strong>DA</strong><strong>1855A</strong> common mode<br />
dynamic range. In the V DIFF mode it is limited by the dynamic range of the internal V DIFF amplifier.<br />
18 922258-00 Rev A
Operator’s <strong>Manual</strong><br />
Table 2 and Table 3 will help the operator stay within the maximum input voltage limits and<br />
understand the relationship between the actual voltage applied and the effective voltage. Effective<br />
voltage is always referred to the input of the <strong>DA</strong><strong>1855A</strong> or the probe tip if a probe is used. When<br />
using probes, the maximum effective voltage range may be limited by the maximum voltage rating<br />
of the probe.<br />
Table 2, Effective Offset Range with ÷11 Probe<br />
Front Panel<br />
Effective Offset<br />
Settings<br />
Range<br />
Gain Attenuation V COMP V DIFF<br />
X1 ÷1 ± 15.5 V ± 10 V<br />
X1 ÷10 ± 155 V ± 100 V<br />
X10 ÷1 ± 15.5 V ± 1 V<br />
x10 ÷10 ± 155 V ± 10 V<br />
NOTE: The effective voltage is always increased by the attenuator. It therefore follows that any<br />
probe will increase the effective voltage of both V COMP and V DIFF by its attenuation factor.<br />
For example, a probe with a 100X attenuation factor will increase the effective full scale range by<br />
100.<br />
Table 3, Effective Offset Range with ÷100 Probe<br />
Front Panel<br />
Effective Offset<br />
Settings<br />
Range with ÷100 Probe<br />
Gain Attenuation V COMP V DIFF<br />
X1 ÷1 ± 1.55 kV ± 1 kV<br />
X1 ÷10 ± 15.5 kV ± 10 kV<br />
X10 ÷1 ± 1.55 kV ± 100 V<br />
x10 ÷10 ± 15.5 kV ± 1 kV<br />
Although the full scale range may be 10 kV or 15.5 kV, most probes have a much lower maximum<br />
input voltage rating which must not be exceeded.<br />
Amplifier Output<br />
The AMPLIFIER OUTPUT BNC is intended to be used with an oscilloscope, spectrum analyzer or<br />
instrument having a 50 Ω input resistance. The amplifier’s output impedance is 50 Ω. Without the 50<br />
Ω load, the amplifier gain will be uncalibrated and will be approximately twice the amount indicated<br />
on the front panel. Proper operation of the 1 MHz or 20 MHz bandwidth limit filters requires an<br />
output load impedance of 50 Ω.<br />
922258-00 Rev A 19
<strong>DA</strong><strong>1855A</strong> Differential Amplifier<br />
Remote Operation<br />
A REMOTE connector on the rear panel of the <strong>DA</strong><strong>1855A</strong> allows total control of the instrument<br />
through a <strong>Teledyne</strong> <strong>LeCroy</strong> oscilloscope when connected to ProBus using the supplied cable. All of<br />
the instrument functions can be controlled through the oscilloscope user interface.<br />
Remote control is also possible using commands sent through the IEEE-488 bus or through RS-232<br />
connected to the oscilloscope. The <strong>DA</strong><strong>1855A</strong> cannot be remotely controlled without a <strong>Teledyne</strong><br />
<strong>LeCroy</strong> oscilloscope. See page 46 for a description of the Remote Commands.<br />
When the ProBus cable is installed, the buttons on the front panel of the differential amplifier are<br />
disabled.<br />
NOTE: Remote operation requires software version 6.6.0.5 or higher.<br />
Probe Coding Input<br />
This jack is to be used with <strong>Teledyne</strong> <strong>LeCroy</strong> DXC series probes to detect the probe attenuation<br />
factor. Other manufacturer’s probes with standard probe coding capability will be properly decoded<br />
through the <strong>DA</strong><strong>1855A</strong>'s front panel +INPUT BNC connector.<br />
Instrument Settings<br />
The <strong>DA</strong><strong>1855A</strong> output is intended to connect directly to the input of an oscilloscope, or other<br />
instrument, but it is important to observe some rules so that the <strong>DA</strong><strong>1855A</strong> delivers its specified<br />
performance.<br />
CAUTION. A properly terminated differential amplifier can deliver an output voltage of ±0.5<br />
Volt. The output is DC coupled and will follow any DC component applied to the input. Some<br />
instruments such as spectrum analyzers could be damaged from overload or DC components.<br />
Retained Settings<br />
All front panel settings, including Precision Voltage Generator (PVG) settings are retained when the<br />
instrument is turned off. The <strong>DA</strong><strong>1855A</strong> return to the same state they were in when power was<br />
removed.<br />
20 922258-00 Rev A
Operator’s <strong>Manual</strong><br />
When used without ProBus interface, the instrument can be set to factory default settings by<br />
pressing the VCOMP and VDIFF buttons simultaneously.<br />
Gain<br />
X1<br />
Attenuation ÷10<br />
+ Input Coupling Off<br />
– Input Coupling Off<br />
Bandwidth Limit<br />
PVG Voltage<br />
V COMP<br />
V DIFF<br />
Input Resistance<br />
PVG Mode<br />
Full<br />
+00.000 V<br />
Off<br />
Off<br />
1 MΩ<br />
Roll through zero<br />
Table 4. Factory Default Settings<br />
Sensitivity, Position and Offset<br />
Oscilloscopes are designed to maintain their accuracy for that portion of a signal that is displayed<br />
on-screen. When the signal is large enough to drive the display off-screen, the oscilloscope’s<br />
amplifier must limit the signal in a non-linear mode. Oscilloscopes are designed so that no matter<br />
how the sensitivity, position and offset controls are set, the operator cannot view this distorted<br />
portion of the signal.<br />
When used with a <strong>Teledyne</strong> <strong>LeCroy</strong> oscilloscope, the setup is automatic to prevent you from<br />
entering a mode which could result in displaying a distorted signal resulting from overload.<br />
When used with instruments lacking ProBus interface, the instrument’s gain and position controls<br />
should be properly set to avoid displaying the non-linear portion of the <strong>DA</strong><strong>1855A</strong>'s output signal<br />
when it is in overdrive. This can be accomplished by observing the following rules:<br />
<br />
<br />
Turn the oscilloscope input coupling to “OFF” or “GND”, set the oscilloscope position<br />
control to center screen, and do not change it! If the oscilloscope has an OFFSET control, it<br />
too should be set to zero. Return the oscilloscope’s input coupling to “DC”. Subsequently<br />
adjust the trace position on the oscilloscope screen using the <strong>DA</strong><strong>1855A</strong> PVG and V DIFF mode<br />
or V COMP input. This assures that the oscilloscope is set to the center of the <strong>DA</strong><strong>1855A</strong>'s<br />
dynamic range.<br />
Set the oscilloscope deflection factor to no greater than 100mV/div. The most useful range<br />
for the oscilloscope deflection factors will be between 1mV/div and 100mV/div. Using a<br />
scale factor of 200 mV/Div will allow the nonlinear portion of the <strong>DA</strong><strong>1855A</strong>'s output to be<br />
viewed on screen.<br />
922258-00 Rev A 21
<strong>DA</strong><strong>1855A</strong> Differential Amplifier<br />
More sensitive settings (e.g. 100µV/div) available on some oscilloscopes can be used, but their<br />
usefulness may be limited by noise, particularly with the <strong>DA</strong><strong>1855A</strong> FULL bandwidth limit selection<br />
and without averaging. With the oscilloscope set to 100µV/div and the <strong>DA</strong><strong>1855A</strong> in the X10 GAIN<br />
mode, the overall scale factor will be 10µV/div.<br />
In the X10 GAIN mode, the <strong>DA</strong><strong>1855A</strong> has lower noise than many oscilloscopes, so it is preferable to<br />
use the /<strong>DA</strong><strong>1855A</strong> X10 GAIN mode and a lower oscilloscope scale factor. For example, to obtain the<br />
best noise performance at 1mV/div, set the <strong>DA</strong><strong>1855A</strong> to X10 mode and the oscilloscope to 10mV/div<br />
rather than the use X1 mode and 1mV/div. This also maximizes the bandwidth, as some<br />
oscilloscopes give up some bandwidth at their most sensitive settings. Some oscilloscopes give up<br />
bits of resolution to obtain 1mV or 2 mV/div sensitivity. The loss of resolution can be avoided by<br />
using this technique. Any oscilloscope bandwidth limit setting may be used so long as the unlimited<br />
signal does not exceed full screen before invoking bandwidth limit.<br />
Probes and Differential Amplifiers<br />
When using a differential amplifier it is very important to understand the role probes play in the<br />
overall measurement system performance. Probes not only make attachment to the circuit under<br />
test more convenient, ÷10 and ÷100 attenuating probes also extend the common mode range of the<br />
differential amplifier. For example, the <strong>DA</strong><strong>1855A</strong> amplifiers have a common mode range of ±15.5<br />
volts when their internal attenuators are set to ÷1 and 155 volts when set to ÷10. The addition of a<br />
probe with an attenuation factor of ten will extend the common mode range to 1550 volts or the<br />
rating of the probe, whichever is less.<br />
There is a trade-off, however. The Common Mode Rejection Ratio (CMRR) capability of even highly<br />
matched differential probe pairs is seldom as good that of the amplifier. In order to preserve as<br />
much of the amplifier’s performance as possible at the probe tips, it is important to use probes that<br />
are designed for differential performance. Attempting to use normal ÷10 or ÷100 attenuating<br />
oscilloscope probes, even high quality probes, will result in very poor CMRR performance. Nominally<br />
matching ÷1 probes however, will provide excellent common mode rejection and are<br />
recommended.<br />
For applications which do not require additional attenuation, ÷1probes present relative high<br />
capacitive loading to the circuit under test, limiting their usefulness to low frequency<br />
measurements.<br />
When making differential measurements, accurate probe compensation is much more important<br />
than in single-ended measurements. Most probes depend on the accuracy of the oscilloscope’s 1<br />
MΩ input resistor to determine the accuracy of the probe’s attenuation factor. Two probes with a<br />
1% accuracy specification can yield a CMRR as low as 50 to 1 at DC while the amplifier CMRR may be<br />
higher than 100,000 to 1. At high frequencies, the CMRR will be worse.<br />
A differential probe pair must allow for matching at DC as well as over their useful frequency range.<br />
Changing the compensation of a differentially matched probe set without following the proper<br />
22 922258-00 Rev A
Operator’s <strong>Manual</strong><br />
compensation procedure can result in a significant decrease in the CMRR capability of any<br />
differential probe pair.<br />
It is a good practice to compensate a probe pair for a given amplifier and then leave the probe pair<br />
and amplifier together as a system. Similarly, it is important that, once compensated for given<br />
amplifier, each probe always be used on the same input (one probe always on the +INPUT and the<br />
other always on the –INPUT).<br />
DXC100A Differential Probe Pair<br />
The DXC100A is a high performance matched passive differential probe pair designed for use with<br />
<strong>Teledyne</strong> <strong>LeCroy</strong> <strong>DA</strong><strong>1855A</strong> series differential amplifiers. The probe pair consists of two well matched<br />
individual probes that share a common compensation box to allow the attenuation factor on both<br />
probes to be simultaneously switched between ÷10 and ÷100. When used with the <strong>DA</strong><strong>1855A</strong><br />
Differential Amplifier, the probe’s attenuation factor is automatically incorporated into the effective<br />
gain display and the decimal properly located in the Precision Voltage Generator (PVG) display.<br />
Probe Grounding<br />
The DXC100A Probe Pair is supplied with accessories that allow for three methods of connecting<br />
probe grounds.<br />
In most cases, when the common mode portion of the signal consists mainly of low frequencies (1<br />
MHz and below), the probe ground leads should not be connected to the ground of the circuit under<br />
test. They should be connected to each other. This minimizes the effects of ground loop currents.<br />
The signal corruption caused by not having the probes connected to the ground of the circuit under<br />
test will be common to both inputs and will be rejected by the differential amplifier.<br />
However, when working in an environment with high RF ambient noise, it is best to connect the<br />
probe ground leads to a good RF ground near the point where the signal is being measured.<br />
The best way to determine which probe grounding technique should be used is to try both methods<br />
and use the one that gives the least corruption of the differential signal.<br />
When adjusting the compensation and probe CMRR, the use of probe tip to BNC adapters is<br />
required. They provide the best performance of the three grounding method.<br />
General Operating Information<br />
This section will help you become familiar with the operation of the <strong>DA</strong><strong>1855A</strong> and how it interfaces<br />
with an oscilloscope. To carry out the following exercises, you will need an oscilloscope and a<br />
general purpose function generator.<br />
922258-00 Rev A 23
<strong>DA</strong><strong>1855A</strong> Differential Amplifier<br />
Power Connection<br />
Check to make sure the power switch located on the rear panel is in the OFF position. Connect the<br />
power cable to an appropriate power source. The <strong>DA</strong><strong>1855A</strong> will operate on a 50 or 60 Hz AC power<br />
source with a nominal voltage range from 100 V to 240 V.<br />
Comparator Mode<br />
The <strong>DA</strong>1855 becomes a differential comparator when the internal Precision Voltage generator (PVG)<br />
output is selected as the amplifier’s inverting (–) input. The – Input is disconnected form the<br />
amplifier and does not serve any purpose in the V COMP mode. In this mode the <strong>DA</strong><strong>1855A</strong> can be used<br />
to very accurately measure relatively small signals riding on large DC components.<br />
Figure 1, Block Diagram V COMP Mode<br />
Differential Mode<br />
The <strong>DA</strong><strong>1855A</strong> built-in Precision Voltage Generator can be used to generate a true differential offset<br />
while still allowing both inputs to be used as differential inputs. This mode facilitates making<br />
measurements such as changes to a transistor’s base to emitter voltage caused by variations in<br />
temperature. Used in this mode, the voltage generator can be set to a value that will zero out the<br />
static value of the junction’s ON voltage. the <strong>DA</strong><strong>1855A</strong>’s differential measurement capability will<br />
reject any dynamic signal common to both sides of the junction and the oscilloscope is left to<br />
measure only the changes in the junction voltage.<br />
24 922258-00 Rev A
Operator’s <strong>Manual</strong><br />
Figure 2, Block Diagram V DIFF Mode.<br />
Setting Up the Oscilloscope with ProBus Interface<br />
Connect the RJ-45 type connector of the ProBus interface cable to the REMOTE connector and one<br />
end of the BNC cable to the AMPLIFIER OUTPUT on the rear panel of the <strong>DA</strong><strong>1855A</strong> and the other<br />
end of the BNC cable to the ProBus connector. Connect the ProBus connector to any vertical<br />
channel and, if necessary, press the Front Panel channel button to turn on the channel.<br />
Switch the power switch located on the <strong>DA</strong><strong>1855A</strong>’s rear panel to ON and observe the front panel<br />
indicators. Initially, each indicator light will be ON and the red OVERLOAD indicator will be ON as<br />
well. All segments in the Precision Voltage Generator display will be ON. The +INPUT and –INPUT<br />
Coupling Indicators will switch to OFF while the amplifier performs the Auto Zero function and back<br />
to the original setting. After approximately 3 seconds from turn on, the <strong>DA</strong><strong>1855A</strong> will return to the<br />
settings in effect when the power was last turned off. The oscilloscope’s input impedance has been<br />
set to 50 Ω automatically through the ProBus interface, the trace has been centered and all<br />
<strong>DA</strong><strong>1855A</strong> front panel controls are locked out.<br />
922258-00 Rev A 25
<strong>DA</strong><strong>1855A</strong> Differential Amplifier<br />
Make these settings:<br />
PVG Mode<br />
+Coupling<br />
–Coupling<br />
<strong>DA</strong><strong>1855A</strong> (Atten/Gain)<br />
List Select: Upper BWL<br />
List Select: Gain<br />
OFF<br />
DC<br />
Grounded (OFF)<br />
Auto<br />
Full BWL<br />
X1<br />
List Select: Atten ÷10<br />
List Select: Input R<br />
1 MΩ<br />
Attenuator and Gain Operation<br />
Connect the function generator output to the +INPUT BNC connector and apply a sine wave of 50<br />
kHz and 1.0 Vp-p amplitude. If necessary, set the oscilloscope scale factor to 0.50 V/div. The signal<br />
on the oscilloscope should be 2 divisions peak to peak. Adjust the oscilloscope’s time per division<br />
and trigger to display at least two complete cycles of the waveform.<br />
Set the <strong>DA</strong><strong>1855A</strong> Atten/Gain to <strong>Manual</strong>. In the List Select menu, select Atten and in the Value menu<br />
select /1. The waveform’s magnitude on the oscilloscope’s display will increase by a factor of 10, to<br />
50 mV/div, the waveform will extend and extend off the top and bottom of the screen. The X1 light<br />
will be lighted in the EFFECTIVE GAIN front panel display. Reduce the function generator’s output<br />
until the oscilloscope’s display is again 2 divisions peak to peak.<br />
Set the gain to X10. Observe the following changes: The +INPUT’s DC light will momentarily go out<br />
and its OFF light will be lighted before returning to their previous states. This momentary change is<br />
the result of the <strong>DA</strong><strong>1855A</strong> automatically adjusting its DC Balance. The X10 light will be lighted in the<br />
EFFECTIVE GAIN display and the display on the oscilloscope will again extend off screen. The overall<br />
sensitivity of the <strong>DA</strong><strong>1855A</strong> and the oscilloscope is now 5mV/div.<br />
26 922258-00 Rev A
Operator’s <strong>Manual</strong><br />
Comparison Voltage Operation (VCOMP)<br />
Set the <strong>DA</strong><strong>1855A</strong> as follows:<br />
PVG Mode<br />
OFF<br />
+Coupling<br />
–Coupling<br />
<strong>DA</strong><strong>1855A</strong> (Atten/Gain)<br />
List Select: Upper BWL<br />
List Select: Gain<br />
DC<br />
Grounded (OFF)<br />
<strong>Manual</strong><br />
FULL BWL<br />
X10<br />
List Select: Atten ÷1<br />
List Select: Inpur R 1<br />
Set the Function generator’s output to 50 kHz and 100 mVp-p sine wave and the output connected<br />
to the <strong>DA</strong>1855’s +INPUT.<br />
Set the oscilloscope to 5 mV/div. Under these conditions, the display on the oscilloscope will extend<br />
off the top and bottom of the screen.<br />
In the PVG Mode menu switch to V COMP . This internally applies the Precision Voltage Generator’s<br />
output to the –INPUT. The OFF light on the <strong>DA</strong><strong>1855A</strong>’s front panel goes out and the –Coupling menu<br />
on the user interface disappears (the –INPUT connector is disabled).<br />
The positive and negative peaks of the waveform displayed on the oscilloscope are (respectively) 10<br />
divisions above and below the display center line. Rotate the OFFSET knob on the oscilloscope until<br />
the positive peak of the waveform appears in the oscilloscope’s display. Continue adjusting the<br />
OFFSET knob until the peak of the waveform is at the centerline of the oscilloscope’s display. The<br />
number in the Precision Voltage Generator display is the waveform’s positive peak voltage.<br />
Rotate the OFFSET knob clockwise until the negative peak of the signal is now at or near the<br />
oscilloscope’s display centerline. By adjusting the OFFSET knob, the negative peak can be positioned<br />
to the oscilloscope’s display centerline. Now the number in the Precision Voltage Generator’s<br />
display is the waveform’s negative peak voltage.<br />
Change the oscilloscope’s sensitivity from 5 mV/div to 1 mV/div. Select Auto Zero in the List Select<br />
menu and push the button next to Auto Zero window to cause the <strong>DA</strong><strong>1855A</strong> to adjust its DC<br />
balance.<br />
Change the OFFSET control to again place the negative peak of the waveform at the oscilloscope’s<br />
center screen. Note that the Precision Voltage Generator’s display represents the negative peak<br />
voltage of the waveform with greater resolution.<br />
Return the oscilloscope’s sensitivity to 50 mV/div and select OFF or in the PVG Menu. The Precision<br />
Voltage Generator will retain its setting and the display on the oscilloscope will be centered about<br />
M Ω<br />
922258-00 Rev A 27
<strong>DA</strong><strong>1855A</strong> Differential Amplifier<br />
the centerline. Following are a few observations on using the <strong>DA</strong><strong>1855A</strong> comparison voltage mode<br />
(V COMP ):<br />
• The negative input and its AC, OFF and DC coupling are disabled. Instead of being a<br />
differential amplifier, the <strong>DA</strong><strong>1855A</strong> becomes a differential comparator. It compares the<br />
voltage present at the +INPUT with the output of the Precision Voltage Generator and when<br />
they are equal, the output of the <strong>DA</strong><strong>1855A</strong> is zero volts.<br />
• The value displayed by the Precision Voltage Generator indicates a waveform’s voltage, with<br />
respect to ground, as it passes through the oscilloscope display’s centerline. By using the<br />
<strong>DA</strong><strong>1855A</strong> in the comparison voltage mode and the oscilloscope in a high sensitivity setting,<br />
highly accurate voltage measurements can be made.<br />
Differential Offset Operation (VDIFF)<br />
Set the <strong>DA</strong><strong>1855A</strong> up as follows through the oscilloscope user interface:<br />
PVG Mode<br />
+Coupling<br />
<strong>DA</strong><strong>1855A</strong> (Atten/Gain)<br />
List Select: Upper BWL<br />
List Select: Gain<br />
V COMP<br />
DC<br />
<strong>Manual</strong><br />
FULL BWL<br />
X10<br />
List Select: Atten ÷1<br />
List Select Input R<br />
1 M Ω<br />
Leaving the OFFSET control set as in the previous example, the <strong>DA</strong><strong>1855A</strong> front panel indicators<br />
should be lit as follows:<br />
+INPUT<br />
DC<br />
–INPUT<br />
BW LIMIT<br />
GAIN<br />
V COMP<br />
FULL<br />
X10<br />
ATTENUATOR ÷ ÷1<br />
INPUT RESISTANCE<br />
1 M Ω<br />
PVG +0.0500<br />
COMPARISON or<br />
DIFFERENTIAL<br />
EFFECTIVE GAIN<br />
COMPARISON<br />
X10<br />
28 922258-00 Rev A
Operator’s <strong>Manual</strong><br />
Set the Function generator’s output to 50 kHz and 100 mVp-p sine wave and the output connected<br />
to the <strong>DA</strong>1855’s +INPUT.<br />
Set the oscilloscope to 5 mV/div and time/div adjusted to display 2 to 3 cycles.<br />
Externally trigger the oscilloscope by connecting a cable from the function generator’s output (same<br />
signal as is applied to the <strong>DA</strong><strong>1855A</strong>'s +INPUT) or from the Trigger Signal out on the oscilloscope.<br />
Under these conditions, the negative peak of the display on the oscilloscope should be very near<br />
center screen. Adjust the OFFSET knob on the oscilloscope until the negative peak is at center<br />
screen.<br />
Select V DIFF in the PVG Mode window. This internally applies the output of the Precision Voltage<br />
Generator to a point within the <strong>DA</strong><strong>1855A</strong>'s amplifier that facilitates a true differential offset. The<br />
V COMP light went out and the OFF light was lighted. In the line under the Precision Voltage Generator<br />
display (COMPARISON or DIFFERENTIAL OFFSET ), the COMPARISON light went out and the<br />
DIFFERENTIAL light was lighted. This indicates that the Precision Voltage Generator will now be<br />
applied as a differential offset rather than as a comparison voltage as in the previous exercise. Both<br />
the +INPUT and the –INPUT inputs are now enabled, even though the –INPUT OFF light is still ON.<br />
The positive and negative peaks of the waveform displayed on the oscilloscope are (respectively) 10<br />
divisions above and below the display center line. Rotate the OFFSET knob above the VOLTS/DIV<br />
knob on the oscilloscope until the positive peak of the waveform appears in the oscilloscope’s<br />
display. Continue adjusting the oscilloscope’s OFFSET knob until the peak of the waveform is at the<br />
centerline of the oscilloscope’s display. The number in the Precision Voltage Generator display is the<br />
waveform’s positive peak voltage.<br />
Rotate the OFFSET knob clockwise until the negative peak of the signal is now at or near the<br />
oscilloscope’s display centerline. By adjusting the OFFSET knob, the negative peak can be positioned<br />
to the oscilloscope’s display centerline. Now the number in the Precision Voltage Generator’s<br />
display is the waveform’s negative peak voltage.<br />
Change the oscilloscope’s sensitivity from 5 mV/div to 1 mV/div. Select Auto Zero in the List Select<br />
menu and push the button next to Auto Zero window to cause the <strong>DA</strong><strong>1855A</strong> to adjust its DC<br />
balance.<br />
Change the OFFSET control to again place the negative peak of the waveform at the oscilloscope’s<br />
center screen. Note that the Precision Voltage Generator’s display represents the negative peak<br />
voltage of the waveform with greater resolution.<br />
Return the oscilloscope’s sensitivity to 50mV/div and select OFF in the PVG Menu. The Precision<br />
Voltage Generator will retain its setting and the display on the oscilloscope will be centered about<br />
the centerline.<br />
922258-00 Rev A 29
<strong>DA</strong><strong>1855A</strong> Differential Amplifier<br />
Following are a few observations on using the differential offset mode (V DIFF ) of the <strong>DA</strong><strong>1855A</strong>:<br />
• Both the positive and negative inputs (AC, OFF and DC) are enabled and the <strong>DA</strong><strong>1855A</strong><br />
remains a true differential amplifier.<br />
• The value displayed by the Precision Voltage Generator indicates a waveform’s differential<br />
voltage, with respect to the –INPUT, as it passes through the oscilloscope display’s center<br />
line.<br />
• By using the <strong>DA</strong><strong>1855A</strong> in the differential offset mode and the oscilloscope in a high<br />
sensitivity setting, high resolution voltage measurements can be made.<br />
• The Precision Voltage Generator can be used as a position control which allows the<br />
<strong>DA</strong><strong>1855A</strong> to operate in its most linear region.<br />
Setting up the Oscilloscope without ProBus Interface<br />
Connect a 50 Ω coaxial cable between the AMPLIFIER OUTPUT BNC on the <strong>DA</strong><strong>1855A</strong> rear panel and<br />
the oscilloscope’s input connector. If the oscilloscope has 1 MΩ and 50 Ω input capability, select 50<br />
Ω. If the oscilloscope has only a 1 MΩ input, terminate the coaxial cable at the oscilloscope’s input<br />
with a 50 Ω feed through terminator. It is important that the <strong>DA</strong><strong>1855A</strong> be terminated by 50 Ω.<br />
Set the oscilloscope vertical scale factor to 50mV/div. Set the oscilloscope’s input coupling to GND<br />
or OFF and position the trace to center screen. Do not move the oscilloscope position setting after<br />
this initial set-up. Change the oscilloscope input coupling to DC.<br />
Change the power switch located on the <strong>DA</strong><strong>1855A</strong>'s rear panel to 1 (ON) and observe the <strong>DA</strong><strong>1855A</strong>'s<br />
front panel indicators. Initially, each indicator light will be ON and the red OVERLOAD indicator will<br />
be ON as well. All segments in the Precision Voltage Generator display will be ON. After<br />
approximately 3 seconds, the <strong>DA</strong><strong>1855A</strong> will return to the settings in effect when the power was last<br />
turned off.<br />
Set the <strong>DA</strong><strong>1855A</strong> as follows:<br />
+INPUT<br />
–INPUT<br />
BW LIMIT<br />
GAIN<br />
30 922258-00 Rev A<br />
DC<br />
OFF<br />
FULL<br />
X1<br />
ATTENUATOR ÷10<br />
INPUT RESISTANCE<br />
COMPARISON or<br />
DIFFERENTIAL<br />
1 M Ω<br />
PVG +00.000<br />
EFFECTIVE GAIN ÷10<br />
COMPARISON
Operator’s <strong>Manual</strong><br />
Attenuator and Gain Operation<br />
Connect the function generator output to the +INPUT BNC connector and apply a sine wave of 50<br />
kHz and 1.0 Vp-p amplitude. The signal on the oscilloscope should be 2 divisions peak to peak<br />
amplitude. Adjust the oscilloscope’s time per division and trigger to display at least two complete<br />
cycles of the waveform.<br />
Press the ÷1 ATTENUATOR button on non-ProBus operated systems or selecting Atten in the List<br />
Select menu and setting the attenuation to /1 in systems with ProBus interface. The waveform’s<br />
magnitude on the oscilloscope’s display will increase by a factor of 10 and extend off the top and<br />
bottom of the screen.<br />
The X1 light will be lighted in the EFFECTIVE GAIN display. Reduce the function generator’s output<br />
until the oscilloscope’s display is again 2 divisions peak to peak. The overall sensitivity of the<br />
<strong>DA</strong><strong>1855A</strong> and the oscilloscope is now 50 mV/div.<br />
Now press the X10 GAIN button. Observe the following changes: The +INPUT’s DC light will<br />
momentarily go out and its OFF light will be lighted before returning to their previous states. This<br />
momentary change is the result of the <strong>DA</strong><strong>1855A</strong> automatically adjusting its DC Balance. The X10<br />
light will be lighted in the EFFECTIVE GAIN display and the display on the oscilloscope will again<br />
extend off screen. The overall sensitivity of the <strong>DA</strong><strong>1855A</strong> and the oscilloscope is now 5 mV/div.<br />
Comparison Voltage Operation (VCOMP)<br />
Leave the <strong>DA</strong><strong>1855A</strong> set up as in the previous exercise or set as follows:<br />
+INPUT<br />
–INPUT<br />
BW LIMIT<br />
GAIN<br />
DC<br />
OFF<br />
FULL<br />
X10<br />
ATTENUATOR ÷ ÷1<br />
INPUT RESISTANCE<br />
1MΩ<br />
PVG +00.00<br />
COMPARISON or<br />
DIFFERENTIAL<br />
COMPARISON<br />
EFFECTIVE GAIN<br />
Set the Function generator’s output to 50 kHz and 100 mVp-p sine wave and the output connected<br />
to the <strong>DA</strong>1855’s +INPUT.<br />
Set the oscilloscope to 50 mV/div (equivalent to 5 mV/div with <strong>DA</strong><strong>1855A</strong> set at X10 GAIN) and<br />
time/div adjusted for 2 to 3 cycles.<br />
Under these conditions, the display on the oscilloscope will extend off the top and bottom of the<br />
screen.<br />
922258-00 Rev A 31<br />
X10
<strong>DA</strong><strong>1855A</strong> Differential Amplifier<br />
Press the –INPUT’s V COMP button. This internally applies the Precision Voltage Generator’s output to<br />
the <strong>DA</strong><strong>1855A</strong>'s –INPUT and the OFF light goes out (the –INPUT connector is disabled).<br />
The positive and negative peaks of the waveform displayed on the oscilloscope are (respectively) 10<br />
divisions above and below the display center line. Push the button above the digit that is two places<br />
right of the decimal (10 mV) in the Precision Voltage Generator (PVG) until the positive peak of the<br />
waveform appears in the oscilloscope’s display. Continue incrementing and decrementing Precision<br />
Voltage Generator’s digits until the peak of the waveform is at the centerline of the oscilloscope’s<br />
display. The number in the Precision Voltage Generator display is the waveform’s positive peak<br />
voltage.<br />
Press the ± button in the Precision Voltage Generator. Observe that the negative peak of the signal<br />
is now at or near the oscilloscope’s display centerline. By incrementing and decrementing the digits,<br />
the negative peak can be positioned to the oscilloscope’s display centerline. At this point the<br />
number in the Precision Voltage Generator’s display is the waveform’s negative peak voltage.<br />
Change the oscilloscope’s sensitivity from 50mV/div to 10mV/div. Overall sensitivity, including the<br />
<strong>DA</strong><strong>1855A</strong>, is now 1mV/div. Temporarily change the oscilloscope’s input coupling from DC to GND (or<br />
OFF) and re-center the trace to center screen using the oscilloscope’s position control. Return its<br />
input coupling to DC. Now press the X10 button on the <strong>DA</strong><strong>1855A</strong> to invoke its autozero function.<br />
(Note that pressing the gain button that is already selected causes the <strong>DA</strong><strong>1855A</strong> to adjust its DC<br />
balance, but does not change its gain.)<br />
Change the Precision Voltage Generator’s reading to again place the negative peak of the waveform<br />
at the oscilloscope’s center screen. Note that the Precision Voltage Generator’s display represents<br />
the negative peak voltage of the waveform with greater resolution.<br />
Return the oscilloscope’s sensitivity to 50 mV/div and press the <strong>DA</strong><strong>1855A</strong>'s –INPUT OFF (or AC or<br />
DC) button. The Precision Voltage Generator will retain its setting and the display on the<br />
oscilloscope will be centered about the centerline. Press the V COMP button on the –INPUT again and<br />
observe that the Precision Voltage Generator’s output is again connected to the –INPUT of the<br />
<strong>DA</strong><strong>1855A</strong>.<br />
Following are a few observations on using the <strong>DA</strong><strong>1855A</strong> comparison voltage mode (V COMP ):<br />
• The negative input and its AC, OFF and DC coupling are disabled. Instead of being a<br />
differential amplifier, the <strong>DA</strong><strong>1855A</strong> becomes a differential comparator. It compares the<br />
voltage present at the +INPUT with the output of the Precision Voltage Generator and when<br />
they are equal, the output of the <strong>DA</strong><strong>1855A</strong> is zero volts.<br />
• The value displayed by the Precision Voltage Generator indicates a waveform’s voltage, with<br />
respect to ground, as it passes through the oscilloscope display’s centerline. It is very<br />
important that the oscilloscope’s trace be positioned to center screen if an accurate<br />
measurement is to be made using this method.<br />
32 922258-00 Rev A
Operator’s <strong>Manual</strong><br />
• By using the <strong>DA</strong><strong>1855A</strong> in the comparison voltage mode and the oscilloscope in a high<br />
sensitivity setting, highly accurate voltage measurements can be made.<br />
• The Precision Voltage Generator can be used as a position control which allows the<br />
<strong>DA</strong><strong>1855A</strong> to operate in its linear region.<br />
Differential Offset Operation (VDIFF)<br />
Leave the <strong>DA</strong><strong>1855A</strong> set up as in the previous exercise or set it up as follows:<br />
+INPUT<br />
–INPUT<br />
BW LIMIT<br />
GAIN<br />
DC<br />
V COMP<br />
FULL<br />
X10<br />
ATTENUATOR ÷ ÷1<br />
INPUT RESISTANCE<br />
1 M Ω<br />
PVG +0.0500<br />
COMPARISON or<br />
DIFFERENTIAL<br />
COMPARISON<br />
EFFECTIVE GAIN<br />
Set the Function generator’s output to 50 kHz and 100 mVp-p sine wave and the output connected<br />
to the <strong>DA</strong><strong>1855A</strong>’s +INPUT.<br />
Set the oscilloscope to 50 mV/div (equivalent to 5 mV/div with <strong>DA</strong><strong>1855A</strong> set at X10 GAIN) and<br />
time/div adjusted for 2 to 3 cycles.<br />
Externally trigger the oscilloscope by connecting a cable from the function generator’s output (same<br />
signal as is applied to the <strong>DA</strong><strong>1855A</strong>'s +INPUT) or from the Trigger Signal out on the Function<br />
generator to the External trigger input of the oscilloscope.<br />
Under these conditions, the negative peak of the display on the oscilloscope should be very near<br />
center screen. Adjust the value in the Precision Voltage Generator until the negative peak is at<br />
center screen.<br />
Press the VDIFF button. This internally applies the output of the Precision Voltage Generator to a<br />
point within the <strong>DA</strong><strong>1855A</strong>'s amplifier that facilitates a true differential offset. The VCOMP light went<br />
out and the OFF light was lighted. In the line under the Precision Voltage Generator display<br />
(COMPARISON or DIFFERENTIAL OFFSET), the COMPARISON light went out and the DIFFERENTIAL<br />
light was lighted. This indicates that the Precision Voltage Generator will now be applied as a<br />
differential offset rather than as a comparison voltage as in the previous exercise. Both the +INPUT<br />
and the –INPUT inputs are now enabled.<br />
The positive and negative peaks of the waveform displayed on the oscilloscope are 10 divisions<br />
above and below (respectively) the center line of the display. Push the button above the digit that is<br />
922258-00 Rev A 33<br />
X10
<strong>DA</strong><strong>1855A</strong> Differential Amplifier<br />
two places right of the decimal (10mV) in the Precision Voltage Generator until the positive peak of<br />
the waveform appears in the oscilloscope’s display. Continue incrementing and decrementing the<br />
digits in the Precision Voltage Generator until the peak of the waveform is at the center line of the<br />
oscilloscope’s display. The number in the Precision Voltage Generator display is the value of the<br />
waveform’s positive peak voltage.<br />
Press the ± button in the Precision Voltage Generator. Observe that the negative peak of the signal<br />
is now at or near the oscilloscope display’s center line. By incrementing and decrementing the digits,<br />
the negative peak can be positioned to the oscilloscope display’s center line. Now the number in the<br />
Precision Voltage Generator’s display is the value of the waveform’s negative peak voltage.<br />
Change the oscilloscope’s sensitivity from 50 mV/div to 10 mV/ div. Overall sensitivity, including the<br />
<strong>DA</strong><strong>1855A</strong>, is now 1 mV/div. Temporarily change the oscilloscope’s input coupling from DC to GND<br />
(or OFF) and re-center the trace to center screen using the oscilloscope’s position control. Return its<br />
input coupling to DC. Now press the X10 button on the <strong>DA</strong><strong>1855A</strong> to invoke its Auto balance function.<br />
(Note that pressing the gain button that is already selected causes the <strong>DA</strong><strong>1855A</strong> to adjust its DC<br />
balance, but does not change its gain.)<br />
Change the Precision Voltage Generator’s reading to again place the negative peak of the waveform<br />
at the oscilloscope’s centerline. Note that the Precision Voltage Generator’s display more accurately<br />
represents the negative peak voltage of the waveform.<br />
Return the oscilloscope’s sensitivity to 50 mV/div and again press the <strong>DA</strong><strong>1855A</strong>'s VDIFF button. The<br />
VDIFF light will go out and the display on the oscilloscope will be centered about the center line.<br />
Notice that the PVG retains its setting, but the output of the PVG is not applied to the amplifier.<br />
Press the VDIFF button again and observe that the Precision Voltage Generator’s output is reapplied<br />
internally to the <strong>DA</strong><strong>1855A</strong> amplifier.<br />
Following are a few observations on using the differential offset mode (VDIFF) of the <strong>DA</strong><strong>1855A</strong>:<br />
• Both the positive and negative inputs (AC, OFF and DC) are enabled and the <strong>DA</strong><strong>1855A</strong><br />
remains a true differential amplifier.<br />
• The value displayed by the Precision Voltage Generator indicates a waveform’s differential<br />
voltage, with respect to the –INPUT, as it passes through the oscilloscope display’s center<br />
line. It is very important that the oscilloscope’s trace be positioned to center screen if an<br />
accurate measurement is to be made using this method.<br />
34 922258-00 Rev A
Operator’s <strong>Manual</strong><br />
• By using the <strong>DA</strong><strong>1855A</strong> in the differential offset mode and the oscilloscope in a high<br />
sensitivity setting, high resolution voltage measurements can be made. The –INPUT is the<br />
reference for these measurements.<br />
• The Precision Voltage Generator can be used as a position control which allows the<br />
<strong>DA</strong><strong>1855A</strong> to operate in its most linear region.<br />
Determining the Proper Offset Mode<br />
The operation of the Comparison (V COMP ) and Differential Offset modes (V DIFF ) are quite similar. The<br />
Comparison mode is easier to understand and has a wider range, 15.5 Volt vs. 10.0 Volt. The<br />
Differential Offset mode provides offset operation while allowing the <strong>DA</strong><strong>1855A</strong> to function as a true<br />
differential amplifier.<br />
For most applications, the Differential Offset (V DIFF ) mode has advantages over the Comparison<br />
(V COMP ) mode. When using the Comparison mode, the Precision Voltage Generator’s output is<br />
subtracted from the +INPUT. Except for the PVG’s offset, operation is the same as a standard singleended<br />
oscilloscope...only one <strong>DA</strong><strong>1855A</strong> input is available. In the Differential Offset mode, the<br />
<strong>DA</strong><strong>1855A</strong> functions as a differential amplifier…both<br />
+INPUT and –INPUT function. This allows the operator to choose a measurement reference point<br />
other than ground. Even in ground referenced measurements, signal degradation can be reduced by<br />
using the –INPUT probe to select a ground reference point with the least noise. This method is<br />
especially useful in eliminating hum and noise from ground loops.<br />
There is one instance in which the Differential Offset (V DIFF ) mode might result in more noise.<br />
Magnetic pick-up is proportional to the area between the probes. If twisting the probe leads<br />
together is not sufficient to reduce magnetic pick-up, the Comparison Offset (V COMP ) mode may be<br />
preferable.<br />
The Differential Offset (VDIFF) mode is usually the mode of choice if the wider range or higher<br />
accuracy of the Comparison (VCOMP) mode is not needed.<br />
Avoiding Common Problems<br />
There are a few situations the operator of either the <strong>DA</strong><strong>1855A</strong>should is aware of to avoid some<br />
potential measurement traps.<br />
Exceeding the Common Mode Range<br />
The <strong>DA</strong><strong>1855A</strong> Differential Amplifiers have the largest common mode range available for this type of<br />
amplifier and are very good at measuring small differences between two large signals. However,<br />
care still must be taken not to allow a large common mode signal to exceed the available common<br />
mode range.<br />
Unlike the differential mode signal, which is viewed on the oscilloscope, the common mode signal is<br />
normally rejected. Thus, you may not notice exceeding the common mode signal range.<br />
922258-00 Rev A 35
<strong>DA</strong><strong>1855A</strong> Differential Amplifier<br />
The maximum common mode range is ± 15.5 Volt when a signal is applied directly (÷1 ATTENUATOR<br />
and no probes) to the<strong>DA</strong><strong>1855A</strong>'s + and – INPUTs.<br />
Attenuating the input signal extends the common mode range by the same factor as the<br />
attenuation. Pressing the ÷10 ATTENUATOR button increases the common mode range to±155 Volt,<br />
and using a probe with a ÷10 attenuation factor will too. The effect of the internal ÷10 ATTENUATOR<br />
and the attenuation factor of probes is multiplied just as the signal is attenuated. As an example,<br />
using the amplifier’s ÷10<br />
ATTENUATOR with a probe having a ÷100 attenuation factor (total attenuation of ÷1000) results in a<br />
common mode range of15, 500 Volt. In this case, the probe’s maximum voltage rating probably<br />
limits the maximum common mode input voltage.<br />
The gain setting of the amplifier has no effect on common mode range; it is the same in X10 GAIN as<br />
it is in X1.<br />
When making measurements on circuits that are power line referenced, be sure to use enough total<br />
attenuation to keep the peak voltage at the amplifier input below 15.5 Volt. The power line voltage<br />
in North America and Japan can exceed 170 V pand therefore at least a total attenuation of ÷100<br />
should be used. Line voltages in some other countries are larger but their peak voltages do not<br />
exceed the 1550 Volt common mode range that a ÷100 attenuation factor provides.<br />
Using the Oscilloscope POSITION control<br />
(DOES NOT APPLY WHEN USING A TELEDYNE LECROY OSCILLOSCOPE WITH PROBUS INTERFACE)<br />
When operating the <strong>DA</strong><strong>1855A</strong> with a scope, it is very important to set the oscilloscope’s position<br />
and/or offset control to center screen, for several reasons.<br />
First, the linear portion of the <strong>DA</strong><strong>1855A</strong>'s ± 500 mV output range is centered around zero volts. As<br />
the <strong>DA</strong><strong>1855A</strong> begins to exceed its limits, the output signal will be distorted. Moving the<br />
oscilloscope’s position control way from center screen can allow these distortions to appear on the<br />
oscilloscope’s screen where they may be mistaken for part of the displayed signal.<br />
Second, proper operation of the <strong>DA</strong><strong>1855A</strong>'s Precision Voltage Generator (PVG) depends on the<br />
operator knowing the location of zero volts on the display. The readout in the PVG is designed to<br />
display the voltage of the signal as it crosses the centerline of the oscilloscope screen. If the<br />
oscilloscope’s position or offset control has been moved, incorrect readings could result.<br />
Using scale factors greater than 100 mV/Div<br />
(DOES NOT APPLY WHEN USING A TELEDYNE LECROY OSCILLOSCOPE WITH PROBUS INTERFACE)<br />
“I know the input to the <strong>DA</strong><strong>1855A</strong> is a sine wave, but I am seeing a square wave on the<br />
oscilloscope.” This comment is the result of setting the oscilloscope Volt/Div to something greater<br />
than 100 mV/div. If the oscilloscope sensitivity is set to 200mV/div, the <strong>DA</strong><strong>1855A</strong> will limit at 2½<br />
divisions above and below center screen (zero volt point if the oscilloscope’s position control is<br />
36 922258-00 Rev A
Operator’s <strong>Manual</strong><br />
properly set). Thus, a sine wave large enough to overdrive the <strong>DA</strong><strong>1855A</strong> will appear as a square<br />
wave on the oscilloscope.<br />
The <strong>DA</strong><strong>1855A</strong> is designed to cleanly limit the output signal to± 500 mV. The <strong>DA</strong><strong>1855A</strong> goes into limit<br />
when its output reaches ± 500 mV and is designed to recover very quickly once its input signal level<br />
decreases sufficiently to allow the amplifier to return to its linear range. The <strong>DA</strong><strong>1855A</strong> will recover<br />
from overdrive to its full accuracy much more quickly than most oscilloscopes. Keeping the<br />
oscilloscope’s position at center screen and using oscilloscope sensitivities between 100 mV/div and<br />
2 mV/div (or the oscilloscope’s most sensitive setting) will insure good signal integrity. When the<br />
displayed signal contains mostly low frequency components, the operator can use the oscilloscopes<br />
100 mV/div setting to allow large signals to be completely shown on screen.<br />
Failure to Terminate the Amplifier into 50 Ω<br />
(DOES NOT APPLY WHEN USING A TELEDYNE LECROY OSCILLOSCOPE WITH PROBUS INTERFACE)<br />
“All the signals displayed on my oscilloscope seem to be twice as large as they should be.” This<br />
comment results from not having the output of the <strong>DA</strong><strong>1855A</strong> properly terminated into 50 Ω. When<br />
interfaced using ProBus to a <strong>Teledyne</strong> <strong>LeCroy</strong> oscilloscope, you do not need to be concerned about<br />
the termination resistance, as the oscilloscope sets the termination mode automatically.<br />
The <strong>DA</strong><strong>1855A</strong> output impedance is 50 Ω. The cable connecting the <strong>DA</strong><strong>1855A</strong> to the oscilloscope or<br />
spectrum analyzer should be 50 Ω and be terminated with a 50 Ω load. If the termination at the end<br />
of the connecting coaxial cable is missing, the amplifier will not be properly terminated.<br />
In addition to the error in scale factor, operating the <strong>DA</strong><strong>1855A</strong>with the output unterminated may<br />
result in poor high frequency, linearity and transient response. Proper operation of the 1 MHz and<br />
20 MHz bandwidth limit filters also require 50 Ω termination.<br />
Poor Overdrive Recovery<br />
The <strong>DA</strong><strong>1855A</strong> output is limited at ± 500 mVp-p to prevent the amplifier from being overdriven by<br />
large inputs. Poor recovery may still occur when the oscilloscope vertical scale is set to too high a<br />
sensitivity, causing the oscilloscope to be overdriven rather than the <strong>DA</strong><strong>1855A</strong> amplifier. Care must<br />
be taken to set the vertical sensitivity such that the oscilloscope is not being overdriven.<br />
922258-00 Rev A 37
<strong>DA</strong><strong>1855A</strong> Differential Amplifier<br />
Care and Maintenance<br />
Cleaning<br />
Clean only the exterior of the amplifier using a soft cloth moistened with water or isopropyl alcohol.<br />
Using abrasive agents, strong detergents or other solvents may damage the exterior of the amplifier.<br />
Calibration Interval<br />
The recommended calibration interval is one year. Adjustment should only be performed by<br />
qualified personnel. A Performance Verification procedure is included in this manual.<br />
Service Strategy<br />
Defective amplifiers must be returned to a <strong>LeCroy</strong> service facility for diagnosis and exchange. A<br />
defective amplifier under warranty will be replaced with a factory refurbished one. An amplifier that<br />
is not under warranty can be exchanged for a factory refurbished unit. A modest fee is charged for<br />
this service. A defective amplifier must be returned in order to receive credit for the amplifier core.<br />
Calibration adjustments require the use of specialized signal sources which are not commercially<br />
available. Amplifiers which do not pass the performance verification must be returned to the factory<br />
for service.<br />
Troubleshooting<br />
If the amplifier is not operating properly the problem may be the way in which it is used. Before<br />
assuming the amplifier is defective, perform the Functional Test as described in the Performance<br />
Verification procedure.<br />
Returns<br />
See Returning a Product on page 85 for instructions on returning an amplifier for repair if you<br />
determine it is malfunctioning after performing the Functional Test procedure.<br />
38 922258-00 Rev A
Applications<br />
Operator’s <strong>Manual</strong><br />
Introduction<br />
Some parts of a power supply operation, such as saturation voltage, upper gate drive, loop response<br />
etc., have been difficult to perform without the proper accessories to expand the measurement<br />
capabilities of oscilloscopes. To obtain accurate voltage and current waveforms is a necessity before<br />
any waveform analysis can occur.<br />
Voltage Measurements<br />
A significant limitation in power supply characterization is that many of the signals of interest are<br />
referenced to voltages other than ground. Several techniques have been tried to overcome this<br />
measurement limitation.<br />
The most frequently used — and probably the worst one – is floating the oscilloscope by<br />
disconnecting the ground wire in the power-line cable. This allows the chassis of the oscilloscope to<br />
float to the potential to which the probe ground lead is connected. The most obvious danger is<br />
electrical shock. When an oscilloscope is floated to hazardous voltages, accidental contact with any<br />
metal component of the oscilloscope chassis can seriously injure or even kill the operator.<br />
Another problem when floating a scope is the inability to externally trigger the oscilloscope, or the<br />
waveform distortion that may occur when high slew rates appear on the ground lead. Another<br />
technique used for measuring voltages not referenced to ground is quasi-differential, or channel A<br />
minus Channel B. Even though this technique is safe, the oscilloscope is still grounded, it is still<br />
limited to measurements where the differential mode (signal of interest) is approximately the same<br />
amplitude or larger than the common mode signal (signal being rejected). A major problem however<br />
is the limited CMRR (Common Mode Rejection Ratio) caused by gain mismatches between the two<br />
input channels.<br />
The best solution for measuring voltages that are not referenced to ground is to use a differential<br />
amplifier. The <strong>DA</strong>1855 is ideally suited for these measurements.<br />
Measuring Current<br />
Current can be measured either by using a shunt resistor or by using a current probe. Adding a shunt<br />
resistor requires cutting the current carrying conductor. Shunt resistors will add a resistance to the<br />
circuit that can affect the operation. It is difficult to obtain accurate resistors with low resistance and<br />
low inductance values necessary to measure large dynamic currents.<br />
Current probes overcome these problems. Some models have a jaw that can be opened to install<br />
around conductors without the need to cut them. They come in two different types, AC and DC. The<br />
DC types can measure from DC to higher frequencies with relative flat frequency response. AC<br />
current probes have both a low frequency and a high frequency response. Many AC current probes<br />
922258-00 Rev A 39
<strong>DA</strong><strong>1855A</strong> Differential Amplifier<br />
have a low frequency cut-off of 40 Hz or higher, eliminating the ability to measure power at line<br />
frequencies<br />
Effects of Probes on Saturation Voltage Measurements<br />
To measure switching’s device saturation voltage while the device is operating in circuits requires<br />
the combination of several capabilities in the measurement system.<br />
First because the measurements are not ground referenced, thus differential voltage measurements<br />
are needed. The amplifier must also be able to quickly recover from overdrive and the amplifier as<br />
well as the probes must have very low high frequency aberrations.<br />
Figure 3, Saturation Voltage<br />
The most obvious problem with this measurement is the signal’s wide dynamic range. The voltage<br />
across the device can be several hundred Volt when the device is off and then drop to less than a<br />
Volt as the device turns on (Figure 3).<br />
To measure the saturation voltage of a device to 100 mV accuracy when the OFF voltage is 400 Volt<br />
requires 250 ppm measurement capability. To accurately view the device’s approximately 1 Volt ONvoltage<br />
with an oscilloscope, the vertical sensitivity must be set to 200 to 500 mV/div. Almost all of<br />
the signal will be off-screen. Also this voltage change occurs in a fraction of a microsecond. This<br />
means that the oscilloscope must be able to accurately display sub-1 Volt signal less than a<br />
microsecond after being overdriven by several hundred divisions. It is obvious that the oscilloscope<br />
input or an input preamplifier such as the <strong>DA</strong><strong>1855A</strong> needs to recover and therefore that a probe<br />
with high frequency performance is required.<br />
To overcome the overdrive problem is to use a specially designed fast clipping circuit to limit the<br />
magnitude of the signal at the oscilloscope’s input to a value within the linear range and to turn ON<br />
and OFF fast enough so not to compromise the measurement integrity. Another solution is to use a<br />
differential pre-amplifier specifically designed to recover from being overdriven and to cleanly clip<br />
the signal so the oscilloscope is not overdriven. Of equal importance to the amplifier’s overdrive<br />
40 922258-00 Rev A
Operator’s <strong>Manual</strong><br />
recovery performance is the oscilloscope or differential amplifier’s probe performance. Probes play<br />
an important role in device ON voltage measurements. They attenuate the voltage’s magnitude as<br />
well as provide a convenient way of connecting to the device under test. in addition to attenuating<br />
the input signal they also attenuate the rate of change of the oscilloscope or differential amplifier’s<br />
input signal. A ÷100 passive probe will attenuate a 400 Volt signal with a dv/dt of 10 V/nsec to a 4<br />
Volt signal with a dv/dt of 0.1 V/nsec. Less obvious is the effect of a probe’s low frequency<br />
compensation adjustment on the measurement accuracy of device saturation voltage. Most<br />
oscilloscope users are familiar with the requirement of adjusting passive probes for low frequency<br />
compensation. Under normal usage, the entire waveform is on screen when a passive voltage<br />
probe’s low frequency compensation is adjusted. A low frequency compensation made with the<br />
entire waveform visible on screen is usually adequate for most measurements.<br />
However when a signal’s amplitude is greatly magnified as can be the case when using a differential<br />
amplifier, a small error in the low frequency compensation flatness can cause major error in voltage<br />
measurements, especially when measuring saturation voltages.<br />
Figure 4 through Figure 7 illustrate how this seemingly minor adjustment can make the saturation<br />
voltage’s DC level appear to be incorrect.<br />
A voltage probe appears to be properly compensated on a 400 V square wave when viewed at<br />
100V/div.<br />
Figure 4<br />
922258-00 Rev A 41
<strong>DA</strong><strong>1855A</strong> Differential Amplifier<br />
When viewed at 500 m/div, the same 400 V square wave shows the probe compensation to be<br />
slightly overpeaked.<br />
Figure 5<br />
When the time/div is decreased to value normally used to view 20 to 150 kHz switchmode power<br />
conversion circuits, the slightly peaked LF compensation appears as a DC level shift.<br />
Figure 6<br />
Viewing a power FET’s saturation voltage with the slightly peaked LF compensation makes the<br />
voltage appear to go negative. In this example the repetition rate of the power supply is 60 kHz.<br />
42 922258-00 Rev A
Operator’s <strong>Manual</strong><br />
Figure 7<br />
Saturation Voltage Measurement<br />
To measure the saturation voltage of a power device in a flyback type switching power supply,<br />
connect the +INPUT probe to the drain and the –INPUT probe to the source of the switching device.<br />
There is no need to ‘float’ the oscilloscope. The probe connected to the –INPUT becomes the<br />
reference lead (same as black lead on a DMM). The <strong>DA</strong><strong>1855A</strong> will reject the power line portion<br />
(common mode part) of the signal and allows us to see the actual signal of interest. Set the<br />
VOLTS/DIV to 50 mV/div and adjust the OFFSET to read 00.000 on the <strong>DA</strong><strong>1855A</strong> front panel<br />
indicator. Press the Autozero button to autobalance the amplifier.<br />
The start of the saturation voltage measures close to 0.0 Volt since the switching device is OFF and<br />
ramps up due to the increase in current through the primary of the transformer. If this starting point<br />
does not come close to the 0 Volt line, then it could indicate an incorrect low frequency adjustment<br />
of the probes.<br />
922258-00 Rev A 43
<strong>DA</strong><strong>1855A</strong> Differential Amplifier<br />
Gate Drive Voltage<br />
The main reason to measure the gate drive voltage is to assure rapid turn-on and turn-off and to<br />
assure that the transistor is fully saturated.<br />
Figure 8, Switching Power Supply with Upper and Lower FET Drive.<br />
Care must be taken when acquiring the switching’s device gate drive signal. In off-line switching<br />
power supplies, the switching devices are elevated to line potential. The <strong>DA</strong><strong>1855A</strong> is ideally suited<br />
for this application with its high CMRR.<br />
The following discussion demonstrates how the <strong>DA</strong><strong>1855A</strong> Differential Amplifier and a XC100<br />
Differential Probe are used to make measurements such as upper gate drive signal on a switching<br />
power supply. A simplified schematic of such a flyback type power supply is shown in Figure 8. In<br />
this circuit both Q1 and Q2 are ON at the same time. D1 and D2 limit the voltage caused by the<br />
primary’s leakage reactance to the rail voltages.<br />
By using the <strong>DA</strong><strong>1855A</strong> and the XC100 probe, the signal reference point can be changed to any point<br />
in the circuit. To select the source of Q2 as the reference point, connect the – INPUT probe to that<br />
point. To acquire the drain to source signal of Q2 place the +INPUT probe on the drain of Q2 and<br />
select DC coupling on both inputs. The amplifier will reject the power line portion (common mode)<br />
of the signal and allows us to see the drain to source signal. For this measurement, the XC100 is set<br />
to ÷100 and the <strong>DA</strong><strong>1855A</strong> is set for ÷10 attenuation and a gain of X1. The total attenuation from<br />
probe tip to the oscilloscope is 1000.<br />
Selecting the differential mode and setting the OFFSET to 245 Volt, will move the trace down about<br />
2½ divisions. This means that the drain voltage with respect to the source is 245 Volt when the top<br />
part crosses the oscilloscope’s screen horizontal center line.<br />
44 922258-00 Rev A
Operator’s <strong>Manual</strong><br />
Rejecting the AC line voltage was no real challenge, but rejecting the drain to source signal is a real<br />
measure of system ability. The drain to source voltage rises over 245 Volt when the FET turns OFF.<br />
The maximum rate of rise of this signal is about 15 V/nsec followed by a ring at the bottom of the<br />
waveform. It will be necessary to adequately reject this signal if upper gate signal is the be<br />
measured accurately.<br />
Upper and Lower Gate Drive<br />
To examine the gate drive signal on the upper FET’s Q1, the –INPUT probe will be connected to the<br />
source of Q1 and the +INPUT probe to the gate of Q1. The XC100 probes are set for an attenuation<br />
of ÷100 and the <strong>DA</strong><strong>1855A</strong> for an attenuation of ÷1 and a gain of X1. The EFFECTIVE GAIN indicator<br />
should read an overall gain of ÷100. To make room for other traces, the OFFSET control on the<br />
oscilloscope was set to –5.0 Volt, moving the trace up one division.<br />
The same procedure is repeated for Q2 gate drive where the OFFSET is set to +15 V to move the<br />
trace down by 3 divisions. By setting mVOLT/DIV to a more sensitive setting, small details of these<br />
signals can be examined.<br />
Avoiding Measurement Errors<br />
The math capabilities in modern digital oscilloscopes can save time and effort. Both scalar<br />
measurements and waveform math provide direct answers for measurements that used to require<br />
considerable computation and analysis. Common causes of erroneous results are:<br />
• Errors in conditioning the input signal, such as clipping or bandwidth limiting.<br />
• Limitation in the acquisition process, such as sample rate, resolution and record length.<br />
• Limitation in the computational algorithms.<br />
The most common source of error in power measurements results from the time delay (skew)<br />
between the voltage and current waveforms. The propagation delay through the current probe and<br />
the voltage probe plus differential amplifier are almost never equal. To eliminate resulting error in<br />
power waveforms, it is necessary to deskew the input signals. Some oscilloscopes have a deskew<br />
function that can be used to shift the time reference of one of the waveforms relative to the other.<br />
Another error to be concerned with is the phase shift in the probes or instrument. As the rise time<br />
of the input signal approaches the rise time of the current probe or amplifier, the phase shift will<br />
create an amplitude error in the power waveform.<br />
922258-00 Rev A 45
<strong>DA</strong><strong>1855A</strong> Differential Amplifier<br />
Remote Control Commands<br />
When attached to a <strong>Teledyne</strong> <strong>LeCroy</strong> oscilloscope equipped with ProBus interface, the <strong>DA</strong><strong>1855A</strong><br />
Amplifier can be remotely controlled along with the other oscilloscope functions. The control<br />
interface can be either the RS-232 or IEEE-488 (GPIB) bus. The commands which control the<br />
amplifier are described below. The text for the command descriptions is formatted in a style<br />
consistent with the oscilloscope command descriptions contained in the <strong>Teledyne</strong> <strong>LeCroy</strong> Digital<br />
Oscilloscopes Remote Control <strong>Manual</strong> supplied with the oscilloscope. Please refer to this manual for<br />
additional information on the remote control buses and the conventions used in the command<br />
descriptions.<br />
Many of the commands begin with the “PRx:” prefix, where “x” is the channel which the <strong>DA</strong><strong>1855A</strong><br />
amplifier is connected to. These commands are similar to the channel commands which use the<br />
prefix “Cx:”. The difference being that the “PRx:” form refers to the probe tip, whereas the “Cx:”<br />
form refers to the oscilloscope input connector. For example, “PRx:VDIV” sets the Volts per<br />
division at the probe tip, while “Cx:VDIV” sets the Volts per division at the BNC input connector,<br />
without factoring the gain or attenuation factor of <strong>DA</strong><strong>1855A</strong> amplifier and attached probes. The<br />
“PRx:” form of these commands are only active when the <strong>DA</strong><strong>1855A</strong> amplifier is connected to the<br />
selected channel. An error will result when an <strong>DA</strong><strong>1855A</strong> specific command is sent to the oscilloscope<br />
without a differential probe attached to the selected channel.<br />
Command List<br />
PRx:ATTENUATION<br />
PRx:AUTOZERO<br />
PRx:BWL<br />
PRx:COUPLING<br />
PRx:GAIN<br />
PRx:OFFSET<br />
PRx:PINPUTR<br />
Selects the input attenuation of the amplifier.<br />
Initiates an auto zero cycle in the amplifier.<br />
Selects the upper bandwidth limit.<br />
Selects the input coupling of the + and – inputs.<br />
Selects the gain of the amplifier<br />
Selects the Precision Voltage Generator voltage.<br />
Selects the input resistance of both inputs.<br />
PRx:PROBEATTENUATION? Reports the attenuation of the passive probe attached to the<br />
amplifier<br />
PRx:PVGMODE<br />
PRx:VDIV<br />
Selects the Precision Voltage Generator Offset mode.<br />
Selects the vertical scale factor of the<br />
probe/amplifier/oscilloscope system.<br />
46 922258-00 Rev A
Operator’s <strong>Manual</strong><br />
Gain Control Mode<br />
The <strong>DA</strong><strong>1855A</strong> amplifiers have two modes for setting the amplifier gain and attenuation; Auto and<br />
<strong>Manual</strong>. (Refer to Gain Control Modes on page 47, Operation, for more information.) The gain<br />
control mode can be selected in the <strong>DA</strong><strong>1855A</strong> control menu through the oscilloscope front panel, or<br />
through remote control by sending the commands which correspond tot the gain mode.<br />
Sending the PRx:ATTEN or PRx:GAIN commands will set the <strong>DA</strong><strong>1855A</strong> amplifier to <strong>Manual</strong> gain<br />
control mode.<br />
Sending the PRx:VDIV command will set the <strong>DA</strong><strong>1855A</strong> amplifier to Auto gain control mode.<br />
Attenuation<br />
Description<br />
Command Syntax<br />
Query Syntax<br />
Response Format<br />
Example<br />
PRx:ATTENUATION,PRx:ATTEN<br />
Command/Query<br />
The PRx:ATTENUATION command sets the attenuation of the differential<br />
amplifier, including the factor of any passive probe attached to the input.<br />
The command will also switch the Atten/ Gain control mode to <strong>Manual</strong> if it<br />
was to Auto mode. The valid arguments with no probe attached is 1 or 10<br />
when the input resistance is set 1 MΩ, or only 1 when the input resistance is<br />
set to 100 MΩ. The valid arguments must be scaled by the attenuation<br />
factor of any passive probe which is attached to the amplifier.<br />
The PRx:ATTENUATION? query returns the attenuation of the differential<br />
amplifier, including the attached probe connected to the specified channel.<br />
:ATTeNuation :={PR1,<br />
PR2, PR3, PR4} :={1,10*}when input resistance is set<br />
to 1 MΩ or {1*} when the input resistance is set to 100 MΩ.<br />
* Attenuation arguments must be scaled by the attenuation of any passive<br />
probe which is attached to the differential amplifier inputs.<br />
:ATTeNuation?<br />
:ATTN<br />
The following command sets the attenuation of the differential amplifier<br />
connected to channel 1 to ÷100 when a ÷10 probe is attached:<br />
CMD$=”PR1:ATTN 100”:CALL IBWRT(SCOPE%,CMD$)<br />
922258-00 Rev A 47
<strong>DA</strong><strong>1855A</strong> Differential Amplifier<br />
Auto-Zero<br />
Description<br />
Command Syntax<br />
Example<br />
PRx:AUTOZERO, PRx:AZ<br />
The PRx:AUTOZERO command initiates an auto zero cycle of the<br />
differential amplifier to remove any offset drift from the output.<br />
Command<br />
The amplifier inputs will be disabled for a fraction of a second during the<br />
autozero cycle.<br />
:AutoZero :={PR1, PR2, PR3, PR4}<br />
The following command initiates an auto zero in the <strong>DA</strong><strong>1855A</strong><br />
Differential Probe attached to channel 1:<br />
CMD$=”PR1:AZ”:CALL IBWRT(SCOPE%,CMD$)<br />
Bandwidth Limit<br />
Description<br />
Command Syntax<br />
Query Syntax<br />
Response Format<br />
Example<br />
PRx:BANDWIDTH_LIMIT, PRx:BWL<br />
Command/Query<br />
The PRx:BWL command sets the upper (HF) -3 dB bandwidth limits of the<br />
<strong>DA</strong><strong>1855A</strong>. The arguments are in Hertz.<br />
The PRx:BWL? query returns the upper bandwidth limit setting for the<br />
differential amplifier connected to the specified channel.<br />
:BWL :={PR1,<br />
PR2, PR3, PR4}<br />
:={FULL, 100K, 1M or 20M}<br />
:BWL?<br />
:BWL <br />
The following command sets the upper bandwidth of the <strong>DA</strong><strong>1855A</strong><br />
connected to channel 1 to 100 kHz.<br />
CMD$=”PR1:BWL 100K”: CALL IBWRT(SCOPE%,CMD$)<br />
48 922258-00 Rev A
Coupling<br />
Operator’s <strong>Manual</strong><br />
PRx:COUPLING, PRx:CPL<br />
Command/query<br />
Description The PRx:COUPLING command sets the input coupling for the + and –<br />
inputs of the differential amplifier. The valid arguments are AC, Ground and<br />
DC.<br />
Command Syntax<br />
Query Syntax<br />
Response Format<br />
Example<br />
The PRx:COUPLING? query returns the input coupling setting of the + and<br />
– inputs of the differential amplifier connected to the specified channel.<br />
The – input coupling is ignored when PVG Mode is set to V COMP . Likewise,<br />
the – input coupling argument is not returned from a query when PVG<br />
Mode is set to V COMP .<br />
:CouPLing|,
<strong>DA</strong><strong>1855A</strong> Differential Amplifier<br />
Gain<br />
Description<br />
Command Syntax<br />
Query Syntax<br />
Response Format<br />
Example<br />
PRx:GAIN,PRx:GAI<br />
Command/Query<br />
The PRx:GAIN command sets the differential amplifier gain. The<br />
command will also switch the Atten/Gain control mode to <strong>Manual</strong> if it was<br />
in Auto. The valid arguments are 1 and 10.<br />
The PRx:GAIN? query returns the gain of the differential amplifier<br />
connected to the selected channel.<br />
:GAIn :={PR1, PR2, PR3,<br />
PR4} :={1, 10}<br />
:GAIn?<br />
:GAIn<br />
The following commend sets the gain of the differential amplifier connected<br />
to channel 1 to X10:<br />
CMD$=”PR1:GAI 10”: CALL IBWRT(SCOPE%,CMD$)<br />
50 922258-00 Rev A
Operator’s <strong>Manual</strong><br />
Offset<br />
Description<br />
PRx:OFFSET, PRx:OFST<br />
Command/Query<br />
The PRx:OFFSET command sets the Precision Voltage Generator (PVG)<br />
value of the <strong>DA</strong><strong>1855A</strong> Differential Amplifier connected to the specified input<br />
channel. The oscilloscope channel offset is always set to 0 Volt.<br />
The maximum range and resolution is determined by the effective gain of<br />
the differential amplifier. Refer to page 19, Table 2, Effective Offset Range<br />
with ÷11 Probe and Table 3, Effective Offset Range with ÷100 Probe for the<br />
list of available ranges.<br />
Note: The attenuation of any external probe is factored into the effective<br />
gain. Changing or removing the probe from the differential amplifier may<br />
change the maximum range.<br />
Command Syntax<br />
Query Syntax<br />
Response Format<br />
Example<br />
If an out-of-range value is entered, the differential amplifier will set the PVG<br />
to the closest valid value and the VAB bit (bit 2) in the STB register will be<br />
set.<br />
The PRx:OFFSET? query returns the offset voltage of the differential<br />
probe connected to the specified channel.<br />
: OFfSeT :={PR1, PR2,<br />
PR3, PR4} : = See Table 2, Effective Offset Range with<br />
÷11 Probe and Table 3, Effective Offset Range with ÷100 Probe for valid<br />
ranges.<br />
:OFfSeT?<br />
:OFST<br />
The following command sets the PVG voltage of the differential amplifier<br />
connected to channel 1 to 6.38 Volt:<br />
CMD$=”PR1:OFST 6.38”: CALL IBWRT(SCOPE%,CMD$)<br />
922258-00 Rev A 51
<strong>DA</strong><strong>1855A</strong> Differential Amplifier<br />
Input-Resistance<br />
Description<br />
Command Syntax<br />
Response Format<br />
Example<br />
PRx:PINPUTR,PRx:PINR<br />
Command/Query<br />
The PRx:PINPUTR command sets the input resistance for both inputs of<br />
the differential amplifier. The valid arguments are 1M or 100M when the<br />
differential amplifier input attenuation is set to ÷1 and an attenuating probe<br />
is not being used. When an attenuating probe is attached to the differential<br />
amplifier, or the internal attenuation is set to ÷10, only 1M may be selected.<br />
The units of the arguments are Ohm.<br />
The PRx:PINPUTR? query returns the input resistance setting for the<br />
differential amplifier connected to the specified channel.<br />
:PINputR :{PR1,<br />
PR2, PR3, PR4}<br />
:={1M or 100M} when the internal<br />
attenuation is ÷1, without attenuating probe, or ={1M} when the internal<br />
attenuation is ÷10 or an attenuating probe is used.<br />
Query Syntax :PINputR?<br />
:PINR<br />
The following command sets the input resistance of the differential<br />
amplifier connected to channel1 to 1 MΩ.<br />
CMD$=”PR1:PINR 1M”:CALL IBWRT(SCOPE%,CMD$)<br />
52 922258-00 Rev A
Probe Attenuation<br />
Description<br />
Query Syntax<br />
Response Format<br />
Example<br />
Operator’s <strong>Manual</strong><br />
PRx:PROBEATTENUATION?,PRxPATTN?<br />
Query<br />
The PRx:PROBEATTENUATION? query returns the attenuation value of<br />
the probe connected to the input of the <strong>DA</strong><strong>1855A</strong>. Only probes which<br />
support probe code sensing will be correctly reported. Attenuation values of<br />
1, 10, 100 or 1000 are sensed and can be reported. Probes which do not<br />
support probe code sensing will be reported having an attenuation of 1.<br />
:PATTeNuation?<br />
:PATTN :={PR1, PR2,<br />
PR3, PR4} :={1, 10, 100, 1000}<br />
The following query reads the attenuation of the probe connected to the<br />
differential amplifier which is connected to channel 1:<br />
CMD$=”PR1:PATTN?”: CALL IBWRT(SCOPE%,CMD$): CALL<br />
IBRD(SCOPE%
<strong>DA</strong><strong>1855A</strong> Differential Amplifier<br />
Precision Voltage Generator<br />
Description<br />
Command Syntax<br />
Query Syntax<br />
Response Format<br />
Example<br />
PRx:PVGMODE,PRx:PVGM<br />
Command Query<br />
The PRx:PVGMODE command sets the operating mode of the Precision<br />
Voltage Generator (PVG) of the differential amplifier. The valid arguments<br />
are VCOMP, V DIFF and OFF.<br />
The PRx:PVGMODE? query returns the operating mode of the Precision<br />
Voltage Generator (PVG) of the differential amplifier connected to the<br />
specified channel.<br />
:PVGMode :={PR1, PR2, PR3,<br />
PR4} :={V COMP , V DIFF or OFF}<br />
:PVGMode?<br />
:PVGM<br />
The following command sets the PVG operating mode of the differential<br />
amplifier connected to channel 3 to VDIFF:<br />
CMD$=”PR3:PVGM V DIFF ”:CALL IBWRT(SCOPE%
Operator’s <strong>Manual</strong><br />
Volt / DIV<br />
Description<br />
Command Syntax<br />
Query Syntax<br />
Response Format<br />
Example<br />
PRx:VOLT_DIV,PRx:VDIV<br />
Command/Query<br />
When used with the "PRx" argument for channel number, the VOLT/DIV<br />
command sets the vertical sensitivity at the probe tip. The effective gain of<br />
the differential amplifier, including any attenuating passive probes, is<br />
factored into the vertical sensitivity. The command will also set the<br />
Atten/Gain control mode to Auto if it was set to <strong>Manual</strong> mode.<br />
The valid range of arguments is effected by the presence of an attenuating<br />
probe on the input. If an out-of-range value is entered, the oscilloscope will<br />
set the vertical sensitivity to the closest valid value and set the VAB bit (bit<br />
2) in the STB register.<br />
The PRx:VOLT_DIV? query returns the vertical sensitivity at the probe<br />
input of the specified channel.<br />
:Volt_DIV :={PR1,<br />
PR2, PR3, PR4} :<br />
See page 11, Operation, for valid arguments.<br />
:Volt_DIV?<br />
:VDIV <br />
The following command sets the vertical sensitivity at the probe tip of the<br />
differential amplifier connected to channel 3 to 2 Volt/ div:<br />
CMD$=”PR3:VDIV 2”:CALL IBWRT(SCOPE%,CMD$)<br />
922258-00 Rev A 55
<strong>DA</strong><strong>1855A</strong> Differential Amplifier<br />
Performance Verification<br />
This procedure can be used to verify the warranted characteristics of the <strong>DA</strong><strong>1855A</strong> Differential<br />
Amplifier.<br />
The recommended calibration interval for this Differential Amplifiers is one year. The complete<br />
performance verification procedure should be performed as the first step of annual calibration. Test<br />
results can be recorded on a photocopy of the Test Record provided in Appendix A.<br />
Performance verification can be completed without removing the instrument covers or exposing you<br />
to hazardous voltages. Adjustment should only be attempted if a parameter measured in the<br />
Performance Verification Procedure is outside of the specification limits.<br />
Adjustment should only be performed by qualified personnel. Removing the covers from the<br />
instrument may alter critical compensation adjustments, requiring the instrument to be<br />
recalibrated. Re-establishing these adjustments requires the use of special calibration fixtures.<br />
Therefore, never remove the covers. The Adjustment Procedure is contained in the Service <strong>Manual</strong>.<br />
Test Equipment Required<br />
The following table lists the test equipment and accessories, or their equivalents, which are required<br />
for performance verification of the <strong>DA</strong><strong>1855A</strong>.<br />
This procedure has been developed to minimize the number of parameters required to be calibrated<br />
in the test instrumentation.<br />
Only the parameters listed in boldface in the Minimum Requirements column must be calibrated to<br />
the accuracy indicated. Because the input and output connector types may vary on different brands<br />
and models of test instruments, additional adapters or cables may be required.<br />
56 922258-00 Rev A
Operator’s <strong>Manual</strong><br />
Table 5, List of required Equipment<br />
Description Minimum Requirements Test Equipment Examples<br />
Wide Band Oscilloscope 500 MHz bandwidth 2 mV -<br />
200mv scale factors<br />
1 ns - 10 μs sweep speed 2%<br />
vertical accuracy<br />
50 Ω termination<br />
Digital Multimeter<br />
DC: 0.01% accuracy<br />
AC: 0.2% accuracy to measure<br />
200 mV and 2 V rms @ 1 kHz<br />
6½ digit resolution<br />
Oscillator/Function Generator Sine Wave output 20 Vp-p at 70<br />
Hz<br />
<strong>Teledyne</strong> <strong>LeCroy</strong> LT374 series<br />
oscilloscope<br />
HP 34401A<br />
Fluke 8842A-09<br />
Keithley 2001<br />
Stanford Research Model DS340<br />
Hewlett Packard 33120A<br />
Leader LAG-120B<br />
Leveled Sine Wave Generator<br />
Relative output level accurate to<br />
0.5 dB flatness from 1 – 100 MHz<br />
and 50 kHz.<br />
Output adjustable to 2 Vp-p<br />
Tegam SG503 with TM series<br />
mainframe and 012-0482-00 output<br />
cable<br />
Terminator, in-line, BNC 50 Ω ± 2% coaxial termination ITT Pomona 4119-50<br />
AIM 27-9008<br />
Terminator, precision, BNC 50 Ω ± 0.05% <strong>Teledyne</strong> <strong>LeCroy</strong> TERM-CF01<br />
Attenuator, BNC 50 Ω ± 2%, ÷10 (20 dB) ITT Pomona 4108-20dB<br />
AIM 279300-20<br />
BNC coaxial cable, (3 ea) Male-male BNC, 50 Ω, 36” ITT Pomona 5697-36<br />
BNC coaxial cable, (2 ea) Male-male BNC, 50Ω, 4"-6" Pasternack Enterprises PE3067-5<br />
BNC ’Y’ connector Male to dual female, BNC AIM 27-9294<br />
BNC Tee connector Male to dual female, BNC AIM 27-8140<br />
ITT Pomona 3285<br />
BNC adapter Female to female AIM 25-7430<br />
ITT Pomona 3283<br />
Banana Plug adapter BNC female to dual banana plug ITT Pomona 1269<br />
922258-00 Rev A 57
<strong>DA</strong><strong>1855A</strong> Differential Amplifier<br />
Preliminary Procedure<br />
1. Connect the <strong>DA</strong><strong>1855A</strong> Differential Amplifier to an AC power source within the range listed in<br />
the Nominal Characteristics in the Specification section.<br />
2. Allow at least 20 minutes warm-up time for the <strong>DA</strong><strong>1855A</strong> and test equipment before<br />
performing the Verification Procedure.<br />
3. Turn on the other test equipment and allow these to warm up for the time recommended<br />
by the manufacturer.<br />
4. While the instruments are reaching operating temperature, make a photocopy of the<br />
Performance Verification test record (located at the end of this section), and fill in the<br />
necessary data.<br />
The warranted characteristics of the <strong>DA</strong><strong>1855A</strong> Differential Amplifiers are valid at any temperature<br />
within the Environmental Characteristics listed in Specifications. However, some of the other test<br />
equipment used to verify the performance may have environmental limitations required to meet<br />
the accuracy requirements needed for the procedure. Be sure that the ambient conditions meet the<br />
requirements of all the test instruments used in the procedure.<br />
NOTE: When the oscilloscope input is connected to the <strong>DA</strong><strong>1855A</strong> AMPLIFIER OUTPUT, the<br />
oscilloscope input impedance must be set to DC 50unless otherwise stated. Use a 50inline<br />
termination when using an oscilloscope without an internal 50termination. Position the<br />
oscilloscope display to center screen. Unless otherwise noted, the oscilloscope position and offset<br />
must remain at zero for the duration of the verification procedure.<br />
This procedure is written assuming local control of the <strong>DA</strong><strong>1855A</strong> Differential Amplifier. When using a<br />
<strong>Teledyne</strong> <strong>LeCroy</strong> oscilloscope, do not use the ProBus cable.<br />
Prior to performing the verification, set the <strong>DA</strong><strong>1855A</strong> as follows:<br />
GAIN<br />
X1<br />
ATTENUATOR ÷1<br />
INPUT RESISTANCE<br />
+INPUT<br />
–INPUT<br />
V COMP<br />
V DIFF<br />
BANDWIDTH LIMIT<br />
PVG<br />
OFFSET<br />
1M<br />
OFF<br />
OFF<br />
OFF<br />
OFF<br />
FULL<br />
ZERO<br />
ZERO<br />
58 922258-00 Rev A
Operator’s <strong>Manual</strong><br />
Functional Check<br />
The functional check will verify the basic operation of the Differential Amplifier functions.<br />
It is recommended that the Functional Check be performed prior to the Performance Verification<br />
Procedure to assure that all other non-warranted functions perform as specified.<br />
To perform the functional check:<br />
<br />
<br />
<br />
Select channel 1 of the oscilloscope and set the input coupling to DC 50 Ω , vertical scale to<br />
100 mV/div, timebase to 10 μsec/div and adjust the trace to screen center.<br />
Connect the output of the function generator with a BNC cable to channel 1 of the<br />
oscilloscope and set the output to square wave and the amplitude to 300 mV (3 div on<br />
screen).<br />
Remove the function generator output cable from the oscilloscope.<br />
1. ProBus operation<br />
a. Connect the ProBus and the BNC cables to the output of the <strong>DA</strong><strong>1855A</strong> and to channel 1<br />
of the oscilloscope.<br />
b. Verify that channel 1 is selected and that the <strong>DA</strong>1855 is being recognized by showing<br />
<strong>DA</strong><strong>1855A</strong> on the screen’s menu.<br />
2. Coupling<br />
a. Connect the 300 mV output voltage of the square wave generator to the +INPUT of the<br />
<strong>DA</strong><strong>1855A</strong>.<br />
b. Verify that the trace is a single line centered on the screen.<br />
c. Press the DC button on the +INPUT of the <strong>DA</strong><strong>1855A</strong>. and verify that the trace has moved<br />
either up or down depending on the polarity of the signal and that DC is highlighted on<br />
the screen’s menu.<br />
d. Press the AC button on the +INPUT and verify that the input signal is centered on screen<br />
and AC is highlighted on the screen’s menu.<br />
e. Disconnect the function generator’s output signal from the +INPUT and connect it to the<br />
–INPUT.<br />
f. Verify the performance of steps 2-b through 2-d for the – input.<br />
922258-00 Rev A 59
<strong>DA</strong><strong>1855A</strong> Differential Amplifier<br />
3. Bandwidth Limiting<br />
a. Press the 10 MHz BW Limit button on the front panel of the <strong>DA</strong><strong>1855A</strong> and verify that<br />
the slope of the trace’s leading and trailing edge has decreased.<br />
b. Press the resp. 1 MHz and 100 kHz BW Limit buttons and verify that in each case that<br />
the slope of the leading and trailing edges decreases.<br />
c. Return to maximum bandwidth by pressing the FULL BW Limit button.<br />
4. X10 Gain and ÷10 Attenuator<br />
a. Press the ÷10 attenuator button and verify that the signal on screen has reduced by<br />
about a factor of 10.<br />
b. Press the X10 Gain button and verify that the signal on screen is again about 3 division.<br />
c. Remove all cables, accessories and return all setting of the <strong>DA</strong><strong>1855A</strong> as shown in the<br />
table in the Preliminary Procedure.<br />
Verification Procedure<br />
1. Check X1 Gain Accuracy<br />
a. Set the <strong>DA</strong><strong>1855A</strong> +INPUT to DC.<br />
b. Connect the Sine Wave Generator output via a 50 Ω BNC coaxial cable and a<br />
standard 50 Ω termination to a female BNC to banana plug adapter.<br />
c. Set the DMM to measure AC Volts.<br />
d. Connect the banana plug adapter to the DMM.<br />
e. Set the sine wave generator to 70 Hz and the output amplitude to read 200 mVrms<br />
± 5 mV on the DMM.<br />
f. Record the DMM reading to 100 μV resolution in the Test Report as ‘Sine Wave<br />
Generator Output Voltage’.<br />
g. Disconnect the sine wave generator output cable with the 50 Ω termination from<br />
the BNC to banana plug adapter on the DMM.<br />
h. Connect this cable with the standard 50 Ω termination to the +INPUT of the<br />
<strong>DA</strong><strong>1855A</strong>.<br />
i. Remove the banana plug adapter from the DMM and connect the <strong>DA</strong><strong>1855A</strong><br />
AMPLIFIER OUTPUT connector via another coaxial cable and the precision 50 Ω<br />
termination to the DMM. See Figure 9.<br />
60 922258-00 Rev A
Operator’s <strong>Manual</strong><br />
Figure 9, X1 Gail Accuracy<br />
j. Press the X1 GAIN button to remove any residual DC offset from the input. (A DC<br />
component may interfere with the RMS computation in some DMMs.)<br />
k. After the DMM has stabilized, record the reading to 100 μV resolution as ‘Amplifier<br />
Output Voltage’ in the Test Record.<br />
l. Divide the measured amplifier output voltage from step 1-k by the sine wave<br />
generator output voltage (amplifier input voltage) in step 1-f. Subtract the ratio<br />
from 1.0 and multiply the result by 100% to get the error in percent.<br />
m. Record the result to two decimal places (± 0.xx %) as ‘X1 Gain Error’ in the Test<br />
Record.<br />
n. Check that the calculated X1 Gain error is less than ± 1.0%.<br />
922258-00 Rev A 61
<strong>DA</strong><strong>1855A</strong> Differential Amplifier<br />
2. Check X10 Gain Accuracy<br />
NOTE: Because most DMMs do not provide the required accuracy on lower AC voltage<br />
ranges, the check for X10 Gain Accuracy uses a ratio technique with an external ÷10<br />
attenuator. The actual attenuation of the attenuator is determined using higher amplitude<br />
signals.<br />
a. Disconnect the <strong>DA</strong><strong>1855A</strong> amplifier output cable and the precision 50 Ω termination<br />
from the DMM.<br />
b. Disconnect the sine wave generator output cable from the +INPUT and remove the<br />
50 Ω termination from the coaxial cable.<br />
c. Connect one female end of a BNC Tee to the sine wave generator cable.<br />
d. Connect a 50 Ω ÷10 attenuator to the male end of the BNC Tee followed by a<br />
standard 50 Ω termination.<br />
Reconnect the banana plug adapter to the DMM and connect another coaxial cable from<br />
the banana plug adapter to the other female end of the BNC Tee. See<br />
e. Figure 10.<br />
f. Set the sine wave generator output amplitude to read 2.00 Vrms ± 50 mV on the<br />
DMM.<br />
g. Record the reading to 1 mV resolution as the ‘Sine Wave Generator Output Voltage’<br />
in the Test Record.<br />
62 922258-00 Rev A
Operator’s <strong>Manual</strong><br />
Figure 10, X10 Gain Accuracy Setup.<br />
h. Remove the DMM cable from the BNC Tee and from the banana plug<br />
adapter on the DMM.<br />
i. Connect the 50 Ω termination end of the termination/attenuator/ BNC Tee<br />
combination on the sine wave generator cable to the Banana Plug adapter on the<br />
DMM. See Figure 11.<br />
Figure 11, X10 Gain Accuracy Setup.<br />
j. Record the DMM reading to 100 μV resolution as ‘Attenuator Output Voltage’ in the<br />
Test Record.<br />
NOTE: This reading should be approximately 200 mV. If it is not, verify that the inline<br />
attenuator and termination are installed in the correct order. The 50 Ω<br />
termination should be closest to the DMM.<br />
922258-00 Rev A 63
<strong>DA</strong><strong>1855A</strong> Differential Amplifier<br />
k. Divide the DMM reading in step 2-j into the output amplitude measured in step 2-g.<br />
This is the exact attenuation of the attenuator-termination combination.<br />
l. Record the result as ‘Exact Attenuation’ to four digit resolution in the Test Record.<br />
m. Disconnect the termination/attenuator/BNC Tee combination from the Banana Plug<br />
adapter on the DMM.<br />
n. Connect the terminated end of the termination/attenuator/ BNC Tee combination<br />
to the <strong>DA</strong><strong>1855A</strong> +INPUT.<br />
o. Connect the DMM to the free female end of the BNC Tee connector using the<br />
previously removed cable.<br />
Figure 12 X10 Gain Accuracy Setup<br />
p. Adjust the sine wave generator output amplitude to read200 mVrms ± 50 mV on the<br />
DMM.<br />
q. Record the DMM reading to 100 μV resolution as ‘Sine Wave Generator Output<br />
Voltage’ in the Test Record.<br />
r. Disconnect the DMM cable from the BNC Tee and remove the BNC to banana plug<br />
adapter from the cable and DMM.<br />
s. Connect the DMM cable to the <strong>DA</strong><strong>1855A</strong> AMPLIFIER OUTPUT connector.<br />
t. Insert the precision 50 Ω termination between the other end of this cable and the<br />
input of the DMM. See Figure 13.<br />
u. Set the <strong>DA</strong><strong>1855A</strong> GAIN to X10.<br />
64 922258-00 Rev A
Operator’s <strong>Manual</strong><br />
Figure 13, X10 Gain Accuracy Setup<br />
v. Divide the sine wave generator output voltage recorded in step 2-q by the exact<br />
attenuation factor recorded in step 2-l. This represents the actual voltage on the<br />
input of the amplifier. Record the result as ‘Amplifier Input Voltage’ in the Test<br />
Record.<br />
w. Multiply the amplifier input voltage as recorded in step 2-v by 10.0 to obtain the<br />
expected output voltage. Record the result to four digit resolution as ‘Expected<br />
Amplifier Output Voltage’ in the Test Record.<br />
x. After the DMM reading has stabilized, record the measured voltage to 100 μV<br />
resolution as ‘Measured Amplifier Output Voltage’ in the Test Record.<br />
y. Calculate the error by dividing the expected output voltage recorded in step 2-w by<br />
the measured output voltage recorded in step 2-x. Subtract this ratio from 1 and<br />
multiply by 100% to get the error in percent.<br />
z. Record the calculated error to two decimal places (±0.xx%) inthe Test Record as ‘X10<br />
Gain Error’. Check that the calculated error is less than ± 1%<br />
922258-00 Rev A 65
<strong>DA</strong><strong>1855A</strong> Differential Amplifier<br />
3. Check ÷10 Attenuator Accuracy<br />
a. Remove the <strong>DA</strong><strong>1855A</strong> output cable/precision termination from the DMM.<br />
b. Remove the sine wave generator output cable/BNC Tee/ attenuator/termination<br />
combination from the +INPUT of the <strong>DA</strong><strong>1855A</strong>.<br />
c. Remove the BNC Tee and attenuator from the cable but leave the standard 50 Ω<br />
termination connected.<br />
d. Connect the terminated output cable from the sine wave generator to the DMM<br />
using the BNC to Banana Plug adapter. Refer to Figure 14.<br />
Figure 14, ÷10 Attenuator Accuracy<br />
e. Set the sine wave generator to read 2.00 Vrms ± 50 mV on the DMM.<br />
f. Record the reading as ‘Sine Wave Generator Output Voltage’ to four digit resolution<br />
in the Test Record.<br />
g. Divide the reading recorded in step 3-f by 10.00 and record the result as ‘Expected<br />
Output Voltage’ to four digit resolution in the space provided in the Test Record.<br />
h. Set the <strong>DA</strong><strong>1855A</strong> GAIN to X1 and the ATTENUATOR to ÷10.<br />
i. Disconnect the sine wave generator output cable and standard 50 Ω termination<br />
from the DMM and reconnect to the +INPUT.<br />
j. Remove the BNC to banana plug adapter from the DMM.<br />
k. Connect the <strong>DA</strong><strong>1855A</strong> AMPLIFIER OUTPUT cable/precision termination to the<br />
DMM. Refer to Figure 15.<br />
66 922258-00 Rev A
Operator’s <strong>Manual</strong><br />
Figure 15, ÷10 Attenuator Accuracy Setup.<br />
l. Press the X1 GAIN button to autozero the amplifier.<br />
m. After the DMM reading has stabilized, record the reading as ‘Measured Amplifier<br />
Output Voltage’ to 100 μV resolution in the Test Record.<br />
n. Calculate the error by dividing the expected output voltage recorded in step 3-g by<br />
the measured amplifier output voltage recorded in step 3-m. Subtract this ratio<br />
from 1 and multiply by 100% to get the error in percent.<br />
o. Record the calculated error to two decimal places (± 0.xx%) as ‘÷10 Attenuation<br />
Error’ in the Test Record.<br />
p. Check that the calculated error is less than ± 1%.<br />
q. Disconnect the DMM, sine wave generator, cables and terminations, but leave the<br />
amplifier output cable (without termination) connected to the <strong>DA</strong><strong>1855A</strong> AMPLIFIER<br />
OUTPUT.<br />
922258-00 Rev A 67
<strong>DA</strong><strong>1855A</strong> Differential Amplifier<br />
4. Check X1 Bandwidth and Calculate Rise Time<br />
a. Connect the <strong>DA</strong><strong>1855A</strong> AMPLIFIER OUTPUT to channel 1 of the oscilloscope.<br />
b. Set the channel 1 input coupling to 50 Ω.<br />
NOTE: If the oscilloscope does not have an internal 50 input termination, insert<br />
the standard inline 50 termination between the cable and the oscilloscope input.<br />
Use the standard wide bandwidth 50 termination. The precision termination is not<br />
accurate at frequencies higher than 100 kHz.<br />
c. Verify that the <strong>DA</strong><strong>1855A</strong> GAIN is set to X1 and the ATTENUATOR to ÷10.<br />
d. Connect a BNC cable to the output of the leveled sine wave generator.<br />
NOTE: Many leveled sine wave generators, including the SG503, are calibrated only<br />
when a special BNC cable is used on its output. Be sure to use a cable which is<br />
specified for the generator.<br />
e. Insert a standard 50 Ω termination on the free end of the cable and connect the<br />
termination to the +INPUT of the <strong>DA</strong><strong>1855A</strong>. Refer to Figure 16.<br />
Figure 16, X1 Bandwidth Check Setup<br />
f. Set the leveled sine wave generator output frequency to 50 kHz, and the amplitude<br />
to approximately 300mVp-p.<br />
g. Set the oscilloscope Volt/div to 50 mV/div and the time/div to 20 μsec/div.<br />
Oscilloscope bandwidth to FULL. Triggering to Channel 1. Adjust the trigger level for<br />
a stable display.<br />
h. Adjust the leveled sine wave generator output for an amplitude of exactly 6<br />
divisions on the oscilloscope.<br />
68 922258-00 Rev A
Operator’s <strong>Manual</strong><br />
i. Set the sine wave generator output frequency to 50 MHz. Be careful not to alter the<br />
output amplitude.<br />
NOTE: The displayed waveform will be compressed in time to form a solid rectangle.<br />
It is not necessary to alter the time/div setting as long as the peak amplitude can be<br />
measured.<br />
j. Slowly increase the output frequency of the leveled sine wave generator until the<br />
displayed amplitude decreases to exactly 4.2 divisions. This is a 3 dB reduction in<br />
amplitude.<br />
k. Record in the Test Record the frequency where the –3 dB amplitude is obtained as<br />
‘Measured –3 dB Frequency at X1 Gain’.<br />
l. Check that the frequency is > 100 MHz.<br />
m. Divide 0.35 by the –3 dB frequency (in Hz) recorded in step 4-k. The result is the<br />
calculated rise time. Record the result as ‘Calculated Rise Time at X1 Gain’ in the Test<br />
Record.<br />
5. Check High Frequency CMRR<br />
NOTE: Common Mode Rejection Ratio, CMRR, is defined as the Differential Mode Gain<br />
divided by the Common Mode Gain (normalized inverse of the Common Mode<br />
Feedthrough). At higher frequencies (>10 MHz) where the bandwidth of the amplifier begins<br />
to attenuate the differential mode signal, both the differential mode gain and common<br />
mode gain feedthrough must be measured to derive the CMRR.<br />
a. Make the set-up the same as used for the bandwidth test (Steps 4 a-e). See Figure 17.<br />
Figure 17, X1 and X10 HF CMRR Check Setup.<br />
922258-00 Rev A 69
<strong>DA</strong><strong>1855A</strong> Differential Amplifier<br />
b. Set the <strong>DA</strong><strong>1855A</strong> GAIN to X1, ATTENUATOR to ÷1.<br />
c. Set the leveled sine wave generator output frequency to 50 kHz. If necessary adjust<br />
the output amplitude for a display of exactly 6 divisions (300 mV) peak to peak.<br />
d. Change the output frequency to 10 MHz, taking care not to change the output<br />
amplitude.<br />
e. Measure the peak to peak output amplitude of the <strong>DA</strong><strong>1855A</strong>. Record the reading to<br />
two digit resolution (xx0 mV) as ‘Amplifier Output Voltage at 10 MHz’ in the Test<br />
Record.<br />
f. Divide the measured output amplitude by 300 mV. Record the answer to two digit<br />
resolution (0.xx) in the Test record. This is the ‘Differential Mode Gain at 10 MHz’.<br />
g. Remove the leveled sine wave generator from the +INPUT of the <strong>DA</strong><strong>1855A</strong>.<br />
h. Connect a BNC cable from the Frequency Reference Signal Output of the sine wave<br />
generator to the External Trigger Input of the oscilloscope. (If the sine wave<br />
generator does not have a Frequency Reference Signal Output, insert a BNC Tee<br />
adapter into the Output connector and attach the External Trigger BNC cable to the<br />
BNC Tee.)<br />
i. Disconnect the AMPLIFIER OUTPUT cable from the oscilloscope’s channel 1 and<br />
connect the terminated end of the sine wave generator output cable to the channel<br />
1 input of the oscilloscope. Refer to Figure 18.<br />
Figure 18, HF CMRR Check Setup<br />
70 922258-00 Rev A
j. Verify that the channel 1 input coupling is set to DC and 1MΩ.<br />
Operator’s <strong>Manual</strong><br />
k. Set the oscilloscope to display channel 1, the vertical sensitivity to 500mV/div,<br />
timebase to 50 ns/div and trigger source to external ÷10. If necessary, adjust the<br />
trigger level for a stable display.<br />
l. Set the leveled sine wave generator frequency to 10 MHz.<br />
m. Set the leveled sine wave generator output amplitude to exactly 2 Vp-p. (4 divisions<br />
on the oscilloscope).<br />
n. Remove the leveled sine wave generator output cable and termination from the<br />
oscilloscope.<br />
o. Attach to the 50 Ω termination a female to female BNC adapter, a BNC ‘Y’ and a 6”<br />
BNC cable to each end of the BNC ‘Y’.<br />
p. Set both the <strong>DA</strong><strong>1855A</strong> +INPUT and –INPUT to DC.<br />
q. Connect the two free ends of the 6” BNC cables to the <strong>DA</strong><strong>1855A</strong> +INPUT and –<br />
INPUT.<br />
r. Reconnect the AMPLIFIER OUTPUT cable to channel 1 of the oscilloscope. Refer to<br />
Figure 19.<br />
Figure 19, HF CMRR Check Setup<br />
922258-00 Rev A 71
<strong>DA</strong><strong>1855A</strong> Differential Amplifier<br />
s. Verify that the oscilloscope is set to display channel 1 and the\ input coupling to DC<br />
and 50Ω.<br />
t. Increase the channel 1 vertical sensitivity to maximum.<br />
u. Verify that the oscilloscope is triggered on the Frequency Reference Signal Output of<br />
the sine wave generator.<br />
v. Measure the peak to peak amplitude. The displayed signal is the Common Mode<br />
Feedthrough. (Use the oscilloscope ZOOM function and averaging if needed to<br />
increase the size of the displayed waveform and to reduce noise.<br />
NOTE: The amplitude of the Common Mode Feedthrough should be very small. If<br />
the output waveform appears to be 1 Volt square wave, check that both of the<br />
<strong>DA</strong><strong>1855A</strong> inputs are set to DC.<br />
w. Record the Common Mode Feedthrough amplitude to two digit resolution in the<br />
Test Record as ‘Common Mode Feedthrough at 10 MHz’.<br />
x. Calculate the Common Mode Gain by dividing the Common Mode Feedthrough (in<br />
mV) by 5,000 mV.<br />
y. Record the result to two significant places as ‘Common Mode Gain at 10 MHz’ in the<br />
Test Record. (Keep all of the leading zero’s or use scientific notation.)<br />
z. Calculate the Common Mode Rejection Ratio (CMRR) at 10 MHz by dividing the<br />
Differential Mode Gain at 10 MHz as recorded in step 5-f by the Common Mode<br />
Gain recorded in step 5-y.<br />
aa. Record the result to two significant places as ‘Common Mode Rejection Ratio at 10<br />
MHz’ in the Test Record. (Keep all of the trailing zero’s).<br />
bb. Check that the CMRR at 10 MHz is greater than 316:1 (50 dB)<br />
cc. Disassemble setup by removing all cable, adapters, etc. from the instruments.<br />
6. Check Low Frequency CMRR.<br />
NOTE: The attenuation of the <strong>DA</strong><strong>1855A</strong> at 70 Hz and 100 kHz is so insignificant that the<br />
Differential Mode Gain can be assumed to be unity (1.0). However, the high value of the<br />
CMRR specification requires the zoom and averaging function to boost the level of the<br />
common mode feedthrough to an amplitude where it can be measured.<br />
a. Connect a BNC cable from the output of the high amplitude sine wave generator to<br />
the channel 1 input of the oscilloscope. Do not terminate the cable into 50 Ω, and<br />
verify that channel 1 coupling is set to DC and 1MΩ.<br />
72 922258-00 Rev A
Operator’s <strong>Manual</strong><br />
b. Connect a BNC cable from the Frequency Reference Signal Output of the leveled<br />
sine wave generator to the External Trigger Input of the oscilloscope. (If the sine<br />
wave generator does not have a Frequency Reference Signal Output, insert a BNC<br />
Tee adapter into the Output connector and attach the External Trigger BNC cable to<br />
the BNC Tee.)<br />
Figure 20, LF CMRR Check Setup<br />
c. Set the oscilloscope to display channel 1, vertical scale to 5 V/div and time base to<br />
10 ms/div.<br />
d. Set the sine wave generator frequency to 70 Hz.<br />
e. Set the high amplitude output of the sine wave generator to exactly 20 Vp-p (4<br />
divisions). Adjust the oscilloscope trigger level as necessary for a stable display. Take<br />
care not to alter the sine wave generator settings during the following steps.<br />
f. Remove the sine wave generator output cable from the oscilloscope input.<br />
g. Connect the open end of this cable to the female to female BNC adapter, a BNC ‘Y”<br />
and a 6” BNC cable to each end of the BNC ‘Y”.<br />
h. Connect the two free ends of the 6” BNC cables to the +INPUT and –INPUT of the<br />
<strong>DA</strong><strong>1855A</strong>. Refer to Figure 21.<br />
i. Verify that both the +INPUT and –INPUT of the <strong>DA</strong><strong>1855A</strong> are set to DC.<br />
j. Connect another BNC cable from the AMPLIFIER OUTPUT on the <strong>DA</strong><strong>1855A</strong> under<br />
test to channel 1 of the oscilloscope.<br />
922258-00 Rev A 73
<strong>DA</strong><strong>1855A</strong> Differential Amplifier<br />
k. Set the oscilloscope to display channel 1, coupling to DC and impedance to 50 Ω and<br />
the vertical sensitivity as necessary to measure the amplitude of the displayed<br />
waveform. Refer to Figure 21<br />
Figure 21, LF CMRR Check Setup<br />
l. The displayed signal is the Common Mode Feedthrough. (Use the oscilloscope<br />
ZOOM function and averaging if needed to increase the size of the displayed<br />
waveform and to reduce noise.)<br />
NOTE: This measurement needs to be made very carefully. The signal is only several<br />
hundred μV in amplitude and measuring the peak to peak amplitude of this signal,<br />
using oscilloscope measurement functions, may cause erroneous reading. Measure<br />
only the amplitude of the common mode feedthrough, not the total value of the<br />
signal plus noise.<br />
m. Record the displayed ‘Common Mode Feedthrough at 70 Hz’ to two digit resolution<br />
in the Test Record.<br />
n. Calculate the Common Mode Gain by dividing the Common Mode Feedthrough (in<br />
μV) by 20,000,000 μV. Record the result to two significant places as ’Common Mode<br />
Gain at70 Hz’ in the Test Record. (Keep all of the leading zeros or use scientific<br />
notation.)<br />
74 922258-00 Rev A
Operator’s <strong>Manual</strong><br />
o. Calculate the Common Mode Rejection ratio (CMRR) at70 Hz by dividing the<br />
Differential Mode Gain at 70 Hz (1.0) by the Common Mode Gain (recorded in step<br />
6-p). Record the result as ‘Common Mode Rejection Ratio at 70 Hz’ to two<br />
significant places in the Test Record. (Keep all of the trailing zeros.)<br />
p. Check that the CMRR at 70 Hz is greater than 50,000:1(94 dB).<br />
q. Remove the sine wave generator output cable from the<strong>DA</strong><strong>1855A</strong>’s + input.<br />
Reconnect the cable to the channel 1input of the oscilloscope.<br />
r. Set the oscilloscope to display channel 1, The coupling to DC and 1 MΩ, the vertical<br />
scale to 5 V/div and the horizontal scale to 5 μs/div. If necessary, adjust the trigger<br />
level for a stable display.<br />
s. Set sine wave generator to 100 kHz.<br />
t. Adjust the output amplitude of the sine wave generator to20 Vp-p (4 divisions).<br />
Readjust the oscilloscope trigger level of necessary to maintain a stable display.<br />
u. Remove the sine wave generator output cable and reconnect it to the female to<br />
female BNC adapter and cables attached to the <strong>DA</strong><strong>1855A</strong> inputs. Refer to Figure 21.<br />
v. Connect the <strong>DA</strong><strong>1855A</strong> output to channel 1 of the oscilloscope<br />
w. Set the oscilloscope to display channel 1, input coupling to DC and 50Ω and the<br />
vertical scale as necessary to measure the amplitude of the displayed signal. The<br />
displayed signal is the Common Mode Feedthrough.(Use the oscilloscope ZOOM<br />
function and averaging if needed to increase the size of the displayed waveform and<br />
to reduce noise.)<br />
NOTE: This measurement needs to be made very carefully. The signal is only several<br />
hundred μV in amplitude and measuring the peak to peak amplitude of this signal,<br />
using oscilloscope measurement functions, may cause erroneous reading. Measure<br />
only the amplitude of the common mode feedthrough, not the total value of the<br />
signal plus noise.<br />
x. Record the displayed amplitude as ‘Common Mode Feedthrough at 100 kHz’ to two<br />
digits resolution in the Test Record.<br />
y. Calculate the Common Mode Gain by dividing the Common Mode Feedthrough (in<br />
μV) by 20,000,000 μV. Record the result as ‘Common Mode Gain at 100 kHz’ to two<br />
significant places in the Test Record. (Keep all of the leading zeros or use scientific<br />
notation.)<br />
z. Calculate the Common Mode Rejection Ratio (CMRR) at<br />
922258-00 Rev A 75
<strong>DA</strong><strong>1855A</strong> Differential Amplifier<br />
aa. 100 kHz by dividing the Differential Mode gain at 70 Hz (1.0)by the Common Mode<br />
Gain recorded in step 6-bb. Record the result as ‘Common Mode Rejection Ratio at<br />
100 kHz’ to two significant places in the Test Record. (Keep all of the trailing zeros.)<br />
bb. Check that the CMRR at 100 kHz is greater than 50,000:1(94 dB).<br />
cc. Remove all cables, terminations and adapters from the instruments.<br />
7. Check the Precision Voltage Generator Accuracy<br />
a. Connect a BNC cable from the <strong>DA</strong><strong>1855A</strong> OFFSET VOLTAGE output connector on the<br />
rear panel of the <strong>DA</strong><strong>1855A</strong> to the DMM input. Do not use a 50 Ω termination.<br />
b. Push the PVG ZERO button, located at the lower left side of the Precision Voltage<br />
Generator display.<br />
c. Set the DMM to DC Volts on the most sensitive range. After the display has<br />
stabilized record the reading as ‘PVG Zero Output Voltage’ in the Test Record.<br />
d. Check that the measured 0.0000 V output is within ± 0.5 mV.<br />
e. Set the DMM range to read 15.5 V.<br />
f. Press and hold MSB increment button (button to right of ± button) until the display<br />
reads +15.500V. (If necessary, press the ± button once to invert the polarity.)<br />
g. After the DMM display has stabilized record the reading as PVG Output Voltage at<br />
15.5 V’ in the Test Record with 100 μV resolution.<br />
h. CHECK — That the measured output is within15.4917 to 15.5082 V.<br />
i. Press the ± button to change the output voltage to –15.5000 V.<br />
j. After the DMM display has stabilized record the reading as ‘PVG Output Voltage at –<br />
15.5 V’ in the Test Record with 100 μV resolution.<br />
k. Check that the measured output is within –15.4917 to –15.5082 V.<br />
l. Disconnect DMM and all cables from amplifier.<br />
This completes the Performance Verification Procedure. File the test results as required to support<br />
your internal calibration procedures.<br />
76 922258-00 Rev A
Operator’s <strong>Manual</strong><br />
Performance Verification Test Record<br />
This record can be used to record the results of measurements made during the performance<br />
verification of the <strong>DA</strong><strong>1855A</strong> Differential Amplifier. Photocopy this page and record the results on the<br />
copy. File the completed record as required by applicable internal quality procedures.<br />
The section in the test record corresponds to the parameters tested in the performance verification<br />
procedure. The numbers preceding the individual data records correspond to the steps in the<br />
procedure that require the recording of data. Results to be recorded in the column labeled "Test<br />
Result" are the actual specification limit check. The test limits are included in all of these steps.<br />
Other measurements and the results of intermediate calculations that support the limit check are to<br />
be recorded in the column labeled "Intermediate Results".<br />
Permission is granted to reproduce these pages for the purpose of recording test results.<br />
Serial Number:<br />
Asset or Tracking Number:<br />
Date:<br />
Technician:<br />
<strong>DA</strong><strong>1855A</strong><br />
Equipment Used<br />
MODEL<br />
SERIAL NUMBER<br />
CALIBRATION<br />
DUE <strong>DA</strong>TE<br />
OSCILLOSCOPE<br />
PREAMPLIFIER<br />
DIGITAL MULTIMETER<br />
LEVELED SINE WAVE<br />
GENERATOR<br />
HIGH AMPLITUDE SINE<br />
WAVE GENERATOR 1<br />
N/A<br />
1 The high amplitude sine wave generator is used in this Performance Verification Procedure for making relative<br />
measurements. The output of this generator is measured with a DMM or oscilloscope in this procedure. Thus, the<br />
generator is not required to be calibrated.<br />
922258-00 Rev A 77
<strong>DA</strong><strong>1855A</strong> Differential Amplifier<br />
<strong>DA</strong><strong>1855A</strong> Test Record<br />
Step Description Intermediate data Test Result<br />
X1 Gain Accuracy<br />
1-f Sine Wave Generator Output Voltage _____________ V<br />
1-k Amplifier Output Voltage _____________ V<br />
1-m X1 Gain Error (Test limit ≤ 1%) _____________%<br />
X10 gain Accuracy<br />
2-g Sine Wave Generator Output Voltage _____________ V<br />
2-j Attenuator Output Voltage _____________ V<br />
2-l Exact Attenuation _____________<br />
2-q Sine Wave Generator Output Voltage _____________ V<br />
2-v Amplifier Input Voltage _____________ V<br />
2-w Expected Amplifier Output Voltage _____________ V<br />
2-x Measured Amplifier Output Voltage _____________ V<br />
2-z X10 Gain Error (Test limit ≤ 1%) _____________%<br />
÷10 Attenuator Accuracy<br />
3-f Sine Wave Generator Output Voltage _____________ V<br />
3-g Expected Output Voltage _____________ V<br />
3-m Measured Amplifier Output Voltage _____________ V<br />
3-o ÷10 Attenuation Error (Test limit ≤± 1.0%) ____________%<br />
X1 Bandwidth and Calculated Rise Time<br />
4-k<br />
4-m<br />
Measured -3 dB Frequency at X1 Gain<br />
(Test limit: > 50 MHz)<br />
Calculated Rise Time at X1Gain<br />
(Test limit: < 7 nsec)<br />
__________ MHz<br />
__________ nsec<br />
78 922258-00 Rev A
Operator’s <strong>Manual</strong><br />
High Frequency CMRR<br />
Step Description Intermediate data Test Result<br />
5-e Amplifier Output Voltage at 10 MHz _____________ V<br />
5-f<br />
Differential Mode Gain at<br />
10 MHz<br />
___________<br />
5-w Common Mode Feedthrough at 10 MHz ___________<br />
5-y<br />
Common Mode Gain at<br />
10 MHz<br />
___________<br />
5-aa Common Mode Rejection Ratio at 10 MHz (Test limit: ≥ 1000:1) __________:1<br />
Low Frequency CMRR<br />
6-m Common Mode Feedthrough at 70 Hz _____________ V<br />
6-n<br />
Common Mode Gain at<br />
70 Hz<br />
___________<br />
6-o Common Mode Rejection Ratio at 70 Hz (Test limit:≥ 50,000:1) __________:1<br />
6-x Common Mode Feedthrough at 100 kHz _____________ V<br />
6-y<br />
Common Mode Gain at<br />
100 kHz<br />
_____________ V<br />
6-z Common Mode Rejection Ratio at 100 KHz (Test limit ≥ 50,000:1 __________:1<br />
Precision Voltage Generator Accuracy<br />
7-c PVG Zero Output Voltage (Test limit: 0.05% of reading + 500 μV) __________ V<br />
7-g PVG Output Voltage at +15.5 V (Test limit: 0.05% of reading + 500 μV) __________ V<br />
7-j PVG Output Voltage at –15.5 V (Test limit: 0.05% of reading + 500 μV) __________ V<br />
922258-00 Rev A 79
<strong>DA</strong><strong>1855A</strong> Differential Amplifier<br />
Reference<br />
Differential Mode and Common Mode<br />
Differential amplifiers amplify the voltage difference which appears between the + input and –<br />
input. This voltage is referred to as the Differential Mode or Normal Mode voltage. The voltage<br />
component which is referenced to earth and is identical on both inputs is rejected by the amplifier.<br />
This voltage is referred to as the Common Mode voltage and can be expressed as:<br />
Differential Mode Range and Common Mode Range<br />
Differential Mode range is the maximum signal which can be applied between the + and – inputs<br />
without overloading the amplifier, which otherwise would result in clipping or distorting the<br />
waveform measured by the oscilloscope.<br />
The Common Mode Range is the maximum voltage with respect to earth ground which can be<br />
applied to either input. Exceeding the common mode range can result in unpredictable<br />
measurements. Because the Common Mode signal is normally rejected and not displayed on the<br />
oscilloscope, you must be careful to avoid accidentally exceeding the common mode range.<br />
Common Mode Rejection Ratio<br />
The ideal differential amplifier would amplify only the differential mode voltage component and<br />
reject all of the common mode voltage component. Real differential amplifiers are not perfect and a<br />
small portion of the common mode voltage component appears at the output. Common Mode<br />
Rejection Ratio (CMRR) is the measure of how much the amplifier rejects the common mode voltage<br />
component. CMRR is equal to the differential mode gain (or normal gain) divided by the common<br />
mode gain. Common mode gain is equal to the output voltage divided by the input voltage when<br />
both inputs are driven by only the common mode signal. CMRR can be expressed as a ratio (e.g.<br />
10000:1) or implicitly in dB (e.g. 80 dB). Higher numbers indicate greater rejection (better<br />
performance).<br />
The first order term which determines the CMRR is the relative gain matching between the + and –<br />
input paths. To obtain high CMRR values, the input attenuators in a differential amplifier are<br />
precisely matched to each other. The matching includes the DC attenuation as well as the<br />
capacitance which determines the AC attenuation. As the frequency of the common mode<br />
component increases, the effects of stray parasitic capacitance and inductance in determining the<br />
AC component becomes more pronounced. The CMRR becomes smaller as the frequency increases.<br />
Hence the CMRR is usually specified in a graph of CMRR versus common mode frequency.<br />
80 922258-00 Rev A
Operator’s <strong>Manual</strong><br />
The common mode frequency in these graphs is assumed to be sinusoidal. In real life applications,<br />
the common mode signal is seldom a pure sine wave. Signals with pulse wave shapes contain<br />
frequency components much higher than the repetition rate may suggests. As such, it is very<br />
difficult to predict actual performance in the application for CMRR versus frequency graphs. The<br />
practical application of these graphs is to compare the relative common mode rejection<br />
performance between different amplifiers.<br />
Figure 22, Typical CMRR<br />
Figure 23, Noise Density<br />
(Referred to the input)<br />
922258-00 Rev A 81
<strong>DA</strong><strong>1855A</strong> Differential Amplifier<br />
Certifications<br />
This section certifies the instrument’s Electromagnetic Compatibility (EMC), Safety and<br />
Environmental compliances.<br />
EMC Compliance<br />
EC DECLARATION OF CONFORMITY - EMC<br />
The amplifier meets intent of EC Directive 2004/108/EC for Electromagnetic Compatibility.<br />
Compliance was demonstrated to the following specifications as listed in the Official Journal of the<br />
European Communities:<br />
EN 61326-1:2006, EN 61326-2-1:2006 EMC requirements for electrical equipment for measurement,<br />
control, and laboratory use. 1<br />
Electromagnetic Emissions:<br />
CISPR 11:2003, Radiated and Conducted Emissions Group 1, Class A 2 3<br />
Electromagnetic Immunity:<br />
EN 61000-4-2:2001 Electrostatic Discharge, 4 kV contact, 8 kV air, 4 kV vertical/horizontal coupling<br />
planes 4<br />
EN 61000-4-3:2006 RF Radiated Electromagnetic Field, 3 V/m, 80-1000 MHz; 3 V/m, 1400 MHz - 2<br />
GHz; 1 V/m, 2 GHz - 2.7 GHz 4<br />
EN 61000-4-4:2004 Electrical Fast Transient/Burst, 1 kV on power supply lines, 0.5 kV on I/O signal<br />
data and control lines 4<br />
EN 61000-4-5:2006 Power line Surge, 1 kV AC Mains, L-N, L-PE, N-PE 4<br />
EN 61000-4-6:2007 RF Conducted Electromagnetic Field, 3 Vrms, 0.15 MHz - 80 MHz 4<br />
EN 61000-4-11:2004 Mains Dips and Interruptions, 0%/1 cycle, 70%/25 cycles, 0%/250 cycles 4 5<br />
1 To ensure compliance with all applicable EMC standards, use high quality shielded interface cables.<br />
2 Emissions which exceed the levels required by this standard may occur when the amplifier is connected to a<br />
test object.<br />
3 This product is intended for use in nonresidential areas only. Use in residential areas may cause<br />
electromagnetic interference.<br />
4 Meets Performance Criteria “B” limits of the respective standard: during the disturbance, product undergoes<br />
a temporary degradation or loss of function or performance which is self-recoverable.<br />
5 Performance Criteria “C” applied for 70%/25 cycle voltage dips and for 0%/250 cycle voltage interruption<br />
test levels per EN61000-4-11.<br />
82 922258-00 Rev A
Operator’s <strong>Manual</strong><br />
European Contact:<br />
<strong>Teledyne</strong> <strong>LeCroy</strong> Europe GmbH<br />
Waldhofer Str 104<br />
D-69123 Heidelberg<br />
Germany<br />
Tel: (49) 6221 82700<br />
AUSTRALIA & NEW ZEALAND DECLARATION OF CONFORMITY – EMC<br />
Amplifier complies with the EMC provision of the Radio Communications Act per the following<br />
standards, in accordance with requirements imposed by Australian Communication and Media<br />
Authority (ACMA):<br />
CISPR 11:2003 Radiated and Conducted Emissions, Group 1, Class A, in accordance with EN61326-<br />
1:2006 and EN61326-2-1:2006.<br />
Australia / New Zealand Contacts:<br />
Vicom Australia Ltd.<br />
1064 Centre Road<br />
Oakleigh, South Victoria 3167<br />
Australia<br />
Vicom New Zealand Ltd.<br />
60 Grafton Road<br />
Auckland<br />
New Zealand<br />
Safety Compliance<br />
EC DECLARATION OF CONFORMITY – LOW VOLTAGE<br />
The amplifier meets intent of EC Directive 2006/95/EC for Product Safety. Compliance was<br />
demonstrated to the following specifications as listed in the Official Journal of the European<br />
Communities:<br />
EN 61010-1:2010 Safety requirements for electrical equipment for measurement, control, and<br />
laboratory use – Part 1: General requirements<br />
EN 61010-2:030:2010 Safety requirements for electrical equipment for measurement, control, and<br />
laboratory use – Part 2-030: Particular requirements for testing and measuring circuits<br />
The design of the instrument has been verified to conform to the following limits put forth by these<br />
standards:<br />
<br />
<br />
<br />
Overvoltage Category II: equipment intended to be supplied from the building wiring with a<br />
nominal supply voltage up to 300V.<br />
Measurement Category 0: amplifier measurement terminals that are not intended to be<br />
directly connected to the MAINS supply.<br />
Pollution Degree 2: an operating environment where normally only dry, non-conductive<br />
pollution occurs. Occasionally a temporary conductivity that is caused by condensation<br />
must be expected. This location is a typical office/home environment.<br />
922258-00 Rev A 83
<strong>DA</strong><strong>1855A</strong> Differential Amplifier<br />
<br />
Protection Class I: grounded equipment in which protection against electric shock is<br />
achieved by Basic Insulation and a connection to the protective ground conductor in the<br />
building wiring.<br />
Environmental Compliance<br />
END-OF-LIFE HANDLING<br />
The instrument is marked with this symbol to indicate that it complies with the<br />
applicable European Union requirements to Directives 2002/96/EC and 2006/66/EC<br />
on Waste Electrical and Electronic Equipment (WEEE) and Batteries.<br />
The instrument is subject to disposal and recycling regulations that vary by country<br />
and region. Many countries prohibit the disposal of waste electronic equipment in<br />
standard waste receptacles. For more information about proper disposal and<br />
recycling of your <strong>Teledyne</strong> <strong>LeCroy</strong> product, please visit teledynelecroy.com/recycle.<br />
RESTRICTION OF HAZARDOUS SUBSTANCES (ROHS)<br />
This instrument has been classified as Industrial Monitoring and Control Equipment, and is outside<br />
the scope of the 2011/65/EU RoHS Directive (Exempt until July 2017, per Article 4).<br />
ISO Certification<br />
Manufactured under an ISO 9000 Registered Quality Management System. Visit teledynelecroy.com<br />
to view the certificate.<br />
84 922258-00 Rev A
Operator’s <strong>Manual</strong><br />
Returning a Product<br />
Contact your local <strong>Teledyne</strong> <strong>LeCroy</strong> sales representative to find out where to return the product. All<br />
returned products should be identified by model number and serial number. Provide your name and<br />
contact number and if possible describe the defect or failure. In case of products returned to the<br />
factory, a Return Authorization Number (RAN) must be used. Contact your nearest <strong>Teledyne</strong> <strong>LeCroy</strong><br />
office, or the New York Customer Care Center, to receive a RAN.<br />
Return shipment should be prepaid. <strong>Teledyne</strong> <strong>LeCroy</strong> cannot accept COD or Collect Return<br />
shipments. We recommend air-freighting.<br />
1. Contact your local <strong>Teledyne</strong> <strong>LeCroy</strong> sales or service representative to obtain a Return<br />
Authorization Number.<br />
2. Remove all accessories from the probe. Do not include the manual.<br />
3. Pack the probe in its case, surrounded by the original packing material (or equivalent) and<br />
box.<br />
4. Label the case with a tag containing:<br />
• The RAN<br />
• Name and address of the owner<br />
• Probe model and serial number<br />
• Description of failure<br />
5. Package the probe case in a cardboard shipping box with adequate padding to avoid<br />
damage in transit.<br />
6. Mark the outside of the box with the shipping address given to you by the <strong>Teledyne</strong> <strong>LeCroy</strong><br />
representative; be sure to add the following:<br />
• ATTN: <br />
• FRAGILE<br />
7. Insure the item for the replacement cost of the probe.<br />
8. If returning a probe to a different country, also:<br />
Mark shipments returned for service as a “Return of US manufactured goods for<br />
warranty repair/recalibration.”<br />
<br />
<br />
If there is a cost involved in the service, put the service cost in the value column and<br />
the replacement value in the body of the invoice marked “For insurance purposes<br />
only.”<br />
Be very specific as to the reason for shipment. Duties may have to be paid on the<br />
value of the service.<br />
922258-00 Rev A 85
<strong>DA</strong><strong>1855A</strong> Differential Amplifier<br />
Contact <strong>Teledyne</strong> <strong>LeCroy</strong><br />
<strong>Teledyne</strong> <strong>LeCroy</strong> Service Centers<br />
United States and Canada -<br />
World Wide Corporate Office<br />
<strong>Teledyne</strong> <strong>LeCroy</strong> Corporation<br />
700 Chestnut Ridge Road<br />
Chestnut Ridge, NY, 10977-6499, USA<br />
Ph: 800-553-2769 / 845-425-2000<br />
FAX: 845-578-5985<br />
teledynelecroy.com<br />
Support:<br />
contact.corp@teledynelecroy.com<br />
Sales:<br />
customersupport@teledynelecroy.com<br />
European Headquarters<br />
<strong>Teledyne</strong> <strong>LeCroy</strong> SA<br />
4, Rue Moïse Marcinhes<br />
Case postale 341<br />
1217 Meyrin 1<br />
Geneva, Switzerland<br />
Ph: + 41 22 719 2228 / 2323 /2277<br />
FAX:+41 22 719 2233<br />
contact.sa@teledynelecroy.com<br />
applications.indirect@teledynelecroy.com<br />
teledynelecroy.com/europe<br />
Protocol Analyzers:<br />
Ph: +44 12 765 03971<br />
China<br />
<strong>Teledyne</strong> <strong>LeCroy</strong> Corporation Beijing<br />
Rm. 2001 - Office; Rm. 2002 - Service Center<br />
Unit A, Horizon Plaza<br />
No. 6, Zhichun Road, Haidian District<br />
Beijing 100088, China<br />
Ph: ++86 10 8280 0318 / 0319 / 0320<br />
FAX:++86 10 8280 0316<br />
Service:<br />
Rm. 2002<br />
Ph: ++86 10 8280 0245<br />
Taiwan<br />
LeColn Technology Co Ltd.<br />
Far East Century Park, C3, 9F<br />
No. 2, Chien-8th Road,<br />
Chung-Ho Dist., New Taipei City, Taiwan<br />
Ph: ++ 886 2 8226 1366<br />
FAX: ++ 886 2 8226 1368<br />
United States - Protocol Solutions Group<br />
<strong>Teledyne</strong> <strong>LeCroy</strong> Corporation<br />
3385 Scott Boulevard<br />
Santa Clara, CA, 95054, USA<br />
FAX: 408-727-0800<br />
teledynelecroy.com<br />
Sales and Service:<br />
Ph: 800-909-7211 / 408-727-6600<br />
contact.corp@teledynelecroy.com<br />
Support:<br />
Ph: 800-909-7112 / 408-653-1260<br />
psgsupport@teledynelecroy.com<br />
Singapore, Oscillosocpes<br />
<strong>Teledyne</strong> <strong>LeCroy</strong> Singapore Pte Ltd.<br />
Blk 750C Chai Chee Road #02-08<br />
Technopark @ Chai Chee<br />
Singapore 469003<br />
Ph: ++ 65 64424880<br />
FAX: ++ 65 64427811<br />
Singapore, Protocol Analyzers<br />
Genetron Singapore Pte Ltd.<br />
37 Kallang Pudding Road, #08-08<br />
Tong Lee Building Block B<br />
Singapore 349315<br />
Ph: ++ 65 9760-4682<br />
Korea<br />
<strong>Teledyne</strong> <strong>LeCroy</strong> Korea<br />
10th fl.Ildong Bldg.<br />
968-5 Daechi-dong, Gangnam-gu<br />
Seoul 135-280, Korea<br />
Ph: ++ 82 2 3452 0400<br />
FAX: ++ 82 2 3452 0490<br />
Japan<br />
<strong>Teledyne</strong> <strong>LeCroy</strong> Japan<br />
Hobunsya Funchu Bldg, 3F<br />
3-11-5, Midori-cho, Fuchu-Shi<br />
Tokyo 183-0006, Japan<br />
Ph: ++ 81 4 2402 9400<br />
FAX: ++ 81 4 2402 9586<br />
teledynelecroy.com/japan<br />
86 922258-00 Rev A