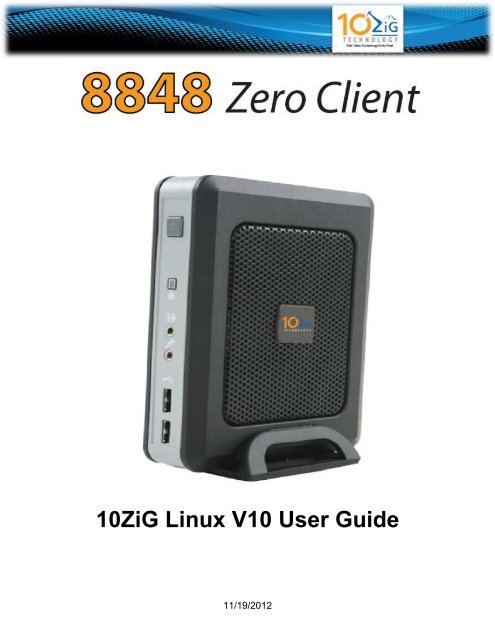
10ZiG Linux V10 User Guide.pdf - 10ZiG Technology
10ZiG Linux V10 User Guide.pdf - 10ZiG Technology
10ZiG Linux V10 User Guide.pdf - 10ZiG Technology

Create successful ePaper yourself
Turn your PDF publications into a flip-book with our unique Google optimized e-Paper software.
<strong>10ZiG</strong> <strong>Linux</strong> <strong>V10</strong> <strong>User</strong> <strong>Guide</strong><br />
11/19/2012
<strong>10ZiG</strong> <strong>Linux</strong> <strong>V10</strong> <strong>User</strong> <strong>Guide</strong><br />
Table of Contents<br />
About This <strong>Guide</strong><br />
Thank you for choosing from the <strong>10ZiG</strong> <strong>Technology</strong> series of thin clients which are<br />
specifically designed for power users in an office environment. They feature a powerful,<br />
yet simple and affordable solution to virtual desktop computing in a fashionable and<br />
sleek design.<br />
In this <strong>User</strong> <strong>Guide</strong>, you will find everything you need to quickly begin using your new<br />
device. Please be sure to verify with your network administrator that your network is<br />
prepared for the configuration of your new device.<br />
Declaration of Conformity<br />
It is hereby declared that this device is in conformity with the essential requirements,<br />
and other relevant provisions of the CE and the FCC.<br />
CE Mark Warning<br />
This is a class B device, in a domestic or office environment. This product<br />
may cause radio interference, in which case the user may be required to<br />
take adequate measures.<br />
Waste Electrical and Electronic Equipment (WEEE) Warning<br />
To potentially avoid adverse effects on the environment, and human<br />
health, as a result of the presence of hazardous substances in electrical<br />
and electronic equipment, end users of electrical and electronic equipment<br />
should understand the meaning of the crossed-out wheeled bin symbol.<br />
Do NOT dispose of WEEE as unsorted municipal waste as municipalities<br />
must collect WEEE separately.
<strong>10ZiG</strong> <strong>Linux</strong> <strong>V10</strong> <strong>User</strong> <strong>Guide</strong><br />
Table of Contents<br />
Table of Contents<br />
GETTING STARTED ................................................................................................................. 1<br />
PACKING LIST ............................................................................................................................................. 1<br />
INITIAL SETUP ............................................................................................................................................. 1<br />
INITIAL BOOT-UP ......................................................................................................................................... 1<br />
CONTROL PANEL ..................................................................................................................... 2<br />
INTRODUCTION ............................................................................................................................................ 2<br />
CONTROL PANEL ........................................................................................................................................ 2<br />
System: ................................................................................................................................................. 3<br />
Security Settings ............................................................................................................................................. 3<br />
System Logs .................................................................................................................................................... 3<br />
System Information......................................................................................................................................... 4<br />
General ......................................................................................................................................................... 4<br />
Packages ...................................................................................................................................................... 4<br />
Advanced ...................................................................................................................................................... 4<br />
VNC Settings ................................................................................................................................................... 5<br />
Time & Date ..................................................................................................................................................... 6<br />
Clock Tab ..................................................................................................................................................... 6<br />
Time Zone Tab ............................................................................................................................................. 6<br />
Time Server Tab ........................................................................................................................................... 7<br />
Certificates ...................................................................................................................................................... 7<br />
Hardware: .............................................................................................................................................. 9<br />
Network Configuration ................................................................................................................................... 9<br />
For Wireless enabled Units Only .................................................................................................................. 9<br />
Display ........................................................................................................................................................... 13<br />
Smart Card Service ....................................................................................................................................... 14<br />
Keyboard ....................................................................................................................................................... 15<br />
Sound ............................................................................................................................................................. 16<br />
USB Devices .................................................................................................................................................. 16<br />
Mouse............................................................................................................................................................. 17<br />
SUPPORT ................................................................................................................................18<br />
SERIAL NUMBER ....................................................................................................................................... 18
<strong>10ZiG</strong> <strong>Linux</strong> <strong>V10</strong> <strong>User</strong> <strong>Guide</strong><br />
Getting Started<br />
Getting Started<br />
Packing List<br />
The following components are included in the package:<br />
• Thin Client Device<br />
• Stand<br />
• 12 VDC Power Adapter with Cord<br />
Optional equipment that may be included:<br />
• USB Wheel Mouse<br />
• USB to PS2 Adapter<br />
• SVGA to DVI Adapter<br />
• Monitor Mount Kit (may include optional video cable)<br />
• SVGA and DVI splitter cable<br />
• Wireless Network Adapter and Antenna<br />
• Quick Installation <strong>Guide</strong> & Management Software CD<br />
Check this list before installation to ensure that you have received each item ordered. If<br />
you are missing any items, please contact technical support.<br />
Initial Setup<br />
To setup the device for initial use:<br />
Attach the Stand (if desired)<br />
Connect a Keyboard, Monitor and Mouse<br />
Connect to a Network and a Power Source<br />
Initial Boot-up<br />
Upon initial boot-up, the unit will attempt to configure the network settings using DHCP.<br />
Once the unit has obtained an IP address, you may continue through the remainder of<br />
the setup process by filling in the required information based on your preferences and<br />
geographical settings. During the setup wizard, you will be asked to fill in your country<br />
location, the time zone you are in, and the current date and time.<br />
1
<strong>10ZiG</strong> <strong>Linux</strong> <strong>V10</strong> <strong>User</strong> <strong>Guide</strong><br />
Control Panel<br />
Control Panel<br />
Introduction<br />
This section provides the user with instructions for the hardware configuration of the<br />
<strong>Linux</strong>-based thin client and explains the various utilities used to accomplish these tasks.<br />
Typically, a thin client is configured locally and then used as a template to configure<br />
other units. These saved configuration templates may then be pushed out to additional<br />
thin clients using the optional <strong>10ZiG</strong> Server Manager.<br />
Control Panel<br />
The Control Panel is where you will find easy access to all of the settings you wish to<br />
configure for the unit. It can be easily accessed by exiting the application that was<br />
preloaded onto the unit and selecting the Settings... button. NOTE: For more<br />
information about this, please see the 8848 guide specific to your application.<br />
2
<strong>10ZiG</strong> <strong>Linux</strong> <strong>V10</strong> <strong>User</strong> <strong>Guide</strong><br />
Control Panel<br />
System:<br />
Security Settings<br />
The Security Settings allows the user or systems administrator to password protect<br />
access to the Control Panel’s various functions and configurations.<br />
System Logs<br />
Selecting a Log file from the left pane will enable you to view it in the right pane. Please<br />
Note: If you are asked by a 10Zig Support technician, you may select the log file and<br />
then Click on the Send Log button at the bottom of the window to copy the file<br />
automatically to the 10Zig FTP site (a working connection to the Internet is required).<br />
3
<strong>10ZiG</strong> <strong>Linux</strong> <strong>V10</strong> <strong>User</strong> <strong>Guide</strong><br />
Control Panel<br />
System Information<br />
General<br />
The General screen displays information about the current software version installed as<br />
well as information about the Model and Name of the unit. Here you may change the<br />
name using the Change Name button if desired.<br />
Packages<br />
Selecting Packages will show the currently installed <strong>Linux</strong> packages on the unit.<br />
Advanced<br />
The Advanced screen shows the Hardware and Firmware information as well as<br />
providing access to the Console or Factory Default options. Selecting the Factory<br />
Default button will delete all saved parameters and return the unit back to the factory<br />
default state. Factory default may also be reset from the unit’s keyboard by pressing<br />
SHIFT-CTL-ALT-F or from the <strong>10ZiG</strong> Manager utility by right clicking on the unit and<br />
selecting Configuration – Reset to Factory Default.<br />
4
<strong>10ZiG</strong> <strong>Linux</strong> <strong>V10</strong> <strong>User</strong> <strong>Guide</strong><br />
Control Panel<br />
VNC Settings<br />
Here you may edit the settings used to remotely connect to the unit using VNC (Virtual<br />
Network Computing). Options include: when the server should start, whether or not to<br />
prompt the user for permission to connect to the unit, and the option to password<br />
protect any connection from a remote source.<br />
5
<strong>10ZiG</strong> <strong>Linux</strong> <strong>V10</strong> <strong>User</strong> <strong>Guide</strong><br />
Control Panel<br />
Time & Date<br />
The Time & Date utility allows you to set the date and time, select the appropriate time<br />
zone, and enable an NTP (Network Time Protocol) Time Server.<br />
Clock Tab<br />
The Clock tab allows the user to set the current date and time. Please Note: You must<br />
Click the Apply button before exiting or all of your changes made here will be lost.<br />
Time Zone Tab<br />
Here you may edit your Time Zone if the one selected during the initial Setup Wizard is<br />
no longer correct.<br />
6
<strong>10ZiG</strong> <strong>Linux</strong> <strong>V10</strong> <strong>User</strong> <strong>Guide</strong><br />
Control Panel<br />
Time Server Tab<br />
Here you may select the Use time server checkbox and enter a valid NTP Server<br />
address if you would like the unit to automatically update the Date & Time.<br />
Certificates<br />
The Certificates window allows you to view Imported and Base certificates installed on<br />
the unit.<br />
To view a certificate, select it from the list and then Click on the Show button.<br />
7
<strong>10ZiG</strong> <strong>Linux</strong> <strong>V10</strong> <strong>User</strong> <strong>Guide</strong><br />
Control Panel<br />
To import a certificate, insert a USB drive into the unit that contains a .crt or .pem file in<br />
the root directory. This will automatically open the USB Installer window. Here you may<br />
select the certificate(s) you would like to import into the unit. When finished, you will<br />
need to reboot the unit to view the newly imported certificate(s).<br />
\<br />
8
<strong>10ZiG</strong> <strong>Linux</strong> <strong>V10</strong> <strong>User</strong> <strong>Guide</strong><br />
Control Panel<br />
Hardware:<br />
Network Configuration<br />
Here you will find options to configure your network settings. If only one type of<br />
connection is available, it will be automatically set to Default.<br />
For Wireless enabled Units Only:<br />
If the unit is enabled with a 10Zig Wireless network interface, the Add button will<br />
become selectable and you may then continue to configure your Wireless connection.<br />
9
<strong>10ZiG</strong> <strong>Linux</strong> <strong>V10</strong> <strong>User</strong> <strong>Guide</strong><br />
Control Panel<br />
For Wireless enabled Units Only (Cont.):<br />
Clicking the Refresh button will force the unit to scan for any available broadcasted<br />
wireless networks and to display the results in the SSID: drop down menu. Selecting an<br />
SSID from the drop down will display its current Signal Strength<br />
After selecting the Wireless Network to connect to and clicking OK, the Network<br />
Settings Window for the connection will open. Here you may select your Security Mode<br />
from the drop down menu and then enter your Passphrase if required. Additionally, you<br />
may edit your TCP/IP Properties and Hosts for this connection from the Tabs here as<br />
well.<br />
10
<strong>10ZiG</strong> <strong>Linux</strong> <strong>V10</strong> <strong>User</strong> <strong>Guide</strong><br />
Control Panel<br />
From the Network Configuration window:<br />
Highlighting a connection and then clicking the Edit button will display additional<br />
network settings for the selected connection.<br />
Selecting the TCP/IP Properties tab for the connection will allow you to manually<br />
configure your IP settings with a Static IP Address.<br />
11
<strong>10ZiG</strong> <strong>Linux</strong> <strong>V10</strong> <strong>User</strong> <strong>Guide</strong><br />
Control Panel<br />
From the Network Configuration window:<br />
Selecting the Status button will display your current network connection status.<br />
Selecting the Test... button opens the Connection Test window where you may chose<br />
a destination to ping to.<br />
12
<strong>10ZiG</strong> <strong>Linux</strong> <strong>V10</strong> <strong>User</strong> <strong>Guide</strong><br />
Control Panel<br />
Display<br />
The Display Settings window allows you to configure your screen resolution along with<br />
the refresh rate and the color quality. Other options here include rotation and support for<br />
multiple displays, if detected.<br />
NOTE: When multiple displays are detected, you will be given the option to select Make<br />
this my main display and Extend these displays under Multiple displays. To detect<br />
or reset detection, click on the Detect button.<br />
13
<strong>10ZiG</strong> <strong>Linux</strong> <strong>V10</strong> <strong>User</strong> <strong>Guide</strong><br />
Control Panel<br />
Clicking the Advanced button will open the window with options to enable Power<br />
Saving-DPMS settings. Here you may configure the timers for each desired instance.<br />
Smart Card Service<br />
The Smart Card Service window allows you to enable Smart Card detection and<br />
Refresh detection of any connected Smart Cards. Any devices found will be displayed in<br />
the Dialog box.<br />
14
<strong>10ZiG</strong> <strong>Linux</strong> <strong>V10</strong> <strong>User</strong> <strong>Guide</strong><br />
Control Panel<br />
Keyboard<br />
Opening the Keyboard window displays the Layout Tab which allows you to select the<br />
keyboard model and country layout, as well as test keystroke output in the Test<br />
Keyboard: dialog box.<br />
The keyboard character repeat parameters, and the enable Numlock at startup<br />
checkbox are located under the Typing Settings Tab.<br />
15
<strong>10ZiG</strong> <strong>Linux</strong> <strong>V10</strong> <strong>User</strong> <strong>Guide</strong><br />
Control Panel<br />
Sound<br />
The Sound window allows you to control the speaker (Output:) and microphone (Input:)<br />
volumes.<br />
USB Devices<br />
USB Device Redirection for VMware and Citrix ICA may be controlled here. Options are<br />
Default, Include or Exclude. NOTE: USB Redirection in VMware View Client - when<br />
a USB printer or USB storage device is connected to the thin client, the VM (Virtual<br />
Machine) will immediately recognize the USB device and indicate that new hardware<br />
has been found. For printers, the printer driver must be installed on the VM in order for it<br />
to work correctly.<br />
16
<strong>10ZiG</strong> <strong>Linux</strong> <strong>V10</strong> <strong>User</strong> <strong>Guide</strong><br />
Control Panel<br />
Mouse<br />
Currently only USB and PS2 mice are supported. The Type option is automatically<br />
detected at system boot with no ability to change it. The Mouse window allows you to<br />
set the mouse speed, and acceleration settings. You may also configure the mouse<br />
buttons for 3 button emulation or for left-handed users.<br />
17
<strong>10ZiG</strong> <strong>Linux</strong> <strong>V10</strong> <strong>User</strong> <strong>Guide</strong><br />
Support<br />
Support<br />
If you require support for your <strong>Linux</strong>-based thin client, please contact your region’s<br />
nearest Technical Support Center. While <strong>10ZiG</strong> <strong>Technology</strong> does provide technical<br />
support for its <strong>Linux</strong>-based thin clients, it does not provide support for the <strong>Linux</strong><br />
operating system or application components that are obtained from the open source<br />
community and that may be included as part of the software image installed.<br />
Headquarters US<br />
<strong>10ZiG</strong> <strong>Technology</strong> Inc.<br />
23309 N 17th Dr - Ste 100<br />
Phoenix, AZ 85027<br />
Phone 866-864-5250 • Fax 623-516-8697<br />
support@10zig.com<br />
sales@10zig.com<br />
www.10zig.com<br />
Headquarters UK<br />
10 ZiG <strong>Technology</strong> Limited<br />
Action Business Centre<br />
Swan Street<br />
Leicester LE3 5AT<br />
Phone 44 1509 276252 • Fax 44 1509 276253<br />
support@10zig.eu<br />
sales@10zig.eu<br />
www.10zig.eu<br />
Serial Number<br />
Each thin client has a unique serial number which is labeled as ID CODE: followed by<br />
the MAC address of the unit. The sticker with this information may be found either on<br />
the side, bottom or near the video output port, depending on which model you have.<br />
Please have this number available when contacting <strong>10ZiG</strong> <strong>Technology</strong>’s Technical<br />
Support for assistance. You may also find this number in the 10Zig Manager or while on<br />
the unit itself under Control Panel> Network> Local Area> Status labeled Physical<br />
Address.<br />
18