10ZiG Imaging Utility - 10ZiG Technology
10ZiG Imaging Utility - 10ZiG Technology
10ZiG Imaging Utility - 10ZiG Technology
- No tags were found...

You also want an ePaper? Increase the reach of your titles
YUMPU automatically turns print PDFs into web optimized ePapers that Google loves.
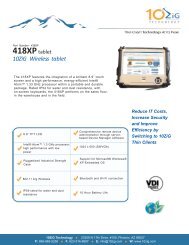
<strong>10ZiG</strong> <strong>Imaging</strong> <strong>Utility</strong>The <strong>10ZiG</strong> Image <strong>Utility</strong> creates a bootable USB thumb drive used to restore an imageon a <strong>10ZiG</strong> thin client. The size of the USB thumb drive must be at least double the sizeof the DOM on the thin client. For example a 1GB DOM would require a minimum 2GBUSB thumb drive. This program will format the USB thumb drive NTFS and create itbootable.Creating USB Thumb DriveOn a Windows PC download and run the executablehttp://www.10zig.com/thinclient/downloads/10zig_manager/TzImgUtil_setup.exeSelect the correct USB Drive to create the bootable USB thumb drive and select InstallPLEASE BE AWARE, THIS UTILITY WILL ERASEEVERYTHING ON THE USB THUMB DRIVE1
!! REMINDER !!FORMATTING WILL ERASE EVERYTHINGON THE USB THUMB DRIVE2
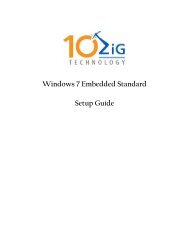
Select YESProcess of preparing the USB thumb drive begins and then completes. Select NEXT3
Copying Image to USB Thumb DriveCopy the binary or compressed image to the USB thumb drive.The example below is a compressed image that was backed up via the <strong>10ZiG</strong> Managerand then copied to the thumb drive for purposes of restoring the image.The USB thumb drive will have two folders in it as seen in the image below. The abovehighlighted files were copied to the USB thumb drive and placed in the root or any folderyou create.4
Restore or Backup of Image from USB Thumb DriveEnter the BIOS of the thin client and set the first boot device to USB HDD (on some thinclients it will be USB-ZIP)To set the Disk Boot Priority to USB the USB thumb drive must be in the thin clientwhen booted into BIOS.BIOS password is 10ZIGHardware model E700 – press DEL to enter BIOS – Advanced BIOD Features – setHard Disk Boot Priority – move USB to top of the list and set the first boot to USB-ZipHardware model U700 – press DEL to enter BIOS – Advanced BIOS Features – HardDisk Boot Priority – move the USB to the top using the + or – key.Hardware model U800 – boot the thin client with the USB thumb drive in it and pressDEL to enter BIOS – Advanced BIOS Features – Hard Disk Boot Priority – move theUSB to the top using the + or - key. You can then use F12 to access the boot menu toselect the USB thumb drive.Hardware model L800 – boot the thin client with the USB thumb drive in it and pressESC to enter the BIOS – Select SCU – enter password and continue to the bootoptions. Select Legacy – Boot Type Order – Find USB and using the + or – keys moveUSB to the top. Save and Exit – unit should now boot to USB. Once the Boot order isset you can also go into the BIOS and select the Boot Manager and to select USB.Hardware model E620 – boot the thin client with the USB thumb drive in it and press F2to enter the BIOS – Select SCU – enter password and continue to the boot options.Select Legacy – Boot Type Order – Find USB and using the + or – keys move USB tothe top. Save and Exit – unit should now boot to USB. Once the Boot order is set youcan also go into the BIOS and select the Boot Manager and to select USB.Reminder: For hardware models E700 the first Boot Device must be set to USB-Zip5
NOTE: Once the first boot device has been set to use USB you can press F12 while thethin client is booting which will present a boot option menu.The thin client will boot from the USB thumb drive to a menu.Choose the desired optionDrive <strong>Imaging</strong> <strong>Utility</strong>Binary Backup – create a backup image of the system drive using a binary copy.Compressed Backup – Create a compressed backup image of the system drive.Restore – Restore an image to the system driveSystem Information – Show the System InformationEach option will present a second menu to select restoring or saving the image to anattached USB thumb drive or to the network share (SMB)A directory is presented – select the desired image to restore. For binary image it willhave the extension .bin for compressed it will have the extension .bim and .bim.px.6
<strong>10ZiG</strong> <strong>Technology</strong> LimitedHeadquarters US23309 N 17 th Drive – Ste 100Phoenix, AZ 85207Phone 866-864-5250Fax 623-516-8697support@10zig.comsales@10zig.comwww.10zig.comHeadquarters UKUnit S2, Troon Way Business CenterHumberstone LaneLeicester LE4 9HAUKPhone 44 1509 276252Fax 44 1509 276253support@10zig.eusales@10zig.euwww.10zig.euNovember 21, 20137