10ZiG Manager Manual PDF - 10ZiG Technology
10ZiG Manager Manual PDF - 10ZiG Technology
10ZiG Manager Manual PDF - 10ZiG Technology
Create successful ePaper yourself
Turn your PDF publications into a flip-book with our unique Google optimized e-Paper software.
<strong>10ZiG</strong> <strong>Manager</strong> Help<br />
file:///G:/<strong>10ZiG</strong> <strong>Manager</strong>/help.html<br />
1 of 70 12/4/2012 12:18 PM<br />
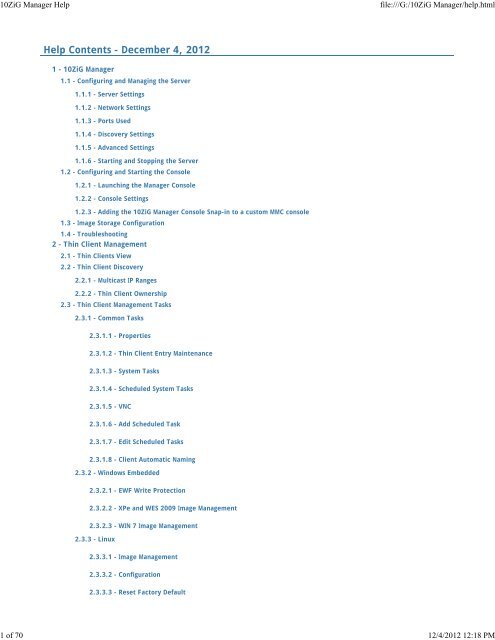
Help Contents - December 4, 2012<br />
1 - <strong>10ZiG</strong> <strong>Manager</strong><br />
1.1 - Configuring and Managing the Server<br />
1.1.1 - Server Settings<br />
1.1.2 - Network Settings<br />
1.1.3 - Ports Used<br />
1.1.4 - Discovery Settings<br />
1.1.5 - Advanced Settings<br />
1.1.6 - Starting and Stopping the Server<br />
1.2 - Configuring and Starting the Console<br />
1.2.1 - Launching the <strong>Manager</strong> Console<br />
1.2.2 - Console Settings<br />
1.2.3 - Adding the <strong>10ZiG</strong> <strong>Manager</strong> Console Snap-in to a custom MMC console<br />
1.3 - Image Storage Configuration<br />
1.4 - Troubleshooting<br />
2 - Thin Client Management<br />
2.1 - Thin Clients View<br />
2.2 - Thin Client Discovery<br />
2.2.1 - Multicast IP Ranges<br />
2.2.2 - Thin Client Ownership<br />
2.3 - Thin Client Management Tasks<br />
2.3.1 - Common Tasks<br />
2.3.1.1 - Properties<br />
2.3.1.2 - Thin Client Entry Maintenance<br />
2.3.1.3 - System Tasks<br />
2.3.1.4 - Scheduled System Tasks<br />
2.3.1.5 - VNC<br />
2.3.1.6 - Add Scheduled Task<br />
2.3.1.7 - Edit Scheduled Tasks<br />
2.3.1.8 - Client Automatic Naming<br />
2.3.2 - Windows Embedded<br />
2.3.2.1 - EWF Write Protection<br />
2.3.2.2 - XPe and WES 2009 Image Management<br />
2.3.2.3 - WIN 7 Image Management<br />
2.3.3 - Linux<br />
2.3.3.1 - Image Management<br />
2.3.3.2 - Configuration<br />
2.3.3.3 - Reset Factory Default
<strong>10ZiG</strong> <strong>Manager</strong> Help<br />
file:///G:/<strong>10ZiG</strong> <strong>Manager</strong>/help.html<br />
2 of 70 12/4/2012 12:18 PM<br />
2.3.3.4 - Firmware Update<br />
2.3.4 - Windows CE<br />
2.4 - Logical Groups<br />
2.5 - Generate Report<br />
2.6 - Task Scheduling<br />
2.7 - Searching for Thin Clients<br />
3 - Remote client configurations<br />
3.1 - Navigation<br />
3.2 - Groups<br />
3.3 - Thin clients<br />
3.4 - Users<br />
3.4.1 - Domain & Roaming Users<br />
3.4.2 - Local Users<br />
3.5 - Group Configuration Settings<br />
4 - XPe and WES 2009 Image Management<br />
4.1 - XPe and WES 2009 Clone System Image<br />
4.2 - XPe and WES 2009 Deploy System Image<br />
4.3 - XPe and WES 2009 Backup and Restore<br />
4.4 - XPe and WES 2009 Image Deployment Concepts<br />
5 - WES 7 Image Management<br />
5.1 - WES 7 Clone System Image<br />
5.2 - WES 7 Deploy System Image<br />
6 - Linux Image Management<br />
6.1 - Linux Backup and Restore<br />
7 - Windows Client Administration<br />
7.1 - Manage Updates<br />
7.2 - Execute Updates<br />
APPENDIX<br />
FAQ<br />
1 - <strong>10ZiG</strong> <strong>Manager</strong><br />
<strong>10ZiG</strong> <strong>Manager</strong> is an enterprise level remote management solution for <strong>10ZiG</strong> thin clients facilitating centralized device<br />
configuration and image management.<br />
<strong>10ZiG</strong> <strong>Manager</strong> Server is the core of the solution consisting of a Windows service that coordinates various<br />
components including a SQL database for thin client configuration management, a network boot server for<br />
PXE-booting supported clients, and various other network communications modules.<br />
<strong>10ZiG</strong> <strong>Manager</strong> Console, an MMC Snap-in, provides the user interface for the <strong>Manager</strong> Server, giving<br />
administrators the ability to monitor thin client status, perform remote configuration administration, and<br />
remotely boot, reboot or shutdown their thin clients.<br />
These individual components offer a scalable architecture and allow delegated administration, requiring only one<br />
central <strong>Manager</strong> Server. Multiple remote <strong>Manager</strong> Consoles can be configured to communicate with the central server.<br />
1.1 - Configuring and Managing the Server<br />
Configuring and managing the <strong>10ZiG</strong> <strong>Manager</strong> Server service is accomplished with the <strong>10ZiG</strong> <strong>Manager</strong> Service<br />
Controller application, which provides a notification icon that appears in the system tray to indicate if the <strong>Manager</strong><br />
Server service is running. Right-clicking on the tray icon provides a context menu to start and stop the service as well as
<strong>10ZiG</strong> <strong>Manager</strong> Help<br />
file:///G:/<strong>10ZiG</strong> <strong>Manager</strong>/help.html<br />
3 of 70 12/4/2012 12:18 PM<br />
to update the <strong>Manager</strong> Server settings.<br />
Service Controller tray icon<br />
The Service Controller is set to start automatically when a user logs onto the <strong>Manager</strong> server; however, it can also be<br />
launched using the Start menu shortcut.<br />
1.1.1 - Server Settings<br />
Server settings are changed via the Settings dialog. These settings include the Default Network Adapter used for<br />
communication between the <strong>Manager</strong> Server and Remoting Port used for <strong>Manager</strong> Console access to the server.<br />
To start the settings dialog:<br />
1.<br />
2.<br />
Right-click on the <strong>Manager</strong> Service Controller icon in the Windows Notification Area.<br />
Click Settings...<br />
1.1.2 - Network Settings<br />
Network Adapter - Specify the adapter connected the network where your <strong>10ZiG</strong><br />
Note: It is also important to remember if Windows Firewall is enabled, "MgrService.exe" MUST be added to the<br />
exclusions.<br />
1.1.3 - Ports Used<br />
The <strong>10ZiG</strong> <strong>Manager</strong> communicates with the thin clients using remote procedure call (RPC) and Active Directory relies on<br />
remote procedure call (RPC) for replication between domain controllers thus resulting in a conflict if on the same<br />
server.<br />
Network Ports and Purpose<br />
TCP 3306 - Used by the local MySQL service hosting the <strong>Manager</strong> database.<br />
TCP 11132 - The <strong>Manager</strong> Console retrieves information from the Server via this port.<br />
TCP 11133-11147 - A <strong>Manager</strong> Console will register one of the ports in this range, usually 11133, with the Server to<br />
receive various notifications.<br />
Client Discovery and Communication Ports<br />
UDP 52500 - Broadcast discovery port for Windows (XTC Agent) and Linux 9 thin clients.
<strong>10ZiG</strong> <strong>Manager</strong> Help<br />
file:///G:/<strong>10ZiG</strong> <strong>Manager</strong>/help.html<br />
4 of 70 12/4/2012 12:18 PM<br />
TCP 52510 - This RPC port is used by <strong>Manager</strong> Server to perform remote operations and queries on Windows (XTC<br />
Agent) clients.<br />
TCP 52511 - This RPC port is used Windows (XTC Agent) clients to notify the manager server when they come online<br />
or are going offline.<br />
TCP 80/443 (HTTP/HTTPS) -These Web ports are used by <strong>Manager</strong> Server to query information from and perform<br />
operations on Linux 9 (LTC Agent) clients.<br />
UDP 1680 or TCP 1680 - Depending on whether TCP discovery is enabled, one of these ports is used to discover of<br />
Linux 8 and Windows CE thin clients.<br />
TCP 21(FTP) - The port is used by <strong>Manager</strong> Server to query information from and perform operations on Linux 8<br />
(Browsed Agent) clients.<br />
TCP 8001 - The <strong>Manager</strong> Server publishes firmware update packages for Linux clients on this port.<br />
PXE Boot Ports<br />
UDP 68 (DHCP/BOOTP) - The <strong>Manager</strong> Server responds to DHCP/BOOTP requests from this port for PXE-Booting<br />
clients for image deployment/recovery.<br />
UDP 69 (TFTP) - When PXE-Booting, the PXE configuration and boot image are transferred to the client via TFTP<br />
Remoting Port - Defines the TCP communications port on which <strong>Manager</strong> Consoles should communicate with the<br />
<strong>Manager</strong> Server. The default value, 11132 should be used unless this conflicts with other services.<br />
NOTE: If the port must be changed, make certain to configure all related <strong>Manager</strong> Consoles to use the same<br />
port.<br />
1.1.4 - Discovery Settings<br />
Automatic Discovery<br />
1. Enable automatic discovery - When enabled, the manager server automatically attempts to discover new <strong>10ZiG</strong> thin
<strong>10ZiG</strong> <strong>Manager</strong> Help<br />
file:///G:/<strong>10ZiG</strong> <strong>Manager</strong>/help.html<br />
5 of 70 12/4/2012 12:18 PM<br />
clients and check existing clients' status at the configured interval. (Enabled by default.)<br />
2. Discovery Interval - The number of seconds between automatic discovery jobs. (Default: 30 seconds)<br />
3. Discovery Timeout - The number of seconds before a client discovery connection attempt times out. (Default: 15<br />
seconds)<br />
NOTE: If you find the <strong>10ZiG</strong> <strong>Manager</strong> is not picking up your thin clients try changing the Discovery Timeout to 30 seconds<br />
Discovery Options<br />
1. Use Broadcast Discovery - (Enabled by default) - Enable/disable broadcasting UDP packets to discover thin clients.<br />
2. Use Multicast Discovery - Enable/disable polling individual addresses within specified multicast IP ranges for the thin<br />
client.<br />
3. Use Ping Discovery - When enabled, the manager server pings an IP address to determine if a device is online prior to<br />
attempting a connection for client discovery. (Enabled by default)<br />
4. Use TCP Discovery (Linux and WinCE only) - By default, the manager server performs a connectionless query (Disabled<br />
by default)<br />
Click OK to save the settings and exit the dialog.<br />
1.1.5 - Advanced Settings<br />
Windows Client Connectivity<br />
RPC Timeout - Timeout period for remote management calls to Windows Thin Clients. Increase this value if certain<br />
tasks are failing due to high latency. Default: 45 seconds<br />
Wake-On-LAN<br />
Wake-on-LAN (WOL) is an Ethernet computer networking standard that allows a computer to be turned on or woken<br />
up by a network message. Default: port 9<br />
Boot Server<br />
Enable Boot Server - Enable/Disable integrated PXE boot server functionality. Specify localhost if the integrated
<strong>10ZiG</strong> <strong>Manager</strong> Help<br />
file:///G:/<strong>10ZiG</strong> <strong>Manager</strong>/help.html<br />
6 of 70 12/4/2012 12:18 PM<br />
TFTP server is to be used or the IP address of an existing TFTP server to use. Default: Enable<br />
To use an existing PXE server already on the network, copy the files in the TFTP folder under the <strong>10ZiG</strong> <strong>Manager</strong><br />
installation directory and place them on the existing PXE server where the PXE server is publishing files. The image<br />
file(s) need to be placed in the general repository directory on the existing PXE server. In the <strong>Manager</strong> Server<br />
Settings - Advanced Tab - uncheck Enable TFTP server and under the TFTP Host put the IP of the existing PXE server<br />
on the network. Boot the thin client in PXE mode and restore the image from the existing PXE server.<br />
Enable TFTP Server - Enable/Disable integrated TFTP server. Default: Enabled<br />
Root Path: Path to the tftp folder/directory on the <strong>10ZiG</strong> <strong>Manager</strong> server<br />
Timeout: Timeout period before TFTP transfers are cancelled if no acknowledgement is received from the client.<br />
Default: 5 seconds<br />
Allow file upload: Enable/Disable uploading files to the TFTP server. Default: Disabled<br />
Allow overwriting existing files: Enable/Disable overwriting files of the same name when uploading. Default:<br />
Disabled<br />
Logging - System Log<br />
Logging Level: Specify the logging verbosity level. Messages are filtered based on criticality. Default: Info<br />
How to generate a detailed <strong>10ZiG</strong> <strong>Manager</strong> System Log<br />
1.<br />
Change the logging level from Info to Debug in <strong>10ZiG</strong> <strong>Manager</strong> Server Settings - Advanced Tab<br />
2.<br />
Start the Syslog from the menu option under the <strong>10ZiG</strong> <strong>Manager</strong> - <strong>10ZiG</strong> Syslog
<strong>10ZiG</strong> <strong>Manager</strong> Help<br />
file:///G:/<strong>10ZiG</strong> <strong>Manager</strong>/help.html<br />
7 of 70 12/4/2012 12:18 PM<br />
3. The ICON in will be display in the Windows notification area<br />
4.<br />
Double click on the ICON to open the Syslog Server Program<br />
5.<br />
Select View Log...the log is displayed. Click on AutoRefresh to view live log.<br />
1.1.6 - Starting and Stopping the Server<br />
Aside from using the Windows Services console, the <strong>Manager</strong> Server service can be started and stopped via the Service<br />
Controller context menu. Since the service is configured, at installation time, to start automatically when the server<br />
computer boots, it is generally unnecessary to manually start the server. However, if the server settings are updated,<br />
the service should be restarted either by rebooting the server or by performing the following:<br />
1.<br />
2.<br />
Right-click on the <strong>Manager</strong> Service Controller icon<br />
Click Stop
<strong>10ZiG</strong> <strong>Manager</strong> Help<br />
file:///G:/<strong>10ZiG</strong> <strong>Manager</strong>/help.html<br />
8 of 70 12/4/2012 12:18 PM<br />
3. When the service has stopped, the tray icon will be grayed.<br />
4. Right-click on the grayed <strong>Manager</strong> Service Controller icon<br />
5. Click Start<br />
6.<br />
When the service has started, the tray icon will be blue.<br />
1.2 - Configuring and Starting the Console<br />
The <strong>10ZiG</strong> <strong>Manager</strong> Console is an MMC Snap-in, and during installation, a pre-configured MMC console, MgrConsole.msc<br />
is created. Shortcuts to the console are also created in the <strong>10ZiG</strong> <strong>Manager</strong> Start menu group and on the desktop.<br />
1.2.1 - Launching the <strong>Manager</strong> Console<br />
Ensure the <strong>Manager</strong> Server has been started before launching the <strong>Manager</strong> Console.<br />
Select <strong>10ZiG</strong> <strong>Manager</strong> Console from the Start menu group to launch<br />
or double-click the desktop shortcut<br />
Tip: On the <strong>Manager</strong> Server computer, double-clicking on the server controller tray icon<br />
Console.<br />
will also launch the <strong>Manager</strong>
<strong>10ZiG</strong> <strong>Manager</strong> Help<br />
file:///G:/<strong>10ZiG</strong> <strong>Manager</strong>/help.html<br />
9 of 70 12/4/2012 12:18 PM<br />
The <strong>10ZiG</strong> <strong>Manager</strong> Console consists of various toolbars and a tabbed window with three tabs, Thin Clients, Client<br />
Configuration, and Image Recovery.<br />
1.2.2 - Console Settings<br />
The <strong>Manager</strong> Console settings include the host address and port to which the Console uses to communicate with the<br />
<strong>Manager</strong> Server. By the default, the Console is configured to contact the <strong>Manager</strong> Server using the localhost or loopback<br />
address (127.0.0.1). However, if a console has been installed on a computer other than the main <strong>Manager</strong> Server, the<br />
appropriate address must be specified in the settings. As well, if the <strong>Manager</strong> Server has been configured to use a<br />
different port, the console must be configured with the same port.<br />
1.<br />
2.<br />
3.<br />
4.<br />
From the Manger Console, select the Settings toolbar button to start the Console settings dialog.<br />
In the Host field, specify the IP address or host name of the <strong>Manager</strong> Server. (Default: localhost or 127.0.0.1)<br />
In the Port field, specify the same port as the Remoting Settings port configured in the <strong>Manager</strong> Server settings.<br />
(Default: 11132)<br />
In the Console refresh interval select the interval in seconds for automatically refreshing the <strong>Manager</strong> Console<br />
(Default is 10 seconds).
<strong>10ZiG</strong> <strong>Manager</strong> Help<br />
file:///G:/<strong>10ZiG</strong> <strong>Manager</strong>/help.html<br />
10 of 70 12/4/2012 12:18 PM<br />
5. Click OK to save the settings and exit the dialog.<br />
6. For any setting changes to take effect, the Console must closed and restarted or select Reload Console<br />
Note: Discovery Tab information can be found under the Thin Client Management section 2.2.1<br />
1.2.3 - Adding the <strong>10ZiG</strong> <strong>Manager</strong> Console Snap-in to a custom MMC console<br />
You may wish to create a custom MMC console, grouping commonly used MMC tools together and adding an instance of<br />
the <strong>10ZiG</strong> console snap-in. Consult Microsoft MMC documentation for further details.<br />
Create a custom MMC console:<br />
1. From the Start menu<br />
2. select Run<br />
3. type mmc, and press enter<br />
An empty MMC console
<strong>10ZiG</strong> <strong>Manager</strong> Help<br />
file:///G:/<strong>10ZiG</strong> <strong>Manager</strong>/help.html<br />
11 of 70 12/4/2012 12:18 PM<br />
Add Snap-ins:<br />
1. From the File menu, select Add/Remove Snap-in to launch the Add/Remove Snap-in dialog.<br />
2. Click the Add button on the Standalone tab to display the Add Standalone Snap-in dialog.<br />
3. Choose the desired snap-in(s) to include and click the Add button.<br />
4. Click the Close button when done.<br />
5. Click the OK button on the Add/Remove Snap-in dialog.
<strong>10ZiG</strong> <strong>Manager</strong> Help<br />
file:///G:/<strong>10ZiG</strong> <strong>Manager</strong>/help.html<br />
12 of 70 12/4/2012 12:18 PM<br />
A new custom MMC console
<strong>10ZiG</strong> <strong>Manager</strong> Help<br />
file:///G:/<strong>10ZiG</strong> <strong>Manager</strong>/help.html<br />
13 of 70 12/4/2012 12:18 PM<br />
1.3 - Image Storage Configuration<br />
<strong>10ZiG</strong> <strong>Manager</strong> provides the ability to backup and restore entire thin client drives, and the resultant files are referred to<br />
as Images. The <strong>10ZiG</strong> <strong>Manager</strong> requires a network share for thin client image back and recovery as well as various other<br />
settings.<br />
Specify a valid UNC path and appropriate credentials to access the share or select a local folder to be shared as "Image<br />
Store". The specified user will have full control access.<br />
To set up the Image Store:<br />
1.<br />
2.<br />
Right-click on the <strong>Manager</strong> Service Controller ICON<br />
Click Image Store...
<strong>10ZiG</strong> <strong>Manager</strong> Help<br />
file:///G:/<strong>10ZiG</strong> <strong>Manager</strong>/help.html<br />
14 of 70 12/4/2012 12:18 PM<br />
3. In the Share Path field, the default will be the local file path C:\ImageStore or click the browse button to<br />
choose the folder to share. During the install, the program will check to see if C:\ImageStore exists and if it does<br />
not the program prompt for permission to create the folder and set the share properties.<br />
When <strong>10ZiG</strong> thin clients are in recovery mode, they need to map the shared "Image Store" in order to read from<br />
or write to the folder. Therefore, one must specify user account credentials with read/write access to the store<br />
folder to be used by the thin clients when mapping the share.<br />
4.<br />
5.<br />
6.<br />
7.<br />
In the Username field, enter the user name preceded by the computer name for a local user or the domain for a<br />
domain user.<br />
i.e. thiscomputer\localuser or somedomain\username<br />
Enter the user's password into the Password field<br />
Confirm the password by entering it again into the Confirm Password field.<br />
Click OK to save the settings and exit the dialog.<br />
1.4 - Troubleshooting<br />
Why won't my <strong>10ZiG</strong> <strong>Manager</strong> Console connect to the <strong>Manager</strong> Server?<br />
Ensure the <strong>Manager</strong> Console settings have been configured with the correct host and port for the <strong>Manager</strong> server.<br />
Refer to <strong>Manager</strong> Console Settings for further details.<br />
Why can't I select OK or Apply after I entered my credentials in the share path?<br />
Turn off Simple File Sharing in folder options:<br />
Windows XP - Uncheck Use simple file sharing (Recommended) in folder options
<strong>10ZiG</strong> <strong>Manager</strong> Help<br />
file:///G:/<strong>10ZiG</strong> <strong>Manager</strong>/help.html<br />
15 of 70 12/4/2012 12:18 PM<br />
Windows 7 - Uncheck Use Sharing Wizard (Recommended) in folder options
<strong>10ZiG</strong> <strong>Manager</strong> Help<br />
file:///G:/<strong>10ZiG</strong> <strong>Manager</strong>/help.html<br />
16 of 70 12/4/2012 12:18 PM<br />
2 - Thin Client Management<br />
Using the <strong>10ZiG</strong> <strong>Manager</strong> Console user interface, administrators can determine the status of <strong>10ZiG</strong> thin clients,<br />
remotely boot, reboot or shutdown thin clients, and execute various other remote management functions. These<br />
remote tasks can be manually initiated on individual or multiple clients. The boot, reboot and shutdown tasks can be<br />
scheduled for automated one-time or recurrent execution. Additionally, thin clients can be organized into logical groups<br />
to ease management of large numbers of related units.<br />
2.1 - Thin Clients View<br />
When the <strong>Manager</strong> Console starts, the Thin Clients tab is shown by default. This view includes a general toolbar<br />
common to all tab views, a thin client management specific toolbar, a group tree in the left pane, and a client list in<br />
the right pane.
<strong>10ZiG</strong> <strong>Manager</strong> Help<br />
file:///G:/<strong>10ZiG</strong> <strong>Manager</strong>/help.html<br />
17 of 70 12/4/2012 12:18 PM<br />
The thin client management toolbar contains buttons to execute various remote operations. At least one client entry must<br />
be selected before performing any of these tasks.<br />
The group tree view contains two base groups or roots; the Search results and the global Thin Clients root where all<br />
clients are first added/displayed, along with any custom Logical Groups. Like Windows Explorer, groups can be expanded<br />
and collapsed using the expand or collapse buttons respectively.<br />
The thin clients list provides a summary of useful details of all discovered <strong>10ZiG</strong> clients.
<strong>10ZiG</strong> <strong>Manager</strong> Help<br />
file:///G:/<strong>10ZiG</strong> <strong>Manager</strong>/help.html<br />
18 of 70 12/4/2012 12:18 PM<br />
The list columns:<br />
1.<br />
The first column contains.<br />
- Client status icons as follows<br />
Indicates the client is on.<br />
Indicates the client is off.<br />
Indicates the client is on, but the <strong>Manager</strong> server does not have ownership of it.<br />
Indicates the client is off, but the <strong>Manager</strong> server does not have ownership of it.<br />
2.<br />
3.<br />
4.<br />
5.<br />
6.<br />
7.<br />
8.<br />
9.<br />
10.<br />
11.<br />
The Name column displays the host or NetBIOS name of the client.<br />
The IP column contains the IP address of the client.<br />
The Platform column displays the thin client's Operating System type.<br />
The Model column shows the <strong>10ZiG</strong> client model.<br />
The Version column shows the version of firmware installed on the thin client<br />
The MAC column displays the thin client's network MAC address.<br />
The System drive column shows the client's system drive capacity.<br />
The RAM column displays the client's total RAM amount.<br />
The EWF column displays the system drive EWF write protection status for Windows XPe clients.<br />
The Last Responded column displays the last date and time the <strong>10ZiG</strong> <strong>Manager</strong> recorded a response from the thin client.<br />
2.2 - Thin Client Discovery<br />
The <strong>Manager</strong> Server must initially discover and register <strong>10ZiG</strong> thin clients to obtain their status and gather relevant<br />
information. The following occurs during discovery:<br />
The <strong>Manager</strong> Server queries and updates the status of clients that have been previously registered with the server.<br />
The server broadcasts a request for any undiscovered clients to initiate registration.<br />
The server tries to contact clients at each address within configured IP ranges.<br />
This discovery process begins when the <strong>Manager</strong> Server starts and repeats every 30 seconds to update client status.<br />
However, the administrator can refresh client status information by clicking the <strong>Manual</strong> discovery button .<br />
2.2.1 - Multicast IP Ranges<br />
Multicast IP Ranges define ranges of IP addresses or sub networks in which the <strong>Manager</strong> Server should attempt to<br />
contact <strong>10ZiG</strong> thin clients. During discovery, each address a range is polled for client response. If no address range is<br />
defined, the <strong>Manager</strong> Server polls the entire network to which the Default Network Adapter is connected.<br />
To add an IP Range:
<strong>10ZiG</strong> <strong>Manager</strong> Help<br />
file:///G:/<strong>10ZiG</strong> <strong>Manager</strong>/help.html<br />
19 of 70 12/4/2012 12:18 PM<br />
1. Launch the Console settings dialog by clicking the Settings toolbar button .<br />
2. Select the Discovery tab.<br />
3.<br />
4.<br />
Enter the first IP address of the range into the Start field.<br />
Note: The default gateway address, usually something like xxx.xxx.xxx.1, should not be included within the<br />
range.<br />
Enter the last IP address within the range into the End field.<br />
Note: The broadcast address, usually something like xxx.xxx.xxx.255, should not be included within the range.<br />
5.<br />
6.<br />
7.<br />
After the desired IP range values have been enter, click Add.<br />
The new range will appear in the range list.<br />
To remove any previously added ranges, check the desired range(s) in the list and click the Delete button.<br />
1.<br />
2.2.2 - Thin Client Ownership<br />
When a <strong>10ZiG</strong> Windows Embedded thin client is discovered for the first time, the discovering <strong>Manager</strong> Server receives<br />
Ownership of that client. That is to say the server will maintain the client's configuration information and will be<br />
authorized to perform any and all remote management functions on the client. Only one<br />
Generally, only one instance of the <strong>10ZiG</strong> <strong>Manager</strong> Server should be installed on a network, however, if multiple<br />
<strong>Manager</strong> Servers exist on the same network, some clients may be owned by one server and others owned by another. As<br />
well, if a <strong>Manager</strong> Server is uninstalled removing all of its saved data, and a new <strong>Manager</strong> Server is installed; the new<br />
server will not have ownership of the XPe clients. Therefore, it may be necessary at times to take ownership of these<br />
clients.<br />
Taking Ownership:<br />
In the <strong>Manager</strong> Console Thin clients list, right-click on an XPe client entry that the <strong>Manager</strong> Server does not have<br />
ownership.
<strong>10ZiG</strong> <strong>Manager</strong> Help<br />
file:///G:/<strong>10ZiG</strong> <strong>Manager</strong>/help.html<br />
20 of 70 12/4/2012 12:18 PM<br />
2. Select the Take ownership menu item.<br />
3. A progress bar will appear briefly while the process completes.<br />
4.<br />
The client's status icon will change from to when ownership has been assumed.<br />
2.3 - Thin Client Management Tasks<br />
The <strong>10ZiG</strong> <strong>Manager</strong> supports all <strong>10ZiG</strong> thin client operating systems including Windows XP Embedded, Linux, and Windows<br />
CE. Many remote management tasks are common to all the types of thin clients, however, as platforms vary in capability;<br />
some tasks are specific to each.<br />
2.3.1 - Common Tasks<br />
Many management tasks are universal to all <strong>10ZiG</strong> thin clients regardless of OS; these tasks are detailed as follows.<br />
2.3.1.1 - Properties<br />
To display some basic information about a thin client including the client model, computer name, agent software<br />
version, and hard drive and RAM resources, right-click on the client entry and select the Properties menu item.
<strong>10ZiG</strong> <strong>Manager</strong> Help<br />
file:///G:/<strong>10ZiG</strong> <strong>Manager</strong>/help.html<br />
21 of 70 12/4/2012 12:18 PM<br />
2.3.1.2 - Thin Client Entry Maintenance<br />
At times some thin client entries may need to be removed from the <strong>Manager</strong> Console clients list either because thin<br />
clients have been removed from the network so the entry is no longer required or because it is necessary to have the<br />
thin client be rediscovered and registered with the <strong>Manager</strong>. There are several ways to remove these entries.<br />
1.<br />
To Right-click on an entry and select the Delete menu item.
<strong>10ZiG</strong> <strong>Manager</strong> Help<br />
file:///G:/<strong>10ZiG</strong> <strong>Manager</strong>/help.html<br />
22 of 70 12/4/2012 12:18 PM<br />
2.<br />
Highlight each thin client entry to remove, use control or shift keys to select multiples. Right click then click select Delete<br />
or press the Delete key on the keyboard.<br />
3.<br />
All clients can be selected by clicking the Select all or deselected by clicking the Deselect all toolbar buttons and<br />
then either press the Delete key or right click on the manager console and select Delete.<br />
2.3.1.3 - System Tasks<br />
Remote system tasks include shutting-down, rebooting and powering-on clients. To Shut down or reboot a single<br />
client, right-click the client entry and select Shutdown or Reboot from the System submenu.
<strong>10ZiG</strong> <strong>Manager</strong> Help<br />
file:///G:/<strong>10ZiG</strong> <strong>Manager</strong>/help.html<br />
23 of 70 12/4/2012 12:18 PM<br />
2.3.1.4 - Scheduled System Tasks<br />
Schedule system tasks such as shutting-down, rebooting and powering-on clients<br />
or edit scheduled tasks<br />
2.3.1.5- VNC<br />
VNC allows shadowing the thin client from the console. For privacy reasons security is set in the VNC parameters when<br />
shipped.<br />
2.3.1.6 - Add Scheduled Task<br />
2.3.1.7 - Edit Scheduled Tasks
<strong>10ZiG</strong> <strong>Manager</strong> Help<br />
file:///G:/<strong>10ZiG</strong> <strong>Manager</strong>/help.html<br />
24 of 70 12/4/2012 12:18 PM<br />
2.3.1.8 - Client Automatic Naming<br />
The <strong>10ZiG</strong> <strong>Manager</strong> features Automatic Client Naming which sets a defined computer name based on a thin client MAC.<br />
To set Client Automatic naming on a specific thin client that has already been discovered by the <strong>10ZiG</strong> <strong>Manager</strong>, right click<br />
on the specific thin client and select Client Automatic Naming - > Add/Edit Naming Entry.<br />
The Add/Edit Auto Naming Settings will be displayed with the MAC already displayed - enter the new Computer Name and<br />
select OK.<br />
Once OK is selected, the MAC and computer name are added to the managed list.<br />
To access the Manage Auto-Naming List right client on any thin client and select Client Automatic naming - > Manage<br />
Auto-Naming List or select the ICON<br />
When the <strong>10ZiG</strong> <strong>Manager</strong> makes a connection with the thin client the list is checked and if the thin client's MAC is listed and<br />
the name is different from the thin client's current name, the change is made immediately.
<strong>10ZiG</strong> <strong>Manager</strong> Help<br />
file:///G:/<strong>10ZiG</strong> <strong>Manager</strong>/help.html<br />
25 of 70 12/4/2012 12:18 PM<br />
To manually add a thin client MAC in the list right click anywhere in the grid or select the<br />
ICON to add thin client MAC<br />
Enter the MAC and the Computer Name.<br />
Note: Join Domain is for Windows Clients Only
<strong>10ZiG</strong> <strong>Manager</strong> Help<br />
file:///G:/<strong>10ZiG</strong> <strong>Manager</strong>/help.html<br />
26 of 70 12/4/2012 12:18 PM<br />
When the thin client boots, the <strong>10ZiG</strong> <strong>Manager</strong> checks the MAC against the information stored in the table and makes<br />
changes accordingly.<br />
The unit below had the default out of box name and was changed to VMView-Tech based information displayed on the<br />
images above<br />
To make name changes to one specific thin client right click on it in the <strong>10ZiG</strong> <strong>Manager</strong> and take the option for Automatic<br />
Client Naming and then Add/Edit Auto Naming Entry.<br />
Change the Computer Name and select OK. Once OK is selected the thin client will reboot. Once the reboot has completed<br />
the computer name has been changed.<br />
For Windows thin clients, in addition to the computer name change, the computer name can be added to Active Directory.<br />
Complete the Domain information making certain the username has the authority to add a computer to the domain.
<strong>10ZiG</strong> <strong>Manager</strong> Help<br />
file:///G:/<strong>10ZiG</strong> <strong>Manager</strong>/help.html<br />
27 of 70 12/4/2012 12:18 PM<br />
To enter Default Domain Credentials select the ICON<br />
For large numbers of thin client name changes it is possible to export and/or import a .csv file<br />
Using the ICONs above will allow for importing and exporting to making large modifications more manageable.<br />
Prior to deploying thin clients a list can be built and saved in .csv format, once the list is completed and saved, it can be<br />
imported.<br />
The video below walks through adding names to the list, exporting the list and then importing.
<strong>10ZiG</strong> <strong>Manager</strong> Help<br />
file:///G:/<strong>10ZiG</strong> <strong>Manager</strong>/help.html<br />
28 of 70 12/4/2012 12:18 PM<br />
NOTE: If the video above does not play correctly, view the HELP file by right clicking on the <strong>10ZiG</strong> <strong>Manager</strong> ICON in the<br />
notification area of the desktop and selecting Help.<br />
2.3.2 - Windows XPe, WES 2009 and WIN 7<br />
Windows Embedded-based <strong>10ZiG</strong> thin clients<br />
Many options are available to specific client types; if the option is grayed out it does not apply to the thin client selected.<br />
2.3.2.1 - EWF Write Protection<br />
Enhanced Write Filter (EWF) provides the ability to write-protect XPe image. Write Protection must be turned off or<br />
disabled before cloning an image!<br />
2.3.2.2 - XPe and WES 2009 Image Management<br />
Image management (Clone and Deploy System Image) this process performs an fbreseal before creating an image to be<br />
used for cloning. Once the image has been resealed, the thin client must be PXE booted to the <strong>10ZiG</strong> <strong>Manager</strong> to<br />
maintain the resealed image where it can be backed up as a binary or compressed image. The cloned image can then be
<strong>10ZiG</strong> <strong>Manager</strong> Help<br />
file:///G:/<strong>10ZiG</strong> <strong>Manager</strong>/help.html<br />
29 of 70 12/4/2012 12:18 PM<br />
pushed out to other XPe thin clients. When the cloned image is booted for the first time it is assigned a unique security<br />
ID (SID) and computer name. See Section 4<br />
2.3.2.3 - WIN 7 Image Management<br />
Image management (Clone and Deploy System Image) this process does a sysprep before creating an image to be used<br />
for cloning. Once the sysprep settings are set and sysprep is complete the image is ready to be cloned, the thin client<br />
must be PXE booted to the <strong>10ZiG</strong> <strong>Manager</strong> to maintain the syspreped image where it can be backed up as a binary or<br />
compressed image. The cloned image can then be deployed to other like thin clients. When the cloned image boots for<br />
the first time a unique security ID (SID), computer name and sysprep settings are assigned to the system. See Section 5<br />
2.3.3 - Linux<br />
Linux Functions<br />
2.3.3.1 - Image Management See Section 6
<strong>10ZiG</strong> <strong>Manager</strong> Help<br />
file:///G:/<strong>10ZiG</strong> <strong>Manager</strong>/help.html<br />
30 of 70 12/4/2012 12:18 PM<br />
2.3.3.2 - Configuration<br />
NOTE: Before editing the configuration take the option to Retrieve. Retrieve will pull in the current configuration of the<br />
thin client. Double click on the thin client to display the Linux Thin Client configuration properties.<br />
Edit<br />
To change the Thin Client name double click on the Computer Name and enter the New Name
<strong>10ZiG</strong> <strong>Manager</strong> Help<br />
file:///G:/<strong>10ZiG</strong> <strong>Manager</strong>/help.html<br />
31 of 70 12/4/2012 12:18 PM<br />
To Edit VNC settings double click on the VNC ICON<br />
From here you can edit the connection manager, create new sessions,<br />
and edit the terminal properties.
<strong>10ZiG</strong> <strong>Manager</strong> Help<br />
file:///G:/<strong>10ZiG</strong> <strong>Manager</strong>/help.html<br />
32 of 70 12/4/2012 12:18 PM<br />
Import Wallpaper<br />
Double click on the Linux v9 thin client to access Client Configuration.<br />
Double click on Desktop<br />
ICON.
<strong>10ZiG</strong> <strong>Manager</strong> Help<br />
file:///G:/<strong>10ZiG</strong> <strong>Manager</strong>/help.html<br />
33 of 70 12/4/2012 12:18 PM<br />
Click on Import and select the .jpg image to use as wallpaper<br />
Select OK<br />
Use the drop down box to select the imported image<br />
Send configuration to thin client<br />
Thin Client will reboot<br />
NOTE: Desktop Properties to change Wallpaper can be changed via the <strong>10ZiG</strong> <strong>Manager</strong> in Linux Version 9 ONLY!<br />
Clone From Another<br />
Select the thin client to clone configuration from another thin client. Select the thin client from which to clone the<br />
configuration. This must be the same model of thin client.
<strong>10ZiG</strong> <strong>Manager</strong> Help<br />
file:///G:/<strong>10ZiG</strong> <strong>Manager</strong>/help.html<br />
34 of 70 12/4/2012 12:18 PM<br />
Click here to view a short video on Linux Cloning<br />
Generate Template<br />
Templates are meant for specific configurations to be applied to other thin clients of the same model. Templates of the<br />
same type will overwrite each other such as two 5250 templates. If both are applied the last one applied will be the<br />
template used. Templates will add to existing configurations.
<strong>10ZiG</strong> <strong>Manager</strong> Help<br />
file:///G:/<strong>10ZiG</strong> <strong>Manager</strong>/help.html<br />
35 of 70 12/4/2012 12:18 PM<br />
Apply Template<br />
Applies a previously created template to a thin client. Templates of the same type will overwrite each other such as two<br />
5250 templates. If both are applied the last one applied will be the template used. Templates will add to existing<br />
configurations or overwrite based on the configuration template.<br />
Example: Thin client was configured to use dual monitor and specific resolution and then a template is applied that has the<br />
display option configured with single monitor and a set resolution. Once the template is applied with the display<br />
configuration will change to the single monitor settings in the applied template. To avoid this scenario, edit the template<br />
and remove the display settings before applying the template.<br />
Click here to view a short video on Templates<br />
Manage Templates
<strong>10ZiG</strong> <strong>Manager</strong> Help<br />
file:///G:/<strong>10ZiG</strong> <strong>Manager</strong>/help.html<br />
36 of 70 12/4/2012 12:18 PM<br />
Manages a previously created template - options are to Edit, Rename, Delete, Import and Export templates<br />
Example below of Edit Template:<br />
2.3.3.3 - Reset Factory Default<br />
Right click on the intended thin client - select configuration - select Reset To Factory Default<br />
Click here to view a short video of resetting factory defaults<br />
2.3.3.4 - Firmware Update<br />
Upon selecting Firmware Update you will be prompted to verify the update process.
<strong>10ZiG</strong> <strong>Manager</strong> Help<br />
file:///G:/<strong>10ZiG</strong> <strong>Manager</strong>/help.html<br />
37 of 70 12/4/2012 12:18 PM<br />
Upon confirming the Firmware Update you will be prompted to select a tar file.<br />
The firmware update will begin. A progress bar will continue until the update has completed at which time the thin client<br />
will reboot. The thin client itself will display Updating Firmware during the process.<br />
2.3.3.7 - VNC<br />
VNC allows shadowing the thin client from the console. To access the thin client via an Ultra VNC Client outside of the <strong>10ZiG</strong><br />
<strong>Manager</strong>, set the VNC options in Terminal Properties - Control Panel - VNC Shadowing to Start VNC Server On Boot.
<strong>10ZiG</strong> <strong>Manager</strong> Help<br />
file:///G:/<strong>10ZiG</strong> <strong>Manager</strong>/help.html<br />
38 of 70 12/4/2012 12:18 PM<br />
2.3.4 - Windows CE<br />
Options for Windows CE thin clients are ADD SCHEDULED TASK, SYSTEM (reboot and Shutdown), and VNC.<br />
NOTE: Management for CE thin clients is not as inclusive as with Linux or XPe thin clients and options are limited - use<br />
BOSmanager instead.
<strong>10ZiG</strong> <strong>Manager</strong> Help<br />
file:///G:/<strong>10ZiG</strong> <strong>Manager</strong>/help.html<br />
39 of 70 12/4/2012 12:18 PM<br />
2.4 - Logical Groups<br />
This feature is used to create logical groups of thin clients. Right click on Thin Clients and select New - > Group.<br />
To include an IP range or other filtering options by selection the Options button.<br />
To edit the group properties right click on the group and select Properties<br />
2.5 - Generate Report<br />
To generate a report right click on a group and select Generate report....<br />
Select which available fields to be reported and move them to the report fields by selecting the green button with a plus<br />
sign in it.
<strong>10ZiG</strong> <strong>Manager</strong> Help<br />
file:///G:/<strong>10ZiG</strong> <strong>Manager</strong>/help.html<br />
40 of 70 12/4/2012 12:18 PM<br />
Select Generate to generate the report.
<strong>10ZiG</strong> <strong>Manager</strong> Help<br />
file:///G:/<strong>10ZiG</strong> <strong>Manager</strong>/help.html<br />
41 of 70 12/4/2012 12:18 PM<br />
2.6 - Task Scheduling<br />
Right click on the Group and select New -> Scheduled task...<br />
Select the desired task to be scheduled
<strong>10ZiG</strong> <strong>Manager</strong> Help<br />
file:///G:/<strong>10ZiG</strong> <strong>Manager</strong>/help.html<br />
42 of 70 12/4/2012 12:18 PM<br />
Below is an example of the task Update Device Firmware
<strong>10ZiG</strong> <strong>Manager</strong> Help<br />
file:///G:/<strong>10ZiG</strong> <strong>Manager</strong>/help.html<br />
43 of 70 12/4/2012 12:18 PM<br />
2.7 - Searching for Thin Clients<br />
To search for a thin client use the<br />
search option. Click on the red ICON to the right of
<strong>10ZiG</strong> <strong>Manager</strong> Help<br />
file:///G:/<strong>10ZiG</strong> <strong>Manager</strong>/help.html<br />
44 of 70 12/4/2012 12:18 PM<br />
the magnifying glass (search button) to clear the search results.<br />
3 - Remote Client Configurations<br />
- The <strong>10ZiG</strong> <strong>Manager</strong> allows the user to build, store and deploy settings for thin clients<br />
- It also provides template management via organizational groups<br />
- The settings are mainly client connection oriented<br />
- The configuration is done in the Client Configuration tab of the console<br />
Tip: You can access a thin client configuration by double-clicking the thin-client entry<br />
3.1 - Navigation<br />
How do I navigate? To navigate through groups one can:<br />
Use the tree view in the left part<br />
Click on each group to see thin clients in the group<br />
How do I populate groups? You can populate groups by editing the properties of the group and setting the filter option.<br />
See Section 3.2 for more details.<br />
or drag and drop items into groups:<br />
- One by one in the tree view<br />
- Single/Multi by selecting the item in the main view<br />
How do I delete items? - To delete a thin client from a group:<br />
To remove a thin client, the properties of the group must be modified to no longer include the thin client. For example if<br />
you are filtering by MAC address, edit the MAC list and remove the MAC of the thin client to be removed. Delete the thin<br />
client from the <strong>10ZiG</strong> <strong>Manager</strong> and<br />
Once the thin client properties have been removed from the group, right click on the thin client and select Delete.<br />
If the thin client was dragged into the group and there are no set properties in the group, right<br />
How do I delete an entire group?<br />
Select the items (in the tree view or in the main view)<br />
Press Delete<br />
How do I delete a user?<br />
From the Client Configuration tab find the user, right click and select Delete<br />
3.2 - Groups<br />
Why would I use a group?<br />
Organize the units and users into logical containers that are representative of the location or organization<br />
Provide layered/inherited or customized settings<br />
Allow specific thin clients to pull their configuration automatically based on preconfigured criteria
<strong>10ZiG</strong> <strong>Manager</strong> Help<br />
file:///G:/<strong>10ZiG</strong> <strong>Manager</strong>/help.html<br />
45 of 70 12/4/2012 12:18 PM<br />
How do I create a group?<br />
Right click on a group item (in the tree view or in the main view)<br />
Click New...Group...<br />
Name the group<br />
Click on Options to edit the filtering options<br />
Groups can be populated based on:<br />
Platform<br />
Model<br />
Version<br />
IP Address<br />
MAC Address<br />
Computer Name
<strong>10ZiG</strong> <strong>Manager</strong> Help<br />
file:///G:/<strong>10ZiG</strong> <strong>Manager</strong>/help.html<br />
46 of 70 12/4/2012 12:18 PM<br />
Thin client will now be displayed in the group - subgroups can also be utilized as seen in the next section:<br />
3.2.1 - Automatic Client Configuration<br />
Automatic Client Configuration - check this to enable automatically configuring thin clients that have been discovered and<br />
added to this group using the specifications assigned. Configurations can be created by selecting Add configuration...<br />
To use Automatic client configuration Filter by Platform must be checked and the specific OS selected.<br />
Configuration options for Linux Thin Clients can be done by using Templates:<br />
Add template<br />
Remote Template from Auto Configuration<br />
Delete Template from Database<br />
Edit Configuration<br />
Import Template<br />
Export Template
<strong>10ZiG</strong> <strong>Manager</strong> Help<br />
file:///G:/<strong>10ZiG</strong> <strong>Manager</strong>/help.html<br />
47 of 70 12/4/2012 12:18 PM<br />
Configuration options for Windows Thin Clients can be done by using Windows Client Configuration:
<strong>10ZiG</strong> <strong>Manager</strong> Help<br />
file:///G:/<strong>10ZiG</strong> <strong>Manager</strong>/help.html<br />
48 of 70 12/4/2012 12:18 PM<br />
NOTE: To replace or change an existing configuration of a specific thin client, the MAC must be removed from the<br />
Edit configured client list....<br />
3.3 - Thin clients (from the Client Configuration Tab)<br />
The manager currently supports three different platforms:<br />
Windows XPe<br />
Windows CE<br />
Linux<br />
How do I create a thin client configuration?<br />
There are two ways to create a thin client configuration<br />
With the XPe units the manager creates an empty entry as the thin client is discovered.<br />
For Linux and WinCE you need to receive the configuration manually. This will create a configuration entry initialized with<br />
the existing settings.<br />
3.4 - Users (from the Client Configuration Tab)<br />
This section only relates to the XPe thin clients as Linux and WinCE platforms do not provide user based sessions. The<br />
manager gives the opportunity to deploy a specific configuration depending on which user is logged on. In fact
<strong>10ZiG</strong> <strong>Manager</strong> Help<br />
file:///G:/<strong>10ZiG</strong> <strong>Manager</strong>/help.html<br />
49 of 70 12/4/2012 12:18 PM<br />
depending on the application the configuration will be updated when the user logs on or when he starts the application.<br />
To enable this option select the wrench in the upper left corner of the ICONS. Check Show Client Configuration Tab.<br />
This option is hidden by default to minimize resource usage.<br />
Domain users: Based on a domain user account.<br />
Roaming user: A roaming user is tied to a local account but the configuration is consistent.<br />
Local user: A local user is a tied to a local account and a specific thin client.<br />
What is the priority of the configuration entries? A user connects the manager will look for an available configuration.<br />
1.<br />
2.<br />
3.<br />
4.<br />
If the user connects as a domain user, the manager will try to find the corresponding Domain User configuration. If the<br />
configuration does not exist it will look for a Roaming user configuration<br />
If the user connects as a local user or if the previous step failed the manager will look for a Roaming user configuration<br />
If the a Roaming user configuration does not exist, the manager tries to Local user attached to the thin client he is using<br />
Ultimately if no user has been defined the configuration of the Thin client will be used<br />
3.4.1 - Domain & Roaming users (from the Client Configuration Tab)<br />
How do I create a domain or roaming user?<br />
To create a user:<br />
To use this method the domain user name must be known in advance.<br />
Right click on Users in the Client Configuration Tab.<br />
Select Add User<br />
Select the Domain and enter the domain user name<br />
How about Active Directory? The manager allows you to import Active Directory user names. In fact the manager<br />
connects to your main Domain server and enumerates<br />
Right click on a user group item or the domain root<br />
Click Import AD users...
<strong>10ZiG</strong> <strong>Manager</strong> Help<br />
file:///G:/<strong>10ZiG</strong> <strong>Manager</strong>/help.html<br />
50 of 70 12/4/2012 12:18 PM<br />
Check the users to import and select OK.<br />
3.4.2 - Local users (from the Client Configuration Tab)<br />
How do I create a local user? The local user must already be added to the XPe thin client itself.<br />
To create a user:<br />
Right click on Users<br />
Click Add User...<br />
Check the Local Account box - use the drop down box to select a local user.
<strong>10ZiG</strong> <strong>Manager</strong> Help<br />
file:///G:/<strong>10ZiG</strong> <strong>Manager</strong>/help.html<br />
51 of 70 12/4/2012 12:18 PM<br />
3.5 - Group Configuration Settings (from the Client Configuration Tab)<br />
To manage a group, user or thin client settings you just need to right click on the group and select Edit Configuration or<br />
just click on a user or thin client to Edit Configuration.<br />
The console will then display the list of applications configuration (connection) as well as the current path of the<br />
current item.<br />
The regular icons represent the actual configuration of your item. The faded icons represent the configuration inherited<br />
from the parent group.<br />
How do I duplicate settings?<br />
To duplicate settings:<br />
Or<br />
Right click on a configuration item<br />
Click copy (configuration item is copied to clipboard)<br />
Select the item to copy to and edit the configuration<br />
Right click and select copy...(configuration item is pasted from the clipboard)<br />
4 - XPe and WES 2009 Image Management
<strong>10ZiG</strong> <strong>Manager</strong> Help<br />
file:///G:/<strong>10ZiG</strong> <strong>Manager</strong>/help.html<br />
52 of 70 12/4/2012 12:18 PM<br />
4.1 - XPe and WES 2009 Clone System Image<br />
The image cloning process involves resealing the selected Windows XPe client by resetting its security ID (SID) and other<br />
identity related information. Once the reseal process has completed, the client will reboot into recovery mode and backup<br />
the image to a specific name.
<strong>10ZiG</strong> <strong>Manager</strong> Help<br />
file:///G:/<strong>10ZiG</strong> <strong>Manager</strong>/help.html<br />
53 of 70 12/4/2012 12:18 PM<br />
The image is saved as a compressed image (.bim) to the ImageStore.<br />
The thin client will now show up under the Image recovery tab with a task of Clone System Image. The thin client will shut<br />
down and boot into PXE mode. It will boot to the PXE server (<strong>10ZiG</strong> <strong>Manager</strong>) and begin the cloning process. A blue progress<br />
bar will be displayed in the status column.<br />
Once cloning image is complete the status will change to Completed.<br />
4.2 - XPe and WES 2009 Deploy System Image<br />
The Deploy System Image deploys a previously cloned image or a factory image to the selected Client(s). Keep in mind the<br />
existing file system will be erased.
<strong>10ZiG</strong> <strong>Manager</strong> Help<br />
file:///G:/<strong>10ZiG</strong> <strong>Manager</strong>/help.html<br />
54 of 70 12/4/2012 12:18 PM<br />
Select the previously saved image (.bim) compressed or (.bin) binary to deploy to the thin client.<br />
The thin client will shut down and boot into PXE mode. It will boot to the PXE server (<strong>10ZiG</strong> <strong>Manager</strong>) and begin the<br />
deploying process. The image recovery tab will show display the task Deploy Image System. Once the process begins you will<br />
see a blue progress bar in the status column while the image is being deployed. The Status will change to Completed one the<br />
image has been successfully deployed.
<strong>10ZiG</strong> <strong>Manager</strong> Help<br />
file:///G:/<strong>10ZiG</strong> <strong>Manager</strong>/help.html<br />
55 of 70 12/4/2012 12:18 PM<br />
4.3 - XPe and WES 2009 Backup and Restore<br />
Backup and Restore sets the thin client in PXE mode. All backup and restore options are then done from the Image Recovery<br />
Tab. Once the confirmation is accepted, the thin client will shut down and boot in PXE mode. If the thin client does not<br />
boot in PXE mode you will need to access the thin client's BIOS and set the first boot device to the network.<br />
NOTE: This option for backup does not do a reseal on the image. The clone option must be used for the<br />
reseal.<br />
Once the thin client has booted into PXE mode you will see it go active in the Image Recovery Tab and then wait for a<br />
backup and<br />
Right click on the thin client to be presented with the backup and recovery options.
<strong>10ZiG</strong> <strong>Manager</strong> Help<br />
file:///G:/<strong>10ZiG</strong> <strong>Manager</strong>/help.html<br />
56 of 70 12/4/2012 12:18 PM<br />
Click here to view a short video of back up to a Compressed Image<br />
4.4 - XPe and WES 2009 Image Deployment Concepts<br />
Image recovery options are performed under the Image Recovery Tab<br />
Compressed Backup - backs up the image in compressed mode to the ImageStore (this is quicker and uses less disk<br />
space).<br />
Restore Compressed Image - restores a compressed image that was created using the Compressed Backup option.<br />
Binary Image Backup - back up the image in binary mode to the ImageStore.<br />
Restore Binary Image - restore a binary image that was created using the Binary Image Backup.<br />
Note: Should you receive a binary image download location from <strong>10ZiG</strong> Technical Support, copy it to the ImageStore<br />
and restore to the thin client using the Restore Binary Image option.<br />
SSH Console allows connection to the thin client in recovery mode using SSH console<br />
XPe Drive - displays the drive information on the XPe thin client<br />
Log will display a log of recovery operation<br />
PXE Booting will set the PXE to yes or no - check or uncheck the box under PXE - a warning must be answered to continue<br />
Power on (WOL)<br />
Reboot and Shutdown<br />
Delete - removes the thin client from the Image Recovery Tab<br />
5 - Windows 7 Image Management<br />
5.1 - Windows 7 Clone System Image<br />
From the Thin Clients tab, right click on the Win 7 thin client to be cloned and select Image Management -> Clone<br />
System Image
<strong>10ZiG</strong> <strong>Manager</strong> Help<br />
file:///G:/<strong>10ZiG</strong> <strong>Manager</strong>/help.html<br />
57 of 70 12/4/2012 12:18 PM<br />
Make any changes required to the Sysprep Settings
<strong>10ZiG</strong> <strong>Manager</strong> Help<br />
file:///G:/<strong>10ZiG</strong> <strong>Manager</strong>/help.html<br />
58 of 70 12/4/2012 12:18 PM<br />
Enter the local administrator user ID and password for the thin client
<strong>10ZiG</strong> <strong>Manager</strong> Help<br />
file:///G:/<strong>10ZiG</strong> <strong>Manager</strong>/help.html<br />
59 of 70 12/4/2012 12:18 PM<br />
Select OK to begin the Sysprep process and then clone the system image<br />
Once the sysprep has completed the thin client will boot to the <strong>10ZiG</strong> Manger in PXE mode where the image is ready to be<br />
backed up.<br />
Once the image has been backed up uncheck the PXE option<br />
5.2 - Windows 7 Deploy System Image<br />
Deploying a Window 7 System Image is the same process as in the previous section 4.2<br />
6 - Linux Image Management<br />
6.1 - Linux Image Backup & Restore<br />
Backup and Restore is mainly used to backup a Linux thin client for the purpose of restoring that specific thin client should<br />
the need arise.<br />
If directed by <strong>10ZiG</strong> <strong>Technology</strong> tech support to restore a binary or compressed image, place that image in the ImageStore<br />
folder, follow directions below to PXE boot the thin client and take the option to restore the binary or compressed image.
<strong>10ZiG</strong> <strong>Manager</strong> Help<br />
file:///G:/<strong>10ZiG</strong> <strong>Manager</strong>/help.html<br />
60 of 70 12/4/2012 12:18 PM<br />
The Backup & Restore option moves the thin client to the Image Recovery tab and sets the PXE value to Yes.<br />
NOTE: If the thin client does not boot in PXE mode you will need to access the BIOS and set the first boot device to the<br />
network.<br />
When the thin client has PXE booted to the <strong>10ZiG</strong> <strong>Manager</strong> the screen on the thin client should look similar to the image<br />
below:
<strong>10ZiG</strong> <strong>Manager</strong> Help<br />
file:///G:/<strong>10ZiG</strong> <strong>Manager</strong>/help.html<br />
61 of 70 12/4/2012 12:18 PM<br />
Once the image has been backed up or restored set the PXE back to NO by unchecking the box under the PXE column and<br />
reboot the thin client.<br />
If the thin client has not been seen prior in the <strong>10ZiG</strong> <strong>Manager</strong> manually add its MAC to the Image Recovery tab by selecting<br />
NOTE: This backup and restore is for recovery only. Each image is licensed based on the thin client's MAC and if copied<br />
from one Linux thin client to another a license error would be displayed on boot. If you need to create an image to to<br />
push out to other like thin clients please contact tech support for further instructions.<br />
7 - Windows Client Administration<br />
Starting with version 2.0.2.7 it is possible to update software on a Windows thin client. Any program that will run on the<br />
operating system can be installed but the program must have the option for a silent install to use the <strong>10ZiG</strong> <strong>Manager</strong>'s<br />
Windows Client Administration menu option. The example below will show the creation and installation of VMware View 4.6<br />
and then updating that version to VMware View 5<br />
7.1 - Manage Updates<br />
Right click on the Windows unit to update and select Windows Client Administration -> Updates -> Manage updates.
<strong>10ZiG</strong> <strong>Manager</strong> Help<br />
file:///G:/<strong>10ZiG</strong> <strong>Manager</strong>/help.html<br />
62 of 70 12/4/2012 12:18 PM<br />
Select Manage Updates to generate a new update. Click on the ICON in the top left of the Windows Client Updates window.<br />
The add update wizard is presented
<strong>10ZiG</strong> <strong>Manager</strong> Help<br />
file:///G:/<strong>10ZiG</strong> <strong>Manager</strong>/help.html<br />
63 of 70 12/4/2012 12:18 PM<br />
Select Next<br />
Name the Update and select Next
<strong>10ZiG</strong> <strong>Manager</strong> Help<br />
file:///G:/<strong>10ZiG</strong> <strong>Manager</strong>/help.html<br />
64 of 70 12/4/2012 12:18 PM<br />
Select Next and then select the Update Execution Level<br />
Select the EWF Write Protection Parameters if write protection is enabled
<strong>10ZiG</strong> <strong>Manager</strong> Help<br />
file:///G:/<strong>10ZiG</strong> <strong>Manager</strong>/help.html<br />
65 of 70 12/4/2012 12:18 PM<br />
Keep in mind that if the thin client has been running for a while and the Disable EWF before execution is selected, the thin<br />
client will commit changes and reboot saving all changes since the last reboot. To make certain the image is clean take the<br />
option to Reboot to flush the EWF prior to executing the Disable EWF.
<strong>10ZiG</strong> <strong>Manager</strong> Help<br />
file:///G:/<strong>10ZiG</strong> <strong>Manager</strong>/help.html<br />
66 of 70 12/4/2012 12:18 PM<br />
The above update creation was created based on the following information which was copied from VMware's Knowledge Base<br />
To perform a Silent installation of the View Client and View Agent:<br />
1.<br />
Copy the Client setup on the local machine.<br />
2.<br />
Note: The Client and Agent packages can be downloaded or copied from the Connection Server at C:\Program<br />
Files\VMware\VMware View\Server\broker\webapps\downloads.war.<br />
For a View Client Silent installation, open a command prompt on the machine where you want to install the View Client<br />
and run this command:<br />
VMware-viewclient.exe /S /V /qn DESKTOP_SHORTCUT=0 VDM_SERVER=INSTALLDIR=C:\VDM RDPCHOICE=0<br />
REBOOT=Reallysupress<br />
Where these are the options used:<br />
REBOOT=Reallysupress suppresses a reboot after the install. If you remove REBOOT=Reallysupress, the machine<br />
automatically reboots after the install.<br />
VDM_SERVER defines the Connection Broker.<br />
DESKTOP_SHORTCUT=0 prevents a shortcut from being placed on the Desktop. A shortcut is placed on the Desktop by<br />
default. If you do not want a shortcut, set the value to 0.<br />
INSTALLDIR=C:\VDM specifies the installation path.<br />
RDPCHOICE=0 prevents RDP from being enabled. After the installation, RDP is enabled by default. If you do not want<br />
RDP to be enabled, set the value to 0.<br />
3.<br />
4.<br />
Copy the Agent to the View desktop<br />
Open a command prompt on the desktop and run this command:
<strong>10ZiG</strong> <strong>Manager</strong> Help<br />
file:///G:/<strong>10ZiG</strong> <strong>Manager</strong>/help.html<br />
67 of 70 12/4/2012 12:18 PM<br />
VMware-viewagent.exe /S /V /qn REBOOT=Reallysupress<br />
Note: REBOOT=Reallysupress suppresses a reboot after the install. If you remove REBOOT=Reallysupress, the machine<br />
automatically reboots after the install.<br />
You can use these switches when running the commands to perform a Silent installation:<br />
/a performs an administrative install<br />
/a patches an existing administrative install<br />
/s hides the initialization dialog. For silent mode use, /s /v/qn<br />
/v indicates parameters to pass to the installer<br />
/c cleans out installation registration information<br />
/l performs detailed logging<br />
/l performs detailed logging<br />
Note: For a large deployment, commands can be entered into a script to automate the Silent installation.<br />
7.2 - Execute Updates<br />
Once the updates have been created they can be run, edited, deleted, imported or exported. To apply an update to<br />
multiple thin clients use the CTRL key to select multiple thin clients and then execute the update.<br />
Click here to watch a short video on Execute Updates or save and view using a browser.<br />
Appendix<br />
Automatic Client Configuration Examples<br />
Linux:<br />
1.<br />
2.<br />
3.<br />
4.<br />
Templates must be created prior to adding configuration see Template section.<br />
Create a Group<br />
Access the Thin Client Group Properties by right clicking on the group and selecting Properties<br />
Check the correct the Linux Platform and narrow it down further if necessary by using filters.<br />
5.<br />
6.<br />
7.<br />
Check Automatic Client Configuration<br />
Select Add configuration...<br />
Templates may be added or imported.
<strong>10ZiG</strong> <strong>Manager</strong> Help<br />
file:///G:/<strong>10ZiG</strong> <strong>Manager</strong>/help.html<br />
68 of 70 12/4/2012 12:18 PM<br />
8. Select the desired Template - at this point templates can be edited.<br />
9.<br />
Add or remove connections
<strong>10ZiG</strong> <strong>Manager</strong> Help<br />
file:///G:/<strong>10ZiG</strong> <strong>Manager</strong>/help.html<br />
69 of 70 12/4/2012 12:18 PM<br />
10.<br />
The thin client contacts the <strong>10ZiG</strong> <strong>Manager</strong> and the <strong>10ZiG</strong> <strong>Manager</strong> moves it into the designated group. If Automatic client<br />
configuration is enabled the thin client will pull the configuration assigned. When the configuration file has been loaded<br />
the thin client will reboot once again<br />
NOTE: When a change is made to the template if the thin client is in the group and its MAC is not listed in the<br />
configuration list, the thin client will immediately reboot to update the configuration. If a change is made to the<br />
template and the thin client's MAC is listed in the Auto-Configured Clients list, the MAC(s) must be removed for the thin<br />
client to pick up the changed configuration.
<strong>10ZiG</strong> <strong>Manager</strong> Help<br />
file:///G:/<strong>10ZiG</strong> <strong>Manager</strong>/help.html<br />
70 of 70 12/4/2012 12:18 PM<br />
FAQ<br />
http://www.10zig.com/faq/10zigmgr.htm


