Murano Under-Cot Storage instructions - Mamas & Papas
Murano Under-Cot Storage instructions - Mamas & Papas
Murano Under-Cot Storage instructions - Mamas & Papas

You also want an ePaper? Increase the reach of your titles
YUMPU automatically turns print PDFs into web optimized ePapers that Google loves.
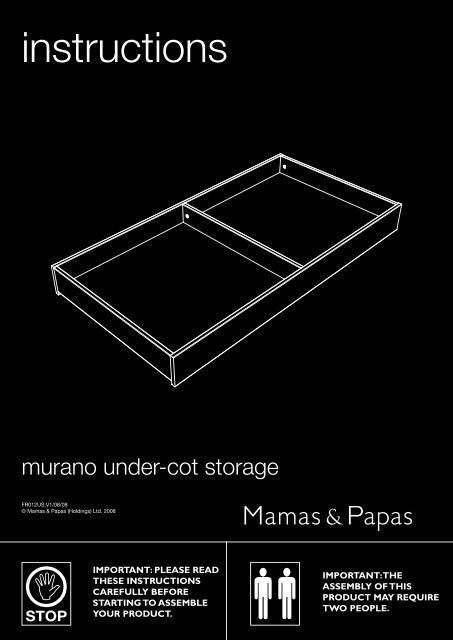
<strong>instructions</strong><br />
murano under-cot storage<br />
FR012US:V1/08/08<br />
© <strong>Mamas</strong> & <strong>Papas</strong> (Holdings) Ltd. 2008<br />
Important: Please read<br />
these <strong>instructions</strong><br />
carefully before<br />
starting to assemble<br />
your product.<br />
Important: the<br />
assembly of this<br />
product may require<br />
two people.
<strong>Murano</strong> under-cot storage<br />
Before assembling your product...<br />
Do not discard any packaging until you are certain you have all the correct components and fittings.<br />
If any items are damaged or missing, please contact your retailer or <strong>Mamas</strong> & <strong>Papas</strong> on +44 (0)845 268 2000. Allow<br />
plenty of time and space when beginning the construction of your product.<br />
Components<br />
1<br />
5<br />
4<br />
3<br />
2<br />
Item Name Part No. Qty.<br />
1 Bottom rails 0000---00000 3<br />
2 Side panels 0000---00000 2<br />
Item Name Part No. Qty.<br />
4 End panels 0000---00000 2<br />
5 Base 0000---00000 1<br />
3 Middle panel 0000---00000 1<br />
A<br />
Fittings<br />
x24<br />
B<br />
x4<br />
Dowels<br />
Castors<br />
C<br />
x8<br />
D<br />
x6<br />
Castor screws<br />
Cam studs<br />
E<br />
x6<br />
Tools required<br />
Cams<br />
X-head screwdriver<br />
2
Step 1<br />
Insert twelve dowels (A) into the ends<br />
of the three bottom rails (1)<br />
A<br />
1<br />
C<br />
B<br />
Step 2<br />
Screw the four castors (B) to two of the<br />
bottom rails (1) using the eight castor<br />
screws (C) and a X-head screwdriver.<br />
1<br />
3
Step 3<br />
Insert twelve dowels (A) into the ends<br />
of the two side (2) and one middle (3)<br />
panels.<br />
A<br />
2<br />
2<br />
3<br />
D<br />
Step 4<br />
Screw the six cam studs (D) into the<br />
two end panels (4) using a X-head<br />
screwdriver.<br />
4<br />
4
2<br />
E<br />
Step 5<br />
Slot the two side panels (2) onto one<br />
of the end panels (4), ensure that the<br />
grooves in the side and end panels are<br />
aligned.<br />
Insert two cams (E) into the holes in the<br />
inside faces of the side panels.<br />
Turn the cams clockwise with a X-head<br />
screwdriver.<br />
4<br />
2<br />
E<br />
Step 6<br />
Slot the middle panel (3) onto the end<br />
panels.<br />
Insert a cam (E) into the hole in the<br />
middle panel.<br />
Turn the cam clockwise with a X-head<br />
screwdriver.<br />
3<br />
5
5<br />
Step 7<br />
Slide the base (5) into the grooves in the<br />
side panels.<br />
Push the base down into the groove in<br />
the end panel.<br />
1<br />
Step 8<br />
Slot the three bottom rails (1) onto the<br />
end panel, ensure the bottom rails with<br />
castors are against the side panels.<br />
6
4 E<br />
Step 9<br />
Slot the remaining end panel (4) onto<br />
the assembled sections as shown.<br />
Ensure the base has slotted into the<br />
groove in the end panel.<br />
Insert three cams (E) into the holes in<br />
the side and middle rails.<br />
Turn the cams clockwise with a X-head<br />
screwdriver.<br />
Step 10<br />
The under cot storage is now fully<br />
assembled.<br />
Check all fittings are fully tightened<br />
before use.<br />
7
INSTRUCTIONS FOR SAFE USE & maintenance<br />
• Warning: Never leave your child unattended. The safety of your child is your responsibility.<br />
• Before use, ensure the product is on a stable, level surface.<br />
• Do not allow children to climb on the Product.<br />
• Never use the product if any parts are broken or missing.<br />
• Wood is a natural product and as such it can be subject to occasional variations in colour. This is not a<br />
defect and will not detract from the strength or performance of the product.<br />
• Never pivot or drag the product on its feet, the product must always be lifted by at least two people<br />
when moved.<br />
• Do not place the product in the near vicinity of open fires or other sources of strong heat, such as<br />
electric or gas fires.<br />
• Always leave the product clean and dry. Wipe away any spillage straight away. The product can be<br />
cleaned with a damp cloth. Never use abrasive, bleach or strong detergents.<br />
• Check regularly that all fittings and screws are correctly tightened and are not damaged.<br />
Due to constant updating and improvements, some components may occasionally differ slightly from the diagrams shown in these <strong>instructions</strong>. We<br />
reserve the right to change the specifications of any product without prior notice.<br />
After sales Service: If you need assistance, spare parts or you are unhappy with any aspect of the goods please contact<br />
Customer Care on: +44 (0)845 268 2000, or e-mail us at: customer.care@mamasandpapas.com. Visit our website at<br />
www.mamasandpapas.com for the latest product information.<br />
8