

Service & Repair Manual - Frogkick.dk
Service & Repair Manual - Frogkick.dk
Service & Repair Manual - Frogkick.dk

You also want an ePaper? Increase the reach of your titles
YUMPU automatically turns print PDFs into web optimized ePapers that Google loves.
SeaAir Regulator<br />
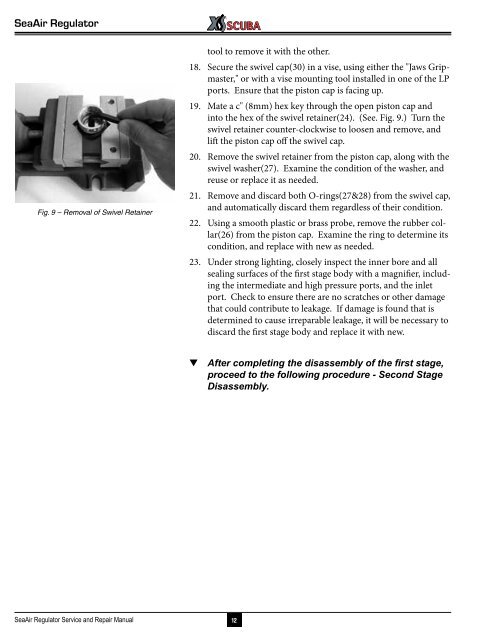
Fig. 9 – Removal of Swivel Retainer<br />
tool to remove it with the other.<br />
18. Secure the swivel cap(30) in a vise, using either the "Jaws Gripmaster,"<br />
or with a vise mounting tool installed in one of the LP<br />
ports. Ensure that the piston cap is facing up.<br />
19. Mate a c" (8mm) hex key through the open piston cap and<br />
into the hex of the swivel retainer(24). (See. Fig. 9.) Turn the<br />
swivel retainer counter-clockwise to loosen and remove, and<br />
lift the piston cap off the swivel cap.<br />
20. Remove the swivel retainer from the piston cap, along with the<br />
swivel washer(27). Examine the condition of the washer, and<br />
reuse or replace it as needed.<br />
21. Remove and discard both O-rings(27&28) from the swivel cap,<br />
and automatically discard them regardless of their condition.<br />
22. Using a smooth plastic or brass probe, remove the rubber collar(26)<br />
from the piston cap. Examine the ring to determine its<br />
condition, and replace with new as needed.<br />
23. Under strong lighting, closely inspect the inner bore and all<br />
sealing surfaces of the first stage body with a magnifier, including<br />
the intermediate and high pressure ports, and the inlet<br />
port. Check to ensure there are no scratches or other damage<br />
that could contribute to leakage. If damage is found that is<br />
determined to cause irreparable leakage, it will be necessary to<br />
discard the first stage body and replace it with new.<br />
▼ After completing the disassembly of the first stage,<br />
proceed to the following procedure - Second Stage<br />
Disassembly.<br />
SeaAir Regulator <strong>Service</strong> and <strong>Repair</strong> <strong>Manual</strong><br />
12


