

Service & Repair Manual - Frogkick.dk
Service & Repair Manual - Frogkick.dk
Service & Repair Manual - Frogkick.dk

Create successful ePaper yourself
Turn your PDF publications into a flip-book with our unique Google optimized e-Paper software.
SeaAir Regulator<br />
28. Lubricate and install the O-rings(16&31) onto all hoses and<br />
port plugs. Install the LP hoses and port plugs(17&32) into<br />
their respective ports in the first stage. Apply a calibrated<br />
torque wrench with x" hex key socket (or appropriate size crow<br />
foot for hoses) to tighten the port plugs and hoses to a torque<br />
measurement of 38 inch-lbs (±2).<br />
IceBreaker Environmental Seal Instructions<br />
WARNING: DO NOT install the IceBreaker environmental<br />
sealing collar without first packing the ambient chamber with<br />
silicone grease purchased directly from XS Scuba, according<br />
to the following instructions. Failure to do will seriously affect<br />
the regulator's performance, and could result in serious<br />
injury or death.<br />
1. Using a narrow tipped oral syringe, slowly inject silicone grease<br />
through the ports on all sides of the piston cap. Rotate among<br />
opposing ports, and repeat as needed until the pressure forces<br />
excess grease to exit the opposite sides, indicating that the<br />
chamber is full.<br />
2. After verifying that the chamber is complete filled with grease,<br />
wipe the outer surface of the piston cap clean with a soft cloth.<br />
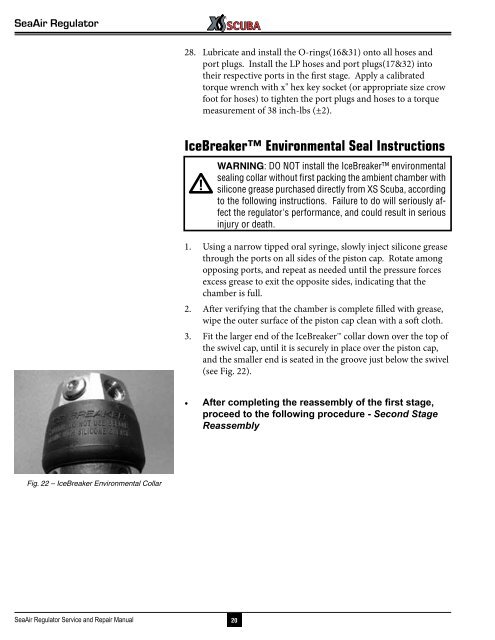
3. Fit the larger end of the IceBreaker collar down over the top of<br />
the swivel cap, until it is securely in place over the piston cap,<br />
and the smaller end is seated in the groove just below the swivel<br />
(see Fig. 22).<br />
• After completing the reassembly of the first stage,<br />
proceed to the following procedure - Second Stage<br />
Reassembly<br />
Fig. 22 – IceBreaker Environmental Collar<br />
SeaAir Regulator <strong>Service</strong> and <strong>Repair</strong> <strong>Manual</strong><br />
20


