
You also want an ePaper? Increase the reach of your titles
YUMPU automatically turns print PDFs into web optimized ePapers that Google loves.
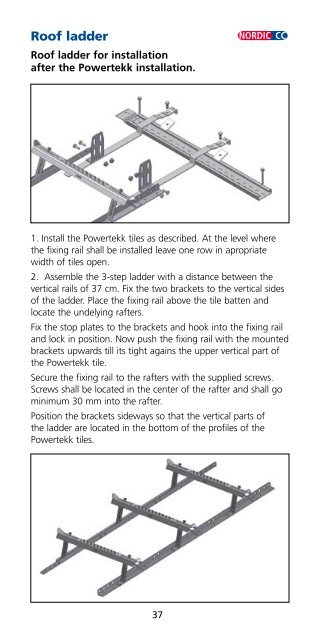
Roof ladder<br />
Roof ladder for installation<br />
after the <strong>Powertekk</strong> installation.<br />
NORDIC CC<br />
1. Install the <strong>Powertekk</strong> tiles as described. At the level where<br />
the fixing rail shall be installed leave one row in apropriate<br />
width of tiles open.<br />
2. Assemble the 3-step ladder with a distance between the<br />
vertical rails of 37 cm. Fix the two brackets to the vertical sides<br />
of the ladder. Place the fixing rail above the tile batten and<br />
locate the undelying rafters.<br />
Fix the stop plates to the brackets and hook into the fixing rail<br />
and lock in position. Now push the fixing rail with the mounted<br />
brackets upwards till its tight agains the upper vertical part of<br />
the <strong>Powertekk</strong> tile.<br />
Secure the fixing rail to the rafters with the supplied screws.<br />
Screws shall be located in the center of the rafter and shall go<br />
minimum 30 mm into the rafter.<br />
Position the brackets sideways so that the vertical parts of<br />
the ladder are located in the bottom of the profiles of the<br />
<strong>Powertekk</strong> tiles.<br />
37