F3 - Operations Manual and Assembly Instructions - Life Fitness
F3 - Operations Manual and Assembly Instructions - Life Fitness
F3 - Operations Manual and Assembly Instructions - Life Fitness

Create successful ePaper yourself
Turn your PDF publications into a flip-book with our unique Google optimized e-Paper software.
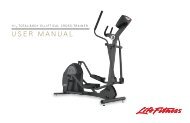
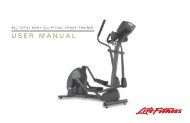
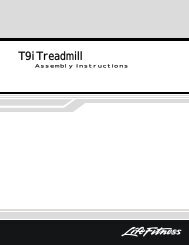
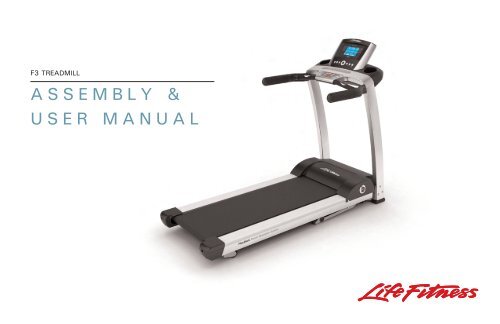
<strong>F3</strong> TREADMILL<br />
ASSEMBLY &<br />
USER MANUAL
LIFE FITNESS ASIA PACIFIC LTD<br />
Room 2610, Miramar Tower<br />
132 Nathan Road<br />
Tsimshatsui, Kowloon<br />
HONG KONG<br />
LIFE FITNESS ATLANTIC BV<br />
LIFE FITNESS BENELUX<br />
Bijdorpplein 25 - 31<br />
2992 LB Barendrecht<br />
THE NETHERLANDS<br />
LIFE FITNESS DO BRAZIL<br />
Av. Dr. Dib Sauaia Neto 1478<br />
Alphaville, Barueri, SP<br />
06465-140<br />
BRAZIL<br />
LIFE FITNESS VERTRIEBS GMBH<br />
Dückegasse 7-9/3/36<br />
1220 Vienna<br />
AUSTRIA<br />
CORPORATE HEADQUARTERS<br />
5100 North River Road<br />
Schiller Park, Illinois 60176 • U.S.A.<br />
www.lifefitness.com<br />
INTERNATIONAL OFFICES<br />
LIFE FITNESS IBERIA<br />
Pol. Ind. Molí dels Frares. c/C, nº 12<br />
08620 Sant Vicenç dels Horts (Barcelona)<br />
SPAIN<br />
LIFE FITNESS EUROPE GMBH<br />
Siemensstrasse 3<br />
85716 Unterschleissheim<br />
GERMANY<br />
LIFE FITNESS ITALIA S.R.L.<br />
Via Vittorio Veneto, 57/A<br />
39042 Bressanone (Bolzano)<br />
ITALY<br />
LIFE FITNESS LATIN<br />
AMERICA <strong>and</strong> CARIBBEAN<br />
5100 North River Road<br />
Schiller Park, Illinois 60176<br />
U.S.A.<br />
8119901 Rev A-1<br />
08/06<br />
LIFE FITNESS UK LTD<br />
Queen Adelaide<br />
Ely, Cambs CB7 4UB<br />
UNITED KINGDOM<br />
LIFE FITNESS JAPAN<br />
Nippon Brunswick Bldg., #8F<br />
5-27-7 Sendagaya<br />
Shibuya-Ku, Tokyo<br />
JAPAN 151-0051<br />
1
Before using this product, it is essential to read this<br />
ENTIRE operation manual <strong>and</strong> ALL installation instructions.<br />
This will help in setting up the equipment quickly<br />
<strong>and</strong> in instructing others on how to use it correctly <strong>and</strong> safely.<br />
FCC Warning - Possible Radio / Television Interference<br />
NOTE: This equipment has been tested <strong>and</strong> found to comply with the limits for a Class B digital device, pursuant to<br />
part 15 of the FCC rules. These limits are designed to provide reasonable protection against harmful interference in<br />
a residential installation. This equipment generates, uses <strong>and</strong> can radiate radio frequency energy, <strong>and</strong> if not installed <strong>and</strong><br />
used in accordance with the operation manual, may cause harmful interference to radio communications. However, there<br />
is no guarantee that the interference will not occur in a particular installation. If this equipment does cause harmful interference<br />
to radio or television reception, which can be determined by turning the equipment off <strong>and</strong> on, the user is<br />
encouraged to try to correct the interference by one or more of the following measures:<br />
Reorient or relocate the receiving antenna.<br />
Increase the separation between the equipment <strong>and</strong> the receiver.<br />
Connect the equipment into an outlet on a circuit different from that to which the receiver is connected.<br />
Consult the dealer or an experienced radio/TV technician for help.<br />
Class HB (Home): Domestic use. Not suitable for therapeutic purposes.<br />
CAUTION: Any changes or modifications to this equipment could void the product warranty.<br />
Any service, other than cleaning or user maintenance, must be performed by an authorized service representative.<br />
There are no user-serviceable parts.<br />
2
TABLE OF CONTENTS<br />
1. Important Safety <strong>Instructions</strong> . . . . . . . . . . . . . . . . . . . . . . . . . . . . . . . . . . . . . . . . . . . . . . . . . . . . . . . . . . . . . . . . .5<br />
2. <strong>Assembly</strong> . . . . . . . . . . . . . . . . . . . . . . . . . . . . . . . . . . . . . . . . . . . . . . . . . . . . . . . . . . . . . . . . . . . . . . . . . . . . . . .8<br />
2.1 Unpacking . . . . . . . . . . . . . . . . . . . . . . . . . . . . . . . . . . . . . . . . . . . . . . . . . . . . . . . . . . . . . . . . . . . . . . . . . . . . . .8<br />
2.2 Parts List . . . . . . . . . . . . . . . . . . . . . . . . . . . . . . . . . . . . . . . . . . . . . . . . . . . . . . . . . . . . . . . . . . . . . . . . . . . . . . .9<br />
2.3 Installing Uprights <strong>and</strong> H<strong>and</strong>lebars . . . . . . . . . . . . . . . . . . . . . . . . . . . . . . . . . . . . . . . . . . . . . . . . . . . . . . . . . . . .10<br />
2.4 Installing the Console . . . . . . . . . . . . . . . . . . . . . . . . . . . . . . . . . . . . . . . . . . . . . . . . . . . . . . . . . . . . . . . . . . . . .12<br />
2.5 Attaching Power Cord . . . . . . . . . . . . . . . . . . . . . . . . . . . . . . . . . . . . . . . . . . . . . . . . . . . . . . . . . . . . . . . . . . . . .13<br />
2.6 Calibration . . . . . . . . . . . . . . . . . . . . . . . . . . . . . . . . . . . . . . . . . . . . . . . . . . . . . . . . . . . . . . . . . . . . . . . . . . . . . .13<br />
3. Setup . . . . . . . . . . . . . . . . . . . . . . . . . . . . . . . . . . . . . . . . . . . . . . . . . . . . . . . . . . . . . . . . . . . . . . . . . . . . . . . . .14<br />
Electrical Power Requirements // Grounding <strong>Instructions</strong> // How to Stabilize the <strong>Life</strong> <strong>Fitness</strong> Treadmill<br />
Raising <strong>and</strong> Lowering Treads // Power Switch // Immobilizing the Treadmill // Centering the Belt<br />
4. Features . . . . . . . . . . . . . . . . . . . . . . . . . . . . . . . . . . . . . . . . . . . . . . . . . . . . . . . . . . . . . . . . . . . . . . . . . . . . . . .18<br />
Reading Rack // Accessory Trays // Activity Zone // H<strong>and</strong> Pulse Sensor System<br />
5. Service <strong>and</strong> Technical Data . . . . . . . . . . . . . . . . . . . . . . . . . . . . . . . . . . . . . . . . . . . . . . . . . . . . . . . . . . . . . . . . .21<br />
5.1 Troubleshooting . . . . . . . . . . . . . . . . . . . . . . . . . . . . . . . . . . . . . . . . . . . . . . . . . . . . . . . . . . . . . . . . . . . . . . . . . .21<br />
5.2 Preventive Maintenance Tips . . . . . . . . . . . . . . . . . . . . . . . . . . . . . . . . . . . . . . . . . . . . . . . . . . . . . . . . . . . . . . . .24<br />
5.3 How to Adjust <strong>and</strong> Tension the Striding Belt . . . . . . . . . . . . . . . . . . . . . . . . . . . . . . . . . . . . . . . . . . . . . . . . . . . .25<br />
The Belt Tensioning Bolts // Tracking (Centering) an Existing or New Striding Belt //<br />
Tensioning an Existing Striding Belt<br />
5.4 How to Obtain Product Service . . . . . . . . . . . . . . . . . . . . . . . . . . . . . . . . . . . . . . . . . . . . . . . . . . . . . . . . . . . . . .27<br />
6. Specifications . . . . . . . . . . . . . . . . . . . . . . . . . . . . . . . . . . . . . . . . . . . . . . . . . . . . . . . . . . . . . . . . . . . . . . . . . . .28<br />
7. Warranty Information . . . . . . . . . . . . . . . . . . . . . . . . . . . . . . . . . . . . . . . . . . . . . . . . . . . . . . . . . . . . . . . . . . . . . .30<br />
© 2006 <strong>Life</strong> <strong>Fitness</strong>, a division of Brunswick Corporation. All rights reserved. <strong>Life</strong> <strong>Fitness</strong> <strong>and</strong> FlexDeck are registered trademarks <strong>and</strong> <strong>Life</strong>spring, Go System-Quick Start,<br />
HeartSync, Heart Rate Hill, Heart Rate Interval, Extreme HR, EZ Incline, <strong>and</strong> 5K (<strong>and</strong> 10K) Sport Training are trademarks of Brunswick Corporation. Polar is a registered<br />
trademark of Polar Electro, Inc. Any use of these trademarks, without the express written consent of <strong>Life</strong> <strong>Fitness</strong> or the corresponding companies is forbidden.<br />
3
This Operation <strong>Manual</strong> describes the functions of the following product:<br />
<strong>Life</strong> <strong>Fitness</strong> Treadmill Model:<br />
<strong>F3</strong><br />
Thank you for purchasing a <strong>Life</strong> <strong>Fitness</strong> treadmill. Before using this product please read this user manual in its entirety<br />
to ensure that you have the knowledge to safely <strong>and</strong> properly operate all of the features on your treadmill. We hope you<br />
achieve the product experience on your treadmill that you expect, but if you do have any service issues please go to the<br />
How to Obtain Product Service page in the How To section which will provide information on obtaining domestic <strong>and</strong><br />
international product service. See "Specifications" in this manual for product specific features.<br />
Statement of Purpose: The Treadmill is an exercise machine that enables users to walk or run in place on a moving surface.<br />
4<br />
CAUTION:<br />
Health-related injuries may result from incorrect or excessive use of exercise equipment. The manufacturer<br />
STRONGLY recommends seeing a physician for a complete medical exam before undertaking an exercise<br />
program, particularly if the user has a family history of high blood pressure or heart disease; or is over the age<br />
of 45; or smokes, has high cholesterol, is obese, or has not exercised regularly in the past year. The<br />
manufacturer also recommends consulting a fitness professional on the correct use of this product.<br />
If, at any time while exercising, the user experiences faintness, dizziness, pain, or shortness of breath,<br />
he or she must stop immediately.
1 IMPORTANT SAFETY INSTRUCTIONS<br />
WARNING: READ ALL INSTRUCTIONS BEFORE USING THE TREADMILL. SAVE THESE INSTRUCTIONS.<br />
DANGER: To reduce the risk of electrical shock, always unplug this <strong>Life</strong> <strong>Fitness</strong> product before cleaning or attempting any<br />
maintenance activity.<br />
WARNING: To reduce the risk of burns, fire, electric shock or injury, it is imperative to connect each product to a properly<br />
grounded electrical outlet.<br />
WARNING: This treadmill has immobilization or lock out software. Only activate software lockout when treadmill is not in use.<br />
Refer to this user manual for instructions on immobilizing the treadmill. Keep instructions out of reach of children.<br />
WARNING: Do not move the treadmill by lifting the console. Do not use the console as a h<strong>and</strong>lebar during a workout.<br />
• Risk of injury to persons – To avoid injury st<strong>and</strong> on the side rails before starting the treadmill.<br />
• To disconnect, turn power OFF at the ON/OFF switch, then remove plug from electrical outlet.<br />
• Never operate a <strong>Life</strong> <strong>Fitness</strong> product if it has a damaged power cord or electrical plug, of if it has been dropped, damaged,<br />
or even partially immersed in water. Contact <strong>Life</strong> <strong>Fitness</strong> Customer Service.<br />
• Position this product so the power cord plug is accessible to the user.<br />
• Keep the power cord away from heated surfaces. Do not pull the equipment by the power cord or use the cord as a h<strong>and</strong>le.<br />
Do not run the power cord on the floor, under or along the side of the treadmill.<br />
• If the electrical supply cord is damaged it must be replaced by the manufacturer, an authorized service agent, or a similarly<br />
qualified person to avoid a hazard.<br />
• Do not use this product in areas where aerosol spray products are being used or where oxygen is being administered. Such<br />
substances create the danger of combustion <strong>and</strong> explosion.<br />
• Always follow the console instructions for proper operation.<br />
• Close supervision is necessary when used by, or near, children or disabled persons.<br />
5
6<br />
• Do not use this product outdoors, near swimming pools or in areas of high humidity.<br />
• Never operate a <strong>Life</strong> <strong>Fitness</strong> product with the air openings blocked. Keep air openings free of lint, hair or any obstructing<br />
material.<br />
• Never insert objects into any openings in this product. If an object should drop inside, turn off the power, unplug the power<br />
cord from the outlet <strong>and</strong> carefully retrieve it. If the item cannot be reached, contact <strong>Life</strong> <strong>Fitness</strong> Customer Service.<br />
• Never place liquids of any type directly on the unit, except in a bottle holder or accessory tray. Lidded containers are recommended.<br />
• When using the treadmill, wear shoes with rubber or high traction soles. Do not use shoes with heels, leather soles, cleats or<br />
spikes. Make sure no stones are embedded in the soles. Do not use this product in bare feet. Keep all loose clothing,<br />
shoelaces <strong>and</strong> towels away from moving parts.<br />
• Do not reach into or underneath the unit, or tip it on its side during operation.<br />
• Keep an open area of six feet (2 meters) by three feet (1 meter) behind the treadmill clear of any obstructions, including<br />
walls, furniture <strong>and</strong> other equipment.<br />
• Use the h<strong>and</strong> rails whenever additional stability is required. In case of emergency, such as tripping, the user should grab the<br />
h<strong>and</strong> rails <strong>and</strong> place his/her feet on the side platforms. The h<strong>and</strong> rails may be held to enhance stability as needed, but are<br />
not for continuous use.<br />
• Never walk or jog backwards on the treadmill.<br />
• Immobilize the treadmill so the motors will not run when the unit is not in use. To do this, press <strong>and</strong> hold both the down arrow<br />
<strong>and</strong> the enter key on the console.<br />
• Activate software lockout when not in use. Refer to Console Owner’s <strong>Manual</strong> for lockout instructions. Store instructions ouf of<br />
reach of children.<br />
• Use caution when folding <strong>and</strong> unfolding the treadmill. Do not let the treadmill lower to the floor unassisted. Guide the deck to<br />
the floor by h<strong>and</strong>.<br />
• Use this appliance only for its intended use as described in this manual. Do not use attachments not recommended by the<br />
manufacturer.
HAND PULSE HEART RATE SENSORS<br />
The heart rate h<strong>and</strong> pulse sensors found on your <strong>Life</strong> <strong>Fitness</strong> <strong>F3</strong> fitness product provide an approximate heart rate<br />
value. The sensors are not medical devices <strong>and</strong> should not be used in any type of medical application. If you purchased<br />
the advanced console use the Polar heart rate chest strap that was included with your product for more accurate<br />
readings.<br />
To improve heart rate accuracy when using the h<strong>and</strong> pulse sensors follow the guidelines below.<br />
• Remove h<strong>and</strong>s from heart rate sensors <strong>and</strong> wait for heart rate display to disappear. Grasp sensors again.<br />
• Make sure h<strong>and</strong>s are fully contacting the sensors.<br />
• Dry h<strong>and</strong>s periodically during use.<br />
• Limit movement. <strong>Life</strong> <strong>Fitness</strong> recommends the h<strong>and</strong> pulse sensors on treadmills be used when st<strong>and</strong>ing<br />
on side rails.<br />
• Clean h<strong>and</strong> pulse sensors per recommended maintenance in user manual.<br />
7
2 ASSEMBLY<br />
For safety, <strong>and</strong> to save time <strong>and</strong> effort, read these setup instructions <strong>and</strong> the Operation <strong>Manual</strong> completely before<br />
installing your <strong>Life</strong> <strong>Fitness</strong> Treadmill. Place the treadmill near where it will be used before beginning the unpacking<br />
procedure.<br />
2.1 UNPACKING<br />
These unpacking instructions assume you have already done the following:<br />
• Removed the top of the shipping carton.<br />
• Removed the styrofoam packing material.<br />
• Removed these assembly instructions from the bridge assembly carton.<br />
The best method for unpacking the rest of the treadmill proceeds as follows:<br />
• Remove the bridge assembly carton from the base unit.<br />
• Break down the sides of the inner shipping carton.<br />
• Remove the treadmill uprights from the shipping carton.<br />
• Assemble the treadmill. Once assembly is complete:<br />
- Fold the treadmill upward until it locks in its upright position.<br />
- Roll the treadmill off of the shipping carton <strong>and</strong> to the location where it will be used.<br />
8
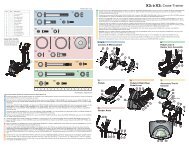
2.2 PARTS LIST<br />
Identify the following components after unpacking<br />
your treadmill:<br />
1. Left Upright . . . . . . . . . . . . . . . . . . . Qty: 1<br />
2. M8 x 60mm Bolt. . . . . . . . . . . . . . . . Qty: 6<br />
3. Star Washers . . . . . . . . . . . . . . . . . Qty: 19<br />
4. Right Upright . . . . . . . . . . . . . . . . . . Qty: 1<br />
5. Console Bridge . . . . . . . . . . . . . . . . Qty: 1<br />
6. M8 x 25mm Bolt. . . . . . . . . . . . . . . . Qty: 3<br />
7. H<strong>and</strong>lebar Extensions . . . . . . . . . . . Qty: 2<br />
8. M8 x 15mm Bolt (Black) . . . . . . . . . Qty: 4<br />
9. M8 x 15mm Bolt (Zinc) . . . . . . . . . . Qty: 6<br />
10. 6mm Hex Head Wrench. . . . . . . . . . Qty: 1<br />
11. Power Cord. . . . . . . . . . . . . . . 120V Qty: 1<br />
. . . . . . . . . . . . . . . . . . . . . . . . 230V Qty: 3<br />
12. Emergency Stop Lanyard . . . . . . . . Qty: 1<br />
9
2.3 INSTALLING UPRIGHTS AND HANDLEBARS<br />
Locate the left upright (1). Position the left upright near the left upright bracket <strong>and</strong> attach the wire connectors that lead<br />
from the bottom of the left upright <strong>and</strong> the left upright bracket. Be sure the connectors are fully seated together. Feed<br />
any excess wire into the hollow inside the left upright.<br />
Put the uprights in their brackets by first inserting them at an angle tilting away from the treadmill, then fitting their upper<br />
rectangular slots over the bracket’s tabs (A) <strong>and</strong> straightening them, then lowering them fully into position. Secure the<br />
left upright to the left upright bracket using three M8 x 60mm bolts (2) <strong>and</strong> three star washers (3). Leave<br />
the bolts finger-tight at this time.<br />
CAUTION: Do not pinch the wire when attaching the left upright to<br />
the left upright bracket.<br />
Secure the right upright (4) to the right upright bracket<br />
using three M8 x 60mm bolts (2) <strong>and</strong> three star washers<br />
(3). Leave the bolts finger-tight at this time.<br />
10
Position the console bridge (5) near the top of the uprights.<br />
Attach the wire connectors leading from the left upright <strong>and</strong><br />
the console bridge. Be sure the connectors are fully seated<br />
together. Feed any excess wire into the hollow inside the left<br />
upright.<br />
Attach the console bridge to the uprights using six<br />
M8 x 15mm zinc bolts (6) <strong>and</strong> four star washers (3), two for<br />
each upright. Leave the bolts finger-tight at this time.<br />
CAUTION: Do not pinch the wire when attaching the left<br />
upright to the console bridge.<br />
Attach one h<strong>and</strong>lebar extension (7) on each side of the<br />
console bridge, using two black M8 x 15mm (8) bolts <strong>and</strong><br />
two star washers (3) each.<br />
11
2.4 INSTALLING THE CONSOLE<br />
Remove the pre-installed bolt (A) from the back of the<br />
main console (B). Position the main console near the<br />
top of the console bridge <strong>and</strong> attach the connectors<br />
leading from the console bridge to the corresponding<br />
tabs on the back of the main console. The wires are<br />
color wrapped to match colored tabs on the main console<br />
circuit board. The main console harness (C)<br />
wrapped in a green sleeve corresponds with the<br />
green tab on the console circuit board. The Activity<br />
Zone harness (D) wrapped in a yellow sleeve corresponds<br />
with the yellow tab on the console circuit<br />
board. The grounding wire (E) is the small green <strong>and</strong><br />
yellow wire that inserts onto either of the two metal<br />
circuit board receptacles.<br />
Be sure the connectors are fully seated together.<br />
Feed any excess wire into the console bridge.<br />
Attach the main console to the console bridge using<br />
three M8 x 15mm zinc bolts (9). Tighten the bolts<br />
securely.<br />
CAUTION: Do not pinch the wires when attaching the main console to the console bridge.<br />
Securely tighten all the bolts that were left finger-tight.<br />
12
2.5 ATTACHING THE POWER CORD<br />
Insert the female plug of your treadmill’s power cord into the male outlet next to your treadmill’s power switch.<br />
Note: <strong>F3</strong> treadmills shipped in the USA <strong>and</strong> Canada are supplied with a North American line cord. 230V <strong>F3</strong> treadmills<br />
shipped outside North America are supplied with three line cords: a UK line cord, a continental line cord, <strong>and</strong> an<br />
Australian line cord. Attach the cord suited to your area.<br />
2.6 CALIBRATION<br />
Before using your treadmill please follow the calibration instructions below. Please st<strong>and</strong> to the side of your treadmill<br />
during calibration.<br />
1. Turn treadmill on, or if on press the RESET key.<br />
2. The console will display "PLEASE WAIT" or "WAIT".<br />
3. When "PLEASE WAIT" or "WAIT" disappears <strong>and</strong> the screen is blank press <strong>and</strong> hold the PAUSE key until "DIAGNOSTICS"<br />
appears.<br />
4. Use the arrow keys to scroll through the diagnostics menu to "CALIBRATION" or "CALIB".<br />
5. Press enter to select "CALIBRATION" or "CALIB".<br />
6. Press the START key located on the lower control pad to begin calibration.<br />
7. Your treadmill will now automatically cycle through a series of tests including speed <strong>and</strong> incline adjustments in order to complete<br />
calibration.<br />
8. When successfully completed the console will display "PASS"<br />
***If there was an error during calibration the console will display "FAIL".<br />
***If a failure occurred press STOP twice <strong>and</strong> restart the process at Step 1.<br />
***If failure occurs again take note of the error number display <strong>and</strong> contact <strong>Life</strong> <strong>Fitness</strong> customer support at 1-800-351-3737<br />
(U.S.A. <strong>and</strong> Canada).<br />
9. Upon successful completion press the RESET key three times to exit calibration mode.<br />
13
3 SETUP<br />
14<br />
ELECTRICAL POWER REQUIREMENTS<br />
Most <strong>Life</strong> <strong>Fitness</strong> Treadmills are intended for use on a normal 120 volt circuit in the United States <strong>and</strong> Canada. Below is<br />
a table that provides the current rating for this product based on supply voltage. Make sure that the treadmill model<br />
supports the proper line voltage for the installation location before plugging into the outlet.<br />
Supply Voltage (VAC) Frequency (Hz) Maximum Current (Amps)<br />
120 50 / 60 12<br />
230 50 / 60 6.3<br />
ELECTRICAL GROUNDING REQUIREMENTS<br />
This <strong>Life</strong> <strong>Fitness</strong> product must be properly grounded. If the unit malfunctions or breaks down, proper grounding<br />
provides the path of least resistance for the electric current, which reduces the risk of shock to anyone touching or using<br />
the equipment. Each unit is equipped with an electrical cord, which includes an equipment grounding conductor <strong>and</strong> a<br />
grounding plug. The plug must be inserted into an outlet that has been properly installed <strong>and</strong> grounded in accordance<br />
with all local codes <strong>and</strong> ordinances. A temporary adapter must not be used to connect this plug to a two-pole receptacle<br />
in North America. If a properly grounded, correct amperage outlet is not available, a qualified electrician must install one.<br />
DANGER: A risk of electrical shock may result from improper connection of the equipment’s grounding conductor. Check<br />
with a qualified electrician if you are unsure about proper grounding techniques. Do not modify the plug provided with<br />
this product. If it will not fit an electrical outlet, have a proper outlet installed by a qualified electrician.<br />
TURNING THE UNIT ON<br />
To turn the treadmill on, locate the ON/OFF power switch at the front of the treadmill near the power cord <strong>and</strong> turn it ON.
HOW TO STABILIZE THE LIFE FITNESS TREADMILL<br />
After placing the unit where it will be used, check its stability. If there is even a<br />
slight rocking motion or the unit is not stable, determine which stabilizing leg is<br />
not resting on the floor. To adjust, turn the STABILIZING LEG (A) until the<br />
rocking motion ceases <strong>and</strong> both stabilizing legs rest firmly on the floor.<br />
NOTE: If excessive vibration occurs during use, adjust the height of the<br />
levelers closer to the uprights. Do not adjust the height of the levelers further<br />
from the uprights.<br />
NOTE: It is extremely important that the stabilizing leg be correctly adjusted for<br />
proper operation.<br />
CHECKING THE BELT<br />
After the treadmill has been installed <strong>and</strong> stabilized, the belt must be checked to confirm proper tracking. First, ensure<br />
the power cord is plugged into a suitable outlet, as described in the Electrical Requirements section. Then turn the<br />
treadmill on. St<strong>and</strong> on the side rails of the treadmill <strong>and</strong> straddle the belt. To start the belt, press the Start/Enter key, then<br />
press the speed up arrow key until the treadmill reaches 4.0 MPH. If the striding belt appears off-center, see the<br />
instructions on the How to Center the Striding Belt page in the Service <strong>and</strong> Technical Data section.<br />
15
16<br />
RAISING AND LOWERING THE DECK<br />
The treadmill’s deck can be folded up when not in use. To do so, make sure that the incline is set to 0%, then simply<br />
grab the deck <strong>and</strong> lift it until it snaps into place.<br />
To lower the deck again, squeeze the release h<strong>and</strong>le (A) <strong>and</strong> slowly lower it to the ground. Make sure the deck is completely<br />
lowered before using the treadmill.<br />
NOTE: When raising <strong>and</strong> lowering deck, take care not to get h<strong>and</strong>s or skin caught in the treadmill’s pinch points (C).<br />
POWER SWITCH<br />
Located on the front panel at the base of the treadmill, the ON/OFF switch has two positions - "I" (one) for ON <strong>and</strong> "0"<br />
(zero) for OFF.<br />
MOVING THE TREADMILL<br />
Turn the treadmill off <strong>and</strong> disconnect its power cord, then raise its deck.<br />
NOTE: If adjustments were made to the front levelers during setup, make sure to tighten the levelers snug against the<br />
base frame before moving.<br />
The treadmill may now be moved on its front platform wheels by pushing <strong>and</strong> pulling on its h<strong>and</strong>rails. Do not attempt to<br />
move the treadmill by pushing or pulling on the deck or deck support tubing.<br />
IMMOBILIZING THE TREADMILL<br />
When it is necessary to immobilize the treadmill, press <strong>and</strong> hold both the down arrow <strong>and</strong> the enter key on the console.
CENTERING THE BELT<br />
After the treadmill has been installed <strong>and</strong> leveled, the belt<br />
must be checked to confirm proper tracking. First, plug the<br />
power cord into a suitable outlet. See the topic titled Electrical<br />
Requirements, which appears earlier in this section, for<br />
details. Then, turn the treadmill ON.<br />
St<strong>and</strong> on the siderails of the treadmill <strong>and</strong> straddle the belt.<br />
Press the START key <strong>and</strong> increase the speed to 4.0-mph<br />
(6.4 kph) using the SPEED UP ARROW key.<br />
If the striding belt moves to the right, turn the right tension bolt<br />
(D) a quarter-turn clockwise with provided quarter-inch Allen<br />
wrench, <strong>and</strong> then turn the left tension bolt a quarter-turn<br />
counter-clockwise (see figure). This sets the striding belt tracking<br />
back to the center of the roller.<br />
If the striding belt moves to the left, turn the left tension bolt a quarter-turn clockwise <strong>and</strong> then turn the right tension bolt<br />
a quarter-turn counter-clockwise to start striding belt tracking back to the center of the roller.<br />
Repeat adjustments until the striding belt appears centered. The belt should be centered on the roller with an equal distance<br />
on both sides from belt to roller. Allow the machine to continue running for several minutes to observe if the tracking<br />
remains stabilized.<br />
NOTE: Do not exceed one full turn of the adjusting screws in either direction.If, after one full turn, the belt does not track<br />
properly, contact Customer Support Services. The phone numbers are listed in Section 5.4, titled How to Obtain Product<br />
Service.<br />
17
4 FEATURES<br />
READING RACK<br />
The display console design includes a built-in reading rack (A), where a<br />
book or magazine can be placed during a workout.<br />
ACCESSORY TRAYS<br />
Accessory trays (B) are located on either side of the display console.<br />
ACTIVITY ZONE<br />
The Go System Activity Zone (C) offers control over the basic<br />
operations of the treadmill, using the<br />
following buttons:<br />
18
D. Start: Causes the belt to begin moving at .5 mph<br />
<strong>and</strong> 0% elevation.<br />
E. Stop: Causes the belt to slow to a gradual stop.<br />
One push pauses the workout, two pushes displays<br />
workout information, <strong>and</strong> three pushes reset<br />
the workout.<br />
F. Incline Arrows: Change the belt’s incline gradually,<br />
increasing (up arrow) or decreasing (down arrow)<br />
the incline by .5% each time the user presses an<br />
arrow.<br />
G. Speed Arrows: Change the belt’s speed gradually, increasing (up arrow) or decreasing (down arrow) the speed by .1<br />
mph each time the user presses an arrow.<br />
H. Low/Med/High: Changes the belt’s incline immediately to a preset value. Initially these buttons are set to change the<br />
incline to 1.5% (Low), 3% (Mid) <strong>and</strong> 5% (High). However, the user can set these buttons to new values by first<br />
changing the belt’s incline to the desired new value, then holding down the button the new value will be assigned to<br />
until the treadmill beeps. Note that the smallest value must always be assigned to the Low key <strong>and</strong> the highest value<br />
to the High key.<br />
I. Walk/Jog/Run: Changes the belt’s speed immediately to a preset value. Initially these buttons are set to change the<br />
speed to 3 mph (Walk), 5 mph (Jog) <strong>and</strong> 7 mph (Run). However, the user can set these buttons to new values by<br />
first changing the belt’s speed to the desired new value, then holding down the button the new value will be<br />
assigned to until the treadmill beeps. Note that the smallest value must always be assigned to the Walk key <strong>and</strong> the<br />
highest value to the Run key.<br />
J. E-Stop Magnet: This circular magnet connects to the E-Stop Lanyard, which must be clipped to the user’s clothing<br />
when the treadmill is in use. Pulling the lanyard so that it comes free of the magnet will stop the treadmill’s striding<br />
belt; this serves as a safety feature, stopping the belt should the user stumble or fall. Replace the magnet to reset<br />
the system.<br />
19
HAND PULSE SENSOR SYSTEM<br />
The h<strong>and</strong> pulse sensors (K) are the built-in heart rate monitoring system<br />
on the treadmill. During a workout, grasp the sensors that are set<br />
into the h<strong>and</strong>lebars. For an accurate reading, use a comfortable grip.<br />
The console displays the heart rate after 15 to 20 seconds.<br />
20
5 SERVICE AND TECHNICAL DATA<br />
5.1 TROUBLESHOOTING<br />
1. Why do I hear a rubbing noise from the belt?<br />
a. The belt could be off-centered. Please see the section entitled How to Adjust <strong>and</strong> Tension the Striding Belt.<br />
2. The console display looks strange or has an error message <strong>and</strong> is not functioning.<br />
a. Unplug the unit to reset the console <strong>and</strong> then plug it back in. Do this multiple times if the console error<br />
message still appears. If the problem still exists please call customer service.<br />
3. My treadmill keeps going into a mode where the message center displays "Press Enter to Unlock"<br />
a. Your treadmill is in safety mode <strong>and</strong> this lock feature is to protect someone from accidentally pressing a<br />
button they are not suppose to <strong>and</strong> starting the treadmill. You can go into the Settings Menu to disable this<br />
feature or extend the length of the time it takes for this feature to turn on. Please refer to the console User<br />
<strong>Manual</strong> for more on this feature.<br />
4. There is a lot of noise coming from the motor area.<br />
a. First make sure that the motor cover is properly installed <strong>and</strong> screwed down. If there continues to be noise<br />
please contact customer service.<br />
21
22<br />
5. My contact heart rate sensors are not reading my heart rate correctly.<br />
a. If the heart rate reading is erratic or missing, do the following:<br />
i. Dry the h<strong>and</strong>s if necessary to prevent slipping.<br />
ii. Apply h<strong>and</strong>s to all four sensors; two in each h<strong>and</strong>.<br />
iii. Grasp the sensors firmly.<br />
iv. Apply constant pressure around the sensors.<br />
6. My belt is tracking off to the left or right.<br />
a. Please see the section entitled How to Adjust <strong>and</strong> Tension the Striding Belt.<br />
7. The belt seems to slip when I run on it.<br />
a. You will need to tighten the belt to the rear roller. Please see the section entitled How to Adjust <strong>and</strong> Tension<br />
the Striding Belt.<br />
8. My treadmill will not lock when I fold it up.<br />
a. Make sure the treadmill is at 0% incline before folding it up. If it is not at 0%, it will not lock.<br />
9. My treadmill will not unfold.<br />
a. Make sure you pull the release lever located on the top left side of the deck. If this problem persists please<br />
contact customer service.
10. My treadmill will not turn on.<br />
a. Make sure that the treadmill’s power cord is connected to the treadmill at one end <strong>and</strong> is plugged into a<br />
power outlet at the other. Also, make sure that the power switch is pushed to on. The power switch is located<br />
on the front of the treadmill right below the motor cover.<br />
11. The h<strong>and</strong>rails on my treadmill wobble.<br />
a. Make sure to tighten all of the bolts that are on the uprights <strong>and</strong> h<strong>and</strong>lebars.<br />
12. My treadmill shakes a lot when I run on it.<br />
a. Turn off the treadmill <strong>and</strong> make sure all assembly hardware is tightened. If shaking still occurs, adjust the<br />
levelers under the frame until the shaking ceases.<br />
23
5.2 PREVENTATIVE MAINTENANCE TIPS<br />
The <strong>Life</strong> <strong>Fitness</strong> <strong>F3</strong> treadmill is backed by the engineering excellence <strong>and</strong> reliability of <strong>Life</strong> <strong>Fitness</strong> <strong>and</strong> is one of the<br />
most rugged <strong>and</strong> trouble-free pieces of exercise equipment on the market today.<br />
NOTE: Safety of the equipment can be maintained only if the equipment is examined regularly for damage or wear.<br />
Keep the equipment out of use until defective parts are repaired or replaced. Pay special attention to parts that are subject<br />
to wear, as outlined below.<br />
The following preventive maintenance tips will keep the <strong>Life</strong> <strong>Fitness</strong> treadmill operating at peak performance:<br />
• Clean the display console <strong>and</strong> all exterior surfaces regularly with mild soap <strong>and</strong> water or a mild household cleaner.<br />
DO NOT use paper towels, ammonia or acid based cleaners.<br />
NOTE: When cleaning the exterior of the unit, a non-abrasive cleaner <strong>and</strong> soft cotton cloth are strongly<br />
recommended. At no time should cleaner be applied directly to any part of the equipment; use non-abrasive<br />
cleaner on a soft cloth <strong>and</strong> then wipe the unit.<br />
• Check operation of the Emergency Stop System once a week.<br />
• Check the operation of the Stop key once a week.<br />
• Inspect <strong>and</strong> vacuum the area under unit regularly.<br />
• Vacuum around the striding belt regularly to keep debris from accumulating.<br />
• Inspect exterior parts regularly for wear, particularly the striding belt <strong>and</strong> deck.<br />
• Check the position (centering) of the striding belt.<br />
The optimum operating position of the striding belt is from .5" (12mm) to 1" (25mm) from either side of the frame. If the<br />
striding belt travels beyond this position, see How to Adjust <strong>and</strong> Tension the Striding Belt or contact <strong>Life</strong> <strong>Fitness</strong><br />
Customer Support Services for proper alignment instructions, 1-800-328-9714 (USA).<br />
24
5.3 HOW TO ADJUST AND TENSION THE STRIDING BELT ON THE LIFE FITNESS TREADMILL<br />
Do not move treadmill or place h<strong>and</strong>s under treadmill while it is plugged into an electrical outlet!<br />
Tool required: 6mm hex key wrench<br />
THE BELT TENSIONING BOLTS<br />
The <strong>Life</strong> <strong>Fitness</strong> treadmill has access holes in the rear roller guards, which allow access to the tensioning bolts. These<br />
tensioning bolts make it possible to adjust tracking <strong>and</strong> centering of the striding belt (A) without removing the guards.<br />
NOTE: It is extremely important that the treadmill be correctly leveled prior to any tracking adjustments. An unstable unit<br />
may cause striding belt misalignment. See "How To Stabilize the <strong>Life</strong> <strong>Fitness</strong> Treadmill" in the "Set Up" section prior to<br />
attempting any rear roller adjustments.<br />
Before proceeding, it is helpful to visualize the REAR ROLLER (B) pivot point (C). Each adjustment made to one side of<br />
the ROLLER must be met with an equal <strong>and</strong> opposite adjustment (D) to the other side of the ROLLER to maintain an<br />
ideal belt tension at the pivot point.<br />
25
TRACKING (CENTERING) AN EXISTING OR NEW STRIDING BELT<br />
1 Locate the two access holes to the belt tensioning bolts on each of the rear roller guards.<br />
2 St<strong>and</strong> on the sides of the treadmill <strong>and</strong> straddle the belt, not st<strong>and</strong>ing on it. Enter the MANUAL Workout <strong>and</strong> set the<br />
belt speed to run at 4.0 mph (6,4 kph).<br />
3 If the striding belt has moved to the right, turn the right tension bolt 1/4 turn clockwise with provided 6mm hex key<br />
wrench, <strong>and</strong> then turn the left tension bolt 1/4 turn counter-clockwise to start striding belt tracking back to center of<br />
roller.<br />
4 If the striding belt has moved to the left, turn the left tension bolt 1/4 turn clockwise <strong>and</strong> then turn the right tension<br />
bolt 1/4 turn counter-clockwise to start striding belt tracking back to center of roller. Repeat adjustments until striding<br />
belt appears centered. Allow machine to continue running for several minutes to observe if tracking remains stabilized.<br />
NOTE: Do not exceed one full turn of the adjusting screws in either direction. If after one full turn the belt does not track<br />
properly, contact Customer Support Services. The phone numbers are listed in "How to Obtain Product Service."<br />
TENSIONING AN EXISTING STRIDING BELT<br />
Under normal usage, the treadmill striding belt may stretch slightly. If the belt starts to slip during use, take the steps listed<br />
below to correct the tension.<br />
1 Using the STOP key, stop the treadmill.<br />
2 Turn the belt tensioning bolts clockwise a quarter-turn per side to tension the belt. Do not exceed one full turn (four<br />
quarter-turns per side).<br />
3 Set the treadmill at 2.0-mph (3,2 kph) <strong>and</strong> get on to make sure the belt no longer slips. Also, check the striding belt’s<br />
tracking. If the striding belt drifts to the left or right see Tracking (Centering) an Existing or New Striding Belt.<br />
NOTE: Do not over-tighten the tensioning bolts while making belt adjustments. Over-tightening of bolts may over stretch<br />
<strong>and</strong> damage the striding belt or roller bearings. Do not exceed one full turn of either bolt in either direction.<br />
26
5.4 HOW TO OBTAIN PRODUCT SERVICE<br />
1. Verify the symptom <strong>and</strong> review the operating instructions.<br />
2. Locate <strong>and</strong> document the serial numbers of the base <strong>and</strong> the console. The base’s serial number is located on front<br />
of the treadmill near the power switch <strong>and</strong> the console serial number is located on the back surface of the console.<br />
3. Contact the nearest <strong>Life</strong> <strong>Fitness</strong> Customer Support Services Group:<br />
For Product Service within the United States <strong>and</strong> Canada:<br />
Telephone: (+1) 847.451.0036<br />
FAX: (+1) 847.288.3702<br />
Toll-free telephone: 800.351.3737<br />
For Product Service<br />
Internationally:<br />
<strong>Life</strong> <strong>Fitness</strong> Europe GmbH<br />
Telephone: (+49) 089.317.751.66<br />
FAX: (+49) 089.317.751.38<br />
<strong>Life</strong> <strong>Fitness</strong> (UK) LTD<br />
Telephone: (+44) 1353.665507<br />
FAX: (+44) 1353.666018<br />
<strong>Life</strong> <strong>Fitness</strong> Atlantic BV<br />
<strong>Life</strong> <strong>Fitness</strong> Benelux<br />
Telephone: +31 (0) 180 64 66 66<br />
FAX: +31 (0) 180 64 66 99<br />
<strong>Life</strong> <strong>Fitness</strong> Italia S.R.L.<br />
Telephone: (+39) 0472.835.470<br />
FAX: (+39) 0472.833.150<br />
Toll-free telephone: 800.438836<br />
<strong>Life</strong> <strong>Fitness</strong> Vertriebs GmbH<br />
Telephone: (+43) 1615.7198<br />
FAX: (+43) 1615.7198.20<br />
<strong>Life</strong> <strong>Fitness</strong> Asia Pacific Ltd<br />
Telephone: (+852) 2891.6677<br />
FAX: (+852) 2575.6001<br />
<strong>Life</strong> <strong>Fitness</strong> Latin America<br />
<strong>and</strong> Caribbean<br />
Telephone: (+1) 847.288.3964<br />
FAX: (+1) 847 288.3886<br />
<strong>Life</strong> <strong>Fitness</strong> Brazil<br />
Telephone: (+55) 11.7295.2217<br />
FAX: (+55) 11.7295.2218<br />
<strong>Life</strong> <strong>Fitness</strong> Japan<br />
Telephone: (+81) 3.3359.4306<br />
FAX: (+81) 3.3359.4307<br />
<strong>Life</strong> <strong>Fitness</strong> Iberia<br />
Telephone : (+34) 93 672 4660<br />
FAX : (+34) 93 672 4670<br />
27
6 SPECIFICATIONS<br />
28<br />
LIFE FITNESS <strong>F3</strong> TREADMILL SPECIFICATIONS<br />
Designed use: Home<br />
Maximum user weight: 350 pounds / 159 kilograms<br />
Speed range: 0.5 - 10.0 mph in 0.1 increments<br />
Elevation range: 0%-12% (in 0.5% increments)<br />
Motor: 3 HP continuous duty DC<br />
Rollers: Front: 2.6" (67mm) precision crowned<br />
Back: 2.0" (50mm) precision crowned<br />
Belt: 55" Length x 20" Width<br />
(147cm Length x 50cm Width), multi-ply<br />
Deck: Flex Deck cushioning, not reversible<br />
H<strong>and</strong>rails: Ergo Crossbar with side h<strong>and</strong>rails.<br />
Accessory tray: St<strong>and</strong>ard, designed into system<br />
Warranty: 10 years motor, 5 years parts,<br />
3 years console, 1 year labor, <strong>and</strong><br />
lifetime on frame <strong>and</strong> springs
Physical Dimensions: Unfolded Folded<br />
Length: 78 inches / 198 centimeters 34.5 inches / 87.5 centimeters<br />
Width: 34.5 inches / 87.5 centimeters 34.5 inches / 87.5 centimeters<br />
Height: 58.5 inches / 148.5 centimeters 75 inches / 190.5 centimeters<br />
Weight:<br />
Shipping Dimensions:<br />
264 pounds / 119.75 kilograms<br />
Carton Length: 86.25 inches / 219 centimeters<br />
Carton Width: 33 inches / 84 centimeters<br />
Carton Height: 14 inches / 35.5 centimeters<br />
Total Weight: 291 pounds / 132 kilograms<br />
29
7 WARRANTY INFORMATION<br />
WHAT IS COVERED:<br />
This <strong>Life</strong> <strong>Fitness</strong> consumer product ("Product") is warranted to be free of all defects in material <strong>and</strong> workmanship.<br />
WHO IS COVERED:<br />
The original purchaser or any person receiving a newly purchased Product as a gift from the original purchaser.<br />
HOW LONG IS IT COVERED:<br />
Residential: All electrical <strong>and</strong> mechanical components <strong>and</strong> labor are covered, after the date of purchase, as listed on the chart below.<br />
Non-Residential: Warranty void (this Product is intended for residential use only).<br />
WHO PAYS SHIPPING & INSURANCE FOR SERVICE:<br />
If the Product or any warranted part must be returned to a service facility for repairs, <strong>Life</strong> <strong>Fitness</strong> will pay all shipping <strong>and</strong> insurance<br />
charges during the warranty period (within the United States only). The purchaser is responsible for shipping <strong>and</strong> insurance charges<br />
after the warranty has expired.<br />
WHAT WE WILL DO TO CORRECT COVERED DEFECTS:<br />
We will ship to you any new or rebuilt replacement part or component, or, at our option, replace the Product. Such replacement parts<br />
are warranted for the remaining portion of the original warranty period.<br />
WHAT IS NOT COVERED:<br />
Any failures or damage caused by unauthorized service, misuse, accident, negligence, improper assembly or installation, debris<br />
resulting from any construction activities in the Product's environment, rust or corrosion as a result of the Product's location, alterations<br />
or modifications without our written authorization or by failure on your part to use, operate <strong>and</strong> maintain the Product as set out in your<br />
User <strong>Manual</strong> ("<strong>Manual</strong>"). All terms of this warranty are void if this Product is moved beyond the continental borders of the United States<br />
of America (excluding Alaska, Hawaii <strong>and</strong> Canada) <strong>and</strong> are then subject to the terms provided by that country's local authorized<br />
<strong>Life</strong> <strong>Fitness</strong> Representative.<br />
30
WHAT YOU MUST DO:<br />
Retain proof of purchase (our receipt of the attached registration card assures registration of purchase information but is not required);<br />
use, operate <strong>and</strong> maintain the Product as specified in the <strong>Manual</strong>; notify Customer Service of any defect within 10 days after discovery<br />
of the defect; if instructed, return any defective part for replacement or, if necessary, the entire Product for repair.<br />
<strong>Life</strong> <strong>Fitness</strong> reserves the right to decide whether or not a product is to be returned for repair.<br />
USER MANUAL:<br />
It is VERY IMPORTANT THAT YOU READ THE MANUAL before operating the Product. Remember to perform the periodic maintenance<br />
requirements specified in the <strong>Manual</strong> to assure proper operation <strong>and</strong> your continued satisfaction.<br />
PRODUCT REGISTRATION:<br />
Register online at www.lifefitness.com/registration. Our receipt assures that your name, address <strong>and</strong> date of purchase are on file<br />
as a registered owner of the Product. Failure to return the card will not affect your rights under this warranty. Being a registered owner<br />
assures coverage in the event you lose your proof of purchase. Please retain your proof of purchase, such as your bill of sale or receipt.<br />
HOW TO GET PARTS & SERVICE:<br />
Simply call Customer Service at 1-800-351-3737 or (+1) 847-288-3300, Monday through Friday from 8:00 a.m. to 5:00 p.m. Central<br />
St<strong>and</strong>ard Time, <strong>and</strong> tell them your name, address <strong>and</strong> the serial number of your Product (consoles <strong>and</strong> frames may have separate<br />
serial numbers). They will tell you how to get a replacement part, or, if necessary, arrange for service where your Product is located.<br />
EXCLUSIVE WARRANTY:<br />
THIS LIMITED WARRANTY IS IN LIEU OF ALL OTHER WARRANTIES OF ANY KIND EITHER EXPRESSED OR IMPLIED,<br />
INCLUDING BUT NOT LIMITED TO THE IMPLIED WARRANTIES OF MERCHANTABILITY AND FITNESS FOR A PARTICULAR<br />
PURPOSE, AND ALL OTHER OBLIGATIONS OR LIABILITIES ON OUR PART. We neither assume nor authorize any person to<br />
assure for us any other obligation or liability concerning the sale of this Product. Under no circumstances shall we be liable under<br />
this warranty, or otherwise, of any damage to any person or property, including any lost profits or lost savings, for any special, indirect,<br />
secondary, incidental or consequential damages of any nature arising out of the use of or inability to use this Product. Some states<br />
do not allow the exclusion or limitation of implied warranties or of liability for incidental or consequential damages, so the above<br />
limitations or exclusions may not apply to you. Warranties may vary outside the U.S. Contact <strong>Life</strong> <strong>Fitness</strong> for details.<br />
31
CHANGES IN WARRANTY NOT AUTHORIZED:<br />
No one is authorized to change, modify or extend the terms of this limited warranty.<br />
EFFECT OF U.S. STATE LAWS:<br />
This warranty gives you specific legal rights <strong>and</strong> you may have other rights which vary from state to state.<br />
32<br />
MODEL LIFETIME 10 YEARS 5 YEARS 3 YEARS 1 YEAR<br />
<strong>F3</strong> Frame & Motor Electrical Parts & Console Parts Labor<br />
<strong>Life</strong>springs Mechanical Parts
<strong>Life</strong> <strong>Fitness</strong> offers a full line of premier fitness equipment for the home.<br />
TOTAL-BODY ELLIPTICAL CROSS-TRAINERS | TREADMILLS | LIFECYCLE ® EXERCISE BIKES<br />
STAIRCLIMBERS | GYM SYSTEMS<br />
5100 N. RIVER ROAD, SCHILLER PARK, ILLINOIS 60176<br />
LIFEFITNESS.COM<br />
©2006 <strong>Life</strong> <strong>Fitness</strong>, a division of Brunswick Corporation. All rights reserved. <strong>Life</strong> <strong>Fitness</strong> <strong>and</strong> <strong>Life</strong>cycle are a registered trademarks of Brunswick Corporation. 8119901 Rev. A-1 (08.06)