X3-0 - User Manual - Life Fitness
X3-0 - User Manual - Life Fitness
X3-0 - User Manual - Life Fitness

You also want an ePaper? Increase the reach of your titles
YUMPU automatically turns print PDFs into web optimized ePapers that Google loves.
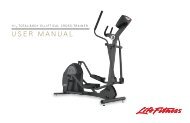
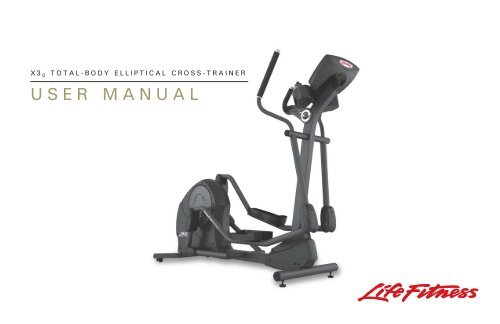
X 3 0 TOTAL-BODY ELLIPTICAL CROSS-TRAINER<br />
USER MANUAL
LIFE FITNESS ASIA PACIFIC LTD<br />
Room 2610, Miramar Tower<br />
132 Nathan Road<br />
Tsimshatsui, Kowloon<br />
HONG KONG<br />
LIFE FITNESS ATLANTIC BV<br />
LIFE FITNESS BENELUX<br />
Bijdorpplein 25 - 31<br />
2992 LB Barendrecht<br />
THE NETHERLANDS<br />
LIFE FITNESS DO BRAZIL<br />
Av. Dr. Dib Sauaia Neto 1478<br />
Alphaville, Barueri, SP<br />
06465-140<br />
BRAZIL<br />
LIFE FITNESS VERTRIEBS GMBH<br />
Dückegasse 7-9/3/36<br />
1220 Vienna<br />
AUSTRIA<br />
CORPORATE HEADQUARTERS<br />
5100 North River Road<br />
Schiller Park, Illinois 60176 • U.S.A.<br />
www.lifefitness.com<br />
INTERNATIONAL OFFICES<br />
LIFE FITNESS IBERIA<br />
Pol. Ind. Molí dels Frares. c/C, nº 12<br />
08620 Sant Vicenç dels Horts (Barcelona)<br />
SPAIN<br />
LIFE FITNESS EUROPE GMBH<br />
Siemensstrasse 3<br />
85716 Unterschleissheim<br />
GERMANY<br />
LIFE FITNESS ITALIA S.R.L.<br />
Via Vittorio Veneto, 57/A<br />
39042 Bressanone (Bolzano)<br />
ITALY<br />
LIFE FITNESS LATIN<br />
AMERICA and CARIBBEAN<br />
5100 North River Road<br />
Schiller Park, Illinois 60176<br />
U.S.A.<br />
7953401<br />
06/05<br />
LIFE FITNESS UK LTD<br />
Queen Adelaide<br />
Ely, Cambs CB7 4UB<br />
UNITED KINGDOM<br />
LIFE FITNESS JAPAN<br />
Nippon Brunswick Bldg., #8F<br />
5-27-7 Sendagaya<br />
Shibuya-Ku, Tokyo<br />
JAPAN 151-0051<br />
1
Before using this product, it is essential to read this<br />
ENTIRE operation manual and ALL installation instructions.<br />
This will help in setting up the equipment quickly<br />
and in instructing others on how to use it correctly and safely.<br />
FCC Warning - Possible Radio / Television Interference<br />
NOTE: This equipment has been tested and found to comply with the limits for a Class B digital device, pursuant to<br />
part 15 of the FCC rules. These limits are designed to provide reasonable protection against harmful interference in<br />
a residential installation. This equipment generates, uses and can radiate radio frequency energy, and if not installed and<br />
used in accordance with the operation manual, may cause harmful interference to radio communications. However, there<br />
is no guarantee that the interference will not occur in a particular installation. If this equipment does cause harmful interference<br />
to radio or television reception, which can be determined by turning the equipment off and on, the user is<br />
encouraged to try to correct the interference by one or more of the following measures:<br />
Reorient or relocate the receiving antenna.<br />
Increase the separation between the equipment and the receiver.<br />
Connect the equipment into an outlet on a circuit different from that to which the receiver is connected.<br />
Consult the dealer or an experienced radio/TV technician for help.<br />
Class HB (Home): Domestic use. Not suitable for therapeutic purposes.<br />
CAUTION: Any changes or modifications to this equipment could void the product warranty.<br />
Any service, other than cleaning or user maintenance, must be performed by an authorized service representative.<br />
There are no user-serviceable parts.<br />
2
TABLE OF CONTENTS<br />
1. Getting Started . . . . . . . . . . . . . . . . . . . . . . . . . . . . . . . . . . . . . . . . . . . . . . . . . . . . . . . . . . . . . . . . . . . . .6<br />
1.1 Important Safety Instructions . . . . . . . . . . . . . . . . . . . . . . . . . . . . . . . . . . . . . . . . . . . . . . . . . . . . . . . . . .6<br />
1.2 Set-up . . . . . . . . . . . . . . . . . . . . . . . . . . . . . . . . . . . . . . . . . . . . . . . . . . . . . . . . . . . . . . . . . . . . . . . . . . .8<br />
Where to Place the Cross-trainer // How to Stabilize the Cross-trainer // Plug In the Cross-trainer<br />
2 The Display Console . . . . . . . . . . . . . . . . . . . . . . . . . . . . . . . . . . . . . . . . . . . . . . . . . . . . . . . . . . . . . . . .9<br />
2.1 The Display Console Overview . . . . . . . . . . . . . . . . . . . . . . . . . . . . . . . . . . . . . . . . . . . . . . . . . . . . . . . .9<br />
2.2 Display Console Descriptions . . . . . . . . . . . . . . . . . . . . . . . . . . . . . . . . . . . . . . . . . . . . . . . . . . . . . . . . . .9<br />
2.3 The Reading Rack and Accessory Tray . . . . . . . . . . . . . . . . . . . . . . . . . . . . . . . . . . . . . . . . . . . . . . . . . .12<br />
2.4 The Wireless Heart Rate Chest Strap . . . . . . . . . . . . . . . . . . . . . . . . . . . . . . . . . . . . . . . . . . . . . . . . . . .13<br />
3. Correct Usage . . . . . . . . . . . . . . . . . . . . . . . . . . . . . . . . . . . . . . . . . . . . . . . . . . . . . . . . . . . . . . . . . . . .14<br />
3.1 Mounting and dismounting the Cross-Trainer . . . . . . . . . . . . . . . . . . . . . . . . . . . . . . . . . . . . . . . . . . . . .14<br />
3.2 Biomechanical Guidelines . . . . . . . . . . . . . . . . . . . . . . . . . . . . . . . . . . . . . . . . . . . . . . . . . . . . . . . . . . .14<br />
General // Forward Motion – Total Body // Reverse Motion – Total Body // Braking Resistance<br />
4 The Workouts . . . . . . . . . . . . . . . . . . . . . . . . . . . . . . . . . . . . . . . . . . . . . . . . . . . . . . . . . . . . . . . . . . . . .16<br />
4.1 Workout Overviews . . . . . . . . . . . . . . . . . . . . . . . . . . . . . . . . . . . . . . . . . . . . . . . . . . . . . . . . . . . . . . . . .16<br />
3
4.2 Setting Up and Using the Workouts . . . . . . . . . . . . . . . . . . . . . . . . . . . . . . . . . . . . . . . . . . . . . . . . . . . . .17<br />
Selecting and Using Quick Start <strong>Manual</strong> Mode // Selecting a Workout // Entering a Duration //<br />
Selecting and Adjusting the Intensity Level // Starting a Workout // Pausing a Workout //<br />
Resetting a Workout // Reviewing a Completed Workout // Understanding the Heart Rate Zone<br />
to Maximize Workout Benefits<br />
4.3 Workout Descriptions . . . . . . . . . . . . . . . . . . . . . . . . . . . . . . . . . . . . . . . . . . . . . . . . . . . . . . . . . . . . . . . . . . . . .22<br />
4.4 Using the Workouts (Chart) . . . . . . . . . . . . . . . . . . . . . . . . . . . . . . . . . . . . . . . . . . . . . . . . . . . . . . . . . . . . . . . . .28<br />
5 Service and Technical Data . . . . . . . . . . . . . . . . . . . . . . . . . . . . . . . . . . . . . . . . . . . . . . . . . . . . . . . . . . .29<br />
5.1 Preventative Maintenance Tips . . . . . . . . . . . . . . . . . . . . . . . . . . . . . . . . . . . . . . . . . . . . . . . . . . . . . . . .29<br />
5.2 Preventative Maintenance Schedule . . . . . . . . . . . . . . . . . . . . . . . . . . . . . . . . . . . . . . . . . . . . . . . . . . . .30<br />
5.3 Troubleshooting the Wireless Heart Rate Chest Strap . . . . . . . . . . . . . . . . . . . . . . . . . . . . . . . . . . . . . . .30<br />
5.4 How to Obtain Product Service . . . . . . . . . . . . . . . . . . . . . . . . . . . . . . . . . . . . . . . . . . . . . . . . . . . . . . . .31<br />
6 Warranty Information . . . . . . . . . . . . . . . . . . . . . . . . . . . . . . . . . . . . . . . . . . . . . . . . . . . . . . . . . . . . . . . .32<br />
7 Cross-trainer Specifications . . . . . . . . . . . . . . . . . . . . . . . . . . . . . . . . . . . . . . . . . . . . . . . . . . . . . . . . . . .35<br />
© 2005 <strong>Life</strong> <strong>Fitness</strong>, a division of Brunswick Corporation. All rights reserved. <strong>Life</strong> <strong>Fitness</strong> is a registered trademark of Brunswick<br />
Corporation. Any use of these trademark, without the express written consent of <strong>Life</strong> <strong>Fitness</strong> is forbidden.<br />
4
This Operation <strong>Manual</strong> describes the functions of the following products:<br />
<strong>Life</strong> <strong>Fitness</strong> cross-trainer:<br />
<strong>X3</strong>0 See Section 7, titled Specifications page in this manual<br />
for product-specific features.<br />
Statement of Purpose: The cross-trainer is an exercise machine that combines low-impact elliptical pedaling with<br />
push/pull arm motion to provide an efficient, effective total body workout.<br />
Health-related injuries may result from incorrect or excessive use of exercise equipment. The manufacturer<br />
STRONGLY recommends seeing a physician for a complete medical exam before undertaking an exercise<br />
program, particularly if the user has a family history of high blood pressure or heart disease; or is over<br />
the age of 45; or smokes, has high cholesterol, is obese, or has not exercised regularly in the past year.<br />
The manufacturer also recommends consulting a fitness professional on the correct use of this product.<br />
If, at any time while exercising, the user experiences faintness, dizziness, pain, or shortness of breath,<br />
he or she must stop immediately.<br />
5
1 GETTING STARTED<br />
1.1 IMPORTANT SAFETY INSTRUCTIONS<br />
SAFETY WARNING: The safety of the product can be maintained only if it is examined regularly<br />
for damage and wear. See Preventative Maintenance section for details.<br />
• Before using this product, it is essential to read this ENTIRE operation manual and ALL instructions.<br />
The cross-trainer is intended for use solely in the manner described in this manual.<br />
• Always follow the console instructions for proper operation.<br />
• Close supervision is necessary when used by or near children, invalids or disabled persons.<br />
• If the cross-trainer does not function properly after it has been dropped, damaged, or even partially immersed<br />
in water, contact Customer Support Services for assistance.<br />
• Never insert objects into any opening in the cross-trainer. If an object should drop inside, carefully retrieve it.<br />
If the item is beyond reach, contact Customer Support Services.<br />
• Never place liquids of any type directly on the unit, except in an accessory tray. Containers with lids<br />
are recommended.<br />
• Do not use the cross-trainer outdoors, near swimming pools or in areas of high humidity.<br />
• Keep all loose clothing, shoelaces, and towels away from the cross-trainer pedals.<br />
• Keep the area around the cross-trainer clear of any obstructions, including walls and furniture.<br />
• Use caution when mounting or dismounting the cross-trainer. While exercising, always hold onto the user arms.<br />
• Never operate a <strong>Life</strong> <strong>Fitness</strong> product if it has a damaged power cord or electrical plug, or if it has been dropped,<br />
damaged, or even partially immersed in water. Contact <strong>Life</strong> <strong>Fitness</strong> Customer Support Services.<br />
6
• Keep the power cord away from heated surfaces. Do not pull the equipment by the power cord or use the cord<br />
as a handle.<br />
• Do not run the power cord on the floor under or alongside of the Cross-Trainer.<br />
• Wear shoes with rubber or high-traction soles. Do not use shoes with heels, leather soles, cleats or spikes.<br />
Do not use the cross-trainer in bare feet.<br />
• Do not tip the cross-trainer on its side during operation.<br />
• Keep hands and feet away from all moving parts.<br />
• To ensure proper functioning of this product, do not install attachments or accessories that are not provided<br />
or recommended by <strong>Life</strong> <strong>Fitness</strong>.<br />
• Use this product in a well-ventilated area.<br />
• Use this product on a solid, level surface.<br />
• Make sure that all components are fastened securely.<br />
SAVE THESE INSTRUCTIONS FOR FUTURE REFERENCE.<br />
7
1.2 SETUP<br />
Read the entire Operation <strong>Manual</strong> before setting up the cross-trainer.<br />
WHERE TO PLACE THE CROSS-TRAINER<br />
Following all safety instructions in Section 1.1, move the cross-trainer to the location in which it will be used. See<br />
Section 5, titled Specifications, for the dimensions of the footprint. Allow one foot (30.4 cm) of clearance in front of the<br />
cross-trainer to allow for movement of the pedal levers. It should be easy to mount the cross-trainer from the side.<br />
HOW TO STABILIZE THE CROSS-TRAINER<br />
After placing the cross-trainer in position, check the unit's stability by attempting<br />
to rock it in all directions. Any slight rocking indicates that the unit must be leveled.<br />
Determine which foot is not resting completely on the floor. Loosen the jam nut (A)<br />
with an open-end 17mm wrench, and rotate the stabilizing foot (B) to lower it. Verify<br />
that the cross-trainer is stable, and repeat the adjustment as necessary until the<br />
unit no longer rocks. Lock the adjustment by tightening the jam nut against the<br />
stabilizer bar. It is extremely important that the stabilizing leg be correctly<br />
adjusted for proper operation.<br />
PLUG IN THE CROSS-TRAINER<br />
The cross-trainer comes with a standard power supply for the U.S., or a power<br />
supply with country-specific line cords.<br />
Insert the power adapter jack (C) into the barrel plug on the back of the crosstrainer.<br />
Then insert the power supply into the wall outlet. Make sure the cord is<br />
routed so that it doesn't bind and will not be walked on.<br />
Check that the console LEDs light up. If not, recheck the plug and wall<br />
connections and make sure the wall outlet has power.<br />
8
2 THE DISPLAY CONSOLE<br />
2.1 DISPLAY CONSOLE OVERVIEW<br />
The computerized display console on the cross-trainer allows the user to tailor a workout to personal fitness abilities and<br />
goals and to monitor progress. With this easy-to-use console the user can track fitness improvement from one workout<br />
to the next.<br />
2.2 DISPLAY CONSOLE DESCRIPTIONS<br />
The functions for the keys and display windows on the<br />
cross-trainer console are listed and described in this<br />
section. See Section 4, titled The Workouts, for detailed<br />
information on using the console to set up workouts.<br />
G<br />
E<br />
A B C D<br />
E<br />
F<br />
9
A START/STOP/HOLD TO RESET: Use this key to initiate a number of different functions on the cross-trainer.<br />
• Beginning a 30-minute QUICK-START MANUAL workout immediately, without setup steps<br />
• Beginning a workout after completing the setup steps for a specific workout<br />
• Pausing a workout-in-progress<br />
• Restarting a paused workout<br />
• Deleting a current workout and making it possible to set up a new workout<br />
B ENTER: Press this key to accept information displayed by the console when setting up a workout.<br />
C ARROW KEYS: Use these keys when setting up a workout to change displayed values for workout type, duration,<br />
weight and resistance level. When a workout is in progress, use these keys to change the intensity level.<br />
D SCROLL: During a workout-in-progress, press this key to browse through workout statistics displayed in the<br />
bottom data window. Each time the SCROLL key is pressed, a different value is displayed, and it’s corresponding<br />
light emitting diode (LED) lights up simultaneously.<br />
Press this key to view summary data for a completed workout, including total calories burned and total distance traveled<br />
E DATA WINDOWS: Two data windows are set in the center of the console display.<br />
The top window displays the following statistics. Depending on which statistic is being displayed at any given<br />
instance, the corresponding LED lights up at the same time.<br />
• Time: The elapsed time of a workout-in-progress. During a workout setup, this window also shows the default<br />
duration of 30 minutes, which the user can change using the ARROW keys.<br />
• Weight: The user’s selected weight.<br />
10
The bottom window displays the following statistics in alternating rotation for a workout-in-progress. Depending<br />
on which statistic is being displayed at any given instance, the corresponding LED lights up at the same time.<br />
• RPM (Revolutions Per Minute): The pedaling speed or rate<br />
• Distance: The total distance traveled<br />
• Calories: The number of calories burned<br />
• Level: The level of a workout-in-progress<br />
• Heart Rate: Actual user heart rate<br />
F WORKOUT LED INDICATORS: One set of LEDs is matched to the cross-trainer’s set of workout options. During a<br />
workout setup, each time the user presses an ARROW key to view another workout option, one of these LEDs lights<br />
up to indicate that the corresponding workout is the currently displayed option. During a workout-in-progress, the<br />
LED corresponding to that workout remains lit.<br />
Another set of LEDs is matched to a set of workout statistics. See the DATA WINDOWS description above.<br />
See the SCROLL key and DATA WINDOW descriptions above for more information.<br />
G DOT MATRIX DISPLAY: This window displays a workout’s profile, which consists of columns of light that represent<br />
the levels of intensity of each interval.<br />
11
2.3 THE READING RACK AND ACCESSORY TRAY<br />
A reading rack (A) for supporting a book or magazine is located at the base of the upper panel of the console.<br />
A water bottle holder (B) is mounted on the monocolumn of the cross-trainer.<br />
12<br />
B<br />
A<br />
B
2.4 THE WIRELESS HEART RATE CHEST STRAP<br />
The exercise bike is equipped with wireless, a heart rate monitoring system in which electrodes, pressed against the skin,<br />
transfer heart rate signals to the exercise bike console. These electrodes are attached to a wireless heart rate chest strap<br />
that the user wears during the workout. The chest strap is included with the exercise bike.<br />
See the diagram below for correct positioning of the strap. The electrodes (A), which are the two grooved surfaces on the<br />
underside of the strap, must remain wet to transmit accurately the electrical impulses of the heart back to the receiver. Moisten<br />
the electrodes. Then, secure the strap as high under the chest muscles as possible. The strap should be snug, but comfortable<br />
enough to allow for normal breathing.<br />
The transmitter strap delivers an optimal heart rate reading when the electrodes are in direct contact with skin. However, it also<br />
functions properly through a thin layer of wet clothing.<br />
If it becomes necessary to re-moisten the chest strap electrodes, grasp the center of the strap, pull it away from the chest<br />
to expose the two electrodes, and moisten them.<br />
A A<br />
NOTE: Using the wireless chest strap will provide more accurate heart rate readings than the hand pulse sensors.<br />
13
3 CORRECT USAGE<br />
3.1 MOUNTING AND DISMOUNTING THE CROSS-TRAINER<br />
If mounting from the user right side of the Cross-Trainer, grasp the user right handlebar with the right hand. Place the right foot<br />
on the user right pedal and carefully step over the Cross-Trainer, grasp the user left handlebar with the left hand, and place<br />
the left foot on the user left pedal. If mounting from the user left side, proceed in an opposite fashion. Reverse the process to<br />
dismount the Cross-Trainer.<br />
3.2 BIOMECHANICAL GUIDELINES<br />
There are two exercise variations that can be performed on the Cross-Trainer. For each variation, it is important to follow<br />
these general biomechanical guidelines as well as the specific instructions listed below.<br />
GENERAL<br />
• Feet should be in a comfortable position facing forward on the pedals so the knees move in a forward plane (not angled<br />
inward or outward) and so the hips do not rotate outward.<br />
• Keep back straight. Do not bend forward at the waist.<br />
• Keep both feet on the pedals at all times.<br />
• If desired, allow heels to slightly lift off the pedals during the motion.<br />
• Do not lock knees during the workout. Keep them slightly bent throughout the motion.<br />
FORWARD MOTION – TOTAL BODY<br />
• Mount the Cross-Trainer facing forward<br />
• Hands should be positioned comfortably on the moving handles such that the elbow creates a 90 degree angle when the<br />
moving handlebar is rotated toward you<br />
• Choose the desired workout profile and duration on the console<br />
• Begin moving feet in a smooth forward pedaling motion by pushing top foot forward and pulling bottom foot backward<br />
• Exercise at a speed that is comfortable for you<br />
14
REVERSE MOTION – TOTAL BODY<br />
• Mount the Cross-Trainer facing forward<br />
• Hands should be positioned comfortably on the moving handles such that the elbow creates a 90 degree angle when<br />
the moving handlebar is rotated toward you<br />
• Choose the desired workout profile and duration on the console<br />
• Begin moving feet in a smooth reverse pedaling motion by pulling top foot backward and pushing bottom foot forward<br />
• Exercise at a speed that is comfortable for you<br />
BRAKING RESISTANCE<br />
The <strong>Life</strong> <strong>Fitness</strong> Cross-Trainer features speed-dependent braking resistance. For a set resistance level on the monitor, the resistance<br />
increases with speed. The faster you go, the greater the resistance. The computer makes no adjustments to maintain the resistance<br />
level based on your speed.<br />
15
4 THE WORKOUTS<br />
4.1 WORKOUT OVERVIEWS<br />
This section lists the cross-trainer’s pre-programmed workouts. For more detailed information, see Section 4.2, titled<br />
Setting Up and Using the Workouts.<br />
QUICK START MANUAL MODE is the fastest way to begin exercising, and it bypasses the steps involved in selecting<br />
a specific workout program. After the START key is pressed, a constant-level workout begins. The resistance level does<br />
not change automatically.<br />
INTERVAL combines “hills” and “valleys” of different resistance levels, which is proven to provide effective,<br />
time-efficient cardiovascular results.<br />
RANDOM is an interval training workout for which the user selects a computer-generated profile of varying intensity levels.<br />
MANUAL is a workout in which the resistance level does not change automatically.<br />
PEAK is intended to burn fat by building up to, and maintaining, a constant level of resistance throughout the workout.<br />
SLOPE gradually increases the intensity throughout the workout duration. It is intended to strengthen the heart, as well<br />
as the major muscle groups that are most active during the workout, such as the leg muscle groups.<br />
CHALLENGE begins at a high resistance level and maintains this level throughout the duration.<br />
16
4.2 SETTING UP AND USING THE WORKOUTS<br />
To activate the console, press any key, or simply start pedaling. When the console display lights up, either select<br />
QUICK START MANUAL MODE, or select a specific workout. Setting up a specific workout involves five steps,<br />
which are described in this section:<br />
1. Selecting a workout<br />
2. Entering a workout duration<br />
3. Entering a weight<br />
4. Selecting a level<br />
5. Starting the workout (pressing START) or ENTER<br />
SELECTING AND USING QUICK START MANUAL MODE<br />
Press the START key to begin a 30-minute MANUAL workout immediately. Once the workout is in progress,<br />
it is possible to change the resistance level using the ARROW keys.<br />
SELECTING A WORKOUT<br />
Press the ARROW KEYS until the LED display for the desired workout lights up. Then, press ENTER to confirm the<br />
workout selection.<br />
ENTERING A WORKOUT DURATION<br />
After a workout is selected, the top DATA WINDOW flashes a default workout duration of 30 minutes. Press ENTER to<br />
accept the default. Or, to change the duration, use the ARROW keys. Then, when the desired duration appears in the<br />
DATA WINDOW, press ENTER to accept the duration. It is not possible to change the duration of a workout-in-progress.<br />
17
18<br />
ENTERING A WEIGHT<br />
After a workout is selected, the top DATA WINDOW flashes a default weight. Press ENTER to accept the default.<br />
Or, to change the weight, use the ARROW keys. Then, when the weight appears in the DATA WINDOW, press ENTER<br />
to accept it. The on-board computer calculates the number and rate of calories burned using the entered weight as well<br />
as the pedaling speed.<br />
SELECTING A LEVEL FOR A MANUAL WORKOUT<br />
After a duration is entered, the bottom DATA WINDOW flashes a default resistance level of “1”, which is the easiest of<br />
the 16 resistance levels. Press ENTER to accept the default. Or, to change the level, use the ARROW keys. Then, when<br />
the desired level appears in the DATA WINDOW, press ENTER to accept the duration. While the workout is in progress,<br />
it is possible to change the resistance level (1-16).<br />
NOTE: QuickStart and <strong>Manual</strong> Workouts have 1 - 16 resistance levels.<br />
SELECTING A LEVEL FOR RANDOM, INTERVAL, SLOPE, PEAK, AND CHALLENGE WORKOUTS<br />
After a duration is entered, the bottom DATA WINDOW flashes a default level of “1,” which is the easiest of the<br />
9 difficulty levels. Press ENTER to accept the default. Or, to change the level, use the ARROW keys. Then, when the<br />
desired level appears in the DATA WINDOW, press ENTER to accept the duration. While the workout is in progress,<br />
it is possible to change the difficulty level.<br />
NOTE: Random, Interval, Slope, Peak, and Challenge workouts have 1 - 9 levels.
DIFFICULTY LEVEL TABLE (APPLIES TO RANDOM, INTERVAL, SLOPE, PEAK, CHALLENGE)<br />
Program Difficulty Level Resistance Level Range<br />
1 1 to 8<br />
2 2 to 9<br />
3 3 to 10<br />
4 4 to 11<br />
5 5 to 12<br />
6 6 to 13<br />
7 7 to 14<br />
8 8 to 15<br />
9 9 to 16<br />
EXPLANATION OF DIFFICULTY LEVELS<br />
The difficulty level table shows the resistance level range at each difficulty level. Since some workouts have<br />
predetermined profiles, a resistance level range had to be created. This allows the user to set a difficulty level of 1 - 9,<br />
which will adjust the entire workouts intensity level.<br />
STARTING A WORKOUT<br />
After accepting a level, press START to begin the workout.<br />
19
20<br />
USING WORKOUTS IN PROGRESS<br />
The cross-trainer MANUAL program features 16 resistance levels, with “1” being the easiest and “16” being the most<br />
difficult. The cross-trainer RANDOM, SLOPE, INTERVAL, PEAK, and CHALLENGE programs feature 9 difficulty levels,<br />
with “1” being the easiest and “9” being the most difficult. While a workout is in progress, it is possible to change the<br />
level of the overall workout. To do so, simply press the UP or DOWN arrow keys repeatedly until the DATA DISPLAY<br />
window shows the desired level. That change remains in effect for the entire workout or until the level is changed again.<br />
NOTE: The cross-trainer features speed-dependent braking resistance. For a set resistance level on the monitor,<br />
the resistance increases with the user’s speed. The computer makes no adjustments to maintain the resistance level<br />
based on the user’s speed.<br />
PAUSING A WORKOUT<br />
To pause a workout-in-progress, press the STOP key, or simply stop pedaling for 25 seconds. A workout can remain in<br />
pause mode for a maximum duration of five minutes. If a paused workout is not resumed before the five-minute pause<br />
duration ends, the console shuts down, and the paused workout information is lost. To resume a paused workout, press<br />
the START key or simply begin pedaling again.<br />
RESETTING A WORKOUT<br />
To reset a workout, press the STOP key, and hold it for three seconds. This deletes the current workout and makes<br />
it possible to set up a new workout.<br />
REVIEWING A COMPLETED WORKOUT<br />
When a workout reaches the end of its duration, the console emits four consecutive beeps. At this point, it is possible to review<br />
summary data for the completed workout, including total calories burned and distance traveled, by pressing the SCROLL key<br />
and reading the results in the DATA WINDOWS. Afterward, press the STOP key to return to the workout-select mode.
USING THE HEART RATE ZONE TO MAXIMIZE WORKOUT BENEFITS<br />
Research shows that keeping the heart rate within a certain range while exercising promotes muscular and cardiovascular<br />
conditioning for maximum health benefits. This range is between 60 percent and 85 percent of a given user’s theoretical<br />
maximum heart rate. The maximum rate varies by age. To calculate it, subtract the user’s age from the number 220.<br />
For example, the theoretical maximum heart rate for a 35-year-old user would be 185 beats per minute (bpm) because<br />
220-35=185. Therefore, the optimal heart rate range or zone for a 35-year-old user would be between 111 bpm<br />
(185 x .60) and 157 bpm (185 x .85).<br />
NOTE: Consulting a fitness trainer is recommended for defining specific fitness goals and designing a workout program.<br />
To monitor the heart rate during a workout, wear the wireless chest strap and monitor heart rate on the console.<br />
SWITCHING THE CONSOLE DISPLAY TO METRIC UNITS<br />
By default, the cross-trainer’s console displays the workout statistic of distance in English units. It is possible to switch<br />
to metric units. When the console is shut down, remove the four screws that attach the console to the console support<br />
assembly column. Carefully turn the console upside down and flip the “English/Metric” switch that appears in the back<br />
of the console to the “Metric” setting. Re-attach the console to the support assembly column. Restart the cross-trainer.<br />
21
4.3 WORKOUT DESCRIPTIONS<br />
22<br />
MANUAL<br />
PURPOSE OF MANUAL WORKOUT<br />
Allows the user to be in complete control of the resistance level. The level directly corresponds with the braking system.<br />
So if the user sets the level to 9, then the braking resistance is set to 9.<br />
EXPLANATION OF TIME SEGMENTS<br />
The workout has 20 total time segments displayed in the shape of a racetrack. The first time segment is located in the lower left corner<br />
of the racetrack. The current time segment will blink to help display the amount of time left in the workout.<br />
EXPLANATION OF RESISTANCE LEVEL<br />
<strong>Manual</strong> is the only workout where the levels are the actual resistance levels of the eddy current brake. The resistance level is displayed<br />
in the first column. There are 1 - 16 resistance levels to choose from. Each LED light in the column represents 2 levels. The below<br />
resistance level column is either at level 7 or 8. The resistance can be adjusted from 1 - 16 at any time during the workout by pressing<br />
the UP and DOWN ARROW keys.<br />
RESISTANCE LEVEL<br />
15-16<br />
13-14<br />
11-12<br />
9-10<br />
7-8<br />
5-6<br />
3-4<br />
1-2<br />
14 13 12 11<br />
15 10<br />
16 9<br />
17 8<br />
18 7<br />
19 6<br />
20 5<br />
1 2 3 4<br />
TIME SEGMENTS
PEAK<br />
PURPOSE OF PEAK WORKOUT<br />
Maintains a constant resistance level throughout the workout. Intended to burn fat.<br />
EXPLANATION OF TIME SEGMENTS<br />
The workout has 16 total time segments, although the workout profile window can only display 8 segments at a time. The workout<br />
profile begins by displaying the first half of the workout, or 1 - 8 time segments. Once the eighth time segment is completed, the final<br />
9 - 16 segments will be displayed. The current workout time segment will blink to show the active interval.<br />
EXPLANATION OF SEGMENT DIFFICULTY LEVEL<br />
The segment difficulty level is predetermined and will always be displayed as shown below.<br />
EXPLANATION OF OVERALL WORKOUT DIFFICULTY LEVEL<br />
During a workout, the overall workout difficult level can be adjusted. There are 1 - 9 program difficulty levels and each has<br />
a corresponding resistance level range. See difficulty level table for reference. When the overall difficulty level is adjusted,<br />
there will be no visual change to the workout profile display.<br />
SEGMENT<br />
DIFFICULTY (VISUAL)<br />
8<br />
7<br />
6<br />
5<br />
4<br />
3<br />
2<br />
1<br />
1 2 3 4 5 6 7 8 9 10 11 12 13 14 15 16<br />
TIME SEGMENTS<br />
23
24<br />
RANDOM<br />
PURPOSE OF RANDOM WORKOUT<br />
Provides a completely random workout profile of hills and valleys every time the user selects this workout. Endless variety<br />
reduces boredom.<br />
EXPLANATION OF TIME SEGMENTS<br />
The workout has 16 total time segments, although the workout profile window can only display 8 segments at a time. The workout<br />
profile begins by displaying the first half of the workout, or 1 - 8 time segments. Once the eighth time segment is completed, the final<br />
9 - 16 segments will be displayed. The current workout time segment will blink to show the active interval.<br />
EXPLANATION OF SEGMENT DIFFICULTY LEVEL<br />
The segment difficulty level is predetermined and will always be displayed as shown below.<br />
EXPLANATION OF OVERALL WORKOUT DIFFICULTY LEVEL<br />
During a workout, the overall workout difficult level can be adjusted. There are 1 - 9 program difficulty levels and each has<br />
a corresponding resistance level range. See difficulty level table for reference. When the overall difficulty level is adjusted,<br />
there will be no visual change to the workout profile display.<br />
SEGMENT<br />
DIFFICULTY (VISUAL)<br />
8<br />
7<br />
6<br />
5<br />
4<br />
3<br />
2<br />
1<br />
1 2 3 4 5 6 7 8 9 10 11 12 13 14 15 16<br />
TIME SEGMENTS
SLOPE<br />
PURPOSE OF SLOPE WORKOUT<br />
Gradually increases resistance so user is less aware of the physical demand. Helps user slowly build-up to higher resistance levels<br />
and improve cardiovascular endurance.<br />
EXPLANATION OF TIME SEGMENTS<br />
The workout has 16 total time segments, although the workout profile window can only display 8 segments at a time. The workout<br />
profile begins by displaying the first half of the workout, or 1 - 8 time segments. Once the eighth time segment is completed, the final<br />
9 - 16 segments will be displayed. The current workout time segment will blink to show the active interval.<br />
EXPLANATION OF SEGMENT DIFFICULTY LEVEL<br />
The segment difficulty level is predetermined and will always be displayed as shown below.<br />
EXPLANATION OF OVERALL WORKOUT DIFFICULTY LEVEL<br />
During a workout, the overall workout difficult level can be adjusted. There are 1 - 9 program difficulty levels and each has<br />
a corresponding resistance level range. See difficulty level table for reference. When the overall difficulty level is adjusted,<br />
there will be no visual change to the workout profile display.<br />
SEGMENT<br />
DIFFICULTY (VISUAL)<br />
8<br />
7<br />
6<br />
5<br />
4<br />
3<br />
2<br />
1<br />
1 2 3 4 5 6 7 8 9 10 11 12 13 14 15 16<br />
TIME SEGMENTS<br />
25
26<br />
INTERVAL<br />
PURPOSE OF INTERVAL WORKOUT<br />
Combines alternating hills and valleys of high and low resistance levels. Raising and lowering the heart rate in this manner is proven<br />
to efficiently promote fat burn and cardiovascular endurance.<br />
EXPLANATION OF TIME SEGMENTS<br />
The workout has 16 total time segments, although the workout profile window can only display 8 segments at a time. The workout<br />
profile begins by displaying the first half of the workout, or 1 - 8 time segments. Once the eighth time segment is completed, the final<br />
9 - 16 segments will be displayed. The current workout time segment will blink to show the active interval.<br />
EXPLANATION OF SEGMENT DIFFICULTY LEVEL<br />
The segment difficulty level is predetermined and will always be displayed as shown below.<br />
EXPLANATION OF OVERALL WORKOUT DIFFICULTY LEVEL<br />
During a workout, the overall workout difficult level can be adjusted. There are 1 - 9 program difficulty levels and each has<br />
a corresponding resistance level range. See difficulty level table for reference. When the overall difficulty level is adjusted,<br />
there will be no visual change to the workout profile display.<br />
SEGMENT<br />
DIFFICULTY (VISUAL)<br />
8<br />
7<br />
6<br />
5<br />
4<br />
3<br />
2<br />
1<br />
1 2 3 4 5 6 7 8 9 10 11 12 13 14 15 16<br />
TIME SEGMENTS
CHALLENGE<br />
PURPOSE OF CHALLENGE WORKOUT<br />
Maintains a high resistance level throughout the workout. Challenges the user to a high intensity workout that promotes<br />
cardiovascular endurance.<br />
EXPLANATION OF TIME SEGMENTS<br />
The workout has 16 total time segments, although the workout profile window can only display 8 segments at a time. The workout<br />
profile begins by displaying the first half of the workout, or 1 - 8 time segments. Once the eighth time segment is completed, the final<br />
9 - 16 segments will be displayed. The current workout time segment will blink to show the active interval.<br />
EXPLANATION OF SEGMENT DIFFICULTY LEVEL<br />
The segment difficulty level is predetermined and will always be displayed as shown below.<br />
EXPLANATION OF OVERALL WORKOUT DIFFICULTY LEVEL<br />
During a workout, the overall workout difficult level can be adjusted. There are 1 - 9 program difficulty levels and each has<br />
a corresponding resistance level range. See difficulty level table for reference. When the overall difficulty level is adjusted,<br />
there will be no visual change to the workout profile display.<br />
SEGMENT<br />
DIFFICULTY (VISUAL)<br />
8<br />
7<br />
6<br />
5<br />
4<br />
3<br />
2<br />
1<br />
1 2 3 4 5 6 7 8 9 10 11 12 13 14 15 16<br />
TIME SEGMENTS<br />
27
4.4 USING THE WORKOUTS (CHART)<br />
The following charts will help you set up and begin the various workout programs. First, select a workout using the specific<br />
workout key. Then, use the Arrows to enter data as prompted. The display will prompt for any additional information that may<br />
be needed for the new workout.<br />
28<br />
WORKOUT SELECTIONS<br />
MANUAL<br />
Enter time<br />
Enter weight<br />
Enter level<br />
Begin workout<br />
PEAK<br />
Enter time<br />
Enter weight<br />
Enter level<br />
Begin workout<br />
RANDOM<br />
Enter time<br />
Enter weight<br />
Enter level<br />
Begin workout<br />
SLOPE<br />
Enter time<br />
Enter weight<br />
Enter level<br />
Begin workout<br />
INTERVAL<br />
Enter time<br />
Enter weight<br />
Enter level<br />
Begin workout<br />
CHALLENGE<br />
Enter time<br />
Enter weight<br />
Enter level<br />
Begin workout
5 SERVICE AND TECHNICAL DATA<br />
5.1 PREVENTATIVE MAINTENANCE TIPS<br />
The cross-trainer is backed by engineering excellence and is one of the most rugged and trouble-free pieces of exercise<br />
equipment on the market today. The manufacturer’s products have proven to be durable in health clubs, colleges, military<br />
facilities, and other locations the world over. This same technology, engineering expertise, and reliability have gone into the<br />
cross-trainer.<br />
NOTE: The safety of the equipment can be maintained only if the equipment is examined regularly for damage or wear.<br />
If maintenance is required, keep the equipment out of use until defective parts are repaired or replaced.<br />
Pay special attention to parts that are subject to wear as outlined in the Preventive Maintenance Schedule.<br />
The following preventive maintenance tips will keep the cross-trainer operating at peak performance:<br />
• Locate the cross-trainer in a cool, dry place.<br />
• Clean the top surface of the pedals regularly.<br />
• Keep the display console free of fingerprints and salt build-up caused by sweat.<br />
• Use a 100% cotton cloth, lightly moistened with water and a mild liquid cleaning product, to clean the cross-trainer.<br />
Other fabrics, including paper towels, may scratch the surface. Do not use ammonia or acid-based cleaners.<br />
• Long fingernails may damage or scratch the surface of the console; use the pad of the finger to press the selection<br />
buttons on the console.<br />
• Clean the housing thoroughly on a regular basis.<br />
NOTE: A non-abrasive cleaner and soft cotton cloth are strongly recommended for cleaning the exterior of the unit.<br />
At no time should cleaner be applied directly to any part of the equipment; apply the non-abrasive cleaner<br />
on a soft cloth, and then wipe the unit.<br />
29
5.2 PREVENTATIVE MAINTENANCE SCHEDULE<br />
Follow the schedule below to ensure proper operation of the product.<br />
ITEM WEEKLY MONTHLY BI-ANNUALLY ANNUALLY<br />
Display Console C I<br />
Console Mounting Bolts I<br />
Frame C I<br />
Plastic Covers<br />
KEY: C=Clean; I=Inspect<br />
C I<br />
5.3 TROUBLESHOOTING THE WIRELESS HEART RATE CHEST STRAP<br />
30<br />
HEART RATE READING IS ERRATIC OR ABSENT ENTIRELY<br />
• Repeat the electrode moistening procedure on the chest strap. See Section 2.4, titled The Wireless Heart Rate<br />
Chest Strap for details. The electrodes must remain wet to pick up and transmit accurate heart rate readings.<br />
• Make sure the electrodes are flat against the skin.<br />
• Wash the belt transmitter regularly with mild soap and water.<br />
• Make sure the chest strap transmitter is within three feet (91 centimeters) of the heart rate receiver.<br />
• The chest strap is battery-operated and will stop functioning when the battery runs out. Contact Customer<br />
Support Services for instructions on how to have the chest strap replaced. See Section 5.4, titled How to Obtain<br />
Product Service
5.4 HOW TO OBTAIN PRODUCT SERVICE<br />
1. Verify the symptom and review the operating instructions. The problem may be unfamiliarity with the product<br />
and its features and workouts.<br />
2. Locate and document the serial number of the unit. The serial number plate is located on the front stabilizer,<br />
below the shroud.<br />
3. Contact Customer Support Services via the Web at: www.lifefitness.com, or call the nearest Customer Support<br />
Services group:<br />
For Product Service within<br />
the United States and Canada:<br />
Telephone: (+1) 847.451.0036<br />
FAX: (+1) 847.288.3702<br />
Toll-free telephone: 800.351.3737<br />
For Product Service<br />
Internationally:<br />
<strong>Life</strong> <strong>Fitness</strong> Europe GmbH<br />
Telephone: (+49) 089.317.751.66<br />
FAX: (+49) 089.317.751.38<br />
<strong>Life</strong> <strong>Fitness</strong> (UK) LTD<br />
Telephone: (+44) 1353.665507<br />
FAX: (+44) 1353.666018<br />
<strong>Life</strong> <strong>Fitness</strong> Atlantic BV<br />
<strong>Life</strong> <strong>Fitness</strong> Benelux<br />
Telephone: +31 (0) 180 64 66 66<br />
FAX: +31 (0) 180 64 66 99<br />
<strong>Life</strong> <strong>Fitness</strong> Italia S.R.L.<br />
Telephone: (+39) 0472.835.470<br />
FAX: (+39) 0472.833.150<br />
Toll-free telephone: 800.438836<br />
<strong>Life</strong> <strong>Fitness</strong> Vertriebs GmbH<br />
Telephone: (+43) 1615.7198<br />
FAX: (+43) 1615.7198.20<br />
<strong>Life</strong> <strong>Fitness</strong> Asia Pacific Ltd<br />
Telephone: (+852) 2891.6677<br />
FAX: (+852) 2575.6001<br />
<strong>Life</strong> <strong>Fitness</strong> Latin America<br />
and Caribbean<br />
Telephone: (+1) 847.288.3964<br />
FAX: (+1) 847 288.3886<br />
<strong>Life</strong> <strong>Fitness</strong> Brazil<br />
Telephone: (+55) 11.7295.2217<br />
FAX: (+55) 11.7295.2218<br />
<strong>Life</strong> <strong>Fitness</strong> Japan<br />
Telephone: (+81) 3.3359.4306<br />
FAX: (+81) 3.3359.4307<br />
<strong>Life</strong> <strong>Fitness</strong> Iberia<br />
Telephone : (+34) 93 672 4660<br />
FAX : (+34) 93 672 4670<br />
31
6 WARRANTY INFORMATION<br />
WHAT IS COVERED:<br />
This <strong>Life</strong> <strong>Fitness</strong> consumer product ("Product") is warranted to be free of all defects in material and workmanship.<br />
WHO IS COVERED:<br />
The original purchaser or any person receiving a newly purchased Product as a gift from the original purchaser.<br />
HOW LONG IS IT COVERED:<br />
Residential: All electrical and mechanical components and labor are covered, after the date of purchase, as listed on the chart<br />
at the end of this section.<br />
Non-Residential: Warranty void (this Product is intended for residential use only).<br />
WHO PAYS SHIPPING & INSURANCE FOR SERVICE:<br />
If the Product or any warranted part must be returned to a service facility for repairs, <strong>Life</strong> <strong>Fitness</strong> will pay all shipping and insurance<br />
charges during the warranty period (within the United States only). The purchaser is responsible for shipping and insurance charges<br />
after the warranty has expired.<br />
WHAT WE WILL DO TO CORRECT COVERED DEFECTS:<br />
We will ship to you any new or rebuilt replacement part or component, or, at our option, replace the Product. Such replacement parts<br />
are warranted for the remaining portion of the original warranty period.<br />
WHAT IS NOT COVERED:<br />
Any failures or damage caused by unauthorized service, misuse, accident, negligence, improper assembly or installation, debris<br />
resulting from any construction activities in the Product's environment, rust or corrosion as a result of the Product's location, alterations<br />
or modifications without our written authorization or by failure on your part to use, operate and maintain the Product as set out in your<br />
<strong>User</strong> <strong>Manual</strong> ("<strong>Manual</strong>"). All terms of this warranty are void if this Product is moved beyond the continental borders of the United States<br />
of America (excluding Alaska, Hawaii and Canada) and are then subject to the terms provided by that country's local authorized <strong>Life</strong><br />
<strong>Fitness</strong> Representative.<br />
32
WHAT YOU MUST DO:<br />
Retain proof of purchase (our receipt of the attached registration card assures registration of purchase information but is not required);<br />
use, operate and maintain the Product as specified in the <strong>Manual</strong>; notify Customer Service of any defect within 10 days after discovery<br />
of the defect; if instructed, return any defective part for replacement or, if necessary, the entire Product for repair.<br />
<strong>Life</strong> <strong>Fitness</strong> reserves the right to decide whether or not a product is to be returned for repair.<br />
USER MANUAL:<br />
It is VERY IMPORTANT THAT YOU READ THE MANUAL before operating the Product. Remember to perform the periodic<br />
maintenance requirements specified in the <strong>Manual</strong> to assure proper operation and your continued satisfaction.<br />
PRODUCT REGISTRATION:<br />
Register online at www.lifefitness.com/registration. Our receipt assures that your name, address and date of purchase are on file as a<br />
registered owner of the Product. Failure to return the card will not affect your rights under this warranty. Being a registered owner assures<br />
coverage in the event you lose your proof of purchase. Please retain your proof of purchase, such as your bill of sale or receipt.<br />
HOW TO GET PARTS & SERVICE:<br />
Simply call Customer Service at 1-800-351-3737 or (+1) 847-288-3300, Monday through Friday from 8:00 a.m. to 5:00 p.m. Central<br />
Standard Time, and tell them your name, address and the serial number of your Product (consoles and frames may have separate<br />
serial numbers). They will tell you how to get a replacement part, or, if necessary, arrange for service where your Product is located.<br />
EXCLUSIVE WARRANTY:<br />
THIS LIMITED WARRANTY IS IN LIEU OF ALL OTHER WARRANTIES OF ANY KIND EITHER EXPRESSED OR IMPLIED,<br />
INCLUDING BUT NOT LIMITED TO THE IMPLIED WARRANTIES OF MERCHANTABILITY AND FITNESS FOR A PARTICULAR<br />
PURPOSE, AND ALL OTHER OBLIGATIONS OR LIABILITIES ON OUR PART. We neither assume nor authorize any person to<br />
assure for us any other obligation or liability concerning the sale of this Product. Under no circumstances shall we be liable under<br />
this warranty, or otherwise, of any damage to any person or property, including any lost profits or lost savings, for any special, indirect,<br />
secondary, incidental or consequential damages of any nature arising out of the use of or inability to use this Product. Some states<br />
do not allow the exclusion or limitation of implied warranties or of liability for incidental or consequential damages, so the above<br />
limitations or exclusions may not apply to you. Warranties may vary outside the U.S. Contact <strong>Life</strong> <strong>Fitness</strong> for details.<br />
33
CHANGES IN WARRANTY NOT AUTHORIZED:<br />
No one is authorized to change, modify or extend the terms of this limited warranty.<br />
EFFECT OF U.S. STATE LAWS:<br />
This warranty gives you specific legal rights and you may have other rights which vary from state to state.<br />
34<br />
MODEL LIFETIME 5 YEARS 3 YEARS 1 YEAR<br />
<strong>X3</strong>0 Frame N/A Electrical Parts & Labor<br />
Mechanical Parts
7 SPECIFICATIONS<br />
Designed use: Consumer<br />
Maximum user weight: 300 pounds / 136 kilograms<br />
Resistance system:<br />
CONSOLE:<br />
Eddy current<br />
Displays: DATA DISPLAYS with time, RPM, distance, calories, level, and heart rate<br />
DOT MATRIX WINDOW indicating workout profile<br />
Summaries: Time, distance<br />
WORKOUTS: Quick Start <strong>Manual</strong> Mode, Interval, Random, <strong>Manual</strong>, Peak, Slope, Challenge<br />
Resistance levels: 16<br />
Pedal size 16 inches by 7 inches / 41 centimeters by 18 centimeters<br />
Drive type: Link6, Whisper Stride<br />
Power requirements: 120V in United States<br />
220V in Europe<br />
240+V in Australia<br />
Color: Pewter Metal<br />
Charcoal gray plastics<br />
Stone gray accents<br />
35
ASSEMBLED DIMENSIONS:<br />
Length 65 inches / 165 centimeters<br />
Width 27 inches / 68 centimeters<br />
Height 62 inches / 157 centimeters<br />
Weight 242 pounds / 109 kilograms<br />
SHIPPING DIMENSIONS:<br />
Length 73 inches / 185 centimeters<br />
Width 28.5 inches / 72.5 centimeters<br />
Height 32 inches / 81 centimeters<br />
Weight 282 pounds / 127 kilograms<br />
36
<strong>Life</strong> <strong>Fitness</strong> offers a full line of premier fitness equipment for the home.<br />
TOTAL-BODY ELLIPTICAL CROSS-TRAINERS | TREADMILLS | LIFECYCLE ® EXERCISE BIKES<br />
STAIRCLIMBERS | GYM SYSTEMS<br />
5100 N. RIVER ROAD, SCHILLER PARK, ILLINOIS 60176<br />
LIFEFITNESS.COM