
You also want an ePaper? Increase the reach of your titles
YUMPU automatically turns print PDFs into web optimized ePapers that Google loves.
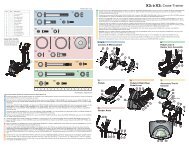
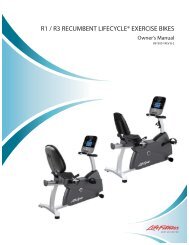
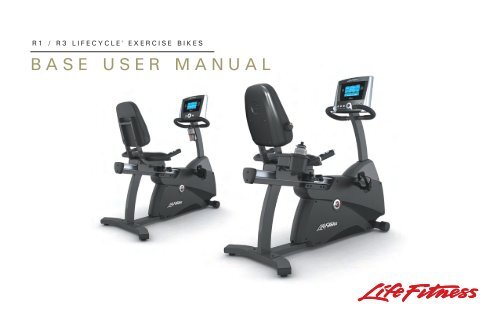
<strong>R1</strong> / <strong>R3</strong> LIFECYCLE ® EXERCISE BIKES<br />
BASE USER MANUAL
LIFE FITNESS ASIA PACIFIC LTD<br />
Room 2610, Miramar Tower<br />
132 Nathan Road<br />
Tsimshatsui, Kowloon<br />
HONG KONG<br />
LIFE FITNESS ATLANTIC BV<br />
LIFE FITNESS BENELUX<br />
Bijdorpplein 25 - 31<br />
2992 LB Barendrecht<br />
THE NETHERLANDS<br />
LIFE FITNESS DO BRAZIL<br />
Av. Dr. Dib Sauaia Neto 1478<br />
Alphaville, Barueri, SP<br />
06465-140<br />
BRAZIL<br />
LIFE FITNESS VERTRIEBS GMBH<br />
Dückegasse 7-9/3/36<br />
1220 Vienna<br />
AUSTRIA<br />
CORPORATE HEADQUARTERS<br />
5100 North River Road<br />
Schiller Park, Illinois 60176 • U.S.A.<br />
www.lifefitness.com<br />
INTERNATIONAL OFFICES<br />
LIFE FITNESS IBERIA<br />
Pol. Ind. Molí dels Frares. c/C, nº 12<br />
08620 Sant Vicenç dels Horts (Barcelona)<br />
SPAIN<br />
LIFE FITNESS EUROPE GMBH<br />
Siemensstrasse 3<br />
85716 Unterschleissheim<br />
GERMANY<br />
LIFE FITNESS ITALIA S.R.L.<br />
Via Vittorio Veneto, 57/A<br />
39042 Bressanone (Bolzano)<br />
ITALY<br />
LIFE FITNESS LATIN<br />
AMERICA <strong>and</strong> CARIBBEAN<br />
5100 North River Road<br />
Schiller Park, Illinois 60176<br />
U.S.A.<br />
8115901 Rev A-1<br />
07/06<br />
LIFE FITNESS UK LTD<br />
Queen Adelaide<br />
Ely, Cambs CB7 4UB<br />
UNITED KINGDOM<br />
LIFE FITNESS JAPAN<br />
Nippon Brunswick Bldg., #8F<br />
5-27-7 Sendagaya<br />
Shibuya-Ku, Tokyo<br />
JAPAN 151-0051<br />
1
Before using this product, it is essential to read this<br />
ENTIRE user manual <strong>and</strong> ALL installation instructions.<br />
This will help in setting up the equipment quickly<br />
<strong>and</strong> in instructing others on how to use it correctly <strong>and</strong> safely.<br />
FCC Warning - Possible Radio / Television Interference<br />
NOTE: This equipment has been tested <strong>and</strong> found to comply with the limits for a Class B digital device, pursuant to part<br />
15 of the FCC rules. These limits are designed to provide reasonable protection against harmful interference in a residential<br />
installation. This equipment generates, uses <strong>and</strong> can radiate radio frequency energy, <strong>and</strong> if not installed <strong>and</strong> used<br />
in accordance with the user manual, may cause harmful interference to radio communications. However, there is no<br />
guarantee that the interference will not occur in a particular installation. If this equipment does cause harmful interference<br />
to radio or television reception, which can be determined by turning the equipment off <strong>and</strong> on, the user is encouraged<br />
to try to correct the interference by one or more of the following measures:<br />
• Reorient or relocate the receiving antenna.<br />
• Increase the separation between the equipment <strong>and</strong> the receiver.<br />
• Connect the equipment into an outlet on a circuit different from that to which the receiver is connected.<br />
• Consult the dealer or an experienced radio/TV technician for help.<br />
Class HB (Home): Domestic use. Not suitable for therapeutic purposes.<br />
CAUTION: Any changes or modifications to this equipment could void the product warranty.<br />
Any service, other than cleaning or user maintenance, must be performed by an authorized service representative.<br />
There are no user-serviceable parts.<br />
2
This User Manual describes the functions of the following products:<br />
<strong>Life</strong> <strong>Fitness</strong> recumbent exercise bikes:<br />
<strong>R1</strong>, <strong>R3</strong><br />
See Section 5, titled Specifications in this manual for product-specific features.<br />
Statement of Purpose: The exercise bike is a machine that simulates the movements of riding a bicycle at various<br />
speeds <strong>and</strong> levels of resistance.<br />
Health-related injuries may result from incorrect or excessive use of exercise equipment. The manufacturer<br />
STRONGLY recommends seeing a physician for a complete medical exam before undertaking an exercise program,<br />
particularly if the user has a family history of high blood pressure or heart disease; or is over the age of<br />
45; or smokes, has high cholesterol, is obese, or has not exercised regularly in the past year. The manufacturer<br />
also recommends consulting a fitness professional on the correct use of this product.<br />
If, at any time while exercising, the user experiences faintness, dizziness, pain, or shortness of breath, he or<br />
she must stop immediately.<br />
3
TABLE OF CONTENTS<br />
1. Getting Started . . . . . . . . . . . . . . . . . . . . . . . . . . . . . . . . . . . . . . . . . . . . . . . . . . . . . . . . . . . . . . . . . . . . . . . . . . . . . . . .5<br />
1.1 Important Safety Instructions . . . . . . . . . . . . . . . . . . . . . . . . . . . . . . . . . . . . . . . . . . . . . . . . . . . . . . . . . . . . . . . . . . . . . .5<br />
1.2 Set-up . . . . . . . . . . . . . . . . . . . . . . . . . . . . . . . . . . . . . . . . . . . . . . . . . . . . . . . . . . . . . . . . . . . . . . . . . . . . . . . . . . . . . . .7<br />
2.<br />
Where to place the Exercise Bike // How to stabilize the Exercise Bike // How to Adjust the Seat to Ensure Correct<br />
Biomechanical Positioning // How to Adjust the Pedal Straps // Starting Up the Bike<br />
Features . . . . . . . . . . . . . . . . . . . . . . . . . . . . . . . . . . . . . . . . . . . . . . . . . . . . . . . . . . . . . . . . . . . . . . . . . . . . . . . . . . . . .10<br />
2.1 The Reading Rack, Accessory Tray <strong>and</strong> Water Bottle Holder . . . . . . . . . . . . . . . . . . . . . . . . . . . . . . . . . . . . . . . . . . . . . .10<br />
2.2 Heart Rate Monitoring . . . . . . . . . . . . . . . . . . . . . . . . . . . . . . . . . . . . . . . . . . . . . . . . . . . . . . . . . . . . . . . . . . . . . . . . . . .11<br />
The H<strong>and</strong> Pulse Sensor System<br />
3. Service <strong>and</strong> Technical Data . . . . . . . . . . . . . . . . . . . . . . . . . . . . . . . . . . . . . . . . . . . . . . . . . . . . . . . . . . . . . . . . . . . . . . .12<br />
3.1 Preventative Maintenance Tips . . . . . . . . . . . . . . . . . . . . . . . . . . . . . . . . . . . . . . . . . . . . . . . . . . . . . . . . . . . . . . . . . . . .12<br />
3.2 Preventative Maintenance Schedule . . . . . . . . . . . . . . . . . . . . . . . . . . . . . . . . . . . . . . . . . . . . . . . . . . . . . . . . . . . . . . . .13<br />
3.3 Troubleshooting the H<strong>and</strong> Pulse Sensors . . . . . . . . . . . . . . . . . . . . . . . . . . . . . . . . . . . . . . . . . . . . . . . . . . . . . . . . . . . .13<br />
3.4 Troubleshooting the Exercise Bike . . . . . . . . . . . . . . . . . . . . . . . . . . . . . . . . . . . . . . . . . . . . . . . . . . . . . . . . . . . . . . . . . .14<br />
3.5 How to Obtain Product Service . . . . . . . . . . . . . . . . . . . . . . . . . . . . . . . . . . . . . . . . . . . . . . . . . . . . . . . . . . . . . . . . . . . .15<br />
4. Warranty Information . . . . . . . . . . . . . . . . . . . . . . . . . . . . . . . . . . . . . . . . . . . . . . . . . . . . . . . . . . . . . . . . . . . . . . . . . . . .16<br />
5. Specifications . . . . . . . . . . . . . . . . . . . . . . . . . . . . . . . . . . . . . . . . . . . . . . . . . . . . . . . . . . . . . . . . . . . . . . . . . . . . . . . . .19<br />
© 2006 <strong>Life</strong> <strong>Fitness</strong>, a division of Brunswick Corporation. All rights reserved. <strong>Life</strong> <strong>Fitness</strong> is a registered trademark of Brunswick Corporation. Any use of these<br />
trademarks, without the express written consent of <strong>Life</strong> <strong>Fitness</strong> is forbidden.<br />
4
1 GETTING STARTED<br />
1.1 IMPORTANT SAFETY INSTRUCTIONS<br />
SAFETY WARNING: The safety of the product can be maintained only if it is examined regularly<br />
for damage <strong>and</strong> wear. See Preventative Maintenance section for details.<br />
• Before using this product, it is essential to read this ENTIRE user manual <strong>and</strong> ALL instructions. The exercise bike is intended for<br />
use solely in the manner described in this manual.<br />
• Always follow the console instructions for proper operation.<br />
• Close supervision is necessary when used by or near children, invalids or disabled persons.<br />
• If an exercise bike does not function properly after it has been dropped, damaged, or even partially immersed in water, contact<br />
Customer Support Services for assistance.<br />
• Never insert objects into any opening in the exercise bike. If an object should drop inside, carefully retrieve it. If the item is<br />
beyond reach, contact Customer Support Services.<br />
• Never place liquids of any type directly on the unit, except in an accessory tray. Containers with lids are recommended.<br />
• Do not use the exercise bike outdoors, near swimming pools or in areas of high humidity.<br />
• Keep all loose clothing, shoelaces, <strong>and</strong> towels away from the exercise bike pedals.<br />
• Keep the area around the exercise bike clear of any obstructions, including walls <strong>and</strong> furniture.<br />
• Always be careful <strong>and</strong> exercise caution when mounting or dismounting the exercise bike. Use the h<strong>and</strong>lebar whenever additional<br />
stability is required.<br />
• Wear shoes with rubber or high-traction soles. Do not use shoes with heels, leather soles, cleats or spikes. Do not use the bike in<br />
bare feet.<br />
• Do not tip the exercise bike on its side during operation.<br />
5
• Keep h<strong>and</strong>s <strong>and</strong> feet away from all moving parts.<br />
• To ensure proper functioning of this product, do not install attachments or accessories that are not provided or<br />
recommended by the manufacturer.<br />
• Use this product in a well-ventillated area.<br />
• Use this product on a solid, level surface.<br />
• Make sure that all components are fastened securely. These include the seat post, saddle, h<strong>and</strong>lebars, <strong>and</strong> pedals.<br />
6<br />
SAVE THESE INSTRUCTIONS FOR FUTURE REFERENCE.
1.2 SETUP<br />
Read the entire User Manual before setting up the exercise bike.<br />
WHERE TO PLACE THE EXERCISE BIKE<br />
Following all safety instructions in Section 1.1, move the bike to the location in which it will be used. See Section 5, titled<br />
Specifications, for the dimensions of the footprint. Allow a distance of four feet, or 120 centimeters, between the bike <strong>and</strong><br />
other objects or surfaces on either side.<br />
HOW TO STABILIZE THE EXERCISE BIKE<br />
After placing the bike in position, check the unit's stability by attempting to rock it in all directions. Any slight rocking indicates<br />
that the unit must be leveled. Determine which foot is not resting completely on the floor. Loosen the jam nut with<br />
an open-end 17mm wrench, <strong>and</strong> rotate the stabilizing foot to lower it. Verify that the bike is stable, <strong>and</strong> repeat the adjustment<br />
as necessary until the unit no longer rocks. Lock the adjustment by tightening the jam nut against the stabilizer bar.<br />
7
HOW TO ADJUST THE SEAT TO ENSURE CORRECT BIOMECHANICAL POSITIONING<br />
Proper seat positioning minimizes unecessary leg muscle fatigue. To determine whether or not the seat requires adjustment,<br />
sit on it <strong>and</strong> place the balls of the feet on the pedals. The knee should bend slightly when the pedal is at the furthest<br />
point in its rotation, relative to the body. The user should be able to pedal without locking the knees or shifting in the seat.<br />
Adjusting the seat: Lift the spring-loaded adjusting h<strong>and</strong>le located on the right side of the seat. Slide the seat forward<br />
or backward as necessary to the proper position <strong>and</strong> release the pin to complete engagement. Gently rock the seat forward<br />
<strong>and</strong> backward to ensure that it is locked into place. Check the seat distance again <strong>and</strong> readjust it if necessary.<br />
NOTE: If the seat carriage rocks excessively, use a wrench to loosen the jam nut (A) on either side of the seat carriage.<br />
With another wrench, tighten the adjustment roller on the inside of the carriage until it is snug, but do not over-tighten it.<br />
Then, while holding the roller in place, tighten the lock nut. Repeat the procedure for the other side of the seat carriage.<br />
8<br />
CAUTION: Do not attempt to adjust the seat while pedaling the bike. Doing so, or failing to insert the seat pin<br />
completely may result in an uncomfortable workout or cause injury.
HOW TO ADJUST THE PEDAL STRAPS<br />
The bike pedal safety straps keep the user's shoes on the pedals during a workout. The<br />
straps should fit comfortably, but they also should be tight enough to prevent shoes from<br />
slipping at any point in the pedaling rotation. Before working out, the user should test <strong>and</strong><br />
adjust the tightness of the straps.<br />
The straps can be adjusted to fit a variety of shoe sizes. Each strap is held in place by a<br />
spring-loaded clip that is connected to the outer edge of each pedal. To tighten a strap, simply<br />
pull the loose end of the strap down. It automatically locks into place with each pull. To<br />
loosen a strap, press down on the top of the clip <strong>and</strong> pull the strap up. Release the clip to<br />
lock the strap into place. Test the adjustment, <strong>and</strong> change if necessary.<br />
HOW TO ADJUST THE LUMBAR SUPPORT ON THE <strong>R3</strong> RECUMBENT BIKE<br />
The back pad can be adjusted to provide additional lumbar support. Twist the knob located<br />
on the right side of the back pad clockwise to increase lumbar support. Three levels of<br />
additional lumbar support are available.<br />
STARTING UP THE BIKE<br />
See Section 5, titled Specifications, for power requirements. Insert the AC adapter into an<br />
electrical outlet that has been properly installed <strong>and</strong> grounded in accordance with all local<br />
codes <strong>and</strong> ordinances.<br />
The exercise bike comes with a st<strong>and</strong>ard power supply for the U.S., or a power supply<br />
with country-specific line cords.<br />
Insert the power adapter jack into the barrel plug on the bottom of the exercise bike. Then insert the power supply into the wall outlet.<br />
Make sure the cord is routed so that it doesn't bind <strong>and</strong> will not be walked on.<br />
Check that the console lights up. If not, recheck the plug <strong>and</strong> wall connections <strong>and</strong> make sure the wall outlet has power.<br />
To power up the exercise bike, simply start pedaling. Once the unit’s power is on, the console display lights up, making it possible to<br />
select a workout. The <strong>R1</strong> display illuminates when the unit is plugged in.<br />
NOTE: For customers outside the United States, please use your country specific transformer to power the unit. Please disregard the<br />
extra 120 Volt transformer located in the packaging material.<br />
9
2 FEATURES<br />
2.1 THE READING RACK, ACCESSORY TRAY AND WATER BOTTLE HOLDER<br />
The Accessory Tray (A) (<strong>R3</strong> only), which is mounted to the right ot the seat, provides storage trays with space for items<br />
such as water bottles, personal stereos, <strong>and</strong> cell phones. A Water Bottle Holder (B) (<strong>R1</strong> only) is located on the<br />
monocolumn.<br />
Additionally, an integrated Reading Rack (C) for supporting a book or magazine is located at the base of the console.<br />
Model <strong>R3</strong> Model <strong>R1</strong><br />
10
2.2 HEART RATE MONITORING<br />
THE HAND PULSE SENSOR SYSTEM<br />
The h<strong>and</strong> pulse sensors (A) are the built-in heart rate monitoring system on the exercise bike. During a workout, grasp<br />
the sensors that are set into the h<strong>and</strong>lebars. For an accurate reading, use a comfortable grip. The console displays the<br />
heart rate after 15 to 20 seconds.<br />
Model <strong>R3</strong> Model <strong>R1</strong><br />
NOTE: Excessively squeezing the h<strong>and</strong> pulse sensors will not improve the heart rate reading.<br />
11
3 SERVICE AND TECHNICAL DATA<br />
3.1 PREVENTATIVE MAINTENANCE TIPS<br />
The exercise bike is backed by engineering excellence <strong>and</strong> is one of the most rugged <strong>and</strong> trouble-free pieces of exercise<br />
equipment on the market today. <strong>Life</strong> <strong>Fitness</strong> products have proven to be durable in health clubs, colleges, military<br />
facilities, <strong>and</strong> other locations the world over.<br />
NOTE: The safety of the equipment can be maintained only if the equipment is examined regularly for damage or wear.<br />
If maintenance is required, keep the equipment out of use until defective parts are repaired or replaced. Pay special<br />
attention to parts that are subject to wear as outlined in the Preventive Maintenance Schedule.<br />
The following preventive maintenance tips will keep the exercise bike operating at peak performance:<br />
• Locate the exercise bike in a cool, dry place.<br />
• Clean the top surface of the pedals regularly.<br />
• Keep the display console free of fingerprints <strong>and</strong> salt build-up caused by sweat.<br />
• Use a 100% cotton cloth, lightly moistened with water <strong>and</strong> mild liquid cleaning product, to clean the exercise<br />
bike. Other fabrics, including paper towels, may scratch the surface. Do not use ammonia or acid-based<br />
cleaners.<br />
• Long fingernails may damage or scratch the surface of the console; use the pad of the finger to press the selection<br />
buttons on the console.<br />
• Clean the housing thoroughly on a regular basis.<br />
NOTE: A non-abrasive cleaner <strong>and</strong> soft cotton cloth are strongly recommended for cleaning the exterior of the unit. At<br />
no time should cleaner be applied directly to any part of the equipment; apply the non-abrasive cleaner on a soft cloth,<br />
<strong>and</strong> then wipe the unit.<br />
12
3.2 PREVENTATIVE MAINTENANCE SCHEDULE<br />
Follow the schedule below to ensure proper operation of the product.<br />
ITEM WEEKLY MONTHLY BI-ANNUALLY ANNUALLY<br />
Display Console C I<br />
Console Mounting Bolts I<br />
Accessory Tray C I<br />
Frame C I<br />
Plastic Covers C I<br />
Pedals <strong>and</strong> Straps C I<br />
Contact Heart Rate Sensors C<br />
KEY: C=Clean; I=Inspect<br />
3.3 TROUBLESHOOTING THE HAND PULSE SENSORS<br />
If the heart rate reading is erratic or missing, do the following:<br />
• Dry moist h<strong>and</strong>s to prevent slipping.<br />
• Apply h<strong>and</strong>s to both sensors, one in each h<strong>and</strong>.<br />
• Grasp the sensors firmly.<br />
• Apply constant pressure around the sensors.<br />
13
3.4 TROUBLESHOOTING THE EXERCISE BIKE<br />
Problem Solution<br />
I hear a clicking noise while I'm pedaling. Use the wrench that was included with the bike to ensure the pedals<br />
are assembled as tight as possible.<br />
The seat wobbles on my recumbent bike. The seat carriage can be adjusted if it is too tight <strong>and</strong> does not slide<br />
freely or if it is too loose <strong>and</strong> rocks excessively.<br />
To adjust the fit of the carriage when there is excessive rocking use a<br />
wrench to loosen the jam nut on either side of the seat carriage. With<br />
another wrench, tighten the adjustment roller on the inside of the<br />
carriage until is it snug, but do not over-tighten. Then, while holding the<br />
roller in place, tighten the lock nut. Repeat the procedure for the other<br />
side of the carriage.<br />
To adjust the fit of the carriage when it does not slide freely, use a<br />
wrench to loosen the jam nut on either side of the seat carriage. With<br />
another wrench, loosen the adjustment roller on the inside of the<br />
carriage until it can move freely, but do not excessively loosen. Then,<br />
while holding the roller in place, tighten the lock nut. Repeat the<br />
procedure for the other side of the seat carriage.<br />
14
3.5 HOW TO OBTAIN PRODUCT SERVICE<br />
1. Verify the symptom <strong>and</strong> review the operating instructions. The problem may be unfamiliarity with the product <strong>and</strong> its<br />
features <strong>and</strong> workouts.<br />
2. Locate <strong>and</strong> document the serial number of the unit. The serial number plate is located on the front stabilizer, below<br />
the shroud.<br />
3. Contact Customer Support Services via the Web at: www.lifefitness.com, or call the nearest Customer Support<br />
Services group:<br />
For Product Service within<br />
the United States <strong>and</strong> Canada:<br />
Telephone: (+1) 847.451.0036<br />
FAX: (+1) 847.288.3702<br />
Toll-free telephone: 800.351.3737<br />
For Product Service<br />
Internationally:<br />
<strong>Life</strong> <strong>Fitness</strong> Europe GmbH<br />
Telephone: (+49) 089.317.751.66<br />
FAX: (+49) 089.317.751.38<br />
<strong>Life</strong> <strong>Fitness</strong> (UK) LTD<br />
Telephone: (+44) 1353.665507<br />
FAX: (+44) 1353.666018<br />
<strong>Life</strong> <strong>Fitness</strong> Atlantic BV<br />
<strong>Life</strong> <strong>Fitness</strong> Benelux<br />
Telephone: +31 (0) 180 64 66 66<br />
FAX: +31 (0) 180 64 66 99<br />
<strong>Life</strong> <strong>Fitness</strong> Italia S.R.L.<br />
Telephone: (+39) 0472.835.470<br />
FAX: (+39) 0472.833.150<br />
Toll-free telephone: 800.438836<br />
<strong>Life</strong> <strong>Fitness</strong> Vertriebs GmbH<br />
Telephone: (+43) 1615.7198<br />
FAX: (+43) 1615.7198.20<br />
<strong>Life</strong> <strong>Fitness</strong> Asia Pacific Ltd<br />
Telephone: (+852) 2891.6677<br />
FAX: (+852) 2575.6001<br />
<strong>Life</strong> <strong>Fitness</strong> Latin America<br />
<strong>and</strong> Caribbean<br />
Telephone: (+1) 847.288.3964<br />
FAX: (+1) 847 288.3886<br />
<strong>Life</strong> <strong>Fitness</strong> Brazil<br />
Telephone: (+55) 11.7295.2217<br />
FAX: (+55) 11.7295.2218<br />
<strong>Life</strong> <strong>Fitness</strong> Japan<br />
Telephone: (+81) 3.3359.4306<br />
FAX: (+81) 3.3359.4307<br />
<strong>Life</strong> <strong>Fitness</strong> Iberia<br />
Telephone : (+34) 93 672 4660<br />
FAX : (+34) 93 672 4670<br />
15
4 WARRANTY INFORMATION<br />
WHAT IS COVERED:<br />
This <strong>Life</strong> <strong>Fitness</strong> consumer product ("Product") is warranted to be free of all defects in material <strong>and</strong> workmanship.<br />
WHO IS COVERED:<br />
The original purchaser or any person receiving a newly purchased Product as a gift from the original purchaser.<br />
HOW LONG IS IT COVERED:<br />
Residential: All electrical <strong>and</strong> mechanical components <strong>and</strong> labor are covered, after the date of purchase, as listed on the chart below.<br />
Non-Residential: Warranty void (this Product is intended for residential use only).<br />
WHO PAYS SHIPPING & INSURANCE FOR SERVICE:<br />
If the Product or any warranted part must be returned to a service facility for repairs, <strong>Life</strong> <strong>Fitness</strong> will pay all shipping <strong>and</strong> insurance<br />
charges during the warranty period (within the United States only). The purchaser is responsible for shipping <strong>and</strong> insurance charges<br />
after the warranty has expired.<br />
WHAT WE WILL DO TO CORRECT COVERED DEFECTS:<br />
We will ship to you any new or rebuilt replacement part or component, or, at our option, replace the Product. Such replacement parts<br />
are warranted for the remaining portion of the original warranty period.<br />
WHAT IS NOT COVERED:<br />
Any failures or damage caused by unauthorized service, misuse, accident, negligence, improper assembly or installation, debris<br />
resulting from any construction activities in the Product's environment, rust or corrosion as a result of the Product's location, alterations<br />
or modifications without our written authorization or by failure on your part to use, operate <strong>and</strong> maintain the Product as set out<br />
in your User Manual ("Manual"). All terms of this warranty are void if this Product is moved beyond the continental borders of the<br />
United States of America (excluding Alaska, Hawaii <strong>and</strong> Canada) <strong>and</strong> are then subject to the terms provided by that country's local<br />
authorized <strong>Life</strong> <strong>Fitness</strong> Representative.<br />
16
WHAT YOU MUST DO:<br />
Retain proof of purchase (our receipt of the attached registration card assures registration of purchase information but is not required);<br />
use, operate <strong>and</strong> maintain the Product as specified in the Manual; notify Customer Service of any defect within 10 days after discovery<br />
of the defect; if instructed, return any defective part for replacement or, if necessary, the entire Product for repair. <strong>Life</strong> <strong>Fitness</strong><br />
reserves the right to decide whether or not a product is to be returned for repair.<br />
USER MANUAL:<br />
It is VERY IMPORTANT THAT YOU READ THE MANUAL before operating the Product. Remember to perform the periodic maintenance<br />
requirements specified in the Manual to assure proper operation <strong>and</strong> your continued satisfaction.<br />
PRODUCT REGISTRATION:<br />
Register online at www.lifefitness.com/registration. Our receipt assures that your name, address <strong>and</strong> date of purchase are on file<br />
as a registered owner of the Product. Failure to return the card will not affect your rights under this warranty. Being a registered owner<br />
assures coverage in the event you lose your proof of purchase. Please retain your proof of purchase, such as your bill of sale or<br />
receipt.<br />
HOW TO GET PARTS & SERVICE:<br />
Simply call Customer Service at 1-800-351-3737 or (+1) 847-288-3300, Monday through Friday from 8:00 a.m. to 5:00 p.m. Central<br />
St<strong>and</strong>ard Time, <strong>and</strong> tell them your name, address <strong>and</strong> the serial number of your Product (consoles <strong>and</strong> frames may have separate<br />
serial numbers). They will tell you how to get a replacement part, or, if necessary, arrange for service where your Product is located.<br />
EXCLUSIVE WARRANTY:<br />
THIS LIMITED WARRANTY IS IN LIEU OF ALL OTHER WARRANTIES OF ANY KIND EITHER EXPRESSED OR IMPLIED,<br />
INCLUDING BUT NOT LIMITED TO THE IMPLIED WARRANTIES OF MERCHANTABILITY AND FITNESS FOR A PARTICULAR<br />
PURPOSE, AND ALL OTHER OBLIGATIONS OR LIABILITIES ON OUR PART. We neither assume nor authorize any person to<br />
assure for us any other obligation or liability concerning the sale of this Product. Under no circumstances shall we be liable under this<br />
warranty, or otherwise, of any damage to any person or property, including any lost profits or lost savings, for any special, indirect,<br />
secondary, incidental or consequential damages of any nature arising out of the use of or inability to use this Product. Some states do<br />
not allow the exclusion or limitation of implied warranties or of liability for incidental or consequential damages, so the above limitations<br />
or exclusions may not apply to you. Warranties may vary outside the U.S. Contact <strong>Life</strong> <strong>Fitness</strong> for details.<br />
17
CHANGES IN WARRANTY NOT AUTHORIZED:<br />
No one is authorized to change, modify or extend the terms of this limited warranty.<br />
EFFECT OF U.S. STATE LAWS:<br />
This warranty gives you specific legal rights <strong>and</strong> you may have other rights which vary from state to state.<br />
18<br />
MODEL LIFETIME 5 YEARS 3 YEARS 1 YEAR<br />
<strong>R1</strong> Frame N/A Electrical Parts & Labor<br />
Mechanical Parts<br />
<strong>R3</strong> Frame N/A Electrical Parts & Labor<br />
Mechanical Parts
5 SPECIFICATIONS<br />
Designed use: Home<br />
Maximum user weight: <strong>R3</strong> <strong>R1</strong><br />
400 pounds / 181 kilograms 300 pounds / 136 kilograms<br />
Heart rate monitor: H<strong>and</strong> pulse sensors<br />
Pedal size 4.5 inches / 11.5 centimeters<br />
Drive type: Poly-V belt-drive<br />
Power requirements: <strong>R3</strong> <strong>R1</strong><br />
None; bike is self-powered 120V in U.S<br />
220V in Europe<br />
240+V in Australia<br />
Accessory Tray: <strong>R3</strong> <strong>R1</strong><br />
St<strong>and</strong>ard None<br />
Color: Pewter Metal<br />
Charcoal Plastic Shrouds<br />
Stone Plastic Accents<br />
19
<strong>R1</strong> ASSEMBLED DIMENSIONS:<br />
Length 56.5 inches / 143.5 centimeters<br />
Width 25.75 inches / 65.4 centimeters<br />
Height 54 inches / 137 centimeters<br />
Weight 147 pounds / 67 kilograms<br />
<strong>R1</strong> SHIPPING DIMENSIONS:<br />
Length 59.84 inches / 152 centimeters<br />
Width 17.91 inches / 45.5 centimeters<br />
Height 29.92 inches / 76 centimeters<br />
Weight 172 pounds / 78 kilograms<br />
<strong>R3</strong> ASSEMBLED DIMENSIONS:<br />
Length 56.5 inches / 143.5 centimeters<br />
Width 25.75 inches / 65.4 centimeters<br />
Height 54 inches / 137 centimeters<br />
Weight 147 pounds / 67 kilograms<br />
<strong>R3</strong> SHIPPING DIMENSIONS:<br />
Length 59.84 inches / 152 centimeters<br />
Width 17.91 inches / 45.5 centimeters<br />
Height 29.92 inches / 76 centimeters<br />
Weight 172 pounds / 78 kilograms<br />
20
<strong>Life</strong> <strong>Fitness</strong> offers a full line of premier fitness equipment for the home.<br />
TOTAL-BODY ELLIPTICAL CROSS-TRAINERS | TREADMILLS | LIFECYCLE ® EXERCISE BIKES<br />
STAIRCLIMBERS | GYM SYSTEMS<br />
5100 N. RIVER ROAD, SCHILLER PARK, ILLINOIS 60176<br />
LIFEFITNESS.COM<br />
©2006 <strong>Life</strong> <strong>Fitness</strong>, a division of Brunswick Corporation. All rights reserved. <strong>Life</strong> <strong>Fitness</strong> <strong>and</strong> <strong>Life</strong>cycle are a registered trademarks of Brunswick Corporation. 8115901 Rev A-1 (07.06)