PFS Lessons all_En.pdf - New Holland PLM Portal
PFS Lessons all_En.pdf - New Holland PLM Portal
PFS Lessons all_En.pdf - New Holland PLM Portal

You also want an ePaper? Increase the reach of your titles
YUMPU automatically turns print PDFs into web optimized ePapers that Google loves.
<strong>PFS</strong> <strong>Lessons</strong><br />
Easy step by step<br />
Start<br />
1
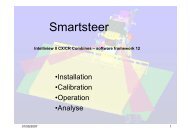
Lesson 01: Inst<strong>all</strong> and register the software<br />
Lesson 02: Prepare Management tree<br />
Lesson 03: Export your management tree to the combine<br />
Lesson 04: Get started in the combine: Logging or Mapping<br />
Lesson 05: Import the combine data from the combine into the <strong>PFS</strong>-Desktop software.<br />
Lesson O6: Make a professional print out.<br />
Lesson O7A: Automatic download of Satellite maps in to your Management tree<br />
Lesson O7B: Use Google back grounds for your MAPS (using 3 reference points)<br />
Lesson O7C:Use Google back grounds for your MAPS (using Latitude/ Longitude).<br />
Lesson O8: Use Google back grounds in your Management tree<br />
2<br />
More
Lesson O9: Change date format to Date + Time<br />
Lesson 10: Apply a simple analysis<br />
Lesson 11: Trace boundary (see also SOLVE A PROBLEM)<br />
Lesson 12: Split fields.<br />
Lesson 13: GPS technology and AG-vehicles<br />
Lesson 14: Make a PDF of my printed maps<br />
<strong>PFS</strong> Lesson 15: Use the Trace boundary area and the ―Monitor Yield‖ in the ―Average yield‖<br />
<strong>PFS</strong> Lesson 16A: Create a SOIL SAMPLING MAP and Export it to my PDA<br />
<strong>PFS</strong> Lesson 16B: Import into my PDA<br />
More<br />
3
<strong>PFS</strong> Desktop software:<br />
<strong>PFS</strong> Lesson 17: Prepare a Management tree for Mapping with CSX Yield Monitor.<br />
<strong>PFS</strong> Lesson 18: Get started in the CSX Combine<br />
<strong>PFS</strong> Lesson 19: Import the combine data from the combine into the <strong>PFS</strong>-Desktop software.<br />
<strong>PFS</strong> Lesson 20: Use the Printer to print the CSX Yield Monitor results.<br />
<strong>PFS</strong> Lesson 21: Clip Contour map to Boundaries.<br />
<strong>PFS</strong> Lesson 22: Export GUIDELINES TO YOUR TRACTOR OR COMBINE<br />
<strong>PFS</strong> Lesson 23: Problem: The shapes and acres for my fields are incorrect!!<br />
<strong>PFS</strong> Lesson 24: Average map: Normalized yield over several years.<br />
<strong>PFS</strong> Lesson 25: Average map: Normalized yield over several years.<br />
More<br />
4
<strong>PFS</strong> Desktop software:<br />
<strong>PFS</strong> Lesson 26: Create SOIL STRUCTURE MAP<br />
<strong>PFS</strong> Lesson 27: Create a VARIABLE RATE MAP from 2 layers<br />
<strong>PFS</strong> Lesson 28: <strong>PFS</strong> Advanced Booklet Printing: Quick guide<br />
<strong>PFS</strong> Lesson 29: Importing CSV- files<br />
<strong>PFS</strong> Lesson 30: Can I export my field reports results into Excel or Word<br />
<strong>PFS</strong> Lesson 31: Can I TEST my D-GPS mapping system, before the season Starts<br />
<strong>PFS</strong> Lesson 32: <strong>PFS</strong> and my tractor<br />
<strong>PFS</strong> Lesson 33: CSX Yield Monitor Calibration<br />
<strong>PFS</strong> Lesson 34: Working with <strong>PFS</strong>9.0 and Make a Fuel consumption report (valid for Tractors and Combines)<br />
<strong>PFS</strong> Lesson 35: Can I use my EZ500 as MAPPING antenna for my CX/CR/CSX combine<br />
5
<strong>PFS</strong> Desktop software:<br />
<strong>PFS</strong> Lesson 36: Make a report with the TRACED BOUNDARY AREA<br />
<strong>PFS</strong> Lesson 37:<br />
<strong>PFS</strong> Lesson 38:<br />
<strong>PFS</strong> Lesson 39:<br />
<strong>PFS</strong> Lesson 40:<br />
<strong>PFS</strong> Lesson 41:<br />
<strong>PFS</strong> Lesson 42:<br />
<strong>PFS</strong> Lesson 43:<br />
<strong>PFS</strong> Lesson 44:<br />
<strong>PFS</strong> Lesson 45:<br />
6
<strong>PFS</strong> Lesson 01: Inst<strong>all</strong> and Register<br />
your software<br />
7
<strong>PFS</strong> Software inst<strong>all</strong>ation<br />
• Insert the INSTALLATION <strong>PFS</strong>-CD in the<br />
disk drive of your computer, the<br />
inst<strong>all</strong>ation wizard will start automatic<strong>all</strong>y.<br />
Click on 1 “Inst<strong>all</strong>”<br />
• Follow the instructions of the wizard.<br />
1<br />
• When the wizard ask you to select a<br />
place for “<strong>PFS</strong> DATA STORAGE<br />
FOLDER”, preferably select “My<br />
Documents\<strong>New</strong> <strong>Holland</strong>\<strong>PFS</strong>\”<br />
• Further the wizard will ask you the<br />
“language” and the “Unit-system”<br />
• The inst<strong>all</strong>ation can take several minutes<br />
(Do not think your computer is pending if<br />
it takes a long time!!)<br />
• Be sure your computer is connected to<br />
the internet and that you have a valid e-<br />
mail address.<br />
8
Register the <strong>PFS</strong> software<br />
1<br />
2<br />
3<br />
9
Register the <strong>PFS</strong> software<br />
Marcel<br />
4. Create Account<br />
1<br />
5: fill in<br />
6: fill in<br />
7: fill in 7: fill in<br />
2<br />
9<br />
Important remark: CREATE ONLY ONE ACCOUNT !!!<br />
If you create a second or third account it will NOT work!!!<br />
10
Register the <strong>PFS</strong> software<br />
Marcel<br />
4:<br />
From the CD box<br />
(backside)<br />
Marcel<br />
2<br />
3<br />
5<br />
11
12<br />
<strong>PFS</strong> Lesson O2: Prepare your management tree:<br />
Create Farmers / Farms / Fields / Drivers / Vehicles
Prepare your management tree<br />
The harvest period is a very busy period.<br />
Especi<strong>all</strong>y the driver should be focused on<br />
getting the maximum capacity out of his<br />
machine.<br />
On a <strong>New</strong> <strong>Holland</strong> Combine you can PRE-LOAD<br />
<strong>all</strong> the names of Farmers / Farms / Fields /<br />
Drivers / Vehicles in advance into the combine<br />
monitor.<br />
In this lesson you will learn how to prepare in the<br />
Desktop software how to create your<br />
management tree.<br />
13
1<br />
2<br />
3<br />
4<br />
14
2<br />
1<br />
3<br />
Repeat step 1, 2 and 3 for <strong>all</strong> the Farmers that you want to have in your management tree<br />
15
1<br />
2<br />
3<br />
4<br />
16
3<br />
1<br />
2<br />
Repeat step 1, 2 and 3 for <strong>all</strong> the Farms that you want to have in your management tree<br />
17
1<br />
2<br />
3<br />
4<br />
18
3<br />
1<br />
Repeat step 1, 2 and 3 for <strong>all</strong> the FIELDS that you want to have in your management tree<br />
19
1<br />
2<br />
3<br />
4<br />
20
1<br />
2<br />
Repeat step 1, 2 and 3 for <strong>all</strong> the<br />
DRIVERS that might drive your<br />
combine.<br />
3<br />
21
1<br />
2<br />
3<br />
4<br />
22
1<br />
2<br />
Learn now how to export your<br />
Management tree to the<br />
combine(s) : see <strong>PFS</strong> Lesson 03<br />
3<br />
23
24<br />
<strong>PFS</strong> Lesson O3: Export your management tree to the combine
1<br />
2<br />
3<br />
25
1<br />
4<br />
2<br />
Repeat step 3 and 4 for <strong>all</strong><br />
the farmers that you want<br />
to be up-loaded.<br />
26
1. People<br />
4: See next page<br />
2 3<br />
Repeat step 2 and 3 and 4 for <strong>all</strong> the people that you want to be up-loaded.<br />
27
1. Vehicle<br />
2<br />
3<br />
4<br />
Repeat step 2 and 3 and 4 for <strong>all</strong> the Vehicles that you want to be up-loaded.<br />
28
1 2<br />
3<br />
Repeat step 1 and 2and 4 for <strong>all</strong> the CROPS that you want to be up-loaded.<br />
29
<strong>New</strong> Customers: just click “4. Finish”<br />
1<br />
2 3<br />
4<br />
Customers who have processed the field data from the previous season can<br />
now also upload the Boundaries (for automatic field recognitions) and the<br />
Navigation paths (for Intellisteer combines).<br />
30
Select:<br />
“<strong>New</strong> <strong>Holland</strong> Voyager 2”<br />
2<br />
1<br />
3<br />
31
1. Click on My Computer<br />
2. Select the Memory stick that will be brought to the combine<br />
3<br />
Bring now the memory stick to the combine:<br />
IMPORTANT REMARK:<br />
NEVER insert the Memory stick into the combine if contact key is ON.<br />
NEVER remove the Memory stick into the combine if contact key is ON.<br />
ALWAYS shut down the combine and wait 10<br />
seconds before inserting or removing the memory<br />
stick. SEE LESSON 04 for more details.<br />
32
33<br />
<strong>PFS</strong> Lesson 04: Get started in the<br />
combine: Logging or Mapping<br />
(IntelliView II)
1. Set up: Advanced mode<br />
DO NOT INSERT THE MEMORY STICK YET !!!!!<br />
34
1. Set up: Advanced mode<br />
1<br />
35
1. Set up: Advanced mode<br />
1<br />
36
2. Clean the Management tree<br />
BEFORE YOU PUT YOUR MEMORY STICK IN THE<br />
CONNECTOR UNDER THE ARMREST:<br />
• In the factory or at your dealership or even yourself<br />
might have done some tests prior to the real work<br />
and set up some Farmers / Farms / Fields<br />
• These tests Farmers / Farms / Fields need to be<br />
deleted BEFORE you start the real work.<br />
• You need to delete These tests Farmers / Farms /<br />
Fields only the FIRST time that you use your<br />
combine.<br />
37
2. Clean the Management tree<br />
1<br />
38
39<br />
2. Clean the Management tree
2. Clean the Management tree<br />
1<br />
40
2. Clean the Management tree<br />
1<br />
41
3. Start<br />
• Switch OFF the contact !!!!!!!<br />
• Put the memory stick in the connector<br />
under the armrest (*).<br />
• Switch the contact key ON<br />
• Wait for some seconds: the combine is<br />
reading the memory stick.<br />
(*): see www.newholland.com/plm <strong>PFS</strong> Lesson 02 and 03<br />
42
Select the desired:<br />
Farmer/Farm/Field/CropType/ Driver<br />
Preferably<br />
43
44<br />
<strong>PFS</strong> Lesson 05: Import the combine data from the combine into the <strong>PFS</strong>-<br />
Desktop software.
1<br />
2<br />
3. Memory stick<br />
4. xxxxxxxx.CNH<br />
5. INDEX.VYG<br />
6<br />
45
1<br />
4. In case the Farmer is<br />
not correct then select<br />
the correct Farmer<br />
3<br />
46
Verify<br />
On the right side of<br />
the word you can<br />
click and eventu<strong>all</strong>y<br />
change or modify, if<br />
needed<br />
47
1<br />
2<br />
48
49<br />
<strong>PFS</strong> Lesson 06: Make a professional print out, including:<br />
-The correct Area of a Field: Traced Boundary.<br />
-The Yield Map<br />
-The Field Data<br />
-Import a Print Layout from the <strong>PLM</strong> <strong>Portal</strong>
Trace boundaries:<br />
1. On the Harvest-1 level, click Right mouse,<br />
2. Select Trace Boundary<br />
2<br />
50
2. Create the map of the boundary<br />
1<br />
2<br />
51
Create the Yield map<br />
1. Click on Harvest-1<br />
2. Add to current Map<br />
1<br />
2<br />
52
Pinting<br />
1. Click on File,<br />
2. Print Map,<br />
3. Custom Layout<br />
53
Drag<br />
&<br />
Drop<br />
Drag<br />
&<br />
Drop<br />
54
2. Select layer 2<br />
1. Double click<br />
On this<br />
map<br />
3<br />
56
1<br />
2. Drag<br />
&<br />
Drop<br />
3. Double click<br />
and select<br />
layer2<br />
57
1<br />
2. Drag<br />
&<br />
Drop<br />
58<br />
3. Double click<br />
and select<br />
Layer 1
1<br />
2. Drag<br />
&<br />
Drop<br />
Double<br />
click<br />
59
1<br />
3<br />
4<br />
60
61<br />
1. Click on “T” and the “Camera”<br />
to complete your layout.<br />
(double click to change)
2. When<br />
you<br />
are<br />
satisfied<br />
with<br />
the<br />
result<br />
click<br />
on<br />
“Save”<br />
Give this layout a special name:<br />
“Traced boundary AND Yield map.lyt”<br />
62
DOWNLOADING A PRINT LAYOUT<br />
Creating a nice and professional print layout as we have done in this lesson can take quite<br />
some time.<br />
Your support company can help you with this.<br />
As an example: download the Print layout which is attached to this lesson and follow the steps<br />
below:<br />
1° Download the second attachment of<br />
this publication (see <strong>PLM</strong>-<strong>Portal</strong>) :<br />
―Trace boundary and Yield map.zip‖<br />
1°<br />
64
DOWNLOADING A PRINT LAYOUT<br />
2° UNZIP it in the following folder: ―……..\<strong>New</strong><br />
<strong>Holland</strong>\Data(\Data_x\)Settings\PrintLayouts‖<br />
2°<br />
65
DOWNLOADING A PRINT LAYOUT<br />
3° Create a Yield map and ADD TO CURRENT MAP<br />
the Boundary map<br />
4° Click on File/Print<br />
Map/Custome layout/File/ Load<br />
Layout/<br />
5° Select the downloaded layout<br />
66
67<br />
DOWNLOADING A PRINT LAYOUT
<strong>PFS</strong> Lesson O7 A: Automatic Import background images from<br />
Google into your Management tree
1. Open the harvest<br />
load from the field<br />
2. Create <strong>New</strong> Map
1. Open<br />
File > Import ><br />
Download Imagery<br />
from Internet
1. Select the Grower<br />
from the farm and<br />
field<br />
2. Press OK and wait until the images<br />
appear
2. Press OK<br />
1. Select the<br />
best picture
1. Expand the<br />
clipping area:<br />
choose for the<br />
best (10 – 50%)<br />
2. Press Next
1. Add to the Management<br />
Hierarchy if you want to use it also<br />
for later<br />
2. Press Finish
2. Press<br />
Accept<br />
1. Add the image to ―NO<br />
Year‖
1. In the management tree, choose the field, NO Year and the<br />
image<br />
3. Change the<br />
transparancy to see the<br />
coverage/yield/ fuel<br />
consumption or<br />
the background image<br />
2. Press Add to Current<br />
Map
77<br />
<strong>PFS</strong> Lesson 7B: Use ANY TYPE OF MAP as back ground for your MAPS<br />
(using 3 reference points)
78<br />
Put cursor in the<br />
middle of the field
79<br />
Type in the Latitude<br />
and the Longitude.<br />
Click on the “zoom”
80<br />
Hit the function “F11” for full<br />
screen and hit the Keybord<br />
bottom “Print Screen”
81<br />
Open “Microsoft Photo Editor”<br />
(is standard on <strong>all</strong> PC‟s)<br />
And click “Edit”, Paste as new Image
82<br />
“File”<br />
“Save as”<br />
In the folder:<br />
“<strong>New</strong> <strong>Holland</strong>”, “<strong>PFS</strong>”, “Photo‟s”
83<br />
1. Click: “File”, “Import”, “Image File”
84<br />
3
85<br />
Give a name
86<br />
Click Right Mouce<br />
Select : Set Background
87<br />
Select
89<br />
<strong>PFS</strong> Lesson 7C: Use Google back grounds for your MAPS<br />
(using Latitude/ Longitude)
<strong>PFS</strong> Lesson 7B:<br />
You want to have a nice background of your fields <br />
90
91<br />
Put cursor in the<br />
middle of the field
92<br />
Surf on the internet to:<br />
http://earth.google.com/ and click on Download
93<br />
Change first the OPTIONS
94<br />
Type in the Latitude<br />
and the Longitude.<br />
Click on the “zoom”
1° Zoom in untill you have a perfect image of your field (or Farm:<br />
see lesson8)<br />
2° Hit the function “F11” for full screen.<br />
3° Put the cursor on 3 easily recognizable points and note for each<br />
point the Latitude and longitude (zoom in as maximum as possible.<br />
The points must be as far as possible from each other.<br />
Point 2<br />
Point 1<br />
Note for each<br />
point the latitude<br />
and longitude<br />
Point 3<br />
95
1° Click on “File”, “Save”, “Save image”<br />
And save the image preferably in your<br />
<strong>New</strong><strong>Holland</strong>/<strong>PFS</strong> folder/Images<br />
96
97<br />
1. Click: “File”, “Import”, “Image File”
Eventu<strong>all</strong>y<br />
Use the<br />
Zoom<br />
tool<br />
3<br />
98
99<br />
Give a name
100<br />
Click Right Mouse<br />
Select : Set Background
101<br />
Select
102
103<br />
<strong>PFS</strong> Lesson O8: Use Google back grounds in your Management tree
<strong>PFS</strong> Lesson 8:<br />
The use of backgrounds in your Management tree!!<br />
On this screen you see the “Jesi Farm”<br />
It is nice that every field has his label and that in the legend the “Traced<br />
boundary” area is mentioned<br />
BUT we want more!! We want to show the farm with its background.<br />
104
In Lesson 7 you have learned how to IMPORT an image<br />
from GOOGLE. In this exercise you need the same picture.<br />
2<br />
105
1<br />
2 2. Check that image that<br />
covers the whole farm<br />
(see lesson 7 for<br />
importing these images)<br />
3<br />
106
107<br />
1
108
109<br />
<strong>PFS</strong> Lesson O9: Change date format to Date + Time
When was my field harvested <br />
See DATE and TIME of<br />
the harvest<br />
110
I prefer to see DATE AND TIME<br />
On this screen I only<br />
see the date of Harvest<br />
111
1<br />
2<br />
112
1. Select “General”<br />
3. Click “Edit”<br />
2. Seclect “Date and time”<br />
6. Be sure that this box is checked<br />
7<br />
113
Refresh your screen and<br />
……..<br />
DATE and TIME of<br />
the harvest !!<br />
114
115<br />
<strong>PFS</strong> Lesson 10: Apply a simple analysis
<strong>PFS</strong> Lesson 10:<br />
Apply a SIMPLE ANALYSIS on your Yield data<br />
When would it be necessary to apply a SIMPLE ANAYSIS on your Yield<br />
data<br />
-In case your Yield sensor has not been calibrated or forgotten.<br />
-In case your Yield sensor has not been correctly calibrated<br />
In those cases the weight on the weight bridge note will be different<br />
from the Est. Weight (Wet)<br />
Example:<br />
Weight bridge = 13.5 Tonne<br />
Estimated Weight (wet)= 14.61 Tonne<br />
Scale factor = 13.5/14.61= 0.9240<br />
116
117<br />
2. Simple analysis can only be done on the<br />
Spatial data !!!
1<br />
3. Select ALL attributes that<br />
are related to “YIELD”<br />
2<br />
4<br />
118
119<br />
Fill in the scale factor (See slide 1)
This symbol shows that on<br />
these data a simple<br />
analysis has been applied!<br />
Note: Simple analysis can also be done on<br />
other attributes: example work width.<br />
120
121<br />
<strong>PFS</strong> Lesson 11: Trace boundary and SOLVE A PROBLEM
I want the boundaries of my fields to show the EXACT area, how <br />
In the old software versions we<br />
clicked Right Mouse on the Field<br />
and selected FREEZE<br />
BOUNDARY.<br />
But this resulted in a boundary<br />
that was a few meters outside<br />
the real boundary<br />
In the new <strong>PFS</strong> software version<br />
we can now offer you a perfect<br />
solution.
I want the boundaries of my fields to show the EXACT area, how <br />
In the new software version 7.0 we now<br />
have a new function:<br />
Click Right Mouse on the HARVEST<br />
LEVEL and selected TRACE<br />
BOUNDARY.<br />
The result is that the boundary will be<br />
clipped exactly on the outside edge of<br />
the header.
I have a problem !!!<br />
When I do ―TRACE<br />
BOUNDARY‖ this is the<br />
result !!<br />
WHY<br />
What can I do<br />
125
1<br />
2<br />
4<br />
5<br />
126
1<br />
The following step<br />
can take several<br />
minutes!!!!<br />
4<br />
127
128<br />
<strong>PFS</strong> Lesson 12: SPLIT FIELDS
<strong>PFS</strong> Lesson 12:<br />
The driver forgot to give a<br />
different name to those 3 fields<br />
Field B<br />
Field A<br />
Field C<br />
129
130<br />
Regenerate Boundary
1<br />
2 3<br />
131
1. ADD a POLYGON<br />
Around the first field<br />
(always Click left mouse<br />
The last time<br />
click right mouse)<br />
2<br />
132
133<br />
(1‟). If needed “ADD NEW”
134<br />
4
135<br />
Delete <strong>all</strong>
5. Correct Name<br />
3<br />
4.Verify<br />
6<br />
136
137
5.Correct Name<br />
3 4. Verify<br />
6<br />
138
3<br />
2<br />
139
2<br />
3<br />
140
141<br />
2
Field A, Field B and Field C have<br />
received a correct place in the<br />
Management tree.<br />
On each field you can now apply<br />
TRACE BOUNDARY<br />
See Lesson 06<br />
142
143<br />
<strong>PFS</strong> Lesson 13: GPS Technology and Agricultural vehicles
How precise is<br />
GPS, D-GPS & RTK<br />
GPS: free<br />
Precision: 5 m---15 m<br />
GPS<br />
• Global Positioning System<br />
• 24 satellites orbit around the earth<br />
• Min 4 satellites are needed to determine a position<br />
• GPS only has an accuracy of 5—15m<br />
• GPS only is OK for Mapping<br />
144
How precise is<br />
GPS, D-GPS & RTK<br />
D-GPS Satellite ( EGNOS free, OmniStar VBS: annual fee)<br />
GPS: free<br />
Differential<br />
Signal send to<br />
the geostationary<br />
satellite<br />
Precision:<br />
15 to 30 cm<br />
Precision: 5 m---15 m<br />
Base station<br />
D-GPS<br />
• Global Positioning System and Differential Correction<br />
• 24 satellites orbit around the earth + 1 Geostationary satellite + many base stations<br />
• D-GPS only has an accuracy of 15—30 cm<br />
• GPS only is perfect for Mapping and basic guidance<br />
145
How precise is<br />
GPS, D-GPS & RTK<br />
D-GPS Satellite ( OmniStar HP/XP: annual fee)<br />
GPS: free<br />
Differential<br />
Signal send to<br />
the geostationary<br />
satellite<br />
Precision:<br />
5 to 10 cm<br />
Precision: 5 m---15 m<br />
Base station<br />
D-GPS<br />
• Global Positioning System and Differential Correction<br />
• 24 satellites orbit around the earth + 1 Geostationary satellite L1+L2 + many base stations<br />
• D-GPS has an accuracy of 5—10 cm<br />
• D-GPS is perfect for Mapping and professional guidance<br />
146
How precise is<br />
GPS, D-GPS & RTK<br />
GPS: free<br />
Precision: 5 m---15 m<br />
Precision:<br />
1 to 2 cm<br />
Customers RTK Base station<br />
Or GPS NH + dealer RTK RTK networks<br />
• Global Positioning System and RTK Real Time Kinematics<br />
• 24 satellites orbit around the earth + 1 Radio + 1 Base station<br />
• D-GPS only has an accuracy of 1—2 cm<br />
• RTK is perfect for Row guidance<br />
147
Mapping on CX & CR<br />
Yield Sensor<br />
CCM 3<br />
Antenna<br />
NH100<br />
Moisture<br />
sensor<br />
IntelliView II<br />
Standard<br />
Data Logger<br />
with USB<br />
ISO 11783<br />
CAN BUS<br />
148
IntelliSteer on CX & CR & Tractores<br />
<strong>New</strong> <strong>Holland</strong> IntelliSteer<br />
NH252<br />
Yield sensor &<br />
Moisture sensor<br />
IntelliView+II<br />
IntelliView II<br />
AGR-ready:<br />
Hydraulic, Sensors, Electrics,<br />
(Steering axle)<br />
<strong>PLM</strong>-Customers<br />
Support<br />
149<br />
<strong>PFS</strong>-Software<br />
Navigation Controller
IntelliSteer TM Auto Guidance<br />
How does it work<br />
B<br />
A<br />
Drive combine to where you<br />
want the “A” point to be. Mark<br />
“A” by pressing button on<br />
display.<br />
A<br />
Drive combine to where you want<br />
the “B” point to be. Mark B by<br />
pressing button on display.<br />
Benefits<br />
• Automatic steering for straight field patterns<br />
• Set up permanent wheel tracks for subsequent field work<br />
• Extend hours of operation, by reducing fatigue<br />
• Reduce overlap, saving time and costs<br />
• Increase productivity<br />
As soon as “B” is marked,<br />
the system lays out the rows.<br />
Run any row you want.<br />
150
Mapping on CSX<br />
DIA: Yield Monitor (Screen +<br />
Moisture sensor+ Yield sensor+<br />
<strong>all</strong> accessories) 87589136<br />
NH<br />
Precision Farming<br />
Seeding<br />
Soil<br />
Analysis<br />
Fertiliser<br />
Phyto<br />
151
CSX: <strong>PFS</strong> Mapping Software<br />
• DIA: 87741688<br />
• <strong>PFS</strong> Mapping software<br />
• DIA List Price : 640 Euro, 435 £<br />
• Valid for CR, CX, CSX, CS<br />
152
CSX: Customer Support<br />
87349865 All Markets in EUR & INT Region,<br />
except (D), (A), (CH), (CZ) & (H)<br />
87370328 Germany (D), Austria (A) &<br />
Switzerland (CH)<br />
87370329 Czech Republic (CZ)<br />
87370331 Hungary (H)<br />
DIA LIST PRICE: 900 Euro / 612 £<br />
Valid for CR, CX, CSX, CS<br />
153
www.newholland.com/plm<br />
www.newholland.com/plm<br />
Sign up<br />
154
155<br />
<strong>PFS</strong> Lesson 14: Make a PDF of my printed reports.<br />
(For example to send it to someone)
5 Rename the layers<br />
(double click)<br />
1<br />
3<br />
2<br />
4<br />
156
1<br />
2<br />
3<br />
157
1<br />
Choose the desired<br />
PRINT LAYOUT<br />
(See lesson 06)<br />
158
159<br />
1. Click on ―File‖ and select ―Print Setup‖
1. Click on ―File‖ and select ―Print‖<br />
2. Select the place<br />
to store the PDF-file<br />
3. Give a name 4<br />
5. Now you are able to pick up the PDF file and<br />
send it as an e-mail to someone.<br />
160
<strong>PFS</strong> Lesson 15: Use the Trace boundary area and the ―Monitor Yield‖ in<br />
the ―Average yield‖<br />
161<br />
Average Yield =<br />
Monitor Yield<br />
Trace Boundary Area<br />
= Ton/ha
162<br />
• Under construction
163<br />
<strong>PFS</strong> Lesson 16A: Create a SOIL SAMPLING MAP and Export it to my PDA
2<br />
3<br />
4<br />
1 Create a Yield map<br />
164
2 2<br />
2 2<br />
2<br />
2<br />
2<br />
3<br />
165
1<br />
3<br />
166<br />
4
3<br />
4<br />
5: Check<br />
6<br />
1<br />
167
1<br />
4<br />
2 Feature ID<br />
3 Name<br />
7<br />
6<br />
8<br />
168
1. Click Right mouse<br />
2<br />
169
1<br />
2<br />
3 1<br />
Give a name<br />
to export 2<br />
170
171<br />
<strong>PFS</strong> Lesson 16B: Import into my PDA
Under construction<br />
Import into my PDA<br />
172
<strong>PFS</strong> Lesson 17:<br />
Prepare a Management tree for Mapping with CSX<br />
Yield Monitor.
Create a management Tree<br />
• For the CSX-yield monitor you can create<br />
a management tree prior to the season to<br />
be loaded in the monitor.<br />
– up to 99 Farms<br />
– Up to 9999 Fields
The data Card<br />
• Buy an SD-card (1 or 2 Gb)<br />
• Put the SD card in the SD-slot of the desktop or the Laptop<br />
(or in a SD-USB adaptor)<br />
• Open the Windows explorer and rename the card to: “CSX_SD_CARD<br />
Rename: CSX_SD_CARD
Download the CSX<br />
Management Tree Upload tool<br />
1. Log on to the <strong>PLM</strong>-PORTAL<br />
2. Click on the link below:<br />
http://plm.arscolor.com/page_details_view.aspxarea=<strong>PFS</strong>&id_sec=320<br />
&id_pag=1117<br />
(or go to the <strong>PLM</strong>-<strong>Portal</strong>, Tab: ―<strong>PFS</strong>-Users/Software Upgrade‖)<br />
1. Download the attachment, EXTRACT the file with Win-Zip and then click<br />
on SETEP.EXE<br />
and follow the wizard.<br />
2. Click now on PROGRAMS and select ―CSX Management Tree Tool‖<br />
Note: If you require the WIN-ZIP application, please download it from: http://www.winzip.com/downwz.htm<br />
Select ―Download Evaluation‖
Create your Management Tree<br />
3<br />
1. Delete the examples<br />
2. Create <strong>all</strong> your Farms<br />
3. Select the first Farm<br />
4. Create <strong>all</strong> the Fields<br />
for the first farm<br />
5. Repeat for the other<br />
farms<br />
2 1 4
Create your Management Tree<br />
When <strong>all</strong> Farms and <strong>all</strong> Field are<br />
created:<br />
1. Click on ―Create Files on<br />
Hard Disk‖<br />
2. Click on the open folder icon<br />
1<br />
2
Create your Management Tree<br />
2<br />
1<br />
The folder will be<br />
automatic<strong>all</strong>y opened.<br />
1. Select the folder<br />
RDS_DATA.XXX to the<br />
SD-Card<br />
2. Copy the folder<br />
RDS_DATA.XXX to the<br />
SD-Card and bring it to<br />
the combine.
<strong>PFS</strong> Lesson 18: Get started in the CSX Combine
Use the Management<br />
tree in the Combine<br />
Before switching on the combine,<br />
insert the SD card in the slot.<br />
Connect the D-GPS 0
Verify the Setup for Mapping<br />
1<br />
3<br />
B: Select 2<br />
A: push<br />
Select 5<br />
2<br />
Pin = 1234<br />
4<br />
PF enable<br />
Log by time<br />
Log time (s): 1<br />
NMEA @ 9600<br />
Differential alarm: off
Log data into a farm/field<br />
1<br />
3<br />
2<br />
4
Log a farm and a field<br />
1<br />
3<br />
2<br />
4
Start Combining the field<br />
1 3<br />
2<br />
Click MAIN to see the normal work screen.<br />
Click LOG enter a TAG or to end the<br />
LOGGING.
186<br />
<strong>PFS</strong> Lesson 19: Import the combine data from the combine into the <strong>PFS</strong>-<br />
Desktop software.
Put the SD-card in the<br />
computer or Laptop<br />
Open the <strong>PFS</strong> desktop<br />
software<br />
187
1<br />
2<br />
4. Pro Series Yield<br />
188
1<br />
4. In case the Farmer is<br />
not correct then select<br />
the correct Farmer<br />
3<br />
189
Verify<br />
On the right side of<br />
the name word you can<br />
click and eventu<strong>all</strong>y<br />
change or modify, if<br />
needed<br />
190
1<br />
2<br />
191
<strong>PFS</strong> Lesson 20: Use the Printer to print the CSX Yield Monitor results.
Use The Printer with the<br />
Yield Monitor<br />
• If your CSX combine is equipped with the<br />
Yield Monitor and the in-Cab printer.<br />
Part Nbr: 8474006 (= 84095875 + additional cable)<br />
Remark: Mapping and Printing can not<br />
work together.
Verify the Setup for Printing<br />
1<br />
3<br />
Select 2:<br />
Technician<br />
3. Select: 5<br />
GPS/FF<br />
setup<br />
2<br />
4<br />
Pin = 1234<br />
PF disabled
Verify the Setup for Printing<br />
1<br />
3<br />
Select<br />
Printer setup<br />
Select the<br />
screen<br />
Click on Prnt<br />
2<br />
Baud rate= 9600<br />
Data bits = 8<br />
Stop Bits= 1<br />
Handshake= RTS<br />
4
<strong>PFS</strong> Lesson 21: Clip Contour map to Boundaries.
Right click on harvest for the<br />
correct year
Trace Boundary to have a nice<br />
Field boundary if there is no<br />
boundary yet.<br />
If there is a boundary<br />
recorded, you can as use as<br />
well that boundary for the<br />
field
click on the field<br />
Click on harvest (or on the<br />
single task)<br />
Create new map
1. Click on harvest (or on the<br />
single task)<br />
2.Add to current<br />
map<br />
3. Click on<br />
contour map
So now, the yield goes<br />
over the boundary as your<br />
example
1.Right click on the yield<br />
map<br />
=>Edit layer options
1. Choose<br />
“Attribute(Yield mass (Dry)) options”<br />
2. Click on “Grid/Contour/Clip”
1. Choose “Clip to Field”<br />
2. Click “Fill Values to<br />
Boundary Edges”<br />
3. Click “Save Spatial<br />
Attibute Settings”
1. Click lower 3
207<br />
<strong>PFS</strong> Lesson 22: Export GUIDELINES TO YOUR TRACTOR OR COMBINE
1<br />
2<br />
208
1<br />
2<br />
3<br />
209
1<br />
2. Check<br />
4<br />
5<br />
6<br />
3<br />
210<br />
7
1<br />
2<br />
3<br />
211<br />
4 5
212<br />
1: Do not change
1<br />
2<br />
213
2<br />
6<br />
3: Just verify 5<br />
214<br />
7
3: MUST be<br />
empty!!!!<br />
1<br />
2: for CX8000 or CR9000<br />
(S’2008 and later)<br />
Put Memory stick in the INTELLISTEER VEHICLE<br />
(CX8000, CR9000, T7000, T8000)<br />
and then ….. go to the IntelliView PF-Run screen<br />
and then ….. AutoSelect Field” ……. Etc. etc.<br />
Or See OpsMan.<br />
215
216<br />
<strong>PFS</strong> Lesson 23: Problem: The shapes and acres for my fields are incorrect!!
The cause of this problem is that a wrong projection<br />
has been chosen.<br />
2<br />
1<br />
217
WGS84 and the UTM zone<br />
See also Tutorial <strong>PFS</strong>-CD<br />
Interesting website: http://franson.com/coordtrans/download.aspplatform=winxp<br />
218
219<br />
<strong>PFS</strong> Lesson 25: Average map: Normalized yield over several years.
Menu, Analysis, Analysis Wizard<br />
1<br />
3<br />
2<br />
4<br />
220
1<br />
4<br />
1<br />
221
1<br />
4<br />
2<br />
3<br />
222
223<br />
1
224
225<br />
<strong>PFS</strong> Lesson 26: Create SOIL STRUCTURE MAP
226<br />
Store this map in ―NO YEAR‖
227<br />
<strong>PFS</strong> Lesson 27: Create a VARIABLE RATE MAP from 2 layers
Assumptions<br />
In this example we will take as input the following<br />
maps:<br />
• Average Yield Map deviated from the normalised<br />
yield maps of the last 2 seasons.<br />
• Soil texture map.<br />
• We will create a variable rate map for Ammonium<br />
Nitrate Liquid 33%<br />
• The target dose is<br />
– On Sand: 40 L + ½ Normalised Yield<br />
– On Loam: 45 L + ½ Normalised Yield<br />
228
229<br />
Average Yield Map deviated from the normalised<br />
yield maps of the last 2 seasons<br />
(How to create such a map See lesson 23)<br />
Store this map in ―NO YEAR‖
230<br />
Soil texture map.<br />
(How to create soil texture maps: See lesson 24<br />
Store this map in ―NO YEAR‖
1<br />
2<br />
Bring both layers in the workscreen.<br />
231
1<br />
4<br />
2<br />
5<br />
6<br />
3<br />
7<br />
232
1<br />
233<br />
2
234<br />
1
1<br />
2<br />
3<br />
235
2 3<br />
4<br />
236
1<br />
2<br />
3<br />
237
2 3<br />
4<br />
238
2<br />
3<br />
4<br />
1<br />
239
1<br />
2<br />
3<br />
4<br />
5<br />
240
1 2<br />
3 4<br />
5<br />
241
1<br />
2<br />
3<br />
6<br />
7<br />
242
Add yourself the following operators:<br />
―THEN‖, ―BEGIN‖, ―RESULT‖<br />
1<br />
3<br />
2<br />
5<br />
4<br />
6<br />
243
1 2<br />
3<br />
4<br />
4<br />
5<br />
244
2<br />
3 4<br />
5<br />
2<br />
3<br />
4<br />
6<br />
5<br />
6<br />
245
1<br />
2<br />
3<br />
4<br />
246
247<br />
Save in Management tree
248<br />
Export to DISPLAY: ―TOOLS, ―DEVISE<br />
SETUP UTILITY‖, ―ADD NEW‖, etc.
249<br />
<strong>PFS</strong> Lesson 28: <strong>PFS</strong> Advanced Booklet Printing: Quick guide
250<br />
To start, go to Analysis, and<br />
Booklet printing
251<br />
First, you will create a new Booklet<br />
template, and give a name
252<br />
(Optional) You can create a custom Cover<br />
Page for your Booklet
253<br />
Select the Management level for the report to group by. This<br />
will give a total of the yearly production for the Grower.
254<br />
Select the type of report to run
255<br />
Select the base operation for the<br />
report to run on. (Grain Harvest)
256<br />
Apply any custom settings that<br />
you would like to have (colors,<br />
logos, page breaks) etc.
257<br />
Now, add the Map layout for the data<br />
based on each field.
258<br />
Select the custom map layout that<br />
you have created. (must be done<br />
prior to starting a Booklet setup)
259<br />
The Operation will be defined by the layout you select, you<br />
can filter to have more specific data if you wish, otherwise,<br />
leave settings on „All.‟
260<br />
We have no setup a Booklet: 1 Grower<br />
report for total production, and 1 yield map<br />
for <strong>all</strong> the fields that we select when used.
261<br />
Now, Select the Booklet template,<br />
and then Next to create the<br />
Booklet
262<br />
Select the Year, Grower, Farm, and<br />
Fields you would like to be included in<br />
your Booklet
263<br />
Finished Booklet
264
<strong>PFS</strong> Lesson 29: Importing CSV-<br />
files<br />
265
3<br />
1<br />
2<br />
266
1<br />
4<br />
267
1<br />
2<br />
268
2<br />
3<br />
4<br />
5<br />
6<br />
269
270<br />
2
2<br />
3<br />
4<br />
271
2: give a clear name<br />
1<br />
3<br />
272
273
274<br />
1
275<br />
<strong>PFS</strong> Lesson 30: Can I export my field reports results into Excel or<br />
Word
Can I export my field reports results into Excel or Word<br />
Yes, we can!<br />
Step 1: create your report in the <strong>PFS</strong> software:<br />
Click on the icon “<strong>New</strong> report”<br />
Follow the wizard and make your choices.<br />
Step 2: Click on the top corner of the report<br />
and drag the mouse to the lowest left corner.<br />
Everything should be selected. Type Ctrl C<br />
(=Copy).<br />
Step 3. Go to Microsoft Excel (or word). Click<br />
in a cell. Type Ctrl V (=Paste) .<br />
Colour and adapt as you are pleased<br />
276
277<br />
<strong>PFS</strong> Lesson 31: Can I TEST my D-GPS mapping system, before the season Starts
Can I TEST my D-GPS<br />
mapping system.<br />
Before the season Starts<br />
Yes.<br />
Drive with the combine on yard<br />
about 200 m : header engaged,<br />
header down threshing engaged.
Shut down the combine, wait 10 sec, take the<br />
memory stick to your office and<br />
1. Process the file in the<br />
normal way: (File/Open/<br />
Memory stick)
1. Click Right Mouse<br />
2. Select
1. Check this box<br />
2. Set this filter to ―0‖
2<br />
1. uncheck
283<br />
<strong>PFS</strong> Lesson 32: <strong>PFS</strong> and my tractor
Management tree
Recording boundaries
Recording obstacles
Recording field marks
Recording swaths
Coverage maps
Trip data<br />
Note: only for tractors connected to the canbus (T7000, T8000)
291<br />
<strong>PFS</strong> Lesson 33: CSX Yield Monitor Calibration
Use the accessories.<br />
Set Crop density<br />
Set Crop moisture content
Click here<br />
Select crop
Click here<br />
1° Position combine on level ground<br />
2° Run the combine at normal<br />
thresing speed with the clean<br />
grain elevator empty<br />
Set now
Click here<br />
1° Harvest +/- 10 Ton<br />
2° Weighbridge result<br />
3° <strong>En</strong>ter
296<br />
<strong>PFS</strong> Lesson 34: Working with <strong>PFS</strong>9.0 and Make a Fuel consumption report.
Step 1: Read the memorystick<br />
1<br />
2<br />
3<br />
4
2<br />
4<br />
5<br />
7<br />
1<br />
6<br />
3
2: check <strong>all</strong><br />
3<br />
1
1<br />
2
Step 2: Process the field data<br />
1<br />
2<br />
3
Step 3: Make sure you can MAP fuel consumption<br />
1<br />
2<br />
3<br />
4<br />
5
1: Check<br />
2<br />
3
Step 4: Make the report<br />
1<br />
2
1<br />
2
2<br />
3<br />
5<br />
1<br />
4<br />
6
1<br />
2
310<br />
<strong>PFS</strong> Lesson 35: Can I use my EZ500 as MAPPING antenna for my<br />
CX/CR/CSX combine
EZ500 for Mapping on CX/CR
On the side of the EZ500<br />
Add also the power cable and the Antenna cable<br />
(put the antenna on top of the graintank.
Take the serial connector<br />
• In the Right Hand side console grasp the<br />
serial connector.
2<br />
1<br />
3 4
5<br />
7<br />
10 Check if D-<br />
GPS is OK<br />
on EZ500
In the IntelliView III<br />
11<br />
Change<br />
if needed
After a few minutes<br />
Check D-GPS status
Build a PF-run screen<br />
Create a grower<br />
Create a farm<br />
Create a field
Test the system<br />
Header down<br />
Threshing engaged<br />
Header engaged<br />
And drive a couple of 100 m<br />
See if the mapping is OK
Test the system<br />
Record a boundary<br />
Check if OK<br />
Check also if the « Field Auto select »<br />
works OK
Stop the combine and wait 10 sec<br />
remove the Memory stick<br />
• Bring the memory stick to the office<br />
• Process the file in <strong>PFS</strong>10
Click on the load: click right mouse<br />
1° Right mouse<br />
2°
Check this box<br />
Minimum Filter at 0
Check if map is OK<br />
1°<br />
2°
Check if the boundary is OK<br />
1°<br />
2°
Conclusion<br />
•If <strong>all</strong> checks are OK<br />
you can trust that the<br />
combine will map<br />
perfectly when the<br />
harvest starts.
<strong>PFS</strong> Lesson 36: Make a report with the<br />
TRACED BOUNDARY AREA<br />
327
328<br />
Traced boundary are is the boundary at the edge of the header.<br />
Therefore Traced Boundary are is the area that is re<strong>all</strong>y combined!!!!
1°<br />
2°<br />
329
330<br />
2°
1°<br />
4°<br />
5°<br />
6° Change as desired<br />
331
1°<br />
2°<br />
332
333<br />
Traced boundary<br />
area