Longhouse Single Wardrobe - Mamas & Papas
Longhouse Single Wardrobe - Mamas & Papas
Longhouse Single Wardrobe - Mamas & Papas

Create successful ePaper yourself
Turn your PDF publications into a flip-book with our unique Google optimized e-Paper software.
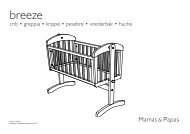
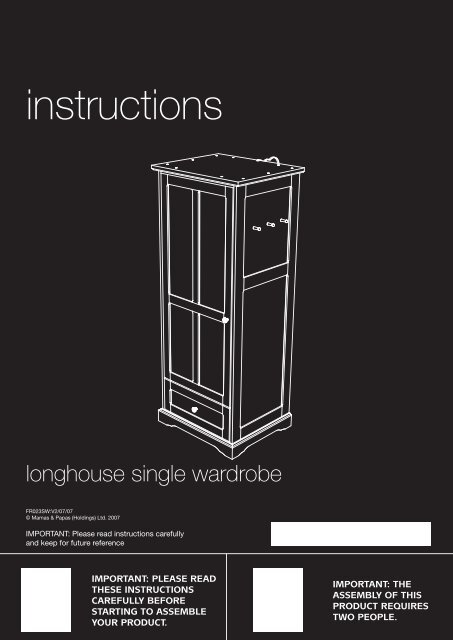
instructions<br />
longhouse single wardrobe<br />
FR023SW:V2/07/07<br />
© <strong>Mamas</strong> & <strong>Papas</strong> (Holdings) Ltd. 2007<br />
IMPORTANT: Please read instructions carefully<br />
and keep for future reference<br />
Important: Please read<br />
these instructions<br />
carefully before<br />
starting to assemble<br />
your product.<br />
Important: the<br />
assembly of this<br />
product requires<br />
two people.
<strong>Longhouse</strong> single <strong>Wardrobe</strong><br />
Before assembling your product...<br />
Do not discard any packaging until you are certain you have all the correct components and fittings.<br />
If any items are damaged or missing, please contact your retailer or <strong>Mamas</strong> & <strong>Papas</strong> on 0870 8307700.<br />
Allow plenty of time and space when beginning the construction of your product.<br />
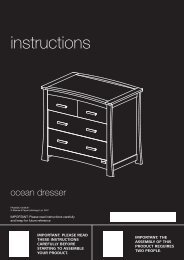
Components<br />
1<br />
7<br />
8<br />
5<br />
4<br />
12<br />
10<br />
11<br />
3<br />
9<br />
13<br />
17<br />
6<br />
15<br />
14<br />
16<br />
2<br />
Item Name Part no. Qty<br />
1 Left side panel 00000---0000 1<br />
2 Right side panel 00000---0000 1<br />
3 Fixed shelf 00000---0000 1<br />
4 Top front rail 00000---0000 1<br />
5 Rails 00000---0000 2<br />
6 Base 00000---0000 1<br />
7 Top 00000---0000 1<br />
8 Back panel 00000---0000 1<br />
9 Shelf 00000---0000 1<br />
Item Name Part no. Qty<br />
10 Hanger rails 00000---0000 2<br />
11 Pegs 00000---0000 3<br />
12 Door 00000---0000 1<br />
13 Left drawer side 00000---0000 1<br />
14 Right drawer side 00000---0000 1<br />
15 Drawer front 00000---0000 1<br />
16 Drawer base 00000---0000 1<br />
17 Drawer back 00000---0000 1<br />
--
FITTINGS<br />
A x 6 B x 3<br />
Cam studs<br />
C x 12<br />
Hinge plates<br />
D x 6<br />
Hinge screws<br />
E x 6<br />
Cams<br />
F x 6<br />
Insert bolts<br />
G x 1<br />
Rail inserts<br />
H x 12<br />
Allen key<br />
I x 4<br />
Assembly bolts<br />
J x 24<br />
Long screws<br />
K x 4<br />
Back panel screws<br />
L x 3<br />
Shelf studs<br />
M x 2<br />
Hinge arms<br />
N x 2<br />
Handles<br />
O x 12<br />
Handle screws<br />
P x 1<br />
Drawer screws<br />
Q x 1<br />
Wall strap screw<br />
R x 1<br />
Wall strap washer<br />
TOOLS<br />
Wall strap<br />
Fitting code: 000000000000<br />
Flat head screwdriver<br />
Cross head screwdriver<br />
Important: The use of powered screwdrivers is not recommended for assembling this product.<br />
--
A<br />
2<br />
STEP 1<br />
Screw six cam studs (A)<br />
into the left (1) and right<br />
(2) side panels using a<br />
cross head screwdriver.<br />
1<br />
C<br />
STEP 2<br />
Attach the three hinge<br />
plates (B) to the left side<br />
panel (1) using six of the<br />
hinge screws (C) and a<br />
cross head screwdriver.<br />
B<br />
1<br />
--
3<br />
STEP 3<br />
Slot the fixed shelf (3)<br />
onto the side panels as<br />
shown.<br />
Insert three cams (D)<br />
into the holes in the<br />
connecting edge of the<br />
fixed shelf. Ensure that<br />
the arrows on the heads<br />
of the cams face the side<br />
panel when inserted.<br />
Turn the cams clockwise<br />
with a flat head<br />
screwdriver to tighten the<br />
cams.<br />
D<br />
5<br />
STEP 4<br />
Slot three insert bolts (E)<br />
through the holes in the<br />
middles of three of the<br />
rail inserts (F).<br />
Slot the top front (4) and<br />
the two rails (5) onto the<br />
side panel a shown in the<br />
diagram.<br />
Slot the rail inserts into<br />
the ends of the rails<br />
against the side panel.<br />
Tighten the bolts in the<br />
rail inserts into the side<br />
panel using the allen key<br />
(G).<br />
E<br />
5<br />
4<br />
G<br />
F<br />
--
2<br />
STEP 5<br />
Slot the right side panel<br />
(2) onto the ends of the<br />
rails and fixed shelf.<br />
Insert the three remaining<br />
rail bolts (E) and inserts<br />
(F) into the ends of the<br />
rails. Tighten the bolts<br />
into the side panel using<br />
the allen key (G).<br />
Insert three cams (D)<br />
into the underside of the<br />
fixed base. Tighten the<br />
cams by turning them<br />
clockwise with a flat head<br />
screwdriver.<br />
F<br />
E<br />
G<br />
D<br />
6<br />
STEP 6<br />
Slot the base (6) onto the<br />
bottom of the side panels.<br />
Ensure that the base is<br />
the correct way round,<br />
see diagram.<br />
Slot six assembly bolts<br />
(H) through the holes in<br />
the underside of the base<br />
and tighten them into the<br />
sides using the allen key<br />
(G).<br />
G<br />
H<br />
--
STEP 7<br />
Slot the top (7) onto the<br />
other end of the side<br />
panels.<br />
Ensure the flat end of the<br />
top is at the back of the<br />
wardrobe when fitted.<br />
Insert six assembly bolts<br />
(H) into the sides of the<br />
top. Tighten the bolts into<br />
the side panels with the<br />
allen key (G).<br />
Insert four long screws (I)<br />
into the remaining holes<br />
in the top.<br />
Tighten the screws into<br />
the rails with a cross head<br />
screwdriver.<br />
7<br />
I<br />
G<br />
H<br />
J<br />
8<br />
STEP 8<br />
Slot the back panel (8)<br />
into the grooves in the<br />
sides and base. Ensure<br />
that the panel is the<br />
correct way round, see<br />
diagram.<br />
Fasten the back panel into<br />
place using the twenty<br />
four back panel screws<br />
(J) and a cross head<br />
screwdriver.<br />
--
STEP 9<br />
Screw the four shelf studs<br />
(K) into one of the five<br />
height positions for the<br />
shelf using your finger.<br />
Ensure that all of the<br />
shelf studs are screwed<br />
into the same height<br />
position.<br />
Slot the shelf (9) onto the<br />
shelf studs and push to<br />
the back of the wardrobe.<br />
K<br />
9<br />
10<br />
Step 10<br />
Slot the two hanger rails<br />
(10) into the hanger<br />
brackets on the side<br />
panels.<br />
Screw the three pegs<br />
(11) into the inserts<br />
in the left or right side<br />
panels using your fingers.<br />
11<br />
--
12<br />
Step 11<br />
Insert the three hinge<br />
arms (L) into the holes in<br />
the edge of the door (12).<br />
Fasten the hinge arms<br />
to the door with the six<br />
remaining hinge screws<br />
(C) and a cross head<br />
screwdriver.<br />
Attach one of the handles<br />
(M) to the other side of<br />
the door using a handle<br />
screws (N) and a cross<br />
head screwdriver.<br />
L<br />
C<br />
N<br />
M<br />
Step 12<br />
Slot the hinge arms on<br />
the door onto the hinge<br />
plates. Ensure that the<br />
claws on the back of the<br />
hinge arms slot under the<br />
hinge plates. Push down<br />
on the ends of the hinge<br />
arms until they lock into<br />
position.<br />
The doors can be removed<br />
by pushing the button on<br />
the end of the hinge arm<br />
inwards.<br />
Claws<br />
--
13<br />
14<br />
STEP 13<br />
Attach the left (13) and<br />
right (14) drawer sides<br />
to the drawer front (15)<br />
using six drawer screws<br />
(O) and a cross head<br />
screwdriver.<br />
Ensure that the grooves<br />
in the sides and front are<br />
aligned.<br />
15<br />
O<br />
16<br />
STEP 14<br />
Slot the drawer base (16)<br />
into the grooves in the<br />
side panels.<br />
Push the base down the<br />
grooves and into the slot<br />
in the drawer front.<br />
-10-
17<br />
STEP 15<br />
Slot the groove in the<br />
bottom of the drawer<br />
back panel (17) onto the<br />
base and between the<br />
side panels.<br />
STEP 16<br />
Fasten the drawer back to<br />
the sides using six drawer<br />
screws (O) and a cross<br />
head screwdriver.<br />
O<br />
-11-
STEP 17<br />
Fasten the remaining<br />
handle (M) to the drawer<br />
front using the last handle<br />
screws (N) and a cross<br />
head screwdriver.<br />
M<br />
N<br />
STEP 18<br />
Slot the runners on the<br />
drawer sides into the<br />
runners attached to<br />
the side panels of the<br />
wardrobe.<br />
Push the drawer into the<br />
wardrobe.<br />
-12-
STEP 19<br />
Slot the wall strap screw<br />
(P) through the hole<br />
in the washer (Q) then<br />
through the end of the<br />
wall strap (R).<br />
Fasten the wall strap to<br />
the back of the wardrobe<br />
top as shown in the<br />
diagram using a cross<br />
head screwdriver.<br />
P<br />
Q<br />
R<br />
STEP 20<br />
The wardrobe is now fully<br />
assembled.<br />
Check all fittings are fully<br />
tightened before using<br />
the wardrobe.<br />
Always lift the wardrobe<br />
with the help of another<br />
person when moving it.<br />
Never drag the wardrobe.<br />
-13-
Adjusting the gap<br />
between the door and<br />
carcass.<br />
Loosen screw ‘A’, turn<br />
screw ‘B’ clockwise or<br />
anti-clockwise until the<br />
gap between the door<br />
and carcass is equal then<br />
tighten screw ‘A’.<br />
step 25<br />
Adjusting the height of<br />
the door.<br />
Loosen screws ‘C’ then<br />
slide the hinge plate up<br />
or down until the door is<br />
centred then tighten the<br />
screws.<br />
Adjusting the angle of<br />
the door.<br />
Loosen screw ‘A’ and<br />
slide the hinge arm either<br />
forwards or backwards<br />
until the door is vertical<br />
then tighten screw ‘A’.<br />
-14-
INSTRUCTIONS FOR SAFE USE & maintenance<br />
• WARNING: DO NOT LEAVE YOUR CHILD UNATTENDED. The safety of your child is your<br />
responsibility.<br />
• Before use, ensure the wardrobe is on a stable, level surface.<br />
• Do not allow children to climb on the wardrobe.<br />
• Never use the wardrobe if any parts are broken or missing.<br />
• Never pivot or drag the wardrobe on its plinth, the wardrobe must always be lifted by at<br />
least two people when moved.<br />
• Do not place the wardrobe in the near vicinity of open fires or other sources of strong<br />
heat, such as electric or gas fires.<br />
• Always leave the wardrobe clean and dry. Wipe away any spillage straight away. The<br />
wardrobe can be cleaned with a damp cloth. Never use abrasive, bleach or strong<br />
detergents.<br />
• Check regularly that all fittings and screws are correctly tightened and are not<br />
damaged. Loose screws can pinch parts of the body and clothing resulting in the risk of<br />
strangulation.<br />
WALL STRAP INFORMATION<br />
The wall strap is only intended to be used with the <strong>Mamas</strong> and <strong>Papas</strong> product that it is<br />
supplied with.<br />
Never attempt to modify or change the wall attachment strap in any way. Never use any<br />
other fittings for attaching the strap to your furniture than those supplied.<br />
Never use the screw provided to attach the strap to the wall. No wall attachment fittings are<br />
supplied. This is because the type of fittings required to attach the strap to the chosen wall<br />
is determined by the walls composition. If you are in any doubt about the correct type of<br />
fittings to use, consult a professional before attempting to attach the strap to the wall.<br />
The wall strap must not be used to replace any other fitting supplied with your piece of<br />
furniture.<br />
Furniture falling over is generally due to the surface the furniture is placed on. A warped<br />
floor or wall-to-wall carpeting will enable the furniture to rock, so greatly increasing the<br />
potential for the furniture to fall. If the furniture is placed on a flat level wood or tiled floor<br />
the risk is reduced, but we still recommend the wall strap is fitted.<br />
Due to constant updating and improvements, some components may occasionally differ slightly from the diagrams shown in<br />
these instructions. We reserve the right to change the specifications of any product without prior notice.<br />
After sales Service: If you need assistance, spare parts or you are unhappy with any aspect of the goods please<br />
contact Customer Services on: 0870 8307700, or e-mail us at: customer.services@mamasandpapas.com.<br />
Visit our website at www.mamasandpapas.com for the latest product information.<br />
-15-
www.mamasandpapas.com<br />
<strong>Mamas</strong> & <strong>Papas</strong><br />
Colne Bridge Road<br />
Huddersfield, HD5 0RH<br />
customer services helpline: 0870 8307700<br />
customer services email: customer.services@mamasandpapas.com<br />
-16-