Drummer Hans van Den Hurk - EasySounds
Drummer Hans van Den Hurk - EasySounds
Drummer Hans van Den Hurk - EasySounds

Create successful ePaper yourself
Turn your PDF publications into a flip-book with our unique Google optimized e-Paper software.
22<br />
settInG uP HI-Hat PaDs<br />
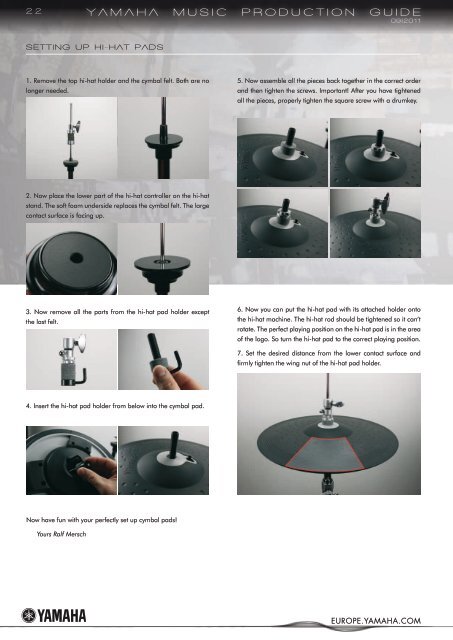
1. Remove the top hi-hat holder and the cymbal felt. Both are no<br />
longer needed.<br />
2. Now place the lower part of the hi-hat controller on the hi-hat<br />
stand. The soft foam underside replaces the cymbal felt. The large<br />
contact surface is facing up.<br />
3. Now remove all the parts from the hi-hat pad holder except<br />
the last felt.<br />
4. Insert the hi-hat pad holder from below into the cymbal pad.<br />
Now have fun with your perfectly set up cymbal pads!<br />
Yours Ralf Mersch<br />
YamaHa musIC PrODuCtIOn GuIDe<br />
09|2011<br />
5. Now assemble all the pieces back together in the correct order<br />
and then tighten the screws. Important! After you have tightened<br />
all the pieces, properly tighten the square screw with a drumkey.<br />
6. Now you can put the hi-hat pad with its attached holder onto<br />
the hi-hat machine. The hi-hat rod should be tightened so it can‘t<br />
rotate. The perfect playing position on the hi-hat pad is in the area<br />
of the logo. So turn the hi-hat pad to the correct playing position.<br />
7. Set the desired distance from the lower contact surface and<br />
firmly tighten the wing nut of the hi-hat pad holder.<br />
EUROPE.YAMAHA.COM