Table of Contents - Mega Miniatures
Table of Contents - Mega Miniatures
Table of Contents - Mega Miniatures

Create successful ePaper yourself
Turn your PDF publications into a flip-book with our unique Google optimized e-Paper software.
can see on the third floor also came <strong>of</strong>f the plans. We<br />
found out that the large circular tower was actually built<br />
after the main building so we had a justifiable reason to<br />
leave it <strong>of</strong>f for now. By now we had actually started<br />
putting glue to bricks and things were moving along nicely,<br />
or so we thought. We took a minute to figure out exactly<br />
how many brick we would need to complete the project.<br />
Chris and I figured out how many ‘standard’ (1” x ½” x ½”)<br />
bricks would be needed. Of course, there would be<br />
windows here and there and we could take a little <strong>of</strong>f <strong>of</strong><br />
this number. Remember back when I said that we wanted<br />
to be able to play games with the piece That meant<br />
playing with models in the castle so that means that there<br />
also had to be interior walls which would add to the total<br />
number <strong>of</strong> bricks that were needed. It would take over<br />
4,500 bricks just for the exterior walls. A quick look at the<br />
interior designs that I had drawn put us into the 6,000<br />
brick range. It could have been a gazillion for all I knew!<br />
Yeah, we’re just a couple <strong>of</strong> big dopes for not figuring this<br />
out before we actually settled on this particular project. I<br />
suspect that even if we knew that number we’d have gone<br />
ahead with it anyway. OK, how can we reduce the<br />
number <strong>of</strong> time that the molds needed to be run AKA how<br />
can we get more bricks for less work Looking back at<br />
the stack <strong>of</strong> molds we saw the half-width wall molds. Slap<br />
two <strong>of</strong> the resulting walls together and you have a 3.5” tall<br />
x 4.5” long wall. Each set <strong>of</strong> two that we use saves us 28<br />
regular 1” bricks. We just added a fourth, and last, mold<br />
to our list.<br />
Let’s take a short break to talk about the molds for a<br />
second. If you’ve counted along with us you’ll notice that<br />
there are four molds that we’re using for this project. Of<br />
those four only two are actually required. You can build<br />
this project using The Wizard’s tower and the Circular<br />
Tower. You can save considerable casting time by using<br />
a mold <strong>of</strong> nothing but standard bricks and/or the flat wall<br />
section mold.<br />
Bottom line to planning is actually do it!<br />
BUILDING<br />
Even though we jumped the gun a little bit and actually<br />
started building back in the PLANNING stage we learned<br />
to never do that again. Bad Mark and Chris, very bad!<br />
The building phase really incorporated more than gluing<br />
bricks together. You have to have bricks in the first place<br />
and running the molds is what you do to get them. We<br />
cannot stress enough the benefits to having a food<br />
dehydrator to dry your bricks with. We used two on this<br />
project and are already considering buying a third. No,<br />
they are not essential especially if you are not on any kind<br />
<strong>of</strong> a timeline, but golly yes they are beneficial. Overall, the<br />
casting and building <strong>of</strong> the castle is not hefty manual work<br />
and is not overly<br />
tedious. Ok, running<br />
the molds over a<br />
hundred times is<br />
borderline tedious.<br />
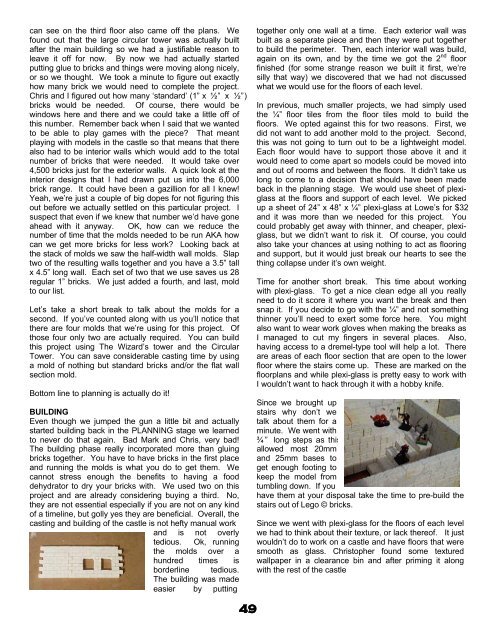
The building was made<br />
easier by putting<br />
together only one wall at a time. Each exterior wall was<br />
built as a separate piece and then they were put together<br />
to build the perimeter. Then, each interior wall was build,<br />
again on its own, and by the time we got the 2 nd floor<br />
finished (for some strange reason we built it first, we’re<br />
silly that way) we discovered that we had not discussed<br />
what we would use for the floors <strong>of</strong> each level.<br />
In previous, much smaller projects, we had simply used<br />
the ¼” floor tiles from the floor tiles mold to build the<br />
floors. We opted against this for two reasons. First, we<br />
did not want to add another mold to the project. Second,<br />
this was not going to turn out to be a lightweight model.<br />
Each floor would have to support those above it and it<br />
would need to come apart so models could be moved into<br />
and out <strong>of</strong> rooms and between the floors. It didn’t take us<br />
long to come to a decision that should have been made<br />
back in the planning stage. We would use sheet <strong>of</strong> plexiglass<br />
at the floors and support <strong>of</strong> each level. We picked<br />
up a sheet <strong>of</strong> 24” x 48” x ¼” plexi-glass at Lowe’s for $32<br />
and it was more than we needed for this project. You<br />
could probably get away with thinner, and cheaper, plexiglass,<br />
but we didn’t want to risk it. Of course, you could<br />
also take your chances at using nothing to act as flooring<br />
and support, but it would just break our hearts to see the<br />
thing collapse under it’s own weight.<br />
Time for another short break. This time about working<br />
with plexi-glass. To get a nice clean edge all you really<br />
need to do it score it where you want the break and then<br />
snap it. If you decide to go with the ¼” and not something<br />
thinner you’ll need to exert some force here. You might<br />
also want to wear work gloves when making the breaks as<br />
I managed to cut my fingers in several places. Also,<br />
having access to a dremel-type tool will help a lot. There<br />
are areas <strong>of</strong> each floor section that are open to the lower<br />
floor where the stairs come up. These are marked on the<br />
floorplans and while plexi-glass is pretty easy to work with<br />
I wouldn’t want to hack through it with a hobby knife.<br />
Since we brought up<br />
stairs why don’t we<br />
talk about them for a<br />
minute. We went with<br />
¾ ” long steps as this<br />
allowed most 20mm<br />
and 25mm bases to<br />
get enough footing to<br />
keep the model from<br />
tumbling down. If you<br />
have them at your disposal take the time to pre-build the<br />
stairs out <strong>of</strong> Lego © bricks.<br />
Since we went with plexi-glass for the floors <strong>of</strong> each level<br />
we had to think about their texture, or lack there<strong>of</strong>. It just<br />
wouldn’t do to work on a castle and have floors that were<br />
smooth as glass. Christopher found some textured<br />
wallpaper in a clearance bin and after priming it along<br />
with the rest <strong>of</strong> the castle<br />
49