Instructions for Use GB - Lucas CPR
Instructions for Use GB - Lucas CPR
Instructions for Use GB - Lucas CPR
Create successful ePaper yourself
Turn your PDF publications into a flip-book with our unique Google optimized e-Paper software.
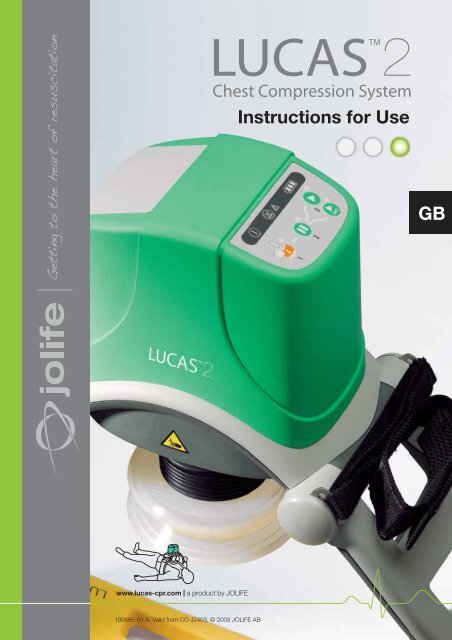
<strong>Instructions</strong> <strong>for</strong> <strong>Use</strong><br />
<strong>GB</strong><br />
www.lucas-cpr.com a product by JOLIFE<br />
LUCAS TM Chest Compression System – <strong>Instructions</strong> <strong>for</strong> <strong>Use</strong><br />
100666-01 A, Valid from COJ2236, © 2009 JOLIFE AB<br />
100666-01 A, Valid from CO J2403, © 2009 JOLIFE AB
2<br />
Thank you <strong>for</strong> choosing the<br />
LUCAS TM 2 Chest Compression System!<br />
With LUCAS TM 2 your cardiac arrest patients<br />
will receive 100 chest compressions per<br />
minute with a depth of 1.5 to 2 inches as<br />
recommended in the ERC (European<br />
Resuscitation Council).<br />
If you have any questions about this product<br />
or its operation, please contact your local<br />
distributor or the manufacturer JOLIFE AB.<br />
MANUFACTURER, MAIN OFFICE<br />
JOLIFE AB<br />
Scheelevägen 17<br />
SE-223 70 LUND<br />
Sweden<br />
Tel. +46 46 286 50 00<br />
Fax. +46 46 286 50 10<br />
www.jolife.com<br />
info@jolife.com<br />
For in<strong>for</strong>mation on local distribution,<br />
please visit www.jolife.com.<br />
LUCAS TM 2 Chest Compression System – <strong>Instructions</strong> <strong>for</strong> <strong>Use</strong><br />
100666-01 A, Valid from CO J2403, © 2009 JOLIFE AB
3<br />
Table of Contents<br />
1 Important user in<strong>for</strong>mation . . . . . . . . . . . . . . . . . . . . . . . . . . . . . . . . . . . .5<br />
2 Introduction . . . . . . . . . . . . . . . . . . . . . . . . . . . . . . . . . . . . . . . . . . . . . . . .6<br />
2.1 LUCAS Chest Compression System . . . . . . . . . . . . . . . . . . . . . . . . . . . . . . . . . . . 6<br />
2.2 Intended use . . . . . . . . . . . . . . . . . . . . . . . . . . . . . . . . . . . . . . . . . . . . . . . . . . . . . . . 6<br />
2.3 Contraindications . . . . . . . . . . . . . . . . . . . . . . . . . . . . . . . . . . . . . . . . . . . . . . . . . . . 6<br />
2.4 Side effects . . . . . . . . . . . . . . . . . . . . . . . . . . . . . . . . . . . . . . . . . . . . . . . . . . . . . . . . 6<br />
2.5 Main parts . . . . . . . . . . . . . . . . . . . . . . . . . . . . . . . . . . . . . . . . . . . . . . . . . . . . . . . . . 6<br />
2.6 LUCAS components . . . . . . . . . . . . . . . . . . . . . . . . . . . . . . . . . . . . . . . . . . . . . . . 7<br />
2.7 <strong>Use</strong>r Control Panel . . . . . . . . . . . . . . . . . . . . . . . . . . . . . . . . . . . . . . . . . . . . . . . . . . 8<br />
3 Safety precautions . . . . . . . . . . . . . . . . . . . . . . . . . . . . . . . . . . . . . . . . . . .9<br />
3.1 Signal words . . . . . . . . . . . . . . . . . . . . . . . . . . . . . . . . . . . . . . . . . . . . . . . . . . . . . . . 9<br />
3.2 Personnel . . . . . . . . . . . . . . . . . . . . . . . . . . . . . . . . . . . . . . . . . . . . . . . . . . . . . . . . . 9<br />
3.3 Contraindications . . . . . . . . . . . . . . . . . . . . . . . . . . . . . . . . . . . . . . . . . . . . . . . . . . . 9<br />
3.4 Side effects . . . . . . . . . . . . . . . . . . . . . . . . . . . . . . . . . . . . . . . . . . . . . . . . . . . . . . . . 9<br />
3.5 Symbols on the device . . . . . . . . . . . . . . . . . . . . . . . . . . . . . . . . . . . . . . . . . . . . . . 10<br />
3.6 General safety precautions . . . . . . . . . . . . . . . . . . . . . . . . . . . . . . . . . . . . . . . . . . . 11<br />
3.7 Battery . . . . . . . . . . . . . . . . . . . . . . . . . . . . . . . . . . . . . . . . . . . . . . . . . . . . . . . . . . 11<br />
3.8 Operation . . . . . . . . . . . . . . . . . . . . . . . . . . . . . . . . . . . . . . . . . . . . . . . . . . . . . . . . 11<br />
3.9 Service . . . . . . . . . . . . . . . . . . . . . . . . . . . . . . . . . . . . . . . . . . . . . . . . . . . . . . . . . . 12<br />
4 First use preparations . . . . . . . . . . . . . . . . . . . . . . . . . . . . . . . . . . . . . . .12<br />
4.1 Delivered items . . . . . . . . . . . . . . . . . . . . . . . . . . . . . . . . . . . . . . . . . . . . . . . . . . . . 12<br />
4.2 The Battery . . . . . . . . . . . . . . . . . . . . . . . . . . . . . . . . . . . . . . . . . . . . . . . . . . . . . . . 13<br />
4.2.1 Charge the Battery . . . . . . . . . . . . . . . . . . . . . . . . . . . . . . . . . . . . . . . . . . . . . . . . . . . . 13<br />
4.3 Prepare the LUCAS Stabilisation Strap . . . . . . . . . . . . . . . . . . . . . . . . . . . . . . . . 14<br />
4.4 Prepare the Stabilisation Bag . . . . . . . . . . . . . . . . . . . . . . . . . . . . . . . . . . . . . . . . . . 14<br />
5 <strong>Use</strong> LUCAS . . . . . . . . . . . . . . . . . . . . . . . . . . . . . . . . . . . . . . . . . . . . . .15<br />
5.1 Arrival at the patient . . . . . . . . . . . . . . . . . . . . . . . . . . . . . . . . . . . . . . . . . . . . . . . . . 15<br />
5.2 Unpack LUCAS . . . . . . . . . . . . . . . . . . . . . . . . . . . . . . . . . . . . . . . . . . . . . . . . . . 15<br />
5.3 Assembly . . . . . . . . . . . . . . . . . . . . . . . . . . . . . . . . . . . . . . . . . . . . . . . . . . . . . . . . 16<br />
5.4 Adjustment and operation . . . . . . . . . . . . . . . . . . . . . . . . . . . . . . . . . . . . . . . . . . . . 17<br />
5.5 Apply the LUCAS Stabilisation Strap . . . . . . . . . . . . . . . . . . . . . . . . . . . . . . . . . . 19<br />
5.6 Move the patient . . . . . . . . . . . . . . . . . . . . . . . . . . . . . . . . . . . . . . . . . . . . . . . . . . . 20<br />
5.6.1 Secure the patient's arms . . . . . . . . . . . . . . . . . . . . . . . . . . . . . . . . . . . . . . . . . . . . . . 20<br />
5.6.2 Prepare to lift the patient . . . . . . . . . . . . . . . . . . . . . . . . . . . . . . . . . . . . . . . . . . . . . . . 20<br />
5.6.3 Lift the patient . . . . . . . . . . . . . . . . . . . . . . . . . . . . . . . . . . . . . . . . . . . . . . . . . . . . . . . 20<br />
5.6.4 Move the patient . . . . . . . . . . . . . . . . . . . . . . . . . . . . . . . . . . . . . . . . . . . . . . . . . . . . . 21<br />
LUCAS TM 2 Chest Compression System – <strong>Instructions</strong> <strong>for</strong> <strong>Use</strong><br />
100666-01 A, Valid from CO J2403, © 2009 JOLIFE AB
4<br />
5.7 Replace the Power Supply during operation . . . . . . . . . . . . . . . . . . . . . . . . . . . . . . 21<br />
5.7.1 Change the Battery . . . . . . . . . . . . . . . . . . . . . . . . . . . . . . . . . . . . . . . . . . . . . . . . . . . 21<br />
5.7.2 Connect to the external Power Supply . . . . . . . . . . . . . . . . . . . . . . . . . . . . . . . . . . . . . 22<br />
5.8 Adjunctive therapies . . . . . . . . . . . . . . . . . . . . . . . . . . . . . . . . . . . . . . . . . . . . . . . . 22<br />
5.8.1 Defibrillation . . . . . . . . . . . . . . . . . . . . . . . . . . . . . . . . . . . . . . . . . . . . . . . . . . . . . . . . . 22<br />
5.8.2 Ventilation . . . . . . . . . . . . . . . . . . . . . . . . . . . . . . . . . . . . . . . . . . . . . . . . . . . . . . . . . . 23<br />
5.8.3 <strong>Use</strong> in the catheteterisation laboratory . . . . . . . . . . . . . . . . . . . . . . . . . . . . . . . . . . . . . 23<br />
5.9 Remove LUCAS from the patient . . . . . . . . . . . . . . . . . . . . . . . . . . . . . . . . . . . . . 23<br />
6 Care after use and preparation <strong>for</strong> next use . . . . . . . . . . . . . . . . . . . . 23<br />
6.1 Cleaning routines . . . . . . . . . . . . . . . . . . . . . . . . . . . . . . . . . . . . . . . . . . . . . . . . . . . 24<br />
6.2 Remove and install the Suction Cup . . . . . . . . . . . . . . . . . . . . . . . . . . . . . . . . . . . . 24<br />
6.3 Remove and attach the Patient Straps . . . . . . . . . . . . . . . . . . . . . . . . . . . . . . . . . . . 24<br />
6.4 Remove and attach the LUCAS Stabilisation Strap . . . . . . . . . . . . . . . . . . . . . . . . 25<br />
6.5 Remove and recharge the Battery . . . . . . . . . . . . . . . . . . . . . . . . . . . . . . . . . . . . . . 25<br />
7 Maintenance . . . . . . . . . . . . . . . . . . . . . . . . . . . . . . . . . . . . . . . . . . . . . . 25<br />
7.1 Routine checks . . . . . . . . . . . . . . . . . . . . . . . . . . . . . . . . . . . . . . . . . . . . . . . . . . . . 25<br />
8 Troubleshooting . . . . . . . . . . . . . . . . . . . . . . . . . . . . . . . . . . . . . . . . . . . 26<br />
8.1 Indicators and warnings during normal operation . . . . . . . . . . . . . . . . . . . . . . . . . . . 26<br />
8.2 Battery replacement and Smart Restart feature . . . . . . . . . . . . . . . . . . . . . . . . . . . . 27<br />
8.3 Malfunction alarms . . . . . . . . . . . . . . . . . . . . . . . . . . . . . . . . . . . . . . . . . . . . . . . . . . 28<br />
9 Technical specifications . . . . . . . . . . . . . . . . . . . . . . . . . . . . . . . . . . . . 29<br />
9.1 Patient parameters . . . . . . . . . . . . . . . . . . . . . . . . . . . . . . . . . . . . . . . . . . . . . . . . . 29<br />
9.2 Compression parameters . . . . . . . . . . . . . . . . . . . . . . . . . . . . . . . . . . . . . . . . . . . . 29<br />
9.3 Device physical specifications . . . . . . . . . . . . . . . . . . . . . . . . . . . . . . . . . . . . . . . . . 29<br />
9.4 Device environmental specifications . . . . . . . . . . . . . . . . . . . . . . . . . . . . . . . . . . . . . 29<br />
9.5 Battery physical specifications . . . . . . . . . . . . . . . . . . . . . . . . . . . . . . . . . . . . . . . . . 30<br />
9.6 Battery environmental specifications . . . . . . . . . . . . . . . . . . . . . . . . . . . . . . . . . . . . 30<br />
9.7 Electromagnetic environmental declaration . . . . . . . . . . . . . . . . . . . . . . . . . . . . . . . 31<br />
9.8 Limited warranty . . . . . . . . . . . . . . . . . . . . . . . . . . . . . . . . . . . . . . . . . . . . . . . . . . . 34<br />
Appendix A; LUCAS2 parts and accessories . . . . . . . . . . . . . . . . . . . . . 35<br />
LUCAS TM 2 Chest Compression System – <strong>Instructions</strong> <strong>for</strong> <strong>Use</strong><br />
100666-01 A, Valid from CO J2403, © 2009 JOLIFE AB
5<br />
1 Important user<br />
in<strong>for</strong>mation<br />
The in<strong>for</strong>mation in these <strong>Instructions</strong> <strong>for</strong> <strong>Use</strong><br />
applies to the LUCAS2 Chest<br />
Compression System, also referred to as<br />
LUCAS.<br />
All operators must read the complete<br />
<strong>Instructions</strong> <strong>for</strong> <strong>Use</strong> be<strong>for</strong>e operating the<br />
LUCAS Chest Compression System.<br />
The <strong>Instructions</strong> <strong>for</strong> <strong>Use</strong> must always be<br />
easily accessible to the operators of LUCAS.<br />
Always follow local and/or international<br />
guidelines <strong>for</strong> cardiopulmonary resuscitation<br />
(<strong>CPR</strong>) when you use LUCAS.<br />
The use of other medical equipment or drugs<br />
in conjunction with LUCAS can affect the<br />
treatment. Always consult the <strong>Instructions</strong><br />
<strong>for</strong> <strong>Use</strong> of the other equipment and/or drugs<br />
to make sure that they are appropriate <strong>for</strong><br />
use in conjunction with <strong>CPR</strong>.<br />
LUCAS can only be bought by, or on the<br />
order of, a licensed medical practitioner.<br />
TRADEMARKS<br />
LUCAS is a trademark of JOLIFE AB.<br />
DECLARATION OF CONFORMITY<br />
LUCAS Chest Compression System<br />
complies with the requirements of the<br />
European Medical Device 93/42/EEC.<br />
It is marked with the CE-symbol:<br />
© Copyright JOLIFE AB 2009. All rights<br />
reserved.<br />
LUCAS TM 2 Chest Compression System – <strong>Instructions</strong> <strong>for</strong> <strong>Use</strong><br />
100666-01 A, Valid from CO J2403, © 2009 JOLIFE AB
6<br />
2 Introduction<br />
2.1 LUCAS Chest Compression<br />
System<br />
The LUCAS Chest Compression System is<br />
a portable tool designed to overcome<br />
problems that have been identified with<br />
manual chest compression. LUCAS assists<br />
rescuers giving 100 chest compressions per<br />
minute with a depth of 1.5 to 2 inches as<br />
recommended in the ERC (European<br />
Resuscitation Council) guidelines 1 .<br />
2.2 Intended use<br />
The LUCAS Chest Compression System is<br />
to be used <strong>for</strong> per<strong>for</strong>ming external cardiac<br />
compressions on adult patients who have<br />
acute circulatory arrest defined as absence<br />
of spontaneous breathing and pulse, and<br />
loss of consciousness.<br />
LUCAS must only be used in cases where<br />
chest compressions are likely to help the<br />
patient.<br />
2.3 Contraindications<br />
Do NOT use the LUCAS Chest Compression<br />
System in these cases:<br />
• If it is not possible to position LUCAS<br />
safely or correctly on the patient's chest.<br />
• Too small patient: If you cannot enter the<br />
PAUSE mode or ACTIVE mode when the<br />
pressure pad touches the patient's chest<br />
and LUCAS alarms with 3 fast signals.<br />
• Patient too large: the Upper Part of<br />
LUCAS cannot be locked to the Back<br />
Plate without compressing the patient's<br />
chest.<br />
Always follow local and/or international<br />
guidelines <strong>for</strong> <strong>CPR</strong> when using LUCAS.<br />
2.4 Side effects<br />
The International Liaison Committee on<br />
Resuscitation (ILCOR) states these side<br />
effects of <strong>CPR</strong> 2 :<br />
"Rib fractures and other injuries are common<br />
but acceptable consequences of <strong>CPR</strong> given<br />
the alternative of death from cardiac arrest.<br />
After resuscitation, all patients should be<br />
reassessed and re-evaluated <strong>for</strong><br />
resuscitation-related injuries."<br />
Apart from the above, bruising and soreness<br />
of the chest are common during the use of<br />
the LUCAS Chest Compression System.<br />
2.5 Main parts<br />
The main parts of the LUCAS Chest<br />
Compression System include;<br />
• A Back Plate which is positioned underneath<br />
the patient as a support during<br />
external chest compressions.<br />
• An Upper Part which contains the proprietary<br />
and rechargeable LUCAS Battery<br />
and the compression mechanism with the<br />
disposable Suction Cup.<br />
• A Stabilisation Strap which helps to<br />
secure the position of the device relative<br />
to the patient.<br />
• A padded Carrying Bag.<br />
1. European Resuscitation Council Guidelines <strong>for</strong><br />
Resuscitation 2005, Resuscitation 2005 67S1;S13-<br />
S14<br />
2. 2005 International Consensus on Cardiopulmonary<br />
diopulmonary Resuscitation and Emergency Cardiovascular<br />
Care Science with Treatment Recommendations.<br />
Resuscitation 2005;67:195<br />
LUCAS TM 2 Chest Compression System – <strong>Instructions</strong> <strong>for</strong> <strong>Use</strong><br />
100666-01 A, Valid from CO J2403 © 2009 JOLIFE AB
7<br />
2.6 LUCAS components<br />
13<br />
15<br />
1<br />
9 8 10<br />
2<br />
3<br />
14 16<br />
4<br />
5<br />
21<br />
20<br />
6<br />
18<br />
7<br />
19<br />
1. <strong>Use</strong>r Control Panel<br />
2. Hood<br />
3. Patient Strap<br />
4. Release ring<br />
5. Support leg<br />
6. Claw locks<br />
7. Back Plate<br />
8. DC input<br />
9. Bellows<br />
10. Suction Cup<br />
11. Power Supply<br />
12. Power Supply cord<br />
13. Battery<br />
14. Pressure pad<br />
15. Upper Part<br />
16. Vent holes<br />
17. Car Power Cable<br />
18. Carrying Bag<br />
13 12 11<br />
17<br />
LUCAS Stabilisation Strap<br />
19. Cushion strap<br />
20. Buckle<br />
21. Support leg strap<br />
LUCAS TM 2 Chest Compression System – <strong>Instructions</strong> <strong>for</strong> <strong>Use</strong><br />
100666-01 A, Valid from CO J2403, © 2009 JOLIFE AB
8<br />
2.7 <strong>Use</strong>r Control Panel<br />
ON/OFF:<br />
LUCAS will power up/power down when<br />
you push this key <strong>for</strong> 1 second. When<br />
LUCAS powers up, it automatically does<br />
a self-test of the functions and the<br />
protection safety system. When the selftest<br />
is complete the green LED (Light<br />
Emitting Diode) beside the ADJUST key<br />
comes on. This procedure takes<br />
approximately 3 seconds.<br />
ADJUST:<br />
This mode is used when you want to<br />
adjust the position of the Suction Cup.<br />
When you push this key, you can move<br />
the Suction Cup up or down. To adjust<br />
the Start Position of the Suction Cup,<br />
manually push the Suction Cup down<br />
onto the chest of the patient using two<br />
fingers.<br />
PAUSE:<br />
When you push this key, the compression<br />
mechanism temporarily stops and is<br />
locked in the Start Position. <strong>Use</strong> this<br />
function when you want to stop LUCAS<br />
temporarily but still want to maintain the<br />
Suction Cup Start Position.<br />
ACTIVE (continuous):<br />
When you push this key, LUCAS<br />
per<strong>for</strong>ms continuous chest<br />
compressions. The green LED signal will<br />
blink 8 times each minute to indicate<br />
when ventilation is required during<br />
compression.<br />
MUTE:<br />
If you push this key when LUCAS is<br />
operating, you mute the alarm <strong>for</strong><br />
60 seconds. If you push this key when<br />
LUCAS is turned OFF, the Battery<br />
indicator shows the charge status of the<br />
Battery.<br />
Battery indicator:<br />
The three green LEDs show the Battery<br />
charge status:<br />
• Three green LEDs: Fully charged<br />
• Two green LEDs: 2/3 charged<br />
• One green LED: 1/3 charged<br />
• One intermittent orange LED and alarm<br />
during operation: low battery, approximately<br />
10 minutes of operating capacity<br />
remaining.<br />
• One intermittent red LED and an alarm<br />
signal: the Battery has run down and<br />
must be recharged.<br />
• One constant red LED and an alarm<br />
signal: the Battery is defective.<br />
Note: When the LED to the far right is<br />
orange and not green, the Battery has<br />
reached the end of its service life. JOLIFE<br />
AB recommends that you replace this<br />
Battery with a new one.<br />
Alarm indicator:<br />
A red LED and an alarm signal indicate<br />
a malfunction.<br />
Refer to Troubleshooting 8:<br />
8.1 <strong>for</strong> indicators and alerts during<br />
normal operation.<br />
8.3 <strong>for</strong> malfunction alarms.<br />
ACTIVE (30:2):<br />
When you push this key, LUCAS<br />
per<strong>for</strong>ms 30 chest compressions and<br />
then temporarily stops <strong>for</strong> 3 seconds.<br />
During the stop time, the operator can<br />
per<strong>for</strong>m 2 ventilations. After this stop time<br />
the cycle starts again. An intermittent LED<br />
combined with an alarm signal will alert<br />
the operator be<strong>for</strong>e each ventilation<br />
pause.<br />
LUCAS TM 2 Chest Compression System – <strong>Instructions</strong> <strong>for</strong> <strong>Use</strong><br />
100666-01 A, Valid from CO J2403 © 2009 JOLIFE AB
9<br />
3 Safety precautions<br />
To ensure maximum safety, always read this<br />
section carefully be<strong>for</strong>e operating, carrying<br />
out any work on the equipment or making<br />
any adjustments.<br />
3.1 Signal words<br />
Throughout the manual, signal words are<br />
indicated with, "WARNING" or "CAUTION".<br />
• CAUTION - signal word used to indicate<br />
a potentially hazardous situation which, if<br />
not avoided, could result in minor or moderate<br />
injury.<br />
• WARNING - signal word used to indicate<br />
a potentially hazardous situation which, if<br />
not avoided, could result in death or serious<br />
injury.<br />
3.2 Personnel<br />
JOLIFE AB recommends that the LUCAS<br />
Chest Compression System is only used by<br />
persons with medical skills such as:<br />
first responders, ambulance personnel,<br />
nurses, physicians or medical staff, who<br />
have:<br />
• undertaken a <strong>CPR</strong> course according to<br />
resuscitation guidelines, e.g. American<br />
Heart Association, European Council of<br />
Resuscitation or equivalent,<br />
• AND received training in how to use<br />
LUCAS.<br />
3.3 Contraindications<br />
Do NOT use the LUCAS Chest Compression<br />
System in these cases:<br />
• If it is not possible to position LUCAS safely<br />
or correctly on the patient's chest.<br />
• Too small patient: If you cannot enter the<br />
PAUSE mode or ACTIVE mode when the<br />
pressure pad touches the patient's chest<br />
and LUCAS alarms with 3 fast signals.<br />
• Patient too large: the Upper Part of LU-<br />
CAS cannot be locked to the Back Plate<br />
without compressing the patient's chest.<br />
Always follow local and/or international<br />
guidelines <strong>for</strong> <strong>CPR</strong> when using LUCAS.<br />
3.4 Side effects<br />
The International Liaison Committee on<br />
Resuscitation (ILCOR) states the following<br />
side effects of <strong>CPR</strong> 3 :<br />
"Rib fractures and other injuries are common<br />
but acceptable consequences of <strong>CPR</strong> given<br />
the alternative of death from cardiac arrest.<br />
After resuscitation, all patients should be<br />
reassessed and re-evaluated <strong>for</strong><br />
resuscitation-related injuries."<br />
The above side effects, as well as bruising<br />
and soreness of the chest, are common<br />
during use of the LUCAS Chest<br />
Compression System.<br />
3. 2005 International Concensus on Cardiopulmonary<br />
Resuscitation and Emergency Cardiovascular Care<br />
Science with Treatment Recommendations. Resuscitation<br />
2005;67:195<br />
LUCAS TM 2 Chest Compression System – <strong>Instructions</strong> <strong>for</strong> <strong>Use</strong><br />
100666-01 A, Valid from CO J2403, © 2009 JOLIFE AB
10<br />
3.5 Symbols on the device<br />
Symbols on<br />
type label<br />
Symbol Meaning<br />
Caution – keep your fingers away<br />
Do not put your hands on or below the<br />
Suction Cup while the LUCAS is operational.<br />
Keep your fingers away from<br />
the claw locks when attaching the<br />
Upper Part or lifting the patient.<br />
Caution – do not lift by the Patient<br />
Straps<br />
Do not use the Patient Straps to lift the<br />
patient. The straps are only to attach<br />
the patient’s arms to LUCAS.<br />
Place the lower edge of the Suction<br />
Cup immediately above the bottom of<br />
the sternum, as indicated in the figure.<br />
The Suction Cup should be central on<br />
the chest.<br />
Pull the release rings to release the<br />
Upper Part from the Back Plate.<br />
Symbols on type label<br />
Symbol Meaning<br />
Caution – see instructions <strong>for</strong> use<br />
All operators must read the complete<br />
<strong>Instructions</strong> <strong>for</strong> <strong>Use</strong> be<strong>for</strong>e operating<br />
the LUCAS Chest Compression<br />
System.<br />
Year of manufacture.<br />
Battery and/or electronics may not be<br />
disposed of in normal waste.<br />
2<br />
Art no.<br />
300000-00<br />
12-24VDC<br />
Do not reuse - Single use only.<br />
DC input.<br />
IP 43<br />
Degree of protection provided by<br />
enclosure per IEC 60 529.<br />
DC voltage.<br />
Defibrillation protected type BF patient<br />
connection.<br />
LUCAS TM 2 Chest Compression System – <strong>Instructions</strong> <strong>for</strong> <strong>Use</strong><br />
100666-01 A, Valid from CO J2403 © 2009 JOLIFE AB
11<br />
3.6 General safety precautions<br />
Caution - use only approved<br />
accessories<br />
<strong>Use</strong> only JOLIFE AB-approved accessories<br />
with LUCAS. LUCAS may not operate<br />
correctly if you use accessories that are not<br />
approved. <strong>Use</strong> only LUCAS Batteries and<br />
the LUCAS Power Supply that are designed<br />
<strong>for</strong> LUCAS. If you use other batteries or<br />
power supplies you can cause permanent<br />
damage to LUCAS. This will also void the<br />
warranty.<br />
Caution - liquid<br />
Do not immerse LUCAS in liquid. The device<br />
can be damaged if liquid enters the hood.<br />
3.7 Battery<br />
WARNING - LOW BATTERY<br />
When the orange Battery LED shows an<br />
intermittent light, either:<br />
• Replace the Battery with one that is<br />
charged.<br />
• Connect the external LUCAS Power<br />
Supply.<br />
Caution - keep Battery in place<br />
The Battery must always be in place <strong>for</strong><br />
LUCAS to be able to operate, even when<br />
powered by the external Power Supply.<br />
To minimise interruptions, we recommend<br />
that there is always a spare, charged,<br />
LUCAS Battery in the Carrying Bag.<br />
3.8 Operation<br />
WARNING - UNSATISFACTORY<br />
POSITION<br />
Start manual <strong>CPR</strong> again if it is not possible to<br />
position LUCAS safely and correctly on the<br />
patient's chest.<br />
WARNING - INCORRECT POSITION<br />
ON CHEST<br />
If the pressure pad is not in the correct<br />
position in relation to the sternum, there is an<br />
increased risk of damage to the rib cage and<br />
the internal organs. Also, the patient's blood<br />
circulation is compromised.<br />
WARNING - INCORRECT START<br />
POSITION<br />
The patient's blood circulation is<br />
compromised if the pressure pad presses<br />
down too heavily or too lightly on the chest.<br />
Push the ADJUST key and adjust the height<br />
of the Suction Cup immediately.<br />
WARNING - CHANGED POSITION<br />
DURING OPERATION<br />
If the position of the Suction Cup changes<br />
during operation or during defibrillation,<br />
immediately push ADJUST and adjust the<br />
position. Always use the LUCAS Stabilisation<br />
Strap to help secure the correct position.<br />
Caution - defibrillation electrodes<br />
Position the defibrillator electrodes and wires<br />
so that they are not under the Suction Cup. If<br />
there are already electrodes on the patient,<br />
make sure that they are not positioned where<br />
the Suction Cup should be placed. If they<br />
are, you must apply new electrodes.<br />
Caution - gel on chest<br />
If there is gel on the patient's chest (e.g. from<br />
ultrasound examination), the position of the<br />
Suction Cup can change during use.<br />
Remove all gel be<strong>for</strong>e you apply the Suction<br />
Cup.<br />
Caution - Stabilisation Strap application<br />
Delay the application of the LUCAS<br />
Stabilisation Strap if this prevents or delays<br />
any medical treatment of the patient.<br />
Caution - adjunctive therapies<br />
The use of other medical equipment or drugs<br />
in conjunction with LUCAS can affect the<br />
treatment. Always consult the <strong>Instructions</strong><br />
<strong>for</strong> <strong>Use</strong> of the other equipment and/or drugs<br />
to make sure that they are appropriate <strong>for</strong><br />
use in conjunction with <strong>CPR</strong>.<br />
WARNING - ECG interference<br />
Chest compressions interfere with ECG<br />
analysis. Push PAUSE be<strong>for</strong>e you start the<br />
ECG analysis. Make the interruption as short<br />
as possible. Push ACTIVE (continuous) or<br />
ACTIVE (30:2) to start the compressions<br />
again.<br />
LUCAS TM 2 Chest Compression System – <strong>Instructions</strong> <strong>for</strong> <strong>Use</strong><br />
100666-01 A, Valid from CO J2403, © 2009 JOLIFE AB
12<br />
WARNING - PATIENT INJURY<br />
Do not let the patient or the device stay<br />
unattended when LUCAS is working.<br />
Caution - keep your fingers away<br />
Do not put your hands on or below the<br />
Suction Cup when LUCAS is working. Keep<br />
your fingers away from the claw locks when<br />
attaching the Upper Part or lifting the patient.<br />
Caution - IV access<br />
Make sure that IV access is not obstructed.<br />
Caution - do not block the vent holes<br />
Do not obstruct the vent holes under the<br />
hood as this can cause the device to<br />
overheat.<br />
Caution - device alarms<br />
If there is any malfunction during operation<br />
the red Alarm LED will be illuminated and<br />
a buzzer signal heard. For troubleshooting,<br />
see section 8.3.<br />
WARNING - MALFUNCTION<br />
If there are interruptions, or the<br />
compressions are not sufficient, or<br />
something unusual occurs during operation:<br />
Push ON/OFF <strong>for</strong> 1 second to stop LUCAS<br />
and remove the device. Start manual chest<br />
compressions.<br />
Caution - do not use the Patient Straps<br />
<strong>for</strong> lifting<br />
Do not use the Patient Straps to lift the<br />
patient. The straps are only to attach the<br />
patient's arms to LUCAS.<br />
Consult your distributor or JOLIFE AB <strong>for</strong><br />
current in<strong>for</strong>mation on where to send<br />
LUCAS <strong>for</strong> maintenance.<br />
4 First use preparations<br />
4.1 Delivered items<br />
LUCAS2 Chest Compression System is<br />
supplied in one box with:<br />
• A LUCAS device (Upper Part and Back<br />
Plate)<br />
• 3 disposable LUCAS Suction Cups<br />
• A LUCAS Carrying Bag<br />
• <strong>Instructions</strong> <strong>for</strong> <strong>Use</strong> in the relevant<br />
language<br />
• A rechargeable LUCAS Battery<br />
• A LUCAS Stabilisation Strap<br />
• LUCAS Patient Straps<br />
Accessories (optional):<br />
• Disposable LUCAS Suction Cups<br />
• External LUCAS Battery Charger<br />
• Extra LUCAS Batteries<br />
• LUCAS Power Supply with Mains cable<br />
• LUCAS 12-24V DC Car Power cable<br />
3.9 Service<br />
We recommend yearly servicing of LUCAS to<br />
ensure that it operates correctly. <strong>Use</strong> the<br />
original shipping box, when you send LUCAS<br />
<strong>for</strong> servicing. Keep the original shipping box,<br />
with padding, <strong>for</strong> this purpose.<br />
WARNING - DO NOT OPEN<br />
Never open the casing of LUCAS. Do not<br />
change or modify external or internal parts of<br />
LUCAS.<br />
Unless otherwise specified, all servicing and<br />
repairs must be done by service personnel<br />
that are approved by JOLIFE AB.<br />
If the above conditions are not followed, this<br />
can lead to patient/operator injury or death,<br />
and will void the warranty.<br />
LUCAS TM 2 Chest Compression System – <strong>Instructions</strong> <strong>for</strong> <strong>Use</strong><br />
100666-01 A, Valid from CO J2403 © 2009 JOLIFE AB
13<br />
4.2 The Battery<br />
The proprietary Lithium Polymer (LiPo)<br />
Battery is the exclusive power source <strong>for</strong><br />
LUCAS. You can remove the Battery from<br />
LUCAS and recharge it. The Battery is<br />
mechanically keyed in LUCAS and in the<br />
Battery Charger to make sure it is correctly<br />
positioned. The top of the battery has<br />
connectors fo both power and data transfer<br />
with the Battery charger and with LUCAS.<br />
• Installed in LUCAS:<br />
- put the Battery in the hood slot on<br />
LUCAS,<br />
- connect the Power Supply to the DC<br />
input on the side of LUCAS,<br />
- plug the Power Supply in to the mains<br />
wall socket.<br />
4.2.1 Charge the Battery<br />
You can charge the LUCAS Battery in two<br />
ways:<br />
• In the external LUCAS Battery Charger<br />
(optional)<br />
- put the Battery in the slot on the<br />
Battery Charger,<br />
- plug the Battery Charger power cable<br />
in to the mains wall socket.<br />
Green LEDs indicate a fully charged Battery.<br />
Caution - keep Battery in position<br />
The Battery must always be in position <strong>for</strong><br />
LUCAS to be able to operate, even when<br />
powered by the external Power Supply.<br />
Caution - use only approved<br />
accessories<br />
<strong>Use</strong> only JOLIFE AB-approved accessories<br />
with LUCAS. LUCAS does not operate<br />
correctly if you use accessories that are not<br />
approved. <strong>Use</strong> only LUCAS Batteries and<br />
the LUCAS Power Supply that are designed<br />
<strong>for</strong> LUCAS. If you use other batteries or other<br />
Power Supply you can cause permanent<br />
damage to LUCAS. This will also void the<br />
warranty.<br />
LUCAS TM 2 Chest Compression System – <strong>Instructions</strong> <strong>for</strong> <strong>Use</strong><br />
100666-01 A, Valid from CO J2403, © 2009 JOLIFE AB
14<br />
4.3 Prepare the LUCAS<br />
Stabilisation Strap<br />
Be<strong>for</strong>e using LUCAS <strong>for</strong> the first time, attach<br />
the support leg straps, which are part of the<br />
Stabilisation Strap, to the LUCAS support<br />
legs.<br />
1. Fold one support leg strap around each<br />
LUCAS support leg.<br />
2. Fasten the buckles on the inner side of<br />
the support leg.<br />
4.4 Prepare the Carrying Bag<br />
TM<br />
1. Insert a fully charged LUCAS Battery in<br />
the Battery slot in the hood of LUCAS.<br />
2. Make sure that a Suction Cup is<br />
mounted correctly.<br />
3. Put the Upper Part in the Carrying Bag<br />
with the hood towards the open end.<br />
4. Put the external Power Supply (optional)<br />
in one of the pockets between the<br />
LUCAS support legs.<br />
5. Put an extra (optional) charged LUCAS<br />
Battery in the other pocket.<br />
6. Put the cushion strap of the Stabilisation<br />
Strap between the support legs.<br />
7. Extra Suction Cups can be put in the<br />
side pockets close to the hood.<br />
8. Position the Back Plate on top of the<br />
bag.<br />
9. Close the green retaining flap.<br />
10. Put the <strong>Instructions</strong> <strong>for</strong> <strong>Use</strong> (IFU) in the<br />
transparent IFU pocket in the bag<br />
11. Close the bag.<br />
LUCAS TM 2 Chest Compression System – <strong>Instructions</strong> <strong>for</strong> <strong>Use</strong><br />
100666-01 A, Valid from CO J2403 © 2009 JOLIFE AB
3<br />
30:2<br />
15<br />
5 <strong>Use</strong> LUCAS<br />
5.1 Arrival at the patient<br />
When you have confirmed a cardiac arrest,<br />
immediately start manual cardiopulmonary<br />
resuscitation (<strong>CPR</strong>). Continue with a<br />
minimum of interruptions.<br />
3. Push ON/OFF on the <strong>Use</strong>r Control Panel<br />
<strong>for</strong> 1 second to power up LUCAS in the<br />
bag and start the self test. The green<br />
LED adjacent to the ADJUST key<br />
comes on when LUCAS is ready <strong>for</strong> use.<br />
5.2 Unpack LUCAS<br />
1. Position the bag with its top nearest to<br />
you.<br />
2. Put your left hand on the black strap on<br />
the left hand side and pull the red handle<br />
so that the bag unfolds.<br />
TM<br />
LUCAS 2<br />
Note: LUCAS powers down automatically<br />
after 5 minutes if you leave it in the ADJUST<br />
mode.<br />
Caution - device alarm<br />
If there is a malfunction, the red Alarm LED<br />
comes on and a buzzer signal is heard. For<br />
trouble shooting, refer to section 8.3.<br />
Caution - keep Battery in position<br />
The Battery must always be in position <strong>for</strong><br />
LUCAS to be able to operate, even when<br />
powered by the external Power Supply.<br />
LUCAS TM 2 Chest Compression System – <strong>Instructions</strong> <strong>for</strong> <strong>Use</strong><br />
100666-01 A, Valid from CO J2403, © 2009 JOLIFE AB
16<br />
5.3 Assembly<br />
1. Remove the LUCAS Back Plate from the<br />
Carrying Bag.<br />
5. Start manual <strong>CPR</strong> again.<br />
6. Hold the handles on the support legs to<br />
remove the LUCAS Upper Part from the<br />
bag. Pull the release rings once to make<br />
sure that the claw locks are open.<br />
7. Let go of the release rings.<br />
2. Stop manual <strong>CPR</strong>.<br />
3. Make sure that you support the patient's<br />
head.<br />
4. Carefully put the LUCAS Back Plate<br />
under the patient, immediately below the<br />
arm pits. <strong>Use</strong> one of these procedures:<br />
a. Hold the patient's shoulder and lift the<br />
patient's upper body slightly,<br />
b. Roll the patient from side to side.<br />
Note: Accurate positioning of the<br />
Back Plate makes it easier and faster<br />
to position the Suction Cup correctly.<br />
LUCAS TM 2 Chest Compression System – <strong>Instructions</strong> <strong>for</strong> <strong>Use</strong><br />
100666-01 A, Valid from CO J2403 © 2009 JOLIFE AB
17<br />
8. Attach the support leg that is nearest to<br />
you to the Back Plate.<br />
5.4 Adjustment and operation<br />
The compression point should be the same<br />
place as <strong>for</strong> manual <strong>CPR</strong> and as indicated<br />
in guidelines.<br />
When the pressure pad in the Suction Cup is<br />
in the correct position, the lower edge of<br />
the Suction Cup is immediately over the<br />
bottom of the sternum.<br />
9. Stop manual <strong>CPR</strong>.<br />
10. Attach the other support leg to the Back<br />
Plate, so that the two support legs lock<br />
against the Back Plate. Listen <strong>for</strong> a click.<br />
11. Pull upwards once to make sure that the<br />
parts are correctly attached.<br />
Suction Cup<br />
outer edge<br />
Pressure<br />
pad<br />
WARNING - INCORRECT POSITION<br />
ON CHEST<br />
If the pressure pad is not in the correct<br />
position relative to the sternum, there is an<br />
increased risk of damage to the rib cage and<br />
internal organs. Also, the patient's blood<br />
circulation is compromised.<br />
Note: If the LUCAS Upper Part does not<br />
attach to the Back Plate, make sure that the<br />
claw locks are open and that you have<br />
released the release rings.<br />
WARNING - PATIENT TOO LARGE<br />
If the patient is too large, the Upper Part of<br />
LUCAS cannot lock to the Back Plate<br />
without compressing the patient's chest.<br />
Continue the manual compressions.<br />
LUCAS TM 2 Chest Compression System – <strong>Instructions</strong> <strong>for</strong> <strong>Use</strong><br />
100666-01 A, Valid from CO J2403, © 2009 JOLIFE AB
18<br />
1. <strong>Use</strong> your finger to make sure that the<br />
lower edge of the Suction Cup is immediately<br />
over the end of the sternum<br />
c. Push PAUSE to lock the Start<br />
Position - then remove your fingers<br />
from the Suction Cup.<br />
If necessary, move the device by pulling<br />
the support legs to adjust the position.<br />
2. Adjust the height of the Suction Cup to<br />
set the Start Position.<br />
a. Make sure that LUCAS is in the<br />
ADJUST mode.<br />
b. Push the Suction Cup down with two<br />
fingers until the pressure pad touches<br />
the patient's chest without<br />
compressing the chest.<br />
d. Check <strong>for</strong> proper position. If not, push<br />
ADJUST, pull up the Suction Cup to<br />
readjust the central position and/or<br />
height <strong>for</strong> a new Start Position.<br />
Push PAUSE.<br />
e. Push ACTIVE (continuous) OR<br />
ACTIVE (30:2) to start the<br />
compressions.<br />
WARNING - UNSATISFACTORY<br />
POSITION<br />
Start manual <strong>CPR</strong> again if it is not possible to<br />
position LUCAS safely and correctly on the<br />
patient's chest.<br />
WARNING - PATIENT TOO SMALL<br />
Too small patient: If you cannot enter the<br />
PAUSE mode or ACTIVE mode when the<br />
pressure pad touches the patient's chest<br />
and LUCAS alarms with 3 fast signals.<br />
Start manual compressions again.<br />
LUCAS TM 2 Chest Compression System – <strong>Instructions</strong> <strong>for</strong> <strong>Use</strong><br />
100666-01 A, Valid from CO J2403 © 2009 JOLIFE AB
19<br />
WARNING - INCORRECT START<br />
POSITION<br />
The patient's blood circulation is<br />
compromised if the pressure pad presses<br />
down too heavily or too lightly on the chest.<br />
Push the ADJUST key and adjust the height<br />
of the Suction Cup immediately.<br />
Caution - gel on chest<br />
If there is gel on the patient's chest (e.g. from<br />
ultrasound examination), the position of the<br />
Suction Cup can change during operation.<br />
Remove all gel be<strong>for</strong>e you apply the Suction<br />
Cup.<br />
Caution - keep your fingers away<br />
Do not put your hands or other body parts on<br />
or under the Suction Cup when LUCAS is<br />
working. Do not touch the claw locks,<br />
especially when you lift the patient.<br />
WARNING - PATIENT INJURY<br />
Do not let the patient or the device stay<br />
unattended while LUCAS is in operation.<br />
WARNING - CHANGED POSITION<br />
DURING OPERATION<br />
If the position of the Suction Cup changes<br />
during operation or during defibrillation,<br />
immediately push ADJUST and adjust the<br />
position. Always use the LUCAS Stabilisation<br />
Strap to help secure the correct position.<br />
Caution - do not block the vent holes<br />
Do not obstruct the vent holes under the<br />
hood since this can cause the device to<br />
overheat.<br />
5.5 Apply the LUCAS<br />
Stabilisation Strap<br />
The LUCAS Stabilisation Strap helps secure<br />
the correct position during operation. Apply it<br />
while LUCAS is working/operational to keep<br />
interruptions to a minimum.<br />
Caution - Stabilisation Strap application<br />
Delay the application of the LUCAS<br />
Stabilisation Strap if this prevents or delays<br />
any medical treatment of the patient.<br />
1. Remove the cushion strap, which is a<br />
part of the Stabilisation Strap, from the<br />
Carrying Bag (the support leg straps part<br />
of the Stabilisation Strap should already<br />
be attached to the support legs).<br />
2. Extend the cushion strap fully at the<br />
buckles.<br />
3. Carefully lift the patient's head and put<br />
the cushion behind the patient's neck.<br />
Position the cushion as near the<br />
patient's shoulders as possible.<br />
4. Join the buckles on the support leg<br />
straps with the buckles on the cushion<br />
strap. Make sure that the straps are not<br />
twisted.<br />
5. Hold the LUCAS support legs stable and<br />
tighten the cushion strap.<br />
WARNING - MALFUNCTION<br />
If there are interruptions, or the<br />
compressions are not sufficient, or<br />
something unusual occurs during operation:<br />
Push ON/OFF <strong>for</strong> 1 second to stop LUCAS<br />
and remove the device. Start manual chest<br />
compressions.<br />
WARNING - LOW BATTERY<br />
When the orange Battery LED shows an<br />
intermittent light, either:<br />
• Replace the Battery with one that is<br />
charged.<br />
• Connect the external LUCAS Power<br />
Supply.<br />
LUCAS TM 2 Chest Compression System – <strong>Instructions</strong> <strong>for</strong> <strong>Use</strong><br />
100666-01 A, Valid from CO J2403, © 2009 JOLIFE AB
20<br />
6. Make sure that the position of the Suction<br />
Cup is correct on the patient's<br />
chest.<br />
If it is not, adjust the position:<br />
a. Push ADJUST.<br />
b. Release the cushion straps from the<br />
support leg straps.<br />
c. Adjust the Suction Cup position (as<br />
described in the section 5.4.2).<br />
d. When the Suction Cup is in the correct<br />
position, push ACTIVE (continuous)<br />
or ACTIVE (30:2) to start the<br />
compressions again.<br />
e. Attach the cushion strap again.<br />
Refer to the steps 2 to 5 above.<br />
5.6.2 Prepare to lift the patient<br />
1. Make a decision about what equipment<br />
you will move and where to put the transportation<br />
device.<br />
2. Those at the patient's side should:<br />
a. put one hand below the claw locks<br />
under the support leg<br />
5.6 Move the patient<br />
5.6.1 Secure the patient's arms<br />
When you move the patient, you can secure<br />
the patient's arms with the Patient Straps on<br />
the LUCAS. This makes it easier to move the<br />
patient.<br />
b. with the other hand, hold the patient's<br />
belt, trousers or under the thigh<br />
3. Make sure that the patient's head is<br />
stable.<br />
Caution - do not use the Patient Straps<br />
<strong>for</strong> lifting<br />
Do not use the Patient Straps to lift the<br />
patient. The straps are only to attach the<br />
patient's arms to LUCAS.<br />
Caution - IV access<br />
Make sure that IV access is not obstructed.<br />
5.6.3 Lift the patient<br />
1. Push PAUSE to temporarily stop the<br />
compressions.<br />
2. Lift and move the patient to a stretcher or<br />
other transportation device (backboard,<br />
vacuum mattress or similar).<br />
3. Make sure that the Suction Cup is in the<br />
correct position on the patient's chest.<br />
4. Push ACTIVE (continuous) or<br />
ACTIVE (30:2) to start the compressions<br />
again.<br />
LUCAS TM 2 Chest Compression System – <strong>Instructions</strong> <strong>for</strong> <strong>Use</strong><br />
100666-01 A, Valid from CO J2403 © 2009 JOLIFE AB
21<br />
5.6.4 Move the patient<br />
LUCAS can continue working while you<br />
move the patient if:<br />
• LUCAS and the patient are safely positioned<br />
on the transportation device<br />
• LUCAS stays in the correct position and<br />
angle on the patient's chest<br />
5.7.1 Change the Battery<br />
Keep interruptions to a minimum while<br />
changing the Battery.<br />
Note: To minimise interruptions, we<br />
recommend to always have a spare,<br />
charged, LUCAS Battery in the Carrying<br />
Bag.<br />
1. Push PAUSE to temporarily stop the<br />
compressions.<br />
2. Pull the Battery out and then upwards<br />
to remove it.<br />
If necessary, adjust the position of the<br />
Suction Cup.<br />
WARNING - CHANGED POSITION<br />
DURING OPERATION<br />
If the position of the Suction Cup changes<br />
during operation or during defibrillation,<br />
immediately push ADJUST and adjust the<br />
position. Always use the LUCAS Stabilisation<br />
Strap to help secure the correct position.<br />
5.7 Replace the Power Supply<br />
during operation<br />
When the Battery is low, LUCAS shows an<br />
intermittent orange LED and there is an<br />
audible alarm signal.<br />
3. Install a fully-charged LUCAS Battery.<br />
Put it in from above.<br />
4. Wait until the green PAUSE mode LED<br />
comes on.<br />
5. Push ACTIVE (continuous) or<br />
ACTIVE (30:2) to start the chest compressions<br />
again. The LUCAS Smart Restart<br />
feature remembers the settings and<br />
Start Position <strong>for</strong> 60 seconds.<br />
Note: If the Battery change takes more than<br />
60 seconds, LUCAS does a self test and you<br />
must adjust the Start Position again.<br />
LUCAS TM 2 Chest Compression System – <strong>Instructions</strong> <strong>for</strong> <strong>Use</strong><br />
100666-01 A, Valid from CO J2403, © 2009 JOLIFE AB
22<br />
5.7.2 Connect to the external Power<br />
Supply<br />
You can connect the LUCAS Power Supply<br />
or Car Power Cable when the LUCAS is in all<br />
operating modes.<br />
Caution - keep Battery in position<br />
The Battery must always be in position <strong>for</strong><br />
LUCAS to be able to operate, even when<br />
powered by the external Power Supply.<br />
To use the Power Supply cable:<br />
• Connect the Power Supply cable to<br />
LUCAS.<br />
5.8.1 Defibrillation<br />
Defibrillation can be per<strong>for</strong>med while LUCAS<br />
operates.<br />
1. You can apply the defibrillation electrodes<br />
be<strong>for</strong>e or after LUCAS has been<br />
put in position.<br />
2. Per<strong>for</strong>m the defibrillation according to<br />
the defibrillator manufacurer's instructions.<br />
Caution - defibrillation electrodes<br />
Position the defibrillation electrodes and<br />
wires so that they are not under the Suction<br />
Cup. If there are already electrodes on the<br />
patient, make sure that they are not where<br />
the Suction Cup will be positioned. If they<br />
are, you must apply new electrodes.<br />
3. After defibrillation, make sure that the<br />
position of the Suction Cup is correct.<br />
If necessary, adjust the position.<br />
• Plug the mains cable in to the wall mains<br />
socket (100-240V, 50/60Hz)<br />
To use the Car Power Cable:<br />
• Connect the Car Power Cable to LUCAS<br />
• Plug the Car Power Cable in to the car<br />
power socket (12-24V DC)<br />
5.8 Adjunctive therapies<br />
Caution - adjunctive therapies<br />
The use of other medical equipment or drugs<br />
in conjunction with LUCAS can affect the<br />
treatment. Always consult the instructions <strong>for</strong><br />
use of the other equipment and/or drugs to<br />
make sure that they are appropriate in<br />
conjunction with <strong>CPR</strong>.<br />
WARNING - CHANGED POSITION<br />
DURING OPERATION<br />
If the position of the Suction Cup changes<br />
during operation or during defibrillation,<br />
immediately push ADJUST and adjust the<br />
position. Always use the LUCAS Stabilisation<br />
Strap to help secure the correct position.<br />
WARNING - ECG INTERFERENCE<br />
Chest compressions interfere with ECG<br />
analysis. Push PAUSE be<strong>for</strong>e you start the<br />
ECG analysis. Make the interruption as short<br />
as possible. Push ACTIVE (continuous) or<br />
ACTIVE (30:2) to start the compressions<br />
again.<br />
LUCAS TM 2 Chest Compression System – <strong>Instructions</strong> <strong>for</strong> <strong>Use</strong><br />
100666-01 A, Valid from CO J2403 © 2009 JOLIFE AB
23<br />
5.8.2 Ventilation<br />
Always follow local and/or international<br />
guidelines <strong>for</strong> ventilation.<br />
LUCAS can operate in two different modes:<br />
• ACTIVE (continuous)<br />
When you push this key LUCAS per<strong>for</strong>ms<br />
continuous compressions. The green<br />
LED signal will blink 8 times per minute<br />
to indicate when to ventilate during ongoing<br />
compressions.<br />
• ACTIVE (30:2)<br />
When you push this key, LUCAS per<strong>for</strong>ms<br />
30 chest compressions and then temporarily<br />
stops <strong>for</strong> 3 seconds. During the stop,<br />
the operator can per<strong>for</strong>m 2 ventilations.<br />
After the stop the cycle starts again. An intermittent<br />
LED in combination with an<br />
alarm signal will alert the operator be<strong>for</strong>e<br />
each ventilation pause.<br />
5.8.3 <strong>Use</strong> in the catheterisation<br />
laboratory<br />
LUCAS can be used in the catheterisation<br />
laboratory. Except <strong>for</strong> the compression<br />
mechanism it is mainly radiotranslucent and<br />
allows most X-ray procedures to be<br />
per<strong>for</strong>med.<br />
5.9 Remove LUCAS from the<br />
patient<br />
1. Push ON/OFF <strong>for</strong> 1 second to turn off<br />
the device.<br />
2. If a LUCAS Stabilisation Strap is<br />
attached to LUCAS, remove the cushion<br />
strap, which is part of the Stabilisation<br />
Strap, from the support leg straps.<br />
3. Pull the release rings to release the<br />
Upper Part from the Back Plate.<br />
4. If the patient's condition allows it,<br />
remove the Back Plate.<br />
6 Care after use and<br />
preparation <strong>for</strong> next<br />
use<br />
After each use of the LUCAS Chest<br />
Compression System you must:<br />
1. Remove the Suction Cup (refer to section<br />
6.2).<br />
2. If necessary, remove and clean the<br />
Patient Straps and the Stabilisation<br />
Strap separately (refer to section 6.1<br />
and 6.3).<br />
3. Clean the device and let it dry<br />
(refer to section 6.1).<br />
Preparation <strong>for</strong> next use:<br />
4. Replace the used Battery in the battery<br />
slot of the hood with a fully charged Battery.<br />
5. Mount a new Suction Cup.<br />
6. Attach the Patient Straps again, if they<br />
have been removed.<br />
7. Attach the support leg straps of the<br />
LUCAS Stabilisation Strap again, if they<br />
have been removed.<br />
8. Pack the device into the Carrying Bag:<br />
• Put the Upper Part in the Carrying Bag<br />
with the hood towards the open end.<br />
• Put the external Power Supply<br />
(optional) in one of the pockets<br />
between the LUCAS support legs.<br />
• Put an extra (optional) charged<br />
LUCAS Battery in the other pocket.<br />
• Put the cushion strap part of the Stabilisation<br />
Strap between the support<br />
legs.<br />
• Extra Suction Cups can be put in the<br />
side pockets near the hood.<br />
• Position the Back Plate on top of the<br />
bag.<br />
• Close the green inner lock.<br />
• Put the <strong>Instructions</strong> <strong>for</strong> <strong>Use</strong> (IFU) in the<br />
transparent IFU pocket in the bag.<br />
9. Close the bag.<br />
Do routine checks weekly and after each use<br />
(refer to the maintenance section).<br />
LUCAS TM 2 Chest Compression System – <strong>Instructions</strong> <strong>for</strong> <strong>Use</strong><br />
100666-01 A, Valid from CO J2403, © 2009 JOLIFE AB
24<br />
6.1 Cleaning routines<br />
Clean all surfaces and straps with a soft cloth<br />
and warm water containing a mild cleaning<br />
agent or disinfectant, e.g.<br />
• 70% isopropyl alcohol solution<br />
• 45% isopropyl alcohol with added<br />
detergent<br />
• Quaternary ammonium compound<br />
Follow the handling instructions from the<br />
manufacturer of the disinfectant.<br />
Caution - liquid<br />
Do not immerse LUCAS in liquid. The device<br />
can be damaged if liquid enters the hood.<br />
6.3 Remove and attach the<br />
Patient Straps<br />
Remove:<br />
1. Open the Patient Straps and pull them<br />
out from the metal rings on the LUCAS<br />
support legs.<br />
Clean according to 6.1.<br />
Install:<br />
1. Thread the Patient Straps through the<br />
metal holder on the LUCAS support legs.<br />
2. Fold the Patient Strap so that the symbol<br />
is visible.<br />
3. Press the strap parts firmly together.<br />
Allow LUCAS to dry be<strong>for</strong>e you pack it into<br />
the bag.<br />
6.2 Remove and install the<br />
Suction Cup<br />
• Pull the Suction Cup off the black mounting<br />
tube.<br />
• Discard the Suction Cup as contaminated<br />
medical waste.<br />
• Bend a new Suction Cup onto the black<br />
mounting tube.<br />
• Make sure the Suction Cup is safely<br />
attached to the mounting tube.<br />
LUCAS TM 2 Chest Compression System – <strong>Instructions</strong> <strong>for</strong> <strong>Use</strong><br />
100666-01 A, Valid from CO J2403 © 2009 JOLIFE AB
25<br />
6.4 Remove and attach the<br />
LUCAS Stabilisation Strap<br />
Remove the Support leg straps, which are<br />
part of the Stabilisation Strap, by opening the<br />
buckles.<br />
Clean the Stabilisation Strap according to<br />
6.1.<br />
Install according to 4.3.<br />
6.5 Remove and recharge the<br />
Battery<br />
1. Replace the Battery with a fully charged<br />
one.<br />
2. Recharge the used Battery <strong>for</strong> future<br />
use.<br />
You can charge the LUCAS Battery in two<br />
ways:<br />
• In the external LUCAS Battery Charger<br />
(optional)<br />
- put the Battery in the slot on the<br />
Battery Charger,<br />
- plug the Battery Charger power cable<br />
in to the mains wall socket.<br />
• Installed in LUCAS:<br />
- put the Battery in the slot in the hood<br />
of LUCAS,<br />
- connect the Power Supply/Car Power<br />
Cable to the DC input on the side of<br />
LUCAS,<br />
- plug the Power Supply in to the mains<br />
wall socket.<br />
Caution - use only approved<br />
accessories<br />
<strong>Use</strong> only JOLIFE AB-approved accessories<br />
with LUCAS. LUCAS does not operate<br />
correctly if you use accessories that are not<br />
approved. <strong>Use</strong> only LUCAS Batteries and<br />
the LUCAS Power Supply that are designed<br />
<strong>for</strong> LUCAS. If you use other batteries or<br />
another Power Supply you can cause<br />
permanent damage to LUCAS. This will also<br />
void the warranty.<br />
7 Maintenance<br />
7.1 Routine checks<br />
Weekly, and after each use of the LUCAS<br />
Chest Compression System, you should:<br />
1. Make sure that the device is clean.<br />
2. Make sure that a new Suction Cup is<br />
fitted.<br />
3. Make sure that the Patient Straps are<br />
attached.<br />
4. Make sure that the two support leg<br />
straps of the Stabilisation Strap are<br />
attached around the support legs.<br />
5. Pull the release rings upwards to make<br />
sure that the claw locks are open.<br />
6. Make sure that the Battery is fully<br />
charged. When LUCAS is in the OFF<br />
mode, push MUTE. The Battery<br />
indicator comes on and shows the<br />
Battery charge status (see section 8.1).<br />
7. Push ON/OFF to make LUCAS do a<br />
self test. Make sure the ADJUST LED<br />
illuminates without any alarm or warning<br />
LED.<br />
8. Push ON/OFF to turn off LUCAS again.<br />
Green LEDs indicate a fully charged Battery.<br />
Caution - keep Battery in position<br />
The Battery must always be in position <strong>for</strong><br />
LUCAS to be able to operate, even when<br />
powered by the external Power Supply.<br />
LUCAS TM 2 Chest Compression System – <strong>Instructions</strong> <strong>for</strong> <strong>Use</strong><br />
100666-01 A, Valid from CO J2403, © 2009 JOLIFE AB
26<br />
8 Troubleshooting<br />
8.1 Indicators and warnings during normal operation<br />
Refer to the table below to find the reason <strong>for</strong> audible and/or LED alarms during normal<br />
operation.<br />
Situation Visual LED indication Audible signals <strong>Use</strong>r action<br />
LUCAS is in the ON mode and there<br />
is more than 90% Battery capacity<br />
remaining.<br />
LUCAS is in the ON mode and there<br />
is more than 60% and less than 90%<br />
Battery capacity remaining.<br />
Fully charged Battery:<br />
All 3 green Battery indicator<br />
LEDs show a<br />
constant light.<br />
Battery 2/3 charged:<br />
The 2 right hand green<br />
Battery indicator LEDs<br />
show a constant light.<br />
None<br />
None<br />
None<br />
None<br />
LUCAS is in the ON mode and there<br />
is more than 30% and less than 60%<br />
Battery capacity remaining.<br />
Battery 1/3 charged:<br />
The right hand green<br />
Battery indicator LED<br />
shows a constant light.<br />
None<br />
None<br />
LUCAS is in the ON mode and there<br />
is less than 30% Battery capacity remaining<br />
(approximately 10 minutes<br />
of operating capacity).<br />
Low Battery:<br />
The right hand orange<br />
Battery indicator LED<br />
comes on intermittently.<br />
Intermittent alarm<br />
Replace the Battery<br />
or connect to the external<br />
power supply.<br />
An external LUCAS Power Supply is<br />
connected and charging the Battery.<br />
Charging Battery:<br />
The 3 green Battery<br />
indicator LEDs show a<br />
"running" light.<br />
None<br />
None<br />
An external LUCAS Power Supply is<br />
connected and the Battery is fully<br />
charged.<br />
Fully charged Battery:<br />
All 3 green Battery indicator<br />
LEDs show a<br />
constant light.<br />
None<br />
None<br />
The Battery has been used more<br />
than 200 times with compressions<br />
of more than 10 minutes each or is<br />
older than 3 years.<br />
End of Battery service<br />
life:<br />
The right hand Battery<br />
indicator LED shows<br />
an orange light instead<br />
of green, in all the<br />
above situations.<br />
None<br />
Dispose of<br />
Battery.<br />
In the ADJUST mode.<br />
The ADJUST LED<br />
shows a green light.<br />
None<br />
None<br />
In the PAUSE mode.<br />
The PAUSE LED shows<br />
a green light.<br />
None<br />
None<br />
LUCAS TM 2 Chest Compression System – <strong>Instructions</strong> <strong>for</strong> <strong>Use</strong><br />
100666-01 A, Valid from CO J2403 © 2009 JOLIFE AB
27<br />
Situation Visual LED indication Audible signals <strong>Use</strong>r action<br />
In the ACTIVE (continuous) mode<br />
In the ACTIVE (30:2) mode<br />
Too small a patient. Trying to enter<br />
the PAUSE mode or any of the AC-<br />
TIVE modes when the Suction Cup is<br />
in a lower position than <strong>for</strong> the minimum<br />
patient size (sternum height<br />
approximately 17 cm)<br />
The ACTIVE (continuous)<br />
key, LUCAS per<strong>for</strong>ms<br />
continuous chest compressions.<br />
The green<br />
LED signal will blink 8<br />
times per minute<br />
The ACTIVE (30:2) LED<br />
shows an intermittant<br />
green light during compressions<br />
number 26,<br />
27, 28, 29 and 30.<br />
None<br />
Alarm signal alert during<br />
compressions<br />
number 28 (“ding”), 29<br />
(“ding”) and 30<br />
(“dong”).<br />
This is to indicate<br />
when to ventilate<br />
during going compressions.<br />
This is to alert the<br />
operator to ventilate<br />
the patient when<br />
LUCAS temporarily<br />
stops the compressions<br />
at number 30.<br />
None 3 fast signals Continue with<br />
manual compressions.<br />
8.2 Battery replacement and Smart Restart feature<br />
If you change the Battery quickly in 60 seconds or less, with LUCAS in the ON mode, the LUCAS<br />
Smart Restart feature remembers the settings and Start Position according to the table below. If<br />
the Battery change takes more than 60 seconds, LUCAS does a self test and you must adjust the<br />
Start Position again.<br />
Mode when you remove the Battery<br />
PAUSE<br />
Mode when the new Battery is in place again<br />
PAUSE (with the same Start Position)<br />
ACTIVE (continuous)<br />
PAUSE (with the same Start Position)<br />
ACTIVE (30:2)<br />
PAUSE (with the same Start Position)<br />
ADJUST<br />
ADJUST<br />
OFF<br />
OFF<br />
LUCAS TM 2 Chest Compression System – <strong>Instructions</strong> <strong>for</strong> <strong>Use</strong><br />
100666-01 A, Valid from CO J2403, © 2009 JOLIFE AB
28<br />
8.3 Malfunction alarms<br />
Below is a list of all alarms that can occur on LUCAS. You mute all alarms <strong>for</strong> 60 seconds if you<br />
push MUTE.<br />
Start with manual compressions immediately if LUCAS does not operate properly.<br />
Reason Visual LED indication Audible alarms Result<br />
Compression pattern outside<br />
limit (too deep, too shallow and<br />
timing failure)<br />
Red alarm LED Alarm Compressions stop<br />
Rising temperature in LUCAS Warning alarm None<br />
Too high temperature in LUCAS Red alarm LED Alarm Compressions stop<br />
Hardware error Red alarm LED Alarm Compressions stop<br />
Too high Battery temperature<br />
Intermittent red Battery<br />
warning:<br />
The red Battery indicator<br />
LED farthest to the right<br />
illuminates intermittently.<br />
Intermittent alarm<br />
Compressions stop<br />
Battery charge too low<br />
Intermittent red Battery<br />
warning:<br />
The red Battery indicator<br />
LED farthest to the right<br />
illuminates intermittently.<br />
Intermittent alarm<br />
Compressions stop.<br />
The Battery must be<br />
recharged in the<br />
external Battery<br />
Charger.<br />
Battery error<br />
Constant red Battery<br />
warning:<br />
The red Battery indicator<br />
LED farthest to the right<br />
shows a constant light.<br />
Alarm<br />
Compressions stop.<br />
The Battery cannot be<br />
used anymore.<br />
If the malfunction described above seems permanent, LUCAS must be examined by approved<br />
service personnel. Please consult your local LUCAS representative or JOLIFE AB. Contact<br />
in<strong>for</strong>mation is available at www.JOLIFE.com<br />
LUCAS TM 2 Chest Compression System – <strong>Instructions</strong> <strong>for</strong> <strong>Use</strong><br />
100666-01 A, Valid from CO J2403 © 2009 JOLIFE AB
29<br />
9 Technical specifications<br />
All specifications in this chapter apply to the LUCAS2 Chest Compression System.<br />
9.1 Patient parameters<br />
Category<br />
Patients eligible <strong>for</strong> treatment:<br />
Specifications<br />
Adult patients who fit into the device;<br />
• sternum height of 6.7 to 11.9 inches / 170 to<br />
303 mm<br />
• a maximum chest width of 17.7 inches /<br />
449 mm<br />
The use of LUCAS is not restricted by patient weight.<br />
9.2 Compression parameters<br />
Category<br />
Specifications<br />
Compression depth<br />
1.5 to 2.0 inches / 4 to 5 cm from the Start Position<br />
Compression frequency<br />
100 ± 5 compressions per minute<br />
Compression duty cycle 50 ± 5%<br />
Compression modes (operator selectable) • 30:2 (30 compressions followed<br />
by a 3 seconds ventilation pause)<br />
• Continuous compressions<br />
9.3 Device physical specifications<br />
Category<br />
Dimensions when assembled (H × W × D)<br />
Dimensions Carrying Bag with device inside (H × W × D)<br />
Weight of the device with the Battery<br />
Specifications<br />
22.4 x 20.5 x 9.4 inches / 57 × 52 × 24 cm<br />
25.6 x 13 x 9.8 inches / 65 × 33 × 25 cm<br />
17.2 lbs / 7.8 kg<br />
9.4 Device environmental specifications<br />
Category<br />
Specifications<br />
Operating temperature<br />
+32°F to +104°F / +0°C to +40°C<br />
Storage temperature<br />
-4°F to +158°F / -20°C to +70°C<br />
Relative humidity<br />
5% to 98%, non-condensing<br />
IP classification (IEC60529) IP 43<br />
Operating input voltage<br />
12-24 V DC<br />
LUCAS TM 2 Chest Compression System – <strong>Instructions</strong> <strong>for</strong> <strong>Use</strong><br />
100666-01 A, Valid from CO J2403, © 2009 JOLIFE AB
30<br />
9.5 Battery physical specifications<br />
Category<br />
Size (H × W × D)<br />
Weight<br />
Type<br />
Capacity<br />
Battery voltage (nominal)<br />
Initial Battery runtime (nominal patient)<br />
Maximum Battery charge time<br />
Required interval <strong>for</strong> replacement of the Battery<br />
Specifications<br />
5.1 x 3.5 x 2.2 inches / 13.0 × 8.8 × 5.7 cm<br />
1.3 lbs / 0.6 kg<br />
Rechargeable Lithium Ion Polymer (LiPo)<br />
3300 mAh (typical), 86 Wh<br />
25.9 V<br />
45 minutes (typical)<br />
Less than 4 hours at room temperature<br />
(72ºF / 22ºC)<br />
Battery replacement is recommended every 3 years or<br />
after 200 uses (of more than 10 minutes use each time)<br />
9.6 Battery environmental specifications<br />
Category<br />
Specifications<br />
Operating temperature<br />
32ºF to 104ºF / 0ºC to +40ºC, ambient when installed in the<br />
device<br />
Charge temperature<br />
41ºF to 95ºF / 5ºC to +35ºC ambient (68ºF to 77ºF / 20ºC to<br />
25ºC preferred)<br />
Storage temperature<br />
32ºF to 104ºF / 0ºC to +40ºC ambient <strong>for</strong> less than six<br />
months<br />
IP classification (IEC60529) IP 44<br />
LUCAS TM 2 Chest Compression System – <strong>Instructions</strong> <strong>for</strong> <strong>Use</strong><br />
100666-01 A, Valid from CO J2403 © 2009 JOLIFE AB
31<br />
9.7 Electromagnetic environmental declaration<br />
Guidance and manufacturer's declaration - electromagnetic emissions<br />
LUCAS 2 is intended <strong>for</strong> use in the electromagnetic environment specified below. The customer or the operator of<br />
LUCAS 2 must make sure that it is used in the correct environment.<br />
Emissions test Compliance Electromagnetic<br />
environment - guidance<br />
RF emissions CISPR 11 Group 1 LUCAS 2 uses RF energy only <strong>for</strong> its<br />
internal operation. This makes its RF<br />
emissions very low and not likely to<br />
cause interference with other electronic<br />
equipment near LUCAS 2.<br />
RF emissions CISPR 11 Class B LUCAS 2 is suitable <strong>for</strong> use in all<br />
Harmonic emissions IEC 61000-3-2<br />
Voltage fluctuations/ flicker emissions<br />
IEC 61000-3-3<br />
Class A<br />
Complies<br />
buildings including the home and places<br />
directly connected to the public<br />
low-voltage Power Supply network that<br />
supplies buildings used <strong>for</strong> domestic<br />
purposes.<br />
Guidance and manufacturer's declaration - electromagnetic immunity<br />
LUCAS 2 is intended <strong>for</strong> use in the electromagnetic environment specified below. The customer or the operator of<br />
LUCAS 2 must make sure that it is used in the correct environment.<br />
Immunity test IEC 60601 test level Compliance level Electromagnetic<br />
environment - guidance<br />
Electrostatic<br />
discharge (ESD)<br />
IEC 61000-4-2<br />
Electrical fast<br />
transient / Burst<br />
IEC 61000-4-4<br />
Surge<br />
IEC 61000-4-5<br />
Voltage dips, short interruptions<br />
and voltage<br />
variations on Power<br />
Supply input lines<br />
IEC 61000-4-11<br />
Power frequency<br />
(50/60 Hz) magnetic<br />
field IEC 61000-4-8<br />
+/- 6 kV contact<br />
+/- 8 kV air<br />
+/- 2 kV <strong>for</strong> Power<br />
Supply lines<br />
+/- 1 kV <strong>for</strong> input/output lines<br />
+/- 1 kV differential mode<br />
+/- 2 kV common mode<br />
95 % dip in UT)<br />
<strong>for</strong> 0.5 cycle<br />
40 % UT (60 % dip in UT)<br />
<strong>for</strong> 5 cycles<br />
70 % UT (30 % dip in UT)<br />
<strong>for</strong> 25 cycles<br />
95 % dip in UT))<br />
<strong>for</strong> 5 sec<br />
+/- 6 kV contact<br />
+/- 8 kV air<br />
+/- 2 kV <strong>for</strong> Power<br />
Supply lines<br />
n/a. <strong>for</strong> input/output lines<br />
+/- 1 kV differential mode<br />
n/a. <strong>for</strong> common mode<br />
95 % dip in UT)<br />
<strong>for</strong> 0.5 cycle<br />
40 % UT (60 % dip in UT)<br />
<strong>for</strong> 5 cycles<br />
70 % UT (30 % dip in UT)<br />
<strong>for</strong> 25 cycles<br />
95 % dip in UT))<br />
<strong>for</strong> 5 sec<br />
Floors must be wood, concrete or<br />
ceramic tile. If there is synthetic<br />
material on the floor, the relative<br />
humidity must be 30% or more.<br />
The mains power quality must be<br />
that of a typical commercial or<br />
hospital environment.<br />
The mains power quality must be<br />
that of a typical commercial or<br />
hospital environment.<br />
The mains power quality must be<br />
that of a typical commercial or<br />
hospital environment. If the user of<br />
the [Equipment or System] requires<br />
continued operation during power<br />
mains interruptions, JOLIFE recommends<br />
that the [Equipment or<br />
System] is energized from a Power<br />
Supply or Battery that cannot be<br />
interrupted.<br />
30 A/m 30 A/m The power frequency magnetic<br />
fields must be at levels that are<br />
characteristic of a typical location in<br />
a typical commercial or hospital<br />
environment<br />
NOTE UT is the a.c. mains voltage prior to application of the test level.<br />
Guidance and manufacturer's declaration - electromagnetic immunity<br />
LUCAS 2 is intended <strong>for</strong> use in the electromagnetic environment specified below. The customer or the operator of LUCAS<br />
2 must make sure that it is used in the correct environment.<br />
LUCAS TM 2 Chest Compression System – <strong>Instructions</strong> <strong>for</strong> <strong>Use</strong><br />
100666-01 A, Valid from CO J2403, © 2009 JOLIFE AB
32<br />
Immunity<br />
test<br />
IEC 60601<br />
test level<br />
Compliance<br />
level<br />
Electromagnetic environment - guidance<br />
Portable and mobile RF communications equipment must<br />
not be used closer to LUCAS 2 (cables included) than the<br />
recommended separation distance calculated with the<br />
equation applicable to the frequency of the transmitter.<br />
Recommended separation distance<br />
Conducted RF<br />
IEC 61000-4-6<br />
10 Vrms<br />
150 kHz to 80 MHz<br />
10 Vrms<br />
d = 1.2 P<br />
Radiated RF<br />
IEC 61000-4-3<br />
10 V/m<br />
80MHz to 2.5GHz<br />
10 V/m<br />
d = 1.2 P<br />
d = 1.3 P<br />
where P is the maximum output power rating of the transmitter<br />
in watts (W) according to the transmitter manufacturer<br />
and d is the recommended separation distance in metres (m).<br />
Field strengths from fixed RF transmitters,<br />
as determined by an electromagnetic site survey, a<br />
must be less than the compliance level in each frequency<br />
range. b<br />
Interference can occur near equipment marked with the following<br />
symbol.<br />
NOTE 1 At 80MHz and 800MHz, the higher frequency range applies.<br />
NOTE 2 These guidelines may not apply in some situations. Electromagnetic propagation is affected by absorption and<br />
reflection from structures, objects and people.<br />
a Field strengths from fixed transmitters, such as base stations <strong>for</strong> radio (mobile/cordless) telephones and land mobile<br />
radios, amateur radio, AM and FM radio and TV broadcasting cannot be predicted theoretically with accuracy.<br />
To assess the electromagnetic environment due to fixed RF transmitters, an electromagnetic site survey should be<br />
considered. If the measured field strength in the location in which LUCAS 2 is used exceeds the applicable RF compliance<br />
level above, LUCAS 2 should be observed to make sure it operates normally. If unusual or incorrect per<strong>for</strong>mance is<br />
observed, additional measures can be necessary, such as reorientating or relocating LUCAS 2.<br />
b Over the frequency range 150 kHz to 80 MHz, field strengths should be less than 10 V/m.<br />
Recommended separation distances between portable and mobile RF communications equipment and the LUCAS 2<br />
LUCAS 2 is intended <strong>for</strong> use in an electromagnetic environment in which radiated RF disturbances are controlled.<br />
The customer or the operator of LUCAS 2 can help prevent electromagnetic interference by maintaining a minimum distance<br />
between portable and mobile RF communications equipment (transmitters) and LUCAS 2 as recommended below,<br />
according to the maximum output power of the communications equipment.<br />
LUCAS TM 2 Chest Compression System – <strong>Instructions</strong> <strong>for</strong> <strong>Use</strong><br />
100666-01 A, Valid from CO J2403 © 2009 JOLIFE AB
33<br />
Rated maximum output<br />
power of transmitter<br />
W<br />
Separation distance according to frequency of transmitter<br />
150 kHz to 80 MHz 80 MHz to 800 MHz 800 MHz to 2.5 GHz<br />
d = 1.2 P<br />
d = 1.2 P<br />
d = 1.3 P<br />
0.01 0.12 0.12 0.24<br />
0.1 0.38 0.38 0.73<br />
1 1.2 1.2 2.3<br />
10 3.8 3.8 7.3<br />
100 12 12 23<br />
For transmitters rated at a maximum output power not listed above, the recommended separation distance d in metres (m)<br />
can be estimated using the equation applicable to the frequency of the transmitter, where P is the maximum output power<br />
rating of the transmitter in watts (W) according to the transmitter manufacturer.<br />
Note 1: At 80 MHz and 800 MHz, the separation distance <strong>for</strong> the higher frequency range applies.<br />
Note 2: These guidelines may not apply in all situations. Electromagnetic propagation is affected by absorption and reflection<br />
from structures, objects and people.<br />
LUCAS TM 2 Chest Compression System – <strong>Instructions</strong> <strong>for</strong> <strong>Use</strong><br />
100666-01 A, Valid from CO J2403, © 2009 JOLIFE AB
34<br />
9.8 Limited warranty<br />
Subject to the limitations and exclusions set <strong>for</strong>th below, JOLIFE AB ("JOLIFE") guarantees that JOLIFE products<br />
which are purchased from authorized JOLIFE representatives or dealers and are used in accordance with their<br />
instructions will be free from defects in material and workmanship appearing under normal service and use <strong>for</strong> the<br />
time period listed below. The time limit and the warranty schedule begin on the date of delivery to the first<br />
purchaser.<br />
12 Months: LUCAS2 Chest Compression System (including the LUCAS device (Upper Part and Back Plate),<br />
Carrying Bag, Battery, Stabilisation Strap, Patient Straps).<br />
JOLIFE does not guarantee that JOLIFE products will per<strong>for</strong>m error-free or without interruptions. The sole and<br />
exclusive remedy under this limited warranty is to repair or replace defective material or workmanship at the option<br />
of JOLIFE. To qualify <strong>for</strong> the repair or replacement, the product must not have been repaired or altered in any way<br />
which, in the judgment of JOLIFE, affects its stability and reliability. The product must have been used and<br />
maintained in accordance with relevant operating instructions and in the intended environment or setting.<br />
The Limited Warranty does not cover problems with products that have been caused by misuse, abuse, improper<br />
maintenance, modifications to the product or accident. JOLIFE or its authorized service provider shall, at its sole<br />
discretion, determine whether a reported problem is covered under this Limited Warranty and whether the product<br />
is field serviceable. If field serviceable and located within 100 miles of a JOLIFE designated service location,<br />
warranty service will be provided by JOLIFE or its authorized service provider at the purchaser's facility during<br />
normal business hours. If not field serviceable or if the product is located outside of such areas, all products<br />
requiring warranty service should be returned to a location designated by JOLIFE or its authorized service<br />
provider, freight prepaid, and must be accompanied by a written, detailed explanation of the claimed failure.<br />
Except <strong>for</strong> the Limited Warranty provided above, NEITHER JOLIFE NOR ITS AUTHORIZED SERVICE<br />
PROVIDER MAKES ANY WARRANTY, EXPRESS OR IMPLIED, INCLUDING, BUT NOT LIMITED TO, ANY<br />
IMPLIED WARRANTY OF MERCHANTABILITY OR FITNESS FOR A PARTICULAR PURPOSE,<br />
WHETHER ARISING FROM STATUTE, COMMON LAW, CUSTOMER OR OTHERWISE. THIS LIMITED<br />
WARRANTY SHALL BE THE EXCLUSIVE REMEDY AVAILABLE TO ANY PERSON OR ENTITY. NEITHER<br />
JOLIFE NOR ITS AUTHORIZED SERVICE PROVIDER IS LIABLE FOR DIRECT OR INDIRECT, SPECIAL,<br />
INCIDENTAL OR CONSEQUENTIAL DAMAGES (INCLUDING LOSS OF BUSINESS OR PROFITS)<br />
WHETHER BASED ON CONTRACT, TORT, OR ANY OTHER LEGAL THEORY.<br />
Any legal action arising from the purchase or use of JOLIFE products shall be commenced within one year from<br />
the accrual of the cause of action, or be barred <strong>for</strong>ever. In no event shall JOLIFE liability under this warranty or<br />
otherwise exceed the greater of $50,000 or the purchase price of the product giving rise to the cause of action.<br />
Products are guaranteed in compliance with applicable law. If any part or term of this Limited Warranty is held to<br />
be illegal, unen<strong>for</strong>ceable or in conflict with applicable law by any court of competent jurisdiction, the validity of the<br />
remaining portions of the Limited Warranty shall not be affected, and all rights and obligations shall be construed<br />
and en<strong>for</strong>ced as if this Limited Warranty did not contain the particular part or term held to be invalid. Some<br />
countries, and states within United States of America, do not allow the exclusion or limitation of incidental or<br />
consequential damages, so the above limitation or exclusion may not apply to you. This Limited Warranty gives the<br />
user specific support legal rights. The user may also have other rights which vary from state to state or country to<br />
country.<br />
LUCAS TM 2 Chest Compression System – <strong>Instructions</strong> <strong>for</strong> <strong>Use</strong><br />
100666-01 A, Valid from CO J2403 © 2009 JOLIFE AB
35<br />
Appendix A; LUCAS2 parts and accessories<br />
Description<br />
JOLIFE AB Part number<br />
LUCAS Back Plate 150208-00<br />
3 x LUCAS 2 Suction Cup 150205-03<br />
LUCAS 2 Carrying Bag 150200-00<br />
LUCAS 2 <strong>Instructions</strong> <strong>for</strong> <strong>Use</strong> (regional versions)<br />
100666-XX<br />
LUCAS 2 Battery 150201-00<br />
LUCAS Stabilisation Strap 150203-00<br />
LUCAS Patient Straps 150204-00<br />
LUCAS 2 Power Supply (regional versions)<br />
150202-XX<br />
LUCAS 2 Car Power Cable 150206-00<br />
LUCAS 2 Battery Charger 150207-00<br />
LUCAS 2 Back Plate Grip Tape 150209-00<br />
LUCAS TM 2 Chest Compression System – <strong>Instructions</strong> <strong>for</strong> <strong>Use</strong><br />
100666-01 A, Valid from CO J2403, © 2009 JOLIFE AB
36<br />
LUCAS TM 2 Chest Compression System – <strong>Instructions</strong> <strong>for</strong> <strong>Use</strong><br />
100666-01 A, Valid from CO J2403 © 2009 JOLIFE AB
Chest Compression System<br />
www.lucas-cpr.com | a product by JOLIFE<br />
For more in<strong>for</strong>mation - please contact the manufacturer JOLIFE AB<br />
JOLIFE AB, Scheelevägen 17, SE-223 70 Lund, Sweden Tel: +46 (0) 46 286 50 00, Fax: +46 (0) 46 286 50 10, E-mail: info@jolife.com<br />
jolife.com<br />
LUCAS is a trademark of JOLIFE AB.<br />
CE 0434 © 2009 JOLIFE AB<br />
100666-01 Rev A
( )<br />
Check <strong>for</strong> proper position.<br />
Adjust if necessary<br />
Push ACTIVE (continuous)<br />
or ACTIVE (30:2)<br />
LUCAS provides compressions<br />
with a rate of 100 per minute<br />
and 1.5 to 2 inches depth


