
You also want an ePaper? Increase the reach of your titles
YUMPU automatically turns print PDFs into web optimized ePapers that Google loves.
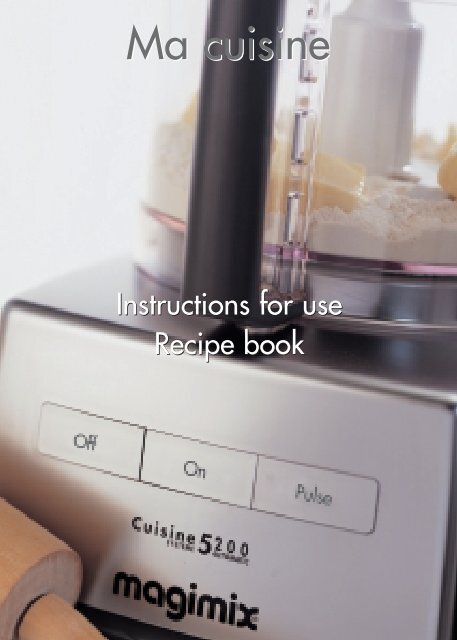
<strong>Ma</strong> <strong>cuisine</strong><br />
Instructions for use<br />
Recipe book
INTRODUCTION<br />
<strong>Ma</strong>gimix, invented the food processor more than thirty years ago, and now<br />
proudly presents the latest generation. <strong>Ma</strong>gimix food processors are the domestic<br />
version of appliances designed for professional use. They are all manufactured<br />
in France and equipped with a powerful, ultra-quiet, commercial grade induction<br />
motor. Easy to use, sturdy and efficient, you will soon wonder how you ever did<br />
without your <strong>Ma</strong>gimix food processor, as it tirelessly chops, purées, blends,<br />
kneads, whisks, grates and slices.<br />
A versatile appliance designed to meet your every need.<br />
You will easily master not only all the basic preparations but also the most<br />
sophisticated <strong>cuisine</strong>. You will soon be producing lump-free pancake batter,<br />
perfect mayonnaise and irresistible home-baked bread.<br />
Featuring everything from courgette soup, spring salad with basil and roast<br />
Provençale vegetables to stuffed sea bream, shepherd’s pie and chocolate cake,<br />
our recipe book contains more than 110 simple ideas that will ensure you use<br />
your food processor day in day out.<br />
We would like to thank you for choosing <strong>Ma</strong>gimix.<br />
2
CONTENTS<br />
Instructions for use<br />
Description 4<br />
Control panel 5<br />
Fitting the bowls 6<br />
Removing the bowls 7<br />
Standard accessories 8<br />
Using the metal blade 9<br />
Using the dough blade 10<br />
Using the egg whisk 11<br />
Using the grating/slicing discs 12<br />
Optional accessories 14<br />
Using the citrus press 15<br />
Using the juicer 16<br />
Using the optional discs 17<br />
Using the extra large feed tube (XL models only) 18<br />
Cleaning 19<br />
<strong>Ma</strong>ximum processing capacities 20<br />
Tips 20<br />
Electrical instructions 22<br />
Safety instructions 23<br />
Recipes<br />
How to read the recipes 24<br />
The essentials 25<br />
Tantalizing appetizers 37<br />
Bread 43<br />
Soups 51<br />
Starters 59<br />
Vegetables 71<br />
Fish 81<br />
Meat 91<br />
Desserts 99<br />
For the discerning baby 117<br />
Cocktails 121<br />
Glossary 124<br />
Recipe index 125<br />
!<br />
PLEASE READ THE SAFETY INSTRUCTIONS (P.23) THROUGH CAREFULLY<br />
BEFORE USING YOUR APPLIANCE.<br />
3
DESCRIPTION<br />
Feed tube<br />
Graduated pusher<br />
or<br />
*<br />
Metal blade<br />
or<br />
Lid<br />
Dough blade<br />
Mini bowl<br />
Egg whisk<br />
Midi bowl<br />
Grating disc<br />
<strong>Ma</strong>in bowl<br />
Motor shaft<br />
Slicing disc<br />
Storage box<br />
Safety<br />
mechanism<br />
(1)<br />
Extension<br />
Motor unit<br />
Spatula<br />
* Only on the XL models.<br />
(1) For greater stability, thread the power cord through the special notches on the<br />
underside of the motor unit.<br />
*<br />
4
CONTROL PANEL<br />
OFF : press this button to switch the machine off.<br />
ON : press this button to process in continuous mode and achieve an even texture.<br />
Ideal for chopping, processing and blending finely, as well as for kneading, beating<br />
egg whites, slicing and grating.<br />
PULSE : press this button for intermittent processing. The machine automatically<br />
switches itself off as soon as you release this button, giving you complete control of<br />
the task from start to finish. Ideal for roughly chopping or processing.<br />
For preparations such as soups and purées, start by pressing the pulse button, then<br />
switch to continuous mode.<br />
This way, you will achieve a smoother consistency.<br />
!<br />
Always press the “Off” button before releasing the lid.<br />
The appliance is fitted with a failsafe which will automatically switch the<br />
motor off if it starts to overheat due to prolonged use or overloading.<br />
Press the “Off” button and wait for the appliance to cool completely<br />
before switching it on again.<br />
5
FITTING THE BOWLS<br />
Before using your appliance for the first time, wash all the parts thoroughly<br />
(except the motor unit).<br />
1<br />
2 3<br />
Place the bowl on top of the motor unit and<br />
turn to the right to lock it into position.<br />
Slide the Midi bowl onto the motor shaft,<br />
inside the <strong>Ma</strong>in bowl.<br />
4<br />
Slide the Mini bowl onto the motor shaft.<br />
5<br />
Fit the Mini bowl metal blade onto the motor<br />
shaft.<br />
W A R N I N G<br />
6 7<br />
Place the lid on top of the bowl and turn<br />
until it locks into position.<br />
• Double failsafe : the machine will only<br />
work if both the bowl and the lid are<br />
correctly locked into position.<br />
• Do not leave the lid in the locked<br />
position when the appliance is not in<br />
use.<br />
6
REMOVING THE BOWLS<br />
1 2<br />
Unlock the bowl lid and lift it off.<br />
3<br />
Remove the blade from the Mini bowl.<br />
4<br />
Remove the Mini bowl.<br />
5<br />
Remove the Midi bowl, holding it by its<br />
sides to lift it out.<br />
W A R N I N G<br />
6 7<br />
Turn the bowl to the left to unlock it. You can<br />
now remove it.<br />
• Always handle the discs and blades<br />
with caution, as they are extremely<br />
sharp.<br />
• Always press the “Off” button before<br />
unlocking the lid. If the bowl does not<br />
move, check that the lid has been<br />
properly unlocked.<br />
7
STANDARD ACCESSORIES<br />
Mini bowl fitted with a metal blade<br />
for chopping, processing and blending<br />
small quantities or baby food.<br />
Midi bowl : both practical and easy to<br />
clean. Specially designed for grating or<br />
slicing cheese, fruit and vegetables.<br />
Metal blade : used in the <strong>Ma</strong>in bowl for<br />
chopping, processing, blending and<br />
grinding.<br />
Dough blade : used in the <strong>Ma</strong>in bowl for<br />
kneading leavened and unleavened dough.<br />
NB : the Compact model’s dough blade does<br />
not have a cap.<br />
Discs : used in either the Midi or the <strong>Ma</strong>in<br />
bowl. At least 2 discs* for slicing and<br />
grating cheese, fruit and vegetables in<br />
different thicknesses (2 and 4 mm).<br />
Egg whisk : used in the <strong>Ma</strong>in bowl to whip<br />
cream or beat egg whites for meringues,<br />
mousses and soufflés.<br />
*according to model<br />
8
USING THE METAL BLADE<br />
1 2 3<br />
Fit the metal blade onto the motor shaft. It<br />
needs to be at the bottom of the bowl.<br />
Place the ingredients in the bowl. Put the<br />
lid on and turn until it locks into position.<br />
Chopping meat, fish and herbs in either<br />
pulse or continuous mode.<br />
Liquidizing soups, purées and pancake<br />
batter in continuous mode.<br />
Blending cake mixtures, milkshakes and<br />
cocktails in continuous mode.<br />
Grinding chocolate, making icing sugar,<br />
crushing ice and blending sauces in<br />
continuous mode.<br />
!<br />
Caution! The metal blade is extremely sharp. Always hold it by the<br />
central hub.<br />
Hold the metal blade in place when pouring out the contents of the bowl.<br />
9
USING THE DOUGH BLADE<br />
1 2 3<br />
Fit the dough blade onto the motor shaft. It<br />
needs to be at the bottom of the <strong>Ma</strong>in<br />
bowl.<br />
Put the lid on and turn until it locks into<br />
position.<br />
4 5<br />
Recommendations : put the solid ingredients<br />
in the bowl first. Switch the machine on<br />
and add the liquid ingredients via the feed<br />
tube.<br />
6 7<br />
You can also use the dough blade to stir in<br />
chocolate chips, dried fruit, etc.<br />
Kneads leavened dough for bread,<br />
brioche, etc.<br />
Kneads unleavened dough for shortcrust<br />
pastry, rich shortcrust pastry, etc.<br />
10<br />
Never exceed the quantities recommended on p. 20.<br />
Use the spatula to push the flour back down into the dough if necessary.
USING THE EGG WHISK<br />
The egg whisk is composed of 3 sections,<br />
so make sure they are properly assembled.<br />
Check that the metal shaft is correctly<br />
inserted.<br />
1<br />
Fit the egg whisk onto the motor shaft.<br />
It needs to be at the bottom of the bowl.<br />
2 3<br />
Put the lid on and turn until it locks into<br />
position.<br />
Remove the pusher from the feed tube<br />
before beating egg whites, otherwise they<br />
will not increase in volume.<br />
Stiffly beaten egg whites : put the egg<br />
whites in the bowl. Add a pinch of salt and<br />
remove the pusher. Whisk continuously for<br />
at least 5-10 minutes.<br />
Whipped cream : an hour beforehand,<br />
place all the ingredients in the fridge. Pour<br />
the whipping cream into the bowl. Remove<br />
the pusher. Whisk continuously for 8-10<br />
minutes.<br />
Featuring an exclusive <strong>Ma</strong>gimix design, the whisk beats the egg whites more gradually,<br />
making them stiffer and giving them greater volume.<br />
11
R/G4<br />
USING THE GRATING/SLICING DISCS<br />
We recommend that you use the discs in the Midi bowl.<br />
R/G4<br />
E/S<br />
2<br />
1 2<br />
Slide the extension over the motor shaft.<br />
Slicing/grating disc : each side is engraved<br />
with a reference code, e.g. R/G4 = 4-mm<br />
grater, E/S 2 = 2-mm slicer.<br />
3 4<br />
Place the chosen disc with the relevant<br />
reference facing upwards.<br />
Slide the disc onto the extension. Turn it so<br />
that it slots on properly. This is a two-stage<br />
process.<br />
W A R N I N G<br />
• Always handle the discs with care, as<br />
the blades are extremely sharp.<br />
• Never insert your fingers or a foreign<br />
object into the feed tube. Always use<br />
the pusher designed for that purpose.<br />
For non-reversible discs, make sure you<br />
place the disc the right way up.<br />
12
USING THE GRATING/SLICING DISCS<br />
Grating : for longer shreds, lay the fruit<br />
and vegetables horizontally in the feed<br />
tube.<br />
Fill the feed tube with upright pieces of<br />
gruyère cheese.<br />
Slicing : Place long fruit and vegetables<br />
(e.g. leeks and carrots) upright in the feed<br />
tube.<br />
If necessary, cut round fruit and vegetables<br />
(e.g. tomatoes and apples) in half.<br />
Cabbage : after removing the hard central<br />
ribs, roll several leaves together, one inside<br />
the other.<br />
Peppers : cut off both ends, make a cut<br />
from top to bottom and roll the pepper into<br />
a swiss roll shape.<br />
Do not be surprised to find small quantities of fruit and vegetables (stubs) on the discs.<br />
This is quite normal.<br />
13
OPTIONAL ACCESSORIES<br />
The list of accessories supplied with the appliance will vary from one model to another.<br />
Citrus press with lever arm and 2 cones :<br />
almost instant juice with no pips and just<br />
the right amount of pulp.<br />
Juicer made from stainless steel : can extract<br />
a clear juice from most types of fruit and<br />
vegetables.<br />
French fries/veg stick disc : for cutting<br />
French fries and fruit and vegetable sticks.<br />
Shredding disc : ideal for shredding fruit<br />
and vegetables.<br />
Parmesan/chocolate grater : perfect for<br />
grating parmesan and plain chocolate.<br />
6-mm slicer : for thicker slices of fruit<br />
and vegetables.<br />
6-mm grater : for grating fruit and<br />
vegetables more thickly.<br />
Extra large feed tube : for slicing or grating<br />
fruit and vegetables (either left whole or cut<br />
into large chunks) to professional standards.<br />
14
USING THE CITRUS PRESS<br />
1<br />
2<br />
Fit the citrus press basket onto the bowl and<br />
turn until it locks into position.<br />
3 4<br />
Select the cone according to the size of<br />
your citrus fruit. The large cone should<br />
always be slotted onto the small one.<br />
5 6<br />
Slide the cone onto the motor shaft. Place<br />
the lever arm opposite the locking system<br />
and clip the tab onto the bottom of the<br />
bowl.<br />
Place the fruit on top of the cone and press<br />
down gently.<br />
Excess pressure is unnecessary and may<br />
cause damage<br />
7 8<br />
Lower the arm, switch the machine on and<br />
exert a gentle pressure on the arm until all<br />
the juice has been extracted.<br />
Switch the machine off before raising the<br />
arm, to avoid any splashing.<br />
In the case of grapefruit, gentle release the pressure from time to time in order to<br />
extract as much juice as possible.<br />
15
USING THE JUICER<br />
These instructions do not apply to the extra large feed tube (XL models).<br />
1<br />
Slide the juicer basket onto the motor shaft.<br />
2<br />
Introduce the pusher into the feed tube.<br />
Check that the tabs are correctly fixed to<br />
the feed tube.<br />
3 4<br />
Place the lid on the bowl and turn until it<br />
locks into position.<br />
Wash the fruit and vegetables and cut into<br />
chunks. There is no need to peel them if<br />
they have thin skin, or to remove the pips.<br />
5 6<br />
Introduce the fruit or vegetables a few<br />
chunks at a time, helping them down with<br />
the pusher. When they have all gone<br />
through, switch the processor off.<br />
!<br />
16<br />
You can juice any number of fruit and<br />
vegetables, ranging from apples, peaches<br />
and pineapple to beetroot, carrots, celery<br />
and cucumber.<br />
Never insert your fingers or a foreign object into the feed tube. Always use the<br />
pusher designed for that purpose.<br />
Wait until the juicer basket has stopped turning before you open the lid. Do not<br />
use the juicer if the sieve has been damaged.
USING THE OPTIONAL DISCS<br />
To find out how to fit the discs, read the instructions on p.12.<br />
1 2<br />
French fries/veg stick disc : to make french<br />
fries, arrange the potatoes horizontally in<br />
the feed tube.<br />
To make fruit or vegetable sticks, lay them<br />
horizontally in the feed tube.<br />
Shredding disc : for finely shredded<br />
vegetables, lay them horizontally in the<br />
feed tube.<br />
Parmesan/chocolate grater : to grate<br />
chocolate or parmesan cheese, stand the<br />
pieces vertically in the feed tube.<br />
6-mm slicing disc : stand the fruit and<br />
vegetables vertically in the feed tube, either<br />
whole or sliced lengthways.<br />
6-mm grating disc : lay the fruit and<br />
vegetables horizontally in the feed tube.<br />
17
USING THE EXTRA LARGE FEED TUBE<br />
Place the lid on the bowl and turn until it<br />
locks into position.<br />
1<br />
The feed tube has two openings : an extra<br />
large opening for grating and slicing fruit<br />
and vegetables, either left whole or cut into<br />
large chunks, to professional standards.<br />
MAX<br />
2<br />
A narrower opening for liquids and small<br />
solid ingredients.<br />
The lid features a safety system which<br />
means that the machine will only work if<br />
the large pusher is properly engaged.<br />
French fries/veg stick disc : for making<br />
french fries or cutting extra-long fruit and<br />
vegetable sticks.<br />
!<br />
18<br />
Slicing/grating disc : for grating or slicing<br />
fruit and vegetables, either left whole or cut<br />
into large chunks.<br />
Caution : always handle the discs with care, as they are extremely sharp.<br />
Do not pack the ingredients into the feed tube too tightly, as the pusher may<br />
then become jammed.<br />
Do not be surprised to find small quantities of fruit and vegetable (stubs) on<br />
the discs. This is entirely normal.
CLEANING<br />
Always unplug your appliance before cleaning it.<br />
1 2<br />
Always clean it immediately after use<br />
(water + washing-up liquid).<br />
Accessories : use a bottle brush to clean<br />
out the base of the accessories.<br />
Dough blade : take off the removable cap*<br />
for a more thorough clean.<br />
3 4<br />
Juicer basket : insert the thin end of the<br />
spatula into the basket and scrape it to<br />
remove most of the pulp.<br />
Motor unit : wipe with a soft, damp cloth.<br />
You must follow certain rules to avoid seriously damaging the removable parts :<br />
• Dishwasher: select the minimum temperature (below 40 °C) and avoid the drying cycle<br />
(generally above 60 °C)<br />
• Washing by hand : do not leave the parts to soak in detergent for too long. Avoid<br />
abrasive products (e.g. Brillo‚ pads).<br />
• Detergents : read the instructions for use to check their compatibility with plastic items.<br />
The blades may become blunt if they come into frequent contact with certain foodstuffs<br />
(parsley, hazelnuts, etc.). You can sharpen them with a sharpening steel.<br />
Some foodstuffs such as carrots tend to stain plastic. Rubbing with a piece of kitchen paper<br />
and a little vegetable oil will remove most of the staining.<br />
* NB : the Compact model’s dough blade does not have a cap.<br />
!<br />
Caution : always handle the blades and discs with care, as they are<br />
extremely sharp.<br />
Never immerse the motor unit in water.<br />
19
MAXIMUM PROCESSING CAPACITIES<br />
C 3200 CS 4200 CS 5200<br />
Bread 600 g 1 kg 1.3 kg<br />
Shortcrust pastry 1 kg 1.4 kg 1.7 kg<br />
Brioche 500 g 850 g 1.1 kg<br />
Minced meat 750 g 1 kg 1.4 kg<br />
Grated /<br />
Sliced foodstuffs<br />
800 g 1 kg 1.4 kg<br />
Soup 1 Ltr 1.3 Ltr 1.8 Ltr<br />
Beaten egg white 2 - 5 3 - 6 3 - 8<br />
TIPS<br />
• In the case of liquids, never fill the bowl more than 1/3 full. In the case of solids, never<br />
fill the bowl more than 2/3 full.<br />
• To make optimum use of your food processor and reduce cleaning to a minimum, use the<br />
Mini bowl first, then the Midi and finally the <strong>Ma</strong>in bowl. Process hard or dry ingredients first<br />
and liquid preparations last.<br />
• Use the Pulse function to maintain complete control over the final result. You can also use it<br />
for roughly chopping or processing.<br />
• Use the spatula to scrape the sides and bottom of the bowl.<br />
• If your processor starts to vibrate, carefully clean and dry the feet.<br />
• To achieve the very best results when chopping, grating or slicing soft foodstuffs (meat, fish,<br />
soft cheese, etc.), put them in the freezer for a few minutes first. They should be firm but not<br />
frozen !<br />
• Mini bowl<br />
The Mini bowl is ideal for baby food and can double as a storage container<br />
once you have removed the metal blade.<br />
You can also put it directly in the microwave (minus the metal blade) to heat food up<br />
(purée, baby’s soup, etc.).<br />
• Midi bowl<br />
The Midi bowl is perfect for grating and slicing cheese, fruit and vegetables.<br />
• Metal blade<br />
When handling large quantities, cut the meat, vegetables, etc. into 2-cm dice.<br />
For soups, sauces, pancake batter, etc., start by combining the solid ingredients.<br />
Then, while the machine is running, gradually add the liquid via the feed tube.<br />
20
TIPS<br />
Vegetable purée : cut the cooked vegetables into large chunks, put these in the <strong>Ma</strong>in bowl<br />
and process with the metal blade. Pulse a few times to begin with, then blend continuously<br />
to achieve the desired consistency.<br />
Fresh herbs : before chopping fresh herbs, check that both the herbs and the bowl are<br />
perfectly clean and dry. This way, you will obtain better results and the herbs will keep for<br />
longer.<br />
Meat and fish : when mincing meat or fish, use the pulse function to monitor<br />
the final result.<br />
• Dough blade<br />
Bread dough, shortcrust pastry, rich shortcrust pastry : begin by combining the solid<br />
ingredients (flour, yeast, etc.). Next, while the machine is running, gradually add the<br />
liquids (eggs, water, milk) via the feed tube.<br />
Leavened dough : use fresh yeast if you can. You can purchase this from your local<br />
baker’s or healthfood shop. For best results, always dissolve the yeast in cool liquid. If the<br />
water is too hot, it will “kill” the yeast.<br />
Dough : Leave your dough to rest or prove at room temperature or in a warm place. That<br />
way, it will rise more quickly.<br />
• Egg whisk<br />
Beaten egg whites : for maximum volume, use eggs at room temperature and<br />
add a pinch of salt or a drop of lemon juice.<br />
Whipped cream : do not use low fat cream as it will not whip properly.<br />
Always use full fat whipping cream.<br />
• Discs<br />
<strong>Ma</strong>shed potatoes : process your peeled, boiled potatoes using the 4-mm grater.<br />
The reversible discs should be stored in the middle of the storage box. As for the<br />
non-reversible ones, make sure you arrange them with the <strong>Ma</strong>gimix name facing<br />
outwards.<br />
Some foodstuffs, such as carrots, tend to stain plastic. Rubbing with a piece<br />
of kitchen paper and a drop of vegetable oil will remove most of this<br />
staining.<br />
•Juicer<br />
It is a good idea to vary your consumption of fruit and vegetables, as they do not all<br />
contain the same substances and are good for you in different ways.<br />
The fresher the fruit and vegetables, the higher their vitamin content and the more<br />
juice they will yield.<br />
Use or drink the juice immediately, if possible, as certain vitamins are destroyed<br />
by exposure to light or oxygen. If you have to store the juice for a while, add a<br />
few drops of lemon juice to help it keep for longer and put it in the fridge.<br />
For optimum yield, press down gently to ensure that the fruit (or vegetable) is in<br />
direct contact with the grater.<br />
21
ELECTRICAL INSTRUCTIONS<br />
FOR UK AND REPUBLIC OF IRELAND ONLY<br />
WARNING: Always replace the fuse cover of the fitted plug, never use the plug with the fuse<br />
cover omitted. If a replacement fuse cover is required, ensure it is the same as the one visible<br />
on the pin face of the plug (i.e. RED or ORANGE).<br />
Fuse covers are available from: BBS Ltd<br />
Po Box 110<br />
Farnham Surrey GU104XL<br />
Phone : 01252 727755<br />
Use a 13 A fuse approved by ASTA to BS1362, marked thus ASA T<br />
WARNING: a plug with a bared flexible cord is hazardous if engaged in a live socket. If the<br />
fitted plug has been cut from the power supply cord, it should be destroyed and replaced with<br />
a three pin plug in accordance with the following code: BLUE : neutral<br />
BROWN : live<br />
GREEN/YELLOW : earth<br />
The wire which is coloured BLUE must be connected to the terminal in the plug which is<br />
marked with the letter “N” or coloured BLUE or BLACK.<br />
The wire which is coloured BROWN must be connected to the terminal in the plug which is<br />
marked with the letter “L” or coloured BROWN or RED which is connected to the fuse.<br />
The wire which is coloured GREEN/YELLOW should be connected to the terminal marked with<br />
the letter “E”, or by the earth symbol • or coloured GREEN or GREEN/YELLOW.<br />
FOR USA AND CANADA ONLY<br />
This appliance has a polarized plug (one blade is wider than the other). To reduce the risk of<br />
electrical shock, this plug will fit in a polarized outlet only one way. If the plug does not fit fully<br />
in the outlet, reverse the plug.<br />
If it still does not fit, contact a qualified electrician. Do not modify the plug in any way.<br />
The electrical rating listed on the unit is based on the attachment that draws the greatest load.<br />
Other attachments might draw significantly less power or current.<br />
22
!<br />
SAFETY INSTRUCTIONS<br />
• Read all instructions<br />
• Check that the voltage of your mains supply corresponds to that shown on the<br />
identification plate.<br />
• Your appliance must always be plugged into an earthed socket.<br />
• This machine must never be left running unattended, even though you do not need to<br />
keep your finger pressed on any of the buttons.<br />
• Never leave children near the machine unattended. This processor is not a toy and has<br />
not been designed to be used by children.<br />
• Never leave the power cord dangling over the edge of the worktop. Never leave it in<br />
contact with a hot or wet surface.<br />
• Always unplug the appliance after use, before adding or removing accessories and<br />
before cleaning it.<br />
• Always clean the appliance after use so that all the parts work smoothly. Never insert<br />
your hand or a utensil into the bowls if the machine is still plugged in.<br />
• Do not use the appliance if the rotating sieve is damage.<br />
• Always press the “Off” button before unlocking the lid.<br />
• Always lift the processor up by the base, using both hands, and never by the handle, as<br />
it is extremely heavy.<br />
• If the power cord has been damaged, if your appliance has broken down, or if your<br />
appliance has fallen it must be repaired by the manufacturer, a <strong>Ma</strong>gimix-approved<br />
after-sales service or any similarly-qualified person, in order to avoid all risks.<br />
• The use of parts that are not recommended or sold by <strong>Ma</strong>gimix could result in injury or<br />
electric shocks.<br />
• If a part or accessory develops a crack, becomes discoloured or misshapen, it must be<br />
replaced.<br />
• Your machine should give you many years of trouble free service, however, we would<br />
recommend that it is taken to an authorised service agent at least every five years in<br />
order that it may be thorougly checked.<br />
• Always handle the discs and blades with caution, as they are extremely sharp.<br />
• Never install the blades or discs on the motor shaft before the bowl has been properly<br />
installed.<br />
• Never lift the accessory storage box up by the lid.<br />
• Never insert your hand or a utensil into the feed tube when the discs or blades are moving<br />
as you may incur severe injury or damage the appliance. Always use the pusher.<br />
• <strong>Ma</strong>ke sure that the lid has been placed horizontally and locked into position before<br />
switching on the appliance.<br />
• Never try to override the safety systems.<br />
• Ensure the safety mechanism is kept clean and free of food.<br />
• To avoid all risks of electric shock, never immerse the motor unit in water or put it in the<br />
dishwasher.<br />
• Never use the appliance out of doors.<br />
• This appliance is designed solely for domestic use.<br />
SAVE THESE INSTRUCTIONS 23