GSM Alarm Control Panel - Microdata Finland Oy
GSM Alarm Control Panel - Microdata Finland Oy
GSM Alarm Control Panel - Microdata Finland Oy
Create successful ePaper yourself
Turn your PDF publications into a flip-book with our unique Google optimized e-Paper software.
A New User<br />
Friendly Concept<br />
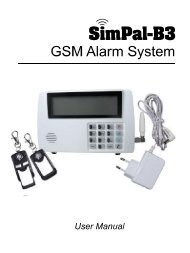
<strong>GSM</strong> SMS <strong>Alarm</strong> For<br />
Your Assets!<br />
<strong>GSM</strong> <strong>Alarm</strong> <strong>Control</strong> <strong>Panel</strong><br />
User Manual<br />
S110<br />
Ver 1.10<br />
Date Issued: 2010-09-01<br />
All rights reserved by<br />
King Pigeon Hi-<br />
Tech.Co.,Ltd.
KingPigeon S110 – www.microdata.fi<br />
Table of Contents<br />
1. Brief introduction -----------------------------------------------------------------------------2<br />
2. Safety Directions ----------------------------------------------------------------------------2<br />
3. Standard Packing list<br />
------------------------------------------------------------------------3<br />
4. Physical Layout ------------------------------------------------------------------------------3<br />
5. Features ----------------------------------------------------------------------------------6<br />
6. Settings ----------------------------------------------------------------------------------8<br />
7. Operating Instructions --------------------------------------------------------18<br />
8. Installation --------------------------------------------------------------------21<br />
9. Add wireless sensors -----------------------------------------------------26<br />
10. Technical specifications --------------------------------------------29<br />
11. Important information --------------------------------------------------------------30<br />
12. Maintenance----------------------------------------------------------------------------30<br />
13. Quality Warranty<br />
-----------------------------------------------------------------------------30<br />
14. Trouble Shooting Guide-------------------------------------------------------------------31<br />
This handbook has been designed as a guide to the installation and operation of<br />
S110.<br />
Statements contained in the handbook are general guidelines only and in no way are<br />
designed to supersede the instructions contained with other products.<br />
We recommend that the advice of a registered electrician be sought before any<br />
Installation work commences.<br />
The manufacturer, its employees and distributors, accept no liability for any loss or<br />
damage including consequential damage due to reliance on any material contained in<br />
this handbook.<br />
The manufacturer, its employees and distributors, accept no liability for <strong>GSM</strong> Network<br />
upgrading or SIMCard upgrading due to the specifications contained in this handbook.<br />
SMS COMMAND<br />
AA<br />
BB<br />
CC<br />
DD<br />
EE<br />
SMS Command List<br />
Functions & Actions<br />
To arm, in this mode, any detector triggered will alarm.<br />
To disarm, in this mode, detector triggered will not alarm.<br />
To switch ON the Relay 2 output.<br />
To switch OFF the Relay 2 output<br />
Inquiry the Status<br />
*The commands should plus Password, the format is Password+SMS Command.<br />
Page 2 of 33 Ver 1.10
KingPigeon S110 – www.microdata.fi<br />
i.e.: if the password is 1234, then you can send 1234AA to arm, 1234BB to disarm,<br />
the AA~EE must be Caps Lock.<br />
1. Brief introduction<br />
The <strong>GSM</strong> <strong>Alarm</strong> System is a new security protection solution special for<br />
home, house and office and other applications. It based on Wireless<br />
<strong>GSM</strong> Communication network, integrated Lcd Menu display and<br />
Computer technology. When any sensor activated, it will Call & Send<br />
SMS to owner’s telephone immediately.<br />
The <strong>GSM</strong> <strong>Alarm</strong> System with user friendly design idea, all operations and<br />
settings are visual and intuitive!.<br />
What you need is a SIMCard which supports Call ID function.<br />
2.Safety Directions<br />
Safe Startup<br />
Do not use <strong>GSM</strong> <strong>Alarm</strong> System when using <strong>GSM</strong> equipment<br />
is prohibited or might bring disturbance or danger.<br />
Interference<br />
All wireless equipment might interfere network signals of<br />
<strong>GSM</strong> <strong>Alarm</strong> System and influences its performance.<br />
Avoid Use at Gas Station<br />
Do not use <strong>GSM</strong> <strong>Alarm</strong> System at a gas station. Power off<br />
<strong>GSM</strong> <strong>Alarm</strong> System it near fuels or chemicals.<br />
Power it off near Blasting Places<br />
Please follow relevant restrictive regulations. Avoid using the<br />
device in blasting places.<br />
Page 3 of 33 Ver 1.10
KingPigeon S110 – www.microdata.fi<br />
Reasonable Use<br />
Please install the product at suitable places as described in<br />
the product documentation. Avoid signal screening by<br />
covering the mainframe.<br />
Use Qualified Maintenance Service<br />
Maintenance can be carried out only by qualified maintainer.<br />
Waterproofness<br />
The product is not waterproof. Please install it at dry places<br />
and keep it dry.<br />
3. Standard Packing List<br />
<strong>Control</strong> Unit X1<br />
Wireless Magnetic Door Sensor X1<br />
Wireless Remote <strong>Control</strong>s X 2<br />
Wireless PIR Motion Sensor X1<br />
Wired Strobe Siren (110dB) X1<br />
Regulated 12VDC Power Supply X1<br />
User Manual X1<br />
<strong>GSM</strong> Antenna X1<br />
Optional Accessories: (Wireless Sensors or Wired Sensors)<br />
PIR Motion Sensor, Glass Break Sensor, Magnetic Window Sensor,<br />
Magnetic Steel Scrolling Door Sensor, Temperature Sensor,<br />
Photoelectric Beams, etc.<br />
4. Physical Layout<br />
4.1 <strong>Control</strong> Unit physical layout<br />
Tips!<br />
1) In order to forbidden the intruder power off the alarm system, we equipped the power<br />
Page 4 of 33 Ver 1.10
KingPigeon S110 – www.microdata.fi<br />
switch inside, it is nearby the SIMCard socket, please pay attention to it, and don’t<br />
tell others of this. Turn it towards inside is off, turn it towards outside is on.<br />
2) We reserved the plastics of the output relay and Wired sensors in the back cover of<br />
the panel. Because of some of the users needn’t this function. If you want to use the<br />
output relay and wired sensors, please remove the plastics carefully. Then you can<br />
see the connectors inside.<br />
Interface 1 Description<br />
Power<br />
Siren<br />
<strong>GSM</strong> ANT<br />
Microphon<br />
e<br />
External Power Connector, Connect to 2A@12V DC power<br />
through AC/DC Adaptor.<br />
Will start for 60seconds when alarm. The siren or strobe<br />
siren should be
KingPigeon S110 – www.microdata.fi<br />
+12V +12VDC@1A power output for wired detectors.<br />
IN1<br />
GND<br />
IN2<br />
IN3<br />
GND<br />
IN4<br />
IN5<br />
GND<br />
IN6<br />
IN7<br />
GND<br />
IN8<br />
Digital input 1, connect to one wire of the wired Detector.<br />
Ground point, connect to another wire of the wired Detector or<br />
-12VDC.<br />
Digital input 2, connect to one wire of the wired Detector.<br />
Digital input 3, connect to one wire of the wired Detector.<br />
Ground point, connect to another wire of the wired Detector.<br />
Digital input 4, connect to one wire of the wired Detector.<br />
Digital input 5, connect to one wire of the wired Detector.<br />
Ground point, connect to another wire of the wired Detector.<br />
Digital input 6, connect to one wire of the wired Detector.<br />
Digital input7, connect to another wire of the wired Detector.<br />
Ground point, connect to another wire of the wired Detector or<br />
-12VDC.<br />
Digital input 8, connect to one wire of the wired Detector.<br />
+12V +12VDC@1A power output for wired detectors.<br />
R1+ Link-Output Relay, when the system alarm will close 4minutes.<br />
(Rated Voltage: 3A/240VAC), this relay can connect to any other<br />
lights or CCTV system as a switch.<br />
R1- Built in 240VAC@3A rated relay output, connect to the device<br />
negative electrode.<br />
R2+ Independent Output Relay, Can switch on or off by SMS<br />
Commands. (Rated Voltage: 3A/240VAC), this relay is very<br />
useful to switch on light when you can not come back in the<br />
evening. Then some hours you can switch off it.<br />
R2- Built in 240VAC@3A rated relay output, connect to the device<br />
negative electrode.<br />
Page 6 of 33 Ver 1.10
KingPigeon S110 – www.microdata.fi<br />
4.2 Working Principle Drawing<br />
The unit works with wireless detectors or Wired detectors. It can switch on<br />
or off one appliance by SMS command. Please see below:<br />
5. Features<br />
5.1 The advantages of the <strong>GSM</strong> <strong>Alarm</strong> System<br />
1) Two-way Voice communication or wiretap are available;<br />
2) LCD displays the entire setup menu;<br />
3) Armed, Partial Armed(At House or Stay), Disarmed, SOS are<br />
available;<br />
4) Armed delay, alarm delay, siren work or not, more other functions are<br />
Programmable by user;<br />
5) Watchdog,24Hours Zone, SOS zone are available;<br />
6) Using ICON to display armed, Partial Armed, Disarmed, Power status,<br />
Siren status and <strong>GSM</strong> Signal status.<br />
Page 7 of 33 Ver 1.10
KingPigeon S110 – www.microdata.fi<br />
7) Auto-detect and report, <strong>GSM</strong> Signal Jammer alarm, SMS Switch is<br />
available.<br />
8) User friendly Icons for LED indicators, LCD and functional Buttons.<br />
5.2 Functions & Features of the <strong>GSM</strong> <strong>Alarm</strong> System<br />
1) <strong>GSM</strong> Frequency: Dual-Band(900/1800/1900MHz), Quad-Band is<br />
optional(850/900/1800/1900Mhz) ;<br />
2) Supports armed, Partial armed(At House or Stay) or disarmed, SOS<br />
by remote control or mainframe keyboard;<br />
3) Supports armed, disarmed, inquiry mainframe status, switch on or off<br />
relay output by SMS Commands;<br />
4) Automatically send SMS Alert and dial to the pre-set cell phone when<br />
any sensor had been triggered;<br />
5) Equips with 16 Wireless Zones and 8 Wired zones, zone attribute<br />
(Normal/At House or Stay mode) and Zone Name is editable;<br />
6) 3 X 24-Hour zones for smoke and gas leakage sensor,1XWatchdog<br />
zone for monitoring elder or child, 1XSOS zone for emergency help;<br />
7) Supports 3 SMS Alert Numbers and 5 Calling alert numbers and 100<br />
<strong>Alarm</strong> Records for owner review;<br />
8) Supports Timer for automatically arm or disarm the system;<br />
9) Supports armed delay to give enough time to you go out the home, the<br />
delay time is editable by user;<br />
10) Equips with 1 <strong>Alarm</strong>-Link output relay, once the system triggered, the<br />
output will switch on for 4minutes;<br />
11) Equips with 1 seperate output relay, it can be switch on or off by SMS<br />
Commands. This is very useful for remote switch on light or off while<br />
you’re in another city in the night;<br />
12) The Keypad can use as a dialer, the functions like the Cell phone;<br />
13) The external power failure & recovery alert function is optional ;<br />
Page 8 of 33 Ver 1.10
KingPigeon S110 – www.microdata.fi<br />
14) Supports wiretap through the internal microphone;<br />
15) Supports internal Speaker to special user for two-way voice<br />
communication;<br />
16) It is Compatible with PT2262 and PT2242 wireless IC;<br />
17) Standby internal rechargeable battery which can last 18 hours;<br />
18) Based on the <strong>GSM</strong> communication network and Operation Menu<br />
Display technology, apply to wide range situations.<br />
6. Settings<br />
Tips!<br />
1) Please insert the SIMCard firstly, and install the <strong>GSM</strong> Antenna then power on it.<br />
Also, you can insert the SIMCard after you setup.<br />
2) All the wireless sensors in the standard package we have assigned to the mainframe<br />
already. Needn’t to learn it again.<br />
3) After you power on the mainframe, the mainframe will auto detect and display the<br />
process. It will detect the 8 wired input current connection status and display on the<br />
LCD with 8 characters. O stands for Open, C stands for Close, L stands for with2.2K<br />
EOL, E Stands for not includes the before 3 status. If it with SIMCard, it will register<br />
the <strong>GSM</strong> Network and display the <strong>GSM</strong> Signal ICON in the left corner of the LCD.<br />
4) All of the setup can be done by the LCD except modify the Zone name, if you need<br />
to modify the zone name, please see the command list in the related chapter.<br />
5) Only disarm by keyboard and modify settings requires password, the other operation<br />
needn’t password. The default password is 1234. Enter password then press Enter<br />
button to enter the system.<br />
6) In standby mode, press #3#6, following UP button. The system will recovery to<br />
factory default settings, the password will be 1234. But the registered wireless<br />
sensors and the Wired type will remain.<br />
7) Two way communication:<br />
In standby mode, dial the telephone number, following the , the system will dial<br />
out; While incoming call, press the Button to answer the incoming. Please<br />
note: if the income calling is from the preset number (Includes SMS Alert number<br />
and Auto-dial numbers), then before 6 tones, if answered it, will create two way<br />
Page 9 of 33 Ver 1.10
KingPigeon S110 – www.microdata.fi<br />
voice communications. After 6 tones, will be entering into wiretap status. The user<br />
can listen in the alarm around sounds, Max. time is 10Minutes. If the income calling<br />
is not from the preset alarm number, after 6 tones, if hasn’t been answered, will<br />
hang up.<br />
8) If you want to test the two way voice communication, please make sure the other<br />
phone is far from the , at least 500meters. Otherwise, the near-cross will make<br />
lots of noise interference.<br />
9) Please setup at least one alarm alert number, otherwise the mainframe will only<br />
activate the siren to work 6 times, this is to remind you setup alarm numbers.<br />
10) The controller panel not accept PIN Code, please disable the SIMCard’s PIN Code<br />
function.<br />
6.1 Key-Function Descriptions.<br />
6.1.1 Led indicator Description<br />
The unit uses the icons to stand for the function, it is visual and intuitive to users.<br />
:<br />
:<br />
:<br />
Stay Mode indicator, on is in stay mode;<br />
Arm Mode indicator, on is in arm mode, off is in disarm mode;<br />
<strong>Alarm</strong> Indicator, on is alarming, off is normally;<br />
<strong>GSM</strong> Module indicator, registering will quickly flick, registered successful<br />
will slowly flick.<br />
Page 10 of 33 Ver 1.10
KingPigeon S110 – www.microdata.fi<br />
:<br />
:<br />
<strong>Alarm</strong> link output indicator, when alarm, will turn on and last 4minutes,<br />
means the alarm link output relay closing.<br />
Separate output relay indicator, when the independent output relay closed, it<br />
: will be on; when the independent output relay opened, will be off.<br />
6.1.2 LCD ICONS Description<br />
The unit uses the icons to descript the present status; it will be more user friendly.<br />
: Enabled the Timer to arm and disarm function; otherwise, will not display it.<br />
: Timer to Arm, has setup a time point to enter armed mode directly.<br />
: Timer to disarm. Has setup a time point to enter disarmed mode directly.<br />
Enabled the Watchdog zone. In the fixed time range if the sensors in the watchdog<br />
zone hasn’t been triggered, will alarm.<br />
:<br />
Enabled : the system condition report function. Will automatically send system<br />
condition to the user by SMS, otherwise, it will not display.<br />
6.1.3 Keyboard functions<br />
The unit uses the icons to mark the buttons; it will be more user friendly to user.<br />
: Enter button, dial out and answer incoming.<br />
: Hang up the incoming, Exit, and Backspace button.<br />
: Up towards button.<br />
: Down towards button.<br />
: Turn right button, in special menu need it to choose the option.<br />
Disarm Button.<br />
Arm Button<br />
At House, Stay mode button.<br />
SOS, Panic Button.<br />
Page 11 of 33 Ver 1.10
KingPigeon S110 – www.microdata.fi<br />
6.2 Main Menu<br />
In standby mode, press the<br />
button, you can see the Menu.<br />
1. View<br />
2. Setup<br />
---To check the settings and event records of the system<br />
---To setup the system functions, requires password, the<br />
default password is 1234.<br />
6.2.1 View<br />
1. <strong>Alarm</strong> Records<br />
2.Timers<br />
---To check the alarm records, up to 100 event<br />
records will be saved.<br />
---To check the Timer you have setup.<br />
---To check the SMS Alert Contents of the Wireless<br />
Related Zones.<br />
---To check the SMS Alert Numbers<br />
---To check the Auto-dial telephone Numbers<br />
---To check the report time.<br />
---To check the RF sensor wireless code.<br />
Name<br />
---To check the SMS Alert Contents of the Wired<br />
Related Zones.<br />
Notice:<br />
1) The RF Code Query function is for check the wireless sensor transmission. You can<br />
enter this submenu, then triggered the wireless sensor, if in the LCD can display<br />
some codes, means the wireless sensor can transmit wireless signal.<br />
6.2.2 Setup<br />
Page 12 of 33 Ver 1.10
KingPigeon S110 – www.microdata.fi<br />
1. Add/Del RF Parts<br />
2.Wired Zones Set<br />
3.Basic Setting<br />
---To add or remove wireless sensors or remote<br />
controls and edit their attributes.<br />
---To setup Wired Zone parameters of the system.<br />
---To setup basic parameters of the system.<br />
---To setup the advanced parameters of the system.<br />
4. Advanced Setting<br />
6.2.2.1 Add/Del RF Parts<br />
---To setup the zone’s attribute and add new wireless<br />
1.Edit RF Zone sensors to specificities zone.<br />
---To add new remote controls.<br />
2.Edit Remote Ctrl<br />
---To remove all registered wireless sensors and<br />
3. Remove All remote controls.<br />
Notice:<br />
1) Zones’ Attribute definition:<br />
Zones’ Attribute<br />
Normal<br />
Stay<br />
24-Hour Zone<br />
Watchdog<br />
SOS Help!<br />
Definition<br />
The sensors with this type triggered will alarm in Armed mode<br />
and not alarm in disarmed mode.<br />
In Stay mode, the sensors with Stay type triggered will alarm, the<br />
sensors with Normal type triggered will not alarm.<br />
In any mode, the sensors with this type triggered will alarm.<br />
In the starting time point and ending time point, the sensors with<br />
this type triggered will not alarm, if the sensor hasn’t been<br />
triggered, will make alarm.<br />
In any mode, the sensors with this type triggered will alarm but<br />
not drive the siren.<br />
<strong>Alarm</strong> Action: when <strong>Alarm</strong> occurrence, the system will Automatically dial the Pre-set<br />
Auto-Dial Tel. Numbers for 3 times one by one, and Send SMS to the Pre-set SMS Alert<br />
Numbers, in the meantime, will drive the siren for 60seconds and close the link-Output<br />
relay for 4 minutes.<br />
2) After you enter the menu, the attribute of the zone will be displayed in the LCD, if<br />
this zone has been assigned wireless sensor, will display “V”. If hasn’t been<br />
assigned wireless sensor, means this zone is empty, you can assign new wireless<br />
Page 13 of 33 Ver 1.10
KingPigeon S110 – www.microdata.fi<br />
sensor to this zone. Press Up or down button on the keyboard to check the other<br />
Zones. Press Enter to edit it. After you pressed the Enter button, you can select the<br />
zone attribute, and then press Enter, you can see “Turn on the device” or “Please<br />
trigger the new wireless sensor”. Then following the instruction to add the new<br />
wireless sensor to the . For Remote control, it will display VVVV if the unit has been<br />
assigned remote control. Both of them you can press Enter to re-assign new<br />
wireless sensor or remote control to replace the existence one.<br />
3) In the Edit RF Parts you can edit the attribute of the sensor as Normal or Stay Type.<br />
If the system is under Stay Mode (Also said At House or Partial Armed), the sensor<br />
set as Normal triggered will not alarm, the sensor set as Stay triggered will <strong>Alarm</strong>. If<br />
the system is under Armed Mode, then all RF sensors triggered, will alarm. This is<br />
very important to remember the sensor types of the system. This function is very<br />
useful when you at house and need some sensors in working status (E.g.: the<br />
sensor installed outer and gas and smoke detectors, etc.) and some sensors indoor<br />
not in working status (e.g.: the sensors installed in the living room, bed room, etc.).<br />
4) The unit can accept total 16 wireless sensors to 16 wireless zones; each zone can<br />
be assigned one wireless sensor, and renamed it by SMS Command. And 5 remote<br />
controls.<br />
5) Wireless Zone Serial Number, Default Zone Name and Zone Attributes Table.<br />
Zone SN. Default Zone Name Default Zone Attribute<br />
01 Intrusion from Entry Door Normal<br />
02 Intrusion from Living Room Normal<br />
03 Intrusion from Bed Room 1 Normal<br />
04 Intrusion from Bed Room 2 Normal<br />
05 Intrusion from Bed Room 3 Normal<br />
06 Intrusion from Front Balcony Normal<br />
07 Intrusion from Behind Balcony Normal<br />
08 Intrusion from 1F Window Normal<br />
09 Intrusion from 2F Window Normal<br />
10 Intrusion from Left Fence Normal<br />
11 Intrusion from Right Fence Normal<br />
12 Medical Button <strong>Alarm</strong> 24-Hour zones, This attribute can<br />
not be modified. In arm or disarm or<br />
13 Gas Leakage <strong>Alarm</strong><br />
Page 14 of 33 Ver 1.10
KingPigeon S110 – www.microdata.fi<br />
14 Smoke Fire <strong>Alarm</strong> stay mode, once the sensor in these<br />
zones triggered will alarm.<br />
15 Watchdog alarm Watchdog Zone, the attribute can<br />
not be modified. In arm or disarm or<br />
stay mode, once the sensor in this<br />
zone triggered in the preset time,<br />
will not alarm, if the sensor hasn’t<br />
been triggered in the preset time,<br />
will alarm.<br />
16 SOS Help! SOS zone, The attribute can not be<br />
modified. In arm or disarm or stay<br />
mode, once the sensor in these<br />
zones triggered will alarm<br />
immediately. not drive the siren.<br />
Notice: The Additional Panic Button, and the SOS button on the Keyboard and<br />
remote control is the same attribute with the SOS zone. If the Additional Panic<br />
Button assigned in 24-Hour Zones, once triggered, the alarm action will be the<br />
same as SOS zone, not start the siren.<br />
6.2.2.2 Wired Zones Set<br />
1.Nodes Type<br />
2.Zones Attributes<br />
---To setup the wired inputs type.<br />
---To setup the wired input’s attribute.<br />
Notice:<br />
1) The Nodes Type NC,NO,EOL should reference the wired input sensor type. The<br />
Default is NC and we short all of the inputs by wires, if you want to contact wired<br />
sensors, then please replace the short wires by wired sensors directly. The no-use<br />
input, please remain them in short-circuited by wires. Please see 8.4 Install the<br />
Wired Sensors and Electricity equipments<br />
2) Zones’ Attribute definition of the wired zone is the same as the wireless zone.<br />
3) The unit can accept total 8 wired sensors to 8 wired zones; each zone can be<br />
assigned one wired sensor, and renamed it by SMS Command.<br />
4) Wired Zone Serial Number, Default Zone Name and Zone Attributes Table.<br />
Zone SN. Default Zone Name Default Zone Attribute<br />
01 Outer Door Opened Normal<br />
02 Intrusion from Left Fence Normal<br />
03 Intrusion from Right Fence Normal<br />
04 Intrusion from Front Fence Normal<br />
Page 15 of 33 Ver 1.10
KingPigeon S110 – www.microdata.fi<br />
05 Intrusion from Guarden Fence Normal<br />
06 24Hours zone alarm 24-Hour zones, This attribute can not<br />
be modified. In arm or disarm or stay<br />
mode, once the sensor in these zones<br />
07 24Hours zone alarm<br />
triggered will alarm immediately.<br />
08 SOS Help! SOS zone, The attribute can not be<br />
modified. In arm or disarm or stay<br />
mode, once the sensor in these zones<br />
triggered will alarm immediately. But<br />
not drive the siren.<br />
6.2.2.3 Basic Setting<br />
1.SMS Phone No. ---To setup the SMS Alert Number, must be cell<br />
phone numbers, total 3.<br />
2. Auto-dial Tel No. ---To setup the Auto-dial telephone number, total is 5.<br />
---To setup the time and date information. The<br />
3. Time & Date Format is Month-Date-Year. Press Up/Down to<br />
setup each item, press * to move to next item.<br />
---Switch on or off the siren when <strong>Alarm</strong> occurrence.<br />
4. Sound <strong>Alarm</strong> ---Setup the Report time gap, Range:<br />
0~240Hours.deflaut is 0, will not report.<br />
5. Report Time Gap ---Enable or Disable the alert function while the AC<br />
power is failure more than 30 minutes.<br />
6. Power Failure Alert ---Setup the delay time after armed the system by<br />
remote control or keyboard. Optional: 0S, 20S,<br />
7. Arm Delay Time 30S, 60S, 90S. Default is 30S.<br />
---Setup the delay time after any sensor triggered.<br />
Optional: 0S, 20S, 30S, 60S, 90S. Default is 20S.<br />
8. <strong>Alarm</strong> delay Time<br />
Notice:<br />
1) The SMS Alert number is for receiving the alarm SMS Message. The Auto-Dial<br />
Telephone number is for receiving the calling. Please help to try adding country code<br />
or removing country code when you can not receive the call or SMS. Because of<br />
Page 16 of 33 Ver 1.10
KingPigeon S110 – www.microdata.fi<br />
different <strong>GSM</strong> Operator with different communication protocols. Our system is with<br />
the international communications protocols.<br />
2) The Auto-dial Tel. Number can dial to the , 6 tones later, can wiretap the system site.<br />
Before 6 tones, if somebody answers the calling, then can create two-way voice<br />
communication. The other telephone number can call in the , if nobody answer the<br />
calling, then can not wiretap the system site, if somebody answers the calling, then<br />
can create two-way voice communication.<br />
For example:<br />
In <strong>Finland</strong>, the country code is 00358, please note, do not write +358.<br />
The user cell phone number is 13511111111 and has been assigned as a SMS Alert<br />
number, the simcard number in the panel is 13512345678.<br />
Problem 1: <strong>Alarm</strong> but the user hasn’t received the SMS Alert.<br />
Solution: Please plus the country code while you setup the 13570810254 as SMS<br />
Alert number, means setup 0035813511111111 to instead of the 13511111111.<br />
Problem 2: The user number can receive the SMS Alert message from alarm panel,<br />
but the alarm panel can not receive the commands from the user number.<br />
Solution: Please add country code to the simcard number in the alarm panel. Means<br />
send sms commands to 0035813512345678 to instead of 13512345678.<br />
Solution 3: When you use cell phone dial another one, what number it will be<br />
displayed then you can set the displayed number as dial numbers; when you use cell<br />
phone send SMS to another cell phone, what number it will be displayed then you<br />
can set the displayed number as SMS Alert number, just use the 00 to replace the<br />
“+”.<br />
3) If Switch off the siren, then all alarm raised will not drive the siren, if switch on the<br />
siren, then when the system alarm will drive the siren for 1 minute except the SOS<br />
help caused. Default is Switch on.<br />
4) If setup the Report Time Gap, the system will periodically send “<strong>GSM</strong> <strong>Alarm</strong> System<br />
in good working condition” to the first SMS Alert number. This is very useful for long<br />
time use the system. Default is 0. Means will not report the system condition.<br />
5) If enable the power failure alert function, the system will send SMS “AC Power Failed<br />
Page 17 of 33 Ver 1.10
KingPigeon S110 – www.microdata.fi<br />
30Min.” to the first SMS Alert numbers after the AC power failure 30minutes, if the<br />
power is recovery then will send SMS “AC Power is OK.”. Default is disabled.<br />
6) There’s no delay for Stay Mode.<br />
6.2.2.4 Advanced Setting<br />
1.Edit Timer<br />
---To setup the starting time to arm and the Ending<br />
time to disarm.<br />
2. Watchdog Timer<br />
---To setup the starting and ending time to work.<br />
3. RCO Alert<br />
---To setup the remote control operation report<br />
function.<br />
4. <strong>GSM</strong> Jammer Alert<br />
---To setup the <strong>GSM</strong> Jammer Alert function.<br />
5. Modify Password<br />
6. Default Set<br />
---Modify the system password.<br />
--- Restore the system settings to factory defaults.<br />
All of the remote controls and wireless sensors<br />
should be re-assigned again.<br />
Notice:<br />
1) The watchdog is special for elder or child or on-duty personnel, in the period (Starting<br />
time point to Ending time point) if this sensor hasn’t been triggered, the system will<br />
alarm. This is very useful to monitor the elder or child goes out the bedroom or enters<br />
the kitchen to eat something. Or monitor the on-duty personnel in the polling period<br />
have gone to on-site inspection.<br />
2) If enable the RCO alert function, then when use any remote control which has been<br />
registered to the system to arm or disarm or stay operation, the system will send<br />
SMS to the first SMS number.<br />
3) If enable the <strong>GSM</strong> Jammer Alert function, when the <strong>GSM</strong> Signal is 0 for more than<br />
90s, the system will drive the siren for 60seconds and the link-output relay will close 4<br />
minutes.<br />
6.3 Modify the SMS Alert Content of the Zone (Zone or Sensor Name)<br />
The unit accepts SMS Command to modify the SMS Alert Content of the<br />
zone.<br />
Page 18 of 33 Ver 1.10
KingPigeon S110 – www.microdata.fi<br />
For Wireless Zone Name, the format is: Password+#+M+Zone Serial<br />
Number+#+New Zone Name+#, the Max. Character for the zone name is 32.<br />
The Zone Serial Number is 01~16 corresponding to the LCD Menu and<br />
6.2.2.1 table. If setup successful, the system will return OK to confirm the<br />
operation.<br />
E.g.: Modify the first wireless zone name as Front Door Opened by Intruder! You should<br />
edit a SMS Content: 1234#M01# Front Door Opened by Intruder!# ,the 1234 is the<br />
password. Then send it to the Simcard Number.<br />
For Wired Zone Name, the format is: Password+#+Z+Zone Serial<br />
Number+#+New Zone Name+#, the Max. Character for the zone name is 32.<br />
The Zone Serial Number is 01~08 corresponding to the LCD Menu and<br />
6.2.2.2 table. If setup successful, the system will return OK to confirm the<br />
operation.<br />
E.g.: Modify the first wired zone name as Front Door Opened by Intruder! You should<br />
edit a SMS Content: 1234#Z01# Front Door Opened by Intruder!# ,the 1234 is the<br />
password. Then send it to the Simcard Number.<br />
7. Operating Instructions<br />
Tips!<br />
The user can arm/disarm/Stay (Partial armed) by Remote controls, Keyboard, SMS,<br />
also, the user can cancel the alarm by Remote <strong>Control</strong>s, Keyboard, SMS to Disarm it.<br />
Another, the user can switch on or off the independent output relay by SMS<br />
Commands.<br />
7.1 Arm or Disarm or Stay (Partial Arm, At House Arm) and<br />
Emergency <strong>Alarm</strong> by remote controls<br />
Page 19 of 33 Ver 1.10
KingPigeon S110 – www.microdata.fi<br />
Press the button “ ” on the remote control or Press Arm button on the<br />
keyboard then select Arm, the <strong>Control</strong> Unit enters arm status (delay time<br />
according to the setting), the ICON will be on. Under this status, any<br />
sensor triggered, the control unit will alarm, if answered the call, the siren<br />
will stop and can listen in the alarm area by phone.<br />
Press the button “ ” on the remote control, or press Disarm button on the<br />
Keyboard then input the password, the <strong>Control</strong> Unit disarms immediately.<br />
The ICON will be off. Under this status, any sensor triggered, the control<br />
unit will not alarm. Except the sensor type is the 24-Hour Zones or<br />
Watchdog zone or SOS zone.<br />
Press the button “ ” on the remote control or Press the Arm button on the<br />
keyboard then select Stay, the <strong>Control</strong> Unit enters Stay(Partial Armed)<br />
status, the ICON will be on. In this status, the sensors had been set as<br />
Stay Type triggered will alarm, but the sensors had been set as normal<br />
Type triggered will not alarm. Please see the menu of the Edit RF Zone.<br />
Press Emergency button (SOS) “!” on the remote control or the control<br />
unit or Press any Emergency button. The <strong>Control</strong> Unit will enter<br />
emergency alarm. The siren will not sound, but will alert the pre-set phone<br />
number immediately.<br />
7.2 SMS Commands for Arm or Disarm or Inquiry system status or<br />
switch on/off independent output relay.<br />
The User can Arm/Disarm/Inquriysystem status/Switch on or off the<br />
independent output relay by sending SMS to the <strong>Control</strong> unit. The SMS<br />
Commands are below:<br />
Notice:<br />
The system will carry out the commands immediately (with no delay) after the<br />
<strong>Control</strong> Unit receive this SMS command.<br />
7.2.1 Armed<br />
Page 20 of 33 Ver 1.10
KingPigeon S110 – www.microdata.fi<br />
xxxxAA<br />
“xxxx” stands for the password<br />
(1-4 digits).<br />
Return SMS<br />
All Armed Mode activated.<br />
Example<br />
1234AA<br />
When the Password is 1234<br />
7.2.2 Disarm<br />
xxxxBB<br />
“xxxx” stands for the password<br />
(1-4 digits).<br />
Return SMS<br />
System deactivated.<br />
Example<br />
1111BB<br />
When the Password is 1111<br />
7.2.3 Switch On the independent output relay<br />
xxxxCC<br />
“xxxx” stands for the password<br />
(1-4 digits).<br />
Return SMS<br />
Output Relay Closed.<br />
Example<br />
1111CC<br />
When the Password is 1111<br />
7.2.4 Switch OFF the independent output relay<br />
xxxxDD<br />
“xxxx” stands for the password<br />
(1-4 digits).<br />
Return SMS<br />
Output Relay Opened.<br />
Example<br />
1111DD<br />
When the Password is 1111<br />
7.2.5 Inquiry System Status<br />
Page 21 of 33 Ver 1.10
KingPigeon S110 – www.microdata.fi<br />
xxxxEE<br />
“xxxx” stands for the password (1-4 digits).<br />
Return SMS<br />
Armed or At House or Disarmed<br />
AC Power is Ok or AC Power is failed<br />
<strong>GSM</strong> Value is 17 or other value<br />
Output Relay is Closed or<br />
Output Relay is opened<br />
Notice:<br />
The Output relay status in the Return SMS is the independent output relay status. It<br />
is not the alarm link Output Relay Status.<br />
8. Installation<br />
Before installing the control unit and sensors and sirens, please help to test the system<br />
firstly, including wireless sensor, power supply, gsm signal, etc.<br />
Please ensure the wireless sensors and electricity appliances from the mainframe more<br />
than 3~5m.<br />
8.1 Insert SIM into <strong>Control</strong> Unit and install the <strong>GSM</strong> ANT.<br />
In the backside of the control unit, please install the <strong>GSM</strong> SIM card<br />
. The <strong>GSM</strong> ANT must be Vertical installation to ensure it in good<br />
working condition.<br />
8.2 Install the Wireless Magnetic door/window sensors<br />
Magnetic door/window sensors signal the <strong>Control</strong> Unit when the two parts<br />
separate by more than between 1.5 to 3.0cm.<br />
Page 22 of 33 Ver 1.10
KingPigeon S110 – www.microdata.fi<br />
In some circumstances an Infrared beam fence is more appropriate than<br />
magnetic sensors. i.e. veranda, picture window balcony, boundary wall<br />
e.t.c.<br />
Wireless glass break sensor can also be used (see below)<br />
For a Scrolling Steel Door, a special Wireless Scroll Steel Door magnetic<br />
sensor must be used due to interference of the wireless signal caused by<br />
the steel door.<br />
Installation: attach the larger half to the floor and attach (rivet or glue) the<br />
smaller half to the scroll steel door. An alarm is triggered when the halves<br />
are separated by more than three to 5.00 cm.<br />
Page 23 of 33 Ver 1.10
KingPigeon S110 – www.microdata.fi<br />
Scroll Steel Door<br />
8.3 Install the wireless PIR Motion Sensor<br />
The PIR sensor will detect a person since human temperature is different to<br />
ambient temperature. When triggered, the PIR will signal the <strong>Control</strong> Unit.<br />
Apply the detection area illustration below when installing.<br />
Wireless curtain sensor, detection area illustration below:<br />
Page 24 of 33 Ver 1.10
KingPigeon S110 – www.microdata.fi<br />
8.4 Install the Wired Sensors and Electricity equipments<br />
Please help to see below wiring diagram, then fixed the related wired<br />
sensors, the sensors connect to the related digital inputs.<br />
Tips!<br />
1) Please setup the NC, NO, EOL type in the Menu correctly;<br />
2) If you setup the Nodes type as NC(Default), and the sensor type must be NC.<br />
Please see below diagram.<br />
3) If you setup the input type as EOL, then please contact a 2.2K Resistor in series with<br />
every inputs. Please see the below diagram.<br />
4) If you setup the input type as NO, then please keep the two points of the inputs by<br />
free, and the sensor type must be NO. Please see the below diagram.<br />
5) The Unit built-in 240VAC@3A rated relay. Please make sure the power cord rated<br />
while you connect to equipment device. also, please make sure the power<br />
consumption is less than 250W for long time working. If you need heavy equipment,<br />
please connect an additional relay ;<br />
6) The R1+ and R1- is for alarm-link output, when the system alarm, will close for 4<br />
minutes, the rated output power is 700W. If you need heavily equipment, please<br />
connect an additional relay .<br />
7) The R2+ and R2- is the relay output for SMS Command, CC is close, DD is open,<br />
EE is inquiry the status.<br />
8) The +12VDC is for the Detectors, if the detectors need 12VDC power, then please<br />
contact it to the +12VDC. The 12VDC power is from external power, not from backup<br />
battery. So please note: When AC power failure, the +12VDC point will no power<br />
supply.<br />
Page 25 of 33 Ver 1.10
KingPigeon S110 – www.microdata.fi<br />
Page 26 of 33 Ver 1.10
KingPigeon S110 – www.microdata.fi<br />
8.5 Install the <strong>Control</strong> Unit<br />
In order to avoid destruction of the <strong>Control</strong> Unit by intruders, please install it<br />
in a concealed location, convenient to the operator.<br />
If applicable, ensure that an uninterruptible AC power outlet is available<br />
near the <strong>Control</strong> Unit. First connect accessories to the <strong>Control</strong> Unit then the<br />
AC adapter.<br />
8.6 Install Siren<br />
Connecting the Siren to the <strong>Control</strong> Unit and fix them in appropriate<br />
locations. Tips!<br />
The Siren should be at least 1.5meters away from the <strong>GSM</strong> SMS <strong>Control</strong>ler unit, if<br />
possible, more than 3meters is better.<br />
8.7 Connecting the loudly siren to the <strong>Panel</strong>.<br />
Please see below mentioned diagram. The siren rated is 12V, so if you<br />
connect the siren to the motherboard, please ensure the panel powered on<br />
with AC power, it cannot work with the internal backup battery. Otherwise<br />
please contact external power to instead of the above mentioned diagram.)<br />
Page 27 of 33 Ver 1.10
KingPigeon S110 – www.microdata.fi<br />
9. Add Wireless Sensors to the <strong>Control</strong> Unit<br />
Notice:<br />
1. Some wireless sensors must be coded by manual as below 9.1 step; some wireless<br />
sensors needn’t coded by manual, because of we will use the learning code sensor.<br />
The learning code wireless sensor you can omit the 9.1 step, can be learned to the<br />
system directly, like the PIR-100B and DM-100A.<br />
2. Please remember setup the PIR-100B to Test Mode while learning to the host, after<br />
assigned to the mainframe, then please setup to USER Mode by change the Black<br />
PIN Jumpers in the PIR-100B, please see the PIR-100B user manual.<br />
The Wireless sensors in the package box are pre-coded prior to shipping.<br />
The Max. Quantity of RF sensors is 16, if you need add more then you can<br />
set the wireless sensor with the same jumper. Add additional wireless<br />
sensors to the control units, please help to see below:<br />
9.1 Prepare the RF Sensors of PT2262 IC Code<br />
1) Prepare the RF sensors, Open the back cover of the Wireless sensor<br />
carefully;<br />
2) Locate the IC boards black jumpers, labeled A0-A7 and D0-D3.<br />
3) Configured the A0~A7 and D0~D3 different from each wireless<br />
sensors(Includes wireless door sensor, wireless smoke sensor, wireless<br />
gas leakage sensor, wireless pir motion sensor and so on). If configured<br />
the A0~A7 and D0~D3 are the same, the system will treat them as the<br />
same one sensor.<br />
4) Also, please check the Resistors value is 3.3M Ohm, there’re 3<br />
Jumpers, 1.5M,3.3M, and 4.7M. if you select incorrect value, the<br />
wireless distance usually very short or can not learn to the alarm panel.<br />
Page 28 of 33 Ver 1.10
KingPigeon S110 – www.microdata.fi<br />
9.2 Enter the RF Sensor Adding Menu.(See 6.2.2.1 Add/Del RF Parts)<br />
Select the Zone number, press Ok, finished it then press OK to select the<br />
Normal Type Or Stay Type, then following the instruction: 1.Turn On the<br />
Device, means trigger the RF sensor, the system will show a code, then<br />
press Enter Key on the Keyboard. The system will ask you repeat the<br />
operation, so please trigger RF sensor again, when you see the Code, then<br />
press the Enter Button on the Keyboard, the system will display Saved OK.<br />
It means the wireless sensor added to the system. Repeat this operation to<br />
add other wireless sensors.<br />
Notice:<br />
a) One time can add only 1 wireless sensor;<br />
b) The Name of the RF sensor can be modified by SMS commands. Please see 6.3.<br />
9.3 Add Remote <strong>Control</strong>s to the <strong>Control</strong> unit:<br />
Because of both of the unit and its remote controls are with learning code,<br />
you can add the remote control to the unit directly following the 6.2.2.1<br />
Add/Del RF Parts<br />
a) Enter the Add/Del RF Parts menu;<br />
b) Select 2. Edit Remote Ctrl, then press Enter button,<br />
c) then following the instruction: 1.Turn On the Device, means trigger the<br />
Remote <strong>Control</strong>, the system will show a code, then press Enter Key on<br />
the Keyboard. The system will ask you repeat the operation, so please<br />
trigger Remote <strong>Control</strong> again, when you see the Code, then press the<br />
Enter Button on the Keyboard, the system will display Saved OK. It<br />
means the Remote <strong>Control</strong> added to the system. Repeat this operation<br />
to add other remote controls.<br />
Notice:<br />
1) VVVV means this serial position saved one remote control already; you can learn a<br />
new remote control to replace it.<br />
9.4 Delete all wireless sensors and remote controls.<br />
Go back to the menu, then select the Remove All, select it then the<br />
system will alert Are You Sure Press Enter to remove all the RF Parts<br />
of the system.<br />
Page 29 of 33 Ver 1.10
KingPigeon S110 – www.microdata.fi<br />
10. Technical specifications of <strong>Control</strong> Unit<br />
Rated Voltage: 9~12VDC 2A Standby current: 30-40mA<br />
Siren Output Voltage: 12VDC<br />
Working temperature: -10℃~+60℃; Storage temperature:-20℃~+60℃<br />
Relative humidity: 10-90%, No condensation<br />
Work frequency: 900/1800/1900MHz or 850/900/1800/1900MHz<br />
Communication protocol: <strong>GSM</strong> PHASE 2/2+ (include data service)<br />
Wireless sensor receiving frequency: 433.92 MHz<br />
Wireless sensor permission quantity: 16Pcs<br />
Wired Zones/ Remote <strong>Control</strong> permission quantity: 8Pcs/5Pcs<br />
Effective distance wireless of remote control: 100 m<br />
Battery: Built-in lithium-ion battery: 1200mAh@3.7V<br />
Standby time Approx.18hours (depending on the network condition)<br />
Size: 180mmX125mmX30mm (LXWXH); Net Weight: 0.36Kg<br />
11. Important information<br />
1) The <strong>Control</strong> unit will auto switch off when the backup battery voltage<br />
less than 3.7V, before switching off, it will drive the buzzer to alert you<br />
by sounds.<br />
2) Please read the User Manual carefully before you install the <strong>Control</strong><br />
Unit and set the <strong>Control</strong> Unit.<br />
3) The siren and relays will not work if the AC/DC power goes off,<br />
because of both of them are working at 12V voltage.<br />
4) Do not install the system in close vicinity with objects that generate<br />
strong interference, such as TV set and computer.<br />
5) Install the system in a hidden place.<br />
6) Avoid getting water into the <strong>Control</strong> Unit.<br />
7) Have a secure connection to the main power supply.<br />
8) This product was designed for the indoor use.<br />
9) More information will be available of them, we will not inform you again<br />
Page 30 of 33 Ver 1.10
KingPigeon S110 – www.microdata.fi<br />
after we upgraded, please check with your dealers.<br />
12. Maintenance<br />
1) If the <strong>Control</strong> Unit works, while the remote control and other sensors fail,<br />
please check and change the battery.<br />
2) If the remote control works, but the <strong>Control</strong> Unit fails to send SMS texts,<br />
switch the power of <strong>Control</strong> Unit off and switch it on after one minute .<br />
Test this system after another minute, or check the settings are correct<br />
and the <strong>GSM</strong> Signals are strong enough.<br />
3) If the <strong>Control</strong> Unit can run and sensors work, but cannot send SMS<br />
texts, please change SIM Card to check it.<br />
4) If the problem cannot be solved, please contact the distributor.<br />
13. Warranty<br />
1) This system is warranted to be free of defects in material and<br />
workmanship for one year from the date of purchase.<br />
2) This warranty does not extend to any defect, malfunction or failure<br />
caused by abuse or misuse by the Operating Instructions.<br />
14.Trouble Shooting Guide<br />
PROBLEM CAUSE POSSIBLE SOLUTION<br />
<strong>GSM</strong> Module 1) Backup battery with 1) Please contact the AC Power;<br />
initialization<br />
failed<br />
low voltage;<strong>GSM</strong><br />
Module connection<br />
loose in transportation;<br />
2) <strong>GSM</strong> Signal is too<br />
2) Please help to take the panel to a mobile<br />
phone repairmen store, and then ask the<br />
engineer to check the <strong>GSM</strong> Module<br />
socket and the <strong>GSM</strong> Module connection;<br />
weak.<br />
3) Please change another position to install<br />
the alarm panel.<br />
Automatically<br />
Restart<br />
1) Backup battery with<br />
low voltage.<br />
1) When the backup battery voltage is lower<br />
than 3.7V, the panel will alert by buzzer<br />
sounds. Please help to contact the AC<br />
Power.<br />
Page 31 of 33 Ver 1.10
KingPigeon S110 – www.microdata.fi<br />
Wireless<br />
Sensor<br />
transmission<br />
short<br />
False <strong>Alarm</strong><br />
<strong>Alarm</strong> without<br />
SMS/<br />
<strong>Alarm</strong> without<br />
Dial/<br />
No action<br />
after send<br />
SMS<br />
command<br />
1) Wireless sensor with<br />
low voltage;<br />
2) Wireless sensor used<br />
PT2262 IC, and<br />
incorrect Value;<br />
3) Haven’t pull out<br />
wireless antenna;<br />
4) Electromagnetic<br />
interference;<br />
5) The wireless receiver<br />
in the panel with<br />
problem.<br />
1) PIR Motion sensor<br />
installation incorrect;<br />
2) Used 24H zones or<br />
SOS Zones or<br />
Watchdog zone.<br />
3) NC/NO/EOL is<br />
incorrect.<br />
1) <strong>GSM</strong> Operator<br />
communication<br />
protocol;<br />
2) Haven’t setup SMS<br />
Alert/Auto dial<br />
Numbers.<br />
3) Caps Lock letters in<br />
the SMS Commands.<br />
1) Please replace the battery of the wireless<br />
sensor, usually once /year;<br />
2) Please correct the resistor value to 3.3M<br />
Ohm of the PT2262 Wireless sensor;<br />
3) Please pull out the wireless sensor<br />
antenna;<br />
4) Please install the wireless sensors or<br />
alarm panel away the electric<br />
equipments;<br />
5) Please contact your distributors or<br />
manufacturer to replace it.<br />
1) Please see the PIR Motion sensor<br />
installation user manual carefully;<br />
2) Please check if any sensor assigned to<br />
these special zones and made incorrect<br />
activated;<br />
3) Please check the detector NC/NO type<br />
and NC/NO/EOL Correctly, and you’re<br />
sure connect a 2.2K Resistor in series in<br />
the un-use input ports.<br />
1) Please setup the SMS Alert Numbers;<br />
2) Please help to see Page 15, the sample<br />
of setup the telephone numbers;<br />
3) Please check the commands with CAPS<br />
LOCK and correct format.<br />
4) Also, please help to change another<br />
<strong>GSM</strong> Operator SIMCard to test it.<br />
The End!<br />
Page 32 of 33 Ver 1.10
KingPigeon S110 – www.microdata.fi<br />
Any questions please help to contact us feel free.<br />
Page 33 of 33 Ver 1.10


