Maya Wardrobe - Mamas & Papas
Maya Wardrobe - Mamas & Papas
Maya Wardrobe - Mamas & Papas

You also want an ePaper? Increase the reach of your titles
YUMPU automatically turns print PDFs into web optimized ePapers that Google loves.
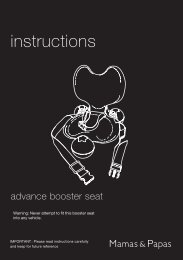
instructions<br />
maya wardrobe<br />
FR051W:V1/09/08<br />
© <strong>Mamas</strong> & <strong>Papas</strong> (Holdings) Ltd. 2008<br />
Important:<br />
Please read these<br />
instructions<br />
carefully before<br />
starting to assemble<br />
your product.<br />
Important: the<br />
assembly of this<br />
product may<br />
require two<br />
people.<br />
<strong>Maya</strong> <strong>Wardrobe</strong> V1.indd 1 1/12/08 09:34:46
Before assembling your product...<br />
MaYA <strong>Wardrobe</strong><br />
Do not discard any packaging until you are certain you have all the correct components and fittings.<br />
If any items are damaged or missing, please contact your retailer or <strong>Mamas</strong> & <strong>Papas</strong> on +44 (0)845 268 2000.<br />
Allow plenty of time and space when beginning the construction of your product.<br />
4<br />
Components<br />
6<br />
7<br />
6<br />
9<br />
8<br />
2<br />
1<br />
3<br />
3<br />
5<br />
10<br />
14<br />
13<br />
10<br />
12<br />
16<br />
15<br />
11<br />
Item Name Part No. Qty.<br />
1 Left side panel 0000---00000 1<br />
2 Right side panel 0000---00000 1<br />
3 Support rail 0000---00000 2<br />
4 Top panel 0000---00000 1<br />
5 Bottom shelf 0000---00000 1<br />
6 Back panel 0000---00000 2<br />
7 H section 0000---00000 1<br />
8 Hanger rail 0000---00000 1<br />
Item Name Part No. Qty.<br />
9 Top shelf 0000---00000 1<br />
10 Door 0000---00000 2<br />
11 Handle 0000---00000 4<br />
12 Left drawer side 0000---00000 1<br />
13 Right drawer side 0000---00000 1<br />
14 Drawer back panel 0000---00000 1<br />
15 Drawer front panel 0000---00000 1<br />
16 Drawer base 0000---00000 1<br />
2<br />
<strong>Maya</strong> <strong>Wardrobe</strong> V1.indd 2 1/12/08 09:34:47
a<br />
Fittings list<br />
x16 b<br />
x16<br />
Cam stud<br />
c<br />
x4<br />
Dowel<br />
d<br />
x2<br />
Shelf support screw<br />
e<br />
x27<br />
Hanger rail bracket<br />
f<br />
x6<br />
Small screw<br />
g<br />
x2<br />
Hinge plate<br />
h<br />
x6<br />
<strong>Wardrobe</strong> runner (left & right version)<br />
I<br />
x12<br />
Euro screw<br />
J<br />
x2<br />
Large cam<br />
K<br />
x30<br />
Door stop<br />
l<br />
x4<br />
Nail<br />
m<br />
x6<br />
Shelf support insert<br />
n<br />
x8<br />
Hinge arm<br />
o<br />
x4<br />
Handle bolt<br />
p<br />
x4<br />
Drawer assembly screw<br />
q<br />
x2<br />
Small cam<br />
r<br />
x1<br />
Drawer runner (left & right version)<br />
s<br />
x1<br />
Drawer base support bracket<br />
t<br />
x4<br />
Wall strap / washer<br />
Feet<br />
3<br />
<strong>Maya</strong> <strong>Wardrobe</strong> V1.indd 3 1/12/08 09:34:49
1<br />
Step 1<br />
Insert eight cam studs (A) into the left<br />
side panel (1) and the right side panel<br />
(2).<br />
Tighten the cam studs using a cross<br />
head screwdriver as shown.<br />
T<br />
2<br />
Insert the four feet (T) into the bottom<br />
of the side panels as shown.<br />
a<br />
Step 2<br />
Insert four dowels (B) into the top<br />
edges of the left side panel (1) and<br />
right side panel (2).<br />
The dowels may require tapping in<br />
with a small hammer.<br />
2<br />
1<br />
b<br />
4<br />
<strong>Maya</strong> <strong>Wardrobe</strong> V1.indd 4 1/12/08 09:34:53
1<br />
Step 3<br />
Insert four shelf support screws (C)<br />
into the left side panel (1) and the<br />
right side panel (2).<br />
Tighten the shelf support screws<br />
using a cross head screwdriver as<br />
shown.<br />
2<br />
C<br />
1<br />
Step 4<br />
Attach two hanger rail brackets (D)<br />
to the left side panel (1) and right<br />
side panel (2). Secure the hanger rail<br />
brackets in place using four small<br />
screws (E).<br />
Tighten the small screws using a<br />
cross head screwdriver as shown.<br />
2<br />
D<br />
E<br />
5<br />
<strong>Maya</strong> <strong>Wardrobe</strong> V1.indd 5 1/12/08 09:34:58
1<br />
Step 5<br />
Attach the six hinge plates (F) to the<br />
left side panel (1) and the right side<br />
panel (2).<br />
Secure the hinge plates by tightening<br />
the screws using a cross head<br />
screwdriver as shown.<br />
2<br />
F<br />
1<br />
Attach the wardrobe runners (G) to<br />
the left side panel (1) and the right<br />
side panel (2) using six euro screws<br />
(H).<br />
2<br />
Please use<br />
this hole<br />
first<br />
Step 6<br />
Tighten the euro screws using a<br />
cross head screwdriver as shown.<br />
Please ensure you insert the<br />
first screw for each runner in the<br />
highlighted hole as shown on the<br />
diagram. Once the first screw is<br />
inserted, the holes on the runner and<br />
the holes in the dresser sides will<br />
align correctly.<br />
Please use<br />
this hole<br />
first<br />
G<br />
H<br />
6<br />
<strong>Maya</strong> <strong>Wardrobe</strong> V1.indd 6 1/12/08 09:35:05
1<br />
I<br />
Step 7<br />
Insert four large cams (I) into the left<br />
side panel (1) and right side panel<br />
(2).<br />
Please ensure that the arrow on the<br />
top of the cam is pointing towards<br />
the hole on the adjacent edge of the<br />
panel.<br />
2<br />
Insert four dowels (B) into the ends<br />
of the support rails (3).<br />
3<br />
The dowels may require tapping in<br />
with a small hammer.<br />
3<br />
Step 8<br />
Insert four large cams (I) into the<br />
support rails (3).<br />
B<br />
3<br />
I<br />
Please ensure that the arrow on the<br />
top of the cam is pointing towards<br />
the hole in the adjacent edge of the<br />
panel.<br />
3<br />
7<br />
<strong>Maya</strong> <strong>Wardrobe</strong> V1.indd 7 1/12/08 09:35:09
4<br />
Step 9<br />
Insert four cam studs (A) into the top<br />
panel (4).<br />
Tighten the cam studs using a cross<br />
head screwdriver.<br />
a<br />
4<br />
Step 10<br />
Attach one door stop (J) to the top<br />
panel (4) using two small screws (E).<br />
Tighten the small screws using a<br />
cross head screwdriver.<br />
J<br />
E<br />
8<br />
<strong>Maya</strong> <strong>Wardrobe</strong> V1.indd 8 1/12/08 09:35:12
I<br />
Step 11<br />
Insert four large cams (I) into the<br />
bottom shelf (5).<br />
Please ensure that the arrow on the<br />
top of the cam is pointing towards<br />
the hole in the adjacent edge of the<br />
panel.<br />
5<br />
5<br />
Step 12<br />
Flip the bottom shelf (5) over and<br />
attach one door stop (J) using two<br />
small screws (E).<br />
Tighten the small screws using a<br />
cross head screwdriver.<br />
J<br />
E<br />
9<br />
<strong>Maya</strong> <strong>Wardrobe</strong> V1.indd 9 1/12/08 09:35:13
5<br />
B<br />
Step 13<br />
Insert four dowels (B) into the ends<br />
of the bottom shelf (5).<br />
The dowels may require tapping in<br />
with a small hammer.<br />
3<br />
3<br />
1<br />
Step 14<br />
Attach the two support rails (3) to the<br />
left side panel (1) ensuring that the<br />
cams are facing the bottom of the left<br />
side panel.<br />
Lock the two cams by using a flat<br />
head screwdriver and turning them<br />
clockwise.<br />
10<br />
<strong>Maya</strong> <strong>Wardrobe</strong> V1.indd 10 1/12/08 09:35:15
5<br />
1<br />
Step 15 1<br />
Attach the bottom shelf (5) to the left<br />
side panel (1) ensuring that the cams<br />
are facing the bottom of the left side<br />
panel.<br />
Lock the two cams by using a flat<br />
head screwdriver and turning them<br />
clockwise.<br />
Step 16 2<br />
Turn the assembled sections over so<br />
than the hinge plates are closest to<br />
the floor.<br />
11<br />
<strong>Maya</strong> <strong>Wardrobe</strong> V1.indd 11 1/12/08 09:35:17
2<br />
Step 17 1<br />
Attach the right side panel (2) to the<br />
assembled sections.<br />
Lock the four cams by using a flat<br />
head screwdriver and turning them<br />
clockwise.<br />
4<br />
Step 18 2<br />
Attach the top panel (4) to the<br />
assembled sections ensuring that the<br />
door stop is closest to the floor.<br />
Lock the four cams using a flat<br />
head screwdriver and turning them<br />
clockwise.<br />
12<br />
<strong>Maya</strong> <strong>Wardrobe</strong> V1.indd 12 1/12/08 09:35:20
Lower the back panels (6) onto the<br />
back of the assembled sections and<br />
slide the H section (7) between the<br />
back panels.<br />
7<br />
6<br />
6<br />
Step 19 1<br />
Secure the back panels to the<br />
assembled sections using the nails<br />
(K). Tap the nails into place using a<br />
small hammer.<br />
Please ensure that the nails are<br />
aligned correctly before tapping them<br />
through the back panel to reduce<br />
the risk of nails protruding into the<br />
wardrobe.<br />
K<br />
Step 20 2<br />
With the help of another person,<br />
stand the wardrobe up.<br />
13<br />
<strong>Maya</strong> <strong>Wardrobe</strong> V1.indd 13 1/12/08 09:35:23
Step 21 1<br />
Insert the hanger rail (8) into the<br />
hanger rail brackets.<br />
8<br />
9<br />
Step 22 2<br />
Insert four shelf support inserts (L)<br />
into the top shelf (9).<br />
Please ensure that the arrow on the<br />
top of the shelf support insert as<br />
pointing to the adjacent edge of the<br />
shelf.<br />
L<br />
14<br />
<strong>Maya</strong> <strong>Wardrobe</strong> V1.indd 14 1/12/08 09:35:25
Step 23 1<br />
Insert the top shelf (9) into the<br />
wardrobe.<br />
please ensure that the shelf support<br />
screws are fully inserted into the<br />
shelf support inserts.<br />
9<br />
10<br />
Step 24 2<br />
Attach six hinge arms (M) onto the<br />
doors (10) using twelve small screws<br />
(E).<br />
Tighten the small screws using a<br />
cross head screwdriver.<br />
10<br />
E<br />
M<br />
15<br />
<strong>Maya</strong> <strong>Wardrobe</strong> V1.indd 15 1/12/08 09:35:29
10<br />
Step 25 1<br />
You may require the help of another<br />
person to complete this step.<br />
Attach the doors (10) to the wardrobe<br />
by sliding the hinge arms (M) onto<br />
the hinge plates (F) then tightening<br />
the screw in the middle of the hinge<br />
plate with a cross head screwdriver.<br />
F<br />
10<br />
M<br />
Close the doors to see if any<br />
adjustment is needed.<br />
A<br />
Step 26 2<br />
Adjustment of the vertical gap<br />
Turn screw A clockwise to decrease<br />
the vertical gap between the door<br />
and the side panels.<br />
Turn screw A anti-clockwise to<br />
increase the vertical gap between the<br />
door and the side panels.<br />
Adjustment of the horizontal gap<br />
To lift the doors, loosen screws B on<br />
all three door hinges and slide the<br />
door up, then tighten the screws up.<br />
To lower the doors, loosen screws B<br />
on all three door hinges and slide the<br />
door down, then tighten the screws<br />
up.<br />
b<br />
b<br />
16<br />
<strong>Maya</strong> <strong>Wardrobe</strong> V1.indd 16 1/12/08 09:35:32
11<br />
Step 27 1<br />
Attach one door handle (11) to each<br />
door using two handle bolts (N) for<br />
each handle.<br />
Tighten the handle bolts using a<br />
cross head screwdriver.<br />
11<br />
N<br />
14<br />
13<br />
Step 28 2<br />
Attach the left drawer side (12) and<br />
the right drawer side (13) to the<br />
drawer back panel (14) using four<br />
drawer assembly screws (O).<br />
Tighten the drawer assembly screws<br />
using a cross head screwdriver.<br />
12<br />
O<br />
17<br />
<strong>Maya</strong> <strong>Wardrobe</strong> V1.indd 17 1/12/08 09:35:35
Step 29 1<br />
Insert four dowels (B) into the ends<br />
of the drawer side panels.<br />
The dowels may require tapping in<br />
with a small hammer.<br />
B<br />
Step 30 2<br />
Insert four small cams (P) into the<br />
drawer side panels.<br />
Please ensure that the arrow on the<br />
top of the cam is pointing towards<br />
the hole in the adjacent edge of the<br />
panel.<br />
p<br />
18<br />
<strong>Maya</strong> <strong>Wardrobe</strong> V1.indd 18 1/12/08 09:35:37
15<br />
Step 31 1<br />
Insert four cam studs (A) into the<br />
drawer front panel (15).<br />
Tighten the cam studs using a cross<br />
head screwdriver.<br />
A<br />
Step 32 2<br />
Slide the drawer base (16) into the<br />
assembled drawer sections.<br />
16<br />
19<br />
<strong>Maya</strong> <strong>Wardrobe</strong> V1.indd 19 1/12/08 09:35:38
Step 33 1<br />
Attach the drawer front panel (15) to<br />
the assembled drawer sections.<br />
Lock the four small cams by using<br />
a flat head screwdriver and turning<br />
them clockwise.<br />
15<br />
Step 34 2<br />
Attach two handles (11) to the front<br />
of the drawer using four handle bolts<br />
(N).<br />
Tighten the handle bolts using a<br />
cross handle screwdriver.<br />
11<br />
11<br />
n<br />
20<br />
<strong>Maya</strong> <strong>Wardrobe</strong> V1.indd 20 1/12/08 09:35:40
Step 35 1<br />
Attach the drawer runners (Q) to the<br />
bottom of the drawer side panels.<br />
Secure the drawer runners using six<br />
small screws (E) and tightening using<br />
a cross head screwdriver.<br />
q<br />
e<br />
Step 36 2<br />
Flip the drawer over and position the<br />
drawer base support bracket (R) in<br />
the centre of the drawer back panel<br />
as shown.<br />
Secure the drawer base support<br />
bracket by tightening the screw using<br />
a cross head screwdriver.<br />
R<br />
21<br />
<strong>Maya</strong> <strong>Wardrobe</strong> V1.indd 21 1/12/08 09:35:43
Step 37<br />
Insert the completed drawer into the<br />
wardrobe by holding it at an angle<br />
and ensuring that the wheels on the<br />
drawer runners locate in the track of<br />
the wardrobe runners.<br />
The drawer should slide freely in and<br />
out on the runners.<br />
Attach the wall strap (S) to the top<br />
panel and the back of the wardrobe<br />
using a small screw (E) as shown.<br />
Secure the strap to the wardrobe<br />
using the supplied washer and screw<br />
as shown.<br />
Step 38<br />
Please see the Wall Strap<br />
Information section for further<br />
details.<br />
The <strong>Maya</strong> <strong>Wardrobe</strong> is now<br />
complete.<br />
Please ensure that you check<br />
that all fittings are tightened and<br />
secured properly before use.<br />
s<br />
E<br />
22<br />
<strong>Maya</strong> <strong>Wardrobe</strong> V1.indd 22 1/12/08 09:35:44
INSTRUCTIONS FOR SAFE USE & maintenance<br />
• Warning: Never leave your child unattended. The safety of your child is your<br />
responsibility.<br />
• Before use, ensure the product is on a stable, level surface.<br />
• Do not allow children to climb on the Product.<br />
• Never use the product if any parts are broken or missing.<br />
• Wood is a natural product and as such it can be subject to occasional variations in colour. This is not a<br />
defect and will not detract from the strength or performance of the product.<br />
• Never pivot or drag the product on its feet, the product must always be lifted by at least two people<br />
when moved.<br />
• Do not place the product in the near vicinity of open fires or other sources of strong heat, such as<br />
electric or gas fires.<br />
• Always leave the product clean and dry. Wipe away any spillage straight away. The product can be<br />
cleaned with a damp cloth. Never use abrasive, bleach or strong detergents.<br />
• Check regularly that all fittings and screws are correctly tightened and are not damaged.<br />
Wall strap information<br />
The wall strap is only intended to be used with the <strong>Mamas</strong> and <strong>Papas</strong> product that it is supplied with.<br />
Never attempt to modify or change the wall attachment strap in any way. Never use any other fittings for<br />
attaching the strap to your furniture than those supplied.<br />
Never use the screw provided to attach the strap to the wall. No wall attachment fittings are supplied. This<br />
is because the type of fittings required to attach the strap to the chosen wall is determined by the walls<br />
composition. If you are in any doubt about the correct type of fittings to use, consult a professional before<br />
attempting to attach the strap to the wall.<br />
The wall strap must not be used to replace any other fitting supplied with your piece of furniture.<br />
Furniture falling over is generally due to the surface the furniture is placed on. A warped floor or wall-towall<br />
carpeting will enable the furniture to rock, so greatly increasing the potential for the furniture to fall.<br />
If the furniture is placed on a flat level wood or tiled floor the risk is reduced, but we still recommend the<br />
wall strap is fitted.<br />
Due to constant updating and improvements, some components may occasionally differ slightly from the diagrams shown in these instructions. We<br />
reserve the right to change the specifications of any product without prior notice.<br />
After sales Service: If you need assistance, spare parts or you are unhappy with any aspect of the goods please contact<br />
Customer Care on: +44 (0)845 268 2000, or e-mail us at: customer.care@mamasandpapas.com. Visit our website<br />
at www.mamasandpapas.com for the latest product information.<br />
23<br />
<strong>Maya</strong> <strong>Wardrobe</strong> V1.indd 23 1/12/08 09:35:44
www.mamasandpapas.com<br />
<strong>Mamas</strong> & <strong>Papas</strong><br />
Colne Bridge Road<br />
Huddersfield, HD5 0RH, UK<br />
customer care helpline: +44(0)845 268 2000<br />
customer care email: customer.care@mamasandpapas.com<br />
<strong>Maya</strong> <strong>Wardrobe</strong> V1.indd 24 1/12/08 09:35:44