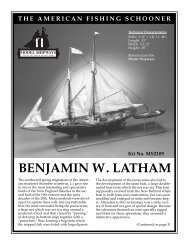
download baltimore instruction manual
download baltimore instruction manual
download baltimore instruction manual

Create successful ePaper yourself
Turn your PDF publications into a flip-book with our unique Google optimized e-Paper software.
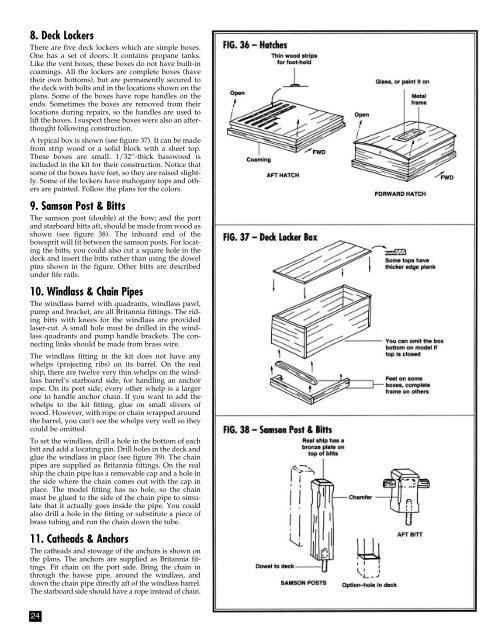
8. Deck Lockers<br />
There are five deck lockers which are simple boxes.<br />
One has a set of doors. It contains propane tanks.<br />
Like the vent boxes, these boxes do not have built-in<br />
coamings. All the lockers are complete boxes (have<br />
their own bottoms), but are permanently secured to<br />
the deck with bolts and in the locations shown on the<br />
plans. Some of the boxes have rope handles on the<br />
ends. Sometimes the boxes are removed from their<br />
locations during repairs, so the handles are used to<br />
lift the boxes. I suspect these boxes were also an afterthought<br />
following construction.<br />
A typical box is shown (see figure 37). It can be made<br />
from strip wood or a solid block with a sheet top.<br />
These boxes are small. 1/32”-thick basswood is<br />
included in the kit for their construction. Notice that<br />
some of the boxes have feet, so they are raised slightly.<br />
Some of the lockers have mahogany tops and others<br />
are painted. Follow the plans for the colors.<br />
9. Samson Post & Bitts<br />
The samson post (double) at the bow; and the port<br />
and starboard bitts aft, should be made from wood as<br />
shown (see figure 38). The inboard end of the<br />
bowsprit will fit between the samson posts. For locating<br />
the bitts, you could also cut a square hole in the<br />
deck and insert the bitts rather than using the dowel<br />
pins shown in the figure. Other bitts are described<br />
under fife rails.<br />
10. Windlass & Chain Pipes<br />
The windlass barrel with quadrants, windlass pawl,<br />
pump and bracket, are all Britannia fittings. The riding<br />
bitts with knees for the windlass are provided<br />
laser-cut. A small hole must be drilled in the windlass<br />
quadrants and pump handle brackets. The connecting<br />
links should be made from brass wire.<br />
The windlass fitting in the kit does not have any<br />
whelps (projecting ribs) on its barrel. On the real<br />
ship, there are twelve very thin whelps on the windlass<br />
barrel’s starboard side, for handling an anchor<br />
rope. On its port side, every other whelp is a larger<br />
one to handle anchor chain. If you want to add the<br />
whelps to the kit fitting, glue on small slivers of<br />
wood. However, with rope or chain wrapped around<br />
the barrel, you can’t see the whelps very well so they<br />
could be omitted.<br />
To set the windlass, drill a hole in the bottom of each<br />
bitt and add a locating pin. Drill holes in the deck and<br />
glue the windlass in place (see figure 39). The chain<br />
pipes are supplied as Britannia fittings. On the real<br />
ship the chain pipe has a removable cap and a hole in<br />
the side where the chain comes out with the cap in<br />
place. The model fitting has no hole, so the chain<br />
must be glued to the side of the chain pipe to simulate<br />
that it actually goes inside the pipe. You could<br />
also drill a hole in the fitting or substitute a piece of<br />
brass tubing and run the chain down the tube.<br />
11. Catheads & Anchors<br />
The catheads and stowage of the anchors is shown on<br />
the plans. The anchors are supplied as Britannia fittings.<br />
Fit chain on the port side. Bring the chain in<br />
through the hawse pipe, around the windlass, and<br />
down the chain pipe directly aft of the windlass barrel.<br />
The starboard side should have a rope instead of chain.<br />
24