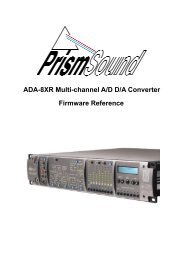
ADA-8XR Multi-channel A/D D/A Converter Operation Manual
ADA-8XR Multi-channel A/D D/A Converter Operation Manual
ADA-8XR Multi-channel A/D D/A Converter Operation Manual
You also want an ePaper? Increase the reach of your titles
YUMPU automatically turns print PDFs into web optimized ePapers that Google loves.
Prism Sound <strong>ADA</strong>-<strong>8XR</strong> <strong>Multi</strong>-<strong>channel</strong> A/D D/A <strong>Converter</strong> <strong>Operation</strong> <strong>Manual</strong> - Revision 1.00<br />
Mix mode). But in menus where settings need to be made ‘per <strong>channel</strong>’, these buttons take<br />
on that function whilst that menu is selected.<br />
4.4 Two-<strong>channel</strong> Monitor<br />
Apart from its two eight-<strong>channel</strong> Paths, the <strong>ADA</strong>-<strong>8XR</strong> has a separate two-<strong>channel</strong> Monitor<br />
which can be assigned to either Path. It has a headphone output, as well as analogue and<br />
digital ‘line outputs’. It has the usual Cut, Invert, Swap and Mono functions, along with a<br />
volume control (which can be switched out if you want to use an external control for the line<br />
volume). Inserting the headphones can be made to mute the line outputs if required.<br />
The Monitor can be set to ‘Pairs’ or ‘Mix’ mode. In Pairs mode, it simply monitors adjacent<br />
pairs of <strong>channel</strong>s (odd to the left, even to the right) as selected by the Channel Select buttons.<br />
In Mix mode, a mix of any or all of the eight <strong>channel</strong>s in the Path can be built up, each with its<br />
own gain and pan. You can switch between separately adjusted mixes for each Path.<br />
4.5 Configuration / Stores<br />
These buttons are used to change the entire setup of the <strong>ADA</strong>-<strong>8XR</strong> between preset<br />
configurations for different tasks. There are four ‘Banks’ each containing six entire Stores of<br />
the <strong>ADA</strong>-<strong>8XR</strong> state, thus a total of 24 stores are available. Each store can have a name of up<br />
to 16 characters to ease identification.<br />
Pressing either the ‘Bank’ button or one of the Store number buttons (‘1’..’6’) attracts the<br />
attention of the LCD display to the Configuration/Store system. The name of the currentlyselected<br />
Store is displayed on the top line, with the Bank/Store number shown below. The<br />
various stores can be previewed by pressing the Store number buttons (‘1’..’6’), and the Bank<br />
can be advanced by pressing the Bank button. The currently-selected Store’s LED flashes.<br />
The LCD is returned to it’s normal operation by re-pressing the flashing Store button (‘1’..’6’),<br />
or by pressing the ‘Menu’ keys (‘↑’ or ‘↓’) or by pressing a blue Access button. Normal<br />
operation is also resumed by the expiry of the menu timeout, if enabled.<br />
The previewed store can be adopted (‘loaded’), unless empty, by pressing Enter/Accept.<br />
Alternatively, it can be over-written (‘saved’) or cleared by using the ‘Select/Change’ keys (‘←’<br />
or ‘→’) to select the required function, followed by ‘Enter/Accept’. Clearing a Store requires a<br />
confirmation step; saving requires the store name to be confirmed or edited, followed by a<br />
confirmation step.<br />
When a Store has been loaded, that Store’s button remains illuminated (until any settings are<br />
manually changed) to indicate that the Store is current.<br />
At the time of delivery, some of the Stores in the first Banks contain ‘factory’ preset stores<br />
covering a range of basic setups (depending on the I/O Modules fitted to the unit), and the<br />
remaining Stores are empty. However, the factory-programmed stores are essentially the<br />
same as others in that they can be user-programmed if required. If, after reprogramming, it is<br />
desired to return these Stores to their factory default settings, this can be achieved through<br />
the Preferences menu. The Factory Default Stores loaded will reflect the I/O Modules fitted at<br />
the time of the reload.<br />
The user can select whether or not analogue I/O line-up gains and trims, and the state of the<br />
Monitor are to be recalled with Stores, or not, by using submenus within Preferences.<br />
© Prism Media Products Limited, 2001-2004 Page 1.13


