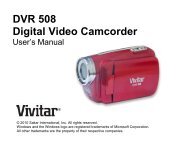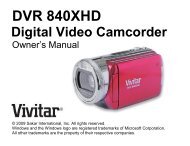
Digital Video Camera User Manual - Vivitar
Digital Video Camera User Manual - Vivitar
Digital Video Camera User Manual - Vivitar

You also want an ePaper? Increase the reach of your titles
YUMPU automatically turns print PDFs into web optimized ePapers that Google loves.
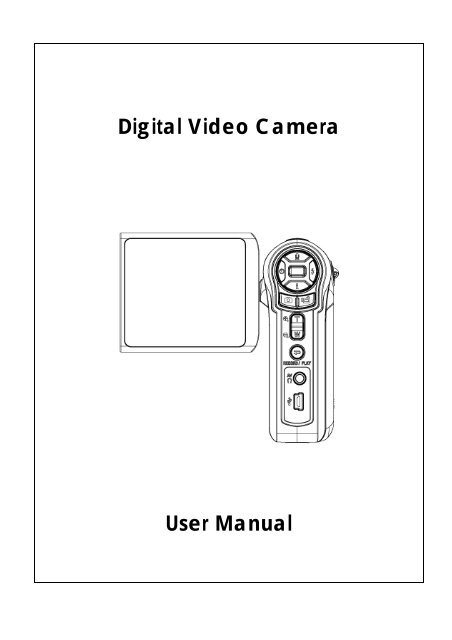
<strong>Digital</strong> <strong>Video</strong> <strong>Camera</strong><br />
<strong>User</strong> <strong>Manual</strong>
Content<br />
Section 1 Getting to Know Your <strong>Camera</strong>.............................. 2<br />
Section 2 Getting Up and Running ....................................... 5<br />
Section 3 Record Mode.......................................................... 7<br />
Section 4 Playback Mode .................................................... 34<br />
Section 5 Listening to MP3 Music ...................................... 47<br />
Section 6 Reading eBook .................................................... 49<br />
Section 7 Viewing MPEG4 Movie on PC............................. 51<br />
Section 8 Viewing Pictures and Movies on a TV ............... 52<br />
Section 9 <strong>Video</strong> File Converter............................................ 53<br />
Section 10 Burning the Recorded Clip into DVD............... 53<br />
Section 11 Transferring Data to a Computer........................ 9<br />
Section 12 Specifications and System Requirements ...... 11<br />
1
� Overview<br />
2<br />
Section 1<br />
Getting to Know Your <strong>Camera</strong><br />
The camera with 5 Mega Pixel sensor can take DVD-Quality MPEG-4 movies. By way of using<br />
MPEG-4 technology, more videos can be taken within certain amount of memory. High quality<br />
images with up to 11 mega-pixels can also be delivered smoothly. With a color LCD monitor,<br />
users can compose images and examine them easily.<br />
Exposure and color balance can either be adjusted automatically or allowed to be changed<br />
manually. An 8x digital zoom increases user control over the movies and pictures you take.<br />
The camera is also ideally suited for using as a PC camera hooked up to your home computer<br />
via high speed USB 2.0 port<br />
Biuld-in 64 MB memory allows you to take pictures and movies without memory card. The<br />
memory card slot allows users to increase the storage capacity up to 2GB.<br />
� Standard Accessories<br />
Note<br />
Partial memory of the built-in 64MB memory is used<br />
for Firmware code<br />
Unpack the package and make sure all standard accessories listed are included:<br />
� <strong>Camera</strong><br />
� USB Cable<br />
� Power Adaptor<br />
� AV Cable<br />
� Lithium-ion Rechargeable Battery<br />
� Quick Guide<br />
� CD-ROM ( Driver, Arcsoft Software and <strong>User</strong> <strong>Manual</strong>)<br />
� Remote Control (Optional)<br />
� Earphone<br />
� Strap<br />
� Pouch
� Front View<br />
� KeyPad illustration<br />
LCD Panel<br />
Lens<br />
Flash<br />
Self-Timer LED<br />
TV Out Port<br />
Mini USB 2.0 port<br />
3<br />
Power Button<br />
SD card slot<br />
Direction Buttons<br />
Enter Button<br />
Picture Shutter Button<br />
Movie Shutter Button<br />
Tele-Wide Button<br />
RECORD/PLAY Button
� Side View<br />
Strap Hole<br />
Macro Switch<br />
Microphone<br />
Speaker<br />
4<br />
Battery Cover
� Loading the Battery<br />
Before using the camera, end users must load<br />
NP60 rechargeable Li-ion Battery.<br />
1. Follow the arrow direction and slide to eject the<br />
battery cover.<br />
2. Insert the batteries according to the correct<br />
polarity marks ( + or -)<br />
3. Close the battery cover firmly.<br />
� Inserting and Removing an SD Card(Optional)<br />
5<br />
Section 2<br />
Getting Up and Running<br />
The camera comes with internal memory which allows you to store pictures, movies, voice<br />
recordings and music. You can expand the memory capacity by using an optional SD or MMC<br />
memory card up to 2GB. To insert a memory card, refer to the figure as below:<br />
1. Insert the memory card into the right position.<br />
2. To remove an installed SD card, press the card inwards to<br />
release it.<br />
3. When the card pops out, gently remove it from its slot.<br />
� Protecting Data on an SD Card<br />
Eject<br />
Note<br />
When a memory card is fitted, movies and pictures are<br />
saved on card rather than on the built-in memory.<br />
SD card is read-only by locking the SD card. No pictures, movies and voice can be recorded<br />
when the SD card is locked. Make sure the lock is on writeable position before recording any<br />
media.<br />
Writeable position<br />
Write-Protected<br />
Position<br />
Write-Protected<br />
Position
� Turning the <strong>Camera</strong> On and Getting Started<br />
To turn on the camera:<br />
(1) Flip out the LCD panel; the camera will turn on automatically.<br />
(2) Or press Power Button for one second to turn on it.<br />
� To take a movie, press the Movie Shutter Button ( ).<br />
� To take a picture, press the Picture Shutter Button ( ).<br />
� To record the voice, press the Upper Button of Direction Buttons and press the Movie<br />
Shutter Button ( ) to start voice recording.<br />
� To view stored movies, pictures, listen to stored MP3 and voice recordings, or read eBook,<br />
press RECORD/PLAY Button once to switch to Playback Mode. Press a second time to<br />
return to Record Mode.<br />
� Turning the <strong>Camera</strong> Off<br />
To turn off the <strong>Camera</strong>, you can either press the Power Button for one second, or you can<br />
place the LCD panel back to its original position.<br />
6
� Button Function<br />
7<br />
Section 3<br />
Record Mode<br />
Right Button : Flash AUTO/OFF<br />
Left Button :Self-Timer ON/OFF<br />
Up Button : Voice Recording Mode<br />
Down Button: LCD Information ON/OFF<br />
Enter Button : Menu ON<br />
Power Button: Press down for one second to turn<br />
on or turn off the camera.<br />
RECORD/PLAY Button functions:<br />
1. Switch between Record /Playback Mode.<br />
2. Return to the previous page.<br />
Tele-Wide Button: <strong>Digital</strong> Zoom in and out.<br />
Movie Shutter Button:<br />
1. Start to take movie, or record voice.<br />
2. To stop recording, press it again.<br />
Picture Shutter Button: Start to take picture<br />
Macro switch: Switch between Macro Mode,<br />
Portrait Mode, and Normal Mode.
� LCD Monitor Information<br />
The indicator shows below may display on LCD when movies and pictures are recorded:<br />
(1) Record Mode<br />
Movie Record Mode<br />
Picture Record Mode<br />
Voice Record Mode<br />
Motion Stabilization<br />
Two in One Mode<br />
Photo Frame<br />
(2) Resolution<br />
(3)<br />
(4)<br />
(5)<br />
Multi-Snap Mode<br />
Backlight Mode<br />
Movie : High / Standard/ Low<br />
Picture: High / Standard/ Low<br />
Number of images or recording time of movie that can still be taken at current<br />
resolution.<br />
SD card inserted<br />
Macro Position Focusing<br />
(6) White Balance<br />
(7) Battery indicator: full power / medium power / low power /<br />
(8)<br />
Auto Flash<br />
Flash Off<br />
power empty<br />
8
(9)<br />
Self-timer enabled<br />
(10) 8X digital zoom<br />
(11) Date/Time : YYYY/MM/DD HH: MM<br />
(12)<br />
Motion Detection<br />
� MPEG4 Movie Recording<br />
Press Movie Shutter button ( ) to start recording. When a movie is recording, a time<br />
indicator will display on LCD monitor. To stop recording, press Movie Shutter Button ( )<br />
again. Press RECORD/PLAY Button to view the recorded movie.<br />
Three resolution settings are available:<br />
High Quality<br />
Standard Quality<br />
Low Quality<br />
� Picture Recording<br />
Quality<br />
Press the Picture Shutter Button ( ) to take a picture.<br />
Press RECORD/PLAY Button to view the picture.<br />
Three resolution settings are available:<br />
Image Quality<br />
High Quality<br />
Standard Quality<br />
Low Quality<br />
9
� Voice Recording<br />
1. Press Upper Button ( ) of Direction Buttons to switch<br />
to Voice Record Mode.<br />
2. Press Movie Shutter Button ( ) to record voice.<br />
3. Press Movie Shutter Button ( ) again to stop.<br />
4. Press RECORD/PLAY Button to view the recorded<br />
voice.<br />
� Taking Close up Pictures<br />
The camera has two close-up picture modes to allow you to take pictures at close range. The<br />
Macro Mode ( ) should be used for object located at about 20 cm, while the Portrait Mode<br />
( ) should be used for object located from 70 cm to 140 cm.<br />
To take close-up pictures:<br />
1. Rotate the lens ring to switch to Macro ( ) or Portrait ( ) positions. In Macro Mode,<br />
the macro icon ( ) will appear on the LCD monitor.<br />
2. Press Picture Shutter Button ( ) to take the picture.<br />
� Using <strong>Digital</strong> Zoom<br />
10<br />
Note<br />
Remember to turn the macro switch back to<br />
Normal ( ) when you are not taking<br />
close-up pictures.<br />
The digital zoom magnifies images, when recording movies or taking pictures.<br />
1. To zoom in/out, press the Tele/Wide Button.<br />
2. The digital zoom can be set from 1x to 8x and the magnification ratio is shown on the<br />
LCD monitor.
� Options for Record Mode<br />
Movie Mode Picture Mode Voice Pen Effect Set<br />
� Resolution<br />
� Exposure<br />
� Sharpness<br />
� White Balance<br />
� Stabilization<br />
� Motion Detect<br />
� Exit<br />
� Resolution<br />
� Exposure<br />
� Two in One<br />
� Photo Frame<br />
� Flash<br />
� Self-timer<br />
� Sharpness<br />
� White Balance<br />
� Multi-snap<br />
� Backlight<br />
� Date printing<br />
� Exit<br />
� Operations for Record Mode<br />
� Enter<br />
� Exit<br />
11<br />
� Normal<br />
� B/W<br />
� Classic<br />
� Negative<br />
� Exit<br />
� Sound<br />
� Start-up Screen<br />
� Time Setting<br />
� Format Memory<br />
� TV System<br />
� Language<br />
� Default Setting<br />
� Exit<br />
Operation Screen<br />
1. Press Enter Button when in Movie/Picture Record<br />
Mode.<br />
2. Use Right/Left Buttons to move between main menu<br />
options, which are Movie Mode, <strong>Camera</strong> Mode,<br />
Voice Mode, Effect, and Set. Submenu will pop out<br />
while move to each main option.<br />
3. Press Enter Button to validate sub option you select.<br />
4. Select Exit option to exit submenu.<br />
Enter Button
� Default Setting and Validation<br />
The following table indicates the camera’s default setting as well as its validation.<br />
1. Always: The setting always keeps valid.<br />
2. One Time: The setting is only valid either once or till camera power off.<br />
Validation Default Factory Setting<br />
Resolution Always High for Movie<br />
Standard for Picture<br />
Exposure One Time 0EV<br />
Sharpness One Time Level 5<br />
White Balance One Time Auto<br />
Motion Stabilization Always Off<br />
Motion Detect One Time Off<br />
Two in One One Time Off<br />
Photo Frame One Time Off<br />
Flash Always Off<br />
Self-Timer One Time Off<br />
Multi-Snap One Time Off<br />
Backlight Mode One Time Off<br />
Date Printing Always Off<br />
Effect One Time Normal<br />
Sound Always On<br />
Format Card One Time Off<br />
TV System Always Depends on shipping area<br />
Language Always Depends on shipping area<br />
Volume Always Level 6<br />
12
� Movie Mode submenu Setting<br />
Record main menu includes camera setting and other advanced setting. You can use<br />
Right/Left Buttons to move between options and press Enter Button to validate the setting.<br />
� Movie Resolution<br />
To change Movie Resolution:<br />
1. In Movie/Picture Record Mode, press Enter Button to switch to record menu screen.<br />
2. Use Right/Left Buttons to select Movie Mode. Submenu of Movie Mode will pop out on the<br />
screen.<br />
3. Use Up/Down Buttons to select Resolution then press Enter Button to switch to Resolution<br />
submenu.<br />
4. Use Up/Down Buttons to move between three settings.<br />
5. Press Enter Button to validate the setting and exit.<br />
Display Screen <strong>Video</strong> Resolution Option<br />
Enter Button<br />
13
� Exposure<br />
The camera adjusts image exposure automatically. In certain circumstances you may wish to<br />
adjust the exposure compensation setting.<br />
To change Exposure setting:<br />
1. In Movie/Picture Record Mode, press Enter Button to switch to record menu screen.<br />
2. Use Right/Left Buttons to select Movie Mode. Submenu of Movie Mode will pop out on the<br />
screen.<br />
3. Use Up/Down Buttons to move to Exposure Option. Press the Enter Button and then<br />
Exposure Submenu will pop out on the screen.<br />
4. Use Up/Down Buttons to choose preferred EV value. The change can be previewed<br />
immediately.<br />
5. Press Enter Button to validate the setting and exit.<br />
Display Screen Exposure Option<br />
Enter Button<br />
14
� Sharpness<br />
You can soften and sharpen images to achieve different effects.<br />
To change Sharpness setting:<br />
1. In Movie/Picture Record Mode, press Enter Button to switch to record menu screen.<br />
2. Use Right/Left Buttons to select Movie Mode. Submenu of Movie Mode will pop out on the<br />
screen.<br />
3. Use Up/Down Buttons to select Sharpness then press Enter Button to switch to Sharpness<br />
submenu.<br />
4. Use Up/Down Buttons to move between nine levels. The change can be previewed<br />
immediately.<br />
5. Press Enter Button to validate the setting and exit.<br />
Display Screen Change Sharpness Setting<br />
Enter Button<br />
15
� White Balance<br />
The camera adjusts the color balance of images automatically. Three manual white balance<br />
settings are available:<br />
1. Auto (Default): The camera automatically adjusts white balance.<br />
2. Daylight: Under outdoors<br />
3. Fluorescent: Under fluorescent light condition.<br />
4. Tungsten: Under tungsten light condition.<br />
To change White Balance Setting:<br />
1. In Movie/Picture Record Mode, press Enter Button to switch to record menu screen.<br />
2. Use Right/Left Buttons to select Movie Mode. Submenu of Movie Mode will pop out on the<br />
screen.<br />
3. Use Up/Down Buttons to select White Balance, then press Enter Button to switch to White<br />
Balance submenu.<br />
4. Use Up/Down Buttons to move between four settings. The change can be previewed<br />
immediately.<br />
5. Press Enter Button to validate the setting and exit.<br />
Display Screen W/B Option<br />
Enter Button<br />
16
� Motion Stabilization<br />
To enable Motion Stabilization:<br />
1. In Movie/Picture Record Mode, press Enter Button to switch to record menu screen.<br />
2. Use Right/Left Buttons to select Movie Mode. Submenu of Movie Mode will pop out on the<br />
screen.<br />
3. Use Up/Down Buttons to select Motion Stabilization then press Enter Button to switch to<br />
Motion Stabilization submenu.<br />
4. Use Up/Down Buttons to choose ON or OFF.<br />
5. Press Enter Button to validate the setting and exit.<br />
Motion Stabiization Motion Stabilization Option<br />
Enter Button<br />
17<br />
Note<br />
1. The captured screen will be smaller when<br />
motion stabilization is enabled.<br />
2. <strong>Digital</strong> Zoom is disabled when motion<br />
stabilization is activated.
� Motion Detection<br />
To enable Motion Detection:<br />
1. In Movie/Picture Record Mode, press Enter Button to switch to record menu screen.<br />
2. Use Right/Left Buttons to select Movie Mode. Submenu of Movie Mode will pop out on<br />
the screen.<br />
3. Use Up/Down Buttons to select Motion Detect then press Enter Buttons to switch to<br />
Motion Detect submenu.<br />
4. Use Up/Down Buttons to choose ON or OFF.<br />
5. Press Enter Button to validate the setting and exit.<br />
6. <strong>Camera</strong> will start to record video once if there is a movement for 3 consecutive seconds.<br />
Stop recording if there is no movement for 3 seconds.<br />
Motion Detect Motion Detect Option<br />
Enter Button<br />
18
� <strong>Camera</strong> Mode Setting<br />
� Picture Resolution<br />
To change Picture Resolution:<br />
1. In Movie/Picture Record Mode, press Enter Button to switch to record menu screen.<br />
2. Use Right/Left Buttons to select <strong>Camera</strong> Mode. Submenu of <strong>Camera</strong> Mode will pop out on<br />
the screen.<br />
3. Use Up/Down Buttons to select Resolution then press Enter Button to switch to Resolution<br />
submenu.<br />
4. Use Up/Down Buttons to move between three settings.<br />
5. Press Enter Button to validate the setting and exit.<br />
Display Screen <strong>Video</strong> Resolution Option<br />
Enter Button<br />
19
� Exposure<br />
The camera adjusts image exposure automatically. In certain circumstances you may wish to<br />
adjust the exposure compensation setting.<br />
To change Exposure setting:<br />
1. In Movie/Picture Record Mode, press Enter Button to switch to record menu screen.<br />
2. Use Right/Left Buttons to select <strong>Camera</strong> Mode. Submenu of <strong>Camera</strong> Mode will pop out on<br />
the screen<br />
3. Use Up/Down Buttons to move to Exposure Option. Press the Enter Button and then<br />
Exposure Submenu will pop out on the screen.<br />
4. Use Up/Down Buttons to choose preferred EV value. The change can be previewed<br />
immediately.<br />
5. Press Enter Button to validate the setting and exit.<br />
Display Screen Exposure Option<br />
Enter Button<br />
20
� Two in One ( Picture Record Mode Only)<br />
With camera set to Two in One mode, you can combine two snapshots into one picture. To<br />
enable Two in One:<br />
1. In Movie/Picture Record Mode, press Enter Button to switch to record menu screen.<br />
2. Use Right/Left Buttons to select <strong>Camera</strong> Mode. Submenu of <strong>Camera</strong> Mode will pop out on<br />
the screen.<br />
3. Use Up/Down Buttons to select Two in One then press Enter Button to switch to Two in One<br />
submenu.<br />
4. Use Up/Down Buttons to choose ON or OFF.<br />
5. Press Enter Button to validate the setting and exit.<br />
Display Screen Two in One Option<br />
6. Press Picture Shutter Button to<br />
take first picture.<br />
7. Press Picture Shutter Button to<br />
take second picture.<br />
8. Press the RECORD/PLAY<br />
Button to view the Two in One<br />
picture.<br />
Enter Button<br />
21
� Photo Frame (Picture Record Mode Only)<br />
Your camera features popular electronic photo frame. You can take your picture with preferred<br />
electronic photo frame. To enable Photo Frame:<br />
1. When in <strong>Camera</strong> Mode, use Up/Down Buttons to select Photo Frame option, then press<br />
Enter Button to switch to Photo Frame submenu.<br />
2. Use Up/Down Buttons to locate preferred photo frame. Then select Set option and press<br />
Enter Button to validate the setting and exit.<br />
Display Screen Photo Frame Option<br />
Enter Button<br />
22
� Flash (Picture Record Mode Only)<br />
This camera has two flash settings. To change flash setting by either hot key (Right Button) or<br />
Option Setting.<br />
Auto-flash( ):the flash fires automatically according to light conditions. Use this mode for<br />
general photography.<br />
Flash Off( ):the flash will not fire under any circumstances. Use this mode when taking<br />
images in a place where flash photography is prohibited, or when the subject is distant<br />
(beyond the range of the flash).<br />
To change Flash setting:<br />
1. When in <strong>Camera</strong> Mode, use Up/Down Buttons to select Flash Option, then press Enter<br />
Button to switch to Flash submenu.<br />
2. Use Up/Down Buttons to move between 2 settings.<br />
3. Press Enter Button to validate the setting and exit.<br />
23<br />
Note<br />
� The flash will be disabled automatically<br />
when battery power is low ( )<br />
Display Screen Flash Options<br />
Enter Button
� Self-timer (Picture Record Mode Only)<br />
The self-timer allows you to take pictures with a ten-second time delay. To activate Self-timer<br />
by either hot key (Left Button) or Option Setting. The self-timer LED on the front of the camera<br />
beneath the flash light will also blink. The speed of blinking will increase just before the picture<br />
is taken.<br />
To enable Self-timer:<br />
1. When in <strong>Camera</strong> Mode, use Up/Down Buttons to select Self-timer, then press Enter Button<br />
to switch to Self-timer submenu.<br />
2. Use Up/Down Buttons to choose On or Off.<br />
3. Press Enter Button to validate the setting and exit.<br />
� Sharpness<br />
Display Screen Self-timer Options<br />
Enter Button<br />
You can soften and sharpen images to achieve different effects.<br />
To change Sharpness setting:<br />
1. When in <strong>Camera</strong> Mode, use Up/Down Buttons to select Sharpness Option, then press<br />
Enter Button to switch to Sharpness submenu.<br />
2. Use Up/Down Buttons to select Sharpness then press Enter Button to switch to Sharpness<br />
submenu.<br />
3. Use Up/Down Buttons to move between nine levels. The change can be previewed<br />
immediately.<br />
4. Press Enter Button to validate the setting and exit.<br />
Display Screen Change Sharpness Setting<br />
Enter Button<br />
24
� White Balance<br />
The camera adjusts the color balance of images automatically. Three manual white balance<br />
settings are available:<br />
1. Auto (Default): The camera automatically adjusts white balance.<br />
2. Daylight: Under outdoors<br />
3. Fluorescent: Under fluorescent light condition.<br />
4. Tungsten: Under tungsten light condition.<br />
To change White Balance Setting:<br />
1. In Movie/Picture Record Mode, press Enter Button to switch to record menu screen.<br />
2. Use Right/Left Buttons to select <strong>Camera</strong> Mode. Submenu of <strong>Camera</strong> Mode will pop out on<br />
the screen.<br />
3. Use Up/Down Buttons to select White Balance, then press Enter Button to switch to White<br />
Balance submenu.<br />
4. Use Up/Down Buttons to move between four settings. The change can be previewed<br />
immediately.<br />
5. Press Enter Button to validate the setting and exit.<br />
Display Screen W/B Option<br />
Enter Button<br />
25
� Multi-Snap (Picture Record Mode Only)<br />
With the camera set to Multi-Snap Mode, you can take five continuous pictures.<br />
To enable Multi-Snap:<br />
1. When in <strong>Camera</strong> Mode, use Up/Down Buttons to select Multi-Snap, then press Enter Button<br />
to switch to Multi-Snap submenu.<br />
2. Use Up/Down Buttons to choose On or Off.<br />
3. Press Enter Button to validate the setting and exit.<br />
Display Screen Multi-Snap Option<br />
� Backlight (Picture Record Mode Only)<br />
Enter Button<br />
With the camera set to backlight Mode, you can take shots when bright light is behind the<br />
subject.<br />
To enable Backlight:<br />
1. When in <strong>Camera</strong> Mode, use Up/Down Buttons to select Backlight, then press Enter Buttons<br />
to switch to Backlight submenu.<br />
2. Use Up/Down Buttons to choose On or Off.<br />
3. Press Enter Button to validate the setting and exit.<br />
Display Screen Backlight Option<br />
Enter Button<br />
26
� Date Printing<br />
To enable Date Printing:<br />
1. When in <strong>Camera</strong> Mode, use Up/Down Buttons to select Date Printing, then press Enter<br />
Buttons to switch to Date Printing submenu.<br />
2. Use Up/Down Buttons to choose On or Off.<br />
3. Press Enter Button to validate the setting and exit.<br />
Display Screen Date Printing Option<br />
Enter Button<br />
27<br />
Note<br />
Date would be shown on the printed picture<br />
once date printing is enabled.
� Voice Mode<br />
To enable voice recording:<br />
1. In Movie/Picture Record Mode, press Enter Button to switch to record menu screen.<br />
2. Use Right/Left Buttons to move to Voice Option. Then Voice Submenu will pop out on the<br />
screen.<br />
3. Use Up/Down Button to move between Enter and Exit Option.<br />
4. Choose Enter option to enable voice recording and press Enter Button to validate the setting<br />
and exit.<br />
Display Screen Voice Mode Option<br />
Enter Button<br />
28
� Effect Setting<br />
There are four modes which are Normal, Black/White, Classic and Negative.<br />
To change Effect setting:<br />
1. In Movie/Picture Record Mode, press Enter Button to switch to record menu screen.<br />
2. Use Right/Left Buttons to move to Effect Option. Then Effect Submenu will pop out on the<br />
screen.<br />
3. Use Up/Down Buttons to move between four settings. The change can be previewed<br />
immediately.<br />
4. Press Enter Button to validate the setting and exit.<br />
Display Screen<br />
29
� Setting Menu<br />
The Setting submenu contains options for configuring your camera set up.<br />
To change advanced setting:<br />
1. In Movie/Picture Record Mode, press Enter Button to switch to record menu screen.<br />
2. Use Right/Left Buttons to move to Setting option, then Setting Submenu will pop out on the<br />
screen.<br />
3. Use Up/Down Buttons to move between settings.<br />
� Sound Setting<br />
Display Screen Setting Option<br />
30<br />
� Sound (operation sound)<br />
� Start-Up Screen<br />
� Time Setting<br />
� Format Card<br />
� TV System<br />
� Language<br />
� Default Setting<br />
Enable or disable KeyPad tone and operation sound by using Up/Down Buttons, the press<br />
Enter Button to validate the setting.<br />
Submenu Display Screen Sound Setting<br />
Sound
� Start-up Screen<br />
Customize the Start-Up Screen with your favorite pictures. Press Right/Left Buttons to select<br />
the picture you want and press Enter Button to validate the setting and exit.<br />
Submenu Display Screen Start-Up Screen<br />
Start-Up Screen<br />
If you do not want to customize the start up screen, press Left/Right Buttons and select No<br />
Start-Up Screen.<br />
� Time Setting<br />
No Start-Up Screen<br />
� Move between Date, Time, Set and Exit by using Left/Right Buttons.<br />
� Adjust date and time by using Up/Down Buttons, then select Set to validate each change.<br />
� Select Exit to leave Time Setting without any change.<br />
Submenu Display Screen Time Setting<br />
Time Setting<br />
31<br />
)
� Format Card<br />
Submenu Display Screen Format Card Options<br />
Format Card<br />
Yes:Format the SD Card / built-in memory<br />
No (Default):Do not format SD Card / built in memory<br />
32<br />
Note<br />
� All the data will be erased if the SD card is<br />
formatted. Make sure all the data are<br />
duplicated to PC before formatting SD<br />
card.
� TV System<br />
Ensure that the appropriate TV standard of your area is selected – either NTSC or PAL.<br />
Wrong TV system setting may cause image flicker.<br />
NTSC standard: USA, Canada, Japan, South Korea and Taiwan etc.<br />
PAL standard: UK, Europe, China, Australia, Singapore and Hong Kong etc.<br />
Submenu Display Screen TV System Option<br />
TV System<br />
� Selecting Interface Language<br />
� Default Setting<br />
Submenu Display Screen<br />
Language<br />
To restore the default factory setting, select this option.<br />
Submenu<br />
Default Setting<br />
Display Screen Default Setting Options<br />
33
34<br />
Section 4<br />
Playback Mode<br />
Press RECORD/PLAY Button to switch from Record Mode to Playback Mode.<br />
The Playback Mode is for viewing and managing movies and pictures as well as listening to<br />
voice and music, or read eBook on the built-in memory or on an optional memory card.<br />
Operation Display Screen<br />
Press RECORD/PLAY Button to switch from Record<br />
Mode to Playback Mode Main Menu.<br />
� There are five options in the Playback Mode, movie,<br />
picture, voice, music, and eBook.<br />
� Direction Buttons can be used to select the specific<br />
option.<br />
� Press Enter Button to view movies/pictures, listen to<br />
voice/music, or read eBook.<br />
Note<br />
When any recorded movie, picture, voice,<br />
music, or eBook is stored in the camera, a folder<br />
will be shown on the respective playback mode.
� Button Functions<br />
The Direction Buttons have the following functions in Movie and Picture Playback Modes.<br />
Right Button : Go to the next movie/ picture.<br />
Left Button : Go to the previous movie/ picture.<br />
Up Button : Invalid<br />
Down Button : Information ON/OFF<br />
Enter Button : Enter to movie, picture, voice,<br />
music or e-Book option menu.<br />
RECORD/PLAY Button functions:<br />
1. Switch between Record and Playback modes.<br />
2. Return to the previous page.<br />
Tele-Wide Button: <strong>Digital</strong> Zoom in and out.<br />
Movie Shutter Button:<br />
Start playing the recorded movie or voice<br />
35
� LCD Monitor Information<br />
Indicators on the LCD screen while in Playback Mode:<br />
(1) Mode Indicator<br />
Movie Playback Mode<br />
Picture Playback Mode<br />
Voice Playback Mode<br />
Music Playback Mode<br />
eBook Playback Mode<br />
(2) Resolution Indicator<br />
High Resolution<br />
Standard Resolution<br />
Low Resolution<br />
(3) Indicate the selected movie/picture is locked.<br />
Indicate the single movie/voice/MP3 is being repeated.<br />
Indicate all of the movies/voices/MP3 are being repeated.<br />
Indicate the slide show is playing.<br />
(4) Current Number/ Total number of movie, picture, voice, or MP3.<br />
(5) Magnification Indicator.<br />
36
� Movie Playback<br />
Operation Display Screen<br />
1. Use Direction Buttons to select the Movie option.<br />
2. Press Enter Button to go to Movie Playback Mode.<br />
3. Use Right/Left Buttons to go to the next or last movie.<br />
4. Press Movie Shutter Button to play and press it again to<br />
pause.<br />
5. While playing movie, press Right/Left Buttons to fast<br />
forward/backward, then release the button to stop.<br />
6. Use Up/Down Buttons to adjust volume.<br />
7. Press Enter Button to go to the movie option menu.<br />
8. Use Direction Buttons to select six options, Delete,<br />
Thumbnail, Lock, Repeat One, Repeat All, or Exit.<br />
37
� Delete Movies<br />
Operation Display Screen<br />
1. Use Direction Buttons to select the Delete option ( ).<br />
2. Press Enter Button to go to the Delete menu.<br />
3. Use Right/Left Buttons to select the movie.<br />
4. Use Up Button to delete all movies and Down Button to<br />
delete single movie.<br />
5. Before a movie is deleted, a confirmation screen will<br />
appear; choosing “Yes” will execute the operation and<br />
“No” to cancel the operation.<br />
6. Press Enter Button to exit.<br />
Note<br />
If a memory card is fitted, you can delete only<br />
those movies stored on the card.<br />
Note<br />
Movies on a written-protected memory card<br />
cannot be deleted.<br />
Note<br />
The delete function will only erase unlocked<br />
movies. Locked movies must be unlocked<br />
before being deleted.<br />
38
� Thumbnail Function<br />
Operation Display Screen<br />
1. Use Direction Buttons to select the Thumbnail option<br />
( ).<br />
2. Press Enter Button to view nine thumbnail movies.<br />
3. To play a movie, use Direction Buttons to select the<br />
movie and press Enter Button to view.<br />
� Lock Movies<br />
Single or all movies can be locked. This function can prevent the movies from being deleted<br />
accidentally.<br />
Operation Display Screen<br />
1. Use Direction Buttons to select the Lock option ( ).<br />
2. Press Enter Button to go to the Lock menu.<br />
3. Use Right/Left Buttons to select the movie.<br />
4. Use Up Button to lock/unlock all movies and Down Button to<br />
lock/unlock single movie.<br />
5. Before a movie is locked/unlocked, a confirmation screen<br />
will appear; choosing “Yes” will execute the operation, “No”<br />
will cancel the operation.<br />
6. Press Enter Button to exit.<br />
39
� Repeat Movies<br />
This function automatically repeats playing single movie or all movies in order.<br />
Operation Display Screen<br />
1. Use Direction Buttons to select the Repeat One option ( )<br />
or Repeat All option ( ).<br />
2. Press Enter Button to start repeating.<br />
40
� Picture Playback<br />
Operation Display Screen<br />
1. Use Direction Buttons to select the Picture option.<br />
2. Press Enter Button to go to Picture Playback Mode.<br />
3. Use Right/Left Buttons to go to the next or last picture.<br />
4. While the picture is selected, use Tele/Wide Buttons to<br />
magnify.<br />
5. Use Direction Buttons to navigate the magnified picture.<br />
6. Press Enter Button to go to the picture option menu.<br />
7. Use Direction Buttons to select five options, Delete,<br />
Thumbnail, Lock, Slideshow, or Exit.<br />
41
� Delete Picture<br />
Operation Display Screen<br />
1. Use Direction Buttons to select the Delete option ( ).<br />
2. Press Enter Button to go to the Delete menu.<br />
3. Use Right/Left Buttons to select the picture.<br />
4. Use Up Button to delete all pictures and Down Button to<br />
delete single picture.<br />
5. Before a picture is deleted, a confirmation screen will<br />
appear; choosing “Yes” will execute the operation, “No”<br />
will cancel the operation.<br />
6. Press Enter Button to exit.<br />
Note<br />
If a memory card is fitted, you can delete only<br />
those pictures stored on the card.<br />
Note<br />
Pictures on a written-protected memory card<br />
cannot be deleted.<br />
Note<br />
The delete function will only erase unlocked<br />
pictures. Locked pictures must be unlocked<br />
before being deleted.<br />
42
� Thumbnail Function<br />
Operation Display Screen<br />
1. Use Direction Buttons to select the Thumbnail option ( ).<br />
2. While selecting Thumbnail option, press Enter Button to<br />
view nine thumbnail pictures.<br />
3. To view a picture, use Direction Buttons to select the picture.<br />
4. Press Enter Button to view the selected picture.<br />
� Lock Pictures<br />
Single or all pictures can be locked. This function can prevent the pictures from being deleted<br />
accidentally.<br />
Operation Display Screen<br />
1. Use Direction Buttons to select the Lock option ( ).<br />
2. Press Enter Button to go to the Lock menu.<br />
3. Use Right/Left Buttons to select the picture.<br />
4. Use Up Button to lock/unlock all pictures and Down<br />
Button to lock/unlock single picture.<br />
5. Before a picture is locked/unlocked, a confirmation<br />
screen will appear; choosing “Yes” will execute the<br />
operation, “No” will cancel the operation.<br />
6. Press Enter Button to exit.<br />
43
� Make Slide Show<br />
This function automatically repeats all pictures in order.<br />
Operation Display Screen<br />
1. Use Direction Buttons to select the Slide option ( ).<br />
2. Press Enter Button to start the slide show; Press it again<br />
to stop.<br />
44
� Voice Playback<br />
� Direction Buttons Function<br />
In Voice Playback Mode, the Direction Buttons have the following functions:<br />
Right/ Left Buttons:Select the last or next voice.<br />
Up/Down Buttons : Adjust the voice playback<br />
volume.<br />
Enter Button:Switch to voice option menu.<br />
Operation Display Screen<br />
1. Use Direction Buttons to select the Voice option.<br />
2. Press Enter Button to go to Voice Playback Mode.<br />
3. Use Right/Left Buttons to go to the next or last<br />
voice recording.<br />
4. Press Movie Shutter Button to start playing back<br />
the selected voice. Press it again to stop.<br />
5. Use Up/Down Buttons to adjust the volume.<br />
6. Press Enter Button to go to the voice playback<br />
option menu.<br />
7. Use Up Button to select Delete option and Down<br />
Button to select Repeat option.<br />
45
8. Press Up Button once to repeat single voice; Press<br />
twice to repeat all voice recording.<br />
9. Press it again to disable the repeat function.<br />
10. The repeat icons will be different while selecting<br />
Repeat One option and Repeat All option.<br />
11. To delete a voice, use Right/Left Buttons to select<br />
the voice.<br />
12. Use Up Button to delete all voice recordings and<br />
Down Button to delete single voice recording.<br />
13. Before a voice is deleted, a confirmation screen<br />
will appear; choosing “Yes” will execute the<br />
operation, “No” will cancel the operation.<br />
14. Press Enter Button to exit submenu.<br />
15. Press Record / Play Button to exit Voice mode.<br />
46
� MP3 Music<br />
47<br />
Section 5<br />
Listening to MP3 Music<br />
MP3 is a compressed audio file format. The MP3 music can be downloaded from some MP3<br />
web sites. This DV includes the feature of MP3 play with lyrics display. To enable this function,<br />
make sure both .mp3 and .lrc files with the same file name are copied to the memory.<br />
� Transfer MP3 Music to the camera<br />
1. Install the camera driver on your computer.<br />
2. Connect your camera to the computer USB port.<br />
3. The Red LED will light when the camera is connected to the computer and in Mass<br />
Storage Mode.<br />
4. Transfer MP3 music to My Computer\Removable Disk\MP3.<br />
5. Once all the music is transferred, disconnect the USB cable from the PC.<br />
� Listen to MP3 Music<br />
Operation Display Screen<br />
1. In Playback Mode, use Direction Buttons to select the<br />
Music option<br />
2. Use Up/Down Buttons to locate MP3 you want to play,<br />
or press Right/Left Buttons to jump to the next/previous<br />
page. There is an icon in the front for those MP3<br />
with Lyrics display.
3. Press Movie Shutter or Enter Button to play MP3<br />
4. Press Movie Shutter Button again to stop playing.<br />
5. Press Up/Down Buttons to adjust volume.<br />
6. Press Enter Button to go to repeat menu.<br />
7. Press Down Button once to repeat current MP3( ).<br />
8. Press Down Button twice to repeat all MP3( ).<br />
9. Press Enter Button to exit. submenu.<br />
10. Press Record / Play Button to exit Music mode.<br />
� Listen to MP3 Music with earphone<br />
MP3 stored in the camera can be played either by built-in speaker, or Earphone, or TV.<br />
When the earphone cable is plugged in the camera, the option menu of Earphone/TV pops out<br />
on the LCD Screen. Choose earphone or TV and press Enter Button to validate the setting.<br />
48
� eBook<br />
49<br />
Section 6<br />
Reading eBook<br />
An eBook is an electronic edition of a physical book. eBooks in your camera have many<br />
features that traditional paper books do not: you have the freedom to control the look and feel<br />
of your eBook through colors, your own bookmarks, carrying your eBooks anywhere with your<br />
camera.<br />
� Transfer eBooks to the camera<br />
1. Install the camera driver on your computer.<br />
2. Connect your camera to the computer USB port.<br />
3. The Red LED will light when the camera is connected to the computer and in Mass<br />
Storage Mode.<br />
4. Transfer eBooks, .txt file format only, to My Computer\Removable Disk\eBook.<br />
5. Once all the files is transferred, disconnect the USB cable from the PC.<br />
� Read eBooks<br />
Operation Display Screen<br />
1. In Playback Mode, use Direction Buttons to select the<br />
eBook option<br />
2. Use Up/Down Buttons to select eBook you want to<br />
read, or press Right/Left Buttons to jump to the<br />
next/previous page. There is an icon in the front for<br />
those eBooks with bookmark added.
3. Press Enter Button to read the eBook.<br />
4. Press Up/Down Buttons to scroll up/down the text<br />
5. Select to jump to the first page<br />
6. Select to jump to the last page<br />
7. Select<br />
background.<br />
to change the color of text and<br />
8. Select to auto scroll down the text.<br />
9. Select to add a bookmark.<br />
50
� MPEG4 Movie<br />
51<br />
Section 7<br />
Viewing MPEG4 Movie on PC<br />
MPEG4, the multimedia format and compression standards, is a cutting-edge compression<br />
technology developed by MPEG (Motion Picture Expert Group). It not only enhances the<br />
image quality but also improves the efficiency of recording capacity.<br />
MPEG4 is adopted in this camera to take DVD-quality MPEG4 movies. The MPEG4 movie<br />
format of AVI is used in this camera.<br />
� View MPEG4 Movie on PC<br />
When playing an MPEG4 movie for the first time, MPEG4 <strong>Video</strong> Codec Xvid should be<br />
installed in PC. To do this:<br />
(1) Insert the CD-ROM into the computer’s CD-ROM drive. Click “Install Device Driver” ( Install<br />
MPEG4 <strong>Video</strong> Codec Xivd) and follow the on-screen instructions to complete the<br />
installation.<br />
(2) Start video player such as Widows Media Player to view MPEG4 AVI Movies.<br />
� Share MPEG4 Movie<br />
You can share the recorded MPEG4 movies to your friends via internet or CD. Make sure<br />
MPEG4 <strong>Video</strong> Codec Xvid is installed in your friends’ PC. MPEG4 <strong>Video</strong> Codec Xvid is<br />
available in the provided CD or can be downloaded from Internet.
52<br />
Section 8<br />
Viewing Pictures and Movies on a TV<br />
You can view stored movies and pictures on a television. To connect to a television:<br />
1. Connect one end of the AV cable to your camera’s AV Out port.<br />
2. Connect the other end of the cable to a television.<br />
3. The option menu of Earphone/TV pops out on the LCD Screen.<br />
4. Choose TV option and press Enter Button to validate the setting.<br />
5. The steps for viewing stored pictures and movie on a TV are exactly the same as for<br />
viewing them on the LCD monitor.<br />
Note<br />
1. The LCD monitor does not work when<br />
the camera is connected to a<br />
television.<br />
2. Taking picture with high resolution is<br />
not supported while the camera<br />
connects to a TV.
53<br />
Section 9<br />
<strong>Video</strong> File Converter<br />
Bundled software CD contains Acrsoft Media Converter that features video file converter to<br />
convert multiple video formats into MPEG4 Xvid compatible format with your camera. In this<br />
way, you can convert various video files formats and playback your favorite movies on your<br />
camera.<br />
For windows XP, 2000 and Vista System users, please refer to 9.1 Media Converter2<br />
For windows 98 and Windows Me <strong>User</strong>s, please refer to 9.2 Media Converter 1<br />
9.1 Media Converter 2<br />
To convert a video file:<br />
(1) Install Arcsoft Media Converter2 ( Refer to section 11)<br />
(2) Click Start � Select Programs�Arcsoft Media Converter2�Media Converter2<br />
(3) Media Converter main Screen will appear on your desktop<br />
(4) Select “Zoran Coach Compatible” at “Select Device” column. The “Select Conversion<br />
Parameter” will change to “Coach 7 <strong>Camera</strong>” respectively.<br />
Compatible Device Selection
(5) Click “Add Media”<br />
(6) Select <strong>Video</strong> file you want to convert
(7) You can preview your media files before converting. To preview media files, use the<br />
following control functions.<br />
* Click to start previewing<br />
*Click to stop previewing<br />
Make sure your media files can be previewed before converting<br />
(8) Click on to begin converting files<br />
1
(8) Task Report window will pop out after the task is completed.<br />
(9) Before transferring the converted file to your camera, rename the converted file to<br />
“ Clip0001.avi”. (Please note: if Clip0001.avi exists in the camera, then the converted file<br />
has to be renamed to clip0002.avi)<br />
(10) Connect your camera to PC and transfer the converted video to “My<br />
Computer\Removable Disk\DCIM\200Movie” in your camera. (Refer to Section<br />
11Transferring Data to a Computer)<br />
(11) After transferring the converted video to the camera, press RECORD/Play �<br />
REC/PLAY Button to enjoy your favorite movie.<br />
2
9.2 Media Converter 1<br />
To convert a video file:<br />
(1) Install Arcsoft Media Converter ( Refer to section 11)<br />
(2) Click Start� Select Programs� Acrsoft Media Converter� Media Converter<br />
(3) Media Converter main Screen will appear on your desktop.<br />
(4) Click “Select Media”<br />
3
(5) Select the video file you want to convert.<br />
(6) Click “Select Destination” to choose the location you want to store the converted video<br />
file.<br />
4
(7) Click “ Convert” to start video converting.<br />
5
(8) Task Report window will pop out after the task is completed.<br />
(9) Before transferring the converted file to your camera, rename the converted file to<br />
“ Clip0001.avi”. (Please note: if Clip0001.avi exists in the camera, then the converted file<br />
has to be renamed to clip0002.avi)<br />
(10) Connect your camera to PC and transfer the converted video to “My<br />
Computer\Removable Disk\DCIM\200Movie” in your camera. (Refer to Section 10<br />
Transferring Data to a Computer)<br />
(11) After transferring the converted video to the camera, press RECORD/Play �<br />
REC/PLAY Button to enjoy your favorite movie.<br />
6
7<br />
Section 10<br />
Burning the Recorded Clip into DVD<br />
Bundled software CD contains ArcSoft Showbiz DVD also feathers burning the movie clip into<br />
DVD. You can preserve your precious movies on DVD to share with family and friends. To<br />
create a DVD:<br />
(1) Install Arcsoft Showbiz DVD ( Refer to section 11)<br />
(2) Click Start� Select Programs� Acrsoft Showbiz DVD� Showbiz DVD<br />
(3) Showbiz DVD main Screen will appear on your desktop.<br />
(4) Drag <strong>Video</strong> File to “ Drag <strong>Video</strong> Here”<br />
(5) Click ” Create ”
(6) Click “ Start “ to start DVD burning<br />
8
� Installing the <strong>Digital</strong> <strong>Camera</strong> Driver<br />
9<br />
Section 11<br />
Transferring Data to a Computer<br />
Before connecting this camera to a computer for the first time, you should install a driver on the<br />
computer. The driver is on the CD-ROM disc provided in the package. To install the driver:<br />
1. Insert the CD-ROM into the computer’s CD-ROM drive. The autorun screen will<br />
appear.<br />
2. Click “Install Device Driver”. Follow the on-screen instructions to complete the<br />
installation. Depending on your operating system, you may have to restart your<br />
computer after installing the driver.<br />
� Connecting Your <strong>Camera</strong> to a Computer<br />
You can transfer pictures, movies or voice recordings stored on your camera to a computer<br />
and send them in emails to friends or post them on websites. To do this you should:<br />
1. Install the camera driver on your computer.<br />
2. Connect the computer and camera with the supplied mini USB 2.0 cable.<br />
3. Default mode is Mass Storage Mode when the camera connects to PC<br />
4. Transfer pictures or movies or MP3 or voice recordings<br />
� Mass Storage Device Mode<br />
The RED LED will light up when the camera is connected to the computer. Movies,<br />
pictures and voice recordings can be found on your computer at “My<br />
Computer\Removable Disk\DCIM\”. Under this mode, you can read, delete, move, or copy<br />
any movie/picture/voice recording you want. Use the bundled Ulead application software<br />
to edit the movies or pictures.<br />
� PC <strong>Camera</strong> Mode<br />
When in Mass Storage Device Mode, press RECORD/PLAY Button to switch to PC<br />
<strong>Camera</strong> Mode and the GREEN LED will light up. Under this mode, you can implement live<br />
video conference meetings or use video email over the Internet.
� Installing Bundled Software<br />
The CD-ROM supplied with this camera contains 5 pieces of software.<br />
� Acrsoft PhotoImpression is a user-friendly application that helps you read,<br />
edit and organize images.<br />
� Acrsoft Show Biz allows you to edit movies and is equally easy to use.<br />
� Arcsoft Media Converter can convert multiple video formats into MPEG4<br />
Xvid compatible format with your camera<br />
� Adobe Reader is a popular program that you need to have installed to read<br />
the <strong>User</strong>’s <strong>Manual</strong>. Many computer users will find they already have this<br />
software installed on their computer.<br />
� MPEG4 <strong>Video</strong> Codec Xvid, this decode software has to be installed for<br />
correctly viewing the movies you record.<br />
The detail information can be found in online help of all the bundled software.<br />
To install the bundled software:<br />
1. Insert the CD-ROM into your computer’s CD-ROM drive. The autorun screen appears.<br />
2. Select the piece(s) of software you want to install from the list, then click Install<br />
Application Software. Follow the on-screen instructions to complete the installation.<br />
10
� Specification<br />
11<br />
Section 12<br />
Specifications and System Requirements<br />
Image Sensor 5 Mega Pixel Sensor<br />
Operation Modes<br />
Lens F3.0 (f = 7.0 mm)<br />
Focus Range<br />
<strong>Digital</strong> Zoom 8X<br />
Shutter Electronic<br />
Movie Record、Picture Record、Voice<br />
Record、e-Book、MP3 Player、PC <strong>Camera</strong>、<br />
Mass Storage Device<br />
140cm~infinite (Normal Mode)<br />
60cm ~ 140cm (Portrait Mode)<br />
Center: 20 cm (Macro Mode)<br />
LCD monitor 2.4" LTPS TFT LCD<br />
Storage Media<br />
Image Resolution<br />
Movie Resolution<br />
White Balance<br />
Built-in 64MB Memory (partial memory is<br />
used for Firmware code);<br />
SD/MMC Card Slot support (up to 2GB)<br />
Still image<br />
3840x2880 (11M Pixels)<br />
2592x1944 (5M Pixels)<br />
1600x1200 (2M Pixels)<br />
VGA 640x480 pixels 30 fps<br />
QVGA 320X240 pixels 30 fps<br />
Auto/<strong>Manual</strong> (Daylight, Fluorescent,<br />
Tungsten)<br />
Exposure Auto/<strong>Manual</strong><br />
Self-Timer 10 second delay<br />
Flash Auto/Off<br />
File Format<br />
Picture: JPEG<br />
Movie : AVI (Xvid)<br />
Voice : WAV<br />
Music : MP3<br />
Image play Single Image/Thumbnails/Slideshow<br />
PC Interface Mini USB 2.0 Port<br />
TV out NTSC/PAL Selectable<br />
Battery Lithium-ion Rechargeable Battery<br />
Dimension 95mm×71mm×34mm<br />
Weight 142g(without battery)
� System Requirement<br />
Windows 98SE/2000/ME/XP/Vista<br />
Pentium III 800MHz or higher<br />
256 MB RAM<br />
CD ROM<br />
1GB free HDD space<br />
Available USB port<br />
12