viv-cv-530v Manual - Vivitar
viv-cv-530v Manual - Vivitar
viv-cv-530v Manual - Vivitar

You also want an ePaper? Increase the reach of your titles
YUMPU automatically turns print PDFs into web optimized ePapers that Google loves.
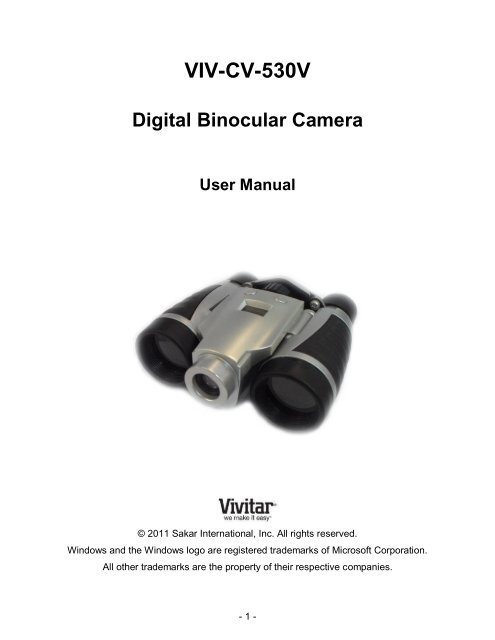
VIV-CV-530VDigital Binocular CameraUser <strong>Manual</strong>© 2011 Sakar International, Inc. All rights reserved.Windows and the Windows logo are registered trademarks of Microsoft Corporation.All other trademarks are the property of their respective companies.- 1 -
Table of ContentsIntroduction ...................................................................................................................... 3Camera Maintenance and Care ....................................................................................... 3Key Features ................................................................................................................... 4What‟s Included ............................................................................................................... 4Computer System Requirements ..................................................................................... 5A Quick Look at Your Camera ......................................................................................... 6Preparing Your Camera for Use ...................................................................................... 7Starting Your Camera ...................................................................................................... 8Taking Photos .................................................................................................................. 9The Camera Modes ....................................................................................................... 10Installing the <strong>Vivitar</strong> Experience Image Manager Software and Camera Driver ........... 15Connecting your Camera to the Computer .................................................................... 16Getting Photos and Videos from your Camera to your Computer .................................. 16Getting Started! ............................................................................................................. 17Using Your Camera as a Webcam ................................................................................ 18Sakar Warranty Card ..................................................................................................... 20Technical Support .......................................................................................................... 21Technical Specifications ................................................................................................ 21Frequently Asked Questions .......................................................................................... 22- 2 -
IntroductionThank you for purchasing your VIV-CV-530V 5 X 30 Digital Binocular Camera. This cameracan be used as a digital camera, binoculars as well as a Webcam. To download photos andvideos to your computer, captured with this easy to use, portable and compact device, youneed only connect the USB cable from your computer to your camera after installing the<strong>Vivitar</strong> Experience Image Manager Software and camera driver.The <strong>Vivitar</strong> Experience Image Manager will help you get the most out of your camera. It ispacked with powerful, yet easy to use features that allow you to share your photos and videoswith friends and family.Everything you need to take quality digital photos and videos is included with your camera.Please read this manual carefully FIRST in order to get the most out of your digital camera.Important Notice:Please do not plug the camera into the USB port of your computer until you haveinstalled the <strong>Vivitar</strong> Experience Image Manager Software and the camera‟s driver.Plugging in your camera at this stage will cause the device to not be recognized by thecomputer and no images will be downloaded.Note: Webcam Feature: In order to speak with your friends over the Internet, you will need aheadset and microphone available at your local computer retailer.Camera Maintenance and CareThe digital telescopic camera is a precision device and must be kept and used carefully.Care must be taken that:1. Your camera does not fall or collide with any hard object2. Not used close to or in water or rainy weather3. Not be used in very hot, very cold or moist environments4. Not be used in situations where there is high vibrations5. DO NOT USE the binocular to view the sun directly- 3 -
Computer System RequirementsTo be able to download photos and videos to your PC or Macintosh, you will need the followingminimum configuration:WINDOWS OSMicrosoft® Windows XP with Service Pack 3, Windows Vista with Service Pack 1 orWindows 7Pentium® 4 processor (or above)250 MB available hard disk space512 MB of RAM16-bit Color display, 1024 X 768 recommended screen resolutionCD-ROM DriveQuickTime® 6 or higherMicrosoft® Internet Explorer 7 or higherWindows Media Player 10 or higherInternet connection required to access social networks and web conferencing applicationsMAC OSIntel processor running Mac OS X v10.5.x or later250 MB free hard disk space256 MB RAMDisplay: 1024 X 768 recommended screen resolutionQuickTime® 6 or higherInternet connection required to access social networks and web conferencing applications- 5 -
A Quick Look at Your Camera1. M - Power / Mode button2. LCD Panel3. Optical Lens4. USB Slot5. Telescope and Viewfinder6. S – Shutter / OK button7. Battery Compartment8. Tripod socket9. Barrels10. Focus Wheel- 6 -
Preparing Your Camera for UseBattery InstallationYour camera requires one (1) AAA battery. Alkaline battery recommended.Insert the battery into the camera:1. Open the battery cover at the bottom of the camera.2. Insert the battery according to the polarity (+ and -) indicated on the inside of the batterycompartment.3. Close the battery cover.WARNING: Opening the battery compartment and/or removing the battery will erase thephotos currently stored in the camera. Download your photos and videos as often as possibleso as not to lose them. Photos may also be lost when the batteries runs low.The LCD will flash when your batteries are running low. This indicates that the battery shouldbe replaced. Remember, before you open the battery compartment to change the battery,please download your photos you have on the camera. When the battery voltage drops, theLCD will display “Lo” and the camera will turn off automatically.Note: If you do not intend to use your camera for an extended period, remove the battery toavoid leakage and corrosion.- 7 -
Starting Your CameraPress the M – Power / Mode button on the top of the camera to turn on the camera.The camera will emit a beep to confirm that your camera is on and ready for use.Energy Saving Feature:To conserve battery power, if the camera is not in use for 30 seconds, it automatically switchesoff.Note: In order to download the photos and videos captured with this camera you need toinstall the <strong>Vivitar</strong> Experience Image Manager Software and camera driver. See the “Installingthe <strong>Vivitar</strong> Experience Image Manager Software and Camera Driver” section of this manual tolearn how to install the software before connecting the camera to your computer.- 8 -
Taking PhotosCapturing Pictures1. Compose your shot by looking through the telescope view finder with both eyesfocused.2. Aim the binocular in the direction of the object you wish to capture.3. Adjust the IPD (the distance between 2 eyes) by holding the binocular with both handsand pushing or moving one or both of the barrels until you can see one circle of view.4. Focus the camera by observing an object at least 15 feet / 5 meters away.5. Rotate the center focus wheel until the observed object is clear.6. Hold the camera steady and press the Shutter button to take a photo.7. The camera will beep when the photo is taken. The number of photos left to take in thatresolution is displayed on the LCD screen.Note: If there are more than 99 photos left to take, the hundreds digit will appear on the LCDfor a split second when you take the photo. Thereafter the last two digits will appear.How to Proceed when your Camera Memory is FullIf the camera beeps twice continuously or if a " " appears on the LCD, this is an indicationthat the memory is full. When the camera memory is full no further photos can be taken untilthe existing photos have been downloaded and cleared from the camera‟s memory.In order to continue taking photos you will need to:1. Use the <strong>Vivitar</strong> Experience Image Manager application to download all the photos andvideos from you camera to your computer.2. After the photos have been downloaded and appear on your computer, you shoulddelete all the photos from your camera.3. Once your camera memory is empty you are now ready to capture more photos andvideos.- 9 -
The Camera ModesNavigating the Camera ModesTo enter the different camera modes, continue to press the MODE button until you haveselected the mode of your choice. Once you have selected the mode, press the Shutter buttonto confirm your choice.Powering On Your CameraTo power on your camera, press the MODE button.Powering Off Your CameraTo power off your camera:Power Off Mode1. Press the MODE button until the icon appears on the LCD screen.2. Press the Shutter button and the camera will switch off.Note: Energy save modeIn order to conserve battery power, if the camera is not used within 30 seconds, thecamera will automatically switch off.Continuous Shoot ModeWhen enabled, the Continuous Shoot mode allows you to take continuous rapid snapshotswith a single click of the Shutter button.This feature can be effective when trying to capture a particular moment in a sporting event orother scenes with quick movements.1. Press the MODE button until the icon appears on the LCD screen.3. Press and hold down the Shutter button for the camera to continuously capture photos.4. The camera will beep for each image being captured and the countdown digits willappear while the images are being taken.- 10 -
5. Lift your finger off the Shutter button to stop capturing images.Note: The photos will continue to be taken until the Shutter button is released or thecamera‟s memory is full.6. The photos will be saved as JPEG images.Note: Photos taken in Continuous Shoot Mode may fail under poor lighting conditions.Video ModeVideo mode allows you to capture videos that are saved in AVI format.1. Press the MODE button until the icon appears on the LCD screen.2. To begin capturing video, press and hold down the Shutter button until you wantto stop shooting the video or until the memory is full. While the camera iscapturing the video, the LCD screen displays rotating-lines.3. The video is automatically saved to the camera‟s memory.Note: As this is a twain camera you will need to download the photos and videosto the computer often in order not to lose them. If the battery runs low before youhave downloaded the images, all the images in the camera‟s memory will beerased without being able to retrieve them.Self-Timer ModeThe Self-Timer feature allows you to set a delay between the time that the camera‟s Shutterbutton is pressed and the actual capture of the picture. This is an optimal feature if you don‟tjust want to take the picture but would also like to be in the picture yourself.It is recommended that you place the camera on a flat surface or use a tripod stand when youuse the Self-Timer.1. Press the MODE button until the icon appears on the LCD screen.2. Press the Shutter button.3. A 10 second count down will start (the camera will beep once a second).4. After 10 seconds a photo will be taken.- 11 -
Clear Last Mode (Delete Last Photo) -To delete the last photo taken:1. Press the MODE button until the icon appears on the LCD screen.2. Press the Shutter button. The LCD display then flashes .3. Press the Shutter button again within 5 seconds and the last photo will be deletedpermanently.4. The LCD counter then displays the updated maximum number of photos that can betaken at the current resolution and compression.Clear All Mode (Delete All Photos)To delete all photos on the camera:1. Press the MODE button until the icon appears on the LCD screen.2. Press the Shutter button. The photo counter flashes.3. Press the Shutter button again within 5 seconds and all photos in the camera will bepermanently deleted.4. The LCD counter is reset to show the maximum number of photos that can be taken atthe current resolution and compression.Photo Resolution Mode /There are 2 photo resolutions to select from:(VGA resolution) or(QVGA resolution)1. Press the MODE button until the or icon appears on the LCD screen.2. If the LCD displays , this means the present resolution is Low resolution and inorder to change to High resolutionclick the Shutter button within 5 seconds.3. If the LCD displays , this means the present resolution is High resolution and inorder to change to Low resolution click the Shutter button within 5 seconds.4. All photos taken after changing the resolution setting will be taken at the new resolution.- 12 -
5. The photo resolution setting can be changed at any time.6. The amount of pictures that can be taken at the selected resolution appears on the LCDscreen.7. As there are only 2 digits on the screen, the camera will flash the hundreds digits beforeshowing the tens and units digits on capturing a picture in order to show you how manypictures you can continue to take at that resolution.Compression Mode /Your camera gives you an additional mode to compress your images so that you can capturemore pictures.There are 2 photo compressions to select from:Non-Compressed - and Compressed -By default your camera is in non- Compressedmode. If you are in the non-Compressedmode the opposite modemode.icon will appear on the LCD. This means that you are in the1. Press the MODE button until the or icon appears on the LCD screen.2. If the LCD displays , this means the image is in compressed mode and in orderto change to no compressionclick the Shutter button.3. If the LCD displays , this means the present compression is no compression andin order to change to compression mode click the Shutter button.4. All photos taken after changing compression will be at the new compression.5. The compression setting can be changed at any time.6. The amount of pictures that can be taken at the selected compression appears on theLCD screen.7. As there are only 2 digits on the screen, the camera will flash the hundreds digits beforeshowing the tens and units digits on capturing a picture in order to show you how manypictures you can continue to take at that resolution.- 13 -
Note: Photos taken at no compression take up more of the camera‟s memory and thereforefewer photos can be taken at non-compression than with compression.The photo resolution and compression settings determine the number of photos that can betaken and the amount of memory required for each photo.The following table tells you how many photos can be taken based on the image resolutionand compression:Number of Captured Photos (According to Resolution and Compression settings)ResolutionVGA (640 x 480)VGA (640 x 480)QVGA (320 x 240)QVGA (320 x 240)Compression20 photos40 photos80 photos160 photosFrequency - /The camera has 2 Frequency settings:- 50HZ for Asia and Europe and - 60HZ for the U.S. and Japan.To set the camera for the correct frequency:1. Press the MODE button until the or icon appears on the LCD screen.2. If the LCD displays , this means the present frequency is 60HZ and in order tochange to 50HZclick the Shutter button.3. If the LCD displays , this means the present frequency is 50HZ and in order tochange to 60HZ click the Shutter button.4. All photos taken after changing frequency will be at the new frequency.5. The frequency setting can be changed at any time.Note: Using the incorrect frequency setting under fluorescent lighting could result in poorimages or video flickering (when using the WebCam). Set the camera for the correct frequencyfor the country that you are in.- 14 -
Installing the <strong>Vivitar</strong> Experience Image Manager Software andCamera DriverWarning: Do not plug your camera into the computer until the <strong>Vivitar</strong> Experience ImageManager Software installation is complete.1. Insert the installation CD into your CD-ROM drive. The <strong>Vivitar</strong> Experience ImageManager will begin to install.2. Please review the license terms.On PC and Macintosh: Click the “I accept the terms of this license agreement” and thenclick “Next” to continue.3. On PC only: Let the “<strong>Vivitar</strong> Experience Image Manager” installer create the folder towhere the program will be installed, and then click “Install”.4. Please wait while the application continues the installation process on your computer.Follow all instructions.Note: On the MAC: A window to „Install Camera Drivers‟ opens. Click „Install‟ then click„Close‟ once installation is complete.5. On PC: Click the “Close” button when the installation is complete.The application automatically opens.On MAC: Close the „Perian pane‟ System Preferences window that appears as the laststep in the installation.The application automatically opens.6. If you closed the application, click on the <strong>Vivitar</strong> Experience Image Manager from yourcomputer to open and run the application.- 15 -
Connecting your Camera to the Computer1. Use the USB cable that came with your camera to connect your camera to yourcomputer.2. Plug the one end of the USB cable into the USB slot on the side of the camera and plugthe other end into an available USB port on your computer.3. Your camera will automatically turn on.4. The first time you connect the device to the computer you will have to wait a fewmoments until the computer recognizes the device.Getting Photos and Videos from your Camera to your ComputerImportant: Do not disconnect the cable during transfer. Doing so will cancel the transfer of anyfiles on their way to your computer.1. Select the “Get Images” button from the Main menu.- 16 -
2. The “Get Images from device” window opens.3. You can select to download photos, videos or both.4. Select your camera (removable disk) from the device window. If your camera is the onlyUSB device connected then it will be selected automatically.5. Select a location on the computer where to place the new photo and video files.6. Add the new photo and video files to albums if desired.7. Select to remove the media files from the selected device (removable disk) after theimport.8. Click the “Get Media” button to transfer the photos and videos from your camera to yourcomputer.9. A media download progress bar appears on the bottom left showing the number ofmedia files downloading to your computer. A message appears when the download iscomplete.10. The photo and video files that you selected are now downloaded to your computer tothe selected folder and albums ready for your use.Getting Started!Using the <strong>Vivitar</strong> Experience Image Manager, you can:Upload and manage photos and videos to and from the most popular photo sharing andsocial networking sites - Facebook, Flickr, Picasa, MySpace, Photobucket, Twitpic,Twitgoo and YouTubeSeamlessly transfer photos and videos from one social network to anotherOrganize your images by creating offline and online albumsEdit images using automatic and manual toolsUse automatic “Geotagging” with built in Google MapsFor more details on how to use the <strong>Vivitar</strong> Experience Image Manager open the „Helpguide‟ from the Help menu or click the “Take a Tour” button on the application‟s Homepage.- 17 -
Using Your Camera as a WebcamYour camera, when plugged into your computer, can also be used as a Webcam with mostinstant messenger and web conferencing applications that support video.On PC: The webcam driver is installed on your computer when you install the <strong>Vivitar</strong>Experience Image Manager Software for this device.1. Open your web conferencing application to activate the video camera option.2. Rotating lines will appear on the camera‟s LCD screen to show that it is active and inwebcam mode.3. Place your camera as desired and begin to use as a webcam.Note: Use the settings option of your web conferencing application to change the settings ifneeded. If you have a built-in camera on your computer, use the settings option of your webconferencing application to choose this „Dual Mode Camera‟. The camera does not have a microphone.On Mac: The webcam driver is installed on your computer when you install the <strong>Vivitar</strong>Experience Image Manager for this device.To preview the webcam video feature and open the Webcam application window, please followthese instructions:1. Click the “Macintosh HD” icon on the desktop2. Click the “Library” folder3. Click the “QuickTime” folder4. Click the “DT03_pccam” to open the Webcam application for Mac.5. Once you see the object appearing in the Webcam application window, close thewindow and open your instant messenger or web conferencing application to beginusing this camera as a webcam on your computer.- 18 -
Note:Use the Control menu / Video settings option of this web conferencing application tochange the settings if needed.If you have a built-in camera on your computer, use the settings option of your webconferencing application to choose this „Dual Mode Camera‟.The camera does not have a microphone.After you connect your camera to your computer, the camera will remain on all the while it isplugged into the USB and it won‟t be switched off. On disconnecting the USB cable the camerawill automatically switch off.- 19 -
Sakar Warranty CardThis warranty covers for the original consumer purchaser only and is not transferable.Products that fail to function properly UNDER NORMAL USAGE, due to defects in material orworkmanship. Your product will be repaired at no charge for parts or labor for a period of one year.What Is Not Covered By Warranty:Damages or malfunctions not resulting from defects in material or workmanship and damagesor malfunctions from other than normal use, including but limited to, repair by unauthorizedparties, tampering, modification or accident.What To Do When Service Is Required:When returning your defective product (postage pre-paid) for service, your package shouldinclude:1. Copy of original bill of sale2. A detailed written description of the problem.3. Your return address and telephone number (Daytime)MAIL TO ADDRESS BELOW:Sakar USSakar InternationalAttention: Service Department195 Carter DriveEdison, NJ08817Sakar UK/EuropeAttention: Service Department2D, Siskin Parkway East4020 Middlemarch Business ParkCoventry, CV3 4PESakar AustraliaReturn faulty camerato the RefundCounter at the storewhere purchased- 20 -
Technical SupportFor technical support issues please visit our website at www.<strong>viv</strong>itar.com. You can findmanuals, software and FAQ‟s at the website. Can‟t find what you are looking for? E-mail us atsupport@<strong>viv</strong>itar.com and one of our technical support team members will answer yourquestions. For phone support in the US please call 1-800-592-9541, in the UK call 0800 9174831, in Australia call 1800-006-614. If you would like to call from anywhere else, please visitwww.<strong>viv</strong>itar.com for your local toll free number.Technical SpecificationsImage Sensor1/5 inch CMOSImage Specification 640 x 480 (VGA); 320 x 240 (QVGA)Memory16MB SDRAMNumber of pictures Hr 20 VGA; Lr 80 QVGA (non- compressed)Hr 40 CIF; Lr 160 QVGA (compressed)Lens1/5 inch Fixed Lens: f=3.9mm/F2.8AVI pixel format320 x 240pixelsShutter speed Range 1/60~ 1/1500 secondLCD display2 digit displaySelf-TimerTimer with 10 sec. delayFrame rate12 frames per secondVideo Frame rate8 frames per second in AI or Ct modeExpose/ white balance Auto/AutomaticPower source1 x 1.5V AAA alkaline / USB 5VAuto power off30 sec.PC interface USB 1.1Operating systems Windows XP (SP 3), Vista (SP1) and 7Mac OSX v10.5.x and above- 21 -
Frequently Asked QuestionsQ: I have taken photos, but my computer says "No photos in camera." What do I do?A: Ensure that you have taken photos with your camera. Press the Shutter button a few timesto take some sample photos and try again. If you still get a no photos error, this indicates thatthe software was not installed correctly or your computer may not meet the minimum systemrequirements (see the Computer System Requirements section of this manual).Q: How do I make sure I don't lose important pictures?A: Your camera uses SDRAM memory, which requires a constant electric current to store yourphotos. Should your camera lose power (for instance if the batteries die, run out of power orare removed) all stored pictures will be lost. We recommend always downloading your photosto your computer as soon as possible to prevent unintentional data loss.Q: If I have a MAC, will the camera work?A: Yes. This twain camera also works as a Digital Camera and Webcam on Macintoshcomputers. Be sure to follow all the installation instruction for installing the driver for thiscamera on your MAC.Q: If the webcam does not work?A: Make sure you have connected the camera correctly into an available USB port or hub andthe webcam application is opened.On first plugging the camera into the computer, allow the computer to recognize your camerafirst before opening the software or webcam application.VIVI-CV-530 (version2)-11211-TA- 22 -
This device complies with the part 15 of the FCC rules. Operation is subject to the following two conditions: (1)this device may not cause harmful interference, and (2) this device must accept any interference received,including interference that may cause undesired operation.Caution: changes or modifications not expressly approved by the party responsible for compliance could void theuser‟s authority to operate the equipment.NOTE: This equipment has been tested and found to comply with the limits for a Class B digital device, pursuantto Part 15 of the FCC Rules. These limits are designed to provide reasonable protection against harmfulinterference in a residential installation. This equipment generates. Uses and can radiate radio frequency energyand, if not installed and used in accordance with instructions, may cause harmful interference to radiocommunications. However, there is no guarantee that interference will not occur in a particular installation. If thisequipment does cause harmful interference to radio or –television reception, which can be determined by turningthe equipment off and on, the user is encouraged to try to correct the interference by one or more of the followingmeasures:- Reorient or relocate the receiving antenna.- Increase the separation between the equipment and receiver.- Connect the equipment into an outlet on a circuit different form that to which the receiver is connected.- Consult the dealer or experienced radio/TV technician for help.- 23 -