Perform deep water rescues - Australian Canoeing
Perform deep water rescues - Australian Canoeing
Perform deep water rescues - Australian Canoeing

Create successful ePaper yourself
Turn your PDF publications into a flip-book with our unique Google optimized e-Paper software.
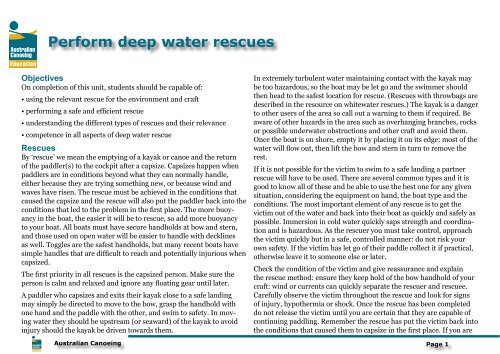
<strong>Perform</strong> <strong>deep</strong> <strong>water</strong> <strong>rescues</strong><br />
Objectives<br />
On completion of this unit, students should be capable of:<br />
• using the relevant rescue for the environment and craft<br />
• performing a safe and efficient rescue<br />
• understanding the different types of <strong>rescues</strong> and their relevance<br />
• competence in all aspects of <strong>deep</strong> <strong>water</strong> rescue<br />
Rescues<br />
By ‘rescue’ we mean the emptying of a kayak or canoe and the return<br />
of the paddler(s) to the cockpit after a capsize. Capsizes happen when<br />
paddlers are in conditions beyond what they can normally handle,<br />
either because they are trying something new, or because wind and<br />
waves have risen. The rescue must be achieved in the conditions that<br />
caused the capsize and the rescue will also put the paddler back into the<br />
conditions that led to the problem in the first place. The more buoyancy<br />
in the boat, the easier it will be to rescue, so add more buoyancy<br />
to your boat. All boats must have secure handholds at bow and stern,<br />
and those used on open <strong>water</strong> will be easier to handle with decklines<br />
as well. Toggles are the safest handholds, but many recent boats have<br />
simple handles that are difficult to reach and potentially injurious when<br />
capsized.<br />
The first priority in all <strong>rescues</strong> is the capsized person. Make sure the<br />
person is calm and relaxed and ignore any floating gear until later.<br />
A paddler who capsizes and exits their kayak close to a safe landing<br />
may simply be directed to move to the bow, grasp the handhold with<br />
one hand and the paddle with the other, and swim to safety. In moving<br />
<strong>water</strong> they should be upstream (or seaward) of the kayak to avoid<br />
injury should the kayak be driven towards them.<br />
In extremely turbulent <strong>water</strong> maintaining contact with the kayak may<br />
be too hazardous, so the boat may be let go and the swimmer should<br />
then head to the safest location for rescue. (Rescues with throwbags are<br />
described in the resource on white<strong>water</strong> <strong>rescues</strong>.) The kayak is a danger<br />
to other users of the area so call out a warning to them if required. Be<br />
aware of other hazards in the area such as overhanging branches, rocks<br />
or possible under<strong>water</strong> obstructions and other craft and avoid them.<br />
Once the boat is on shore, empty it by placing it on its edge: most of the<br />
<strong>water</strong> will flow out, then lift the bow and stern in turn to remove the<br />
rest.<br />
If it is not possible for the victim to swim to a safe landing a partner<br />
rescue will have to be used. There are several common types and it is<br />
good to know all of these and be able to use the best one for any given<br />
situation, considering the equipment on hand, the boat type and the<br />
conditions. The most important element of any rescue is to get the<br />
victim out of the <strong>water</strong> and back into their boat as quickly and safely as<br />
possible. Immersion in cold <strong>water</strong> quickly saps strength and coordination<br />
and is hazardous. As the rescuer you must take control, approach<br />
the victim quickly but in a safe, controlled manner: do not risk your<br />
own safety. If the victim has let go of their paddle collect it if practical,<br />
otherwise leave it to someone else or later.<br />
Check the condition of the victim and give reassurance and explain<br />
the rescue method: ensure they keep hold of the bow handhold of your<br />
craft: wind or currents can quickly separate the rescuer and rescuee.<br />
Carefully observe the victim throughout the rescue and look for signs<br />
of injury, hypothermia or shock. Once the rescue has been completed<br />
do not release the victim until you are certain that they are capable of<br />
continuing paddling. Remember the rescue has put the victim back into<br />
the conditions that caused them to capsize in the first place. If you are<br />
<strong>Australian</strong> <strong>Canoeing</strong> Page 1
<strong>Perform</strong> <strong>deep</strong> <strong>water</strong> <strong>rescues</strong><br />
unsure of their paddling confidence keep supporting them and organise<br />
a supported tow to the nearest safe landing.<br />
There are conditions on rivers and in the sea where environmental hazards<br />
may make a partner rescue impracticable. In surf or caught in a<br />
rip traveling towards breakers, or when in or approaching rapids, see to<br />
your own safety first while keeping the victim in sight. When the hazard<br />
passes move in for the appropriate rescue. There is no point in becoming<br />
another casualty requiring rescue.<br />
Equipment<br />
As an instructor or group leader you will need to be prepared to do<br />
<strong>rescues</strong> and towing. Make sure your own boat is easy to rescue in case<br />
you have to rescue it yourself with minimal assistance. Keeping track of<br />
the paddle has always been a problem, and sea paddlers have long used<br />
some form of paddle leash or park. Two types are shown in the diagram.<br />
As with all ropes, be aware of the possibility of entanglement.<br />
Loop for wrist<br />
2m of 4mm or 6mm line<br />
Other end identical<br />
Float<br />
50cm of 4mm shock cord<br />
Snaplink (e.g. RF-533)<br />
Sufficient length to wrap around paddle shaft<br />
Loop around paddle shaft<br />
Rigging ball can be put under deck shock cord<br />
A variation on this leash uses an Olive cleat on the wrist loop<br />
Reboarding<br />
All rescue methods eventually have the swimmer reboarding, so it is<br />
worth considering first. There are alternative methods, depending on<br />
preferences and conditions, with all methods requiring a stable raft.<br />
That is achieved by having the boats facing in opposite directions and<br />
the rescuer putting as much weight as possible on to the swimmer’s<br />
boat.<br />
Peak of deck in armpit (This<br />
rescuer is holding swimmer’s<br />
paddle under the boat)<br />
Either twist around, keeping<br />
low, or use face-down method<br />
below<br />
Reboarding over swimmer’s kayak<br />
Feet at the surface<br />
Reboarding over rescuer’s kayak<br />
Feet at the surface<br />
Lie face down, put feet into cockpit. Roll face<br />
up, wriggle forward, sit up when over seat<br />
<strong>Australian</strong> <strong>Canoeing</strong> Page 2
<strong>Perform</strong> <strong>deep</strong> <strong>water</strong> <strong>rescues</strong><br />
Reboarding is possible over the rescuer’s or the swimmer’s boat, with<br />
the choice often based on individual preference. By staying low and<br />
spreading weight across both boats the raft will be stable, and the<br />
swimmer less likely to slide off.<br />
The rescue is not complete until the spray deck is in place and the rescuer<br />
satisfied that the rescuee is ready to continue.<br />
Key points<br />
Stabilise<br />
• Lean hard on the rescuee’s boat, with the peak of the deck in your<br />
armpit. That hand can hold the rescuee’s paddle<br />
• Hold the cockpit rim with your other hand, ready to assist the rescuee<br />
if necessary<br />
Reboard<br />
• Move around the raft to the cockpit<br />
• Rescuer’s weight on rescuee’s boat<br />
• Put one hand each side of the cockpit rim<br />
• Kick the feet to the surface<br />
• Make a breaststroke kick and pull with the arms to come across the<br />
deck<br />
• Keep moving, face down, until the feet are in the cockpit<br />
• Roll face up, and wriggle forward until over the seat<br />
• Sit up<br />
The X rescue<br />
This rescue is a versatile rescue used for general purpose and white<br />
<strong>water</strong> kayaks. The victim of the capsize leaves the kayak inverted and<br />
holds the bow (preferably) or stern handhold. On approach the rescuer<br />
takes the bow from the victim who then grasps the bow handhold of the<br />
rescuer’s kayak. The victim can take care of paddles. The rescuer then<br />
hauls the inverted kayak across their foredeck keeping both kayaks at<br />
right angles. It is advisable to keep the inverted kayak off your spray<br />
deck as it can cause damage. The <strong>water</strong> is emptied from the kayak by<br />
seesawing it.<br />
X rescue: contact The rescuer is<br />
putting leashed paddle aside, the<br />
swimmer is transferring to the<br />
rescuer’s boat. The floating hat is<br />
being ignored<br />
The initial lift: nearer hand<br />
on on the hull, other hand<br />
gripping the toggle<br />
Seasawing the boat, both<br />
hands holding cockpit rim,<br />
nearer edge higher<br />
Dealing with a boat with<br />
insufficient buoyancy<br />
When the kayak is empty it is righted, then slid off the rescuer’s boat<br />
and placed alongside the rescuer’s kayak, facing the opposite direction,<br />
for the swimmer to reboard.<br />
Although the victim can assist in hauling their kayak across the rescuer’s<br />
boat, which may be necessary if the boat has insufficient buoyancy,<br />
the rescuer normally does the entire rescue. This makes it ideal for<br />
Instructors or leaders of inexperienced paddlers.<br />
Key points<br />
Swimmer:<br />
• Leave the boat inverted<br />
• Hold it by the bow (preferably) in one hand, with the paddle in the<br />
other<br />
• Ignore anything floating away: let go of your boat and it can drift<br />
faster than you can swim<br />
<strong>Australian</strong> <strong>Canoeing</strong> Page 3
<strong>Perform</strong> <strong>deep</strong> <strong>water</strong> <strong>rescues</strong><br />
• Watch for your rescuer: if necessary swap sides so that your boat is<br />
between you and the rescuer’s boat when it arrives<br />
Rescuer<br />
• Put your paddle into its leash<br />
• Talk to the rescuee, giving clear, concise instructions<br />
• Plan your approach to pick up the rescuee and boat in one move<br />
• Have the victim transfer to your bow<br />
• Place your nearer hand on the upturned hull<br />
• With the other, grab the toggle or end loop<br />
• Lean on the boat, and then push away to give some impetus for the lift<br />
• Use the deck lines (if present) to haul the boat across: be quick at this<br />
stage to avoid the stern filling<br />
• Grab the cockpit rim as soon as you can reach it, then drag the boat to<br />
and fro to drain it<br />
• Have the nearer side slightly higher so that it clears your own cockpit<br />
rim<br />
• Do not try to remove every last drop: you will not be able to do so and<br />
will waste time if you try<br />
• Do not try gripping the upturned hull unless you have hands like octopus<br />
tentacles<br />
• If the boat is <strong>water</strong>logged (because of insufficient buoyancy), you may<br />
find it difficult to handle: let the rescuee do some work:<br />
– the rescuee reaches across the rescuer’s deck to grasp the handhold<br />
of the capsized boat<br />
– drag it across the deck<br />
– with feet on the gunwale, keep pulling until the cockpit is over the<br />
rescuer’s deck<br />
– pull downward to begin draining<br />
– the rescuer must hold the boat by the cockpit rim as usual<br />
– the rescuee must stay in contact at all times, and return to the rescuer’s<br />
bow<br />
Launch<br />
• Put the boat back into the <strong>water</strong>, on the side opposite from where you<br />
picked it up and facing the opposite direction<br />
X rescue for open canoes<br />
The method is similar to the X Rescue for kayaks, and for <strong>rescues</strong> from<br />
another open canoe, it is usually the stern paddler who does the work<br />
• If necessary, and there is space among the gear, the bow paddler can<br />
turn round to assist<br />
• The rescuee hanging on the bow of the rescuing canoe can help to<br />
stabilise it<br />
• The canoe may roll itself upright as you begin the lift. If that happens,<br />
simply keep lifting and dragging the boat across your own gunwale,<br />
and <strong>water</strong> will spill out as the boat rises<br />
• Ignore any floating drums and other packages until the rescue is complete<br />
Flip and pump<br />
This rescue is for sea kayaks fitted with a hands free pump and is the<br />
quickest way to get the victim into their kayak and paddling. That<br />
makes it the method of choice for <strong>rescues</strong> near surf breaks, where there<br />
is danger of being swept against a cliff, etc.<br />
The capsized paddler rights their kayak after leaving the cockpit, and<br />
if the pump is electric, switches it on. The victim then moves to the<br />
bow of their kayak and holds on to boat and paddle. The rescuer moves<br />
alongside the victim’s kayak to stabilise it for reboarding.<br />
As soon as the paddler is back in the cockpit he or she can paddle away<br />
from danger, letting the pump do the work, and leaving the spray deck<br />
until in a safe position.<br />
This rescue assumes minimum volume cockpits which can be paddled<br />
when flooded. (Some boats will need to have buoyancy material fitted<br />
in the cockpit.) It’s something worth practising.<br />
<strong>Australian</strong> <strong>Canoeing</strong> Page 4
<strong>Perform</strong> <strong>deep</strong> <strong>water</strong> <strong>rescues</strong><br />
Wedge rescue<br />
This is one of the fastest methods of clearing the cockpit of <strong>water</strong>. The<br />
victim rights the kayak after leaving the cockpit, moves to the bow and<br />
waits. The rescuer approaches the victim’s bow with an angle of 45–60˚<br />
between the two. As the rescuer’s bow crosses that of the rescuee, the<br />
rescuee transfers to the rescuer’s bow. The rescuer grasps the swimmer’s<br />
kayak by the deck lines and pulls so that it rides up onto their<br />
foredeck.<br />
Time the pull with wave action to save effort and avoid being speared.<br />
When the cockpit is clear of the <strong>water</strong> the boat is pushed forward on<br />
the deck clear of the rescuer’s cockpit, and rolled towards the rescuer to<br />
drain. The kayak is then righted and slid off the deck and supported for<br />
the victim to re-enter.<br />
Key points<br />
• Grab the bow of the boat by the deck lines, with an angle between the<br />
boats of 46–60˚<br />
• Pull the bow: it will come up and across in front of you<br />
• Keep pulling until the cockpit is clear of the <strong>water</strong><br />
• Push the boat forward on the deck and roll the boat towards you and<br />
watch the <strong>water</strong> draining. (Do not try to remove every last drop: you<br />
will not be able to and will waste time if you try)<br />
• Roll the boat upright and slide it back into the <strong>water</strong> facing the opposite<br />
direction<br />
• Re-entry is by any of the methods shown above<br />
The Swimmer assisted rescue<br />
In this rescue the victim leaves the boat inverted and moves to the<br />
stern. The rescuer approaches the bow with kayaks at an angle of 90˚<br />
and grasps the bow. The victim pushes down on the stern to lift the bow<br />
as the rescuer draws the kayak over their deck until the cockpit is clear<br />
of the <strong>water</strong>, allowing it to be drained. The kayak is then righted and<br />
pushed back into the <strong>water</strong> and supported for the victim to re-enter.<br />
Push down<br />
Initial lift: direct pull<br />
Push forward, roll towards you<br />
45–60˚<br />
*The word ‘Eskimo’ means ‘eater of raw meat’, a derogatory term. The Arctic peoples called<br />
themselves Inuit, ‘the people’.<br />
<strong>Australian</strong> <strong>Canoeing</strong> Page 5<br />
Swimmer moving<br />
round<br />
Push forward, roll towards you<br />
Keep boat on deck, not cockpit<br />
Pull across<br />
Eskimo rescue<br />
The Eskimo* rescue is useful, since the victim does not have to leave<br />
their kayak. On capsize the victim remains in their kayak in the tuck<br />
position and bangs hard on the hull to attract attention. The arms are<br />
then moved slightly away from the hull and waved back and forward<br />
waiting to feel the rescuer’s bow. The rescuer aims at the nearer end<br />
of the victim’s kayak, grabs it with both hands, and swings their bow<br />
within reach of the victim who can then roll up on it.
<strong>Perform</strong> <strong>deep</strong> <strong>water</strong> <strong>rescues</strong><br />
There are other variations of this technique, however this is the safest<br />
and preferred method.<br />
Key points<br />
• The rescuee waits in the boat, tapping on the hull, running their<br />
hands along the sides of the boat, and swimming up for air if need be<br />
• The rescuer aims at the nearer end of the rescuee’s boat, grabs it with<br />
both hands, and swings his or her own bow within reach of the victim,<br />
who can then roll up on it.<br />
Deck carries<br />
If a paddler has been separated from their kayak or their kayak has<br />
been severely damaged it may be necessary to carry them to safety on<br />
the rescuer’s boat. A paddler may also come across a swimmer in need<br />
of assistance. There are several carry methods.<br />
Towing<br />
There is always the possibility that a group member may become incapacitated<br />
by illness or injury, and is then unable to keep up with the<br />
group’s pace or even paddle on at all. This paddler will need to be assisted<br />
to a safe landing.<br />
If the distance is short, the tow can be done by having the incapacitated<br />
paddler lean on your foredeck while you continue paddling, reaching<br />
over the other boat to put the blade in on that side. Short tows can also<br />
be done using paddle leashes, loops in deck lines and so on. For paddling<br />
any distance however, a proper towline is necessary.<br />
Towlines exist in two main forms: those attached to the paddler, either<br />
as a belt or as part of a PFD harness, and those attached to the boat.<br />
The latter is preferred at sea, where the forces can be considerable,<br />
and tows tend to be over longer distances. (Towing at sea is described<br />
in greater detail in the ‘<strong>Perform</strong> <strong>deep</strong> <strong>water</strong> <strong>rescues</strong>: Sea’ module.) A<br />
length of shock cord in the system can be used to take up the ‘snatch’.<br />
Whichever system is used, it must be easy to deploy and have a reliable<br />
quick-release system.<br />
Towing requires skills that should be developed in calm conditions<br />
before they are needed in a real situation. Towing in heavy seas and<br />
high winds or fast flowing <strong>water</strong> is demanding of both paddling skill<br />
and energy reserves. Towing also requires effective group management.<br />
Regular practice is worthwhile.<br />
At the start of a tow it is essential that all group members are aware of<br />
their role. The paddlers who are in good condition should perform the<br />
tow. If one paddler is having difficulty there are usually others who are<br />
also not coping as well. The towline should be attached to the bow of<br />
the patient’s kayak and deployed gradually as the tower moves forward<br />
to prevent entanglement. This should be done quickly as there is a risk<br />
of impact injury or equipment damage if kayaks are thrown together<br />
in rough conditions. Towing requires more energy and concentration<br />
and should be rotated through the group at regular intervals. Compatible<br />
towline systems make it possible for a single line to be passed from<br />
paddler to paddler in turn.<br />
<strong>Australian</strong> <strong>Canoeing</strong> Page 6
<strong>Perform</strong> <strong>deep</strong> <strong>water</strong> <strong>rescues</strong><br />
Observer<br />
Maintain separation<br />
Another paddler should be positioned alongside the patient to provide<br />
emotional support and monitor their condition. If the patient appears<br />
in danger of capsize the support paddler should quickly form a raft<br />
with them. A capsize in these circumstances will most certainly lead to<br />
complications.<br />
Communications from the towers to the patient are difficult, particularly<br />
in windy conditions. As a tower it is difficult turning around to check<br />
the condition of the patient, and a ‘point’ paddler out to the side of the<br />
tow can keep an eye on the whole set-up and relay messages.<br />
There are several towing methods that can be used depending on the<br />
conditions, the ability of the group, and the level of incapacity. A single<br />
tow is used where the incapacity is slight or for a tired paddler who is<br />
able to provide some power and directional control.<br />
Towed boats have a tendency to wander, and must be kept in line behind<br />
the towing craft by the paddler steering as necessary. Care must<br />
also be taken to avoid catching up to the towing craft or jerking the<br />
towline suddenly.<br />
A double tow is performed by two paddlers assisting the incapacitated<br />
paddler and can be an in line or V formation. This may be useful when<br />
battling into head winds or where the patient is unable to paddle. The<br />
tow will be faster, but the towers must be careful to maintain their direction<br />
and separation.<br />
Supported tows are necessary when the incapacitated paddler cannot<br />
support him or herself. Another kayak can be rafted to the patient’s<br />
boat for support and reassurance. A double tow is essential if good<br />
progress is to be maintained. The supporting paddler will use consider-<br />
able energy controlling the patient’s kayak and keeping the raft together,<br />
so supporters need to be changed at regular intervals.<br />
Key points<br />
• For flat <strong>water</strong> use the towline can be short, 5 meters or so, while sea<br />
boats will need towlines as long as 15 metres<br />
• Stow the towline where it is readily accessible, but not where it will be<br />
in the way<br />
• Single tows require that the rescuee steer straight behind the towing<br />
kayak, otherwise the boat will veer from side to side. If necessary,<br />
have a third person supporting the incapacitated paddler<br />
• With someone completely unable to paddle and requiring constant<br />
support, the double tow may be required<br />
• Keep the towing boats parallel about two metres apart (interesting in<br />
heavy conditions)<br />
• Having the strongest and fastest member of the group tow the slowest<br />
member can be a useful method of keeping a group together: almost<br />
like putting the two together in a double<br />
Acknowledgement<br />
This resource was written and illustrated by Peter Carter, with additional<br />
material by Ian Dewey.<br />
<strong>Australian</strong> <strong>Canoeing</strong> Page 7