Acumed Bone plates, screws, and accessories are designed to pro ...
Acumed Bone plates, screws, and accessories are designed to pro ...
Acumed Bone plates, screws, and accessories are designed to pro ...

Create successful ePaper yourself
Turn your PDF publications into a flip-book with our unique Google optimized e-Paper software.
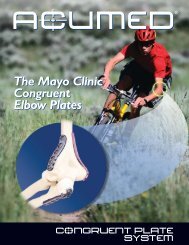
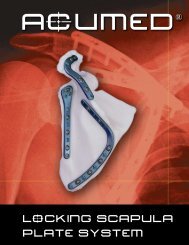
AcUMEDr<br />
CONGRUENT<br />
CLAVIcLE PLATES
CONGRUENT<br />
CLAVIcLE PLATES<br />
Since 1988 <strong>Acumed</strong> has been<br />
designing solutions <strong>to</strong> the<br />
dem<strong>and</strong>ing situations facing<br />
orthopedic surgeons, hospitals<br />
<strong>and</strong> their patients. Our<br />
strategy has been <strong>to</strong> know the<br />
indication, design a solution <strong>to</strong><br />
fit, <strong>and</strong> deliver quality<br />
<strong>pro</strong>ducts <strong>and</strong> instruments.<br />
The <strong>Acumed</strong> Congruent Clavicle<br />
Plate is <strong>designed</strong> <strong>to</strong> <strong>pro</strong>vide<br />
excellent fixation for acute<br />
fractures, malunions, <strong>and</strong><br />
non-unions of the clavicle.<br />
While often treated<br />
conservatively, a portion of these<br />
fractures can benefit from a low<br />
<strong>pro</strong>file congruent plate that minimizes<br />
soft tissue irritation <strong>and</strong><br />
im<strong>pro</strong>ves patient function while<br />
returning them <strong>to</strong> their normal<br />
activities sooner.<br />
Closed Treatment of Displaced<br />
Middle-Third Fractures of the Clavicle<br />
Gives Poor Results. 1<br />
The results of the 52 cases studied with<br />
an average follow-up of 38 months:<br />
15% nonunion rate<br />
25% pain requiring NSAID's<br />
36% difficulty lifting 20lb overhead<br />
39% tenderness at fracture site<br />
31% signs of nerve compression<br />
31% were dissatisfied with the result<br />
"We now recommend open reduction<br />
<strong>and</strong> internal fixation of severely<br />
displaced fractures of the middle third<br />
of the clavicle in adult patients"<br />
With the Congruent Clavicle Plate, <strong>Acumed</strong> has <strong>designed</strong> a comprehensive<br />
solution for repairing fractures located from the middle third <strong>to</strong> the distal<br />
third of the clavicle. St<strong>and</strong>ard ORIF <strong>pro</strong>cedures for clavicle fractures including,<br />
pinning, reconstruction, <strong>and</strong> DC plating have his<strong>to</strong>rically <strong>pro</strong>vided less<br />
than desirable results. 2 Traditional hardw<strong>are</strong> frequently causes soft tissue irritation<br />
<strong>and</strong>/or fails prior <strong>to</strong> union, requiring a second <strong>pro</strong>cedure.<br />
Designed in conjunction with William Geissler, MD, the Congruent Clavicle<br />
Plate offers a low <strong>pro</strong>file solution for superior plating of the clavicle.<br />
Pre-con<strong>to</strong>ured <strong>to</strong> match the natural S-shape of the clavicle, this titanium<br />
plate offers increased strength, with a rounded <strong>pro</strong>file <strong>and</strong> a low-<strong>pro</strong>file<br />
screw-plate interface. This design not only reduces OR time spent in con<strong>to</strong>uring<br />
a plate but also minimizes soft-tissue irritation for the patient.<br />
As an add-on <strong>to</strong> the existing Congruent<br />
Plate System, the Clavicle Plate requires<br />
only minimal additional instrumentation:<br />
several bone clamps, retrac<strong>to</strong>rs <strong>and</strong> a<br />
specialized soft tissue <strong>pro</strong>tec<strong>to</strong>r. With<br />
these, this system efficiently utilizes the<br />
resources of the existing plate set <strong>to</strong><br />
make for a straightforward <strong>pro</strong>cedure.
Precon<strong>to</strong>ured Plate Geometry matches the ana<strong>to</strong>my of<br />
the patient with little or no bending. The Congruent<br />
Clavicle Plate may also act as guide or template for<br />
res<strong>to</strong>ring the patient's original ana<strong>to</strong>my when reconstructing<br />
a malunion, nonunion, or a highly comminuted<br />
fracture, unlike intramedullary rods/pins or straight <strong>plates</strong>.<br />
Superior Biomechanical Stability is engineered in<strong>to</strong> both the<br />
design of the <strong>plates</strong> <strong>and</strong> their orientation on the clavicle.<br />
Yield Strength<br />
87.5<br />
Stress:<br />
Clavicle Plate<br />
Plating the superior aspect of the clavicle has been found <strong>to</strong><br />
be biomechanically the most stable 3 . <strong>Acumed</strong> in house<br />
analysis showed that when subjected <strong>to</strong> equal force, a 3.5mm<br />
N<br />
26<br />
Recon Plate<br />
87.5 N<br />
SS reconstruction plate broke in multiple locations while the<br />
Congruent Clavicle Plate suffered no permanent deformation 4 .<br />
Recon<br />
Plate<br />
Clavicle<br />
Plate<br />
low<br />
87.5 N<br />
failure<br />
Multiple Plate Options <strong>are</strong> available <strong>to</strong> fit a wide variety<br />
More<br />
Curvature<br />
Distal/Lateral<br />
Small<br />
of clavicle curvatures. For central one-third applications,<br />
Medium<br />
there <strong>are</strong> three different curvatures in both left (blue)<br />
<strong>and</strong> right (green), <strong>and</strong> for distal/lateral fractures a<br />
Large<br />
specialized “J” plate is available.<br />
Less<br />
Curvature<br />
Color coded for left (blue) <strong>and</strong> right (green) application.<br />
Laser marked for<br />
<strong>pro</strong>per orientation.<br />
Low <strong>pro</strong>file plate/screw interface.<br />
All <strong>plates</strong> have eight screw<br />
holes/slots for a minimum<br />
of three <strong>screws</strong> on each<br />
side of the fracture.<br />
St<strong>and</strong>ard compression/<br />
reduction slots.<br />
Anterior surface is rounded<br />
<strong>to</strong> minimize irritation.<br />
Undersurface is tubularized<br />
for additional stability,<br />
especially in <strong>to</strong>rsion.<br />
1) Hill et al, J <strong>Bone</strong> Joint Surg (Br.) 1997;79-B:537-539<br />
2) Bostman et al, J Trauma: Injury, Infection, <strong>and</strong> Critical C<strong>are</strong>.<br />
1997; 5:778-783<br />
3) Iannotti, et, al, JSES, Sept/Oct 2002<br />
4) Data on file at <strong>Acumed</strong><br />
Larger compression/<br />
reduction slots.<br />
Static hole.<br />
Beveled medial <strong>and</strong><br />
lateral <strong>pro</strong>file <strong>to</strong><br />
minimize irritation.
Step 5:<br />
Plate Placement<br />
Step 6:<br />
Screw Insertion<br />
Once the ideal position of the plate has been selected, it is<br />
<strong>pro</strong>visionally stabilized <strong>to</strong> the clavicle with bone clamps. The<br />
clavicle plate <strong>screws</strong> may be placed either unicortical or<br />
bicortical. If bicortical <strong>screws</strong> <strong>are</strong> used, it is important <strong>to</strong><br />
not over-penetrate the distal cortex <strong>and</strong> potentially risk<br />
neurovascular injury. A curved retrac<strong>to</strong>r may be placed<br />
under the inferior surface of the clavicle <strong>to</strong> <strong>pro</strong>tect the neurovascular<br />
structures from over-penetration of the drill bit.<br />
NOTE: The drill may need <strong>to</strong> be replaced if it comes in<br />
contact with the retrac<strong>to</strong>r.<br />
Initially, one screw should be placed medial <strong>and</strong> one screw<br />
lateral <strong>to</strong> the fracture site for early stability (typically the<br />
third <strong>and</strong> sixth holes). Once these two <strong>screws</strong> <strong>are</strong> placed,<br />
the <strong>pro</strong>visional bone clamps holding the plate <strong>to</strong> the clavicle<br />
may be removed. The second <strong>and</strong> seventh holes of the<br />
plate <strong>are</strong> compression slots enabling screw placement <strong>to</strong><br />
further compress the fracture site. The medial <strong>and</strong> lateral<br />
<strong>screws</strong> may now be placed so that there <strong>are</strong> three <strong>screws</strong><br />
on each side of the fracture.<br />
NOTE: The bolster supporting the patient's head may be<br />
temporarily removed if the head is in the way during drilling<br />
of the medial <strong>screws</strong>. Once the medial <strong>screws</strong> <strong>are</strong> placed,<br />
the bolster supporting the head may be replaced.<br />
Step 7:<br />
Final Plate <strong>and</strong> Screw Position<br />
The remaining two center <strong>screws</strong> may be placed, depending<br />
on the amount of comminution. Lag screw fixation across<br />
the major fracture fragment may be performed prior <strong>to</strong><br />
placement of the plate. The 3.5/2.0mm drill sleeve (PL-<br />
CL07) from the <strong>Acumed</strong> set may be used for lagging. After<br />
the near cortex is drilled with the 3.5mm drill, the<br />
3.5/2.0mm drill sleeve (PL-CL07) from the <strong>Acumed</strong> instrument<br />
set is inserted <strong>and</strong> the far cortex is drilled with a<br />
2.0mm drill.<br />
An intraoperative radiograph is recommended <strong>to</strong> check the<br />
position of the <strong>screws</strong> <strong>and</strong> the final reduction of the<br />
fracture. The musculature is then re-ap<strong>pro</strong>ximated directly<br />
over the plate. The skin is then closed in layers with a<br />
subcuticular stitch for the remaining skin layer.<br />
Post-op Pro<strong>to</strong>col<br />
The patient is placed in an arm sling <strong>and</strong> starts pendulum<br />
range of motion exercises. Passive motion exercises <strong>are</strong><br />
initiated from the first four weeks, active assisted from four<br />
<strong>to</strong> six weeks, <strong>and</strong> active strengthening is initiated at six<br />
weeks post operatively, once healing is seen radiographically.
CONGRUENT BONE PLATE SYSTEM<br />
FOR THE PERSONAL ATTENTION OF THE OPERATING SURGEON<br />
DESCRIPTION: <strong>Acumed</strong> <strong>Bone</strong> <strong>plates</strong>, <strong>screws</strong>, <strong>and</strong> <strong>accessories</strong> <strong>are</strong> <strong>designed</strong> <strong>to</strong> <strong>pro</strong>vide<br />
fixation for fractures, fusions or osteo<strong>to</strong>mies.<br />
INFORMATION FOR USE: Physiological dimensions limit the sizes of implant appliances.<br />
The surgeon must select the type <strong>and</strong> size that best meets the patient’s<br />
requirements for close adaptation <strong>and</strong> firm seating with adequate support.<br />
INDICATIONS: The <strong>Acumed</strong> bone plate system includes <strong>plates</strong> <strong>and</strong> <strong>screws</strong><br />
<strong>designed</strong> specifically for clavicle, humerus, radius, ulna, metacarpal, metatarsal, malleolus,<br />
tibia, <strong>and</strong> fibula. The wrist fusion <strong>plates</strong> <strong>and</strong> <strong>accessories</strong> <strong>are</strong> <strong>designed</strong> specifically<br />
for fusion of the small bones of the h<strong>and</strong> including: hamate, capitate,lunate, triquetrum.<br />
CONTRAINDICATIONS: Active or latent infection. Osteoporosis, insufficient quantity<br />
or quality of bone/soft tissue. Material sensitivity. If suspected, tests <strong>are</strong> <strong>to</strong> be<br />
performed prior <strong>to</strong> implantation. Sepsis. Patients who <strong>are</strong> unwilling or incapable of<br />
following pos<strong>to</strong>perative c<strong>are</strong> instructions. This device is not intended for screw<br />
attachment or fixation <strong>to</strong> the posterior elements (pedicles) of the cervical, thoracic,<br />
or lumbar spine.<br />
WARNINGS: For safe <strong>and</strong> effective use of this implant, the surgeon must be thoroughly<br />
familiar with the implant, the method of application, instruments, <strong>and</strong> the recommended<br />
surgical technique for this device. The device is not <strong>designed</strong> <strong>to</strong> withst<strong>and</strong><br />
the stress of weight bearing, load bearing, or excessive activity. Device breakage<br />
or damage can occur when the implant is subjected <strong>to</strong> increased loading associated<br />
with delayed union, nonunion, or incomplete healing. Im<strong>pro</strong>per insertion of the<br />
device during implantation can increase the possibility of loosening <strong>and</strong> migration.<br />
The patient must be cautioned, preferably in writing, about the use, limitations, <strong>and</strong><br />
possible adverse effects of this implant including the possibility of the device failing as<br />
a result of loose fixation <strong>and</strong>/or loosening, stress, excessive activity, or weight bearing<br />
or load bearing, particularly if the implant experiences increased loads due <strong>to</strong><br />
delayed union, nonunion, or incomplete healing. The patient must be warned that<br />
failure <strong>to</strong> follow pos<strong>to</strong>perative c<strong>are</strong> instructions can cause the implant <strong>and</strong>/or treatment<br />
<strong>to</strong> fail.<br />
PRECAUTIONS: An implant shall never be reused. Previous stresses may have created<br />
imperfections which can lead <strong>to</strong> device failure. Instruments shall be inspected<br />
for wear or damage prior <strong>to</strong> usage. Protect implant appliances against scratching <strong>and</strong><br />
nicking. Such stress concentrations can lead <strong>to</strong> failure.<br />
ADVERSE EFFECTS: Fracture of the implant due <strong>to</strong> excessive activity, <strong>pro</strong>longed<br />
loading upon the device, incomplete healing, or excessive force exerted on the<br />
implant during insertion. Implant migration <strong>and</strong>/or loosening. Metal sensitivity or his<strong>to</strong>logical<br />
or allergic reaction resulting from implantation of a foreign material. Pain,<br />
discomfort, or abnormal sensations due <strong>to</strong> the presence of an implant. Nerve damage<br />
resulting from surgical trauma. Necrosis of bone or bone resorption. Necrosis<br />
of tissue or inadequate healing.<br />
AcUMEDr<br />
5885 NW Cornelius Pass Road<br />
Hillsboro, OR 97124<br />
888 627-9957<br />
www.acumed.net<br />
CPS00-00-01<br />
Effective: 10/2003<br />
STERILITY: This <strong>pro</strong>duct is <strong>pro</strong>vided nonsterile. Sterilization may be performed<br />
using one of the following methods. For a gravity displacement au<strong>to</strong>clave, set at<br />
250º F (121ºC) for 30 minutes. For a prevacuum au<strong>to</strong>clave, set at<br />
270º F (132ºC) for 4 minutes, or at 273ºF-279ºF (134ºC <strong>to</strong> 137ºC) for 3 minutes.<br />
Please consider your equipment manufacturer’s written instructions for the specific<br />
sterilizer <strong>and</strong> load configuration being used, <strong>and</strong> current AORN st<strong>and</strong>ards <strong>and</strong> recommended<br />
practices.<br />
STORAGE INSTRUCTIONS: S<strong>to</strong>re in a cool dry place, <strong>and</strong> keep away from direct<br />
sunlight. Prior <strong>to</strong> use, inspect <strong>pro</strong>duct package for signs of tampering, damage, or<br />
water contamination.<br />
CAUTION: Federal Law (USA) restricts this <strong>pro</strong>duct <strong>to</strong> sale by or on the order of a<br />
physician or hospital.
SURGICAL TECHNIQUE<br />
By William Geissler, M.D.<br />
This section offers <strong>Acumed</strong>’s suggested method for implanting the Congruent Clavicle Plate. For specific questions<br />
not addressed here, please contact your local <strong>Acumed</strong> representative or <strong>Acumed</strong> at 888 627-9957.<br />
Step 2:<br />
Exposure<br />
Step 1:<br />
Patient Positioning<br />
The patient is initially placed in the beach chair position. A<br />
bolster is placed between the shoulder blades <strong>to</strong> help facilitate<br />
reduction of the fracture during the case. The patient's<br />
involved upper extremity is prepped <strong>and</strong> draped in a sterile<br />
fashion allowing the arm <strong>to</strong> be manipulated <strong>to</strong> help further<br />
reduce the fracture if required.<br />
Ap<strong>pro</strong>ximately a six cm transverse (medial <strong>to</strong> lateral) incision<br />
is made over the palpable fracture of the clavicle, usually in the<br />
middle third. The medial fragment is usually <strong>pro</strong>ximal in<br />
relation <strong>to</strong> the distal fragment.The incision is usually placed<br />
midway between the <strong>pro</strong>ximal/distal migration of the<br />
<strong>pro</strong>ximal fragments. Dissection is carried down <strong>to</strong> the fascia<br />
<strong>and</strong> the skin flaps <strong>are</strong> elevated. The cutaneous nerves <strong>are</strong><br />
<strong>pro</strong>tected. The musculature is then subperosteally elevated off<br />
the bone fragments. It is important <strong>to</strong> keep soft tissue<br />
attachments <strong>to</strong> the butterfly fragments in an attempt <strong>to</strong><br />
maintain vascularity.<br />
Step 3:<br />
Fracture Reduction<br />
Once the fracture fragments <strong>are</strong> exposed, the fracture is<br />
ana<strong>to</strong>mically reduced <strong>and</strong> <strong>pro</strong>visionally stabilized with bone<br />
clamps.<br />
Step 4:<br />
Plate Selection<br />
J Plate<br />
The ap<strong>pro</strong>priately sized left or right clavicle plate is then selected from the three different curvatures (small, medium <strong>and</strong> large). Usually, the large<br />
plate is ideal for most males, the medium plate for smaller males <strong>and</strong> most females, <strong>and</strong> the small plate for smallest patients. The two middle holes<br />
may be placed over the fracture, ideally leaving three holes both <strong>pro</strong>ximal <strong>and</strong> distal <strong>to</strong> the fracture fragments; however, the plate can be slid medially<br />
or laterally for the most ideal location. In cases of non-union or malunion, the curve of the plate can assist in ana<strong>to</strong>mic reduction of the clavicle,<br />
reducing strain on the sternoclavicular <strong>and</strong> acromioclavicular joints.<br />
NOTE: The plate may be rotated 180° for a more ana<strong>to</strong>mical fit on fractures that <strong>are</strong> more lateral than the central 1/3.<br />
The "J" plate is indicated for displaced Type II clavicle fractures where the lateral fragment is usually quite small but wide. The distal 3<br />
screw holes were <strong>designed</strong> <strong>to</strong> be placed in the lateral fragment, the two oval holes for possible lag screw placement, <strong>and</strong> the three<br />
remaining medial holes for stabilization of the medial fragment.