Arthroscopic Shoulder Repair Using the Smith & Nephew KINSA ...
Arthroscopic Shoulder Repair Using the Smith & Nephew KINSA ...
Arthroscopic Shoulder Repair Using the Smith & Nephew KINSA ...

You also want an ePaper? Increase the reach of your titles
YUMPU automatically turns print PDFs into web optimized ePapers that Google loves.
Reviewed by:Larry D. Field, MDMississippi Sports Medicine and Orthopaedic CenterJackson, MSGary M. Gartsman, MDClinical ProfessorDepartment of Orthopaedic SurgeryThe University of Texas Health Science Center at HoustonTexas Orthopedic HospitalHouston, TexasPhilippe Landreau, MD<strong>Shoulder</strong> and Knee SurgeonMedical and Surgical Center of Paris 5Department of Orthopaedic SurgeryLa Pitié-Salpétrière HospitalParis, FranceLars Neumann, FRCS (Ed)Consultant <strong>Shoulder</strong> and Elbow SurgeonThe Nottingham <strong>Shoulder</strong> and Elbow UnitNottingham, United Kingdom
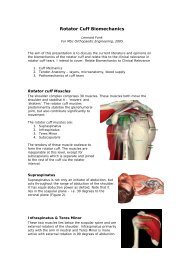
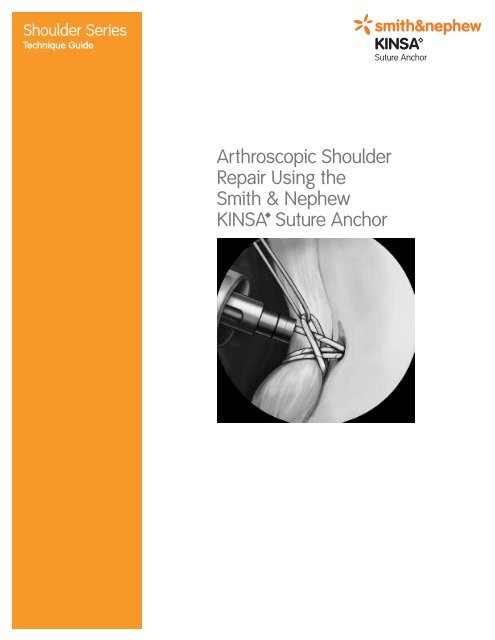
<strong>Arthroscopic</strong> <strong>Shoulder</strong> <strong>Repair</strong> <strong>Using</strong> <strong>the</strong><strong>Smith</strong> & <strong>Nephew</strong> <strong>KINSA</strong> Suture AnchorIntroductionThe <strong>Smith</strong> & <strong>Nephew</strong> <strong>KINSA</strong> Suture Anchor forinstability (Figure 1) is intended to provide securefixation of soft tissue to bone. The <strong>KINSA</strong> Anchorconsists of a tap-in, non-absorbable polymeranchor, preloaded with ULTRABRAID Suture(cobraid) and loaded onto a disposable inserter. Aself-locking, sliding knot, based on <strong>the</strong> <strong>Smith</strong> &<strong>Nephew</strong> FAST-FIX Meniscal <strong>Repair</strong> System, iscontained in <strong>the</strong> anchor allowing secure fixationwithout tying any knots. The design allows <strong>the</strong>tension placed on <strong>the</strong> tissue for fixation to be totallyindependent of <strong>the</strong> anchor depth. A suture loopreduces <strong>the</strong> tissue, leaving a low profile repair withno knot stack in <strong>the</strong> joint.Patient PreparationPlace <strong>the</strong> patient in ei<strong>the</strong>r <strong>the</strong> beach chair positionor <strong>the</strong> lateral decubitus position.Typically, <strong>the</strong> posterior portal is used forarthroscopic visualization. Establish a standardposterior portal at <strong>the</strong> “soft spot.”Establish <strong>the</strong> anterior-superior portal (referred to inthis technique as <strong>the</strong> “non-operative” cannula) in<strong>the</strong> rotator cuff interval.Establish <strong>the</strong> anterior-inferior portal (referred to inthis technique as <strong>the</strong> “operative” cannula) as closeas possible to <strong>the</strong> superior edge of <strong>the</strong>subscapularis tendon.AnchorEtch mark (hidden)Outer inserter shaftInner inserter shaftHandleULTRABRAID Suturecobraid loopSuture leaderImpaction knobFigure 13
Figure 2Technique1. In preparation for <strong>the</strong> procedure, remove <strong>the</strong>monofilament from <strong>the</strong> <strong>Smith</strong> & <strong>Nephew</strong>ACCU-PASS Suture Shuttle. Reload <strong>the</strong>monofilament so that when advanced <strong>the</strong> tailends pass through <strong>the</strong> needle first (Figure 2) oruse a preferred method of suture shuttlepassage.2. Place <strong>the</strong> distal tip of a <strong>Smith</strong> & <strong>Nephew</strong> InlineDrill Guide onto <strong>the</strong> bone at <strong>the</strong> desiredimplantation site.3. Stabilize <strong>the</strong> guide over <strong>the</strong> insertion site andadvance <strong>the</strong> <strong>Smith</strong> & <strong>Nephew</strong> <strong>KINSA</strong> Drill Bituntil <strong>the</strong> shoulder on <strong>the</strong> drill bit reaches <strong>the</strong>bone surface, or <strong>the</strong> wide etch mark on <strong>the</strong> drillbit fills <strong>the</strong> distal windows of <strong>the</strong> inline drill guide(Figure 3). Note <strong>the</strong> drill bit alignment and holelocation before removing <strong>the</strong> drill bit and drillguide. The anchor will need to be inserted on<strong>the</strong> same alignment and angle.4. Remove <strong>the</strong> drill bit and drill guide from <strong>the</strong>insertion site. Mark <strong>the</strong> edge of <strong>the</strong> hole usinga preferred method. It is strongly recommendedto mark <strong>the</strong> edge of <strong>the</strong> hole (Figure 4) becauseit can be difficult to find later.Figure 34Figure 4
5. Insert <strong>the</strong> suture shuttle down <strong>the</strong> operativecannula and through <strong>the</strong> labrum and capsule tobe repaired (Figure 5). Advance <strong>the</strong> tails into <strong>the</strong>joint space. Use a grasper to retrieve <strong>the</strong> tailsthrough <strong>the</strong> non-operative cannula (Figure 6).Hemostat <strong>the</strong> monofilament tail ends to preventslippage. Remove <strong>the</strong> suture shuttle whilebacking off <strong>the</strong> monofilament, leaving <strong>the</strong>monofilament loop exiting <strong>the</strong> operative cannula.Figure 5Figure 65
Figure 76. Pass six inches of both limbs of <strong>the</strong> coloredsuture leader, preloaded on <strong>the</strong> <strong>KINSA</strong> SutureAnchor, through <strong>the</strong> monofilament loop end(Figure 7). Shuttle <strong>the</strong> colored suture leaderthrough <strong>the</strong> tissue by pulling <strong>the</strong> tails of <strong>the</strong>monofilament out <strong>the</strong> non-operative cannula(Figure 8). Remove <strong>the</strong> monofilament.7. Advance <strong>the</strong> inserter down <strong>the</strong> operativecannula while pulling on <strong>the</strong> colored sutureleader to remove slack (Figure 9). Advance until<strong>the</strong> loop of ULTRABRAID Suture has passedthrough <strong>the</strong> soft tissue and is visible on bothsides of <strong>the</strong> tissue (Figure 10).Note: As you advance <strong>the</strong> inserter, position it so<strong>the</strong> slot on <strong>the</strong> outer shaft faces toward <strong>the</strong>labrum and away from <strong>the</strong> glenoid. Avoidtwisting <strong>the</strong> suture.Figure 86Figure 9
8. Pass <strong>the</strong> anchor completely through <strong>the</strong> loop ofULTRABRAID Suture which has been passedthrough <strong>the</strong> soft tissue (Figure 11). Use <strong>the</strong>colored suture leader to help manipulate <strong>the</strong>loop.9. Insert <strong>the</strong> anchor tip into <strong>the</strong> drill hole andestablish alignment (Figure 12). Maintain axialalignment of <strong>the</strong> anchor relative to <strong>the</strong> drilledinsertion site. Tap <strong>the</strong> anchor slowly into <strong>the</strong>hole until <strong>the</strong> laser mark on <strong>the</strong> inner insertershaft is fully buried beneath <strong>the</strong> articularsurface. Because <strong>the</strong> laser etch mark is 3 mmabove <strong>the</strong> anchor head, <strong>the</strong> anchor will becompletely embedded in <strong>the</strong> subchondral bone.Note: Axial alignment of <strong>the</strong> anchor to <strong>the</strong>drilled hole during implantation is imperativefor successful implantation.Figure 10Figure 11Figure 127
Figure 1310.Press <strong>the</strong> inserter against <strong>the</strong> anchor and pullback <strong>the</strong> outer inserter shaft, as it is no longerneeded (Figure 13).11. Continue to maintain pressure on <strong>the</strong> anchorwith <strong>the</strong> inserter and pull back slowly on <strong>the</strong>impaction knob to shorten <strong>the</strong> loop that ispassed around <strong>the</strong> tissue (Figure 14). Continueto pull on <strong>the</strong> impaction knob until <strong>the</strong> loopreduces tightly around <strong>the</strong> inner shaft of <strong>the</strong>inserter. Pull <strong>the</strong> colored suture leader to helpremove any slack from <strong>the</strong> ULTRABRAID Suturecobraid loop.12.Pull back on <strong>the</strong> inserter to disengage it from <strong>the</strong>anchor (Figure 15).13.Continue to pull <strong>the</strong> impaction knob, advancing<strong>the</strong> tissue to <strong>the</strong> repair site, until <strong>the</strong> desiredamount of tissue tension is achieved.Note: It is important to pause during loopreduction and pull on <strong>the</strong> colored suture leaderto remove any slack from <strong>the</strong> suture loop.Figure 148Figure 15
14.Release <strong>the</strong> ULTRABRAID Suture by first pulling<strong>the</strong> suture clockwise. This will “walk” <strong>the</strong>suture around <strong>the</strong> knob, following <strong>the</strong> arrow(Figure 16a), until it slips out of <strong>the</strong> straight slot(Figure 16b). With <strong>the</strong> suture clear of <strong>the</strong> straightslot, reverse direction (Figure 16c), turningcounterclockwise, until <strong>the</strong> suture slips out of <strong>the</strong>“L”-shaped slot (Figure 16d). Remove and discard<strong>the</strong> knob and inserter.15.Remove and discard <strong>the</strong> colored suture leader.Cut <strong>the</strong> ULTRABRAID Suture with <strong>the</strong><strong>Smith</strong> & <strong>Nephew</strong> ELITE Sliding Suture Cutter.Probe <strong>the</strong> repair to check <strong>the</strong> quality of <strong>the</strong>fixation (Figure 17).acbdTechnical Tips and Pearls• To aid in verifying <strong>the</strong> alignment of <strong>the</strong> drilledhole, after removal of <strong>the</strong> drill guide and bit, aguide wire can be inserted to relocate <strong>the</strong> holeand check alignment. Remove <strong>the</strong> guide wirewhen verified.• Do not use excess force when advancing <strong>the</strong><strong>KINSA</strong> Inserter down <strong>the</strong> cannula. Gently pullon <strong>the</strong> colored suture leader only enough tokeep tension on <strong>the</strong> suture and to avoid suturetangling.• During loop reduction, if one leg of suturetightens faster than <strong>the</strong> o<strong>the</strong>r it is best to stoppulling on <strong>the</strong> suture. Use a probe or hook toloosen <strong>the</strong> tight suture leg until its tension isequal to <strong>the</strong> loose suture leg. Continue with <strong>the</strong>reduction, repeating <strong>the</strong> loosening technique asnecessary. Uneven loop reduction is sometimesseen when a twist occurs in <strong>the</strong> suture, makingloop reduction difficult.• The fixation tension can be adjusted by pullingon <strong>the</strong> ULTRABRAID Suture anytime prior tocutting <strong>the</strong> suture. A probe can be used to verify<strong>the</strong> fixation before or after <strong>the</strong> impaction knoband inserter are removed.• If bone quality is of concern, remove <strong>the</strong>impaction knob and inserter early – during <strong>the</strong>tissue reduction step. Introduce and hold a knotpusher against <strong>the</strong> fixation site to support <strong>the</strong>anchor during suture loop reduction.• Do not remove <strong>the</strong> inserter prematurely, as itaids in suture sliding. Once disengaged, do notuse <strong>the</strong> inserter as a knot pusher.Figure 16Figure 179
Additional InstructionPrior to performing this technique,consult <strong>the</strong> Instructions for Useprovided with individualcomponents — includingindications, contraindications,warnings, cautions, andinstructions.Courtesy of <strong>Smith</strong> & <strong>Nephew</strong>, Inc.,Endoscopy DivisionCaution: U.S. Federal law restricts thisdevice to sale by or on <strong>the</strong> order of aphysician.Trademarks of <strong>Smith</strong> & <strong>Nephew</strong>. Certain marksregistered U.S. Patent & Trademark Office.Endoscopy<strong>Smith</strong> & <strong>Nephew</strong>, Inc.Andover, MA 01810USAwww.smith-nephew.com+1 978 749 1000+1 978 749 1108 Fax+1 800 343 5717 U.S. Customer Service©2006 <strong>Smith</strong> & <strong>Nephew</strong>, Inc. All Rights Reserved.09/06 10600180 Rev. B