MT350 Clutch Replacement - Peak Riders
MT350 Clutch Replacement - Peak Riders
MT350 Clutch Replacement - Peak Riders
- No tags were found...

Create successful ePaper yourself
Turn your PDF publications into a flip-book with our unique Google optimized e-Paper software.
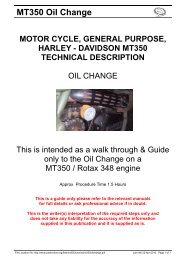
<strong>MT350</strong> <strong>Clutch</strong> <strong>Replacement</strong><br />
MOTOR CYCLE, GENERAL PURPOSE,<br />
HARLEY - DAVIDSON <strong>MT350</strong><br />
TECHNICAL DESCRIPTION<br />
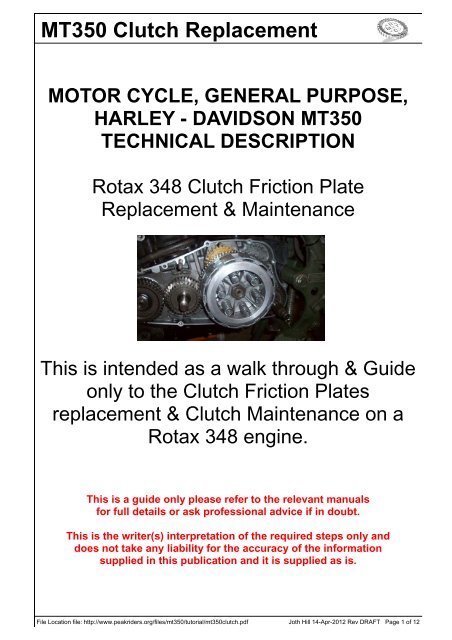
Rotax 348 <strong>Clutch</strong> Friction Plate<br />
<strong>Replacement</strong> & Maintenance<br />
This is intended as a walk through & Guide<br />
only to the <strong>Clutch</strong> Friction Plates<br />
replacement & <strong>Clutch</strong> Maintenance on a<br />
Rotax 348 engine.<br />
This is a guide only please refer to the relevant manuals<br />
for full details or ask professional advice if in doubt.<br />
This is the writer(s) interpretation of the required steps only and<br />
does not take any liability for the accuracy of the information<br />
supplied in this publication and it is supplied as is.<br />
File Location file: http://www.peakriders.org/files/mt350/tutorial/mt350clutch.pdf<br />
Joth Hill 14-Apr-2012 Rev DRAFT Page 1 of 12
<strong>MT350</strong> <strong>Clutch</strong> <strong>Replacement</strong><br />
Amendment Record<br />
Amendment<br />
No.<br />
Amendment<br />
By<br />
Date<br />
DRAFT N/A Joth<br />
16 April 2012<br />
1<br />
Minor Amendments and Note added on<br />
Page 4 Omitting Oil / Seal Changes.<br />
2 Various Enhancements and Amendments<br />
woodruff<br />
Bth2bth2<br />
Nickp500<br />
Bunker<br />
Wirralman<br />
17 April 2012<br />
18 April 2012<br />
3 Slide 50 Updated Joth<br />
27 April 2012<br />
Before carrying out the Procedure ensure you have the current amendment.<br />
File Location file: http://www.peakriders.org/files/mt350/tutorial/mt350clutch.pdf<br />
Joth Hill 14-Apr-2012 Rev DRAFT Page 2 of 12
<strong>MT350</strong> <strong>Clutch</strong> <strong>Replacement</strong><br />
General Tools<br />
13 MM Spanners X 2<br />
4,5,5.5, & 6 mm Allen Keys<br />
13mm socket<br />
24mm socket<br />
10mm spanner<br />
27mm Socket<br />
Torque Wrench 5 to 120Nm<br />
Fluids<br />
Engine Oil<br />
Lithium Grease (Lubricate Seals / O Rings)<br />
Loctite (Medium & Strong)<br />
Copper Slip (Apply where required)<br />
Specialist Tools<br />
TDC Locking Bolt M8 (P/N 241.965)<br />
<strong>Clutch</strong> Locking Tool 132mm Dia (P/N 276.825)<br />
M30x1.5 Extractor Lower Pulley (P/N 276.445)<br />
Top Pulley Puller<br />
Required Parts<br />
1x <strong>Clutch</strong> Cover Gasket (P/N 250-381) *<br />
8x 2.6mm Fibre Plate M41 132mm (P/N259.905) *<br />
1x Starter Gear Cover O ring (P/N 230-310) *<br />
1x Timing Belt (P/N 280-015)<br />
6x <strong>Clutch</strong> Springs (212-N)34.1mm (P/N 239.625)<br />
1x <strong>Clutch</strong> Cable (P/N297.530)<br />
1x Timing Pulley Oil Seals (P/N 930-715)<br />
1x kick Start Shaft Oil Seal (P/N 831-260)<br />
1x Oil Filter<br />
The parts marked * are the parts that you will need for this procedure.<br />
Other Parts were changed as general maintenance.<br />
File Location file: http://www.peakriders.org/files/mt350/tutorial/mt350clutch.pdf<br />
Joth Hill 14-Apr-2012 Rev DRAFT Page 3 of 12
<strong>MT350</strong> <strong>Clutch</strong> <strong>Replacement</strong><br />
General Torque Values<br />
Where Torque settings are not detailed the following are a guide.<br />
M5<br />
M6<br />
M8<br />
M10<br />
7-8 Nm<br />
11-14 Nm<br />
24-27 Nm<br />
51-54 Nm<br />
Minimum Procedure<br />
If you need to replace the clutch plates in an emergency or quickly you can omit the<br />
references to the oil / seal changes. You will need to remove the battery and lay the bike<br />
on its side. Protect the area just in case some oil spills out of the filler cap or engine.<br />
Omit Slides 2, 3, 4, 5, 6, 29, 30, 47, 48, 49, 50, 51, 52 & 53<br />
File Location file: http://www.peakriders.org/files/mt350/tutorial/mt350clutch.pdf<br />
Joth Hill 14-Apr-2012 Rev DRAFT Page 4 of 12
<strong>MT350</strong> <strong>Clutch</strong> <strong>Replacement</strong><br />
1. Remove Panniers Support Bar. 2. Drop the Right Foot Rest<br />
3. Remove the Oil Drain Plug and drain out the<br />
oil. (Hold a bucket up to the plug when removing<br />
as oil shoots out Horizontally. Then clean the<br />
magnet of metal filings.<br />
4. Remove the Sump Guard and the Sump drain<br />
plugs and drain out the oil. Also clean the 2nd<br />
magnet of metal filings.<br />
5. Remove the Oil Filter by removing the 3 bolts<br />
holding the Plastic Chain Guard on and then the<br />
3 oil filter cover screws and pull out the filter.<br />
6. The non return oil valve is located behind the<br />
oil filter. This can be replaced while the filter is<br />
out if the oil level is falling in the reservoir when<br />
the bike is stood. (Use Correct Size Screwdriver).<br />
7. Remove the 4 timing cover bolts with a 5mm<br />
Allen Key. (Note: Screws are Different Lengths)<br />
8. Remove the 4 bolts holding on the starter gear<br />
cover and remove the Cog & 2 washers.<br />
File Location file: http://www.peakriders.org/files/mt350/tutorial/mt350clutch.pdf<br />
Joth Hill 14-Apr-2012 Rev DRAFT Page 5 of 12
<strong>MT350</strong> <strong>Clutch</strong> <strong>Replacement</strong><br />
9. Remove the bolt circled above using a 6mm<br />
Allen Key . Locate the V in the fly wheel through<br />
the hole using a torch and screw in the crank<br />
locking bolt (the crank locking bolt is a M8 bolt<br />
with the end of the thread is tapered.)<br />
10. Mark the rotation of the Timing belt if you not<br />
replacing it.<br />
12. Remove the Timing Belt Tension bearing.<br />
11. Check the markings on the Pulleys and ensure<br />
they are all visible and Marked. Loosen the<br />
bolts marked with arrows.<br />
13. Remove the Timing Belt Runner Bearing.<br />
14. Remove the Bolt and washers on the top<br />
pulley, Remove the Belt then remove the pulley<br />
using the pulley removal tool.<br />
15. Remove the lower pulley nut and remove the<br />
pulley using the special removal tool.<br />
File Location file: http://www.peakriders.org/files/mt350/tutorial/mt350clutch.pdf<br />
Joth Hill 14-Apr-2012 Rev DRAFT Page 6 of 12
<strong>MT350</strong> <strong>Clutch</strong> <strong>Replacement</strong><br />
16. Remove timing belt cover stud. 17. Remove the Timing belt back plate.<br />
18. Remove the Gear Lever and Kick Start<br />
Lever by removing the 2 Allen Bolts. Then remove<br />
the Circlip and Washer.<br />
19. Remove the bolts around the casing.<br />
Make a note of which ones come from which<br />
hole as they are different lengths.<br />
20. Remove the Casing and disconnect the<br />
clutch cable.<br />
21. Remove the 6 Bolts holding the <strong>Clutch</strong> cover<br />
plate on.<br />
22. Remove the 6 Springs.<br />
(2 Shown in Place)<br />
23. Remove the nut in the Centre of the clutch<br />
basket using the basket spanner. Then pull out<br />
the basket assembly.<br />
File Location file: http://www.peakriders.org/files/mt350/tutorial/mt350clutch.pdf<br />
Joth Hill 14-Apr-2012 Rev DRAFT Page 7 of 12
<strong>MT350</strong> <strong>Clutch</strong> <strong>Replacement</strong><br />
8nr Friction Plates 2.6mm Thick<br />
7nr Plain Plates 1.25mm Thick<br />
1nr Plain Plate 1.5mm Thick<br />
24. Remove the Friction and steel Plates and<br />
keep them in order as one of the plain rings is a<br />
different thickness. Re assemble with the new<br />
Friction plates and plain rings as required.<br />
(Measure clutch plates pack - should be 31.5mm or within 3mm)<br />
25. Replace the Basket and plates on the bike,<br />
then put the <strong>Clutch</strong> Hub, lock washer and the<br />
bolt on with “Strong thread lock” and torque up<br />
to 120 Nm.<br />
120 Nm<br />
26. Bend back the Nut locking Washer, If bent<br />
more than twice then replace with a new<br />
washer.<br />
27. Replace the Springs.<br />
6<br />
1<br />
3<br />
5<br />
4<br />
2<br />
28. Replace the <strong>Clutch</strong> cover and tighten the 6<br />
Bolts holding the <strong>Clutch</strong> cover plate on. Tighten<br />
in a Alternate pattern<br />
29. While the cover is off I took the time to<br />
change the two seals. Pre grease the seals<br />
WARNING never insert seals / O Rings dry.<br />
30. Use a socket to push in the seals.<br />
31. Put on the casing gasket.<br />
File Location file: http://www.peakriders.org/files/mt350/tutorial/mt350clutch.pdf<br />
Joth Hill 14-Apr-2012 Rev DRAFT Page 8 of 12
<strong>MT350</strong> <strong>Clutch</strong> <strong>Replacement</strong><br />
32. Re connect the clutch cable and refit the<br />
casing, insert the bolts and tighten<br />
each bolt to 8 Nm (Read 33 First)<br />
8 Nm<br />
33. There are 2 washers and they go on the kick<br />
shaft before the case goes on. Circlip goes on<br />
after the case.<br />
See Manual for Full Instructions<br />
34. Refit the O Ring to the Gear Lever.<br />
Use tape around the splines to protect the O<br />
Ring from damage when sliding the O Ring over<br />
the splines.<br />
35. Adjust the clutch by screwing in the centre<br />
screw until it bites and then loosed 1/4 of a turn<br />
and tighten the lock nut. Check the clutch operation<br />
and then replace the cover.<br />
36 Refit the Starter Cog first by fitting the metal<br />
washer then cog then another washer. Fit the<br />
cover and tighten up the 4 bolts.<br />
37. Replace the lower pulley, lock washer and<br />
nut “Strong thread lock” on the<br />
thread and torque to 100 Nm.<br />
100 Nm<br />
38. Refit the Timing Back Plate. The back plate<br />
requires a bead of sealant between it and the<br />
casing.<br />
39. Install the two retaining bolts and replace<br />
the timing cover stud & Washer.<br />
File Location file: http://www.peakriders.org/files/mt350/tutorial/mt350clutch.pdf<br />
Joth Hill 14-Apr-2012 Rev DRAFT Page 9 of 12
<strong>MT350</strong> <strong>Clutch</strong> <strong>Replacement</strong><br />
40. Install the Timing Belt Runner<br />
Bearing “Medium thread lock”<br />
on the thread and torque to 20 Nm.<br />
20 Nm<br />
41. Refit the top Pulley and Spacers.<br />
Ensure the Two marks line up.<br />
42. Install the Large Washer, Lock Washer and<br />
Nut on the Top Pulley. Note : Put the Timing belt<br />
on temporarily to assist in Torquing<br />
the Bolt.<br />
20 Nm<br />
Note: See Slide 11 for realigning the Top Pulley.<br />
43. Install the Timing Belt Tension<br />
Bearing “Medium thread<br />
35 Nm<br />
lock” on the thread and torque to<br />
35 Nm. Ensure the belt can be twisted through<br />
90 Deg between the Top Pulley and the Tension<br />
Bearing. (See Manual for Detailed Settings.)<br />
44. Remove the Fly Wheel Locking Bolt and replace<br />
with the original bolt & Copper Washer.<br />
45. Re fit the Timing Belt cover and tighten the 4<br />
Allen bolts.<br />
46. Replace Kick Start.<br />
Replace Gear Lever.<br />
27 Nm<br />
8 Nm<br />
File Location file: http://www.peakriders.org/files/mt350/tutorial/mt350clutch.pdf<br />
47. Replace the Drain Plug & Copper<br />
Compression Washer. Torque 20 Nm.<br />
20 Nm<br />
Joth Hill 14-Apr-2012 Rev DRAFT Page 10 of 12
<strong>MT350</strong> <strong>Clutch</strong> <strong>Replacement</strong><br />
48. Insert a New Oil Filter. 49. Refit the Oil Filter Cover and Rataining<br />
Screws.<br />
50. Re Fit the Plastic Chain Guard. 51. Refit the Sump Plugs with new<br />
copper compression washers 20Nm.<br />
Then Refit the Metal Sump Guard.<br />
20 Nm<br />
52. Refit the Foot Rest and tighten<br />
the 2 bolts to 24 - 27 Nm.<br />
24-27 Nm<br />
53. Fill With Oil, Ensure you do not over fill.<br />
54. Pull in the <strong>Clutch</strong> Lever and Turn over the<br />
bike without starting to allow oil to coat the new<br />
Plates and Engine Parts.<br />
55. Run the Bike checking the oil level and fill to<br />
the correct level and replace the Filler Cap.<br />
File Location file: http://www.peakriders.org/files/mt350/tutorial/mt350clutch.pdf<br />
Joth Hill 14-Apr-2012 Rev DRAFT Page 11 of 12
<strong>MT350</strong> <strong>Clutch</strong> <strong>Replacement</strong><br />
END OF PROCEDURE<br />
File Location file: http://www.peakriders.org/files/mt350/tutorial/mt350clutch.pdf<br />
Joth Hill 14-Apr-2012 Rev DRAFT Page 12 of 12