Download Tribute 8040 Manual - Hearthstone Stoves
Download Tribute 8040 Manual - Hearthstone Stoves
Download Tribute 8040 Manual - Hearthstone Stoves

You also want an ePaper? Increase the reach of your titles
YUMPU automatically turns print PDFs into web optimized ePapers that Google loves.
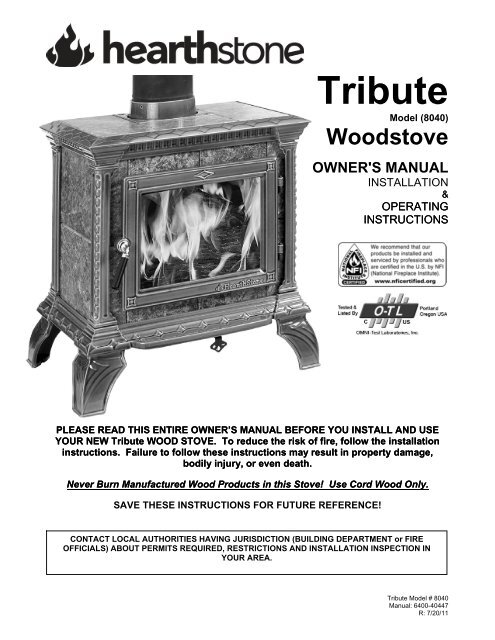
<strong>Tribute</strong><br />
Model (<strong>8040</strong>)<br />
Woodstove<br />
OWNER'S MANUAL<br />
INSTALLATION<br />
&<br />
OPERATING<br />
INSTRUCTIONS<br />
PLEASE READ THIS ENTIRE OWNER’S MANUAL BEFORE YOU INSTALL AND USE<br />
YOUR NEW <strong>Tribute</strong> WOOD STOVE. To reduce the risk of fire, follow the installation<br />
instructions. Failure to follow these instructions may result in property damage,<br />
bodily injury, or even death.<br />
Never Burn Manufactured Wood Products in this Stove! Use Cord Wood Only.<br />
SAVE THESE INSTRUCTIONS FOR FUTURE REFERENCE!<br />
CONTACT LOCAL AUTHORITIES HAVING JURISDICTION (BUILDING DEPARTMENT or FIRE<br />
OFFICIALS) ABOUT PERMITS REQUIRED, RESTRICTIONS AND INSTALLATION INSPECTION IN<br />
YOUR AREA.<br />
<strong>Tribute</strong> Model # <strong>8040</strong><br />
<strong>Manual</strong>: 6400-40447<br />
R: 7/20/11
Intentionally Blank<br />
<strong>Hearthstone</strong> Quality Home Heating Products, Inc. ® 1<br />
<strong>Tribute</strong> Model <strong>8040</strong>
Table of Contents<br />
INTRODUCTION ..................................................................................................................... 1<br />
SAFETY AND GOOD PRACTICES ........................................................................................ 2<br />
CODES ............................................................................................................................................................. 2<br />
SAFETY INFORMATION ....................................................................................................................................... 2<br />
EMERGENCY PROCEDURES ............................................................................................................................... 3<br />
SPECIFICATIONS ..................................................................................................................4<br />
INSTALLATION ...................................................................................................................... 5<br />
UNPACKING....................................................................................................................................................... 5<br />
INSTALLING YOUR STOVE .................................................................................................................................. 5<br />
HEARTH REQUIREMENTS AND FLOOR PROTECTION ............................................................................................ 5<br />
OUTSIDE AIR SUPPLY ........................................................................................................................................ 7<br />
CLEARANCES TO COMBUSTIBLES....................................................................................................................... 8<br />
VENTING COMPONENTS AND CONFIGURATION ............................................................ 11<br />
CHIMNEY & CONNECTOR REQUIREMENTS......................................................................................................... 11<br />
CONNECTING YOUR WOODSTOVE .................................................................................................................... 12<br />
INSTALLING IN A MOBILE HOME........................................................................................................................ 15<br />
OPERATION ......................................................................................................................... 16<br />
CHOOSING FIREWOOD..................................................................................................................................... 16<br />
BUILDING A FIRE ............................................................................................................................................. 17<br />
CONTROLS AND FEATURES.............................................................................................................................. 17<br />
BREAKING IN YOUR WOOD STOVE ................................................................................................................... 17<br />
NORMAL OPERATION....................................................................................................................................... 18<br />
BURN RATE..................................................................................................................................................... 19<br />
REMOVAL AND DISPOSAL OF ASHES................................................................................................................ 20<br />
MAINTENANCE ....................................................................................................................21<br />
CREOSOTE FORMATION AND NEED FOR REMOVAL ........................................................................................... 21<br />
CAST IRON...................................................................................................................................................... 21<br />
STONE............................................................................................................................................................ 21<br />
GASKETS ........................................................................................................................................................ 22<br />
GLASS ............................................................................................................................................................ 22<br />
TROUBLESHOOTING .......................................................................................................... 24<br />
TROUBLESHOOTING GUIDE .............................................................................................................................. 25<br />
REPLACEMENT PARTS & OPTIONAL ACCESSORIES .................................................... 26<br />
SAFETY LABEL ...................................................................................................................27<br />
<strong>Hearthstone</strong> Quality Home Heating Products, Inc. ® 1<br />
<strong>Tribute</strong> Model <strong>8040</strong>
Congratulations! You have just invested in a most<br />
unique wood burning stove – the <strong>Tribute</strong> Wood<br />
Burning Stove from <strong>Hearthstone</strong> Quality Home<br />
Heating Products Inc®. The <strong>Tribute</strong> Model –<strong>8040</strong> is<br />
a clean burning EPA certified, non-catalytic wood<br />
burning stove. At 1.1 cubic feet capacity and 2.97<br />
grams per hour particulate emissions you can be<br />
proud to join the <strong>Hearthstone</strong> family with our Premier<br />
Soapstone Wood-Burning Stove. The front door,<br />
along with the generous depth allow for loading of<br />
wood up to 16 inches long!<br />
Your purchase insures years of clean, comfortable<br />
heat with minimal maintenance. You will receive the<br />
benefits of the most advanced technology in wood<br />
burning without the cost and maintenance<br />
requirements of a catalytic stove. The <strong>Tribute</strong><br />
blends modern technology with the unique beauty<br />
and heating qualities of soapstone, long known for<br />
its even heat production and long heat-retaining<br />
ability. We trust that you will appreciate the quality of<br />
our handcrafted product.<br />
Please read this manual in its entirety. Its purpose<br />
is to familiarize you with your stove's safe<br />
installation, proper break-in, operation and<br />
maintenance. It contains information that will be<br />
useful to you now, and in years to come, so keep it<br />
handy and refer to it as needed.<br />
Use these instructions as well as national, state, and<br />
local building codes to install your stove. Be sure to<br />
maintain the designated stovepipe and stove<br />
clearances to walls, ceilings, hearth, and other<br />
combustible surfaces. This will help reduce the risk<br />
of fire. Failure to follow these instructions can result<br />
in property damage, bodily injury, and even death.<br />
Locate your stove in a safe, convenient, open area;<br />
away from traffic flow, doors, and hallways; and near<br />
a chimney and chimney connector. Review the<br />
proper clearance measurements from combustible<br />
surfaces. You can safely reduce required clearances<br />
in most cases by using the, optional, rear heat<br />
shield, and also with a special connector pipe and<br />
special wall coverings as specified by this manual,<br />
the NFPA 211 codes, and your local authorities<br />
having jurisdiction.<br />
Keep furniture, drapes, curtains, wood, paper, and<br />
other combustibles far away from the stove. Never<br />
install the stove in a location where gasoline,<br />
kerosene, charcoal lighter fluid or other flammable<br />
liquids are used or stored.<br />
Introduction<br />
Locate the stove centrally in your living area to allow<br />
the heat to travel naturally to distant rooms. We<br />
recommend that you do not locate your stove in an<br />
uninsulated basement. The amount of radiant<br />
energy required to heat concrete basement walls is<br />
so great that most of the usable heat is absorbed by<br />
them and lost.<br />
SAFETY NOTICE: A HOUSE FIRE MAY RESULT IF<br />
THIS STOVE IS NOT INSTALLED PROPERLY.<br />
FOR YOUR SAFETY, CAREFULLY FOLLOW THE<br />
INSTALLATION DIRECTIONS. CONTACT LOCAL<br />
BUILDING OR FIRE OFFICIALS ABOUT<br />
RESTRICTIONS AND INSTALLATION INSPECTION<br />
IN YOUR AREA.<br />
The performance of your stove depends on many<br />
variables. Since all installations are unique, the<br />
general information and operating procedures<br />
presented here can only serve as useful guidelines<br />
rather than hard and fast rules. Should you have<br />
any questions, do not hesitate to contact your dealer<br />
for additional information.<br />
Validate your warranty - return your warranty<br />
registration card to <strong>Hearthstone</strong> within 30 days of<br />
purchase. Once your warranty is validated by<br />
returning your warranty card, contact your dealer for<br />
any necessary warranty service.<br />
This stove is manufactured and warranted by:<br />
<strong>Hearthstone</strong> Quality Home Heating Products Inc®<br />
317 Stafford Ave.<br />
Morrisville, Vermont 05661-8695<br />
www.hearthstonestoves.com<br />
inquiry@hearthstonestoves.com<br />
<strong>Hearthstone</strong> Quality Home Heating Products, Inc. ® 1<br />
<strong>Tribute</strong> Model <strong>8040</strong>
Safety and Good Practices<br />
CODES<br />
When you install your <strong>Tribute</strong> wood stove, it is<br />
imperative that you adhere to all local codes, which<br />
can be obtained from either of the following two<br />
National sources:<br />
American National Standards Institute, Inc.<br />
(ANSI)<br />
1430 Broadway<br />
New York, NY 10018<br />
www.ansi.org<br />
National Fire Protection Association, Inc. (NFPA)<br />
Battery March Park<br />
Quincy, MA 02269<br />
www.nfpa.org<br />
If you are installing your <strong>Tribute</strong> in a mobile home,<br />
follow the guidelines described in the Manufactured<br />
Home Construction and Safety Standard, Title 24<br />
CFR, Part 3280 (United States).<br />
SAFETY INFORMATION<br />
Read and understand this Owner's <strong>Manual</strong><br />
thoroughly before installing and using this<br />
stove.<br />
Make sure to install your stove:<br />
According to the manufacturer's<br />
recommendations.<br />
In accordance with all applicable codes.<br />
With the proper sized chimney.<br />
When using your stove:<br />
Warn children and others unfamiliar with<br />
woodstoves of the danger of touching hot,<br />
radiating surfaces of your stove. For your<br />
additional safety, obtain hearth and stove guards<br />
through your local dealer.<br />
Follow recommended break-in procedure as<br />
outlined in this manual.<br />
Burn natural wood only. Higher efficiencies and<br />
lower emissions result when burning air-dried,<br />
seasoned wood, as compared to green or<br />
freshly cut wood.<br />
Use caution when loading firewood into a hot<br />
stove.<br />
Keep the door closed at all times except when<br />
loading wood.<br />
Inspect the stovepipe, chimney connector and<br />
chimney, as recommended.<br />
Follow these safety precautions:<br />
Never modify this stove in any way, especially<br />
the primary air control system.<br />
Never burn kiln dried wood, painted or treated<br />
wood, solvents, trash, plywood, colored or<br />
glossy paper, artificial logs, cardboard, coal,<br />
garbage or driftwood. Especially, do not burn<br />
coal in this stove.<br />
Never use gasoline type fuel, kerosene,<br />
charcoal lighter fluid, or other liquid fuels or solid<br />
fire starters to start or invigorate the fire. These<br />
fuels can possibly generate carbon monoxide,<br />
which can deplete the supply of oxygen. Keep<br />
all such materials away from the stove.<br />
Never use a wood grate or other device to<br />
elevate the fire.<br />
Do Not allow logs to rest against or otherwise<br />
come in contact with the glass when the door is<br />
closed.<br />
Do Not slam the door or use the door to force<br />
wood in to the stove.<br />
Never over-fire your stove. (See page 19)<br />
Never put articles of clothing or candles on a hot<br />
stove.<br />
Do Not connect the stove to a flue that is<br />
serving another appliance.<br />
WARNING: FIREPLACE STOVES EQUIPPED WITH<br />
DOORS SHOULD BE OPERATED ONLY WITH<br />
DOORS FULLY OPEN OR DOORS FULLY<br />
CLOSED. IF DOORS ARE LEFT PARTLY OPEN,<br />
GAS AND FLAME MAY BE DRAWN OUT OF THE<br />
FIREPLACE STOVE OPENING, CREATING RISKS<br />
FROM BOTH FIRE AND SMOKE.<br />
Other safety guidelines<br />
As a general rule, keep all movable combustible<br />
items such as furniture, drapes, clothing, and<br />
other items, at least 36" (0.92 m) from the stove.<br />
Install a smoke detector, preferably in an area<br />
away from your wood stove.<br />
Keep a fire extinguisher handy. We recommend<br />
the type rated "A B C."<br />
Dispose of ashes properly. (See page 20)<br />
Keep children and pets away from the stove;<br />
they could be burned by touching a hot stove.<br />
Clean your chimney system as needed. (See<br />
page 21)<br />
PERIODIC CHECKLIST<br />
Perform each of these tasks at the specified<br />
intervals.<br />
At the End of Every Week:<br />
Empty ashes from the firebox sooner if the<br />
firebox begins to fill up.<br />
<strong>Hearthstone</strong> Quality Home Heating Products, Inc. ® 2<br />
<strong>Tribute</strong> Model <strong>8040</strong>
At the Beginning of Every Other Month:<br />
A visual inspection of the chimney connector<br />
and chimney for creosote is recommended<br />
depending upon your use of the stove. (Please<br />
see page 21)<br />
Check door seals using the "dollar bill test." -<br />
When the fire is out and the stove is cool, shut<br />
the door on a dollar bill. If the bill pulls out<br />
without any resistance, then your stove’s door<br />
isn't sealed properly. To tighten the seal,<br />
change the door gasket. (Refer to page 22.)<br />
At the End of Every Season:<br />
Dismantle the chimney connector and clean it<br />
thoroughly. Replace any pieces that show signs<br />
of rust or deterioration.<br />
Inspect and, if necessary, clean your chimney.<br />
Thoroughly clean out the inside of the stove.<br />
Inspect all door gasket material and replace if<br />
worn, frayed, cracked or extremely hard.<br />
EMERGENCY PROCEDURES<br />
If you have a stovepipe or chimney fire, follow these<br />
instructions:<br />
1. If the fire is too threatening, leave the area and<br />
call the fire department immediately! If not,<br />
perform the next three steps.<br />
2. Close the primary air control.<br />
3. Close the stovepipe damper (if present).<br />
4. Keep the stove door closed!<br />
WARNING: DO NOT ATTEMPT TO PUT OUT A<br />
STOVEPIPE OR CHIMNEY FIRE BY THROWING<br />
WATER ONTO THE STOVE, STOVEPIPE, OR<br />
CHIMNEY. THE EXTREMELY HIGH<br />
TEMPERATURE ASSOCIATED WITH SUCH FIRES<br />
CAN CAUSE INSTANTANEOUS STEAM AND<br />
SERIOUS BODILY HARM.<br />
Once the chimney fire has expired, leave the primary<br />
air control closed and let the fire in the stove die out<br />
completely. The stove should not be fired again until<br />
the stove, stovepipe, and chimney are all thoroughly<br />
inspected for any sign of damage. You must correct<br />
any damage before using your stove again.<br />
HEARTHSTONE’S THERMO-CERAMIC BAFFLE<br />
SYSTEM<br />
To enhance the combustion efficiency and reduce<br />
the emissions of the fire in your stove <strong>Hearthstone</strong><br />
QHHP, Inc. has developed an advanced THERMO-<br />
CERAMIC baffle system. This system uses a<br />
lightweight, durable ceramic material above the<br />
burner tubes to maintain the high temperatures in<br />
the secondary combustion area and maintain the<br />
low emission – high efficiency combustion you<br />
desire. This new technology will not corrode, rust<br />
dissolve or lose its strength, however it is vulnerable<br />
to puncture or cracking due to rough handling.<br />
PLEASE EXERCISE CARE WHEN LOADING<br />
WOOD OR CLEANING YOUR STOVE, NOT TO<br />
DAMAGE THE THERMO-CERAMIC BAFFLE<br />
Located directly above the burner tubes in the<br />
firebox, this white sheet of material will break if wood<br />
or cleaning brushes impact it. Be careful when<br />
loading and cleaning your stove to not break this<br />
material. If this piece has been fractured or a hole is<br />
punctured, it will cause the stove to function<br />
improperly. You must replace the board through a<br />
qualified <strong>Hearthstone</strong> dealer.<br />
<strong>Hearthstone</strong> Quality Home Heating Products, Inc. ® 3<br />
<strong>Tribute</strong> Model <strong>8040</strong>
Maximum Output:<br />
Size of Heated Area:<br />
Firebox Capacity:<br />
36,000 BTUs per hour using<br />
cordwood (based on<br />
independent laboratory test<br />
results).<br />
1,300 square feet<br />
(maximum).<br />
Maximum Log Length: 16" (53cm)<br />
1.2 cubic feet (.031 cubic<br />
meters) or 22 pounds of<br />
wood (The amount and<br />
weight of wood contained<br />
per cubic foot of firebox<br />
volume can vary from 15 to<br />
36 lbs. per cubic foot<br />
depending on type of wood,<br />
moisture content, packing<br />
density and other factors.<br />
As a constant for<br />
comparison and test<br />
purposes, we are assuming<br />
20 lbs. of seasoned<br />
hardwood per cubic foot of<br />
firebox volume).<br />
Specifications<br />
Stove Dimensions:<br />
Door Size:<br />
Stovepipe Size:<br />
Metal Chimney:<br />
Masonry Chimney:<br />
Flue Exit:<br />
Actual Weight<br />
Height 25-1/2" (65 cm)<br />
Width 24" (61 cm)<br />
Depth 18" (45.7 cm)<br />
9.5" high x 12-3/4" wide<br />
(24.1 x 32.4 cm)<br />
6" (152 mm) diameter<br />
6" (152 mm) inside diameter<br />
6” (15.2cm) inside diameter<br />
(round flue) 8” x 8” (20 x<br />
20cm) (square flue)<br />
Top exit only<br />
318 pounds<br />
Optional Equipment Rear Heat Shield 90-68400<br />
Outside Air Kit 90-53400<br />
Blower 90-57210<br />
Screen 90-69400<br />
Soapstone Finish 1 Polished Gray Soapstone<br />
Castings Finish Painted Matte and Porcelain<br />
Enamel<br />
1 Polished gray soapstone is a natural product and will vary<br />
from stone to stone. Various amounts of gray, charcoal, blue<br />
and green will be evident according to the natural<br />
composition of the stone.<br />
Figure 1<br />
<strong>Hearthstone</strong> Quality Home Heating Products, Inc. ® 4<br />
<strong>Tribute</strong> Model <strong>8040</strong>
UNPACKING<br />
<strong>Hearthstone</strong> <strong>Stoves</strong> packages your <strong>Tribute</strong> stove<br />
with the greatest care, so that it ships safely. Under<br />
certain circumstances, however, damage can occur<br />
during transit and handling. When you receive your<br />
stove, unpack it carefully, inspecting your stove and<br />
all parts for damage. Also, make sure that all parts<br />
are included in the box. If any parts are damaged or<br />
missing, please contact your dealer immediately.<br />
INSTALLING YOUR STOVE<br />
First, you must decide where your stove will reside.<br />
After choosing an appropriate spot, inspect this<br />
location to make sure that the stove will have<br />
enough clearance to combustible materials that<br />
would surround the stove. These combustibles can<br />
include walls, floor, ceiling, fireplace, and chimney.<br />
You must carefully consider the clearances to all of<br />
these combustibles before actually connecting your<br />
stove. When considering these clearances, also<br />
decide the kind of floor the stove will rest on.<br />
Please use this section to plan how to locate your<br />
stove in your particular location. Consider both the<br />
clearances of the stovepipe and the stove itself to<br />
the surrounding combustibles.<br />
The soapstone walls of the <strong>Tribute</strong> soapstone stove<br />
produce and even, radiant heat. Locate the stove<br />
centrally in your living area to allow the heat to travel<br />
naturally to distant rooms. It is not recommended<br />
that you locate your stove in an uninsulated<br />
basement. The amount of radiant energy required to<br />
heat concrete basement walls is so great that most<br />
of the usable heat is absorbed by them and lost.<br />
Read this chapter to obtain a sound understanding<br />
of how to properly install your stove.<br />
If you use a close clearance connector pipe, it must<br />
be tested to UL standards and listed. Check the<br />
Installation<br />
listing of your pipe for actual clearances. The<br />
diagrams in this manual represent typical<br />
installations, but are specific to the Simpson Dura-<br />
Vent DVL brand. Clearances cannot be reduced<br />
without the use of close clearance connector pipe<br />
and/or by protecting the surfaces per NFPA 211<br />
standards.<br />
CLEARANCES TO NFPA 211 PROTECTED<br />
SURFACES<br />
You can reduce the clearances to combustible<br />
surfaces by using any National Fire Protection<br />
Agency (NFPA) approved wall protection system.<br />
Please refer to NFPA 211 for specifications and<br />
complete details. You can obtain this information<br />
directly from the NFPA (U.S. Only).<br />
National Fire Protection Agency<br />
Batterymarch Park<br />
Quincy, MA 02269<br />
1-800-344-3555<br />
1-617-770-3000<br />
www.nfpa.org<br />
HEARTH REQUIREMENTS AND FLOOR<br />
PROTECTION<br />
Combustible flooring must be protected with a UL<br />
listed hearth pad, or in the absence of fabricate one<br />
with an R-value of 0.6 (slate, marble tiles, or other<br />
noncombustible material can be used for this<br />
purpose). The floor protection must extend beyond<br />
the body of the stove at the minimum as follows:<br />
<br />
<br />
<br />
SIDES 3-1/2” (20 cm Canada)<br />
REAR 0” (20 cm Canada)<br />
FRONT 16” (45 cm Canada)<br />
When installing the <strong>Tribute</strong> with a rear exit, the<br />
minimum area to be covered by floor protection is<br />
under the chimney connector and 2” (51 mm)<br />
beyond each side.<br />
<strong>Hearthstone</strong> Quality Home Heating Products, Inc. ® 5<br />
<strong>Tribute</strong> Model <strong>8040</strong>
Note: Dimensions shown in figure above are<br />
measured from the body of the stove unless<br />
otherwise stated.<br />
Floor protector’s come with various types of<br />
specifications. To convert a floor protector’s<br />
specification to an R-value, do one of the following:<br />
If the R-value is given, use that value—no<br />
conversion is needed.<br />
If a k-factor is given with a required<br />
thickness (T) in inches, use this formula:<br />
R-value = 1/k x T<br />
If a C-factor is given, use the formula:<br />
R-value = 1/C<br />
To determine the R-value of the proposed alternate<br />
floor protector:<br />
<br />
<br />
Use either the k-factor or the C-factor<br />
formula explained above to convert<br />
specifications not expressed as R-values.<br />
For multiple layers of floor protectors, simply<br />
add the R-values of each layer to determine<br />
the overall R-value of the layers.<br />
If the overall R-value of your setup is greater than<br />
the R-value of the specified floor protector, then your<br />
setup is acceptable.<br />
Figure 2: Minimum Hearth Pad Dimensions<br />
Noncombustible Material Thickness R-<br />
value<br />
Gypsum or plaster board1 0.5” 0.45<br />
Wallboard, Wonderboard, or Durock1 0.5” 0.20<br />
Ceramic board (Fiberfrax or Micor)1 0.5” 1.10<br />
Nominal solid clay brick1 1” 0.20<br />
Ceramic wall or floor tile1 0.25” 0.01<br />
Mineral wool insulation2 1” 3.12<br />
Cement mortar2 1” 0.20<br />
Horizontal still air2 * 0.128” 0.92<br />
Handle Assembly<br />
Locate the handle, bolt, and washers enclosed in the<br />
envelope with the owner’s manual. Place the<br />
washers on the bolt and then push it through the<br />
handle so that the bolt threads extend through the<br />
bottom of the handle. Using a slotted screwdriver,<br />
turn the bolt into the chrome latch on the door, until<br />
snug.<br />
Handle Operation<br />
Front Door – when closed, the handle will be in the 7<br />
o’clock position. To open the front door, rotate the<br />
latch clockwise to approximately the 10 o’clock<br />
position.<br />
1<br />
According to Intertek Testing Services, Inc.<br />
2<br />
According to ASHRAE Handbook of<br />
Fundamentals 1977<br />
<strong>Hearthstone</strong> Quality Home Heating Products, Inc. ® 6<br />
<strong>Tribute</strong> Model <strong>8040</strong>
Figure 3: Door Handle Detail<br />
OUTSIDE AIR SUPPLY<br />
(Kit # 90-53400)<br />
An outside air source may be connected directly to<br />
this stove using an optional outside air kit. The<br />
advantage of providing outside air directly to the<br />
stove is that the air used by the stove for combustion<br />
is taken from outside of the residence rather than<br />
from within the room where the stove is located.<br />
With outside air supplied directly to the stove, drafts<br />
within the room and air infiltration within the building<br />
are reduced. Use of the outside air kit may also<br />
improve stove performance in a particularly airtight<br />
house.<br />
The outside air kit for this stove allows for the direct<br />
connection of the stove's air intake to a minimum 3"<br />
(76 mm) diameter duct (supplied by others) which<br />
leads to the outside of the house. When considering<br />
placement of the duct from the outside of the house<br />
to the hearth, keep in mind the need to avoid<br />
structural members of the house. The outside air kit<br />
will attach to the back of the stove.<br />
The termination of the duct on the outside wall of the<br />
stove should be located in such a manner so as to<br />
preclude the possibility of obstruction by snow,<br />
leaves or other material and should be screened<br />
against animals and insects. The termination should<br />
be screened using ¼” x ¼” mesh rodent screen and<br />
be covered with a rain/wind proof hood (flex pipe,<br />
outside termination, mesh, and hood supplied by<br />
others) Contact your dealer for availability).<br />
<strong>Hearthstone</strong> Quality Home Heating Products, Inc. ® 7<br />
<strong>Tribute</strong> Model <strong>8040</strong>
CLEARANCES TO COMBUSTIBLES<br />
Clearances may only be reduced by means approved by the regulatory authority.<br />
It is very important to follow minimum clearances for chimney connectors to combustibles such as walls and<br />
ceilings when installing the stove near non-combustible surfaces.<br />
Figure 4: <strong>Tribute</strong> <strong>8040</strong> Clearances<br />
<strong>Tribute</strong> Clearances Parallel Corner<br />
Clearances (inches) A B C D E G H I J K<br />
Single wall stove pipe without heat 16.<br />
shield<br />
5 19 21 24 27.5 13 25.<br />
17 5 28.5 68.25<br />
16. 14. 16. 19.<br />
Single wall stove pipe with heat shield 5 5 5 5 27.5 13 19.<br />
11 5 22.5 59.75<br />
Double wall pipe w/ optional heat 16.<br />
15.<br />
shield<br />
5 8 10 13 27.5 13 7 5 18.5 54<br />
Figure 5: <strong>Tribute</strong> <strong>8040</strong> Allowable Minimum Alcove Clearances<br />
<strong>Hearthstone</strong> Quality Home Heating Products, Inc. ® 8<br />
<strong>Tribute</strong> Model <strong>8040</strong>
Figure 6: <strong>Tribute</strong> <strong>8040</strong> Fireplace Mantle and Trim Minimum Clearances<br />
<strong>Hearthstone</strong> Quality Home Heating Products, Inc. ® 9<br />
<strong>Tribute</strong> Model <strong>8040</strong>
Figure 7: Chimney Connector Clearances<br />
<strong>Hearthstone</strong> Quality Home Heating Products, Inc. ® 10<br />
<strong>Tribute</strong> Model <strong>8040</strong>
Venting Components and Configuration<br />
WARNING: DO NOT CONNECT THIS UNIT TO A<br />
CHIMNEY FLUE SERVING ANOTHER APPLIANCE!<br />
CHIMNEY & CONNECTOR REQUIREMENTS<br />
Single wall connector is 24 MSG or 25 MSG<br />
blued steel stovepipe.<br />
Double wall connector (close clearance pipe)<br />
which must be used with a listed factory-built<br />
“Type HT" chimney also may be used with a<br />
masonry chimney to reduce clearances, is<br />
available from several manufacturers, your dealer<br />
can help you choose. Some air insulated<br />
connector pipe models available are Simpson<br />
Dura Vent DVL and Metalbestos DS. Security,<br />
GSW and Ameritec also have acceptable close<br />
clearance connector pipe.<br />
When used in a mobile home, a spark arrester is<br />
required. (See page 15)<br />
Chimney connector shall not pass through floor<br />
or ceiling, nor any attic or roof space, closet or<br />
similar concealed space. Where passage<br />
through a wall or partition of combustible<br />
construction is desired, the installation shall<br />
conform to NFPA 211 or CAN/CSA - B365.<br />
It is very important to follow minimum clearances<br />
for chimney connectors to combustibles such as<br />
walls and ceilings when installing the stove near<br />
non-combustible surfaces. Typical chimney<br />
connector clearances are outlined below. The<br />
single wall clearances are generic; the Double<br />
wall clearances are for Simpson Dura Vent DVL,<br />
check the specifications from the<br />
manufacturer of your connector.<br />
COMPONENTS OF A VENTING SYSTEM<br />
The complete venting system consists of several<br />
components: chimney connector, wall thimble, wall<br />
pass-through, chimney, and liner. It is absolutely<br />
necessary that you install all of these components<br />
within the clearances to combustibles discussed<br />
earlier to install your stove safely.<br />
To protect against the possibility of a house fire, you<br />
must properly install and constantly maintain the<br />
venting system. Upon inspection, immediately<br />
replace rusted, cracked, or broken components.<br />
The chimney connector is the stovepipe from the<br />
woodstove to the chimney. The chimney<br />
connector stovepipe must be 6" (152 mm)<br />
diameter, 24 MSG or 25 MSG blued steel<br />
connector pipe. Do not use aluminum or<br />
galvanized steel pipe - they cannot withstand the<br />
extreme temperatures of a wood fire.<br />
A thimble is a manufactured (or site-constructed)<br />
device installed in combustible walls through<br />
which the chimney connector passes to the<br />
chimney. It keeps the walls from igniting. You<br />
must use a wall thimble when installing a<br />
chimney connector through a combustible wall<br />
to the chimney.<br />
A wall pass-through (or chimney support<br />
package) also keeps the walls from igniting.<br />
You must use one when connecting through a<br />
wall or ceiling to a prefabricated chimney.<br />
Only install this stove to a lined masonry<br />
chimney or an approved high temperature<br />
prefabricated residential type building heating<br />
appliance chimney. Do not connect this stove to<br />
a chimney serving another appliance; you will<br />
compromise the safe operation of both the wood<br />
stove and the connected appliance.<br />
WARNING: DO NOT CONNECT THIS APPLIANCE<br />
TO ANY AIR DISTRIBUTION DUCT OR SYSTEM.<br />
A liner is the UL 1777 or ULC S635 (for factory<br />
built fireplace or masonry) chimney.<br />
You must connect your stove to a chimney<br />
comparable to those recommended in this manual.<br />
Do not use stovepipe as a chimney. Use stovepipe<br />
for freestanding installations only to connect the<br />
stove to a proper chimney.<br />
INSTALLING A VENTING SYSTEM<br />
Stovepipe sections must be attached to the stove<br />
and to each other with the crimped end toward the<br />
stove. If creosote builds up, this allows the creosote<br />
to run into the stove and not the outside of the<br />
stovepipe and onto the stove.<br />
Secure all joints, including attaching the stovepipe to<br />
the stove's flue collar, with three sheet metal screws.<br />
Install #10 x 1/2" (3 mm x 13 mm) sheet metal<br />
screws into the holes pre-drilled in the flue collar.<br />
Leaving off the screws can cause joints to separate<br />
from the vibration that results from a creosote<br />
chimney fire.<br />
You can simplify connecting stovepipe by using<br />
additional accessories such as telescoping pipes,<br />
slip-connectors or clean-out tees. These<br />
accessories ease the inspection of your chimney, as<br />
well as allow you to easily dismantle the stovepipe<br />
<strong>Hearthstone</strong> Quality Home Heating Products, Inc. ® 11<br />
<strong>Tribute</strong> Model <strong>8040</strong>
(without moving the stove) when you periodically<br />
inspection the stovepipe connection and chimney.<br />
Install the stove as close as practical to the chimney,<br />
while maintaining all proper clearances. Install<br />
stovepipe that is as short and as straight as<br />
possible. Horizontal runs of stovepipe should<br />
always rise away from the stove a minimum of 1/4"<br />
per foot (21mm/m).<br />
Long runs of stovepipe to increase heat dispersal<br />
are not recommended. Using longer lengths of<br />
stovepipe or more connecting elbows than<br />
necessary increase the chances of draft resistance<br />
and the accumulation of creosote buildup.<br />
In general, you do not need to install a stovepipe<br />
damper with the <strong>Tribute</strong>. Some installations,<br />
however, could benefit from a stovepipe damper,<br />
such as a tall chimney which can create a higher<br />
than normal draft. In such cases, a damper can help<br />
regulate the draft. The <strong>Tribute</strong> requires a draft<br />
between 0.06" wc and 0.1" wc. For drafts above<br />
0.1" wc, install a stovepipe damper. This should be<br />
checked at installation time.<br />
Remember, the NFPA has recommended, minimum<br />
clearances for chimney connectors to combustibles<br />
such as walls and ceilings. Once the stove is<br />
installed at safe distances from these combustible<br />
surfaces, it is important to maintain these connector<br />
clearances for the remainder of the installation.<br />
CONNECTING YOUR WOODSTOVE<br />
You can install your <strong>Tribute</strong> to a prefabricated metal<br />
chimney or a masonry chimney.<br />
PREFABRICATED METAL CHIMNEY<br />
There are two ways to install a prefabricated metal<br />
chimney:<br />
1. An interior installation where the chimney<br />
passes inside the residence through the ceiling<br />
and roof.<br />
2. An exterior installation where the chimney<br />
passes through the wall behind the stove then<br />
up the outside of the residence.<br />
Whenever possible, choose an interior chimney. An<br />
interior chimney heats up more quickly and retains<br />
its heat; thus promotes a better draft and<br />
discourages the formation of creosote. An exterior<br />
chimney does not benefit from the warmth of being<br />
surrounded by the building, so it typically operates at<br />
lower flue temperatures than an interior chimney.<br />
An exterior chimney’s draft is not as strong and may<br />
experience increased creosote accumulation.<br />
When connecting the <strong>Tribute</strong> to a prefabricated<br />
metal chimney, you must follow, precisely, the<br />
manufacturer's installation instructions. Use only<br />
Type HT (2100 deg. F), prefabricated metal<br />
chimneys listed per UL 103 or ULC S629 standards.<br />
WARNING: DO NOT CONNECT THE STOVE TO A<br />
CHIMNEY FLUE SERVING ANOTHER APPLIANCE.<br />
Ensure the size of the chimney’s flue is appropriate<br />
for the <strong>Tribute</strong>. The <strong>Tribute</strong> requires a 6" (152 mm)<br />
inside diameter flue for new installations. A 6”<br />
diameter flue provides adequate draft and<br />
performance. You can use an 8" (203 mm) diameter<br />
existing flue with a reducer. An oversized flue<br />
contributes to creosote accumulation. (In this case,<br />
bigger is NOT better.)<br />
When purchasing a prefabricated chimney to install<br />
with your stove, be sure to also purchase from the<br />
same manufacturer the wall pass-through (or ceiling<br />
support package), "T" section package, fire-stops<br />
(when needed), insulation shield, roof flashing,<br />
chimney cap, and any other needed accessories.<br />
Follow the manufacturer’s instructions when<br />
installing the chimney and accessories. In addition,<br />
be sure to maintain all manufacturers’<br />
recommendations for the proper clearances to the<br />
chimney.<br />
MASONRY CHIMNEY<br />
Consider two primary elements when connecting<br />
your stove to a masonry chimney: the chimney itself<br />
and the thimble where the stovepipe connects to the<br />
chimney. Use only Code approved masonry<br />
chimneys with a flue liner.<br />
Before connecting to a masonry chimney, hire a<br />
professional to examine the chimney for cracks,<br />
loose mortar, and other signs of deterioration and<br />
blockage. If the chimney needs repair, complete<br />
them before installing and using your stove. Do not<br />
install your stove until the chimney is safe for use.<br />
Figure 8: Typical Masonry Fireplace Connection<br />
<strong>Hearthstone</strong> Quality Home Heating Products, Inc. ® 12<br />
<strong>Tribute</strong> Model <strong>8040</strong>
Ensure the chimney’s cleanout is complete and<br />
working properly. To avoid a loss of draft, the<br />
cleanout must close off completely. If allowed to<br />
cool, your stove will perform poorly and creosote will<br />
build up in the chimney.<br />
Make sure the size of the chimney’s flue is<br />
appropriate for this stove and that it is not too large.<br />
Use a masonry chimney with 6” diameter (152 mm)<br />
tile size for best results. An 8" x 8" (203 mm x 203<br />
mm) liner will also work. An oversized flue will<br />
contribute to the accumulation of creosote.<br />
Use the following checklist to ensure that your<br />
masonry chimney meets these minimum<br />
requirements:<br />
Chimney wall construction:<br />
Brick or modular block at least 4" (102 mm)<br />
thick.<br />
A rubble or stone wall.<br />
Flue liner:<br />
Minimum thickness of 5/8" (16 mm).<br />
Installed with refractory mortar.<br />
At least 1" (25 mm) air space.<br />
An equivalent flue liner must be a listed chimney<br />
liner system meeting type HT requirements or<br />
other approved material. Interior chimney<br />
requirements:<br />
At least 2" (51 mm) clearance to combustible<br />
structure<br />
Fire stops must be installed at the spaces where<br />
the chimney passes through floors and/or<br />
ceiling.<br />
Insulation must be 2" (51 mm) from the chimney.<br />
Exterior chimney requirements:<br />
At least 1" (25 mm) clearance to combustible<br />
structure.<br />
Chimney height requirements: (See Illustration)<br />
At least 3 feet (0.9 m) higher than the highest<br />
part of the roof opening through which it passes.<br />
At least 2 feet (0.6 m) higher than any part of the<br />
roof within 10 feet (3 m) measured horizontally<br />
from the top of the chimney.<br />
This stove requires a minimum chimney height of 13<br />
feet (4 m). The maximum allowable chimney height<br />
is 30 feet (9m).<br />
Figure 9: Chimney Height Requirements<br />
<strong>Hearthstone</strong> Quality Home Heating Products, Inc. ® 13<br />
<strong>Tribute</strong> Model <strong>8040</strong>
Figure 10: Typical Allowable Chimney Configurations<br />
<strong>Hearthstone</strong> Quality Home Heating Products, Inc. ® 14<br />
<strong>Tribute</strong> Model <strong>8040</strong>
INSTALLING IN A MOBILE HOME<br />
Follow these mandatory requirements for installing<br />
your stove in a mobile home:<br />
Install the stove in accordance with 24 CFR,<br />
Part 3280 (HUD)<br />
You must use the <strong>Tribute</strong> outside air kit<br />
Assembly 390-53400<br />
Ensure that the outside air inlet must remain<br />
clear of any objects, leaves, icing, snow, or other<br />
debris. Keep the inlet away from any exhaust<br />
fans. The inlet requires an adequate amount of<br />
ventilation. If the inlet becomes restricted during<br />
operation, the unit may starve for room air,<br />
which may cause smoke spillage and an inability<br />
to maintain a proper fire. This smoke may set off<br />
any smoke detectors if installed.<br />
Permanently attach the stove to your mobile<br />
home’s floor. Use 1/4" holes in each leg base to<br />
bolt down the stove.<br />
Install one of the following Dura-Vent Mobile<br />
Home Chimney & Connector Kits:<br />
6DP-MH 6” Diameter S/N 9096N<br />
7DP-MH 7” Diameter S/N 9196N<br />
8DP-MH 8” Diameter S/N 9296N<br />
Each kit includes:<br />
Stainless spark arrester cap, storm collar,<br />
Adjustable vented flashing – 0/12 – 6/12,<br />
Two 24” Dura/Plus* chimney pipes, 24”<br />
support box with built-in starter section and<br />
trim.<br />
* (UL or ULC approved equipment is acceptable).<br />
Chimney must be removed when transporting<br />
Mobile Home.<br />
Use silicone to create an effective vapor barrier<br />
at the location where the chimney or other<br />
component penetrates to the exterior of the<br />
structure.<br />
WARNING: DO NOT INSTALL IN A SLEEPING<br />
ROOM<br />
CAUTION: MAINTAIN THE STRUCTURAL<br />
INTEGRITY OF THE MOBILE HOME WALLS,<br />
FLOOR, CEILING, AND ROOF WHILE YOUR<br />
STOVE IS INSTALLED AND IN USE.<br />
Figure 11<br />
<strong>Hearthstone</strong> Quality Home Heating Products, Inc. ® 15<br />
<strong>Tribute</strong> Model <strong>8040</strong>
Operation<br />
Once your <strong>Tribute</strong> is installed, you are ready to light<br />
a fire. <strong>Hearthstone</strong> pressure tests each wood stove<br />
before we ship, so you should be able to easily light<br />
your first fire.<br />
WARNING: HOT WHILE IN OPERATION.<br />
KEEP CHILDREN, CLOTHING AND<br />
FURNITURE AWAY. CONTACT MAY CAUSE<br />
SKIN BURNS.<br />
Please read this entire chapter before lighting your<br />
first fire. It explains the controls and features of your<br />
wood stove, how to choose firewood, and how to<br />
break-in your stove and use it on a daily basis.<br />
CHOOSING FIREWOOD<br />
Burn only natural firewood (known as cordwood)<br />
in the <strong>Tribute</strong> <strong>8040</strong> Woodstove. This stove is not<br />
designed, or certified to burn other fuels.<br />
CAUTION: DO NOT USE CHEMICALS OR<br />
FLAMMABLE FLUIDS TO START THE FIRE. DO<br />
NOT USE CHARCOAL, PELLETS, COAL,<br />
ARTIFICIAL LOGS OR ANY OTHER MATERIALS<br />
AS FUEL; THEY ARE NOT SAFE. DO NOT BURN<br />
GARBAGE.<br />
The quality of your firewood directly affects heat<br />
output, duration of burn and performance of your<br />
stove. Softwoods generally burn hotter and faster,<br />
while hardwoods burn longer and produce better,<br />
longer lasting coals. Density and moisture content<br />
are two critical factors to consider when purchasing<br />
wood for your stove.<br />
The following is a list of some wood species and<br />
their relative BTU (British Thermal Unit) content. The<br />
higher the BTU content, the longer the burn.<br />
Firewood with higher BTUs is generally ideal for a<br />
woodstove.<br />
Wood Heat Value: Sorted By Btu<br />
Content<br />
Common Name Lb/ cord MBTU/<br />
cord<br />
High<br />
Osage Orange (Hedge) 4,728 32.9<br />
Hickory, Shagbark 4,327 27.7<br />
Hop Hornbeam (Ironwood) 4,267 27.3<br />
Beech, Blue (Ironwood) 3,890 26.8<br />
Birch, Black 3,890 26.8<br />
Locust, Black 3,890 26.8<br />
Hickory, Bitternut 3,832 26.7<br />
Locust, Honey 3,832 26.7<br />
Apple 4,100 26.5<br />
Mulberry 3,712 25.8<br />
Oak, White 4,012 25.7<br />
Medium High<br />
Beech, European 3,757 24<br />
Maple, Sugar 3,757 24<br />
Oak, Red 3,757 24<br />
Ash, White 3,689 23.6<br />
Birch, Yellow 3,689 23.6<br />
Medium<br />
Juniper, Rocky Mtn 3,150 21.8<br />
Elm, Red 3,112 21.6<br />
Coffeetree, Kentucky 3.112 21.6<br />
Hackberry 3,247 20.8<br />
Tamarack 3,247 20.8<br />
Birch, Gray 3,179 20.3<br />
Birch, White (Paper) 3,179 20.3<br />
Walnut, Black 3,192 20.2<br />
Cherry 3,120 20<br />
Ash, Green 2,880 19.9<br />
Cherry, Black 2,880 19.9<br />
Elm, American 3,052 19.5<br />
Elm, White 3,052 19.5<br />
Sycamore 2,808 19.5<br />
Ash, Black 2,992 19.1<br />
Maple, Red 2,924 18.7<br />
Fir, Douglas 2,900 18.1<br />
Medium Low<br />
Boxelder 2,797 17.9<br />
Alder, Red 2,710 17.2<br />
Pine, Jack 2,669 17.1<br />
Pine, Norway (Red Pine) 2,669 17.1<br />
Pine, Pitch 2,669 17.1<br />
Catalpa 2,360 16.4<br />
Hemlock 2,482 15.9<br />
Spruce, Black 2,482 15.9<br />
Pine, Ponderosa 2,380 15.2<br />
Low<br />
Aspen, American 2,290 14.7<br />
Butternut (Walnut, White) 2,100 14.5<br />
Spruce 2,100 14.5<br />
Willow 2,100 14.5<br />
<strong>Hearthstone</strong> Quality Home Heating Products, Inc. ® 16<br />
<strong>Tribute</strong> Model <strong>8040</strong>
Fir, Balsam 2,236 14.3<br />
Pine, White (Eastern,<br />
2,236 14.3<br />
Western)<br />
Fir, Concolor (White) 2,104 14.1<br />
Basswood (Linden) 2,108 13.8<br />
Buckeye, Ohio 1,984 13.8<br />
Cottonwood 2,108 13.5<br />
Cedar, White 1,913 12.2<br />
Moisture content also plays a key role in the<br />
performance of your stove. Wood freshly cut from a<br />
living tree (green wood) contains a great deal of<br />
moisture. As you might expect, green wood burns<br />
poorly. You must season green wood before using it<br />
in your wood stove. To season green wood properly,<br />
split, stack, and allow it to air dry for a period of one<br />
year. Green wood may provide less than 2000 Btu<br />
per pound, whereas dry wood can provide up to<br />
7000 Btu per pound.<br />
Stack the firewood on skids or blocks to keep it off<br />
the ground, cover only the top of the stack. Plastic or<br />
tarps that cover the sides of the woodpile trap<br />
moisture and prevent the wood from drying. As for<br />
stacking, an old Vermonter said, "The spaces<br />
between the logs should be large enough for a<br />
mouse to get through, but not for the cat that's<br />
chasing it."<br />
CAUTION: DO NOT STORE FIREWOOD WITHIN<br />
THE STOVE'S SPECIFIED CLEARANCES TO<br />
COMBUSTIBLE MATERIALS.<br />
BUILDING A FIRE<br />
Once you understand the controls of your wood<br />
stove and have chosen the appropriate firewood,<br />
you are ready to start a fire.<br />
CONTROLS AND FEATURES<br />
Before lighting any fires, become familiar with the<br />
location and operation of your stove's controls and<br />
features and learn how to use them. For your own<br />
safety, do not modify these features in any way.<br />
FRONT DOOR HANDLE: The front door is for<br />
loading wood into your stove, and for viewing the<br />
fire; a fixed, rotating handle operates the front door<br />
and latches the front door closed. To open the door,<br />
lift the handle to the 10 o’clock position and pull on<br />
the door. To latch the door, push the door closed<br />
tightly then lower the handle to the 7 o’clock<br />
position. Pull lightly on the door handle to ensure it<br />
is properly latched.<br />
PRIMARY AIR CONTROL: The air control lever is<br />
located on the front lower left of the stove, just under<br />
the ash lip. The primary air control regulates the<br />
amount of air entering the firebox. Generally, the<br />
more air entering the firebox, the faster and hotter<br />
the rate of burn; conversely, less air creates a slower<br />
burn. To fully open the primary air intake, move the<br />
handle as far as it will go to the left; move the handle<br />
as far as it will go to the right, to close the primary air<br />
control. The primary air opening does not close<br />
completely.<br />
BREAKING IN YOUR WOOD STOVE<br />
It is imperative that your stove is "broken in"<br />
gradually. Soapstone must be "seasoned"; overfiring<br />
a new stove may cause soapstone to crack or<br />
may damage other stove parts. Natural moisture in<br />
the freshly quarried soapstone must be driven out<br />
slowly to minimize the “shock” to the stone of its first<br />
exposure to high firebox temperatures. In addition,<br />
the asbestos-free furnace cement must be cured<br />
slowly to ensure adequate sealing and bonding.<br />
When you light your first fires, the wood stove will<br />
emit some smoke and fumes. This is normal “offgassing”<br />
of the paints and oils used when<br />
manufacturing the wood stove. If you find it<br />
necessary, open a few windows to vent your room.<br />
The smoke and fumes will usually subside after 10<br />
to 20 minutes of operation. The odor and smoke will<br />
end once the stove is “cured”.<br />
The first fires may produce other odors from<br />
impurities that exist in the area immediately<br />
surrounding the stove. Some of these impurities can<br />
be from cleaning solvents, paint solvents, cigarettes,<br />
smoke, pet hair, dust, adhesives, a new carpet,<br />
scented candles, and new textiles. These odors will<br />
generally dissipate over time. You can alleviate<br />
these odors by opening a few windows or otherwise<br />
creating additional ventilation around your stove. If<br />
any odor persists, remove the impurities, or contact<br />
your dealer or an authorized service technician.<br />
If you adhere to the following break-in procedure, as<br />
well as all other operating procedures in this manual,<br />
the cast iron and soapstone components of your<br />
stove will give you many years of trouble-free use.<br />
With use, the color of the soapstone may change<br />
and small fractures may appear on the surface of<br />
the stone. These changes will only add character<br />
and distinction to your stove.<br />
Avoid the following conditions that can cause the<br />
soapstone or cast iron pieces to break:<br />
<br />
Do not throw wood into the stove.<br />
<strong>Hearthstone</strong> Quality Home Heating Products, Inc. ® 17<br />
<strong>Tribute</strong> Model <strong>8040</strong>
Do not use the door as leverage to force wood<br />
into the stove.<br />
Do not load wood that is encrusted with ice into<br />
a burning stove as the thermal shock can cause<br />
damage.<br />
Do not use a manufactured grate. Burn the fire<br />
directly on the soapstone that lines the bottom of<br />
the firebox.<br />
The bottom layer of soapstone in the firebox is<br />
intended to prevent thermal stress and should<br />
remain in place in the firebox at all times.<br />
BUILDING A BREAK IN FIRE<br />
1) Open the front door and place five or six double<br />
sheets of tightly twisted newspaper in the center<br />
of the firebox. Arrange kindling in a crisscross<br />
pattern over the newspaper. Kindling should be<br />
approximately ten pieces, 1/2" (13 mm) in<br />
diameter and 10" to 18" (254 mm to 457 mm)<br />
long.<br />
2) Fully open the primary air control by pushing the<br />
control handle fully to the left, away from the<br />
firebox.<br />
3) Light the paper under the kindling. Leave the<br />
door slightly ajar momentarily until the kindling<br />
has started to burn and draft begins to pull.<br />
4) Close the door and allow the fire to burn. Keep<br />
the door closed while the stove is in use.<br />
5) KEEP A WATCHFUL EYE ON YOUR STOVE to<br />
maintain a steady, low-heat fire. Your first fire<br />
should make the stove warm but not hot to the<br />
touch. Visible steam, or boiling moisture and<br />
hissing indicate the soapstone is too hot. At<br />
most, a few small chunks of wood should be<br />
added to the fire to reach safe break-in<br />
temperatures.<br />
6) Once the stove is warm but not hot to the<br />
touch, close the primary air control by pushing it<br />
fully to the right to allow the fire to die out<br />
completely.<br />
7) Let the stove return to room temperature.<br />
Your first fire and first fire each season thereafter<br />
should be built and maintained as outlined above.<br />
Your patience will be rewarded by a properly<br />
seasoned stove.<br />
NOTE: The cool flue gas temperatures<br />
present during the break-in procedure may<br />
cause rapid creosote build-up. The door<br />
glass may also get dirty. A good hot fire will<br />
clean it. We recommend a visual inspection<br />
(and cleaning if necessary) of your<br />
stovepipe and chimney once the break-in<br />
procedure is completed.<br />
NORMAL OPERATION<br />
If your stove is not used continuously or has not<br />
been used in quite some time, follow the break-in<br />
procedure at least once to minimize the stress of a<br />
hot fire on a cold stove before proceeding with<br />
normal operation. We recommend one break-in fire<br />
at the start of each heating season. Ensure you<br />
clear the ashes from around the “doghouse.” The<br />
doghouse is the sloping piece of metal, located in<br />
the front lower center of the firebox. If the front door<br />
is open the doghouse is in the lower center of the<br />
door opening. There is a hole located on the<br />
opposite side, facing into the stove which lets air into<br />
the stove. Obstructing this hole will hinder the<br />
operation of the stove.<br />
BUILDING A FIRE FOR EVERYDAY USE<br />
1) Open the front door and place five or six double<br />
sheets of tightly twisted newspaper in the center<br />
of the firebox. Arrange kindling in a crisscross<br />
pattern over the newspaper. Kindling should be<br />
approximately ten pieces, 1/2" (13 mm) in<br />
diameter and 10" to 18" (254 to 457 mm) long.<br />
2) Fully open the primary air control by pushing it<br />
completely to the left, away from the firebox.<br />
3) Light the paper under the kindling. Leave the<br />
front door slightly ajar momentarily until the<br />
kindling has started to burn and draft begins to<br />
pull.<br />
4) Close the door and allow the fire to burn.<br />
5) Once the kindling is burning, open the door and<br />
add logs, small at first, to build the fire up.<br />
Ensure you keep the logs away from the glass in<br />
front in order for the air-wash system to work<br />
properly. Otherwise, keep the door closed while<br />
the stove is in use.<br />
6) Once the fire is burning well, use the primary air<br />
control to regulate the desired rate of burn.<br />
Pushing the handle to the left opens the<br />
PRIMARY AIR CONTROL for a high rate of burn<br />
or pushing it to the right for a low rate of burn.<br />
Note: When opening the door to reload or rearrange<br />
logs, it is advisable to open the door just<br />
a crack, pause for a moment then open the door<br />
completely. This procedure will allow the firebox<br />
to clear of smoke before the door is opened<br />
fully. Also, reloading on a bed of hot, red coals<br />
reduces smoking time and will bring fresh fuel<br />
up to a high temperature rapidly.<br />
<strong>Hearthstone</strong> Quality Home Heating Products, Inc. ® 18<br />
<strong>Tribute</strong> Model <strong>8040</strong>
BURN RATE<br />
MONITORING STOVE TEMPERATURES<br />
Monitor the stove temperatures with a good stove<br />
thermometer (available from your dealer) placed on<br />
the top center stone of the stove near the flue collar.<br />
The thermometer could read as high as 600F<br />
(316C) on High Burn and as low 200-300F (93-<br />
149C) on low burn. Maintaining sustained surface<br />
temperatures in excess of 600F (316C) will cause<br />
the stones to crack and other damage to the stove.<br />
HIGH BURN: Fully load the firebox with wood on a<br />
bed of hot coals or on an actively flaming fire and<br />
fully open the primary air control by moving it fully to<br />
the left, away from the firebox. This will fully open<br />
the primary air shutter. A high burn rate is<br />
recommended once or twice a day to fully heat the<br />
stovepipe and chimney, which will help minimize<br />
creosote accumulation.<br />
MEDIUM HIGH BURN: With the primary air control<br />
in the closed position, move the control handle<br />
slightly to the left.<br />
MEDIUM LOW BURN: With the primary air control<br />
in the closed position, move the handle half way<br />
between the medium and low settings. A mediumlow<br />
burn rate should be the typical setting and is<br />
preferable if the stove is to be left unattended.<br />
LOW BURN: Close the primary air control by<br />
moving it fully to the right. A low burn rate over<br />
extended periods of time is not advisable as it may<br />
promote the accumulation of creosote. The venting<br />
system should be inspected frequently if low burn<br />
rates are maintained consistently.<br />
NOTE: If equipped with a blower the following<br />
blower settings are recommended:<br />
Low and Medium-Low Burn: Set blower on<br />
low by turning the control knob clockwise<br />
until the blower is running at a low speed.<br />
Medium High and High Burn: Set blower on<br />
high by turning the control know until the<br />
blower is running at a high speed. The<br />
blower will be at its highest setting when the<br />
control knob is turned clockwise to the “ON”<br />
position. By continuing to turn the control<br />
know clockwise, the blower speed will be<br />
reduced until it reaches its lowest setting. It<br />
is recommended that the blower is not<br />
turned on for the first 30 minutes of<br />
operation.<br />
OVER-FIRE CAUTION<br />
DO NOT OVER-FIRE THE STOVE. DAMAGE DONE<br />
BY OVER-FIRING WILL VOID THE WARRANTY<br />
(refer to page 19).<br />
Over-firing means the stove is operating at<br />
temperatures above the recommended<br />
temperatures outlined in the BURN RATE section.<br />
Over-firing should be carefully avoided since it will<br />
cause damage to the stove. Symptoms of over-firing<br />
include short burn times, a roaring sound in the<br />
stove or stovepipe, and discoloration of the<br />
stovepipe.<br />
Over-firing can be caused by excessive draft,<br />
inappropriate fuel, and operator error. Correct an<br />
over-fire situation as follows:<br />
EXCESSIVE DRAFT: Contact your dealer<br />
to have a draft reading taken. Any draft in excess of<br />
0.1 wc requires a damper in the stovepipe. Some<br />
installations may require more than one damper.<br />
INAPPROPRIATE FUEL: Do not burn coal,<br />
kiln dried lumber, wax logs or anything other than<br />
natural cordwood.<br />
OPERATOR ERROR: Ensure all the<br />
gaskets are in good condition. Replace worn out or<br />
compressed gaskets. Do not burn the stove with the<br />
door in in a partially open position.<br />
Monitoring the temperature of the surface of the top<br />
stones is the best way to determine if the stove is<br />
over-firing. If you suspect that your stove is overfiring,<br />
contact your dealer immediately. Damage<br />
done by over-firing is not covered by your<br />
warranty. Results of over-firing can include: warped<br />
or burned out internal parts, cracked stones,<br />
discolored or warped external parts, and damaged<br />
enamel.<br />
NOTE: ANY SYMPTOMS OF OVER-FIRING WILL<br />
VOID YOUR WARRANTY!!<br />
<strong>Hearthstone</strong> Quality Home Heating Products, Inc. ® 19<br />
<strong>Tribute</strong> Model <strong>8040</strong>
REMOVAL AND DISPOSAL OF ASHES<br />
Ashes should be removed when the stove is cold.<br />
Use protective fireplace gloves when the container is<br />
warm. Exercise extreme caution when handling,<br />
storing or disposing of ashes.<br />
The firebox should be cleared of ashes often, and<br />
they should not be allowed to build up more than 3<br />
inches high, and it is important to prevent ashes<br />
from building up around the dog house.<br />
Ashes should be dumped into a steel container with<br />
a tight fitting lid. Do not place any other items or<br />
trash into the metal container. Replace the lid on<br />
the container and allow the ashes to cool. Do not<br />
place the ash disposal container on a combustible<br />
surface, as the container will be hot!<br />
Pending disposal, place the closed ash container on<br />
a noncombustible floor or on the ground, well away<br />
from all combustible materials. Ashes should be<br />
retained in the closed container until all cinders have<br />
thoroughly cooled.<br />
Ashes should NEVER be placed in wooden or<br />
plastic containers, or in paper or plastic bags, no<br />
matter how long the fire is out. Coals within a bed of<br />
ashes can remain hot for several days once<br />
removed from the firebox.<br />
<strong>Hearthstone</strong> Quality Home Heating Products, Inc. ® 20<br />
<strong>Tribute</strong> Model <strong>8040</strong>
Maintenance<br />
ONLY WORK ON A COOL STOVE!<br />
CREOSOTE FORMATION AND NEED FOR<br />
REMOVAL<br />
When wood is burned slowly, it produces tar and<br />
other organic vapors, which combine with expelled<br />
moisture to form creosote. These creosote vapors<br />
condense in the relatively cool chimney flue of a<br />
slow-burning fire. As a result, creosote residue<br />
accumulates on the flue lining. When ignited, this<br />
creosote makes an extremely hot fire, which may<br />
damage the chimney or even destroy the house.<br />
When burning wood, the chimney connector and<br />
chimney should be inspected at least once every<br />
two months during the heating season to determine<br />
if a creosote buildup has occurred.<br />
To prevent the buildup of creosote:<br />
1. Burn the stove with the primary air<br />
control fully open for 35 - 45 minutes daily to burn<br />
out creosote deposits from within the stove and the<br />
venting system.<br />
2. After reloading with wood, burn the stove<br />
with the primary air control fully open for 20 to 30<br />
minutes. This manner of operation ensures early<br />
engagement of the secondary combustion system<br />
which, when engaged, minimizes creosote buildup in<br />
the chimney.<br />
The stovepipe connector and chimney should be<br />
inspected at least monthly during the heating season<br />
to determine if a creosote build-up has occurred. If<br />
a creosote residue greater that 1/4" (6 mm) has<br />
accumulated, it should be removed to reduce the<br />
risk of a chimney fire.<br />
If your glass is remaining dirty, your operating<br />
temperatures are low; therefore, there is a higher<br />
risk of creosote buildup.<br />
The venting system must be inspected at the stove<br />
connection and at the chimney top. Cooler surfaces<br />
tend to build creosote deposits quicker, so it is<br />
important to check the chimney at the top (where it is<br />
coolest) as well as from the bottom near the stove.<br />
Accumulated creosote should be removed with a<br />
cleaning brush specifically designed for the type of<br />
chimney in use. A certified chimney sweep should<br />
be used to perform this service. Contact your dealer<br />
for the name of a certified chimney sweep in your<br />
area (your dealer may be a certified sweep!).<br />
It is also recommended that before each heating<br />
season the entire system be professionally<br />
inspected, cleaned and repaired, if necessary.<br />
CAST IRON<br />
Exterior cast iron parts are either painted with black,<br />
high-temperature stove paint or porcelainized with<br />
an enamel finish in various colors.<br />
Use black, high-temperature stove paint (satin black<br />
by Stovebright) to touch up and maintain the original<br />
appearance of painted cast iron. Use a damp<br />
sponge to wipe clean. Dry the cast iron thoroughly<br />
to prevent rusting.<br />
Clean enamel castings with a standard glass<br />
cleaner. With time and use, a very fine, subtle<br />
network of crazed lines may appear seemingly<br />
beneath the surface of the enamel. Crazing is a<br />
natural predictable process and does not represent<br />
a flaw.<br />
Seafoam Majolica enamel will shift to a slightly<br />
greener hue at very high temperatures – this is<br />
normal, and the original color will return as the stove<br />
cools.<br />
STONE<br />
Soapstone is porous - do not use chemical agents to<br />
wash the stone; do not use waxes or any abrasive<br />
polishing agents on the stone.<br />
Occasional cleaning is all that should be necessary<br />
to maintain the natural beauty of your stove’s<br />
polished soapstone finish. Clean the soapstone with<br />
water, any non-abrasive cleaner and a soft cloth.<br />
Wipe dust from the stone with a clean cloth.<br />
Care must be taken not to scratch or chip the stone.<br />
Do not set items, which can scratch or chip the stone<br />
(or enamel finish), on top of your stove.<br />
Often, with use and over time, subtle earth tones of<br />
brown, red, and yellow appear on the soapstone.<br />
This is a natural reaction in the soapstone. Surface<br />
or hairline fractures may appear in the stone after a<br />
stove has been used. Such changes are normal and<br />
do not affect the operation or the integrity of the<br />
stove and do not require replacement. If you<br />
observe a completely broken stone, contact your<br />
dealer for service.<br />
<strong>Hearthstone</strong> Quality Home Heating Products, Inc. ® 21<br />
<strong>Tribute</strong> Model <strong>8040</strong>
GASKETS<br />
Gasket material should normally be replaced every<br />
two to three seasons, depending on stove use. If<br />
the door seal is loose, a new gasket will assure a<br />
tight seal and improved stove performance. Contact<br />
your dealer for a gasket kit that includes instructions<br />
and gaskets for your stove.<br />
The procedure for replacing gaskets on the glass is<br />
reviewed on page 23.<br />
To replace door gaskets, first remove the old<br />
gaskets with a utility or putty knife. Clean all gasket<br />
channels with a wire brush. Sparingly apply gasket<br />
glue (sodium silicate) to the channels and push the<br />
new gasket into place without stretching the gasket<br />
material. Too much glue will saturate, and harden<br />
the gaskets. The door should be shut immediately to<br />
fully press the gasket into place and assure a<br />
positive seal.<br />
Order gasket kit 90-58400 when replacing your<br />
gaskets.<br />
GLASS<br />
Do not operate the stove with a broken door glass.<br />
Do not abuse the front door by striking or slamming.<br />
When necessary, clean the glass with low alkaline<br />
content commercial stove glass cleaners, or<br />
standard window cleaners. Never attempt to clean<br />
the glass while the fire is burning or when the glass<br />
is hot. Most deposits are easily cleaned by following<br />
the instructions provided with the cleaner. To clean<br />
heavier deposits, open the door and lift it straight up<br />
and off the stove with the hinge pins remaining in the<br />
door (take care to save hinge pins and any washers<br />
for reuse). Lay the door face down on a workbench<br />
or table, with the handle hanging off the edge so it<br />
will lay flat. Apply the cleaner to the glass and allow<br />
it to soak for a few minutes. By laying the door flat, it<br />
will allow the cleaner to penetrate rather than run off<br />
the surface of the glass. Wipe the cleaner off with a<br />
soft cloth, or black & white newsprint.<br />
Important: scratching or etching the glass will<br />
weaken the integrity of the glass. Do not use a<br />
razor blade, steel wool, or any other abrasive<br />
material to clean the glass. Use low alkaline<br />
content cleaners, or dry white ashes only.<br />
The front door glass is a ceramic, shock-resistant<br />
material, made specifically for use in woodstoves.<br />
Do not use any replacement glass other than the<br />
5mm thick ceramic glass manufactured and supplied<br />
for use in this woodstove. Replacement glass is<br />
available through your local dealer.<br />
Replace the door glass immediately if broken or<br />
chipped. Contact your local dealer for the<br />
replacement glass kit PN 90-58405, which is<br />
accompanied with instructions and everything<br />
needed for the repair. If you replace the glass<br />
yourself, wear work gloves and safety glasses.<br />
<strong>Hearthstone</strong> Quality Home Heating Products, Inc. ® 22<br />
<strong>Tribute</strong> Model <strong>8040</strong>
The procedure for glass and glass gasket<br />
replacement is as follows:<br />
1. Remove the door by lifting it straight up off<br />
the hinges with the hinge pins remaining in<br />
the door.<br />
2. Place the door face down on a flat, smoo th<br />
surface, other than the floor, with the handle<br />
hanging over the edge.<br />
3. Apply penetrating oil to the screws in the<br />
glass retainer clips. Remove the screws to<br />
separate the glass from the door.<br />
4. Carefully lift the damaged glass and/or old<br />
gasket from the doorframe and discard.<br />
5. Peel the paper backing from the tape<br />
gasket. Apply the new gasket to the<br />
doorframe as illustrated on page 17.<br />
6. Place the gasketed glass onto the door.<br />
Place a new clip and gasket square around<br />
the glass and over the screw holes in the<br />
clip.<br />
7. Screw the glass retainer clips (6) back on<br />
the door.<br />
8. Install the door.<br />
<strong>Hearthstone</strong> Quality Home Heating Products, Inc. ® 23<br />
<strong>Tribute</strong> Model <strong>8040</strong>
Virtually all woodstove operators experience basic<br />
common problems at one time or another. Most are<br />
correctable and generally require only a minor<br />
adjustment of the stove, installation, or operating<br />
technique. In cases where weather conditions<br />
dramatically affect stove performance, the problems<br />
are typically temporary and solve themselves once<br />
the weather changes.<br />
If you question whether your stove is producing<br />
adequate heat, the best way to troubleshoot the<br />
problem is to monitor the temperature of the stove. A<br />
temperature of about 400 degree F (200 degree C)<br />
confirms the stove is supplying sufficient heat. Keep<br />
in mind that your house itself will regulate<br />
room/house temperatures. How well the walls, floors<br />
and ceilings are insulated, the number and size of<br />
glass windows, the tightness of outside doors, and<br />
the construction or style of your house (vaulted<br />
ceilings or other open spaces which collect large<br />
percentages of heat, ceiling fans, etc.) all are<br />
determining factors of room temperature.<br />
Your stove's performance is also dependant on its<br />
installation. One common cause of poor<br />
performance is an oversized chimney flue.<br />
Oversized chimney flues result in decreased draft,<br />
which prevents the smoke from rising out the<br />
chimney. Oversized flues are also more difficult to<br />
heat effectively, especially when burning a high<br />
efficiency stove. Cool flue temperatures inhibit the<br />
establishment of a strong draft (and encourage the<br />
accumulation of creosote). The lack of a strong draft<br />
will cause the fire to die down and may even force<br />
the smoke to pour into the room.<br />
If your chimney is the proper size and a strong draft<br />
is not easily established, there is the possibility of the<br />
chimney is too cold. Again, hot chimneys promote a<br />
stronger draft.<br />
Other draft guidelines are as follows:<br />
AN "AIRTIGHT" HOUSE: If your home is superinsulated<br />
or especially well sealed, the required<br />
(infiltration) air supply to the interior of the house may<br />
be inadequate. This phenomenon of air starvation<br />
within the building can be exacerbated if exhaust<br />
fans, such as clothes dryers, bathroom fans or<br />
Troubleshooting<br />
cookstove exhaust fans, are in operation within the<br />
home. Outfitting your stove with the optional outside<br />
air supply adaptor connected to an air duct which<br />
leads to the outside of the building should correct this<br />
problem.<br />
TALL TREES OR BUILDINGS: These obstructions,<br />
when located in proximity to the top of the chimney<br />
can cause chronic or occasional downdrafts. When<br />
selecting a site for a new chimney, take care to<br />
consider the placement of other objects near the<br />
proposed chimney location.<br />
WIND VELOCITY: Generally, the stronger and<br />
steadier a wind, the stronger (better) the draft.<br />
However, "gusty" wind conditions may cause erratic<br />
downdrafts. Wind can also impact interior air<br />
pressure which can hinder draft.<br />
BAROMETRIC PRESSURE: Chimney drafts are<br />
typically sluggish on balmy, wet or muggy days. This<br />
is a weather-related phenomenon, which generally is<br />
self-correcting as the weather changes.<br />
BRISKNESS OF FIRE: The hotter the fire in your<br />
stove, the hotter your chimney and, therefore, the<br />
stronger the draft.<br />
BREAKS IN THE VENTING SYSTEM: An unsealed<br />
clean-out door at the bottom of the chimney, leaky<br />
stovepipe joints, a poor stovepipe-to-thimble<br />
connection, missing caps, or a leaky chimney may<br />
cause inadequate draft.<br />
SEASONAL FACTORS: Early fall and late spring are<br />
generally difficult seasons in which to establish<br />
proper drafts. The colder the outside air is (relative to<br />
room temperatures) the stronger the draft.<br />
OPERATING THE STOVE<br />
There are days when a draft is not easily established.<br />
As outlined above, seasonal factors or a cold<br />
chimney may be the cause. Try starting the fire by<br />
using small kindling and fuel to obtain a quick, hot<br />
fire. Tend the fire frequently with small fuel until the<br />
chimney is hot and the draft is well established.<br />
Briefly opening a window, or door in the room with<br />
the stove can also help – especially if a reverse draft<br />
has established in the chimney.<br />
<strong>Hearthstone</strong> Quality Home Heating Products, Inc. ® 24<br />
<strong>Tribute</strong> Model <strong>8040</strong>
TROUBLESHOOTING GUIDE<br />
PROBLEM POSSIBLE CAUSE SOLUTIONS<br />
STOVE SMOKES Operating Technique Fully open the primary air control one minute before<br />
opening doors.<br />
Cold Chimney<br />
Preheat the chimney when first starting a fire. Briefly open<br />
a window or door in the room when starting the fire.<br />
Blocked Chimney Examine the chimney and stovepipe for blockage or<br />
creosote accumulations.<br />
Oversized Chimney Reline the chimney to the appropriate diameter<br />
Undersized Chimney Install a draft inducer or replace the chimney.<br />
Chimney Too Short Lengthen the chimney.<br />
Air Infiltration Into The Seal chimney connections and openings in clean-out<br />
BACK-PUFFING<br />
OR GAS<br />
EXPLOSIONS<br />
UNCONTROLLED<br />
OR SHORT BURN<br />
INSUFFICIENT<br />
HEAT<br />
BLISTERING OF<br />
ENAMEL<br />
CASTING<br />
Chimney<br />
More Than One<br />
Appliance Connected to<br />
the Flue<br />
Operating Technique<br />
Extra Low Burn Rate<br />
Chimney Down-draft<br />
Excessive Ash Build-up<br />
Unsealed or Open Door<br />
Excessive Draft<br />
Deteriorated Cement<br />
Seals<br />
Extra Long Chimney<br />
Oversized Chimney<br />
High Winds or Hilltop<br />
Location:<br />
Excessive Draft<br />
Poor Quality or Green<br />
Wood<br />
Low Burn Rate<br />
Air Insulated Chimney<br />
Cold Exterior Chimney<br />
Leaky Stovepipe or<br />
Chimney<br />
Too Much Heat Loss<br />
From House<br />
Operating Technique<br />
Excessive Draft<br />
doors.<br />
Disconnect all other appliances and seal openings.<br />
Fully open the primary air control one minute before<br />
opening the door and keep it fully open for a few minutes<br />
after reloading.<br />
Burn the stove at a higher burn rate.<br />
Install a chimney cap.<br />
Empty ashes more frequently.<br />
Close the door tightly or replace the gaskets.<br />
Check the installation. Operate at LOW BURN. Install<br />
stovepipe damper.<br />
Reseal the stove with furnace cement.<br />
Shorten the chimney. Install stovepipe damper.<br />
Reline the chimney to the proper diameter.<br />
Install a chimney cap.<br />
Draft in excess of 0.1 wc should be corrected with a<br />
stovepipe damper<br />
Use only air-dried wood, preferably dried at least one<br />
year.<br />
Operate the stove at a higher burn rate.<br />
Replace with a pre-fabricated insulated chimney system or<br />
a properly sized masonry chimney.<br />
Reline or insulate the chimney.<br />
Check the installation.<br />
Caulk windows, seal openings in home.<br />
Do not over-fire the stove. Monitor stove temperatures.<br />
Use seasoned wood only.<br />
Check the DRAFT. A damper may be required. Operate<br />
the stove at a LOW BURN range.<br />
<strong>Hearthstone</strong> Quality Home Heating Products, Inc. ® 25<br />
<strong>Tribute</strong> Model <strong>8040</strong>
Replacement Parts & Optional Accessories<br />
PART # DESCRIPTION PART # DESCRIPTION<br />
CAST¹<br />
MISC<br />
2010-210 Foot 0000-100 Stone: Ref, 4-3/4"X6-3/4"<br />
2010-275 Side Trim 0000-400 Stone: Ref, 6 3/8"X 6 3/8",Floor Stone<br />
2010-285 Flue Collar 1041-410 Stone: Pol, 9 1/2"X 8",Rear Stone<br />
2010-410 Bottom 1041-420 Stone: Pol, 8"X 10 3/4",Side Stone<br />
2010-420 Corner Column 1041-430 Stone: Pol, 2 3/4"X 6 15/16",Front Lower<br />
2010-430 Primary Manifold 1041-440 Stone: Pol, 2 5/8"X 8",Front Side Stone<br />
2010-440 Door Frame 1041-450 Stone: Pol, 2 1/2"X 6 15/16",Front Upper<br />
2010-450 Door 1041-460 Stone: Pol, 5 1/2"X 13 1/8",Top Side Stone<br />
2010-460 Side Stone Trim 1041-470 Stone: Pol, 5.6"X 8",Top Center Stone<br />
2010-470 Secondary Manifold Top 3120-040 Baffle:Ceramic,5 5/8" X 12 1/2"<br />
2010-480 Secondary Manifold Bottom 5550-155 Bushing: Shutter, Pri Air 1/4x3/8<br />
2010-490 Top 6400-40447 Owner’s <strong>Manual</strong><br />
STEEL<br />
KITS<br />
5040-030 Handle: Slider,Pri Air Control 90-58400 Gasket Kit<br />
5040-050 Pipe: Secondary Air Riser 90-58405 Glass Kit (Include gasket & hardware)<br />
5040-051 Pipe: Air,Secondary,#1 90-71100 Wood Handle Kit<br />
5040-052 Pipe: Air,Secondary,#2 90-73212 Latch Kit<br />
5040-070 Support: Baffle,Ss,Tri<br />
5040-080 Tie_Rod Sleeve (Top Rear)<br />
5021-020 Bracket:Slider Retainer,Pri Air<br />
5021-025 Plate: Slider,Pri Air<br />
5210-3070 Rod: 1/4-20x19", 3/4"&3/4"<br />
5210-3080 Rod: 1/4-20x20 1/4"<br />
OPTIONAL ACCESSORIES<br />
90-68400 Rear Heat Shield Kit<br />
90-57210 Convection Blower<br />
90-69400 Viewing Screen<br />
90-53400 Outside Air Kit<br />
¹ Cast part numbers: Specify finish color when ordering enamel parts (Matte Black shown).<br />
<strong>Tribute</strong> Woodstove Model <strong>8040</strong>.<br />
Manufactured and Warranted by:<br />
<strong>Hearthstone</strong> Quality Home Heating Products, Inc.<br />
317 Stafford Ave,<br />
Morrisville, VT 05661<br />
www.hearthstonestoves.com<br />
inquiry@hearthstonestoves.com<br />
<strong>Hearthstone</strong> Quality Home Heating Products, Inc. ® 26<br />
<strong>Tribute</strong> Model <strong>8040</strong>
SAFETY LABEL<br />
<strong>Hearthstone</strong> Quality Home Heating Products, Inc. ® 27<br />
<strong>Tribute</strong> Model <strong>8040</strong>
WARRANTY REGISTRATION<br />
The Original Purchaser can complete their warranty registration on our website at www.hearthstonestoves.com,<br />
or send a completed and signed Warranty Registration Form, which is enclosed in the Woodstove warranty<br />
packet, to the following address:<br />
<strong>Hearthstone</strong> Quality Home Heating Products, Inc.<br />
Warranty Department<br />
317 Stafford Avenue<br />
Morrisville, VT 05661<br />
NOTE: SENDING IN THE SIGNED WARRANTY REGISTRATION FORM IS NOT REQUIRED AS A<br />
CONDITION OF WARRANTY COVERAGE OR HEARTHSTONE’S PERFORMANCE.<br />
<strong>Hearthstone</strong> Quality Home Heating Products, Inc. ® 28<br />
<strong>Tribute</strong> Model <strong>8040</strong>