Manchester 8360 Manual - Hearthstone Stoves
Manchester 8360 Manual - Hearthstone Stoves
Manchester 8360 Manual - Hearthstone Stoves
- No tags were found...

You also want an ePaper? Increase the reach of your titles
YUMPU automatically turns print PDFs into web optimized ePapers that Google loves.
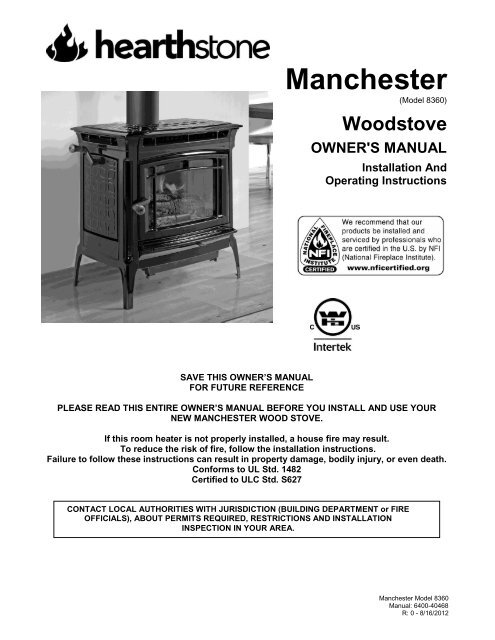
<strong>Manchester</strong>(Model <strong>8360</strong>)WoodstoveOWNER'S MANUALInstallation AndOperating InstructionsSAVE THIS OWNER’S MANUALFOR FUTURE REFERENCEPLEASE READ THIS ENTIRE OWNER’S MANUAL BEFORE YOU INSTALL AND USE YOURNEW MANCHESTER WOOD STOVE.If this room heater is not properly installed, a house fire may result.To reduce the risk of fire, follow the installation instructions.Failure to follow these instructions can result in property damage, bodily injury, or even death.Conforms to UL Std. 1482Certified to ULC Std. S627CONTACT LOCAL AUTHORITIES WITH JURISDICTION (BUILDING DEPARTMENT or FIREOFFICIALS), ABOUT PERMITS REQUIRED, RESTRICTIONS AND INSTALLATIONINSPECTION IN YOUR AREA.<strong>Manchester</strong> Model <strong>8360</strong><strong>Manual</strong>: 6400-40468R: 0 - 8/16/2012
IntroductionThank you for purchasing a <strong>Manchester</strong> woodstovefrom <strong>Hearthstone</strong> Quality Home Heating Products.This stove will provide years of comfortable heat.This stove also provides the benefits of advancedtechnology in wood burning without the cost andmaintenance requirements of a catalytic device. The<strong>Manchester</strong> blends modern technology with theunique beauty and qualities of cast iron. We trustthat you will appreciate the quality of thishandcrafted product.Your <strong>Manchester</strong> woodstove burns very efficiently,and produces a large amount of heat. However, youshould not consider your <strong>Manchester</strong> the primaryheat source for your home. The <strong>Manchester</strong>’s largeglass window allows you to enjoy the fire from avariety of locations in the room.Please read this manual in its entirety. Its purpose isto familiarize you with your stove's safe installation,proper break-in, operation and maintenance. Itcontains extremely important information so keep ithandy and refer to it often.A qualified heating technician may need this owner’smanual as a reference when installing this stove inyour home. There are national, state, and localbuilding codes that direct the technician on how toinstall your stove. These codes stipulate thedimension of stovepipe and clearances to walls,ceilings, hearth, and other combustible surfaces.The codes exist to reduce the risk of fire. Failure tofollow these instructions can result in fire, propertydamage, bodily injury, and even death.Install the stove in a safe, open area, away fromtraffic flow, doors, and hallways. If possible, try toinstall the stove near an existing chimney andchimney connector. It is extremely important toinstall this stove with the proper clearance fromcombustible surfaces. You can purchase specificconnector pipe and special wall coverings asspecified by this manual and the NFPA 211 code toprotect combustible surfaces. As a general rule,keep furniture, drapes, curtains, wood, paper, andother combustibles at least 36 inches (92 cm) awayfrom the stove. Never install the stove in or near astorage location for gasoline, kerosene, charcoallighter fluid or any other flammable liquids.Install the stove in your central living area to allowheat to radiate naturally to distant rooms. Do notinstall your stove in a poorly insulated area. This isinefficient and would likely result in higher fuelusage.SAFETY NOTICE:AN IMPROPERLY INSTALLED STOVE CANRESULT IN A HOUSE FIRE. FOR YOUR SAFETY,CAREFULLY FOLLOW THE INSTALLATIONDIRECTIONS. CONTACT LOCAL BUILDING ORFIRE OFFICIALS ABOUT RESTRICTIONS ANDINSTALLATION INSPECTION IN YOUR AREA.The safety of your stove will depend on manyfactors, some of which include: distance tocombustible objects, correct venting, and adequatechimney maintenance. Should you have anyquestions, do not hesitate to contact your dealer foradditional information.Contact your dealer for any necessary warrantyservice.This <strong>Manchester</strong> Model <strong>8360</strong> stove is warranted by:<strong>Hearthstone</strong> Quality Home Heating Products, Inc®317 Stafford Ave.Morrisville, Vermont 05661, USAwww.<strong>Hearthstone</strong>stoves.com<strong>Hearthstone</strong> Quality Home Heating Products, Inc ® 3<strong>Manchester</strong> Model <strong>8360</strong>
If these or other indications suggest that infiltrationair is inadequate, additional combustion air shouldbe provided from the outdoors. Outside combustionair can be provided to the appliance by using theoptional outside air kit #93-53500PERIODIC CHECKLISTPerform each of these tasks at the specifiedintervals.At the End of Every Week: Empty ashes from the firebox and ash pan,sooner if the firebox or the ash pan is full.At the Beginning of Every Other Month: Depending upon your use of the stove, visuallyinspect the chimney connector and chimney forcreosote. (see page 26) Check door seals using the "dollar bill test." -When the stove is cool, shut the door on a dollarbill. If the bill pulls out without any resistance,then your stove’s door is not sealing properly. Totighten the seal, adjust the door latchmechanism or change the door gasket. (Refer topage 26.)At the End of Every Season: Dismantle the chimney connector and clean itthoroughly. Replace any pieces that show signsof rust or deterioration. Inspect and, if necessary, clean your chimney. Clean out the inside of the stove thoroughly. Inspect all door gasket material and replace ifworn, frayed, cracked or extremely hard.EMERGENCY PROCEDURESIf you have a stovepipe or chimney fire, follow theseinstructions:1. If the fire is too threatening, leave the area andcall the fire department immediately! If not,perform the next three steps.2. Close the primary air control.3. Close the stovepipe damper (if present).4. Keep the stove front door closed!WARNING: DO NOT ATTEMPT TO PUT OUT ASTOVEPIPE OR CHIMNEY FIRE BY THROWINGWATER ONTO THE STOVE, STOVEPIPE, ORCHIMNEY. THE EXTREMELY HIGHTEMPERATURE OF SUCH FIRES CAN CAUSEINSTANTANEOUS STEAM AND SERIOUS BODILYHARM.Once the chimney fire expires, leave the primary aircontrol closed and let the fire in the stove die outcompletely. Inspect the stove, stovepipe, andchimney thoroughly for any sign of damage beforefiring the stove again. You must correct any damagebefore using your stove again.<strong>Hearthstone</strong> Quality Home Heating Products, Inc ® 5<strong>Manchester</strong> Model <strong>8360</strong>
InstallationUNPACKING<strong>Hearthstone</strong> packages your <strong>Manchester</strong> woodstovewith the greatest care so that it ships safely. Undercertain circumstances, however, damage may occurduring transit and handling. When you receive the<strong>Manchester</strong>, carefully unpack and inspect the stoveand all accompanying parts. Ensure you remove thecorrugated paper padding from the flue collar andbaffle area. Ensure that all parts are included in theaccessory box. If any parts are damaged or missing,please contact your authorized <strong>Hearthstone</strong> dealerimmediately.PACK LIST1- <strong>Manchester</strong> Model <strong>8360</strong> Woodstove1- Owner’s <strong>Manual</strong>INSTALLING YOUR STOVEChoose a place to install your <strong>Manchester</strong>woodstove. Inspect this location to make sure thatthe stove and stovepipes will have the requiredclearance from combustible materials that are nearthe stove. Combustibles include walls, floor, ceiling,and chimney chase. You must carefully consider theclearances to all of these combustibles beforeactually connecting your stove.If the floor is made of combustible material, then anon-combustible floor protector is required betweenthe floor and the stove. An example of a noncombustiblefloor protector is a hearth constructedwith a continuous layer of tile, brick, slate, glass oranother non-combustible facing. There is no R-valuerequirement.If you use a close clearance connector pipe, ensureit is listed with Underwriter’s Laboratories. Check thelisting of your pipe with UL for the correctclearances.The diagrams in this manual represent typicalinstallations, but are specific to the Simpson Dura-Vent DVL brand.Clearances to NFPA Code 211 ProtectedSurfacesYou can reduce the clearances to combustiblesurfaces by using any National Fire ProtectionAgency (NFPA) approved wall protection system.Please refer to NFPA Code 211 for specificationsand complete details. You can obtain thisinformation directly from the NFPA.National Fire Protection AgencyBatterymarch ParkQuincy, MA 022691-800-344-35551-617-770-3000www.nfpa.org<strong>Hearthstone</strong> Quality Home Heating Products, Inc ® 7<strong>Manchester</strong> Model <strong>8360</strong>
HEARTH REQUIREMENTS & FLOOR PROTECTIONEnsure you protect combustible flooring with a covering of noncombustible material. The <strong>Manchester</strong> does notrequire an insulated hearth pad. The minimum floor protection must be met under the stove and extend beyondthe stove as follows:The minimum floor protection for US installations is 48in x 36-3/4in.The minimum floor protection for installations in Canada is 56in x 44in.* Installations in Canada require 18” (45.72 cm) of floor protection on both side and front.** Rear clearance required only if stovepipe runs horizontally back above the top or behind the stove.Figure 2 – Hearth Dimensions<strong>Hearthstone</strong> Quality Home Heating Products, Inc ® 8<strong>Manchester</strong> Model <strong>8360</strong>
COMBUSTIBLE SURFACE REQUIRED CLEARANCESNote: Dimensions shown in the following figures are from the body of the stove unless otherwise indicated.It is very important to follow minimum clearances for chimney connectors to combustibles such as walls andceilings when installing the stove near combustible surfaces.Figure 3 – Clearance to CombustiblesParallelCornerClearances *A B C D ESingle wall Connector – No Close Clearance Heat Shield 18”-46cm 16”-41cm 21”-54cm 33.625”-86cm 9”-23cmSingle Wall Connector – With Close Clearance Heat Shield 18”-46cm 10”-26cm 15”-39cm 33.625”-86cm 9”-23cmDouble Wall Connector – No Close Clearance Heat Shield 16”-41cm 16”-41cm 21”-54cm 31.625”-81cm 9”-23cmDouble Wall Connector – With Close Clearance Heat Shield 16”41cm 6”-16cm 11”-28cm 31.625”-81cm 9”-23cmAlcove Clearances (inches)Unprotected Surfaces Protected Surfaces (NFPA-211)Minimum alcove width 62.25” – 159cm See NFPA-211Maximum alcove depth 52” – 132cm See NFPA-211Min. Alcove ceiling from floor with single wall connector 68” – 173cmMin. Alcove ceiling from floor with double wall connector 64” – 163cmSee NFPA-211See NFPA-211*SIDE WITH DOOR MUST BE 18” FROM SIDE WALL UNLESS THE SIDE DOOR LOCKING KIT ISINSTALLED. CONSIDER SPACE FOR LOADING OF STOVE USING THE SIDE DOOR.FOR CLOSE CLEARANCE HEAT SHIELD, USE KIT #93-68600<strong>Hearthstone</strong> Quality Home Heating Products, Inc ® 9<strong>Manchester</strong> Model <strong>8360</strong>
Figure 4 Chimney Connector ClearancesSingle Wall PipeDouble Wall PipeVertical Pipe Length BeforeElbowWith Heat Shield** Without Heat Shield** With Heat Shield** Without Heat Shield**A A A A18” or More 10” 16” 6” 16”Less Than 18” 14” 16” 10” 16”Direct Rear Exit n/a 14” n/a 6”*For double wall pipe clearance toceiling refer to pipe manufacturerspecifications.** Close Clearance Heatshield, kit #93-68600See Parallel Clearance to Combustiblesfor clearances to the sides of the stove.<strong>Hearthstone</strong> Quality Home Heating Products, Inc ® 10<strong>Manchester</strong> Model <strong>8360</strong>
Chimney Connector Systems and Clearances<strong>Hearthstone</strong> Quality Home Heating Products, Inc ® 11<strong>Manchester</strong> Model <strong>8360</strong>
Figure 5 Trim and Mantle ClearancesOUTSIDE AIR SUPPLY(Optional Kit #93-53500)You can connect an outside air source directly tothis stove using an optional outside air kit. Theadvantage of providing outside air directly to thestove is that the air used by the stove for combustionis taken from outside the residence rather than fromwithin the room where the stove is located.The outside air kit for this stove allows for the directconnection of the stove's air intake to a minimum 3"(76 mm) diameter duct (supplied by others) whichleads to the outside of the house. When consideringplacement of the duct from the outside of the houseto the hearth, keep in mind the need to avoidstructural members of the house. The outside air kitattaches to the back of the stove. Refer to theinstructions provided with the kit for installation.Figure 6 – Outside Air Kit DetailThe International Residential Code (IRC) does notallow the outside air duct to terminate higher thanthe appliance. Some building officials also do notlike to see any vertical rise in the duct’s termination.<strong>Hearthstone</strong> recommends the termination be at thesame level, or lower than the air intake on the stove.Locate the termination of the duct on the outsidewall of the home in such a manner to avoid thepossibility of obstruction by snow, leaves or othermaterial. Screen the termination using ¼” x ¼” meshrodent screen and cover it with a rain/wind proofhood (flex pipe, outside termination, mesh, and hoodsupplied by others) Contact your dealer foravailability).<strong>Hearthstone</strong> Quality Home Heating Products, Inc ® 12<strong>Manchester</strong> Model <strong>8360</strong>
VENTING COMPONENTS &CONFIGURATION REQUIREMENTSDO NOT CONNECT THIS UNIT TO A CHIMNEYFLUE USED BY ANOTHER APPLIANCESingle wall connector that is at least 24 MSG or25 MSG blued steel stovepipe.Double wall connector (close clearance pipe)which is used with a listed, factory-built “Type HT"chimney or with a masonry chimney to reduceclearances, is available from severalmanufacturers, your dealer can help you choose.Some air insulated connector pipe modelsavailable are Simpson Dura Vent DVL andMetalbestos DS. Security, GSW and Ameritecalso have acceptable close clearance connectorpipe. The chimney connector is the stovepipe from thewoodstove to the chimney. The chimneyconnector stovepipe is 6" (152 mm) diameter, 24MSG or 25 MSG blued steel connector pipe. Donot use aluminum or galvanized steel pipe - theycannot withstand the extreme temperatures of awood fire. The thimble is a manufactured (or siteconstructed)device installed in combustiblewalls through which the chimney connectorpasses to the chimney. It keeps the walls fromigniting. You must use a wall thimble wheninstalling a chimney connector through acombustible wall to the chimney.A wall pass-through (or chimney supportpackage) also keeps the walls from igniting. Youmust use one when connecting through a wall orceiling to a prefabricated chimney.When used in a mobile home, a spark arrester isrequired. (See page 18)The chimney connector cannot pass through afloor or ceiling, nor any attic or roof space, closetor similar concealed space. Where ventingrequires passage through a wall or partition ofcombustible construction, the installation mustconform to NFPA Code 211 or CAN/CSA -B365.Only install this stove to a lined masonrychimney or an approved high temperatureprefabricated residential type building heatingappliance chimney. Do not connect this stove toa chimney serving another appliance; you willcompromise the safe operation of both the woodstove and the connected appliance.A liner is the UL 1777 or ULC S635 (for factorybuilt fireplace or masonry) chimney.It is very important to follow minimum clearancesfor chimney connectors to combustibles such aswalls and ceilings when installing the stove.Typical chimney connector clearances areoutlined below. The single wall clearances aregeneric; the double wall clearances shown arespecifically for Simpson DuraVent DVL and mayvary with other brands. Check thespecifications from the manufacturer of yourconnector.COMPONENTS OF A VENTING SYSTEMThe complete venting system consists of severalcomponents: chimney connector, wall thimble, wallpass-through, chimney, and liner. It is absolutelynecessary that you install all of these componentsand maintain the clearances to combustiblesdiscussed earlier to ensure a safe stove installation.To protect against the possibility of a house fire, youmust properly install and constantly maintain theventing system. Upon inspection, immediatelyreplace rusted, cracked, or broken components.You must connect your stove to a chimneycomparable to those recommended in this manual.Do not use stovepipe as a chimney. Use stovepipefor freestanding installations only to connect thestove to a proper chimney.WARNING: DO NOT CONNECT THIS APPLIANCETO ANY AIR DISTRIBUTION DUCT OR SYSTEM.INSTALLING A VENTING SYSTEMAttach stovepipe sections to the flue collar and toeach other with the crimped end toward the stove. Ifcreosote builds up, this allows the creosote to runinto the stove and not on the outside of thestovepipe or onto the stove.Secure all joints, including attaching the stovepipe tothe stove's flue collar, with three sheet metal screws.Install #10 x 1/2" (3 mm x 13 mm) sheet metalscrews into the holes pre-drilled in the flue collar.Disregarding the screws can cause joints toseparate from the vibrations that result from acreosote chimney fire.<strong>Hearthstone</strong> Quality Home Heating Products, Inc ® 13<strong>Manchester</strong> Model <strong>8360</strong>
You can simplify connecting stovepipe by usingadditional accessories such as telescoping pipes,slip-connectors or clean-out tees. These accessoriesease the periodic inspection of your chimney, as wellas allow you to dismantle the stovepipe easily(without moving the stove).Install the stove as close as practical to the chimney,while maintaining all proper clearances. Installstovepipe that is as short and as straight aspossible. Horizontal runs of stovepipe must alwaysrise away from the stove at a minimum of 1/4" perfoot (21mm/m).We do not recommend long runs of stovepipe toincrease heat dispersal. Longer lengths ofstovepipe, or more connecting elbows, thannecessary increase the chances of draft resistanceand the accumulation of creosote buildup.In general, you do not need to install a stovepipedamper with the <strong>Manchester</strong>. Some installations,however, could benefit from a stovepipe damper,such as a tall chimney which can create a higherthan normal draft. In such cases, a damper can helpregulate the draft. The <strong>Manchester</strong> requires a draftbetween 0.06" and 0.1" WC. For drafts above 0.1"WC, install a stovepipe damper. Check the draft atstove installation time.Remember, the NFPA recommends minimumclearances for chimney connectors to combustiblessuch as walls and ceilings. Once the stove isinstalled at safe distances from these combustiblesurfaces, it is also important to maintain theseconnector clearances for the remainder of theinstallation.CONNECTING THE STOVE TO A CHIMNEYYou can install your <strong>Manchester</strong> to a prefabricatedmetal chimney, or to a masonry chimney.This room heater must be connected to (1) a listedType HT (2100° F) chimney per UL 103 or ULCS629, or (2) a code-approved masonry chimney witha flue liner. The chimney size should not be lessthan the flue collar, or more than three times greaterthan the cross-sectional area of the flue collar.We recommend installing a cleanout tee wherepossible to simplify chimney cleaning andmaintenance.Connecting to a Prefabricated Metal ChimneyThere are two ways to install a prefabricated metalchimney:An interior installation where the chimneypasses inside the residence through the ceilingand roof.An exterior installation where the chimneypasses through the wall behind the stove thenup the outside of the residence.Whenever possible, choose an interior chimney. Aninterior chimney heats up quickly and retains itsheat; thus promotes a better draft and discouragesthe formation of creosote. An exterior chimney doesnot benefit from the warmth of the building, so ittypically operates at lower flue temperatures than aninterior chimney and may experience increasedcreosote accumulation.When connecting the <strong>Manchester</strong> to a prefabricatedmetal chimney, you must follow, precisely, themanufacturer's installation instructions. Use onlyType HT (2100° F), prefabricated metal chimneyslisted per UL 103 or ULC S629 standards.Ensure the size of the prefabricated chimney’s flueis appropriate for the <strong>Manchester</strong>. The <strong>Manchester</strong>requires a 6" (152 mm) inside diameter flue for newinstallations. A 6” diameter flue provides adequatedraft and performance. You can use an 8" (203 mm)diameter existing flue with a reducer. An oversizedflue contributes to creosote accumulation. (In thiscase, bigger is NOT better.)When purchasing a prefabricated chimney to installwith your stove, Ensure you also purchase from thesame manufacturer the wall pass-through (or ceilingsupport package), "T" section package, fire-stops(when needed), insulation shield, roof flashing,chimney cap, and any other required accessories.Follow the manufacturer’s instructions wheninstalling the chimney and accessories. In addition,ensure you maintain all manufacturers’recommendations for the proper clearances to thechimney.Connection to a Masonry ChimneyConsider two primary elements when connectingyour stove to a masonry chimney: the chimney itselfand the thimble where the stovepipe connects to thechimney. Use only code approved masonrychimneys containing a proper flue liner.Before connecting to a masonry chimney, hire aprofessional to examine the chimney for cracks,loose mortar, and other signs of deterioration andblockage. If the chimney needs repair, completethem before installing and using your stove. Do notinstall your stove until the chimney is safe for use.<strong>Hearthstone</strong> Quality Home Heating Products, Inc ® 14<strong>Manchester</strong> Model <strong>8360</strong>
Ensure the chimney’s cleanout is complete andworking properly. To avoid a loss of draft, thecleanout door must close completely and provide atight seal. If the cleanout door leaks, the chimney willcool, your stove will perform poorly, and creosotecan form.Ensure the size of the chimney’s flue is appropriatefor this stove and that it is not too large. Use amasonry chimney with a maximum 6” Diameter or 8"x 8" (203 mm x 203 mm) tile size for best results. Anoversized flue contributes to the accumulation ofcreosote.Use the following checklist to ensure that yourmasonry chimney meets these minimumrequirements:Masonry Chimney wall construction: Mortared brick or modular block at least 4" (102mm) thick – must use liner A mortared rubble or stone wall – must use linerFlue liner options:Tile - minimum wall thickness of 5/8" (16 mm),installed with refractory mortar, and with at least1" (25 mm) air space around the linerStainless steel - UL listed 6” diameter, insulatedor wrapped liner, or the space around the linerfilled with vermiculite or suitable material (thesekeep the liner warmer for better performance)Ensure any equivalent flue liner is a listedchimney liner system meeting type HTrequirements or other approved material.Interior chimney requirements: Must have at least 2" (51 mm) clearance tocombustible materials Must install fire stops at the spaces where thechimney passes through floors and/or ceiling Any insulation material must be at least 2" (51mm) from the chimneyExterior chimney requirements:At least 1" (25 mm) clearance to combustiblematerialsChimney height requirements (See Figure 8):At least 3 feet (0.9 m) higher than the highestpart of the roof opening through which it passes.At least 2 feet (0.6 m) higher than any part of theroof within 10 feet (3 m) measured horizontallyfrom the top of the chimney.The recommended minimum chimney height is 10feet (3 m) off the floor. The recommended maximumchimney height is 30 feet (9m).The <strong>Manchester</strong>requires a draft between 0.06” and 0.1” watercolumn. Ensure your chimney is long enough toprovide the minimum draft, and use a damper if yourinstallation has a required chimney height thatprovides too much draft.<strong>Hearthstone</strong> Quality Home Heating Products, Inc ® 15<strong>Manchester</strong> Model <strong>8360</strong>
Figure 7 – Typical Chimney Configurations<strong>Hearthstone</strong> Quality Home Heating Products, Inc ® 16<strong>Manchester</strong> Model <strong>8360</strong>
2'-0"MINIMUM2'-0"MINIMUM3'-0"MINIMUM3'-0"MINIMUM10'-0"Figure 8 – Chimney Height Requirements<strong>Hearthstone</strong> Quality Home Heating Products, Inc ® 17<strong>Manchester</strong> Model <strong>8360</strong>
INSTALLING IN A MOBILE HOMEFollow these special requirements for installing yourstove in a mobile home.Install the stove in accordance with 24 CFR,Part 3280 (HUD)Permanently attach the stove to your mobilehome’s floor. Use the shipping clips that camewith the stove and fasteners long enough toattach securely to the subfloor. (The clips andfastener heads may be painted to minimizevisibility) .Burning any fuel other than wood in this unitcould generate dangerous levels of carbonmonoxide within the living space.THE FRONT DOOR, SIDE DOOR AND ASH PANDOOR MUST REMAIN CLOSED WHEN INOPERATION EXCEPT FOR START UP ANDLOADING. Leaving the doors open during usecould cause any smoke or fire detectors in thehome to be set off or a fire could escape thefirebox and start the room on fire.If this unit is installed in a mobile home, care mustbe taken to ensure adequate air is available. If notenough air is available it could starve the room ofall the oxygen. (See page 27 for more details)Figure 9 - Lock Down DetailInstall a Mobile Home Chimney & ConnectorKit*.Each kit must include:Stainless spark arrester cap, storm collar,Adjustable vented flashing – 0/12 – 6/12,Two 24” chimney pipes, 24” support boxwith built-in starter section and trim.* (any UL or ULC approved equipment is acceptable)WARNING: DO NOT INSTALL IN A SLEEPINGROOM IN A MOBILE HOME.CAUTION: MAINTAIN THE STRUCTURALINTEGRITY OF THE MOBILE HOME WALLS,FLOOR, CEILING, AND ROOF WHEN INSTALLINGAND USING YOUR STOVE.Figure 10CAUTION: REMOVE THE CHIMNEY WHENTRANSPORTING THE MOBILE HOME!<strong>Hearthstone</strong> Quality Home Heating Products, Inc ® 18<strong>Manchester</strong> Model <strong>8360</strong>
Once your <strong>Manchester</strong> is installed, you are ready tolight a fire.Every installation, season’s firewood, and operator’stechnique varies. Learn how to use your stove mostefficiently for your installation. We can give you thebasic principles, but only you can ensure maximizingthe potential of your stove while also operating itsafely.WARNING: HOT WHILE IN OPERATION! KEEPCHILDREN, PETS, CLOTHING AND FURNITUREAWAY. CONTACT MAY CAUSE SKIN BURNS.Read this entire chapter before lighting your first fire.It explains the controls and features of your woodstove, how to choose firewood, and how to use yourstove on a daily basis.CONTROLS AND FEATURESBefore lighting any fires, become familiar with thelocation and operation of your stove's controls andfeatures and learn how to use them (See Figure 11).For your own safety, do not modify these features inany way. We recommend you use fireplace gloveswhen the stove is in operation and hot.OperationASH PAN: (This becomes hot during operation. It isbest to remove the ash pan only after the stovecools). To access the ash pan you must open theash door. Grip the ash door handle from the bottom(See figure 11) and rotate toward you. While holdingit in the rotated position pull the handle away fromthe stove and lower it. When the handle stopslowering allow it to hang by letting go of it. The ashpan handle and the ash grate handle (see figure 12)are now accessible. To remove the ash pan, grip thehandle, and then pull it out. The ash pan collects theash residue from each fire and when full, allows youto remove the ash conveniently from the stove.Clear the firebox of ashes periodically. With the ashpan in position and no fuel other than dead coals inthe stove pull the ash grate handle toward you. Siftthe ashes through the grate in the bottom of thefirebox into the ash pan or shake the ashes into thepan by repeatedly moving the ash grate in and out.Figure 11 - Controls & FeaturesFigure 12 Ash Door HandleDo not operate the stove unless the ASH PAN isin place, and properly sealed by the gasket onthe ash box door. A poor seal could causeoverheating and damage the stove.FRONT DOOR HANDLE: The firebox door allowsyou to load wood into your stove; a wood handleoperates the door. To open the door, pull up on thehandle and swing the door away from the stove. Tolatch the door, push the door tightly towards thefirebox then continue to push the handle in anddown until it latches shut. Gently pull on the doorhandle to make sure it is properly latched.<strong>Hearthstone</strong> Quality Home Heating Products, Inc ® 19<strong>Manchester</strong> Model <strong>8360</strong>
PRIMARY AIR CONTROL: The primary air controlLever is located under the center of the ash lip. Theprimary air control allows you to regulate the amountof air entering the firebox. Generally, the more airallowed into the firebox, the faster the rate of burn;conversely, less air creates a slower burn. Formaximum air flow, move the lever to the left as far aspossible; move the lever as far right as possible forminimum air flow (does not close completely).Figure 13 – Air Control Low Position<strong>Hearthstone</strong> Quality Home Heating Products, Inc ® 20<strong>Manchester</strong> Model <strong>8360</strong>
CHOOSING FIREWOODBurn only natural firewood (known as cordwood) inthe <strong>Manchester</strong> <strong>8360</strong> Wood Heater. This stove is notdesigned to burn other fuels. CAUTION: DO NOT USE CHEMICALS ORFLAMMABLE FLUIDS TO START THE FIRE. DONOT USE CHARCOAL, PELLETS, COAL,ARTIFICIAL LOGS OR ANY OTHER MATERIALSAS FUEL; THEY ARE NOT SAFE. DO NOT BURNGARBAGE OR FLAMMABLE FLUIDS.THE USE OF UNAUTHORIZED FUEL SUCH ASCOAL COULD PRODUCE HIGH LEVELS OFCARBON DIOXIDE IN THE LIVING SPACE. ATHIGH LEVELS CARBON DIOXIDE COULD RESULTIN PERSONAL INJURY OR DEATH.The quality of your firewood directly affects heatoutput, duration of burn and performance of yourstove. Softwoods generally burn hotter and faster,while hardwoods burn longer and produce bettercoals. Density and moisture content are two criticalfactors to consider when purchasing wood for yourstove.The following is a list of some wood species andtheir relative BTU (British Thermal Unit) content. Thehigher the BTU content, the longer the burn.Firewood with higher BTUs is generally ideal for awood stove.Wood Heat Value: Sorted By Btu ContentCommon Name Lb/ cord MBTU/cordHighOsage Orange (Hedge) 4,728 32.9Hickory, Shagbark 4,327 27.7Hop Hornbeam (Ironwood) 4,267 27.3Beech, Blue (Ironwood) 3,890 26.8Birch, Black 3,890 26.8Locust, Black 3,890 26.8Hickory, Bitternut 3,832 26.7Locust, Honey 3,832 26.7Apple 4,100 26.5Mulberry 3,712 25.8Oak, White 4,012 25.7Medium HighBeech, European 3,757 24Maple, Sugar 3,757 24Oak, Red 3,757 24Ash, White 3,689 23.6Birch, Yellow 3,689 23.6MediumJuniper, Rocky Mtn 3,150 21.8Elm, Red 3,112 21.6Coffeetree, Kentucky 3.112 21.6Hackberry 3,247 20.8Tamarack 3,247 20.8Birch, Gray 3,179 20.3Birch, White (Paper) 3,179 20.3Walnut, Black 3,192 20.2Cherry 3,120 20Ash, Green 2,880 19.9Cherry, Black 2,880 19.9Elm, American 3,052 19.5Elm, White 3,052 19.5Sycamore 2,808 19.5Ash, Black 2,992 19.1Maple, Red 2,924 18.7Fir, Douglas 2,900 18.1Medium LowBoxelder 2,797 17.9Alder, Red 2,710 17.2Pine, Jack 2,669 17.1Pine, Norway (Red Pine) 2,669 17.1Pine, Pitch 2,669 17.1Catalpa 2,360 16.4Hemlock 2,482 15.9Spruce, Black 2,482 15.9Pine, Ponderosa 2,380 15.2LowAspen, American 2,290 14.7Butternut (Walnut, White) 2,100 14.5Spruce 2,100 14.5Willow 2,100 14.5Fir, Balsam 2,236 14.3Pine, White (Eastern,2,236 14.3Western)Fir, Concolor (White) 2,104 14.1Basswood (Linden) 2,108 13.8Buckeye, Ohio 1,984 13.8Cottonwood 2,108 13.5Cedar, White 1,913 12.2<strong>Hearthstone</strong> Quality Home Heating Products, Inc ® 21<strong>Manchester</strong> Model <strong>8360</strong>
Moisture content also plays a key role in theperformance of your stove. Wood freshly cut from aliving tree (green wood) contains a great deal ofmoisture. As you might expect, green wood burnspoorly. You must season green wood before using itin your wood stove. To season green wood properly,split, stack, and allow it to air dry for a period of oneyear. Green wood may provide less than 2000 Btuper pound, whereas dry wood can provide up to7000 Btu per pound.Stack the firewood on skids or blocks to keep it offthe ground, cover only the top of the stack. Plastic ortarps that cover the sides of the woodpile trapmoisture and prevent the wood from drying. As forstacking, an old Vermonter said, "The spacesbetween the logs should be large enough for amouse to get through, but not for the cat that'schasing it."CAUTION: DO NOT STORE FIREWOOD WITHINTHE STOVE'S SPECIFIED CLEARANCES TOCOMBUSTIBLE MATERIALS.BUILDING A FIREOnce you understand the controls of your woodstove and have the appropriate firewood, you areready to start a fire.WARNING: NEVER USE GASOLINE, GASOLINE-TYPE LANTERN FUEL, KEROSENE, CHARCOALLIGHTER FLUID, OR SIMILAR LIQUIDS TO STARTOR 'FRESHEN UP' A FIRE IN THIS HEATER.KEEP ALL SUCH LIQUIDS WELL AWAY FROMTHE HEATER WHILE IT IS IN USE.When you light your first fires, the woodstove willemit some smoke and fumes. This is normal “offgassing”of the paints and oils used whenmanufacturing the woodstove. If you find itnecessary, open a few windows to vent your room.The smoke and fumes will usually subside after 10to 20 minutes of operation. The odor and smoke willend once the stove is “cured”.The first few fires of the season may produce otherodors from impurities that exist in the areaimmediately surrounding the stove. Some potentialimpurities are cleaning solvents, paint solvents,cigarette smoke, and soot from scented candles, pethair, dust, adhesives, a new carpet, and newtextiles. These odors will dissipate over time. Youcan alleviate these odors by opening a few windowsor otherwise creating additional ventilation aroundyour stove. If any odor persists, contact your dealeror an authorized service technician.If you adhere to the operating procedures in thismanual, the steel, cast iron, and refractorycomponents of your stove will give you many yearsof trouble-free use. With use, the color of therefractory panels will change and small fracturesmay appear on the surface. These changes do notaffect the function of the stove. If a panel breakscompletely, it must be replacedAvoid the following conditions that can cause theglass, refractory panels, steel or cast iron pieces tobreak:Do not throw wood into the stove.Do not use the door as a lever to force wood intothe stove.Do not load wood encrusted with ice into aburning stove - the thermal shock can causedamage.Do not use a manufactured log grate. Burn thefire directly on the cast iron bottom of thefirebox.NORMAL OPERATIONPrior to loading the stove, ensure the ash grate andthe ash pan are in place.BUILDING A FIRE FOR EVERYDAY USE1) Open the front door and place five or sixdouble sheets of tightly twisted newspaperin the center of the firebox. Arrange kindlingin a tee-pee configuration over thenewspaper. Use approximately 10 pieces ofkindling, 1/2" (13 mm) in diameter and 10" to16" (254 mm to 406 mm) long.2) Fully open the primary air control by movingthe lever completely to the left.3) Light the paper under the kindling. Leave thefront door slightly ajar momentarily until thekindling begins to burn and draft begins topull.4) Close the door and allow the fire to burn.5) Once the kindling is burning, open the frontdoor and add logs, small at first, to build thefire up. Ensure you keep the logs away fromthe glass in front in order for the air-washsystem to work properly. Keep the front doorand ash pan closed while the stove is in use.6) Once the fire is burning well, use the primaryair control to regulate the desired rate ofburn. Move the handle to the left to open theprimary air control for a high rate of burn; ormove it to the right for a low rate of burn.The air control does not close completely.<strong>Hearthstone</strong> Quality Home Heating Products, Inc ® 22<strong>Manchester</strong> Model <strong>8360</strong>
Note: When opening the front door to reload or rearrangelogs, it is advisable to open the door just acrack, pause for a moment then open the doorcompletely. This procedure allows the firebox toclear of smoke before the door is open fully. Inaddition, reloading on a bed of hot, red coalsreduces smoking time and brings fresh fuel up to ahigh temperature rapidly.BURN RATELOW BURN: Move the air control lever all the wayto the right. (see figure 14). This closes the airshutter to its minimum opening. A low burn rate overextended periods is not advisable as it can promotethe accumulation of creosote. Inspect the ventingsystem frequently if using low burn ratesconsistently.MEDIUM LOW BURN: With the primary air controlin the low position, lightly tap the lever to the left (alittle less than 1/16”). A medium-low burn rate is thetypical setting and is preferable if the stove isunattended. At this burn rate a little goes a long way.MEDIUM HIGH BURN: With the primary air controlin the low position, move the air control lever to theleft about 3/8”.HIGH BURN: Completely open the primary aircontrol by moving it all the way to the left. Fully loadthe firebox with wood on a bed of hot coals or on anactively flaming fire. To minimize creosoteaccumulation, run the stove on high once or twicedaily for 35 to 45 minutes to fully heat the stovepipeand chimney.Figure 14 AIR CONTROL POSITIONS<strong>Hearthstone</strong> Quality Home Heating Products, Inc ® 23<strong>Manchester</strong> Model <strong>8360</strong>
OVER-FIRE CAUTIONOver-firing means the stove is operating attemperatures above normal temperatures reachedduring High Burns outlined in the BURN RATEsection. Carefully avoid over-firing, as it will damagethe stove. Symptoms of chronic over-firing caninclude warped components, short burn times, aroaring sound in the stove or stovepipe, anddiscoloration of the stovepipe. A properly installedstove using fuel and following operating proceduresas outlined in this manual should not over-fire.Excessive draft, inappropriate fuel, and operatorerror can cause over-firing. Correct an over-firesituation as follows:EXCESSIVE DRAFT: Contact your local dealerto have a draft reading taken. Any draft inexcess of 0.1 WC requires a damper in thestovepipe. Some installations may require morethan one damper.INAPPROPRIATE FUEL: Do not burn coal; kilndried lumber, wax logs, compressed wood oranything other than natural cordwood.OPERATOR ERROR: Ensure all the gasketsare in good condition. Replace worn out orcompressed gaskets. Do not burn the stove withthe front door or ash door in the open, orpartially open position.If you suspect that your stove is over-firing,discontinue use and contact your dealerimmediately. Damage caused by over-firing is notcovered by your warranty. Results of over-firingcan include warped or burned out internal parts,cracked refractory panels, discolored or warpedexternal parts, and damaged finish.ANY SIGNS OF OVER-FIRING WILL VOID YOURWARRANTY!THE FRONT DOOR, SIDE DOOR AND ASH PANDOOR MUST REMAIN CLOSED WHEN INOPERATION EXCPET FOR START UP ANDLOADING.REMOVAL AND DISPOSAL OF ASHESRemove ashes only when the stove is cold. Use theprovided protective fireplace glove if the ash pan iswarm. Exercise extreme caution when handling,storing or disposing of ashes.The ash pan is located behind the ash door at thebottom front of the stove. The ash pan collectsburned ash from a fire and allows you to remove theash conveniently from your wood stove. Clear thefirebox of ashes, and do not let them build up toohigh. You can leave a thin layer of ashes in thefirebox if preferred. It is important to prevent ashesfrom building up around the front door opening orthey will spill out, or they can pack into the gasketchannel and prevent proper sealing. To removeashes, sift the ashes across the grate into the ashpan. The large ash pan is easy to remove forconvenient disposal of ashes. Dump ashes from theash pan directly into a metal container with a tightfitting lid. Do not place any other items or trash intothe metal container. Do not pour water into thecontainer. Replace the container’s lid and allow theashes to cool. Never place the ash disposalcontainer on a combustible surface or vinyl flooring,as the container could be hot!Pending disposal, place the closed ash container ona noncombustible floor or on the ground outside,well away from all combustible materials, liquid fuels,or vehicles. Retain ashes in the closed containeruntil all coals thoroughly cool.If the ashes are disposed of by burial in soil orotherwise locally dispersed, they should be retainedin the closed container until all cinders havethoroughly cooled.NEVER place ashes in wooden or plasticcontainers, in trashcans with other trash, or inpaper or plastic bags, no matter how long thefire has been out. Coals within a bed of ashescan remain hot for several days once removedfrom the firebox.<strong>Hearthstone</strong> Quality Home Heating Products, Inc ® 24<strong>Manchester</strong> Model <strong>8360</strong>
MaintenanceGLASS REPLACEMENT PROCEDURESWARNING: DO NOT OPERATE THIS APPLIANCE WITH THE GLASS PANEL REMOVED, CRACKED, ORBROKEN. DO NOT SUBJECT THE DOOR TO ABUSE, SUCH AS STRIKING OR SLAMMING SHUT. ONLY AQUALIFIED SERVICE PERSON SHOULD REPLACE THE GLASS PANEL.Glass Clips (8)Glass GasketDoor GasketGlass Pads (8)GlassDoor FrameFigure 15: Front Door assembly1. Follow the instructions included with the replacement glass kit.2. Remove the door.3. Remove the screws from the glass retainer (use penetrating oil if necessary) – lift the retainer off the glass.Set aside for reinstallation.4. Carefully lift the damaged glass out of the door and discard.5. Remove any remaining glass and old gasket material.6. Clean the screw holes and place a small amount of anti-seize compound in each one.7. Place the gasketed new glass onto the door. Ensure sticker is on the exterior face of the glass.8. Important! Center the glass and ensure that the edges of the glass are parallel with the edges of theopening.9. Check glass position again (centered, and parallel), then screw the glass retainer clips back on the doorusing a crisscross pattern. Tighten the screws no more than 1/8 th of a turn after they seat. The glass willbreak at this point if not positioned correctly.10. Apply a light film of anti-seize lubricant on the door’s hinge pins if needed.11. Install the door.12. After 5 or 6 fires, check the glass retainer screws, and retighten if necessary.Required Glass Kit: Part Number: 90-58901 (Glass with gasket applied). Use only 5mm Ceramic IR, orNeoceram IR glass. Contact your <strong>Hearthstone</strong> dealer.<strong>Hearthstone</strong> Quality Home Heating Products, Inc ® 25<strong>Manchester</strong> Model <strong>8360</strong>
CREOSOTE FORMATION & REMOVALWhen wood burns slowly at low temperatures, it mayproduce tar and other organic vapors, whichcombine with expelled moisture to form creosote.These creosote vapors condense in the relativelycool chimney flue of a slow-burning fire. As a result,creosote residue accumulates on the flue lining.When ignited, this creosote makes an extremely hotfire, which may damage the chimney or even destroythe house. When burning wood, inspect the chimneyconnector and chimney at least once every twomonths during the heating season to determine ifthere is a creosote buildup.If a creosote build-up occurs, inspect the stovepipeconnector and chimney more often, at least monthlyduring the heating season to monitor theaccumulation. If a creosote residue greater that 1/4"(6 mm) accumulates, remove it to reduce the risk ofa chimney fire.PreventionBurn the stove with the primary air control fully openfor 35 - 45 minutes daily to burn out creosotedeposits from within the stove and the ventingsystem.After reloading with wood, burn the stove with theprimary air control fully open for 15 to 20 minutes.This manner of operation ensures early engagementof the secondary combustion system that minimizescreosote buildup in the chimney.If your glass always remains dirty, your operatingtemperatures are too low or your wood is wet;therefore, there is a higher risk of creosote buildup.Inspect the venting system at the stove connectionand at the chimney top. Cooler surfaces tend tobuild creosote deposits faster, so it is important tocheck the chimney at the top (where it is coolest) aswell as from the bottom near the stove.CleaningRemove accumulated creosote with a cleaningbrush specifically designed for the type of chimneyin use. We recommend you use a certified chimneysweep to perform this service. Contact your dealerfor the name of a certified chimney sweep in yourarea (your dealer may be a certified sweep!).We recommend that before each heating seasonyou have the entire system professionally inspected,cleaned and repaired, if necessary.GASKETSReplace door gasket material every two to threeseasons, or whenever it becomes deteriorated orloose, depending on stove use. If the door sealleaks, a new gasket will ensure a tight seal andimprove stove performance.We recommend you only use <strong>Hearthstone</strong>replacement gaskets when you need to replace yourdoor gasket. Contact your dealer for a gasket kit thatincludes instructions, and the gasket for your stove.GLASSThe glass used in our stoves is actually not plainglass, but a tough, clear ceramic material capable ofoperating at temperatures up to 2300° F. Do notoperate the stove with a broken door glass. Do notabuse the front door by striking or slamming.When necessary, clean the glass. We recommendusing a damp paper towel dipped in gray ash. Rubthe inside of the glass with a circular motion. Whenall the deposits are removed, clean up with windowcleaner or with commercial stove glass cleaners,which are available from your local dealer. Neverattempt to clean the glass while the fire is burning orwhile the glass is hot. Remove deposits by followingthe instructions provided with the cleaner. Wipe thecleaner off with a soft cloth, or black & whitenewsprint.Important: scratching or etching the glasswill weaken the integrity of the glass. Do notuse a razor blade, steel wool, or any otherabrasive material to clean the glass. Use acleaner specifically manufactured forwoodstoves only.The front door glass is a ceramic, thermal shockresistantglass, made specifically for use inwoodstoves. Do not use any replacement glassother than the ceramic glass manufactured andsupplied for use in this woodstove. Replacementglass is available through your local dealer.Replace the door glass immediately if broken orchipped. Contact your local dealer for replacementglass. The glass kit includes instructions andeverything needed for the repair. If you replace theglass yourself, wear work gloves and safety glasses.Required Glass Kit: PN: 93-58300 (Glass withgasket applied).<strong>Hearthstone</strong> Quality Home Heating Products, Inc ® 26<strong>Manchester</strong> Model <strong>8360</strong>
TroubleshootingCOMMON ISSUESVirtually all woodstove operators experience basiccommon problems at one time or another. Most arecorrectable and generally require only a minoradjustment of the stove, installation, or operatingtechnique. In cases where weather conditionsdramatically affect stove performance, the problemsare typically temporary and solve themselves oncethe weather changes.If you question whether your stove is producingadequate heat, the best way to troubleshoot theproblem is to monitor the temperature of the stackno more than 12 inches (30 cm) above the fluecollar. A 400° F (200° C) stovepipe confirms thestove is supplying sufficient heat. Keep in mind thatyour house itself will regulate room/housetemperatures. How well the walls, floors and ceilingsare insulated, the number and size of windows, thetightness of outside doors, and the construction orstyle of your house (vaulted ceilings or other openspaces which collect large percentages of heat,ceiling fans, etc.) all are determining factors of roomtemperature.Your stove's performance is also dependent on itsinstallation. One common cause of poorperformance is an oversized chimney flue.Oversized chimney flues result in decreased draft,which prevents the smoke from rising out thechimney. Oversized flues are also more difficult toheat effectively, especially when burning a highefficiency stove. Cool flue temperatures inhibit theestablishment of a strong draft (and encourage theaccumulation of creosote). The lack of a strong draftwill cause the fire to die down and may even forcesmoke to pour into the room.If your chimney is the proper size and a strong draftis not easily established, there is the possibility thatthe chimney is too cold. Again, hot chimneyspromote stronger drafts. Opening a window briefly inthe room while lighting the stove may help.Other draft guidelines are as follows:An "AIRTIGHT" HOUSE: The air supply (infiltration)to the interior of the house may be inadequate ifyour home is super-insulated or especially wellsealed. This phenomenon of air starvation within thebuilding is exacerbated if exhaust fans, such asclothes dryers, bathroom fans or cook stove exhaustfans, are in operation within the home. Outfittingyour stove with the optional outside air adaptorconnected to an air duct, which leads to the outsideof the building, can correct this problem.Tall Trees or Buildings: These obstructions, whenlocated close to the top of the chimney can causechronic or occasional downdrafts. When selecting asite for a new chimney, consider the placement ofother objects near the proposed chimney location.Wind Velocity: Generally, the stronger and steadiera wind, the stronger (better) the draft. However,"gusty" wind conditions can cause erraticdowndrafts. For consistent problems, consider ahigh wind cap, such as the Vacu-Stack.Barometric Pressure: Chimney drafts are typicallysluggish on balmy, wet or muggy days (lowbarometric pressure). This is a weather-relatedphenomenon, which generally is self-correcting asthe weather changes.Briskness of Fire: The hotter the fire in your stove,the hotter your chimney and, therefore, the strongerthe draft.Breaks in the Venting System: An unsealedclean-out door at the bottom of the chimney, leakystovepipe joints, a poor stovepipe-to-thimbleconnection, missing caps, or a leaky chimney all cancause inadequate draft.Seasonal Factors: Early fall and late spring aregenerally difficult seasons in which to establishproper drafts. The colder the outside air is relative toroom temperature, the stronger the draft.OPERATING THE STOVEAs outlined above, there are days when a good draftis just not easy to establish. The causes are usuallyseasonal factors or a cold chimney. Try starting thefire by using small kindling and fuel to obtain a quick,hot fire. Tend the fire frequently with small fuel untilthe chimney is hot and the draft is well established.Sometimes, partially opening a first floor windowbriefly will help quickly get draft established.<strong>Hearthstone</strong> Quality Home Heating Products, Inc ® 27<strong>Manchester</strong> Model <strong>8360</strong>
TROUBLESHOOTING GUIDEPROBLEM POSSIBLE CAUSE SOLUTIONSSTOVE SMOKES Operating Technique Fully open the primary air control one minute before openingdoors.Cold Chimney or reversedraftPreheat the chimney when first starting a fire. Briefly open awindow in the room containing the stove.Blocked Chimney Examine the chimney and stovepipe for blockage orcreosote accumulations.Oversized Chimney Reline the chimney to the appropriate diameterUndersized Chimney Install a draft inducer or replace the chimney.Chimney Too Short Lengthen the chimney.Air Infiltration Into The Seal chimney connections and openings. Check clean-outBACK-PUFFING ORGAS EXPLOSIONSUNCONTROLLEDOR SHORT BURNINSUFFICIENTHEATBLISTERING OFFINISHChimneyMore Than OneAppliance Connected tothe FlueOperating TechniqueExtra Low Burn RateChimney Down-draftExcessive Ash Build-upUnsealed or Open DoorExcessive DraftExtra Long ChimneyOversized ChimneyHigh Winds or HilltopLocation:Poor Quality, low Btucontent, or Green WoodLow Burn RateCold Exterior ChimneyLeaky Stovepipe orChimneyToo Much Heat LossFrom HouseExcessive Ash Build-upOperating TechniqueExcessive Draftdoors.Disconnect all other appliances and seal openings.Fully open the primary air control one minute before openingthe door and keep it fully open for a few minutes afterreloading.Burn the stove at a higher burn rate.Install a chimney cap.Empty the ash pan more frequently. Increase efficiency ofburns, and avoid using poor quality or green wood.Close the door tightly or replace the gaskets.Check the installation. Operate at LOW BURN. Installstovepipe damper. Draft in excess of 0.1 wc should becorrected with a stovepipe damper(s)Shorten the chimney. Install stovepipe damper(s).Reline the chimney to the proper diameter.Install a chimney cap.Use only air-dried wood, preferably dried at least one year.Use a wood with a high Btu content if available.Operate the stove at a higher burn rate.Reline or insulate the chimney.Check the installation. Replace with a pre-fabricatedinsulated chimney system or a properly sized masonrychimney.Add insulation, use energy efficient windows, or caulkwindows, and seal openings in home.Empty the ash pan more frequently. Increase efficiency ofburns, and avoid using poor quality or green wood.Do not over-fire the stove. Monitor stove temperatures. Useseasoned wood only.Check the DRAFT. A damper may be required. Operate thestove at a LOW BURN range.<strong>Hearthstone</strong> Quality Home Heating Products, Inc ® 28<strong>Manchester</strong> Model <strong>8360</strong>
REPLACEMENT PARTS & OPTIONAL ACCESSORIESPART # DESCRIPTION PART # DESCRIPTIONCASTINGS5491-045 DOOR CATCH2010-282 FLUE PLATE2010-285 FLUE COLLAR *2310-600 PRIMARY AIR PLENUM MISCELLANEOUS2310-605 UPPER ASH GRATE 1-0000-101 REFRACTORY STONE (4-1/2”x9”)2310-610 TOP PANEL 1-0000-300 REFRACTORY STONE (7-1/2”x10-3/8”)2310-615 FRONT DOOR * 1-0000-304 REFRACTORY STONE (4-7/8”x12”)2310-617 FRONT/SIDE DOOR HANDLE 1-0000-308 REFRACTORY STONE (2-3/4”x9”)2310-620 SIDE DOOR * 3120-360 CERAMIC BAFFLE2310-625 ASH PAN FRAME 3120-362 CERAMIC, SIDE DOOR BOARD2310-630 INNER REAR PANEL 3120-363 CERAMIC BLANKET (2”x12”x1/4”)2310-635 BOTTOM2310-640 SIDE PANEL* (WITH NO DOOR OPENING)2310-650 GRILL * OPTIONAL ACCESSORIES2310-655 ASH PAN DOOR HANDLE * 93-57600 BLOWER KIT2310-660 ASH LIP * 93-53500 OUTSIDE AIR KIT2310-665 LOWER ASH GRATE 93-68600 CLOSE CLEARANCE HEAT SHIELD KIT2310-670 SECONDARY AIR PLENUM, BOTTOM 93-69600 SPARK SCREEN KIT2310-675 FRONT PLATE 93-58300 GLASS KIT2310-685 TOP * 93-58600 GASKET KIT2310-690 REAR PANEL * 93-71600 FRONT & SIDE DOOR HANDLE KIT2310-695 SECONDARY AIR PLENUM, TOP 94-73910 SIDE DOOR LATCH KIT*SPECIFY COLOR IF FINISH IS ENAMELED93-73600 FRONT DOOR LATCH KITSTEEL SET93-70607 SIDE DOOR LOCKING KIT5021-060 GLASS CLIP5021-066 BAFFLE BRACKET5360-010 ASH PAN5360-012 ASH DOOR5360-014 ASH DOOR HINGE5360-024 PRIMARY AIR SLIDER5360-028 AIR CONTROL LEVER5360-030 SECONDARY AIR RISER PIPE5360-050 FRONT DOOR HINGE W/ PIN5360-052 REFRACTORY RETAINER5360-058 SIDE DOOR HINGE5360-060 SIDE DOOR HINGE CLIP5360-062 FRONT DOOR HINGE (NO PIN)5360-071 SECONDARY AIR PIPE #15360-072 SECONDARY AIR PIPE #25360-073 SECONDARY AIR PIPE #35360-085 TOP HEAT SHIELD<strong>Hearthstone</strong> Quality Home Heating Products, Inc ® 29<strong>Manchester</strong> Model <strong>8360</strong>
Safety Label<strong>Hearthstone</strong> Quality Home Heating Products, Inc ® 30<strong>Manchester</strong> Model <strong>8360</strong>
WARRANTY REGISTRATIONThe Original Purchaser can complete their warranty registration on our website at www.hearthstonestoves.com,or send a completed and signed Warranty Registration Form, which is enclosed in the Woodstove warrantypacket, to the following address:<strong>Hearthstone</strong> Quality Home Heating Products, Inc.Warranty Department317 Stafford AvenueMorrisville, VT 05661NOTE: SENDING IN THE SIGNED WARRANTY REGISTRATION FORM IS NOT REQUIRED AS ACONDITION OF WARRANTY COVERAGE OR HEARTHSTONE’S PERFORMANCE.<strong>Hearthstone</strong> Quality Home Heating Products, Inc ® 31<strong>Manchester</strong> Model <strong>8360</strong>
Notes:<strong>Hearthstone</strong> Quality Home Heating Products, Inc ® 32<strong>Manchester</strong> Model <strong>8360</strong>