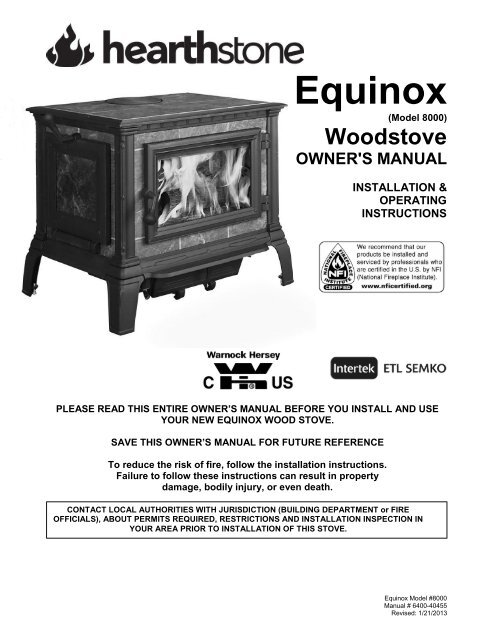
Equinox 8000 Manual - Hearthstone Stoves
Equinox 8000 Manual - Hearthstone Stoves
Equinox 8000 Manual - Hearthstone Stoves

You also want an ePaper? Increase the reach of your titles
YUMPU automatically turns print PDFs into web optimized ePapers that Google loves.
Maximum Heat Output120,000 BTU per hour using cordwood (based onindependent laboratory test results).Floor Size of Heated AreaUp to a maximum of 3,500 square feet. Factorsunique to your home and installation can reduce thesquare footage the stove will heat. Home insulationvalue, number and efficiency of windows, floor plan,stove placement, quality of the fuel and otherconditions may limit the heating ability of the stove.Firebox Capacity4.0 cubic feet, or 80 pounds of wood. The amountand weight of wood contained per cubic foot offirebox volume can vary from 15 to 36 lbs. per cubicfoot depending on type of wood, moisture content,packing density and other factors. As a constant forcomparison and test purposes, we are assuming 20lbs. of seasoned hardwood per cubic foot of fireboxvolume.Maximum Log Length: 25”Front Door Opening Size:Side Door Opening Size:Stove Dimensions:Height (includes flue collar):Width:Depth:Actual Weight:Crate Dimensions:(includes pallet).Specifications19.25" W x 10" H13" wide x 8.5” high30-5/8" (77.8 cm)33-5/8" (85.4 cm)27" (68.6 cm)689 lbs (313 kg)H-40” W-41” D-31”Flue Exit:Stovepipe Size:Metal Chimney:View 2 - <strong>Equinox</strong> TopView 3 - <strong>Equinox</strong> Left SideTop or rear8" (203 mm) diameter8" (203 mm) inside diameterMasonry Chimney: 8" (203 mm) inside diameter(round flue) 8” x 8” (203 x 203mm) (square flue)Optional Equipment:Soapstone Finish 1SoapstoneRear Heat Shield 90-6<strong>8000</strong>Outside Air Kit 90-53500Blower 90-57502Spark Screen 90-69000Side Door Lock Kit 90-70200Smooth, Polished GrayView 1 – <strong>Equinox</strong> Front1 Gray soapstone is a natural product and colors will varyfrom stone to stone. Various amounts of gray, charcoal, blueand green are evident dependant on the natural compositionof the stone.HearthStone Quality Home Heating Products, Inc ®6<strong>Equinox</strong> Model <strong>8000</strong>
InstallationUNPACKING<strong>Hearthstone</strong> packages your <strong>Equinox</strong> woodstove withthe greatest care so that it ships safely. Undercertain circumstances, however, damage may stilloccur during transit and handling. When you receivethe <strong>Equinox</strong>, refer to the instructions below forremoving the stove from the pallet, then carefullyunpack and inspect the stove and all accompanyingparts. Make sure that all parts are included in thebox. If any parts are damaged or missing, pleasecontact your dealer immediately.system will support the weight of the stove andhearth. If you are not certain your floor is adequate,contact a professional structural engineer for advice.If the floor is made of combustible material, then anon-combustible floor protector with at least an R-1rating is required between the floor and this stove.An example of a non-combustible floor protector is ahearth constructed with a continuous layer of a listedbacker board (such as Micore, Wonder-Board orDurock) used for ember protection with a tile, brick,slate, or another non-combustible facing.If you use a close clearance connector pipe, ensureit is listed with Underwriter’s Laboratories. Check thelisting of your pipe with UL for the correctclearances.The diagrams in this manual represent typicalinstallations, but are specific to the Simpson Dura-Vent DVL brand.CLEARANCES TO NFPA CODE 211 PROTECTEDSURFACESYou can reduce the clearances to combustiblesurfaces by using any National Fire ProtectionAgency (NFPA) approved wall protection system.Please refer to NFPA Code 211 for specificationsand complete details. You can obtain thisinformation directly from the NFPA (U.S. Only).Detail 1 – Removing stove from palletINSTALLING YOUR STOVEChoose a place to install your <strong>Equinox</strong> woodstove.Inspect this location to make sure that the stove andstovepipes will have the required clearance fromcombustible materials that are near the stove.Combustibles include walls, floor, ceiling, andchimney chase. You must carefully consider theclearances to all of these combustibles beforeactually connecting your stove.National Fire Protection AgencyBatterymarch ParkQuincy, MA 022691-800-344-35551-617-770-3000www.nfpa.orgHEARTH REQUIREMENTS AND FLOORPROTECTIONEnsure you protect combustible flooring with acovering of noncombustible material. The floorprotection must extend beyond the body of thestove at the minimum as follows:* Installations in Canada require 18” (45.72 cm) of floorprotection on the sides with doors, and 8” (20.32 cm) on thesides without a door.** Rear clearance required only if stovepipe runs horizontallyback above the top of the stove.Consider the weight of the <strong>Equinox</strong> [689 pounds(313 kg)], and its hearth. You must ensure the floorHearthStone Quality Home Heating Products, Inc ®7<strong>Equinox</strong> Model <strong>8000</strong>
(76 mm) diameter duct (supplied by others) whichleads to the outside of the house. When consideringplacement of the duct from the outside of the houseto the hearth, keep in mind the need to avoidstructural members of the house. The outside air kitwill attach to the back of the stove.The International Residential Code (IRC) does notallow the outside air duct to terminate higher thanthe appliance. Some building officials also do notlike to see any vertical rise in the duct’s termination.<strong>Hearthstone</strong> recommends the termination be at thesame level, or lower than the air intake on the stove.Locate the termination of the duct on the outsidewall of the home in such a manner to avoid thepossibility of obstruction by snow, leaves or othermaterial. Screen the termination using ¼” x ¼” meshrodent screen and cover it with a rain/wind proofhood (flex pipe, outside termination, mesh, and hoodsupplied by others) Contact your dealer foravailability.COMBUSTIBLE SURFACE REQUIRED CLEARANCES:It is very important to follow minimum clearances for chimney connectors to combustibles such as walls andceilings when installing the stove near combustible surfaces.MINIMUM CLEARANCES TO COMBUSTIBLES (FROM CLOSEST POINT OF STOVE)Figure 3: Freestanding Installation Clearances (with side door shown on left) (US Requirements)HearthStone Quality Home Heating Products, Inc ®9<strong>Equinox</strong> Model <strong>8000</strong>
Figure 4: Fireplace Installation ClearancesFREESTANDING COMBUSTIBLE SURFACE CLEARANCE DIMENSIONS (INCHES) (US REQUIREMENTS)ParallelCornerInstallation type A** B C D E** F G H I J KNo Heat Shield &single wall connector21 21 22-3/4 26-3/4 37-1/4 18-1/4 59-3/4 15 26-3/8 30-3/8 76No Heat Shield &double wall connector20 17 18-3/4 22-3/4 36-1/4 14-1/4 55-3/4 14-1/2 25-7/8 29-7/8 75-1/3Rear Heat Shield &single wall connector22 8 * 9-3/4 13-3/4 38-1/4 5-1/4 46-3/4 15-1/2 26-7/8 30-7/8 76-3/4Rear Heat Shield &double wall connector19 6 * 7-3/4 11-3/4 35-1/4 3-1/4 44-3/4 13-1/2 24-7/8 28-7/8 73-7/8* Measured from the body of the stove, not the heat shield. ** A and E apply to the side of stove where the side door is installed.ALCOVE COMBUSTIBLE SURFACE CLEARANCE DIMENSIONS (INCHES)Installation type A** B Top of Stove to CeilingNo Heat Shield & single wall connector 20 21 67Rear Heat Shield & single wall connector 21 8 67Rear Heat Shield & double wall connector 20 6 67If you use a rear heat shield to obtain reducedclearances, you must only use the optional rear heatshield manufactured by <strong>Hearthstone</strong> specifically forthe <strong>Equinox</strong> Model <strong>8000</strong> (Heat Shield part number:90-6<strong>8000</strong>) , which is available through your localdealer.Use only close clearance connector pipe tested toUL standards and listed. Check listings of your pipefor actual clearances. Measurements shown aboveand on the following page are specific to theSimpson Dura Vent DVL brand. Do not reduceclearances without the use of the rear heat shieldand/or with close clearance connector pipe and/orby protecting the combustible surfaces per NFPA211 standards. See NFPA-211 for protectedsurface clearance requirements.HearthStone Quality Home Heating Products, Inc ®10<strong>Equinox</strong> Model <strong>8000</strong>
Figure - 5HearthStone Quality Home Heating Products, Inc ®11<strong>Equinox</strong> Model <strong>8000</strong>
We do not recommend long runs of stovepipe toincrease heat dispersal. Longer lengths of stovepipeor more connecting elbows than necessary increasethe chances of draft resistance and theaccumulation of creosote.In general, you do not need to install a stovepipedamper with the <strong>Equinox</strong>. Some installations,however, could benefit from a stovepipe damper,such as a tall chimney which can create a higherthan normal draft. In such cases, a damper can helpregulate the draft. The <strong>Equinox</strong> requires a draftbetween 0.06" and 0.1" Water Column. For draftsabove 0.1" Water Column (wc), install a stovepipedamper. Check the draft at stove installation time.Remember, the NFPA recommends minimumclearances for chimney connectors to combustiblessuch as walls and ceilings. Once the stove isinstalled at safe distances from combustiblesurfaces, it is important to also maintain theseconnector clearances for the remainder of theinstallation.CONNECTING THE STOVE TO A CHIMNEYYou can install your <strong>Equinox</strong> to a prefabricatedmetal chimney, or a masonry chimney (see Figures6 and 8).PREFABRICATED METAL CHIMNEYThere are two ways to install a prefabricated metalchimney:1. An interior installation where the chimneypasses inside the structure through the ceilingand roof2. An exterior installation where the chimneypasses through the wall behind the stove thenup the outside of structureWhenever possible, choose an interior chimney. Aninterior chimney heats up quickly and retains itsheat; thus promotes a better draft and discouragesthe formation of creosote. An exterior chimney doesnot benefit from the warmth of the building, so ittypically operates at lower flue temperatures. Anexterior chimney’s draft is not as strong and mayexperience increased creosote accumulation.When connecting the <strong>Equinox</strong> to a prefabricatedmetal chimney, you must follow precisely, themanufacturer's installation instructions. Use onlyType HT (2100 deg. F), prefabricated metalchimneys listed per UL 103 or ULC S629 standards.The <strong>Equinox</strong> requires a minimum 8" (203 mm) insidediameter flue. An 8” diameter flue provides adequatedraft and performance. You can use a largerdiameter existing flue with a reducer – see NFPA211. Ensure the chimney size is not less than, ormore than three times greater than, the crosssectionalarea of the flue collar. Note that anoversized flue contributes to creosote accumulation.(In this case, bigger is NOT better.)When purchasing a prefabricated chimney to installwith your stove, Ensure you also purchase from thesame manufacturer the wall pass-through (or ceilingsupport package), "T" section package, fire-stops(when needed), insulation shield, roof flashing,chimney cap, and any other needed accessories.Follow the manufacturer’s instructions wheninstalling the chimney and accessories. In addition,ensure you maintain all manufacturers’recommendations for the proper clearances to thechimney.MASONRY CHIMNEYConsider two primary elements when connectingyour stove to a masonry chimney: the chimney itselfand the thimble where the stovepipe connects to thechimney. Use only Code approved masonrychimneys with a flue liner.Before connecting to a masonry chimney, hire aprofessional to examine the chimney for cracks,loose mortar, and other signs of deterioration andblockage. If the chimney needs repair, completethem before installing and using your stove. Do notinstall your stove until the chimney is safe for use.Make sure the chimney’s cleanout is complete andworking properly. To avoid a loss of draft, thecleanout door must close completely and provide atight seal. If the cleanout door leaks, the chimney willcool, your stove will perform poorly, and creosote willbuild up.Ensure the size of the chimney’s flue is appropriatefor this stove and that it is not too large. You can usea masonry chimney with a larger tile size – but seeNFPA 211 for limitations. An oversized flue reducesdraft, and contributes to the accumulation ofcreosote.Use the following checklist to ensure that yourmasonry chimney meets these minimumrequirements:Masonry Chimney wall construction:Mortared brick or modular block at least 4" (102mm) thickA mortared rubble or stone wall at least 4" (102mm) thickFlue liner options:Tile - minimum wall thickness of 5/8" (16 mm)HearthStone Quality Home Heating Products, Inc ®13<strong>Equinox</strong> Model <strong>8000</strong>
Tile - installed with refractory mortarTile - at least 1" (25 mm) air space around linerStainless steel - UL listed 8” diameterStainless steel - fill space around liner withvermiculite (keeps liner warmer for betterperformance)Ensure an equivalent flue liner is a listedchimney liner system meeting type HTrequirements or other approved material.Interior chimney requirements:At least 2" (51 mm) clearance to combustiblematerialsFire stops installed at the spaces where thechimney passes through floors and/or ceilingAny insulation is at least 2" (51 mm) from thechimneyExterior chimney requirements:At least 1" (25 mm) clearance to combustiblematerialsChimney height requirements (See Figure onpage 15):At least 3 feet (0.9 m) higher than the highestpart of the roof opening through which it passes.At least 2 feet (0.6 m) higher than any part of theroof within 10 feet (3 m) measured horizontallyfrom the top of the chimney.This stove requires a minimum chimney heightof 13 feet (4 m).HearthStone Quality Home Heating Products, Inc ®14<strong>Equinox</strong> Model <strong>8000</strong>
Figure 6: Typical Acceptable Chimney & Connector ConfigurationsHearthStone Quality Home Heating Products, Inc ®15<strong>Equinox</strong> Model <strong>8000</strong>
INSTALLING IN A MOBILE HOMEFollow these special requirements for installing yourstove in a mobile home.Install the stove in accordance with 24 CFR,Part 3280 (HUD).A chimney cap spark arrestor is a requirementin mobile home installations.<strong>Hearthstone</strong> recommends you install at leastone smoke detector.You must permanently attach the stove to yourmobile home’s floor. Use appropriate boltsthrough the existing holes in the legs, or use theclips that secured the <strong>Equinox</strong> to the pallet (seeDetail 1 on page Error! Bookmark notdefined. of this manual).Mobile home installations require the use of anoutside air adaptor kit:o<strong>Hearthstone</strong> Kit # 93-53500 (Seepage 8)Install the following Dura-Vent Mobile HomeChimney & Connector Kit (or equivalent):oo8DP-MH 8” Diameter S/N 9296NEach kit includes:• Stainless spark arrestorcap, storm collar,• Adjustable vented flashing– 0/12 – 6/12,• Two 24” Dura/Plus*chimney pipes, 24” Supportbox with built-in startersection and trim. You mustprovide the appropriateconnector pipe.*(UL or ULC approved equipment is acceptable)Remove the entire chimney and connector pipeprior to transporting the mobile home. Flexing ofthe structure during movement could damagethe chimney components if not removed.WARNING: DO NOT INSTALL IN A SLEEPINGROOM IN A MOBILE HOME.CAUTION: MAINTAIN THE STRUCTURALINTEGRITY OF THE MOBILE HOME WALLS,FLOOR, CEILING, AND ROOF WHENINSTALLING AND USING YOUR STOVE.HearthStone Quality Home Heating Products, Inc ®17<strong>Equinox</strong> Model <strong>8000</strong>
Once installation of your <strong>Equinox</strong> is complete, youare ready to light a fire. <strong>Hearthstone</strong> tests eachwoodstove before we ship it, so you will easily lightyour first fire.WARNING: HOT WHILE IN OPERATION! KEEPCHILDREN, CLOTHING AND FURNITURE AWAY.CONTACT CAN CAUSE SKIN BURNS.Read this entire chapter before lighting your first fire.It explains the controls and features of yourwoodstove, how to choose firewood, and how to useyour stove on a daily basis.CONTROLS AND FEATURESBefore lighting any fires, become familiar with thelocation and operation of your stove's controls andfeatures and learn how to use them. For your ownsafety, do not modify these features in any way. The<strong>Equinox</strong> wood stove radiates heat into thesurrounding area. In doing this, the controls of theheater can become very hot. Please use cautionwhen using any of the controls. Do not use thecontrols unless the stove is cool or you have ahearth glove.FRONT & SIDE DOOR HANDLES: (These becomehot during operation. Use a fireplace glove to openthe handle while the stove is in use) The front & sidedoors allow you to load wood into your stove; fixedhandles operate the doors. To open either door,rotate the handle clockwise and pull the door awayfrom the stove. To latch the door, push the doortightly towards the firebox then rotate the handlecounter clock-wise until it stops.ASH GRATE LEVER: (This becomes very hotduring operation. It is best to operate the ashremoval system after the stove cools.) The ash gratelever folds up, and is located directly under the frontedge of the ash lip. Reach under the right side of theash lip and rotate the handle outward clockwise untilit is fully extended. Use the ash grate lever to openand shake the ash grate to allow movement of theashes from the firebox to the ash pan. Pull the leverout to open the grate. Once you have sifted theashes through the grate into the ash pan, push thelever back in towards the stove to close the grate.Rotate the lever counterclockwise to store it backunder the ash lip.PRIMARY AIR CONTROL: (This becomes hotduring operation. It is best to operate the primary airsystem with a fireplace glove.) The primary aircontrol handle is located on the front lower left of theOperationstove, just under the left edge of the ash lip. Theprimary air control allows you to regulate the amountof air entering the firebox. Generally, the more airallowed into the firebox, the faster the rate of burn;conversely, less air creates a slower burn. Formaximum air flow, move the primary air handle asfar left as possible; move the primary air controlhandle as far to the right as possible for minimum airflow (does not close completely).ASH PAN: (This becomes hot during operation. It isbest to remove the ash pan only after the stovecools).To access the ash pan you must open the ash pancompartment door (rotate the handle ¼ turnclockwise), which is located under the front ash lip.Open the control door and locate the ash panhandle. To remove the ash pan, grip the handle andthen pull it out. The ash pan drawer will slide outwith the ash pan and provides support for the panwhile you install the pan’s lid.Lift the ash pan off the drawer with the lid’s handle.The lid for the ash pan is stored under the stove, orwhere convenient for you. Use the lid only to containthe ashes during transport for disposal – do notleave in place.The ash pan collects the ash residue from each fireand when full, allows you to remove the ashconveniently from your wood stove. Clear the fireboxof ashes periodically by opening and shaking theash grate in the bottom of the firebox. Sift the ashesthrough the grate into the ash pan, and then returnthe grate to its closed position (see images 1-3 onpage 23).To replace the ash pan, place the pan back onto thedrawer ensuring the side pins engage the drawer’snotches. Slide the ash pan and drawer back intoplace in the ash pan compartment. Lift and latchclosed the compartment door by turning the handlecounter-clockwise ¼ turn.Do not operate the stove unless the ashcompartment door is closed, and properlysealed. Not doing this could overheat anddamage the stove.HearthStone Quality Home Heating Products, Inc ®18<strong>Equinox</strong> Model <strong>8000</strong>
CHOOSING FIREWOODBurn only natural firewood (known as cordwood)in the <strong>Equinox</strong> <strong>8000</strong> Woodstove. This stove isnot designed, or certified to burn other fuels.CAUTION: DO NOT USE CHEMICALS ORFLAMMABLE FLUIDS TO START THE FIRE. DONOT USE CHARCOAL, PELLETS, COAL,ARTIFICIAL LOGS OR ANY OTHER MATERIALSAS FUEL; THEY ARE NOT SAFE. DO NOT BURNGARBAGE OR FLAMMABLE FLUIDS.The quality of your firewood directly affects heatoutput, duration of burn and performance of yourstove. Softwoods generally burn hotter and faster,while hardwoods burn longer and produce bettercoals. Density and moisture content are two criticalfactors to consider when purchasing wood for yourstove.The following is a list of some wood species andtheir relative BTU (British Thermal Unit) content. Thehigher the BTU content, the longer the burn.Firewood with higher BTUs is generally ideal for awood stove.Wood Heat Value: Sorted By BtuContentCommon Name Lb/ cord MBTU/cordHighOsage Orange (Hedge) 4,728 32.9Hickory, Shagbark 4,327 27.7Hop Hornbeam (Ironwood) 4,267 27.3Beech, Blue (Ironwood) 3,890 26.8Birch, Black 3,890 26.8Locust, Black 3,890 26.8Hickory, Bitternut 3,832 26.7Locust, Honey 3,832 26.7Apple 4,100 26.5Mulberry 3,712 25.8Oak, White 4,012 25.7Medium HighBeech, European 3,757 24Maple, Sugar 3,757 24Oak, Red 3,757 24Ash, White 3,689 23.6Birch, Yellow 3,689 23.6MediumJuniper, Rocky Mtn 3,150 21.8Elm, Red 3,112 21.6Coffeetree, Kentucky 3.112 21.6Hackberry 3,247 20.8Tamarack 3,247 20.8Birch, Gray 3,179 20.3Birch, White (Paper) 3,179 20.3Walnut, Black 3,192 20.2Cherry 3,120 20Ash, Green 2,880 19.9Cherry, Black 2,880 19.9Elm, American 3,052 19.5Elm, White 3,052 19.5Sycamore 2,808 19.5Ash, Black 2,992 19.1Maple, Red 2,924 18.7Fir, Douglas 2,900 18.1Medium LowBoxelder 2,797 17.9Alder, Red 2,710 17.2Pine, Jack 2,669 17.1Pine, Norway (Red Pine) 2,669 17.1Pine, Pitch 2,669 17.1Catalpa 2,360 16.4Hemlock 2,482 15.9Spruce, Black 2,482 15.9Pine, Ponderosa 2,380 15.2LowAspen, American 2,290 14.7Butternut (Walnut, White) 2,100 14.5Spruce 2,100 14.5Willow 2,100 14.5Fir, Balsam 2,236 14.3Pine, White (Eastern,2,236 14.3Western)Fir, Concolor (White) 2,104 14.1Basswood (Linden) 2,108 13.8Buckeye, Ohio 1,984 13.8Cottonwood 2,108 13.5Cedar, White 1,913 12.2Moisture content also plays a key role in theperformance of your stove. Wood freshly cut from aliving tree (green wood) contains a great deal ofHearthStone Quality Home Heating Products, Inc ®19<strong>Equinox</strong> Model <strong>8000</strong>
moisture. As you might expect, green wood burnspoorly. You must season green wood before using itin your wood stove. To season green wood properly,split, stack, and allow it to air dry for a period of oneyear. Green wood may provide less than 2000 Btuper pound, whereas dry wood can provide up to7000 Btu per pound.Stack the firewood on skids or blocks to keep it offthe ground, cover only the top of the stack. Plastic ortarps that cover the sides of the woodpile trapmoisture and prevent the wood from drying. As forstacking, an old Vermonter said, "The spacesbetween the logs should be large enough for amouse to get through, but not for the cat that'schasing it."CAUTION: DO NOT STORE FIREWOOD WITHINTHE STOVE'S SPECIFIED CLEARANCES TOCOMBUSTIBLE MATERIALS.BUILDING A FIREOnce you understand the controls of your woodstove and have the appropriate firewood, you areready to start a fire.BREAKING IN YOUR WOOD STOVEIt is imperative that your stove is "broken in" slowly.Soapstone must be "seasoned"; over-firing a newstove may cause soapstone to crack or maydamage other stove parts. Removing the moisture inthe soapstone slowly is critical to minimize the“shock” to the stone at its first exposure to highfirebox temperatures. In addition, any moistureremaining in the asbestos-free furnace cement mustalso be slowly removed to ensure adequate sealingand bonding.When you light your first fires, the woodstove willemit some smoke and fumes. This is normal “offgassing”of any paints and oils used whenmanufacturing the woodstove. If you find itnecessary, open a few windows to vent your room.The smoke and fumes will usually subside after 10to 20 minutes of operation. The odor and smoke willend once the stove is “cured”.The first fires may produce other odors fromimpurities that exist in the area immediatelysurrounding the stove. Some potential impurities arecleaning solvents, paint solvents, cigarette smoke,and soot from scented candles, pet hair, dust,adhesives, a new carpet, and new textiles. Theseodors will dissipate over time. You can alleviatethese odors by opening a few windows or otherwisecreating additional ventilation around your stove. Ifany odor persists, contact your dealer or anauthorized service technician.If you adhere to the operating procedures in thismanual, the stainless steel, cast iron, and soapstonecomponents of your stove will give you many yearsof trouble-free use. With use, the color of thesoapstone will change and small fractures mayappear on the surface of the stone. These changeswill only add character and distinction to your stove.Avoid the following conditions that can cause theglass, soapstone, steel or cast iron pieces to break:Do not throw wood into the stove.Do not use the door as a lever to force wood intothe stove.Do not load wood encrusted with ice into aburning stove - the thermal shock can causedamage.Do not use a manufactured log grate. Burn thefire directly on the cast iron and stone bottom ofthe firebox.The bottom layer of soapstone in the fireboxprevents thermal stress and should remain in placein the firebox at all times.BUILDING A BREAK IN FIRE1. Open the front or side door and place five or sixdouble sheets of tightly twisted newspaper in thecenter of the firebox. Arrange kindling in acrisscross pattern over the newspaper. Kindlingshould consist of approximately ten pieces, 1/2"(13 mm) in diameter and 10" to 20" (254 mm to508 mm) long.2. Fully open the primary air control by pushing thecontrol handle fully to the left, away from thefirebox.3. Light the paper under the kindling. Close theside door and briefly leave the front door slightlyajar until the kindling burns and draft begins topull.4. Close the door and allow the fire to burn. Keepboth the front and side doors closed while thestove is in use. Ensure the ash grate is in theclosed position and the ash drawer compartmentdoor is tightly closed.5. MONITOR YOUR STOVE to maintain a steady,low-burn fire. Your first fire should make thestove warm but not hot, to the touch. At most,add a few small chunks of wood to the fire toreach safe break-in temperatures.6. Once the stove is warm but not hot to thetouch, close the primary air control by pushing itfully to the right to allow the fire to die outcompletely.HearthStone Quality Home Heating Products, Inc ®20<strong>Equinox</strong> Model <strong>8000</strong>
7. Let the stove return to room temperature.Ensure your first break-in fire and each subsequentfirst fire each season thereafter is built andmaintained as outlined above. A properly seasonedstove that will keep you warm for years to come willreward your patience.NOTE: Because of the cool flue gas temperaturespresent during the break-in procedure, creosote maybuild up quickly. The stove’s window may get dirty. Asubsequent good, hot fire will clean the glass. Werecommend a visual inspection (and cleaning ifnecessary) of your stovepipe and chimney after thebreak-in procedure is completed.NORMAL OPERATIONPrior to loading the stove, ensure the ash grate andthe ash compartment door both are closed. If leftopen, the stove will over-fire and will suffer damage.WARNING! RISK OF SMOKE AND FLAMESPILLAGE, OPERATE ONLY WITH THE FRONTDOOR FULLY OPEN OR FULLY CLOSED.BUILDING A FIRE FOR EVERYDAY USE1) Open the front door and place five or six doublesheets of tightly twisted newspaper in the centerof the firebox. Arrange kindling in a crisscrosspattern over the newspaper. Use approximately10 pieces of kindling, 1/2" (13 mm) in diameterand 10" to 20" (254 mm to 508 mm) long.2) Fully open the primary air control by moving itcompletely to the left.3) Light the paper under the kindling. Briefly leavethe front door slightly ajar until the kindling burnsand draft begins to pull.4) Close the door and allow the fire to burn.5) Once the kindling is burning well, open the frontdoor and add logs - small at first, to build the fireup. Ensure you keep the logs away from theglass in front in order for the air-wash system towork properly. Keep the front and side doors,and ash compartment door closed while thestove is in use.6) Once the fire is burning well, use the primary aircontrol to regulate the desired rate of burn.Move the handle to the left to open the primaryair control for a high rate of burn; or push it tothe right for a low rate of burn. The air controldoes not close completely.Note: When opening the front door to reload or rearrangelogs, it is advisable to open the door just acrack, pause for a moment, then open the doorcompletely. This procedure allows the firebox to clearof smoke before the door is open fully. In addition,reloading on a bed of hot, red coals reduces smokingtime and brings fresh fuel up to a high temperaturerapidly.BURN RATEHIGH BURN: Fully load the firebox with wood on abed of hot coals or on an actively flaming fire andfully open the primary air control by moving it all theway to the left, away from the ash lip. A high burnrate once or twice a day to heat the stovepipe andchimney fully, will help minimize creosoteaccumulation. Temperatures of top center stonenear flue collar should be in the 500-600 degrees Frange.MEDIUM HIGH BURN: With the primary air controlin the open, left most position, push the controlhandle about ¼ to ½ the distance to the right. Youshould see temperatures around 450-500 degreesF.MEDIUM LOW BURN: With the primary air controlin the open, left most position, push the handleabout ¾ of the distance to the right. A medium-lowburn rate is the typical setting and is preferable if thestove is unattended. You should see temperaturesaround 400-450 degrees F.LOW BURN: Push the primary air control inward allthe way to the right. This closes the air shutter to itsminimum opening. A low burn rate over extendedperiods is not advisable as it can promote theaccumulation of creosote. Inspect the ventingsystem frequently if using low burn ratesconsistently. You should see temperatures around300-400 degrees F.OVER-FIRE CAUTIONOver-firing means the stove is operating atsustained temperatures above the recommendedhigh burn temperatures outlined in the BURN RATEsection. Carefully avoid over-firing, as it will damagethe stove and void the warranty. Symptoms ofchronic over-firing can include cracked stones,warped components, short burn times, a roaringsound in the stove or stovepipe, and discoloration ofthe stovepipe.Excessive draft, inappropriate fuel, and operatorerror can cause over-firing. Correct an over-firesituation as follows:EXCESSIVE DRAFT: Contact your local dealerto have a draft reading taken. Any draft inexcess of 0.1 Water Column requires a damperin the stovepipe. Some installations may requiremore than one damper.INAPPROPRIATE FUEL: Do not burn coal; kilndried lumber, wax logs or anything other thannatural cordwood.HearthStone Quality Home Heating Products, Inc ®21<strong>Equinox</strong> Model <strong>8000</strong>
OPERATOR ERROR: Ensure all the gasketsare in good condition. Replace worn out orcompressed gaskets. Do not burn the stove withthe front or side door, ash compartment door, orthe ash grate in the open position.If you suspect that your stove is over-firing, contactyour dealer immediately. Damage caused by overfiringis not covered by your warranty. Results ofover-firing can include warped or burned out internalparts, cracked stones, discolored or warped externalparts, and damaged finish.CAUTION: NEVER USE GASOLINE, LANTERNFUEL, KEROSENE, DIESEL, HEATING FUEL OIL,CHARCOAL LIGHTER FLUID OR SIMILARLIQUIDS TO START, OR ‘FRESHEN UP’ A FIRE INTHIS HEATER. KEEP ALL SUCH LIQUIDS WELLAWAY FROM THE HEATER WHILE IT IS IN USE.CAUTION: INSTALL A CARBON MONOXIDEDETECTOR IF USING THE STOVE WITH THEOPTIONAL SPARK SCREEN INSTALLED (FRONTDOOR OPENED). FOLLOW THEMANUFACTURER’SINSTALLATIONINSTRUCTIONS. CARBON MONOXIDE IS ACOLORLESS, ODORLESS GAS THAT REPLACESOXYGEN. HIGH CONCENTRATIONS OF CARBONMONOXIDE ARE LETHAL.HearthStone Quality Home Heating Products, Inc ®22<strong>Equinox</strong> Model <strong>8000</strong>
REMOVAL AND DISPOSAL OF ASHESRemove ashes only when the stove is cold. Useprotective fireplace gloves if the ash pan is warm.Exercise extreme caution when handling, storing ordisposing of ashes.The ash pan is behind the ash compartment doorlocated under the front ash lip. The ash pan collectsburned ash from a fire and allows you to remove theash conveniently from your wood stove. Clear thefirebox of ashes often, and do not let them build uptoo high. It is important to prevent ashes frombuilding up around the front door opening. Toremove ashes, unfold and pull the grate lever out toopen the grate. Shake the grate while sifting theashes across the grate into the ash pan. Then returnthe ash grate to its closed position by pushing thelever back in towards the stove and then fold it backunder the ash lip. The ash pan is easy to removeand has a handle and lid for convenient disposal ofashes (see images 1-3 for ash pan operation andfeatures).Dump ashes from the ash pan directly into a steelcontainer with a tight fitting lid. Do not place anyother items or trash into the steel container. Do notpour water into the container. Replace thecontainer’s lid and allow the ashes to cool. Neverplace the ash disposal container on a combustiblesurface or vinyl flooring, as the container could behot!Pending disposal, place the closed ash container ona noncombustible floor or on the ground, well awayfrom all combustible materials, liquid fuels, orvehicles. Retain ashes in the closed container untilall coals thoroughly cool.Image 2 - Lift ash pan from drawerImage 3 - Store ash pan lid under stoveBefore removing the ash pan from the drawer, slidethe lid in place. Then, slide the drawer out and liftthe ash pan to remove it. Tilt the pan slightly soashes do not spill. When returning the ash pan tothe drawer, ensure the side pins engage the cutoutsin the drawer. Remove the ash pan lid before slidingthe drawer back into the ash pan compartment.Store the lid under the stove, or where convenient.Note: The lid may be hot after removing the ashes.NEVER PLACE ASHES IN WOODEN OR PLASTICCONTAINERS, IN TRASHCANS WITH OTHERTRASH, OR IN PAPER OR PLASTIC BAGS, NOMATTER HOW LONG THE FIRE IS OUT. COALSWITHIN A BED OF ASHES CAN REMAIN HOT FORSEVERAL DAYS ONCE REMOVED FROM THEFIREBOX.Image 1 – Slide lid onto ash panHearthStone Quality Home Heating Products, Inc ®23<strong>Equinox</strong> Model <strong>8000</strong>
MaintenanceNOTE: ANY SYMPTOMS OF OVER-FIRING WILLVOID YOUR WARRANTY!CREOSOTE FORMATION AND NEED FORREMOVALWhen wood burns slowly at low temperatures, itproduces tar and other organic vapors, whichcombine with expelled moisture to form creosote.These creosote vapors condense in the relativelycool chimney flue of a slow-burning fire. As a result,creosote residue accumulates on the flue lining.When ignited, this creosote makes an extremely hotfire, which may damage the chimney or even destroythe house. When burning wood, inspect the chimneyconnector and chimney at least once every twomonths during the heating season to determine ifthere is a creosote buildup.To prevent the buildup of creosote:Burn the stove with the primary air control fully openfor 35 - 45 minutes daily to burn out creosotedeposits from within the stove and the ventingsystem.After reloading with wood, burn the stove with theprimary air control fully open for 20 to 30 minutes.This manner of operation ensures early engagementof the secondary combustion system that minimizescreosote buildup in the chimney.If a creosote build-up occurs, inspect the stovepipeconnector and chimney more often, at least monthlyduring the heating season to monitor theaccumulation. If a creosote residue greater that 1/4"(6 mm) accumulates, remove it to reduce the risk ofa chimney fire.If your glass always remains dirty, your operatingtemperatures are too low or your wood is wet;therefore, there is a higher risk of creosote buildup.Inspect the venting system at the stove connectionand at the chimney top. Cooler surfaces tend tobuild creosote deposits faster, so it is important tocheck the chimney at the top (where it is coolest) aswell as from the bottom near the stove.Remove accumulated creosote with a cleaningbrush specifically designed for the type of chimneyin use. Use a certified chimney sweep to performthis service. Contact your dealer for the name of acertified chimney sweep in your area (your dealermay be a certified sweep).We recommend that before each heating seasonyou have the entire system professionally inspected,cleaned and repaired, if necessary.FRONT DOOR REMOVAL PROCEDURE:1. Open the door 45 to 90 degrees.2. Remove the front door by lifting it straight up offthe hinges with the hinge pins remaining in thedoor.3. It may be necessary to apply considerableupward pressure on the door while swinging itback and forth slightly to work the hinge pins outof the bronze bushings.4. Take care to avoid scratching the adjacentsoapstone when the hinge pins come free.GASKETSReplace door gasket material every two to threeseasons, depending on stove use. If the door sealleaks, a new gasket will ensure a tight seal andimprove stove performance.We recommend you only use <strong>Hearthstone</strong>replacement gaskets and adhesive when you needto replace your door gasket. Contact your dealer fora gasket kit that includes instructions, adhesive, andthe gasket for your stove.Required Door Gasket: Part Number: 3110-051, 68”Length, 1/2" Diameter.FRONT DOOR GASKET REPLACEMENT:1. To replace the front door gasket, remove thedoor from the stove (see door removalinstructions above), Pull off the old rope gasket.Carefully remove any old gasket material andadhesive with a small screwdriver, or small coldchisel and a hammer. Clean all gasket channelswith a small wire brush if necessary.2. Apply a small amount of waterglass (sodiumsilicate), or a 1/8 inch bead of an approvedgasket adhesive into the bottom of the entiregasket groove.3. Start at the center of the hinge side of the doorand push the new gasket into place uniformlywithout stretching or compressing the gasketmaterial. Pinch the gasket into place asnecessary.4. Once the gasket is installed, re-install and closethe door immediately to fully seat the gasket inthe channel and ensure complete adhesion.Waterglass will dry quickly, and does not requireheat to cure. Other adhesives may need heat tocure – so follow the product manufacturer’sinstructions.HearthStone Quality Home Heating Products, Inc ®24<strong>Equinox</strong> Model <strong>8000</strong>
5. Check the gasket seal using a dollar bill. Placethe bill in various locations around the door.Close the door and remove the bill by pulling itout. If the bill slides out without resistance, theseal will leak. If the bill does not slide out, thedoor is too tight, and the gasket will wearquickly. If the test reveals varying results indifferent locations – the gasket may not beinstalled uniformly, or too much adhesive wasused.6. First, adjust the gasket as necessary byreseating it uniformly. If that does not work,adjust the latch mechanism so it applies more orless pressure when the door is closed.SIDE DOOR GASKET REPLACEMENT:1. To replace the side door gasket, open the doorand support it so the hinge plate supports noweight. Remove the three Allen head bolts andlift the plate out of the way.a. Do not remove the door! The side dooruses torsion springs to ease closing.Removing the door could causeunexpected spring tension release.2. Pull off the old rope gasket. Carefully removeany old gasket material and adhesive with asmall screwdriver, or small cold chisel and ahammer. Clean all gasket channels with a smallwire brush if necessary.3. Apply a small amount of waterglass (sodiumsilicate), or a 1/8 inch bead of an approvedgasket adhesive into the bottom of the entiregasket groove.4. Start at the center of the hinge side of the doorand push the new gasket into place uniformlywithout stretching or compressing the gasketmaterial. Pinch the gasket into place asnecessary.5. Once the gasket is installed, re-install the hingeplate and close the door immediately to fullyseat the gasket in the channel and ensurecomplete adhesion. Waterglass will dry quickly,and does not require heat to cure. Otheradhesives may need heat to cure – so follow theproduct manufacturer’s instructions.LATCH ADJUSTMENT:(Latch Kit #90-73010)1. Test gasket seal quality with small latchadjustments first. Too much pressure makes thedoor difficult to open and close and prematurelywears the gasket.2. Loosen the setscrew and rotate the handleassembly to increase or decrease springpressure.GLASSDo not operate the stove with a broken door glass.Do not abuse the front door by striking or slamming.When necessary, clean the glass with commercialstove glass cleaners, which are available from yourlocal dealer. Never attempt to clean the glass whilethe fire is burning or while the glass is hot. Removedeposits by following the instructions provided withthe cleaner. To clean heavier, stubborn deposits,remove the door from the stove (See door removalprocedures on page 24). Lay the door face down ona clean, padded workbench or table with the handlehanging over an edge, apply the cleaner to the glassand allow it to soak for a few minutes to allow thecleaner to penetrate any heavy deposits. Wipe thecleaner off with a soft cloth, or black & whitenewsprint.Important: scratching or etching the glass willweaken the integrity of the glass. Do not use arazor blade, steel wool, or any other abrasivematerial to clean the glass. Use a cleanerspecifically manufactured for woodstoves only.The front door glass is a 5mm ceramic, shockresistantglass, made specifically for use inwoodstoves. Do not use any replacement glassother than the ceramic glass manufactured andsupplied for use by <strong>Hearthstone</strong> in this woodstove.Replacement glass is available through your localdealer.Replace the door glass immediately if broken orchipped. Contact your local dealer for replacementglass. The glass kit includes instructions andeverything needed for the repair. If you replace theglass yourself, wear work gloves and safety glasses.Required Glass Kit: Part Number: 90-58205 (5mmCeramic Glass, gasket, and clips).GLASS REPLACEMENT PROCEDURES:1. Follow the instructions included with thereplacement glass kit.2. Remove the door (see door removal procedureon page 24).3. Remove the screws from the glass retainer clips(use penetrating oil if necessary) – remove theclips (8) and lift off the glass. Set aside the clipsfor reinstallation.4. Carefully lift the damaged glass out of the doorand discard.5. Remove any remaining glass and old gasketmaterial.6. Clean the screw holes and place a small amountof anti-seize compound in each one.HearthStone Quality Home Heating Products, Inc ®25<strong>Equinox</strong> Model <strong>8000</strong>
7. Install the ¼ inch rope gasket – peel off theadhesive backing, and press the gasketuniformly into the gasket channel.8. Place the new glass onto the door.9. Important! Center the glass and ensure thatthe edges of the glass are parallel with theedges of the opening.10. Check glass position again (centered, andparallel), then screw the glass retainer clips backon the door.11. Apply a light film of anti-seize lubricant on thedoor’s hinge pins and bushings if needed.12. Install the door.13. After five or six fires, check the glass clipscrews, and retighten if necessary.SCREWGLASSCLIPPAD1/2" ROPEGASKETGLASS1/4" ROPEGASKETGLASS CLIPSTONEOccasional cleaning is all that is necessary tomaintain the natural beauty of your stove’ssoapstone finish. Clean the soapstone with water,any non-abrasive cleaner and a soft cloth. Wipe dustfrom the stone with a clean cloth. Do not usechemical agents to wash the stone; do not usewaxes or any polishing agents on the stone.Take care not to scratch or chip the soapstone. Donot set items that can scratch or chip the stone ontop of your stove. Do not use sandpaper to buff outscratches, as it will remove the polished surface ofthe stone.Contact your local <strong>Hearthstone</strong> dealer foraccessories such as trivets, or soapstone tiles if youintend to place metal pots on the stove. Your<strong>Hearthstone</strong> dealer has a soapstone steamer potavailable, which will complement your soapstonestove.Often, with use and over time, subtle earth tones ofbrown, red, and yellow may appear in thesoapstone. This is a natural reaction in thesoapstone. Surface or hairline fractures may alsoappear in the stone after a stove is used. Suchchanges are normal and do not affect the operationor the integrity of the stove and do not requirereplacement.If you observe a completely broken stone, contactyour dealer for a replacement. Please note that areplacement stone will most likely not exactly matchyour existing stones. When <strong>Hearthstone</strong>manufactures a soapstone woodstove, we strive tomatch all the stones on the stove as closely aspossible. However, over time, the original stones onyour stove will change as mentioned above. Inaddition, even stone from the same quarry is notuniform in grain, or color.DOORFigure 9: Door & Glass AssemblyHearthStone Quality Home Heating Products, Inc ®26<strong>Equinox</strong> Model <strong>8000</strong>
COMMON ISSUESVirtually all woodstove operators experience basiccommon problems at one time or another. Most arecorrectable and generally require only a minoradjustment of the stove, installation, or operatingtechnique. In cases where weather conditionsdramatically affect stove performance, the problemsare typically temporary and solve themselves oncethe weather changes.If you question whether your stove is producingadequate heat, the best way to troubleshoot theproblem is to monitor the temperature of the chimneyconnector (single wall) no more than 12 inches (30cm) above the flue collar. A 400° F (200° C) singlewall stovepipe confirms the stove is supplyingsufficient heat. If you are using a double wall chimneyconnector, measure the temperature at the fluecollar. Keep in mind that your house itself willregulate room/house temperatures. How well thewalls, floors and ceilings are insulated, the numberand size of windows, the tightness of outside doors,and the construction or style of your house (vaultedceilings or other open spaces which collect largepercentages of heat, ceiling fans, etc.) all aredetermining factors of room temperature.Your stove's performance is also dependant on itsinstallation. One common cause of poor performanceis an oversized chimney flue. Oversized chimneyflues result in decreased draft, which prevents thesmoke from rising out the chimney. Oversized fluesare also more difficult to heat effectively, especiallywhen burning a high efficiency stove. Cool fluetemperatures inhibit the establishment of a strongdraft (and encourage the accumulation of creosote).The lack of a strong draft will cause the fire to diedown and may even force smoke to pour into theroom.If your chimney is the proper size and a strong draftis not easily established, there is the possibility thatthe chimney is too cold. Again, warm/hot chimneyspromote stronger drafts. Briefly opening a window (inthe room containing the stove) during lighting mayhelp.Other draft guidelines are as follows:An "AIRTIGHT" HOUSE: The air supply (infiltration)to the interior of the house may be inadequate if yourTroubleshootinghome is super-insulated or especially well sealed.This phenomenon of air starvation within the buildingis exacerbated if exhaust fans, such as clothesdryers, bathroom fans or cook stove exhaust fans,are in operation within the home. Outfitting your stovewith the optional outside air adaptor connected to anair duct, which leads to the outside of the building,can correct this problem.TALL TREES OR BUILDINGS: These obstructions,when located close to the top of the chimney cancause chronic or occasional downdrafts. Whenselecting a site for a new chimney, consider theplacement of other objects near the proposedchimney location.WIND VELOCITY: Generally, the stronger andsteadier a wind, the stronger (better) the draft.However, "gusty" wind conditions can cause erraticdowndrafts. For consistent problems, consider a highwind cap, such as the Vacu-Stack.BAROMETRIC PRESSURE: Chimney drafts aretypically sluggish on balmy, wet or muggy days (lowbarometric pressure). This is a weather-relatedphenomenon, which generally is self-correcting asthe weather changes.BRISKNESS OF FIRE: The hotter the fire in yourstove, the hotter your chimney and, therefore, thestronger the draft.BREAKS IN THE VENTING SYSTEM: An unsealedclean-out door at the bottom of the chimney, leakystovepipe joints, a poor stovepipe-to-thimbleconnection, missing caps, or a leaky chimney all cancause inadequate draft.SEASONAL FACTORS: Early fall and late spring aregenerally difficult seasons in which to establishproper drafts. The colder the outside air is relative toroom temperature, the stronger the draft.Operating the StoveAs outlined above, there are days when a good draftis just not easy to establish. The causes are usuallyseasonal factors or a cold chimney. Try starting thefire by using small kindling and fuel to obtain a quick,hot fire. Tend the fire frequently with small fuel untilthe chimney is hot and the draft is well established.Sometimes, partially opening a window briefly willhelp quickly get draft established.HearthStone Quality Home Heating Products, Inc ®27<strong>Equinox</strong> Model <strong>8000</strong>
TROUBLESHOOTING GUIDE:PROBLEM POSSIBLE CAUSE SOLUTIONSSTOVE SMOKES Operating Technique Fully open the primary air control one minute before opening doors.Open doors slowly – rapid movement can suck smoke out of theBACK-PUFFING ORGAS EXPLOSIONSUNCONTROLLEDOR SHORT BURNINSUFFICIENTHEATBLISTERING OFFINISHCold ChimneyBlocked ChimneyBlocked outside air ductOutside air inlet too highOversized ChimneyUndersized ChimneyChimney Too ShortAir Infiltration Into TheChimneyMore Than One ApplianceConnected to the FlueOperating TechniqueExtra Low Burn RateBlocked outside air ductChimney Down-draftExcessive Ash Build-upUnsealed or Open DoorOpen ash grateExcessive DraftExtra Long ChimneyOversized ChimneyHigh Winds or HilltopLocation:Excessive DraftPoor Quality or Green WoodLow Burn RateBlocked outside air ductAir Insulated ChimneyCold Exterior ChimneyLeaky Stovepipe or ChimneyToo Much Heat Loss FromHouseExcessive Ash Build-upOperating TechniqueExcessive Draftstove.Preheat the chimney when first starting a fire. Briefly open awindow in the room containing the stove.Examine the chimney and stovepipe for blockage or creosoteaccumulations.Examine the duct and outside inlet for blockage caused by snow,insects, or debris accumulations.Reduce mounting height until below inlet level on stove.Reline the chimney to the appropriate diameterInstall a draft inducer or replace the chimney.Lengthen the chimney.Seal chimney connections and openings such as clean-out doors.Disconnect all other appliances and seal openings.Fully open the primary air control one minute before opening thedoor and keep it fully open for a few minutes after reloading.Burn the stove at a higher burn rate.Examine the duct and outside inlet for blockage caused by snow,insects, or debris accumulations.Install a chimney cap.Empty the ash pan more frequently. Increase efficiency of burns,and avoid using poor quality or green wood.Close the door tightly or replace the gaskets.Slide ash grate to closed position.Check the installation. Operate at LOW BURN. Install stovepipedamper.Shorten the chimney. Install stovepipe damper(s).Reline the chimney to the proper diameter.Install a chimney cap.Correct draft in excess of 0.1 wc with a stovepipe damper(s)Use only air-dried wood, preferably dried at least one year.Operate the stove at a higher burn rate.Examine the duct and outside inlet for blockage caused by snow,insects, or debris accumulations.Replace with a pre-fabricated insulated chimney system or aproperly sized masonry chimney.Reline or insulate the chimney.Check the installation.Add insulation, use energy efficient windows, or caulk windows,and seal openings in home.Empty the ash pan more frequently. Increase efficiency of burns,and avoid using poor quality or green wood.Do not over-fire the stove. Monitor stove temperatures. Useseasoned wood only.Check the DRAFT. A damper may be required. Operate the stoveat a LOW BURN range.HearthStone Quality Home Heating Products, Inc ®28<strong>Equinox</strong> Model <strong>8000</strong>
Replacement Parts Kits & Optional Accessories:ITEM PART # DESCRIPTION ITEM PART # DESCRIPTIONPART REPLACEMENT KITSOPTIONAL ACCESSORIES1 90-58205 GLASS REPLACEMENT KIT 6 93-53500 OUTSIDE AIR KIT2 90-73010 LATCH REPLACEMENT KIT 7 90-57502 BLOWER3 90-76010 BAFFLE REPLACEMENT KIT 8 90-6<strong>8000</strong> REAR HEAT SHIELD4 90-58010 GASKET REPLACEMENT KIT 9 90-69000 SPARK SCREENDOCUMENTATION5 6400-40455 OWNER’S MANUAL10 90-70200 SIDE DOOR LOCK KITHearthStone Quality Home Heating Products, Inc ®29<strong>Equinox</strong> Model <strong>8000</strong>
Rating LabelHearthStone Quality Home Heating Products, Inc ®30<strong>Equinox</strong> Model <strong>8000</strong>
WARRANTY REGISTRATIONThe Original Purchaser may complete the registration on our website (www.hearthstonestoves.com/customerresources/warranty-registration),or mail a completed and signed Warranty Registration Form, which is enclosedin the stove information packet, to the following address:<strong>Hearthstone</strong> Quality Home Heating Products, Inc.Warranty Department317 Stafford AvenueMorrisville, VT 05661NOTE: SENDING IN THE SIGNED WARRANTY REGISTRATION FORM IS NOT A CONDITION OFWARRANTY COVERAGE, OR HEARTHSTONE’S PERFORMANCE.HearthStone Quality Home Heating Products, Inc ®31<strong>Equinox</strong> Model <strong>8000</strong>
Notes:HearthStone Quality Home Heating Products, Inc ®32<strong>Equinox</strong> Model <strong>8000</strong>