ASSEMBLY INSTRUCTIONS
ASSEMBLY INSTRUCTIONS
ASSEMBLY INSTRUCTIONS

You also want an ePaper? Increase the reach of your titles
YUMPU automatically turns print PDFs into web optimized ePapers that Google loves.
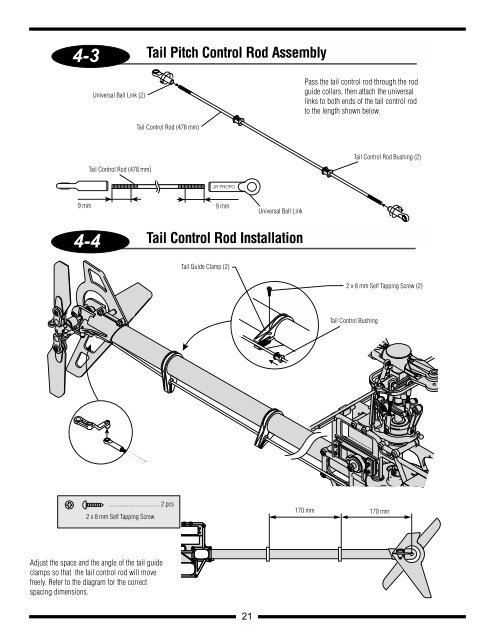
4-3<br />
9 mm<br />
4-4<br />
Universal Ball Link (2)<br />
Tail Control Rod (478 mm)<br />
Tail Control Rod (478 mm)<br />
.................................. 2 pcs<br />
2 x 8 mm Self Tapping Screw<br />
Adjust the space and the angle of the tail guide<br />
clamps so that the tail control rod will move<br />
freely. Refer to the diagram for the correct<br />
spacing dimensions.<br />
Tail Pitch Control Rod Assembly<br />
JR PROPO<br />
9 mm<br />
Tail Guide Clamp (2)<br />
Universal Ball Link<br />
Tail Control Rod Installation<br />
21<br />
Pass the tail control rod through the rod<br />
guide collars, then attach the universal<br />
links to both ends of the tail control rod<br />
to the length shown below.<br />
Tail Control Rod Bushing (2)<br />
2 x 8 mm Self Tapping Screw (2)<br />
Tail Control Bushing<br />
170 mm 170 mm