Acer Altos G330 Server Series User's Guide - Warranty Life
Acer Altos G330 Server Series User's Guide - Warranty Life
Acer Altos G330 Server Series User's Guide - Warranty Life

You also want an ePaper? Increase the reach of your titles
YUMPU automatically turns print PDFs into web optimized ePapers that Google loves.
31<br />
Opening the server<br />
Caution: Before you proceed, make sure that you have turned<br />
off the system and all peripherals connected to it. Read the<br />
"Pre-installation instructions" section page 30.<br />
You need to open the server before you can install upgrade<br />
components. The front bezels and (left) side panel are removable to<br />
allow access to the server’s internal components. Refer to the<br />
following sections for instructions.<br />
Removing the side panel<br />
1 Perform the pre-installation instructions described on page 30.<br />
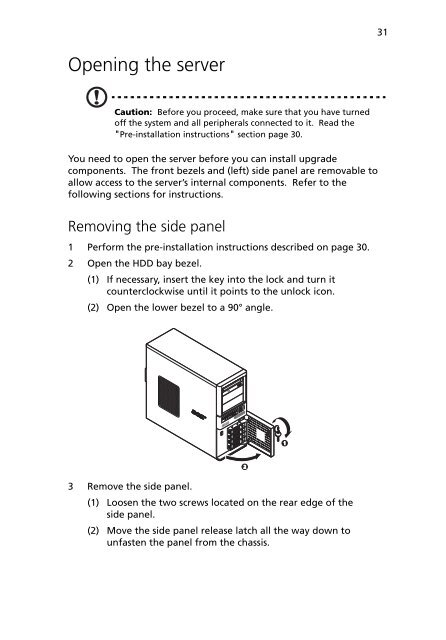
2 Open the HDD bay bezel.<br />
(1) If necessary, insert the key into the lock and turn it<br />
counterclockwise until it points to the unlock icon.<br />
(2) Open the lower bezel to a 90° angle.<br />
3 Remove the side panel.<br />
(1) Loosen the two screws located on the rear edge of the<br />
side panel.<br />
(2) Move the side panel release latch all the way down to<br />
unfasten the panel from the chassis.