The Monarch Shaving Brush Kit - Penn State Industries
The Monarch Shaving Brush Kit - Penn State Industries
The Monarch Shaving Brush Kit - Penn State Industries

Create successful ePaper yourself
Turn your PDF publications into a flip-book with our unique Google optimized e-Paper software.
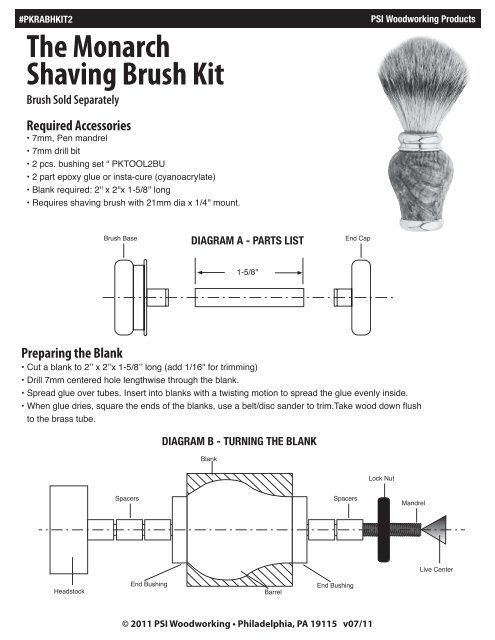
#PKRABHKIT2<br />
PSI Woodworking Products<br />
<strong>The</strong> <strong>Monarch</strong><br />
<strong>Shaving</strong> <strong>Brush</strong> <strong>Kit</strong><br />
<strong>Brush</strong> Sold Separately<br />
Required Accessories<br />
• 7mm, Pen mandrel<br />
• 7mm drill bit<br />
• 2 pcs. bushing set “ PKTOOL2BU<br />
• 2 part epoxy glue or insta-cure (cyanoacrylate)<br />
• Blank required: 2'' x 2''x 1-5/8'' long<br />
• Requires shaving brush with 21mm dia x 1/4'' mount.<br />
<strong>Brush</strong> Base<br />
DIAGRAM A - PARTS LIST<br />
End Cap<br />
1-5/8''<br />
Preparing the Blank<br />
• Cut a blank to 2’’ x 2’’x 1-5/8’’ long (add 1/16'' for trimming)<br />
• Drill 7mm centered hole lengthwise through the blank.<br />
• Spread glue over tubes. Insert into blanks with a twisting motion to spread the glue evenly inside.<br />
• When glue dries, square the ends of the blanks, use a belt/disc sander to trim.Take wood down flush<br />
to the brass tube.<br />
DIAGRAM B - TURNING THE BLANK<br />
Blank<br />
Lock Nut<br />
Spacers<br />
Spacers<br />
Mandrel<br />
Live Center<br />
Headstock<br />
End Bushing<br />
Barrel<br />
End Bushing<br />
© 2011 PSI Woodworking • Philadelphia, PA 19115 v07/11
#PKRABHKIT2<br />
PSI Woodworking Products<br />
Turning the Blanks<br />
• Place spacer bushings on the mandrel, follow with an end bushing.<br />
• Slide the blank over, follow with the other end bushing and spacer bushing. Lock in place.<br />
• Turn the blank to the desired profile.<br />
• To finish wood, CA glue finishing system is preferred to seal the blank.<br />
DIAGRAM C - ASSEMBLY<br />
<strong>Brush</strong> Mount<br />
<strong>Brush</strong> Base<br />
Barrel<br />
End Cap<br />
Assembly<br />
• Press the brush base into the top end of the barrel.<br />
• Press the end cap into the opposite end of the barrel<br />
• Use CA glue or other water resistant glue to secure the brush base to the brush mount<br />
• Use the brush with razor and brush stand #PKRASTG<br />
DIAGRAM D - BUSHINGS<br />
#PKTOOL2BU<br />
Ø<br />
.990” +0 Ø<br />
.248” +/-0<br />
HOLES<br />
INSIDE<br />
Same as on the Left<br />
Philadelphia, PA 19115<br />
© 2011 PSI Woodworking • Philadelphia, PA 19115 v07/11