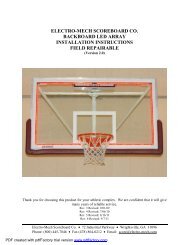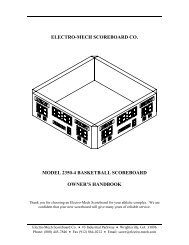
Linescore Baseball with 4-Digit Clock - Scoreboards
Linescore Baseball with 4-Digit Clock - Scoreboards
Linescore Baseball with 4-Digit Clock - Scoreboards

Create successful ePaper yourself
Turn your PDF publications into a flip-book with our unique Google optimized e-Paper software.
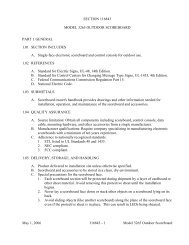
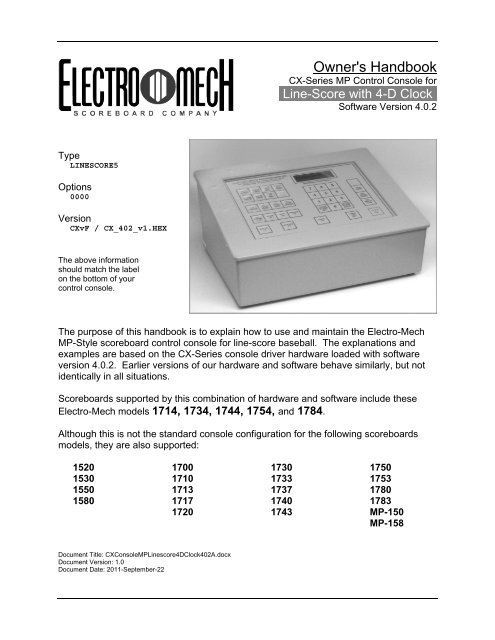
Owner's Handbook<br />
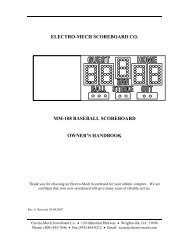
CX-Series MP Control Console for<br />
·Line-Score <strong>with</strong> 4-D <strong>Clock</strong>·<br />
Software Version 4.0.2<br />
Type<br />
LINESCORE5<br />
Options<br />
0000<br />
Version<br />
CXvF / CX_402_v1.HEX<br />
The above information<br />
should match the label<br />
on the bottom of your<br />
control console.<br />
The purpose of this handbook is to explain how to use and maintain the Electro-Mech<br />
MP-Style scoreboard control console for line-score baseball. The explanations and<br />
examples are based on the CX-Series console driver hardware loaded <strong>with</strong> software<br />
version 4.0.2. Earlier versions of our hardware and software behave similarly, but not<br />
identically in all situations.<br />
<strong>Scoreboards</strong> supported by this combination of hardware and software include these<br />
Electro-Mech models 1714, 1734, 1744, 1754, and 1784.<br />
Although this is not the standard console configuration for the following scoreboards<br />
models, they are also supported:<br />
1520<br />
1530<br />
1550<br />
1580<br />
1700<br />
1710<br />
1713<br />
1717<br />
1720<br />
1730<br />
1733<br />
1737<br />
1740<br />
1743<br />
1750<br />
1753<br />
1780<br />
1783<br />
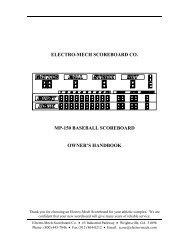
MP-150<br />
MP-158<br />
Document Title: CXConsoleMP<strong>Linescore</strong>4D<strong>Clock</strong>402A.docx<br />
Document Version: 1.0<br />
Document Date: 2011-September-22
Electro-Mech Scoreboard Company<br />
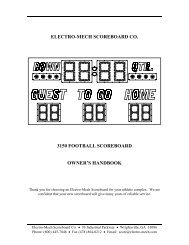
MP Line-Score 4-D <strong>Clock</strong> Control Console CX_402<br />
Table of Contents<br />
Seven Ways to Stay Safe and Make Your Console Last Longer ................................... 3<br />
Console Parts and Accessories ..................................................................................... 4<br />
Hooking Up and Powering Up the Console and Accessories ......................................... 6<br />
Control Console Initialization .......................................................................................... 7<br />
Control Console LCD Screen ......................................................................................... 9<br />
Key-By-Key Operation .................................................................................................. 10<br />
Handheld <strong>Clock</strong> Start / Stop Switch .............................................................................. 19<br />
Control Console Power Down and Storage ................................................................... 20<br />
Jumper Settings ........................................................................................................... 21<br />
Revised 2011-September-22 Page 2
Electro-Mech Scoreboard Company<br />
MP Line-Score 4-D <strong>Clock</strong> Control Console CX_402<br />
Seven Ways to Stay Safe and Make Your Console Last Longer<br />
1 - Don't remove the grounding pin from the power cord. It's there to help keep you<br />
from getting shocked. If your receptacle only handles two-pronged power cords<br />
then your wiring was probably installed sometime before President Hoover left<br />
office. It's time to upgrade.<br />
2 - Keep your console dry. We've designed our consoles <strong>with</strong> outdoor activities in<br />
mind, but find some shelter if it is raining. The box is not waterproof. Drinks spilled<br />
over the keypad can lead to trouble too.<br />
3 - Unplug both the power and data cables when you are not using the console.<br />
Noise over these cables -- either from lightning, glitches in the power line, or some<br />
other accident -- can damage the console. Leaving the console connected 24-7 just<br />
increases your risk of getting it fried.<br />
4 - Store the console in a clean, dry, secure area. Leave it where somebody can<br />
kick it, drop it, pile stuff on top of it, or steal it, and you can expect your console will<br />
get kicked, dropped, piled on, and stolen. See also the "keep your console dry" tip<br />
above. Neither sprinkler systems nor natural sources of precipitation are beneficial<br />
to your control console.<br />
5 - If you must open the console box, unplug the power and data cables. Yes, it is<br />
possible to get shocked if you go poking around inside the console.<br />
6 - Don't plug something into the console that doesn't belong there. The stereo<br />
connector in the back plate of the console is the same kind used by audio<br />
equipment. The RJ-45 connector for the hand-held clock switch is the same type<br />
you often see in wired computer networks. Accidently plugging an audio amplifier<br />
or Ethernet access point into your scoreboard control console can cause problems -<br />
- both to your console and to your audio and networking equipment. A common<br />
mistake we see our customers make is to accidentally plug public address<br />
equipment into the junction box that leads to the scoreboard. This often fries<br />
components in the scoreboard.<br />
7 - Check out your equipment before game day. We're always happy to answer<br />
questions, walk you through solutions, repair damage, or send replacement parts.<br />
But if your game starts in ten minutes, there is often not much we can do to help<br />
you. Make sure your scoreboard is in good working order a few days before the<br />
game so that, however unlikely the chance of a problem, there will be time to solve<br />
it.<br />
Revised 2011-September-22 Page 3
Electro-Mech Scoreboard Company<br />
MP Line-Score 4-D <strong>Clock</strong> Control Console CX_402<br />
Console Parts and Accessories<br />
This is a generic set of photos identifying parts of the console and accessories. You<br />
should receive a packing slip or other paperwork <strong>with</strong> your order that tells specifically<br />
what parts you are supposed to have. Your configuration may be different.<br />
Console<br />
Top or<br />
Lid<br />
LCD<br />
Screen<br />
Screws<br />
Keypad<br />
Console Front View<br />
Console<br />
Base or<br />
Bottom<br />
Handheld<br />
Accessory<br />
Input<br />
Socket<br />
(RJ-45)<br />
Back Plate<br />
Power Cord<br />
Data<br />
Output<br />
Socket<br />
(Stereo)<br />
Console Rear View<br />
Handheld <strong>Clock</strong><br />
Start / Stop Switch<br />
Revised 2011-September-22 Page 4
Electro-Mech Scoreboard Company<br />
MP Line-Score 4-D <strong>Clock</strong> Control Console CX_402<br />
Stereo Data Cable<br />
Junction Box (<strong>with</strong> coil of data cable)<br />
ScoreLink Transmitter<br />
Revised 2011-September-22 Page 5
Electro-Mech Scoreboard Company<br />
MP Line-Score 4-D <strong>Clock</strong> Control Console CX_402<br />
Hooking Up and Powering Up the Console and Accessories<br />
1 - Apply power to the scoreboard.<br />
2 - Place the console on a sturdy desk or table so that you have a clear view of the<br />
game's action as well as the console's keypad and LCD screen. You may hold the<br />
console in your lap, if you find it comfortable that way.<br />
3 - Attach hand-held devices. You may have an<br />
external switch to start and stop the Game<br />
<strong>Clock</strong> on the scoreboard. This corded switch<br />
plugs into the RJ-45 style socket on the back<br />
of the console.<br />
4 - Attach one end of the stereo data cable to the<br />
data output connector on the back plate of<br />
the console.<br />
5 - Attach the other end of the stereo data cable to the junction box. If you have the<br />
ScoreLink wireless RF system, refer to the ScoreLink owner's handbook for details.<br />
6 - Plug in the console power cable to a standard electrical outlet.<br />
About one out of every few hundred customers asks us the question, "How do you turn<br />
the console on and off" There is no power button on the console. If it's plugged in, it's<br />
on. The logic here is that, for most installations, the scoreboard is not used very often.<br />
During the down time, the console needs to be disconnected from the scoreboard and<br />
from power to prevent damage from line noise and power surges. A power switch<br />
would discourage that good habit and provide a false sense of security.<br />
Likewise, the scoreboard should be disconnected from power when not in use.<br />
Therefore the console has no means of turning the scoreboard on or off. However, a<br />
freshly powered on scoreboard will display no information until it receives a good signal<br />
from the control console. So in order to "turn on" the scoreboard display, you have to<br />
power up and connect the control console.<br />
Revised 2011-September-22 Page 6
Electro-Mech Scoreboard Company<br />
MP Line-Score 4-D <strong>Clock</strong> Control Console CX_402<br />
Control Console Initialization<br />
Be quick. You only have about three seconds to see the splash screen when your<br />
console powers up. It should look like this:<br />
ELECTRO-MECH 402<br />
LINESCORE5 0000<br />
The splash screen is telling you four things:<br />
The software author -- ELECTRO-MECH<br />
The software version -- 402<br />
The selected scoreboard type -- LINESCORE5<br />
The selected option jumpers -- none<br />
This information is important for diagnostics, and you can get back to this splash screen<br />
by pressing [NEW GAME] [1] [ENTER] on the keypad. If you see something different<br />
on your display, either this is the wrong owner's handbook for you or your console is not<br />
configured to the expected standard.<br />
If your console has data from the previous game, you will be prompted to restore that<br />
data. Press [1] [ENTER] to reload the old Scores and other information. Press [0]<br />
[ENTER] to clear out memory and start over fresh. If you do not respond to this prompt,<br />
the console will restore the previous game data automatically after a few seconds.<br />
RESTORE GAME<br />
1=YES 0=NO <br />
Revised 2011-September-22 Page 7
Electro-Mech Scoreboard Company<br />
MP Line-Score 4-D <strong>Clock</strong> Control Console CX_402<br />
After the splash screen clears, you will see the main scoreboard information screen:<br />
00 D12:00 B- 00<br />
0 00 0-0-0 00 0<br />
The scoreboard will display the following information (some scoreboard models do not<br />
displays all the functions listed):<br />
Top (Guest) Total Runs -- 0<br />
Top (Guest) Total Hits -- 0<br />
Top (Guest) Total Errors -- 0<br />
Top (Guest) Runs-By-Inning -- All Blank<br />
Bottom (Home) Total Runs -- 0<br />
Bottom (Home) Total Hits -- 0<br />
Bottom (Home) Total Errors -- 0<br />
Bottom (Home) Runs-By-Inning -- All Blank<br />
Inning -- Blank<br />
Batter Number -- 0<br />
Ball -- Blank<br />
Strike -- Blank<br />
Out -- Blank<br />
Hit Indicator -- Blank<br />
Error Indicator -- Blank<br />
Error Fielder Position -- Blank<br />
Pitch Count -- 0<br />
Game <strong>Clock</strong> -- 12:00<br />
Revised 2011-September-22 Page 8
Electro-Mech Scoreboard Company<br />
MP Line-Score 4-D <strong>Clock</strong> Control Console CX_402<br />
Control Console LCD Screen<br />
The LCD screen primarily shows you the main scoreboard data screen. Information<br />
shown here corresponds closely (but not exactly) to information shown on the<br />
scoreboard.<br />
Numbers that display as "0" on the LCD may display as blanks on the scoreboard. For<br />
instance, when the Strike Count reads "0" on the control console, the display on the<br />
scoreboard will be blank. Some scoreboard models do not include features like Total<br />
Errors or Time, so, of course, the scoreboard will not match all the information on the<br />
LCD in those cases.<br />
The illustration above refers to "Top Team" and "Bottom Team" to be as generic as<br />
possible. Traditionally the Guest Team is assigned to be at bat during the Top Half of<br />
each Inning, so you may want to think of the "Top Team" as the Guest Team and the<br />
"Bottom Team" as the Home Team.<br />
Revised 2011-September-22 Page 9
Electro-Mech Scoreboard Company<br />
MP Line-Score 4-D <strong>Clock</strong> Control Console CX_402<br />
Key-By-Key Operation<br />
This section will provide a key-by-key explanation of the console features. Use the<br />
[0] ... [9] buttons to respond to prompts, pressing [ENTER] to complete or confirm your<br />
response. The [CLEAR] button backs you out of a prompt <strong>with</strong>out making changes.<br />
[SET CLOCK] - Available only when the Game <strong>Clock</strong> is NOT running. This button<br />
allows the operator to edit the time shown on the Game <strong>Clock</strong>. Pressing the button<br />
brings up an input prompt on the second line of the LCD screen.<br />
SET CLK<br />
To set the time to 5:30, press [SET CLOCK] [5] [3] [0] [ENTER]. The console<br />
rejects time entries <strong>with</strong> a Seconds part greater than 59.<br />
This function prompts for Hours, Minutes, and Second. Your scoreboard can show<br />
only Minutes and Seconds -- ignoring the Hours <strong>Digit</strong>. But the console is able to<br />
track up to nine Hours.<br />
So that 4-<strong>Digit</strong> <strong>Clock</strong>s can show times up to 99:59, this prompt allows you to enter<br />
times <strong>with</strong> a Minutes part of up to 99. You could set the Time to 99:99:59 and count<br />
down a Period of 10 hours, 39 minutes, and 59 seconds.<br />
When the <strong>Clock</strong> is displaying one or more Hours, the LCD display shows Hours and<br />
Minutes -- dropping Seconds until the final hour (of a countdown). A blinking<br />
asterisk to the right of the Minutes on the LCD indicates a running <strong>Clock</strong>.<br />
[SET CLOCK .1 SEC] - Available only when the Game <strong>Clock</strong> is NOT running and the<br />
Game <strong>Clock</strong> is in Down-Counting Mode. This button allows the operator to edit the<br />
time shown on the Game <strong>Clock</strong> during the final minute of the Period including the<br />
Tenth of Seconds digit. Pressing the button brings up an input prompt on the<br />
second line of the LCD screen.<br />
SET SEC <br />
To set the time to 14.7 seconds, press [SET CLOCK .1 SEC] [1] [4] [7] [ENTER].<br />
The console rejects entries greater than 59.9 Seconds.<br />
Revised 2011-September-22 Page 10
Electro-Mech Scoreboard Company<br />
MP Line-Score 4-D <strong>Clock</strong> Control Console CX_402<br />
[.1 SEC ON / OFF] - Available only when the Game <strong>Clock</strong> is NOT running and the<br />
Game <strong>Clock</strong> is in Down-Counting Mode. This button allows the operator to set the<br />
behavior of the Game <strong>Clock</strong> during the final minute of a Period. By default, during<br />
the final minute, the Game <strong>Clock</strong> shifts into Tenth of Second Mode, displaying<br />
Seconds in the area that usually shows Minutes and Tenths of Seconds in the place<br />
where the Seconds Tens digit is otherwise seen. The operator may override this<br />
feature by disabling Tenth of Second Mode so that the Minutes and Seconds stay<br />
put and Tenths of Seconds are not displayed at all. Pressing the button brings up a<br />
two-line prompt on the LCD screen.<br />
1/10TH SECOND<br />
1=YES 0=NO <br />
To turn off Tenth of Second Mode, press [.1 SEC ON / OFF] [0] [ENTER]. To turn it<br />
back on, press [.1 SEC ON / OFF] [1] [ENTER] or reset the console <strong>with</strong> the New<br />
Game function.<br />
[CLOCK UP / DOWN] - Available only when the Game <strong>Clock</strong> is NOT running. This<br />
button allows the operator to change the direction of the Game <strong>Clock</strong>. By default<br />
the Game <strong>Clock</strong> counts down until reaching 0:00. The operator may set the Game<br />
<strong>Clock</strong> to count up starting from any valid time. Pressing the button brings up a twoline<br />
prompt on the LCD screen.<br />
COUNT UP OR DOWN<br />
1=UP 0=DOWN <br />
To count up, press [CLOCK UP / DOWN] [1] [ENTER]. The Game <strong>Clock</strong> on the<br />
LCD screen will show a "U" prefix to indicate Up Counting Mode. A "D" is for Down<br />
Counting Mode.<br />
In up-counting mode, the Hours part of the <strong>Clock</strong> is ignored, so after 99:59, the<br />
Time cycles to 0:00.<br />
Revised 2011-September-22 Page 11
Electro-Mech Scoreboard Company<br />
MP Line-Score 4-D <strong>Clock</strong> Control Console CX_402<br />
[ASSIGN ERROR] - Indicates the Position of the Fielder who commits and Error.<br />
Pressing the button brings up a prompt on the second line of the LCD:<br />
ERR POSITION <br />
Press [ASSIGN ERROR] [2] [ENTER] to indicate an Error committed by the person<br />
in Position 2. This causes a few things to happen. On the scoreboard, the "E"<br />
character (or other Error bullet) will flash four times. If your scoreboard has an Error<br />
Fielder Number display, it will flash (in this case, the number "2") along <strong>with</strong> the<br />
Error indicator. Also the console will automatically increment the Total Errors for the<br />
Team NOT currently At Bat. So, if it is currently the Top of the 5th Inning, the<br />
Bottom/Home Team Total Errors will increase by 1.<br />
Here's a quick reference for the numbers associated <strong>with</strong> Fielder Positions:<br />
1 = Pitcher<br />
2 = Catcher<br />
3 = First Base<br />
4 = Second Base<br />
5 = Third Base<br />
6 = Short Stop<br />
7 = Left Field<br />
8 = Center Field<br />
9 = Right Field<br />
[AUTO HORN] - Allows the operator to set the behavior of the Horn. By default, the<br />
Main Horn attached to the scoreboard is activated for about four seconds at the end<br />
of each Period. That is, when the Game <strong>Clock</strong> counts down to 0:00, the Horn<br />
blows. You can turn off this feature by using the [AUTO HORN] button. Pressing it<br />
brings up this prompt:<br />
AT END OF PERIOD<br />
1=AUTO 0=OFF <br />
To turn off the Automatic Horn at the End of Period, press [0] [ENTER] at this<br />
prompt. Of course, baseball scoreboards do not generally include Horns, so this<br />
feature is there only to accommodate the odd circumstance of a Horn added to a<br />
baseball scoreboard.<br />
Revised 2011-September-22 Page 12
Electro-Mech Scoreboard Company<br />
MP Line-Score 4-D <strong>Clock</strong> Control Console CX_402<br />
[TIME OF DAY] - Available only when the Game <strong>Clock</strong> is NOT running. This button<br />
allows the operator to use the scoreboard Game <strong>Clock</strong> to show the time of day.<br />
Since accidentally sending the scoreboard into Time of Day Mode in the middle of a<br />
game could be confusing, this function requires a confirmation before it will let the<br />
operator continue.<br />
TIME OF DAY CLCK<br />
1=YES 0=NO <br />
Press [1] [ENTER] to continue. The next prompt is asking whether Ball, Strike, and<br />
Out counts, and other features should remain illuminated on the scoreboard during<br />
Time of Day Mode or be blanked to show that a game is not underway.<br />
BLANK OTHERS<br />
1=YES 0=NO <br />
Press [1] [ENTER] to turn off the rest of the scoreboard. This blanking feature<br />
doesn't work on many older scoreboards <strong>with</strong> incandescent light bulbs.<br />
Finally, you will be prompted to enter the current time of day (in 12-hour format).<br />
SET CLK <br />
Press [3] [4] [5] [ENTER] to set the clock to 3:45.<br />
While the console is in Time of Day Mode, the <strong>Clock</strong> on the LCD display will have a<br />
"C" prefix. Most other keys on the console will work and update the values of their<br />
respective functions while the Game <strong>Clock</strong> is in Time of Day Mode. For instance,<br />
you can still change the Runs. You can even change the value of the Game <strong>Clock</strong><br />
using the [SET CLOCK] button, and your new value will be in place when you exit<br />
Time of Day Mode.<br />
To exit Time of Day Mode, press [TIME OF DAY] [0] [ENTER].<br />
[SET PITCH COUNTS] - Allows the operator to directly set or edit the Pitch Counts for<br />
both Teams. At the first prompt you may change the Pitch Count for the Team at<br />
bat during the Top Half of the Inning.<br />
TOP PITCHES<br />
At the second prompt you may change the Pitch Count for the Team at bat during<br />
the Bottom Half of the Inning.<br />
BOT PITCHES<br />
Revised 2011-September-22 Page 13
Electro-Mech Scoreboard Company<br />
MP Line-Score 4-D <strong>Clock</strong> Control Console CX_402<br />
[SET BATTER] - Allows the operator to set or edit the Player Number of person at bat.<br />
Pressing the button brings up an input prompt on the second line of the LCD<br />
screen.<br />
BATTER NUM <br />
To set the Batter Number to 35, press [SET BATTER] [3] [5] [ENTER].<br />
[SET TOTAL RUNS] - Allows the operator to directly set or edit the Total Runs for each<br />
Team. Pressing the button brings up an input prompt on the second line of the LCD<br />
screen.<br />
TOT RUNS TOP<br />
The first prompt is for the Team that is at bat during the Top Half of each Inning. At<br />
the second prompt you may change the Total Runs for the Team at bat during the<br />
Bottom Half of each Inning<br />
TOT RUNS TOP<br />
For scoreboards <strong>with</strong> Runs-By-Innings displays, it is possible change the Total<br />
Runs so that sum of the Runs-By-Innings is not equal to the Total. In general it is<br />
better to track the Runs as they happen using the [RUNS +1] button rather than<br />
relying on the [SET TOTAL RUNS] button. The primary purpose of this feature is to<br />
help you recover from accidentally logging an extra Run.<br />
[SET TOTAL HITS] - Allows the operator to directly set or edit the Total Hits for each<br />
Team. Pressing the button brings up an input prompt on the second line of the LCD<br />
screen.<br />
TOT HITS TOP<br />
The first prompt is for the Team that is at bat during the Top Half of each Inning. At<br />
the second prompt you may change the Total Hits for the Team at bat during the<br />
Bottom Half of each Inning<br />
TOT HITS TOP<br />
In general it is better to track the Hits as they happen using the [HITS +1] button<br />
rather than relying on the [SET TOTAL HITS] button. The primary purpose of this<br />
feature is to help you recover from accidentally logging an extra Hit.<br />
Revised 2011-September-22 Page 14
Electro-Mech Scoreboard Company<br />
MP Line-Score 4-D <strong>Clock</strong> Control Console CX_402<br />
[SET TOTAL ERRORS] - Allows the operator to directly set or edit the Total Errors for<br />
each Team. Pressing the button brings up an input prompt on the second line of<br />
the LCD screen.<br />
TOT ERRS TOP<br />
The first prompt is for the Team that is at bat during the Top Half of each Inning. At<br />
the second prompt you may change the Total Runs for the Team at bat during the<br />
Bottom Half of each Inning<br />
TOT ERRS TOP<br />
In general it is better to track the Errors as they happen using the [ERRORS +1]<br />
button rather than relying on the [SET TOTAL ERRORS] button. The primary<br />
purpose of this feature is to help you recover from accidentally logging an extra<br />
Error.<br />
[INC. INNING TOP / BOT] - Increments the Half Inning. Initially the Inning display on<br />
the scoreboard (if you have one) is blank and the LCD shows "B-". The first time<br />
you press this button, the Inning display on the scoreboard shows "1" and the LCD<br />
shows "T01" -- indicating the Top of the First Inning. The second time you press the<br />
button, the Inning display on the scoreboard remains at "1" while the LCD changes<br />
to "B01" -- indicating the Bottom of the First Inning. The next stop is, of course, "2"<br />
on the scoreboard and "T02" on the LCD.<br />
Many other functions of the control console are affected by this button. For<br />
instance, [RUNS +1] acts on the Team currently at bat. So pressing [RUNS +1]<br />
increments the Team on the Top line of the scoreboard during the Top Half of an<br />
Inning. Pressing [INC. INNING TOP / BOT] will take you to the Bottom Half, thus<br />
changing the Team affected by [RUNS +1].<br />
[RUNS + 1] - Increments the Runs for the Team currently at bat. If you have a<br />
scoreboard <strong>with</strong> Runs-By-Inning, the display for the current Inning will be updated<br />
along <strong>with</strong> the Total Runs display.<br />
[HITS + 1] - Increments the Total Hits for the Team currently at bat. The Hit Indicator<br />
will flash four times when you press this button.<br />
[ERRORS + 1] - Increments the Total Errors for the Team currently NOT at bat. The<br />
Error Indicator will flash four times when you press this button.<br />
[BALL + 1] - Increments the Ball Count by one.<br />
[STRIKE + 1] - Increments the Strike Count by one.<br />
[OUT + 1] - Increments the Out Count by one.<br />
[HORN] - Sounds the Horn for a two-second burst.<br />
Revised 2011-September-22 Page 15
Electro-Mech Scoreboard Company<br />
MP Line-Score 4-D <strong>Clock</strong> Control Console CX_402<br />
[CLOCK ON / OFF] - Starts and stops the Game <strong>Clock</strong>.<br />
[CLEAR / FLASH HIT] - Flashes the Hit Indicator four times, but does NOT affect the<br />
Total Hits for either Team. This button is also used while entering numerical data to<br />
exit the function <strong>with</strong>out change.<br />
[ENTER / FLASH ERROR] - Flashes the Error Indicator four times, but does NOT affect<br />
the Total Errors for either Team. This button is also used while entering numerical<br />
data to confirm the entry and continue.<br />
[SET INNING TOP / BOT] - Allows the operator to directly set the current Inning and<br />
Half. Pressing the button brings up an input prompt on the second line of the LCD<br />
screen.<br />
SET INNING <br />
At this prompt you could press [5] [ENTER] to tell the console you are in the 5th<br />
Inning. The next prompt requires the operator to indentify the Top or Bottom Half of<br />
the Inning<br />
1=BOT 0=TOP <br />
At this prompt press [1] [ENTER] to indicate the Bottom Half. All functions that<br />
depend on the particular Half Inning will now work according to the new setting you<br />
have provided.<br />
[SET RUNS / INNING] - Allows the operator to directly edit of set the Runs-By-Inning<br />
displays (if present on the scoreboard). Pressing the button brings up an input<br />
prompt on the second line of the LCD screen.<br />
EDIT INNING <br />
At this prompt you could press [6 [ENTER] to change the Runs in the 6th Inning.<br />
The next prompt asks you to update the Runs for the Top Half of the Inning:<br />
SET RUNS TOP <br />
You may edit the current number of Runs or press [ENTER] to accept the current<br />
number and skip to the Bottom Half.<br />
SET RUNS BOT <br />
[PITCHES + 1] - Increments the Pitch Count for the Team currently NOT at bat.<br />
Revised 2011-September-22 Page 16
Electro-Mech Scoreboard Company<br />
MP Line-Score 4-D <strong>Clock</strong> Control Console CX_402<br />
[NEW GAME] - Available only when the Game <strong>Clock</strong> is NOT running. This button is the<br />
doorway to one fairly obvious feature and a few other hidden features. Pressing it<br />
brings up the following display:<br />
RESET SCOREBOARD<br />
1=YES 0=NO <br />
Press [1] [ENTER] to reset all information to default values. For instance, Guest<br />
and Home Scores will be reset to 0.<br />
In addition to this memory-clearing function, [NEW GAME] allows the operator to<br />
access other functions by entering other numbers at the prompt. These are listed<br />
below.<br />
[NEW GAME] [4] - This sub-function turns off all the scoreboard displays and shows<br />
the following message on the LCD screen:<br />
***BLANK TEST***<br />
**NEWGAME=EXIT**<br />
Blank Test Mode is a diagnostic feature that allows you to check for display circuits<br />
that are damaged in a way that prevents them from being turned off. If anything<br />
remains lit on the scoreboard when the console is in this mode, there is a hardware<br />
problem that should be resolved by contacting technical support.<br />
Exit this mode by pressing [NEW GAME] again.<br />
This is also a handy trick for blanking the scoreboard between games or whenever<br />
it is convenient. Just remember that the scoreboard is not truly off in this state. The<br />
electronic components are still energized.<br />
[NEW GAME] [5] - This sub-function turns on all the scoreboard displays and shows<br />
the following message on the LCD screen:<br />
***LAMP TEST****<br />
**NEWGAME=EXIT**<br />
Lamp Test Mode is a diagnostic feature that allows you to check for display circuits<br />
that are damaged in a way that prevents them from being turned on. If anything is<br />
blank on the scoreboard when the console is in this mode, there is a hardware<br />
problem that should be resolved by contacting technical support. Horns are not<br />
supposed to sound in Lamp Test mode.<br />
Exit this mode by pressing [NEW GAME] again.<br />
Revised 2011-September-22 Page 17
Electro-Mech Scoreboard Company<br />
MP Line-Score 4-D <strong>Clock</strong> Control Console CX_402<br />
[NEW GAME] [8] - This sub-function configures the console to work <strong>with</strong> timing<br />
equipment provided by Precision Time Systems, Inc. You have to confirm entry into<br />
this mode by typing [1] [ENTER] in response to this prompt:<br />
PRECISION TIME<br />
1=YES 0=NO <br />
The practical results of being in Precision Time Mode are 1) the [CLOCK ON / OFF]<br />
button is disabled, and 2) the Game <strong>Clock</strong> only runs when the console hardware<br />
reads a switch closure from an external clock switch. You can simulate the<br />
behavior of the Precision Time equipment by plugging an Electro-Mech Hand-Held<br />
<strong>Clock</strong> Start/Stop Switch into one of the connectors on the back of the console and<br />
holding down the button on the handheld device to start the <strong>Clock</strong>. The <strong>Clock</strong> on<br />
the LCD screen will have a "P" prefix to indicate Precision Time Mode.<br />
To exit Precision Time Mode, press [NEW GAME] [8] [0] [ENTER].<br />
Revised 2011-September-22 Page 18
Electro-Mech Scoreboard Company<br />
MP Line-Score 4-D <strong>Clock</strong> Control Console CX_402<br />
Handheld <strong>Clock</strong> Start / Stop Switch<br />
Unlike football and basketball, baseball rules don't require (as far as we know) a<br />
separate person to operate the Game <strong>Clock</strong>. But the feature is available if you want it.<br />
So you can purchase a handheld pendant-style switch that plugs into the back of the<br />
control console and allows a separate operator the ability to start and stop the Game<br />
<strong>Clock</strong>. The RJ-45 style connector at one end of the handheld unit's cable can plug into<br />
the matching socket on the back of the console. The pendant end fits nicely in your<br />
hand so that your thumb rests on the switch. Press the switch once to start the <strong>Clock</strong>.<br />
Press the switch again to stop the <strong>Clock</strong>.<br />
Revised 2011-September-22 Page 19
Electro-Mech Scoreboard Company<br />
MP Line-Score 4-D <strong>Clock</strong> Control Console CX_402<br />
Control Console Power Down and Storage<br />
There is no "OFF" switch on the control console; nor is there a function on the console<br />
that turns the scoreboard off. The scoreboard should be disconnected from power<br />
when not in use. Electro-Mech recommends installing a disconnect switch for all<br />
permanently mounted scoreboards. You may simply unplug a portable scoreboard<br />
model and store it between games.<br />
You should unplug your control console both from its power receptacle and from its data<br />
cable when you are not using it. Electro-Mech offers a carrying case that provides a<br />
convenient way to store and transport the console along <strong>with</strong> various cables and other<br />
accessories. Whether you have a case or not, you should store the console in a safe,<br />
dry location between games.<br />
If the console loses connection <strong>with</strong> the scoreboard while the scoreboard is powered,<br />
the scoreboard will freeze up -- showing the last good Time, Score, and other<br />
information it received from the console. The scoreboard will synchronize <strong>with</strong> the<br />
console again as soon as you reestablish the connection.<br />
If the scoreboard loses power <strong>with</strong> the console still connected and powered, nothing will<br />
happen other than the scoreboard display going blank. Again, the scoreboard will<br />
synchronize <strong>with</strong> the console as soon as it receives power.<br />
If the console loses power -- either because you intentionally unplug it or because of<br />
something unexpected -- it will save the current game information to flash memory.<br />
When you next apply power to the console, the LCD will prompt you to restore the<br />
previous game. If you fail to respond to the prompt, the game data will restore<br />
automatically after a few seconds.<br />
Revised 2011-September-22 Page 20
Electro-Mech Scoreboard Company<br />
MP Line-Score 4-D <strong>Clock</strong> Control Console CX_402<br />
Jumper Settings<br />
CX Driver<br />
*** Important: If you plan to open up the console and do work inside the box,<br />
make sure the power cable is disconnected from the receptacle! ***<br />
The PCB that is the heart of the CX console is called the CX driver. This driver contains<br />
a set of jumper pins that can be used to tell the software how to behave. By installing<br />
shunts across a pair of pins, you are, in essence, closing a switch that tells the program<br />
to do something. On some CX drivers these pins are labeled B through I, A through I,<br />
or A through J. On other drivers the A, B, C,... labels are missing, but you will find a<br />
corresponding diode next to pins B through I (A and J are not for jumpers). The diodes<br />
are labeled D8 through D1 (D8 = B, D7 = C, etc.).<br />
Revised 2011-September-22 Page 21
Electro-Mech Scoreboard Company<br />
MP Line-Score 4-D <strong>Clock</strong> Control Console CX_402<br />
Jumper pins A and J are used for attaching a programming cable to the CX driver and<br />
don't really do anything in this context. Pins F, G, H, and I are the "Board Type<br />
Jumpers" that determine the sport. So, for instance, by removing the shut across the H<br />
pins, you can make your console think it is operating an Electro-Mech baseball<br />
scoreboard rather than a football scoreboard. This table summarizes the jumper<br />
settings for the Board Type Jumpers:<br />
Board Type F G H I Models / Comments<br />
BASEBALL_3<br />
10xx, 12xx, 134x, MM-10x, MM-12x<br />
BASEBALL_4 X 1360, MM-136<br />
FOOTBALL_4 X 1360, 3150, MM-136 MM-335, MM-338<br />
BASEBALL_1 X X 10xx, 11xx, 12xx, 134x, MM-10x, MM-12x<br />
BASEBALL_2 X Not used<br />
SOCCER_LX X X Not a part of CX_402 Software<br />
SOCCER X X Not a part of CX_402 Software<br />
HOCKEY X X X Not a part of CX_402 Software<br />
LINESCORE4 X 1440, 1480<br />
LINESCORE5 X X 15xx, 17xx<br />
FOOTBALL_1 X X<br />
3xxx (except 3150), 7xxx (except 72xx, 73xx,<br />
and 79xx), MP-3xx<br />
BASKETBALL X X X 2xxx (except Player Stats), 72xx, MP-2xx<br />
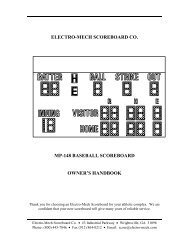
MP-14X X X MP-140, MP-144, MP-148<br />
MP-15X X X X MP-15x<br />
MULTISPORT X X X 137x, 1390<br />
HOCKEY_LX X X X X Not a part of CX_402 Software<br />
Pins B, C, D, and E are the "Option Jumpers". Each one typically controls one of four<br />
options for a given Board Type. This document discusses the options for the<br />
LINESCORE5 Board Type only. You'll have to look at the Owner's Handbooks for<br />
consoles configured for the other Board Types if you are curious about their Option<br />
Jumpers.<br />
Jumper B = Pitch Speed (Install this jumper to use a radar gun -- disables Batter Num)<br />
Jumper C = 2-D/3-D <strong>Clock</strong> (Install this jumper to indicate H:MM or MM Game <strong>Clock</strong>)<br />
Jumper D = Double Pitch Count (Install this for separate Top/Bottom PC displays)<br />
Jumper E = B-S-O to 4-3-3 (Install this jumper for Balls to 4, Strikes & Outs to 3)<br />
Installing Jumper C indicates an H:MM:SS or MM Game <strong>Clock</strong> as found in Models<br />
1711, 1712, 1731, 1732, 1741, 1742, 1751, 1752, 1781, and 1782. This would create<br />
an incompatibility <strong>with</strong> Models 1714, 1734, 1744, 1754, and 1784. Other Models would<br />
be unaffected by this change.<br />
Adding Jumper D would allow the console to operate a Pitch Count display that shows<br />
one set of digits for the Top/Guest Pitch Count and another set of digits for the<br />
Bottom/Home Pitch Count. This would create an incompatibility <strong>with</strong> Models 1713,<br />
1733, 1743, 1753, and 1783.<br />
Any Model listed on the front page of this document can be made to show the Ball,<br />
Strike, and Out Counts to 4, 3, and 3 when E Jumper is added to this console.<br />
Revised 2011-September-22 Page 22