LED Light Bar Kit for Basketball Backboards - Scoreboards
LED Light Bar Kit for Basketball Backboards - Scoreboards
LED Light Bar Kit for Basketball Backboards - Scoreboards

You also want an ePaper? Increase the reach of your titles
YUMPU automatically turns print PDFs into web optimized ePapers that Google loves.
BACKBOARD <strong>LED</strong> ARRAY Page 2TABLE OF CONTENTSSPECIFICATIONS .............................................................................................. 3OVERVIEW ......................................................................................................... 4BACKBOARD <strong>LED</strong> ARRAY INSTALLATION INSTRUCTIONS ................. 5WARRANTY ...................................................................................................... 10Electro-Mech Scoreboard Co. • 72 Industrial Parkway • Wrightsville, GA 31096Phone: (800) 445-7846 • Fax (478) 864-0212 • Email: score@electro-mech.comPDF created with pdfFactory trial version www.pdffactory.com
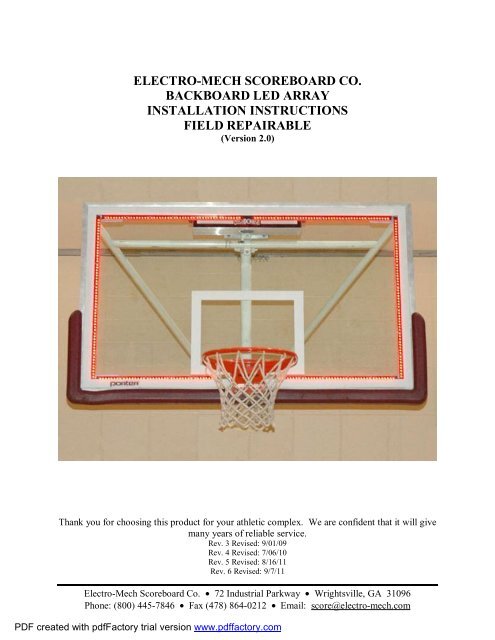
BACKBOARD <strong>LED</strong> ARRAY Page 3SPECIFICATIONSGENERAL: This accessory includes the backboard <strong>LED</strong> array segment brackets (one TOP bracket, two BOTTOMbrackets, and two SIDE brackets), a wire assembly, and a trans<strong>for</strong>mer enclosure assembly (If trans<strong>for</strong>mer isneeded <strong>for</strong> your application).DIMENSIONS: TOP BRACKET: 66” L x 1” W x 1” D; SIDE BRACKETS: 30.5” L x 1” W x 1” D; SIDEBRACKETS: 20.25” L x 1” W x 1” DARRAY WEIGHT: 3 lbsCONSTRUCTION: The backboard <strong>LED</strong> array consists of five segments. Each segment consists of a number ofprinted circuit board assemblies mounted on a <strong>for</strong>med aluminum bracket. The brackets are attached to thebackboard with very high bond foam tape. The trans<strong>for</strong>mer is mounted in a NEMA 4X enclosure (Iftrans<strong>for</strong>mer is needed <strong>for</strong> your application).DISPLAY: The backboard <strong>LED</strong> array illuminates when the basketball scoreboard game clock reaches 0 seconds. Itwill also illuminate when the scoreboard’s control console HORN key is pressed.SEGMENTS: Precision optical per<strong>for</strong>mance red oval light emitting diodes mounted on printed circuit boards <strong>for</strong>mthe segments. Each printed circuit board assembly includes nine high intensity light emitting diodes. Thelight emitting diodes are spaced 0.6” apart.POWER REQUIREMENTS:BACKBOARD LIGHT ASSEMBLY: 18.9 VDC, 7.7A DC each. The backboard <strong>LED</strong> array is poweredby a compatible Electro-Mech Scoreboard shot timer.TRANSFORMER ENCLOSURE ASSEMBLY: 120 VAC stepped down to 15 VAC, .75A each at 120VAC, 6.0 A each at 15 VAC, 60 Hz. The backboard <strong>LED</strong> array is powered by a compatible Electro-Mechbasketball scoreboard.WARRANTY: Five year limited warranty.Electro-Mech Scoreboard Co. • 72 Industrial Parkway • Wrightsville, GA 31096Phone: (800) 445-7846 • Fax (478) 864-0212 • Email: score@electro-mech.comPDF created with pdfFactory trial version www.pdffactory.com
BACKBOARD <strong>LED</strong> ARRAY Page 4OVERVIEWBackboard lights can be powered by a dedicated output either on any basketball scoreboard or ashot clock with a CPC plug. If they are powered by a basketball scoreboard, a trans<strong>for</strong>merenclosure is required between the scoreboard and the backboard lights assembly. If they arepowered by a shot clock with a CPC plug, the shot clock is connected directly to the backboardlights assembly. For both installations the backboard light brackets are installed the same.Fig. 0Power System ComparisonElectro-Mech Scoreboard Co. • 72 Industrial Parkway • Wrightsville, GA 31096Phone: (800) 445-7846 • Fax (478) 864-0212 • Email: score@electro-mech.comPDF created with pdfFactory trial version www.pdffactory.com
BACKBOARD <strong>LED</strong> ARRAY Page 5BACKBOARD <strong>LED</strong> ARRAY INSTALLATION INSTRUCTIONSFirst determine which configuration you are installing.If you have a shot clock with a CPC connector on the top (see Fig. 1), then follow theinstructions <strong>for</strong> “Shot Timer Powered Backboard <strong>Light</strong>s”.CPC ConnectorCPC ConnectorFig. 1Left: 2180 CPC Location, Right: Close-up of CPC ConnectorIf you have any other configuration follow the instructions <strong>for</strong> “Scoreboard PoweredBackboard <strong>Light</strong>s”.For both types the <strong>LED</strong> backboard light brackets will be installed the same way as follows.Electro-Mech Scoreboard Co. • 72 Industrial Parkway • Wrightsville, GA 31096Phone: (800) 445-7846 • Fax (478) 864-0212 • Email: score@electro-mech.comPDF created with pdfFactory trial version www.pdffactory.com
BACKBOARD <strong>LED</strong> ARRAY Page 6<strong>LED</strong> Backboard <strong>Light</strong> Brackets1. CLEAN SURFACE OF BACKBOARD BEFORE APPLYING BRACKETS!2. Remove the white liner from the high bond tape on the backboard light brackets labeledSIDE and mount them along the left and right side of the backboard glass (inside the whitetape line). Be sure that the <strong>LED</strong>s are visible through the backboard glass.3. Mount the backboard light bracket labeled TOP LEFT in the same manner as in step 1 alongthe top left side of the backboard (as viewed from the rear of the backboard).4. Mount the backboard light bracket labeled TOP RIGHT in the same manner as in step 1along the top right side of the backboard (as viewed from the rear of the backboard).5. Mount the backboard light bracket labeled BOTTOM LEFT in the same manner as in step 1along the bottom left side of the backboard (as viewed from the rear of the backboard).6. Mount the backboard light bracket labeled BOTTOM RIGHT in the same manner as in step1 along the bottom right side of the backboard (as viewed from the rear of the backboard).7. Connect all wire harnesses in the four corners of the backboard as shown in Fig. 28. Continue to the next appropriate section <strong>for</strong> your configuration.Electro-Mech Scoreboard Co. • 72 Industrial Parkway • Wrightsville, GA 31096Phone: (800) 445-7846 • Fax (478) 864-0212 • Email: score@electro-mech.comPDF created with pdfFactory trial version www.pdffactory.com
BACKBOARD <strong>LED</strong> ARRAY Page 7<strong>LED</strong> BACKBOARD LIGHTS ASSEMBLYINPUT POWERCONNECT 3BLACK WIRESCONNECT 3RED WIRESTOP RIGHTTOP LEFTSIDESIDEBOTTOM RIGHTBOTTOM LEFTFig. 2Front view of bracket assembly(Looking through goal side of backboard)Shot Timer Powered Backboard <strong>Light</strong>s1. Plug one side of supplied CPC cable into shot clock.2. Route cable from shot clock to the four wires on the TOP bracket.3. Using the wire nuts connect the wires of this cable to the <strong>LED</strong> backboard lights as shown inFig. 2.4. Installation complete.Electro-Mech Scoreboard Co. • 72 Industrial Parkway • Wrightsville, GA 31096Phone: (800) 445-7846 • Fax (478) 864-0212 • Email: score@electro-mech.comPDF created with pdfFactory trial version www.pdffactory.com
BACKBOARD <strong>LED</strong> ARRAY Page 8Scoreboard Powered Backboard <strong>Light</strong>s1. Mount the trans<strong>for</strong>mer enclosure assembly within 25 ft. of the backboard. Some mountinghardware has been provided <strong>for</strong> attachment to a pole.2. Open the trans<strong>for</strong>mer enclosure assembly door (see Fig 3).Run 120VACwires through thisgrommet (Whiteand Black wires)Run 24VACwires throughthis grommet(Red and Blackwires)10A FUSETie wires herewith wire tieSCOREBOARD POWERED BACKBOARD <strong>LED</strong> ARRAY.120 VAC FROMBASKETBALL SCOREBOARDGOAL LIGHT RECEPTACLE10ABACKBOARD LIGHTS RED WIREBACKBOARD LIGHTS BLACK WIREFig. 3Top: Trans<strong>for</strong>mer Enclosure AssemblyBottom: Trans<strong>for</strong>mer Enclosure Assembly SchematicElectro-Mech Scoreboard Co. • 72 Industrial Parkway • Wrightsville, GA 31096Phone: (800) 445-7846 • Fax (478) 864-0212 • Email: score@electro-mech.comPDF created with pdfFactory trial version www.pdffactory.com
BACKBOARD <strong>LED</strong> ARRAY Page 93. Cut a length of the supplied cable to connect from inside the trans<strong>for</strong>mer enclosure assemblyto the goal light receptacle on the right side of a compatible Electro-Mech Scoreboard Co.scoreboard (see Fig. 4).Fig. 4Left: Goal <strong>Light</strong> Receptacle on side of Scoreboard, Right: Close-up of Goal <strong>Light</strong> Receptacle4. Install the cable between the trans<strong>for</strong>mer enclosure assembly and the goal light receptacle.5. At the scoreboard end of the cable, attach the supplied plug (DO NOT PLUG IN UNTILINSTALL IS COMPLETE TO AVOID ELECTRIC SHOCK).6. At the other end, insert the cable in one of the holes in the trans<strong>for</strong>mer enclosure assembly(see Fig. 3).7. Use a wire nut to connect the black wire from inside the trans<strong>for</strong>mer enclosure assembly(labeled AC-L) to either wire in the cable (see Schematic in Fig. 3).8. Use a wire nut to connect the white wire from inside the trans<strong>for</strong>mer enclosure assembly(labeled AC-N) to other wire in the cable (see Schematic in Fig. 3).9. Cut a length of the supplied cable to connect from inside the trans<strong>for</strong>mer enclosure assemblyto the TOP bracket of the backboard.10. Install the cable between the trans<strong>for</strong>mer enclosure assembly and the goal light receptacle.11. Insert the cable in one of the holes in the trans<strong>for</strong>mer enclosure assembly.12. Use a wire nut to connect the red wire from inside the trans<strong>for</strong>mer enclosure assembly(labeled BACKBOARD LIGHTS RED WIRE) to either wire in the cable (see Schematic inFig. 3).13. Use a wire nut to connect the black wire from inside the trans<strong>for</strong>mer enclosure assembly(labeled BACKBOARD LIGHTS black WIRE) to other wire in the cable (see Schematic inFig. 3).14. Fasten both cables to the black cable tie mounts inside the enclosure assembly using a plastictie wrap.15. Close the trans<strong>for</strong>mer enclosure assembly door.16. At the TOP backet of the backboard, connect the wires of the cable to the <strong>LED</strong> backboardlights as shown in Fig. 2.17. Insert the plug into the scoreboard goal light receptacle (see Fig. 4).18. Installation complete.Electro-Mech Scoreboard Co. • 72 Industrial Parkway • Wrightsville, GA 31096Phone: (800) 445-7846 • Fax (478) 864-0212 • Email: score@electro-mech.comPDF created with pdfFactory trial version www.pdffactory.com
BACKBOARD <strong>LED</strong> ARRAY Page 10ELECTRO-MECH SCOREBOARD CO.FIVE YEAR LIMITED WARRANTYTHE ELECTRICAL COMPONENTS OF ALL ELECTRO-MECH SCOREBOARDSARE GUARANTEED FOR A PERIOD OF FIVE (5) YEARS FROM THE DATE OFINVOICE AGAINST DEFECTS IN WORKMANSHIP OR MATERIAL AND WILLBE REPLACED OR REPAIRED WITHOUT COST TO THE OWNER PROVIDEDTHE EQUIPMENT OR PARTS ARE RETURNED POSTAGE-PAID TO THEFACTORY IN WRIGHTSVILLE, GA. SHIPPING BACK TO THE OWNER WILL BEVIA UPS GROUND SERVICE EXCEPT WHEN AIR OR SPECIAL METHOD OFRETURN IS SPECIFIED BY THE OWNER, IN WHICH CASE SHIPPING WILL BEFREIGHT COLLECT.EXCLUDED FROM THIS WARRANTY ARE FUSES.THIS WARRANTY DOES NOT INCLUDE LABOR CHARGES INCURRED IN THEREMOVAL OF COMPONENT PARTS, SERVICE CALLS, OR DAMAGESRESULTING FROM IMPROPER INSTALLATION, IMPROPER OPERATION, ORPROBLEMS CAUSED BY ANY REPAIR, ALTERATION OR MODIFICATION OFTHE SCOREBOARD NOT PERFORMED BY ELECTRO-MECH.EQUIPMENT WHICH IS SUBJECTED TO ACCIDENT, NEGLECT, ABUSE,MISUSE OR OTHER NATURAL DISASTERS, INCLUDING BUT NOT LIMITEDTO FIRE, WIND, LIGHTNING, OR FLOOD, IS NOT COVERED BY THISGUARANTEE.Electro-Mech Scoreboard Co. • 72 Industrial Parkway • Wrightsville, GA 31096Phone: (800) 445-7846 • Fax (478) 864-0212 • Email: score@electro-mech.comPDF created with pdfFactory trial version www.pdffactory.com