ELECTRO-MECH SCOREBOARD CO. MP-320 ... - Scoreboards
ELECTRO-MECH SCOREBOARD CO. MP-320 ... - Scoreboards
ELECTRO-MECH SCOREBOARD CO. MP-320 ... - Scoreboards

You also want an ePaper? Increase the reach of your titles
YUMPU automatically turns print PDFs into web optimized ePapers that Google loves.
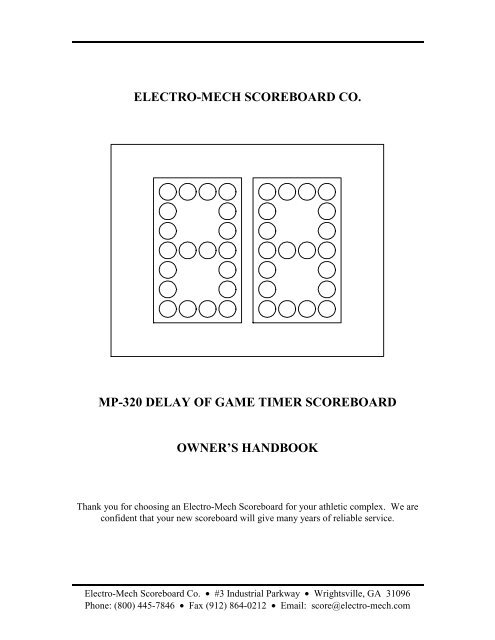
<strong>ELECTRO</strong>-<strong>MECH</strong> <strong>S<strong>CO</strong>REBOARD</strong> <strong>CO</strong>.<strong>MP</strong>-<strong>320</strong> DELAY OF GAME TIMER <strong>S<strong>CO</strong>REBOARD</strong>OWNER’S HANDBOOKThank you for choosing an Electro-Mech Scoreboard for your athletic complex. We areconfident that your new scoreboard will give many years of reliable service.Electro-Mech Scoreboard Co. • #3 Industrial Parkway • Wrightsville, GA 31096Phone: (800) 445-7846 • Fax (912) 864-0212 • Email: score@electro-mech.com
Model <strong>MP</strong>-<strong>320</strong> Page 3<strong>MP</strong>-<strong>320</strong> DELAY OF GAME TIMER SPECIFICATIONSGENERAL: This ETL listed system includes two delay of game timer units (home and visitor teams),mounting hardware, control cable (sold separately), two 10 ft. extension cables, and two junctionboxes. The <strong>MP</strong>-<strong>320</strong> may be purchased with or without a control console. It is 100 % compatiblewith any <strong>MP</strong> football control console.UNIT DIMENSIONS: 4’ L x 38” H x 6” D (<strong>MP</strong>-<strong>320</strong> with side sponsor panel measures 6’ L x 38” H x6” D)UNIT WEIGHT: Approximately 70 lbs (<strong>MP</strong>-<strong>320</strong> with side sponsor panel weighs 90 lbs.)UNIT <strong>CO</strong>NSTRUCTION: The outer frame is made from extruded aluminum. Internal structural partsmay be extruded aluminum or formed from aluminum sheet. The face and back are made fromaluminum sheet. The face is finished with enamel paint. Black is the standard face color. Whiteis the standard color for the captions. Mounting hardware is included.DISPLAY: The <strong>MP</strong>-<strong>320</strong> DELAY OF GAME TIMER is a two digit counter which can be set from 1 to 99seconds.LA<strong>MP</strong> BANKS: A 4 x 7 matrix of lamps forms each 24” digit. The scoreboard uses 15 watt 120 VACfrosted medium based appliance lamps (also known as 15A15IF lamps). Recessed aluminumreflectors provide a crisp separation between each lamp. Expanded metal screens protect thelamps.UNIT POWER REQUIREMENTS: Scoreboard - 120 VAC, 5 A, 60 Hz, 600 watts maximum, (8 Aservice recommended). Control Console - 120 VAC, 0.5 A, 60 HzUNIT <strong>ELECTRO</strong>NICS: 100% solid state fully enclosed within a plug in module.<strong>CO</strong>NTROL <strong>CO</strong>NSOLE: The microprocessor control console is constructed of a rugged plastic housingwith a metal back plate. It features a 37 key sealed membrane keypad, a LCD display of gameinformation, an attached 6 foot power cord, and a lithium cell battery backup to retain gameinformation.<strong>CO</strong>NTROL CABLE: The cable has two 22 AWG stranded copper conductors with semi-rigid PVCinsulation. It also has a braided shield and a foil shield. The polyethylene jacket is rated at 300volts. The cable is direct burial rated and measures approximately ¼” in diameter. One length isrequired to run from each unit to the point of operation (conduit installation recommended).JUNCTION BOX AND EXTENSION CABLE: A 4 ¼” x 2 ¼” x 2” junction box with a stereo jackmounted on the face is attached to each control cable at the point of operation. The ten footextension cables connect the control console to the junction boxes.WARRANTY: Five year limited warranty.Electro-Mech Scoreboard Co. • #3 Industrial Parkway • Wrightsville, GA 31096Phone: (800) 445-7846 • Fax (912) 864-0212 • Email: score@electro-mech.com
Model <strong>MP</strong>-<strong>320</strong> Page 4<strong>S<strong>CO</strong>REBOARD</strong> INSTALLATIONThe <strong>MP</strong>-<strong>320</strong> Delay of Game Timer units are typically installed in or behind the end zonesof the football field. Typical installation of the <strong>MP</strong>-<strong>320</strong> consists of positioning the posts,mounting the units on the posts, and making the proper electrical connections. Note:Installation of a unit on a wall will force a service technician to remove the unit fromthe wall in order to remove the plug in module inside the unit for repair.Items not provided by Electro-Mech Scoreboard Company which are necessary forinstallation:• Four posts• Power cable to connect each unit to your power source• Grounding hardware• A grounded NEMA 5-15R 120 VAC receptacle for the control console.Items not provided which are recommended by Electro-Mech Scoreboard Company forinstallation:• A weatherproof power disconnect at each unit• A weatherproof NEMA 5-15R 120 VAC convenience receptacle at each unitWhile Electro-Mech Scoreboard Company does not perform installations, we will makeevery effort to answer your installation questions. Installation should be performed byqualified personnel. Consult national and local codes before installation.POSITIONING THE POSTSEach unit is designed to be mounted on two posts. We suggest that the front of each unitshould angled away from the afternoon sun, if possible. Typically installers will use steelpipes or I-beams. The mounting hardware will accommodate posts up to 4.5 inches outerdiameter. We recommend that the posts are sunk in reinforced concrete footings. Figure1 shows the spacing of the posts for a <strong>MP</strong>-<strong>320</strong>. It suggests one possible installation for a<strong>MP</strong>-<strong>320</strong> in silty sand soil. No dimensional data in this manual is intended to bespecifications except the size of the unit cabinet and the distance between the posts.The specifications for the posts and concrete footings are dependent upon the expectedlocal wind and soil conditions, the height of the scoreboard from the ground, and the localbuilding codes. Electro-Mech Scoreboard Company assumes no responsibility for theinstallation of scoreboards by others.Electro-Mech Scoreboard Co. • #3 Industrial Parkway • Wrightsville, GA 31096Phone: (800) 445-7846 • Fax (912) 864-0212 • Email: score@electro-mech.com
Model <strong>MP</strong>-<strong>320</strong> Page 5Earth Ground120 VAC ConvenienceReceptacleControl Cable In3/4" ConduitPower DisconnectPower Cable In3/4" ConduitTo PowerSourceTo ControlCenterFigure 1 <strong>MP</strong>-<strong>320</strong> Post SpacingFigure 2 shows the spacing of the posts for a <strong>MP</strong>-<strong>320</strong> with an optional side sponsor panel.Electro-Mech Scoreboard Co. • #3 Industrial Parkway • Wrightsville, GA 31096Phone: (800) 445-7846 • Fax (912) 864-0212 • Email: score@electro-mech.com
Model <strong>MP</strong>-<strong>320</strong> Page 6120 VAC ConvenienceReceptacleEarth GroundPower DisconnectPower Cable In3/4" ConduitControl Cable In3/4" ConduitTo PowerSourceTo ControlCenterFigure 2 <strong>MP</strong>-<strong>320</strong> with Optional Side Sponsor Panel Post SpacingMOUNTING HARDWAREFour sets of mounting hardware are provided to attach the scoreboard to the posts.Additional hardware sets are provided to attach the optional sponsor panels, if ordered. Amounting hardware set consists of a steel angle bracket, two threaded rods, two washers,and two nuts. Figure 3 shows an overhead cross section view and a side cross sectionview of the scoreboard attached to a post at a mounting point using the hardware. A steelbracket is riveted to the scoreboard’s aluminum extrusion frame. The bracket has twotapped holes. The threaded rods screw into these tapped holes. The washers and nuts areused to clamp the steel angle bracket against the steel post and hold the scoreboard inplace.Electro-Mech Scoreboard Co. • #3 Industrial Parkway • Wrightsville, GA 31096Phone: (800) 445-7846 • Fax (912) 864-0212 • Email: score@electro-mech.com
Model <strong>MP</strong>-<strong>320</strong> Page 7Overhead cross section viewSide cross section viewSteel Angle BracketSteel Angle BracketFigure 3 Standard Mounting MethodMOUNTING THE <strong>S<strong>CO</strong>REBOARD</strong>The scoreboard is attached to the posts at four points. Figure 4 shows the location of themounting points on the rear of the scoreboard.Mounting PointsFigure 4 Mounting PointsElectro-Mech Scoreboard Co. • #3 Industrial Parkway • Wrightsville, GA 31096Phone: (800) 445-7846 • Fax (912) 864-0212 • Email: score@electro-mech.com
Model <strong>MP</strong>-<strong>320</strong> Page 8The following steps describe how to mount the scoreboard on the posts:1. Place the scoreboard cabinet against the posts on the ground. Make sure the mountingpoints are aligned with the posts.2. Screw the threaded rods into the tapped holes in the scoreboard.3. Place a steel angle bracket over the threaded rods at a mounting point.4. Place a washer over each threaded rod.5. Screw the nuts onto the threaded rods so that the bracket is loosely held in place.6. Repeat steps 4 -6 at the other mounting points.7. Raise the scoreboard into place and tighten the nuts to clamp the scoreboard in placeon the posts.Electro-Mech Scoreboard Co. • #3 Industrial Parkway • Wrightsville, GA 31096Phone: (800) 445-7846 • Fax (912) 864-0212 • Email: score@electro-mech.com
Model <strong>MP</strong>-<strong>320</strong> Page 9ELECTRICAL <strong>CO</strong>NNECTIONSWe recommend a qualified electrician perform the needed electrical connections toensure proper operation of your scoreboard. These connections include grounding thescoreboard, connecting the scoreboard to a power source, installing the control cable, andconnecting the control console.Ground ConnectionThe National Electrical Code requires a scoreboard (electric sign) to be grounded.Grounding the scoreboard helps the scoreboard electronics operate properly and helpsminimize damage if it is struck by lightning. Metal posts do not provide an adequateground path when they are placed in concrete. One method of grounding is to connect thescoreboard cabinet to one or more grounding rods which are driven into the ground nearthe scoreboard via a large gauge copper wire. The self tapping sheet metal screws on theback of the scoreboard cabinet provide a convenient connection point.Connecting The Scoreboard To Your Power SourceThe scoreboard requires 120 VAC service at the scoreboard to operate properly.Maximum power consumption of Model <strong>MP</strong>-<strong>320</strong>: 600 Watts. Make sure that powercable is rated for this electrical load. Electro-Mech Scoreboard Company recommendsthat your power cable is installed in conduit. Avoid running your power cables in closeproximity to your control cable. The following steps describe how to connect thescoreboard to your power source:1. Remove the hex head screws which hold the rear upper access panel in place (Figure5).Rear Access PanelknockoutsFigure 5 Upper Access PanelElectro-Mech Scoreboard Co. • #3 Industrial Parkway • Wrightsville, GA 31096Phone: (800) 445-7846 • Fax (912) 864-0212 • Email: score@electro-mech.com
Model <strong>MP</strong>-<strong>320</strong> Page 10MST-01T1S31/2 AF18AF2T2T3Figure 6 Access Panel Removed2. Punch out the knockouts for the power and control cables.3. Feed the power cable through a knockout.4. Connect the AC line wire to position 1 and AC neutral wire to position 2 of terminalstrip T3 on the junction chassis according to figure 7.Electro-Mech Scoreboard Co. • #3 Industrial Parkway • Wrightsville, GA 31096Phone: (800) 445-7846 • Fax (912) 864-0212 • Email: score@electro-mech.com
Model <strong>MP</strong>-<strong>320</strong> Page 11Position 1:AC line (hot) wirefrom your powersourcePosition 2:AC neutral wirefrom your powersourceFigure 7 Power ConnectionsElectro-Mech Scoreboard Company suggests that you install a power cut-off switch and aNEMA 5-15R receptacle in a weatherproof box on the scoreboard post below thescoreboard. The cut-off switch provides a convenient way of turning the scoreboard offduring maintenance or repairs. The NEMA 5-15R receptacle will allow a technician toeasily plug in the control console and operate the scoreboard via the test jack S-3(avaluable trouble-shooting aid).ScoreLink 300The S<strong>CO</strong>RELINK 300 RF MODEM SET is intended to eliminate the control cablebetween the scoreboard and the control console on Electro-Mech Scoreboard MM and<strong>MP</strong> series scoreboards. If you have purchased this option, disregard the next section ofthis manual. Refer to the S<strong>CO</strong>RELINK 300 RF MODEM SET OWNER’SHANDBOOK for installation instructions.Installing The Control CableThe control cable connects the scoreboard to the control console. While the control cableis direct burial rated, Electro-Mech Scoreboard Company recommends that it is installedin conduit to protect it from being cut. A small junction box with a stereo jack mountedon the face plate is attached to the control cable at the point of operation of thescoreboard. This junction box should be securely mounted in a clean, dry area within tenfeet of the rear of the control console. Most customers order the control cable with thejunction box attached. Some customers prefer to attach the junction box after the cable isinstalled. Those customers must match their stereo jack to one of the stereo jacks infigure 8 in order to make the proper connections. These connections should be soldered.Electro-Mech Scoreboard Co. • #3 Industrial Parkway • Wrightsville, GA 31096Phone: (800) 445-7846 • Fax (912) 864-0212 • Email: score@electro-mech.com
Model <strong>MP</strong>-<strong>320</strong> Page 12STEREN1/4" STEREO JACKSWITCHCRAFT1/4" STEREO JACKORANGETAN13 2PIN 1 - BLACK WIREPIN 2 - RED WIREPIN 3 - SHIELD, GREEN WIRE2 31Figure 8 STEREO JACK WIRING DIAGRAMThe following steps describe how to connect the control cable to the scoreboard:1. At the rear of the scoreboard feed the control cable through one of the knockoutsbelow the access panel.2. Crimp fork terminals to the control cable wires and the shield.3. Connect the control cable to terminal strip T1 (located to the left of the test jack S3)according to the diagram in figure 9.BLACK RED SHIELDFigure 9 T1 WIRING DIAGRAMConnecting The Control ConsoleThe control console is normally connected to the junction box via the 10 ft. extensioncable. This extra length of cable allows the scoreboard operator some mobility and theability to store the control console after the game. The extension cable has two moldedstereo plugs attached to it. One end of the extension cable is plugged into the junctionbox stereo jack and the other end is plugged into the stereo jack mounted on the controlElectro-Mech Scoreboard Co. • #3 Industrial Parkway • Wrightsville, GA 31096Phone: (800) 445-7846 • Fax (912) 864-0212 • Email: score@electro-mech.com
Model <strong>MP</strong>-<strong>320</strong> Page 13console back plate. The control console power cord is plugged into a grounded NEMA 5-15R 120 VAC receptacle.Electro-Mech Scoreboard Co. • #3 Industrial Parkway • Wrightsville, GA 31096Phone: (800) 445-7846 • Fax (912) 864-0212 • Email: score@electro-mech.com
Model <strong>MP</strong>-<strong>320</strong> Page 14<strong>S<strong>CO</strong>REBOARD</strong> OPERATIONThe <strong>MP</strong>-<strong>320</strong> Scoreboard is normally operated at a site with a football scoreboard. If youhave a Electro-Mech Scoreboard Company <strong>MP</strong> series football scoreboard, the <strong>MP</strong>-<strong>320</strong>scoreboard can be programmed by that control console and operated by a hand held unit.If you do not have a <strong>MP</strong> series football scoreboard, it can be programmed by its owncontrol console and operated by a hand held unit which interfaces with the controlconsole. No scoreboard functions will operate without connecting the controlconsole. Figure 10 shows the keypad layout on your control console. The keypadfunctions are described in the text below the figure.<strong>ELECTRO</strong>-<strong>MECH</strong> <strong>S<strong>CO</strong>REBOARD</strong> <strong>CO</strong>.P.O. BOX 102 #3 INDUSTRIAL PARKWAYWRIGHTSVILLE, GA 31096(912) 864-3366SETCLOCKSETCLOCK.1 SEC.1 SE<strong>CO</strong>N/OFFCLOCKUP/DOWNFOOTBALL/SOCCER/TRACKDELAYOF GAMETIMERAUTOHORNTIMEOFDAYTIMEOUTTIMER7 8 9DIMMERSETGUESTS<strong>CO</strong>RESETHOMES<strong>CO</strong>REYARDSTO GOBALLON4 5 6NEWGAME1 2 3GUESTTIMEOUTSHOMETIMEOUTSDOWNCLEAR 0 ENTER QTRGUESTS<strong>CO</strong>RE+1HOMES<strong>CO</strong>RE+1NEXTPOSSHORNON/OFFCLOCKON/OFFFigure 10 Keypad LayoutElectro-Mech Scoreboard Co. • #3 Industrial Parkway • Wrightsville, GA 31096Phone: (800) 445-7846 • Fax (912) 864-0212 • Email: score@electro-mech.com
Model <strong>MP</strong>-<strong>320</strong> Page 15Control Console Key Functions1. DELAY OF GAME TIMER – The delay of game timer should be set prior to thestart of a game. The game timer default time is 30 seconds. To change this time,press [DELAY OF GAME TIMER]. The console LCD display will read:DELAY TIME1 Press the keypad numbers for the time, [ENTER]. The LCD display will then read:DELAY TIME2 This will allow you to change the second reset time. To change this time, press thekeypad numbers for the time, [ENTER].2. NEW GAME – This key can be used to reset all scoreboard functions. Press NEWGAME and, within two seconds, press CLOCK RESET.3. CLOCK RESET – This key is used only in conjunction with the MASTER RESETkey.4. CLOCK ON/OFF – This key is used to start and stop the clock. The clock must beon in order for the <strong>MP</strong>-<strong>320</strong> to count down.The other keys are not used with the <strong>MP</strong>-<strong>320</strong> scoreboard, but may be used for a <strong>MP</strong> seriesfootball scoreboard.You should reset the scoreboard each time that it is turned on. Test out all the functionsto ensure that the scoreboard is operating properly. Electro-Mech ScoreboardCompany strongly advises that you unplug the control console, disconnect theextension cable at the control console, and turn the power to the scoreboard offwhen the scoreboard is not in use. The control console can not turn the scoreboardoff. This action will help protect the scoreboard and control console from power surgesand lightning strikes.Electro-Mech Scoreboard Co. • #3 Industrial Parkway • Wrightsville, GA 31096Phone: (800) 445-7846 • Fax (912) 864-0212 • Email: score@electro-mech.com
Model <strong>MP</strong>-<strong>320</strong> Page 16DELAY OF GAME TIMER HAND HELD UNIT OPERATIONThe delay of game hand held unit has an attached cable which is plugged into a jack onthe control console back plate labeled DBT/SC Hand held. As seen in figure 11, thehand held unit has three buttons. The operation of the buttons is described in the textbelow the figure.RESETRESET-OBON/OFFSHOT TIMER<strong>ELECTRO</strong>-<strong>MECH</strong><strong>S<strong>CO</strong>REBOARD</strong> <strong>CO</strong>WRIGHTSVILLE GA.Figure 11 DELAY OF GAME TIMER HAND HELD UNITControl Console Key Functions1. RESET – This button is used to reset the <strong>MP</strong>-<strong>320</strong> to the time programmed in theconsole as DELAY TIME1. The default time is 30 seconds.2. RESET-OB – This button is used to reset the <strong>MP</strong>-<strong>320</strong> to the time programmed in theconsole as DELAY TIME2. The default time is 5 seconds. Press and hold this buttonto blank the scoreboard.3. ON/OFF – Press and hold this button to pause the count.Electro-Mech Scoreboard Co. • #3 Industrial Parkway • Wrightsville, GA 31096Phone: (800) 445-7846 • Fax (912) 864-0212 • Email: score@electro-mech.com
Model <strong>MP</strong>-<strong>320</strong> Page 17SERVICING THE <strong>S<strong>CO</strong>REBOARD</strong>While your scoreboard was designed for years of trouble-free operation, some problemsmay occasionally occur. Our trained personnel at Electro-Mech Scoreboard Company areready to answer your questions from Monday to Friday during the hours of 8 AM to 5 PMEastern Standard Time. Be sure to know your scoreboard model number when calling.Scoreboard replacement parts, including lamps, are always available. Electro-MechScoreboard Company can repair the control console and plug in module at a significantsavings when compared to the price of new units. Our convenient toll free number islisted at the bottom of every page in this manual.As seen in figure 12, the plug in module MST-01, fuses, connection points for the powerand control cable, and a test jack are located behind the rear access panel.MST-01T1S31/2 A 8AF1 F2T2T3Figure 12 Rear Access ComponentsElectro-Mech Scoreboard Co. • #3 Industrial Parkway • Wrightsville, GA 31096Phone: (800) 445-7846 • Fax (912) 864-0212 • Email: score@electro-mech.com
Model <strong>MP</strong>-<strong>320</strong> Page 18PLUG IN MODULE REPLACEMENTThe plug in module MST-01 performs all of the scoreboard functions. The module hastwo bottom plugs which mate with sockets in the scoreboard. A screw located at the topof the module holds it against the scoreboard cabinet. Simply remove the screw and pullthe module upward to unseat the module. To avoid damage to the plug in module,always turn off the power to the scoreboard when removing or replacing it.FUSESFUSE RATING FUNCTIONF1 1/2 A 250 V <strong>CO</strong>NTROL LINEF2 8 A 250 V LA<strong>MP</strong>S<strong>CO</strong>NNECTION POINTSTERMINAL STRIP FUNCTIONT-1 control cable connectionT-2 MOV (surge protection)T-3 power cable connectionS-3 test jackLA<strong>MP</strong> REPLACEMENTReplacing lamps may be the only service you ever perform on your Electro-Mechscoreboard. The lamps are accessed by removing the protective mask covering each lampbank. To avoid damage to the plug in module, always turn off the power to thescoreboard when changing lamps. We recommend using a felt pen or tape to marklamps that will not light. This scoreboard uses 15 watt medium base lamps (also called15A15 lamps). Never replace these with higher wattage lamps.Electro-Mech Scoreboard Co. • #3 Industrial Parkway • Wrightsville, GA 31096Phone: (800) 445-7846 • Fax (912) 864-0212 • Email: score@electro-mech.com
Model <strong>MP</strong>-<strong>320</strong> Page 19<strong>ELECTRO</strong>-<strong>MECH</strong> <strong>S<strong>CO</strong>REBOARD</strong> <strong>CO</strong>.FIVE YEAR LIMITED WARRANTYTHE ELECTRICAL <strong>CO</strong><strong>MP</strong>ONENTS OF ALL <strong>ELECTRO</strong>-<strong>MECH</strong><strong>S<strong>CO</strong>REBOARD</strong>S ARE GUARANTEED FOR A PERIOD OF FIVE (5) YEARSFROM THE DATE OF INVOICE AGAINST DEFECTS IN WORKMANSHIPOR MATERIAL AND WILL BE REPLACED OR REPAIRED WITHOUT<strong>CO</strong>ST TO THE OWNER PROVIDED THE EQUIPMENT OR PARTS ARERETURNED POSTAGE-PAID TO THE FACTORY IN WRIGHTSVILLE, GA.SHIPPING BACK TO THE OWNER WILL BE VIA UPS GROUND SERVICEEXCEPT WHEN AIR OR SPECIAL METHOD OF RETURN IS SPECIFIED BYTHE OWNER, IN WHICH CASE SHIPPING WILL BE FREIGHT <strong>CO</strong>LLECT.EXCLUDED FROM THIS WARRANTY ARE LA<strong>MP</strong>S, FUSES ANDSOCKETS.THIS WARRANTY DOES NOT INCLUDE LABOR CHARGES INCURRED INTHE REMOVAL OF <strong>CO</strong><strong>MP</strong>ONENT PARTS, SERVICE CALLS, ORDAMAGES RESULTING FROM I<strong>MP</strong>ROPER INSTALLATION, I<strong>MP</strong>ROPEROPERATION, OR PROBLEMS CAUSED BY ANY REPAIR, ALTERATIONOR MODIFICATION OF THE <strong>S<strong>CO</strong>REBOARD</strong> NOT PERFORMED BY<strong>ELECTRO</strong>-<strong>MECH</strong>.EQUIPMENT WHICH IS SUBJECTED TO ACCIDENT, NEGLECT, ABUSE,MISUSE OR OTHER NATURAL DISASTERS, INCLUDING BUT NOTLIMITED TO FIRE, WIND, LIGHTNING, OR FLOOD, IS NOT <strong>CO</strong>VERED BYTHIS GUARANTEE.Electro-Mech Scoreboard Co. • #3 Industrial Parkway • Wrightsville, GA 31096Phone: (800) 445-7846 • Fax (912) 864-0212 • Email: score@electro-mech.com