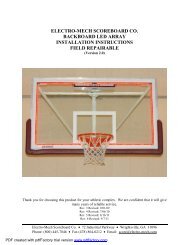
Football with 4-Digit Clock - Scoreboards
Football with 4-Digit Clock - Scoreboards
Football with 4-Digit Clock - Scoreboards

You also want an ePaper? Increase the reach of your titles
YUMPU automatically turns print PDFs into web optimized ePapers that Google loves.
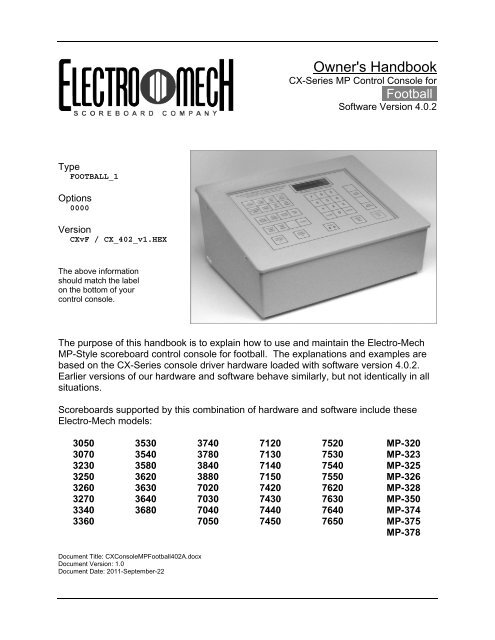
Owner's HandbookCX-Series MP Control Console for·<strong>Football</strong>·Software Version 4.0.2TypeFOOTBALL_1Options0000VersionCXvF / CX_402_v1.HEXThe above informationshould match the labelon the bottom of yourcontrol console.The purpose of this handbook is to explain how to use and maintain the Electro-MechMP-Style scoreboard control console for football. The explanations and examples arebased on the CX-Series console driver hardware loaded <strong>with</strong> software version 4.0.2.Earlier versions of our hardware and software behave similarly, but not identically in allsituations.<strong>Scoreboards</strong> supported by this combination of hardware and software include theseElectro-Mech models:305030703230325032603270334033603530354035803620363036403680374037803840388070207030704070507120713071407150742074307440745075207530754075507620763076407650MP-320MP-323MP-325MP-326MP-328MP-350MP-374MP-375MP-378Document Title: CXConsoleMP<strong>Football</strong>402A.docxDocument Version: 1.0Document Date: 2011-September-22
Electro-Mech Scoreboard CompanyMP <strong>Football</strong> Control Console CX_402Table of ContentsSeven Ways to Stay Safe and Make Your Console Last Longer ................................... 3Console Parts and Accessories ..................................................................................... 4Hooking Up and Powering Up the Console and Accessories ......................................... 6Control Console Initialization .......................................................................................... 7Control Console LCD Screen ......................................................................................... 9Key-By-Key Operation .................................................................................................. 10Practice Segment Timer Mode ...................................................................................... 17Practice Segment Timer Setup ..................................................................................... 18Practice Segment Timer Operation ............................................................................... 22Handheld <strong>Clock</strong> Start / Stop Switch .............................................................................. 27Handheld Three-Button Controller for Play <strong>Clock</strong>s ....................................................... 28Control Console Power Down and Storage ................................................................... 29Jumper Settings ........................................................................................................... 30Revised 2011-September-22 Page 2
Electro-Mech Scoreboard CompanyMP <strong>Football</strong> Control Console CX_402Seven Ways to Stay Safe and Make Your Console Last Longer1 - Don't remove the grounding pin from the power cord. It's there to help keep youfrom getting shocked. If your receptacle only handles two-pronged power cordsthen your wiring was probably installed sometime before President Hoover leftoffice. It's time to upgrade.2 - Keep your console dry. We've designed our consoles <strong>with</strong> outdoor activities inmind, but find some shelter if it is raining. The box is not waterproof. Drinks spilledover the keypad can lead to trouble too.3 - Unplug both the power and data cables when you are not using the console.Noise over these cables -- either from lightning, glitches in the power line, or someother accident -- can damage the console. Leaving the console connected 24-7 justincreases your risk of getting it fried.4 - Store the console in a clean, dry, secure area. Leave it where somebody cankick it, drop it, pile stuff on top of it, or steal it, and you can expect your console willget kicked, dropped, piled on, and stolen. See also the "keep your console dry" tipabove. Neither sprinkler systems nor natural sources of precipitation are beneficialto your control console.5 - If you must open the console box, unplug the power and data cables. Yes, it ispossible to get shocked if you go poking around inside the console.6 - Don't plug something into the console that doesn't belong there. Those stereoconnectors in the back plate of the console are the same kind used by audioequipment. The RJ-45 connectors for the hand-held devices are the same type youoften see in wired computer networks. Accidently plugging an audio amplifier orEthernet access point into your scoreboard control console can cause problems --both to your console and to your audio and networking equipment. A commonmistake we see our customers make is to accidentally plug public addressequipment into the junction box that leads to the scoreboard. This often friescomponents in the scoreboard.7 - Check out your equipment before game day. We're always happy to answerquestions, walk you through solutions, repair damage, or send replacement parts.But if your game starts in ten minutes, there is often not much we can do to helpyou. Make sure your scoreboard is in good working order a few days before thegame so that, however unlikely the chance of a problem, there will be time to solveit.Revised 2011-September-22 Page 3
Electro-Mech Scoreboard CompanyMP <strong>Football</strong> Control Console CX_402Console Parts and AccessoriesThis is a generic set of photos identifying parts of the console and accessories. Youshould receive a packing slip or other paperwork <strong>with</strong> your order that tells specificallywhat parts you are supposed to have. Your configuration may be different.ConsoleTop orLidLCDScreenScrewsKeypadConsole Front ViewConsoleBase orBottomHandheldAccessoryInputSockets(RJ-45)Back PlatePower CordDataOutputSockets(Stereo)Console Rear ViewRevised 2011-September-22 Page 4
Electro-Mech Scoreboard CompanyMP <strong>Football</strong> Control Console CX_402Handheld <strong>Clock</strong>Start / Stop SwitchHandheld Play <strong>Clock</strong>Three-Button ControllerStereo Data CableJunction Box (<strong>with</strong> coil of data cable)Revised 2011-September-22 Page 5
Electro-Mech Scoreboard CompanyMP <strong>Football</strong> Control Console CX_402Hooking Up and Powering Up the Console and Accessories1 - Apply power to the scoreboard.2 - Place the console on a sturdy desk or table so that you have a clear view of thegame's action as well as the console's keypad and LCD screen. You may hold theconsole in your lap, if you find it comfortable that way.3 - Attach hand-held devices. You may have anexternal switch to start and stop the Game<strong>Clock</strong> on the scoreboard. You may also havea three-button device to control Play <strong>Clock</strong>s(also called Delay of Game Timers, 25-second <strong>Clock</strong>s, etc.). These devices pluginto the RJ-45 connectors on the console'sback plate. It does not matter which device isconnected to which RJ-45 socket.4 - Attach one end of the stereo data cable to one of the four data output connectors onthe back plate of the console. Your console may have two outputs designated forthe scoreboard and two for Play <strong>Clock</strong>s or other optional displays. It doesn't reallymake a difference; all four outputs are the same. If you have multiple displays, goahead and hook them up to whichever outputs are convenient.5 - Attach the other end of the stereo data cable to the junction box. If you have morethan one scoreboard or optional display, each one will typically have its ownjunction box and its own stereo data cable. If you have the ScoreLink wireless RFsystem, refer to the ScoreLink owner's handbook for details.6 - Plug in the console power cable to a standard electrical outlet.About one out of every few hundred customers asks us the question, "How do you turnthe console on and off?" There is no power button on the console. If it's plugged in, it'son. The logic here is that, for most installations, the scoreboard is not used very often.During the down time, the console needs to be disconnected from the scoreboard andfrom power to prevent damage from line noise and power surges. A power switchwould discourage that good habit and provide a false sense of security.Likewise, the scoreboard should be disconnected from power when not in use.Therefore the console has no means of turning the scoreboard on or off. However, afreshly powered on scoreboard will display no information until it receives a good signalfrom the control console. So in order to "turn on" the scoreboard display, you have topower up and connect the control console.Revised 2011-September-22 Page 6
Electro-Mech Scoreboard CompanyMP <strong>Football</strong> Control Console CX_402Control Console InitializationBe quick. You only have about three seconds to see the splash screen when yourconsole powers up. It should look like this:ELECTRO-MECH 402FOOTBALL_1 0000The splash screen is telling you four things:The software author -- ELECTRO-MECHThe software version -- 402The selected scoreboard type -- FOOTBALL_1The selected option jumpers -- noneThis information is important for diagnostics, and you can get back to this splash screenby pressing [NEW GAME] [1] [ENTER] on the keypad. If you see something differenton your display, either this is the wrong owner's handbook for you or your console is notconfigured to the expected standard.If your console has data from the previous game, you will be prompted to restore thatdata. Press [1] [ENTER] to reload the old Scores and other information. Press [0][ENTER] to clear out memory and start over fresh. If you do not respond to this prompt,the console will restore the previous game data automatically after a few seconds.RESTORE GAME?1=YES 0=NO If your console was previously in Practice Segment Timer mode, you will be promptedto restore the Practice Segment Timer Program you were running when you unpluggedthe console.RESTORE PGM 011=YES 0=NO This document will discuss the Practice Segment Timer Mode in detail a few pageslater. For now, let's focus on how the console behaves in <strong>Football</strong> Mode and assumeyou are starting <strong>with</strong> new data rather than restoring a game.Revised 2011-September-22 Page 7
Electro-Mech Scoreboard CompanyMP <strong>Football</strong> Control Console CX_402After the splash screen clears, you will see the main scoreboard information screen:00 D12:00 1 003 1 10 20 3The scoreboard will display the following information (some scoreboard models do notdisplays all the functions listed):Left (Guest) Score -- 0Left (Guest) TOL -- 3Left (Guest) Possession -- blankRight (Home) Score -- 0Right (Home) TOL -- 3Right (Home) Possession -- blankGame <strong>Clock</strong> -- 12:00Quarter (Period) -- 1Down -- 1To Go -- 10Ball On -- 20If you have Play <strong>Clock</strong>s attached to the control console, they will show 40 seconds.Revised 2011-September-22 Page 8
Electro-Mech Scoreboard CompanyMP <strong>Football</strong> Control Console CX_402Control Console LCD ScreenThe LCD screen primarily shows you the main scoreboard data screen. Informationshown here corresponds closely (but not exactly) to information shown on thescoreboard.Numbers that display as "0" on the LCD may display as blanks on the scoreboard. Forinstance, when the Down Count reads "0" on the control console, the display on thescoreboard will be blank. Some scoreboard models do not include features like TimeOuts Left and Possession Indicators, so, of course, the scoreboard will not match all theinformation on the LCD in those cases.The illustration above refers to "Left Team" and "Right Team" to be as generic aspossible. In most cases, the Left side is for the Guest team and the right side is for theHome team. Some scoreboard/console pairs ship <strong>with</strong> the positions swapped.Revised 2011-September-22 Page 9
Electro-Mech Scoreboard CompanyMP <strong>Football</strong> Control Console CX_402Key-By-Key OperationThis section will provide a key-by-key explanation of the console features. Use the[0] ... [9] buttons to respond to prompts, pressing [ENTER] to complete or confirm yourresponse. The [CLEAR] button backs you out of a prompt <strong>with</strong>out making changes.[SET CLOCK] - Available only when the Game <strong>Clock</strong> is NOT running. This buttonallows the operator to edit the time shown on the Game <strong>Clock</strong>. Pressing the buttonbrings up an input prompt on the second line of the LCD screen.SET CLK To set the time to 5:30, press [SET CLOCK] [5] [3] [0] [ENTER]. The consolerejects time entries <strong>with</strong> a Seconds part greater than 59.[SET CLOCK .1 SEC] - Available only when the Game <strong>Clock</strong> is NOT running and theGame <strong>Clock</strong> is in Down-Counting Mode. This button allows the operator to edit thetime shown on the Game <strong>Clock</strong> during the final minute of the Period including theTenth of Seconds digit. Pressing the button brings up an input prompt on thesecond line of the LCD screen.SET SEC To set the time to 14.7 seconds, press [SET CLOCK .1 SEC] [1] [4] [7] [ENTER].The console rejects entries greater than 59.9 Seconds.[.1 SEC ON / OFF] - Available only when the Game <strong>Clock</strong> is NOT running and theGame <strong>Clock</strong> is in Down-Counting Mode. This button allows the operator to set thebehavior of the Game <strong>Clock</strong> during the final minute of a Period. By default, duringthe final minute, the Game <strong>Clock</strong> shifts into Tenth of Second Mode, displayingSeconds in the area that usually shows Minutes and Tenths of Seconds in the placewhere the Seconds Tens digit is otherwise seen. The operator may override thisfeature by disabling Tenth of Second Mode so that the Minutes and Seconds stayput and Tenths of Seconds are not displayed at all. Pressing the button brings up atwo-line prompt on the LCD screen.1/10TH SECOND1=YES 0=NO To turn off Tenth of Second Mode, press [.1 SEC ON / OFF] [0] [ENTER]. To turn itback on, press [.1 SEC ON / OFF] [1] [ENTER] or reset the console <strong>with</strong> the NewGame function.Revised 2011-September-22 Page 10
Electro-Mech Scoreboard CompanyMP <strong>Football</strong> Control Console CX_402[CLOCK UP / DOWN] - Available only when the Game <strong>Clock</strong> is NOT running. Thisbutton allows the operator to change the direction of the Game <strong>Clock</strong>. By defaultthe Game <strong>Clock</strong> counts down until reaching 0:00. The operator may set the Game<strong>Clock</strong> to count up starting from any valid time. Pressing the button brings up a twolineprompt on the LCD screen.COUNT UP OR DOWN1=UP 0=DOWN To count up, press [CLOCK UP / DOWN] [1] [ENTER]. The Game <strong>Clock</strong> on theLCD screen will show a "U" prefix to indicate Up Counting Mode. A "D" is for DownCounting Mode.[PLAY CLOCKS] - Allows the operator to edit the current display value and theprogrammable reset values associated <strong>with</strong> Play <strong>Clock</strong>s displays, also known asDelay of Game Timers. You must have these optional displays and the three-buttonhandheld controller that ships <strong>with</strong> them for this function to be of any use. As longas the Play <strong>Clock</strong>s are not running (actively counting down), pressing the buttonproduces this prompt:CURRENT TIMETo set the Play <strong>Clock</strong>s to show 12 Seconds, press [PLAY CLOCKS] [1] [2][ENTER]. You can press [ENTER] at this prompt to skip to the next prompt <strong>with</strong>outmaking changes. If the Play <strong>Clock</strong> had been running when the operator pressed[PLAY CLOCKS], this would have bypassed the first prompt, leading us to thesecond:RESET 1 TIMEThis is where you program the first (top) button of the three-button handheldcontroller. If you want that button to reset the Play <strong>Clock</strong> to 60 seconds every timeyou press it, type [6] [0] [ENTER] at this prompt. You can press [ENTER] to skip tothe next prompt <strong>with</strong>out making changes.RESET 2 TIMEThis is where you program the second (middle) button of the three-button handheldcontroller. If you want that button to reset the Play <strong>Clock</strong> to 5 seconds every timeyou press it, type [5] [ENTER] at this prompt. You can press [ENTER] to accept thecurrent value <strong>with</strong>out making changes.Revised 2011-September-22 Page 11
Electro-Mech Scoreboard CompanyMP <strong>Football</strong> Control Console CX_402[AUTO HORN] - Allows the operator to set the behavior of the Horn. By default, theMain Horn attached to the scoreboard is activated for about four seconds at the endof each Period. That is, when the Game <strong>Clock</strong> counts down to 0:00, the Hornblows. You can turn off this feature by using the [AUTO HORN] button. Pressing itbrings up this prompt:AT END OF PERIOD1=AUTO 0=OFF To turn off the Automatic Horn at the End of Period, press [0] [ENTER] at thisprompt. You can press [ENTER] to skip to the next prompt <strong>with</strong>out makingchanges. The next prompt offers you control of the Horn at the end of a Time Out.END OF TIME OUT1=AUTO 0=OFF By default the Automatic Horn at the End of Time Out is disabled, but you canenable it by pressing [1] [ENTER] here.[TIME OF DAY] - Available only when the Game <strong>Clock</strong> is NOT running. This buttonallows the operator to use the scoreboard Game <strong>Clock</strong> to show the time of day.Since accidentally sending the scoreboard into Time of Day Mode in the middle of agame could be confusing, this function requires a confirmation before it will let theoperator continue.TIME OF DAY CLCK1=YES 0=NO Press [1] [ENTER] to continue. The next prompt is asking whether Scores, Ball On,and other features should remain illuminated on the scoreboard during Time of DayMode or be blanked to show that a game is not underway.BLANK OTHERS?1=YES 0=NO Press [1] [ENTER] to turn off the rest of the scoreboard. This blanking featuredoesn't work on many older scoreboards <strong>with</strong> incandescent light bulbs.Finally, you will be prompted to enter the current time of day (in 12-hour format).SET CLK Press [3] [4] [5] [ENTER] to set the clock to 3:45.While the console is in Time of Day Mode, the <strong>Clock</strong> on the LCD display will have a"C" prefix. Most other keys on the console will work and update the values of theirrespective functions while the Game <strong>Clock</strong> is in Time of Day Mode. For instance,you can still change the Scores. You can even change the value of the Game<strong>Clock</strong> using the [SET CLOCK] button, and your new value will be in place when youexit Time of Day Mode.To exit Time of Day Mode, press [TIME OF DAY] [0] [ENTER].Revised 2011-September-22 Page 12
Electro-Mech Scoreboard CompanyMP <strong>Football</strong> Control Console CX_402[TIME OUT TIMER] - Available only when the Game <strong>Clock</strong> is NOT running and theconsole is not in Time of Day Mode. This button allows the operator to initiate acountdown of any duration less than ten minutes <strong>with</strong>out losing track of the Game<strong>Clock</strong> information.TO SCOREBOARD?1=YES 0=NO The first prompt asks the operator if the Time Out Time should temporarily replacethe Game <strong>Clock</strong> display on the scoreboard. Otherwise the countdown will be seenonly on the control console LCD. Press [1] [ENTER] to display the Time Out Timeon the scoreboard.SET T-OUT At the second prompt, the operator should enter the duration of the Time Out (orwhatever is being timed). To count down from Two Minutes, press [2] [0] [0][ENTER]. As soon as you press [ENTER] the Time Out Countdown begins. The<strong>Clock</strong> on the LCD display will have a "T" prefix to indicate Time Out Timer Mode.To stop the Time Out Countdown, press [TIME OUT TIMER] again. Pressing the[CLOCK ON / OFF] button while the Time Out Timer is running will abort thecountdown and start the Game <strong>Clock</strong> running.If the Auto Horn at End of Time Out feature has been turned on, the Horn will soundwhen the Time Out Timer reaches 0:00. The Time Out Timer is not affected bysettings for Tenth of Second Mode (never shows Tenths) or <strong>Clock</strong> Direction (alwayscounts down).[SET GUEST SCORE] - Allows the operator to directly set or edit the Guest Score.Pressing the button brings up an input prompt on the second line of the LCDscreen.SET SCORE To set the Guest Score to 35, press [SET GUEST SCORE] [3] [5] [ENTER].Some scoreboard/console pairs ship <strong>with</strong> the positions of the Guest and Home keysswapped.[SET HOME SCORE] - Allows the operator to directly set or edit the Home Score.Pressing the button brings up an input prompt on the second line of the LCDscreen.SET SCORE To set the Home Score to 42, press [SET HOME SCORE] [4] [2] [ENTER].Some scoreboard/console pairs ship <strong>with</strong> the positions of the Guest and Home keysswapped.Revised 2011-September-22 Page 13
Electro-Mech Scoreboard CompanyMP <strong>Football</strong> Control Console CX_402[YARDS TO GO] - Allows the operator to set or edit the Yards To Go display. Pressingthe button brings up an input prompt on the second line of the LCD screen.YARDS TO GO To set the Yards To Go display to 15, press [YARDS TO GO] [1] [5] [ENTER].[BALL ON] - Allows the operator to set or edit the Ball On display. Pressing the buttonbrings up an input prompt on the second line of the LCD screen.BALL ON To set the Ball On display to 29, press [BALL ON] [2] [9] [ENTER].[GUEST TIME OUTS] - Allows the operator to decrement the Guest Time Outs Leftcount by one.[HOME TIME OUTS] - Allows the operator to decrement the Home Time Outs Leftcount by one.[DOWN +1] - Allows the operator to increment the Down count by one.[GUEST SCORE +1] - Allows the operator to increment the Guest Score by one.[HOME SCORE +1] - Allows the operator to increment the Home Score by one.[POSS] - Toggles the Possession indicator between the Guest and Home sides.[HORN] - Sounds the Horn for a two-second burst.[CLOCK ON / OFF] - Starts and stops the Game <strong>Clock</strong>.[QTR. / PERIOD +1] - Allows the operator to increment the Quarter or Period display byone.Revised 2011-September-22 Page 14
Electro-Mech Scoreboard CompanyMP <strong>Football</strong> Control Console CX_402[NEW GAME] - Available only when the Game <strong>Clock</strong> is NOT running. This button is thedoorway to one fairly obvious feature and a few other hidden features. Pressing itbrings up the following display:RESET SCOREBOARD1=YES 0=NO Press [1] [ENTER] to reset all information to default values. For instance, Guestand Home Scores will be reset to 0.In addition to this memory-clearing function, [NEW GAME] allows the operator toaccess other functions by entering other numbers at the prompt. These are listedbelow.[NEW GAME] [4] - This sub-function turns off all the scoreboard displays and showsthe following message on the LCD screen:***BLANK TEST*****NEWGAME=EXIT**Blank Test Mode is a diagnostic feature that allows you to check for display circuitsthat are damaged in a way that prevents them from being turned off. If anythingremains lit on the scoreboard when the console is in this mode, there is a hardwareproblem that should be resolved by contacting technical support. The DecimalIndicators on Game <strong>Clock</strong> displays that include them will remain on in some cases.Exit this mode by pressing [NEW GAME] again.This is also a handy trick for blanking the scoreboard during halftime or whenever itis convenient. Just remember that the scoreboard is not truly off in this state. Theelectronic components are still energized.[NEW GAME] [5] - This sub-function turns on all the scoreboard displays and showsthe following message on the LCD screen:***LAMP TEST******NEWGAME=EXIT**Lamp Test Mode is a diagnostic feature that allows you to check for display circuitsthat are damaged in a way that prevents them from being turned on. If anything isblank on the scoreboard when the console is in this mode, there is a hardwareproblem that should be resolved by contacting technical support. Two exceptions:Horns are not supposed to sound in Lamp Test mode, although Visual HornIndicators should light up, and the Decimal indicators on some Game <strong>Clock</strong> displaysthat include them will not light up in this mode.Exit this mode by pressing [NEW GAME] again.Revised 2011-September-22 Page 15
Electro-Mech Scoreboard CompanyMP <strong>Football</strong> Control Console CX_402[NEW GAME] [8] - This sub-function configures the console to work <strong>with</strong> timingequipment provided by Precision Time Systems, Inc. You have to confirm entry intothis mode by typing [1] [ENTER] in response to this prompt:PRECISION TIME?1=YES 0=NO The practical results of being in Precision Time Mode are 1) the [CLOCK ON / OFF]button is disabled, and 2) the Game <strong>Clock</strong> only runs when the console hardwarereads a switch closure from an external clock switch. You can simulate thebehavior of the Precision Time equipment by plugging an Electro-Mech Hand-Held<strong>Clock</strong> Start/Stop Switch into one of the connectors on the back of the console andholding down the button on the handheld device to start the <strong>Clock</strong>. The <strong>Clock</strong> onthe LCD screen will have a "P" prefix to indicate Precision Time Mode.To exit Precision Time Mode, press [NEW GAME] [8] [0] [ENTER].[NEW GAME] [9] - This sub-function places the console in Practice Segment Timermode. You have to confirm entry into this mode by typing [1] [ENTER] in responseto this prompt:SEGMENT TIMER?1=YES 0=NO Practice Segment Timer Mode requires an in depth discussion that we will take upin the next section of this document. If you find yourself at the prompt by accident,press [0] [ENTER] to return to <strong>Football</strong> Mode. Otherwise you will need to work yourway through the several questions required to set up the Practice Segment Timerbefore you can press [NEW GAME] [1] [ENTER] to return to <strong>Football</strong> Mode, whichwill also reset all your game data to the default values.Revised 2011-September-22 Page 16
Electro-Mech Scoreboard CompanyMP <strong>Football</strong> Control Console CX_402Practice Segment Timer ModeThe Practice Segment Timer (PST) mode of your football console is a powerful tool forcreating, saving, editing, and running a set of programs, each defining the times thatmake up a practice schedule. You may have a simple practice schedule <strong>with</strong> two hoursof practice broken into four 30-minute Segments, for instance. Or you may have acomplicated practice schedule <strong>with</strong> several longer Segments interspersed <strong>with</strong> shorterSegments, break periods, one-minute drills, and more. A PST Program can include upto 90 Segments. You can create up to 45 of these PST Programs (each containing 1 to90 different Segments). That's over 4,000 individual Segments in all. You store thesePrograms by assigning them a two-digit Program ID. You may call up the PSTPrograms to be run as many times as you like -- days, weeks, or years later.Practice Segment Timer Mode can be used to control a football scoreboard, displayingthe Segment Time in the Game <strong>Clock</strong> area and the Segment Count in the Home Scorearea along <strong>with</strong> regular control of the Play <strong>Clock</strong>s. Or you may use your Play <strong>Clock</strong>s asPractice Segment Timer displays. Or you may have purchased a special PracticeSegment Timer display from Electro-Mech in one of several possible configurations.The multitude of options makes for a slightly complicated setup process. But, once youunderstand the questions the console asks you, it should make sense. The diagrambelow gives you four examples of how your displays can be configured to use thePractice Segment Timer Mode.Revised 2011-September-22 Page 17
Electro-Mech Scoreboard CompanyMP <strong>Football</strong> Control Console CX_402Practice Segment Timer SetupIf you are in <strong>Football</strong> Mode, press [NEW GAME] [9] [1] [ENTER] to go into PracticeSegment Timer Mode. The LCD will prompt you to enter a Program ID.ENTER PROGRAM IDNUMBER: You can get to this same prompt from <strong>with</strong>in Practice Segment Timer Mode by pressing[NEW GAME] [9] [0] [ENTER].This prompt is asking you to pick a two-digit number that you can use to refer to yourcollection of Segment Times. You can use this number to call up this Program over andover again in the future -- so you don't have to go through the setup process that followsevery time you have a practice. You could use a different Program ID for each day ofthe week if your practice schedule varies by day. Or you could assign Program IDs toparticular teams. If several people run practices using this control console, you canassign certain numbers to certain people. For instance, the athletic director might useProgram IDs 10 through 19; another coach might be assigned Program IDs 20 through29. Pick whatever two-digit number is meaningful to you (up to 45).If you select a Program ID that has already been used, you will have the opportunity tocompletely overwrite that program <strong>with</strong> new information or edit the existing information.OVERWRITE PROG?1=YES 0=NO Press [0] [ENTER] if you want to edit the program, or press [1] [ENTER] to begin fresh.This document will assume we are creating a new Program. Editing an existingProgram is similar enough that an example of it would be redundant.The LCD will prompt you to enter the number of digits in your Practice Segment Timer<strong>Clock</strong>.NUMBER OF DIGITSIN CLOCK: If you are using your football scoreboard only as your Practice Segment Timer displayEVEN IF YOUR SCOREBOARD HAS A FIVE-DIGIT TRACK CLOCK, accept thedefault value of four digits by pressing [ENTER]. If you have a dedicated PracticeSegment Timer display <strong>with</strong> a four-digit <strong>Clock</strong>, accept the default value by pressing[ENTER]. If you have a dedicated Practice Segment Timer display <strong>with</strong> a two-digit<strong>Clock</strong> or you want to use your <strong>Football</strong> Play <strong>Clock</strong>s as your Timer, press [2] [ENTER]here.Selecting a two-digit <strong>Clock</strong> skips over the next prompt.Revised 2011-September-22 Page 18
Electro-Mech Scoreboard CompanyMP <strong>Football</strong> Control Console CX_402If you have a dedicated Practice Segment Timer, then the answer to the followingquestions is 1=Yes if your display includes a Play <strong>Clock</strong> section and 0=No if yourdisplay does not include a Play <strong>Clock</strong> section.ENABLE PLAY CLK?1=YES 0=NO If you are using your football scoreboard as your Practice Segment Timer display, thisbecomes a trick question. 1=Yes causes the Segment Count to appear in your HomeScore position on your scoreboard so that your Play <strong>Clock</strong>s are available to use as Play<strong>Clock</strong>s. The tricky part is that if you DO NOT have Play <strong>Clock</strong>s, you'll want to answer1=Yes to this question to make sure your Segment Count shows up on the scoreboard.If you answer 0=No here, the Segment Count will be sent to your Play <strong>Clock</strong>s -- whetherthey exist or not.Next you will choose the total number of Segments to be used in your Program.**90 AVAILABLE**TOTAL SEGS: For a Practice that consists of five timed periods, press [5] [ENTER].Now you enter the length of each Segment.ENTER LENGTH OFSEG #01 The length of a Segment cannot be 0 nor some time <strong>with</strong> Seconds greater than 59. Anyvalid time from 1 Second to 99 Minutes 59 Seconds will work. Whether you'reprogramming a two-digit or four-digit <strong>Clock</strong>, you are prompted for four digits here.Let's assume your first Segment needs to be 12 Minutes 30 Seconds long. You press[1] [2] [3] [0] [ENTER]. Now the LCD will prompt you to enter the length of the secondSegment.ENTER LENGTH OFSEG #02 These prompts will continue until you have given a length of each Segment up tohowever many Segments you requested in the previous step. Notice that the defaultlength for a given Segment is the same as the length of the previous Segment youentered, so you can just press [ENTER] at these prompts if all your Segments are thesame.Next up: <strong>Clock</strong> Direction:CLOCK DIRECTION1=UP 0=DOWN Count time up from 0:00 or down to 0:00. Pretty straightforward.Revised 2011-September-22 Page 19
Electro-Mech Scoreboard CompanyMP <strong>Football</strong> Control Console CX_402Tenth of Second Mode:1/10TH SECONDS?1=YES 0=NO This prompt only shows up if you choose a four-digit <strong>Clock</strong> and select Down Counting atthe previous prompt. Up-counting <strong>Clock</strong>s always show time in the MM:SS format. Bydefault (that is, if you press [ENTER] here) your <strong>Clock</strong> will go into Tenth of SecondMode for times less than one Minute. In this mode the Time is displayed as Secondsand Tenths (SS.t format) rather than Minutes and Seconds (MM:SS format). You canturn off this behavior by pressing [0] [ENTER] at this prompt. For scoreboards <strong>with</strong> 5-<strong>Digit</strong> Track <strong>Clock</strong>s, this prompt controls whether or not the fifth digit (Tenth of Seconds)is displayed.If you are setting up a two-digit Practice Segment Timer or if you've disabled Tenth ofSecond Mode for your four-digit PST, you will next be prompted for the Flash Zone.You can ignore this prompt by pressing [ENTER].SET FLASH ZONE(0=NONE) The Flash Zone feature allows you to make the Segment Time blink on and off duringthe final portion of a Segment. The idea is to get your attention when the Segment isabout to end. So, if you type [3] [0] [ENTER] at this prompt, you are saying that youwant the <strong>Clock</strong> to flash during the last 30 Seconds of each Segment. The Flash Zonefeature works specifically for dedicated Practice Segment Timers and Play <strong>Clock</strong>s; it isnot compatible <strong>with</strong> most scoreboards and will have no effect on the main scoreboarddisplay.Interval Time:BETWEEN SEGMENTSINTERVAL:This controls how long your PST Program pauses between each Segment. There aretwo reasons that you might want to change this value to 0. First, you may want the<strong>Clock</strong> to simply stop at the end of each Segment and wait for you to manually start it.Second, you may want to have absolutely no breaks between Segments. Setting it to 5Seconds or more allows time for the Horn to die down between Segments. Or youcould use the Interval Time to allow a break of several minutes between Segments.Whatever value you choose, it will be the same in between all Segments. If you want tostop between Segments and manually restart the <strong>Clock</strong>, set this value to 0, and disablethe Continuous Play feature (more on this later). Remember that the Horn can be set toautomatically sound at the end of each Segment but will never sound at the end of theInterval Time.Revised 2011-September-22 Page 20
Electro-Mech Scoreboard CompanyMP <strong>Football</strong> Control Console CX_402Display Interval:DISPLAY INTERVAL1=YES 0=NO If you are programming for a four-digit <strong>Clock</strong> and you set you Interval Time to somethingother than 0 in the previous step, you'll be prompted to tell whether or not that Intervalshould be displayed on the <strong>Clock</strong>. The default is "No" -- meaning the Practice SegmentTimer <strong>Clock</strong> will show 0:00 or 0.0 during the Interval (while the console's LCD will countdown the Interval time). If you respond [1] [ENTER] to this prompt, you are allowing theInterval Time to be displayed in same places the Segment Time is normally shown. Ifyou have a two-digit <strong>Clock</strong>, this is not an option, so the console skips the prompt. If youare using your football scoreboard to display PST information, the Interval Time displayswhether you answer Yes or No to this question.Automatic End of Segment Horn Feature:END OF SEG HORN1=AUTO 0=OFF By default (that is, if you press [ENTER] here) the Horn sounds at the end of eachSegment. You may turn off this feature by pressing [0] [ENTER] here. If you have adedicated Practice Segment Timer <strong>with</strong> a Visual Horn Indicator, the indicator will stillilluminate at the end of the Segment no matter how you set the Horn to behave. Youmay still sound the Horn manually using the [HORN] button on the console.Segment Count Direction:SEGMENT COUNT?1=UP 0=DOWN By default the Segment Count starts at 1 and continues up to how ever many Segmentsyou programmed. You may select down-counting mode by pressing [0] [ENTER] here.Continuous Play Mode:CONTINUOUS PLAY?1=YES 0=NO You'll see this prompt only if you set the Interval Time to 0 a few prompts back.Continuous Play Mode means the <strong>Clock</strong> never stops (unless the operator manuallystops it). Once Segment 1 is finished, Segment 2 automatically starts, etc. If you preferto manually start the next Segment, press [0] [ENTER] at this prompt. By the way,because it only makes sense to have an Interval Time if you want Continuous Play, youwill always be in Continuous Play Mode if you set Interval Time to anything other than 0.Continuous Loop Mode:CONTINUOUS LOOP?1=YES 0=NO You'll see this prompt only if you've enabled Continuous Play Mode. If you press [1][ENTER] the Program will automatically start over at the end of the last Segment andcontinue from the beginning.Revised 2011-September-22 Page 21
Electro-Mech Scoreboard CompanyMP <strong>Football</strong> Control Console CX_402Practice Segment Timer OperationOnce you've created, loaded, or edited a Program, your LCD will show something likethis:SEG 01 25:00PROGRAM 35 40"PROGRAM 35" tells you that you are at the beginning of PST Program 35. Later, thisarea of the screen will provide other messages. The Segment Count is shown in theupper left part of the LCD. During an Interval Time you'll see the Next Segmentdisplayed here. The lower right part of the LCD shows the Play <strong>Clock</strong> time, if you haveenabled that feature. The upper right part shows the Segment Time (or Interval Time).The following buttons on the control console are available for use when you are inPractice Segment Timer Mode:[CLOCK ON / OFF] - This may be the only button you have to use once you've loadedyour Program. Press [CLOCK ON / OFF] to start the Segment Timer <strong>Clock</strong>. Ifyou've enabled Continuous Play Mode, the <strong>Clock</strong> will continue to run until all yourSegments have been completed.Once you start the <strong>Clock</strong> running, only two buttons on the keypad have any effect.You can either use [CLOCK ON / OFF] to stop the <strong>Clock</strong> or use [HORN] to soundthe Horn.[HORN] - Sounds the Horn for a one- to two-second burst. If your Practice SegmentTimer has Visual Horn Indicators, they will illuminate as well.[QTR. / PERIOD +1] - Available only when the <strong>Clock</strong> is NOT running. This buttonadvances to the beginning of the next Segment. If you are currently showing thelast Segment, pressing [QTR / PERIOD] will cycle you back to the first.[CLEAR] - Available only when the <strong>Clock</strong> is NOT running. This button allows you toreset the current Segment back to its starting time. If you press [CLEAR] at thebeginning of a Segment, you'll go to the start of the previous Segment.[SET CLOCK] - Available only when the <strong>Clock</strong> is NOT running. This button allows theoperator to edit the time shown on the <strong>Clock</strong>. Pressing the button brings up aninput prompt on the second line of the LCD screen.SET CLK To set the time to 5:30, press [SET CLOCK] [5] [3] [0] [ENTER]. The consolerejects time entries <strong>with</strong> a Seconds part greater than 59. Any changes you make tothe Time last only until the end of the current Segment or Interval. Afterwards, alltimes revert to their programmed values.Revised 2011-September-22 Page 22
Electro-Mech Scoreboard CompanyMP <strong>Football</strong> Control Console CX_402[SET CLOCK .1 SEC] - Available only when the <strong>Clock</strong> is NOT running. The button isdisabled for two-digit Practice Segment Timer Programs. It allows the operator toedit the time shown on the <strong>Clock</strong> during the last minute of a Segment including theTenth of Seconds digit. Pressing the button brings up an input prompt on thesecond line of the LCD screen.SET SEC To set the time to 14.7 seconds, press [SET CLOCK .1 SEC] [1] [4] [7] [ENTER].The console rejects entries greater than 59.9 Seconds. Any changes you make tothe Time last only until the end of the current Segment. Afterwards, all times revertto their programmed values.[.1 SEC ON / OFF] - Available only when the <strong>Clock</strong> is NOT running. The button isdisabled for up-counting Segment <strong>Clock</strong>s, unless the control console is configuredfor a scoreboard <strong>with</strong> a five-digit Track <strong>Clock</strong>. It is also disabled for two-digitPractice Segment Timer Programs.This button allows the operator to set the behavior of the <strong>Clock</strong> during the finalminute of a Segment. By default, during the final minute, the Segment <strong>Clock</strong> shiftsinto Tenth of Second Mode, displaying Seconds in the area that usually showsMinutes and Tenths of Seconds in the place where the Seconds Tens digit isotherwise seen. The operator may override this feature by disabling Tenth ofSecond Mode so that the Minutes and Seconds stay put and Tenths of Seconds arenot displayed at all. Pressing the button brings up a two-line prompt on the LCDscreen.1/10TH SECOND1=YES 0=NO To turn off Tenth of Second Mode, press [.1 SEC ON / OFF] [0] [ENTER]. To turn itback on, press [.1 SEC ON / OFF] [1] [ENTER]. Any changes you make to Tenth ofSecond Mode will last only as long as you continue to run the currently loadedProgram. If you reload the Program or load a new one, the Tenth of Second Modewill revert to the programmed value.If you created a Practice Segment Timer Program <strong>with</strong> a four-digit <strong>Clock</strong> and youdisabled Tenth of Second Mode during setup, you may have enabled Flash Zone. Ifyou then use the [.1 SEC ON / OFF] button to enable Tenth of Second Mode, Flashzone will be disabled. The two features are mutually exclusive.Revised 2011-September-22 Page 23
Electro-Mech Scoreboard CompanyMP <strong>Football</strong> Control Console CX_402[PLAY CLOCKS] - Allows the operator to edit the current display value and theprogrammable reset values associated <strong>with</strong> Play <strong>Clock</strong>s displays, also known asDelay of Game Timers. You must have these optional displays and the three-buttonhandheld controller that ships <strong>with</strong> them for this function to be of any use. As longas the Play <strong>Clock</strong>s are not running (actively counting down), pressing the buttonproduces this prompt:CURRENT TIMETo set the Play <strong>Clock</strong>s to show 12 Seconds, press [PLAY CLOCKS] [1] [2][ENTER]. You can press [ENTER] at this prompt to skip to the next prompt <strong>with</strong>outmaking changes. If the Play <strong>Clock</strong> had been running when the operator pressed[PLAY CLOCKS], this would bypass the first prompt leading us to the second:RESET 1 TIMEThis is where you program the first (top) button of the three-button handheldcontroller. If you want that button to reset the Play <strong>Clock</strong> to 60 seconds every timeyou press it, type [6] [0] [ENTER] at this prompt. You can press [ENTER] to skip tothe next prompt <strong>with</strong>out making changes.RESET 2 TIMEThis is where you program the second (middle) button of the three-button handheldcontroller. If you want that button to reset the Play <strong>Clock</strong> to 5 seconds every timeyou press it, type [5] [ENTER] at this prompt. You can press [ENTER] to accept thecurrent value <strong>with</strong>out making changes.[AUTO HORN] - Allows the operator to set the behavior of the Horn. By default, theMain Horn attached to the scoreboard is activated for about four seconds at the endof each Segment. That is, when the <strong>Clock</strong> counts down to 0:00, the Horn blows.You can turn off this feature by using the [AUTO HORN] button. Pressing it bringsup this prompt:END OF SEG HORN1=AUTO 0=OFF To turn off the Automatic Horn at the End of each Segment, press [0] [ENTER] atthis prompt. You can press [ENTER] to skip to the next prompt <strong>with</strong>out makingchanges. The next prompt offers you control of the Horn at the end of a Time Out.END OF TIME OUT1=AUTO 0=OFF By default the Automatic Horn at the End of Time Out is disabled, but you canenable it by pressing [1] [ENTER] here.Revised 2011-September-22 Page 24
Electro-Mech Scoreboard CompanyMP <strong>Football</strong> Control Console CX_402[TIME OF DAY] - Available only when the <strong>Clock</strong> is NOT running; disabled for two-digitPractice Segment Timer <strong>Clock</strong>s. This button allows the operator to use thescoreboard or Practice Segment Timer to show the time of day.TIME OF DAY CLCK1=YES 0=NO Press [1] [ENTER] to continue.At the next prompt, enter the current time. The LCD display on the control consolewill tell you that you are in Time of Day Mode:11:35TIME OF DAY MODETo exit Time of Day Mode, press [TIME OF DAY] [0] [ENTER].[TIME OUT TIMER] - Available only when the <strong>Clock</strong> is NOT running and the console isnot in Time of Day Mode; disabled for two-digit Practice Segment Timer <strong>Clock</strong>s.This button allows the operator to initiate a countdown of any duration less than tenminutes <strong>with</strong>out losing track of the Segment Time information.TO SCOREBOARD?1=YES 0=NO The first prompt asks the operator if the Time Out Time should temporarily replacethe <strong>Clock</strong> display on the scoreboard. Otherwise the countdown will be seen only onthe control console LCD. Press [1] [ENTER] to display the Time Out Time on thescoreboard.SET T-OUT At the second prompt, the operator should enter the duration of the Time Out (orwhatever is being timed). To count down from Two Minutes, press [2] [0] [0][ENTER]. As soon as you press [ENTER] the Time Out Countdown begins.To stop the Time Out Countdown, press [TIME OUT TIMER] again.If the Auto Horn at End of Time Out feature has been turned on, the Horn will soundwhen the Time Out Timer reaches 0:00. The Time Out Timer is not affected bysettings for Tenth of Second Mode (never shows Tenths) or <strong>Clock</strong> Direction (alwayscounts down). Pressing the [CLOCK ON / OFF] button while the Time Out Timer isrunning will abort the countdown and start the Game <strong>Clock</strong> running.Revised 2011-September-22 Page 25
Electro-Mech Scoreboard CompanyMP <strong>Football</strong> Control Console CX_402[NEW GAME] - Available only when the <strong>Clock</strong> is NOT running. As it is in <strong>Football</strong>Mode, in PST Mode this button is a gateway to several menu functions including...- [NEW GAME] [1] [ENTER] = reset scoreboard (returning to football mode).- [NEW GAME] [4] = blank test.- [NEW GAME] [5] = lamp test.In addition, the New Game functions have special features available in PracticeSegment Timer Mode.[NEW GAME] [6] - Available only when the <strong>Clock</strong> is NOT running. This feature allowsthe console operator to hide either the <strong>Clock</strong> or the Segment Count or both. Thefirst time you press [NEW GAME] [6], the LCD will show you what is about tohappen:HIDE CLOCKSHOW SEGMENTPress [ENTER] to continue, and the <strong>Clock</strong> section of the scoreboard will go blank.You will continue to see the <strong>Clock</strong> on the LCD screen. Press [NEW GAME] [6][ENTER] again to restore the <strong>Clock</strong> and hide the Segment Count. Press these keysagain to hide both, and a fourth time to turn both back on. You can quickly cyclethrough the various combinations by pressing [NEW GAME] [6], then press [6]repeatedly until the LCD displays the condition you are looking for. Press [ENTER]to accept that condition and complete the command.The feature will not be available if you are using a Program created for a two-digit<strong>Clock</strong>.[NEW GAME] [9] - Available only when the <strong>Clock</strong> is NOT running. This feature allowsyou to edit your current Program or load or create a new Program.EDIT PROGRAM 36?1=YES 0=NO If you press [1] [ENTER] at this prompt, you will be taken through the same series ofprompts that you saw when you set up the Program the first time. This timethrough, all the default values will be filled in <strong>with</strong> values from your Program. Youcan quickly cycle through your original Program values by pressing [ENTER]repeatedly until you reach a value that you want to change.If you answer [0] [ENTER] to the "EDIT PROGRAM" prompt, you will be given achance to enter a new Program ID. Here you may load an existing Program or starta new one.Revised 2011-September-22 Page 26
Electro-Mech Scoreboard CompanyMP <strong>Football</strong> Control Console CX_402Handheld <strong>Clock</strong> Start / Stop SwitchSome of our football scoreboard packages ship <strong>with</strong> a handheld pendant-style switchthat plugs into the back of the control console and allows a separate operator the abilityto start and stop the Game <strong>Clock</strong> (or the Segment Timer <strong>Clock</strong>). The RJ-45 styleconnector at one end of the handheld unit's cable can plug into the console socketlabeled "CLOCK Hand-held" or the one labeled "DGT / SC Hand-held". The pendantend fits nicely in your hand so that your thumb rests on the switch. Press the switchonce to start the <strong>Clock</strong>. Press the switch again to stop the <strong>Clock</strong>.Revised 2011-September-22 Page 27
Electro-Mech Scoreboard CompanyMP <strong>Football</strong> Control Console CX_402Handheld Three-Button Controller for Play <strong>Clock</strong>sIf you purchased a set of Play <strong>Clock</strong>s (also called Delay of Game Timers or 25-Second<strong>Clock</strong>s), your package includes a handheld three-button controller. This controller plugsinto the back of the control console using the RJ-45 style connector at the end of thehandheld unit's cable. You may plug into the socket labeled "DGT / SC Hand-held" orthe one labeled "CLOCK Hand-held". Here's what the buttons do:Top Button = Set the Play <strong>Clock</strong> to Reset 1 value (default = 40 seconds).Middle Button = Set the Play <strong>Clock</strong> to Reset 2 value (default = 25 seconds).Bottom Button = Start / Stop the Play <strong>Clock</strong>.If you press and hold the bottom button for two to three seconds, the Play <strong>Clock</strong>s willblank. Then pressing any of the three buttons turns the displays back on.Revised 2011-September-22 Page 28
Electro-Mech Scoreboard CompanyMP <strong>Football</strong> Control Console CX_402Control Console Power Down and StorageThere is no "OFF" switch on the control console; nor is there a function on the consolethat turns the scoreboard off. The scoreboard should be disconnected from powerwhen not in use. Electro-Mech recommends installing a disconnect switch for allpermanently mounted scoreboards. You may simply unplug a portable scoreboardmodel and store it between games.You should unplug your control console both from its power receptacle and from its datacable when you are not using it. Electro-Mech offers a carrying case that provides aconvenient way to store and transport the console along <strong>with</strong> various cables and otheraccessories. Whether you have a case or not, you should store the console in a safe,dry location between games.If the console loses connection <strong>with</strong> the scoreboard while the scoreboard is powered,the scoreboard will freeze up -- showing the last good Time, Score, and otherinformation it received from the console. The scoreboard will synchronize <strong>with</strong> theconsole again as soon as you reestablish the connection.If the scoreboard loses power <strong>with</strong> the console still connected and powered, nothing willhappen other than the scoreboard display going blank. Again, the scoreboard willsynchronize <strong>with</strong> the console as soon as it receives power.If the console loses power -- either because you intentionally unplug it or because ofsomething unexpected -- it will save the current game information to flash memory.When you next apply power to the console, the LCD will prompt you to restore theprevious game or Practice Segment Timer Program. If you fail to respond to theprompt, the game data will restore automatically after a few seconds.Revised 2011-September-22 Page 29
Electro-Mech Scoreboard CompanyMP <strong>Football</strong> Control Console CX_402Jumper SettingsCX Driver*** Important: If you plan to open up the console and do work inside the box,make sure the power cable is disconnected from the receptacle! ***The PCB that is the heart of the CX console is called the CX driver. This driver containsa set of jumper pins that can be used to tell the software how to behave. By installingshunts across a pair of pins, you are, in essence, closing a switch that tells the programto do something. On some CX drivers these pins are labeled A through I or A throughJ. On other drivers the A, B, C,... labels are missing, but you will find a correspondingdiode next to pins B through I (A and J are not for jumpers). The diodes are labeled D8through D1 (D8 = B, D7 = C, etc.).Revised 2011-September-22 Page 30
Electro-Mech Scoreboard CompanyMP <strong>Football</strong> Control Console CX_402Jumper pins A and J are used for attaching a programming cable to the CX driver anddon't really do anything in this context. Pins F, G, H, and I are the "Board TypeJumpers" that determine the sport. So, for instance, by removing the shut across theH pins, you can make your console think it is operating an Electro-Mech baseballscoreboard rather than a football scoreboard. This table summarizes the jumpersettings for the Board Type Jumpers:Board Type F G H I Models / CommentsBASEBALL_310xx, 12xx, 134x, MM-10x, MM-12xBASEBALL_4 X 1360, MM-136FOOTBALL_4 X 1360, 3150, MM-136 MM-335, MM-338BASEBALL_1 X X 10xx, 11xx, 12xx, 134x, MM-10x, MM-12xBASEBALL_2 X Not usedSOCCER_LX X X Not a part of CX_402 SoftwareSOCCER X X Not a part of CX_402 SoftwareHOCKEY X X X Not a part of CX_402 SoftwareLINESCORE4 X 1440, 1480LINESCORE5 X X 15xx, 17xxFOOTBALL_1 X X3xxx (except 3150), 7xxx (except 72xx, 73xx,and 79xx), MP-3xxBASKETBALL X X X 2xxx (except Player Stats), 72xx, MP-2xxMP-14X X X MP-140, MP-144, MP-148MP-15X X X X MP-15xMULTISPORT X X X 137x, 1390HOCKEY_LX X X X X Not a part of CX_402 SoftwarePins B, C, D, and E are the "Option Jumpers". Each one typically controls one of fouroptions for a given Board Type. This document discusses the options for the <strong>Football</strong>_1Board Type only. You'll have to look at the Owner's Handbooks for consoles configuredfor the other Board Types if you are curious about their Option Jumpers.Jumper B = 5 Time Outs (Install this jumper to have 5 Time Outs Left instead of 3)Jumper C = 9 Time Outs (Install this jumper to have 9 Time Outs Left instead of 3)Jumper D = MP-320 (Install this jumper if you have Model MP-320 Play <strong>Clock</strong>s)Jumper E = Track <strong>Clock</strong> (Install this jumper if your scoreboard has a 5-digit Track <strong>Clock</strong>)Installing Jumper B and Jumper C together gives you 9 Time Outs Left and gives youPeriod (Quarter) to 9.Installing Jumper E changes the Game <strong>Clock</strong> behavior in a way that is incompatible <strong>with</strong>the scoreboard models listed on the first page of this document. Instead, this optionconfigures the console to handle the following Electro-Mech football / track scoreboards:30503070326533653535354535853625364536853745378538453885MP-320MP-326-TKMP-350-TKMP-374-TKMP-375-TKMP-378-TKRevised 2011-September-22 Page 31