Rod Failure - Alberta Oil Tool
Rod Failure - Alberta Oil Tool
Rod Failure - Alberta Oil Tool
You also want an ePaper? Increase the reach of your titles
YUMPU automatically turns print PDFs into web optimized ePapers that Google loves.
A Special Report from <strong>Alberta</strong> <strong>Oil</strong> <strong>Tool</strong>
<strong>Failure</strong> Mechanisms ……………………………….. 1<br />
Design and Operation <strong>Failure</strong>s ………………….. 3<br />
Mechanical <strong>Failure</strong>s ……………………………….. 4<br />
Bent <strong>Rod</strong> <strong>Failure</strong>s ………………………………….. 5<br />
Surface Damage <strong>Failure</strong>s ………………………… 5<br />
Connection <strong>Failure</strong>s ……………………………….. 6<br />
Corrosion <strong>Failure</strong>s …………………………………. 9<br />
Acid Corrosion ……………………………………... 10<br />
Chloride Corrosion ………………………………… 10<br />
CO 2 Corrosion ………………………………….…… 10<br />
H 2 S Corrosion ………………………………………. 11<br />
Microbiologically Influenced Corrosion (MIC) ... 11<br />
Oxygen Enhanced Corrosion ……………………. 12<br />
Scale Corrosion ……………………………………. 12<br />
Stray Current Corrosion ………………………….. 13<br />
Manufacturing Defects ……………………………. 13
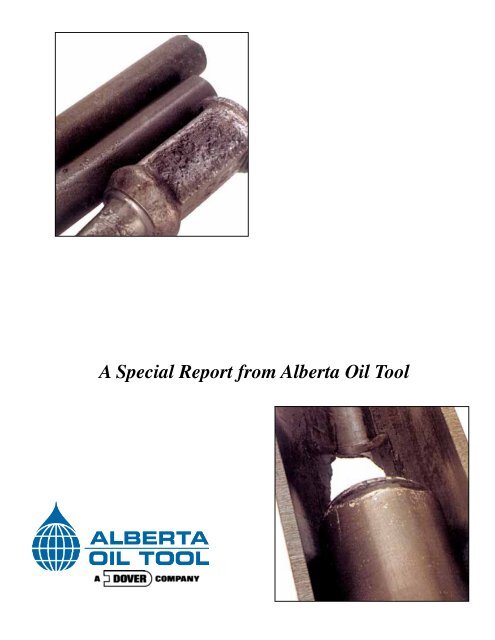
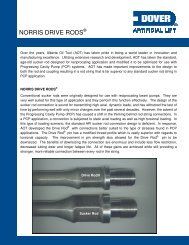
Root Cause <strong>Failure</strong> Analysis is Essential for <strong>Failure</strong><br />
Frequency Reduction in Wells With Artificial Lift.<br />
Excerpted from Sucker <strong>Rod</strong> <strong>Failure</strong> Analysis by: Clayton T. Hendricks and Russell D. Stevens<br />
Most failures associated with artificial lift systems can be attributed to one of three downhole<br />
components - pump, sucker rod, or tubing. A pump, sucker rod, or tubing failure is defined as any catastrophic<br />
event requiring servicing personnel to pull or change-out one or more of these components. By this definition,<br />
the failure frequency rate is the total number of component failures occurring per well, per year. Marginally<br />
producing wells with high failure frequency rates are often classified as “problem” wells and effective failure<br />
management practices can mean the difference between operating and plugging these wells. <strong>Failure</strong><br />
management includes preventing, identifying, implementing and recording the “real” root cause of each failure<br />
and is central to overall cost-effective asset management. For the purpose of this photo essay, we will deal only<br />
with sucker rod failures.<br />
Cost-effective failure management begins with prevention, and the time to stop the next failure is nowprior<br />
to an incident! Simply fishing and hanging the well on after a sucker rod failure will not prevent failure<br />
recurrence. In fact, most failures continue with increasing frequency until the entire rod string must be pulled<br />
and replaced. Achievable failure frequency reductions require accurate failure root cause analysis and the<br />
implementation of corrective action measures to prevent failure recurrence. A database capable of querying the<br />
well “servicing” history is needed to tack and identify failure trends. Once a failure trend is identified, remedial<br />
measures should be implemented during well servicing operations to prevent premature rod string failures. The<br />
database failure history should include information on the failure type, location, depth, root cause, and the<br />
corrective action measures implemented.<br />
Sucker rods can be caused to fail prematurely. Understanding the effects of seemingly minor damage<br />
to rod strings, and knowing how that damage can produce catastrophic failures, is very important for production<br />
personnel. Sucker rod failure analysis is challenging and you need to be able to look past the obvious and seek<br />
clues from the not so obvious. All production personnel should have adequate knowledge and training in failure<br />
root cause analysis. Understanding how to identify failures and their contributing factors allows us an<br />
understanding of what is required to correct the root cause of the failure. Every step that can be taken to<br />
eliminate premature sucker rod failures must be taken. On-going training programs concerning sucker rods<br />
should include formal and informal forums that advocate following the recommendations of manufacturers for<br />
artificial lift design, care & handling, storage & transportation, running & rerunning, and makeup & breakout<br />
procedures. A variety of training schools are currently available and, with advanced notice, most can be tailored<br />
to meet the specific needs of production personnel.<br />
<strong>Failure</strong> Mechanisms<br />
All sucker rod, pony rod, and coupling fractures are either tensile or fatigue failures. Tensile failures<br />
occur when the applied load exceeds the tensile strength of the rod. The load will concentrate at some point in<br />
the rod string, create a necked-down appearance around the circumference of the rod, and a fracture occurs<br />
where the cross-section is reduced. This rare failure mechanism only occurs when pulling too much load on the<br />
rod string- such as attempting to unseat a stuck pump. To avoid tensile failures, the maximum weight indicator<br />
pull for a rod string in “like new” condition should never exceed 90% of the yield strength for the known size and<br />
grade of the smallest diameter sucker rod. For unknown sucker rod conditions, sizes, or grades a sufficient derating<br />
factor should be applied to the maximum weight pulled. All other sucker rod, pony rod and coupling<br />
failures are fatigue failures.<br />
Fatigue failures are progressive and begin as small stress cracks that grow under the action of cyclic<br />
stresses. The stresses associated with this failure have a maximum value that is less than the tensile strength<br />
of the sucker rod steel. Since the applied load is distributed nearly equally over the full cross-sectional area of<br />
the rod string, any damage that reduces the cross-sectional area will increase the load or stress at that point<br />
and is a stress raiser. A small stress fatigue crack forms at the base of the stress raiser and propagates<br />
perpendicular to the line of stress, or axis of the rod body. As the stress fatigue crack gradually advances, the<br />
1
mating fracture surfaces opposite the advancing crack front try to separate under load and these surfaces<br />
become smooth and polished from chafing. As the fatigue crack progresses, it reduces the effective crosssectional<br />
area of the sucker rod until not enough metal remains to support the load, and the sucker rod simply<br />
fractures in two. The fracture surfaces of a typical fatigue failure have a fatigue portion, tensile portion, and final<br />
shear tear.<br />
Fatigue failures are initiated by a multitude of stress raisers. Stress raisers are visible or microscopic<br />
discontinuities that cause an increase in local stress on the rod string during load. Typical visible stress raisers<br />
on sucker rods, pony rods and couplings are bends, corrosion, cracks, mechanical damage, threads, and wear<br />
or any combination of the preceding. This increased stress effect is the most critical when the discontinuity on<br />
the rod string is transverse (normal) to the principle tensile stress. In determining the stress raiser of a fatigue<br />
failure, the fatigue portion opposite the final shear tear (extrusion/protrusion) must be carefully cleaned and<br />
thoroughly examined. Fatigue failures have visible or macroscopic identifying characteristics on the fracture<br />
surface, which help to identify the location of the stress raiser. Ratchet marks and beach marks are arguably<br />
two of the most important features in fatigue failure identification. Ratchet marks are lines that result from the<br />
intersection and connection of multiple stress fatigue cracks while beach marks indicate a change in the rate of<br />
crack growth. Ratchet marks are parallel to the overall direction of crack growth and lead to the initiation point<br />
of the failure. Beach marks are elliptical or semi-elliptical rings radiating outward from the fracture origin and<br />
indicate successive positions of the advancing stress fatigue crack growth.<br />
Figure 1<br />
Figure 1 is an example of tensile and fatigue<br />
failures. The two examples on the right are tensile<br />
failures. A tensile failure is characterized by a reduction<br />
in the diameter of the cross-sectional area at the point of<br />
fracture. Typical tensile failures have cup-cone fracture<br />
halves. The second example from the right is typical in<br />
appearance for tensile failures. During the final stages of<br />
an overload, fractures from tensile failures rupture, or<br />
shear, on 45ϒ angles to the stresses applied. A good<br />
example of the shear is the characteristic cup-cone<br />
fracture surfaces of a typical tensile failure. The rod body<br />
on the right is an excellent example of needing to look<br />
past the obvious for the not so obvious. A fatigue failure<br />
is primarily responsible for the failure even though fracture occurred while trying to unseat a stuck pump. Visual<br />
examination of the fracture surface reveals a small semi-elliptical, stress fatigue crack. This sucker rod had preexisting,<br />
transverse fatigue cracks, from in-service stresses. One of the stress fatigue cracks opened during the<br />
straight, steady load applied in attempting to unseat the pump, and fracture occurred. The tensile failure is<br />
secondary and results in the unusual appearance of the fracture surface – with the small fatigue portion, large<br />
tensile portion and unusually large 45ϒ double shear tears.<br />
The remaining examples are fatigue failures on: casehardened sucker rods; normalized and tempered<br />
sucker rods; and quenched and tempered sucker rods. The example on the far left is a torsional fatigue failure<br />
from a progressing cavity pump. Ratchet marks found in the large fatigue portion, and originating from the<br />
surface of the rod body, completely encircle the fracture surface with the small tensile tear portion shown slightly<br />
off middle-center. The second rod body on the left is a casehardened fatigue failure. The case encircling the<br />
rod body diameter carries the load for this high tensile strength sucker rod and if you penetrate the case, you<br />
effectively destroy the load-carrying capability of this type of manufactured sucker rod. The fatigue crack<br />
advances around the case and progresses across the rod body. A fatigue failure on a casehardened sucker rod<br />
generally exhibits a small fatigue portion and a large tensile tear. The third rod body from the left is typical in<br />
appearance for most fatigue failures. Typical fatigue failures have a fatigue portion, tensile portion with a final<br />
shear tear. The width of the fatigue portion is an indication of the loading involved with the fracture. Mechanical<br />
damage can prevent or hinder failure analysis by destroying the visual clues and identifying characteristics<br />
normally found on a fatigue fracture surface. Care must be exercised when handling the fracture halves. It is<br />
very important to resist the temptation to fit the mating fracture surfaces together since this almost always<br />
destroys (smears) microscopic features. To avoid mechanical damage, fracture surfaces should never actually<br />
touch during fracture-surface matching.<br />
2
Design and Operation <strong>Failure</strong>s<br />
Sucker rod failure prevention begins with design. It is possible for poorly designed rod strings to<br />
contribute to other component failures in the artificial lift system, such as rod cut tubing resulting from<br />
compressive rod loads. Designing the artificial lift system is a compromise between the amount of work to be<br />
done and the expense of doing this work over a cost-effective period of time. Numerous combinations of<br />
depths, tubing sizes, fluid volumes, pump sizes and configurations, unit sizes and geometries, stoke lengths,<br />
pumping speeds and rod tapers are available to the system designer. Sucker rod size and grade selection is<br />
dependent upon many factors including predicted maximum stresses, stress ranges, and operating<br />
environments.<br />
Figure 2 Commercially available computer design<br />
programs allow the system designer to optimize<br />
production equipment at the least expense for the well<br />
conditions existing at the time of the design. After the<br />
initial design and installation of the rod string, periodic<br />
dynamometer surveys should be utilized to confirm that<br />
equipment load parameters are within those considered<br />
acceptable. A good initial design may become a poor<br />
design if well conditions change. Changes in the fluid<br />
volume, fluid level, stroke length, stokes per minute or<br />
pump size severely impact the total artificial lift system.<br />
Changes in fluid corrosiveness can affect the fatigue<br />
endurance lift of sucker rods and may lead to premature<br />
failures. When one of the preceding conditions change, the design of the artificial lift system must be reevaluated.<br />
Figures 2 and 3 are examples of design and<br />
operationally induced mechanical failures. Wear, flexing<br />
fatigue, unidirectional bending fatigue, and stress-fatigue<br />
failures indicate compressive rod loads, deviated wells,<br />
fluid pound, gas interference, highly stressed sucker rods,<br />
improperly anchored tubing, pumps tagging bottom,<br />
sticking pump plungers, unanchored tubing, or some<br />
combination of the preceding.<br />
Wear causes rod failures by reducing the crosssection<br />
of the metal, exposing new surface metal to<br />
Figure 3 corrosion, and causes joint failures from impact and<br />
shoulder damage. The Class T coupling on the left, the<br />
Class SM coupling second from left, and the rod body on the left are all examples of wear. Wear on the sucker<br />
rod string is defined as the progressive removal of surface metal by contact with the tubing. Wear that is equal<br />
in length, width, and depth usually suggests a deviated or crooked well bore. Angled wear patterns indicate rod<br />
strings that are aggressively contacting the tubing at an angle, usually as a result of fluid pound or unanchored<br />
(improperly anchored) tubing. The middle rod body represents corrosion-abrasion wear. Wear also removes<br />
corrosion inhibiting films and exposes new surface metals to corrosive well fluids-which accelerate the rate of<br />
corrosion. The Class T coupling on the far right has a work-hardened ridge from tubing-slap wear. Tubing-slap<br />
wear is the result of the rod string “stacking out” – probably as a result of fluid pound, gas interference or pump<br />
tagging. The work-hardened material doesn’t wear as fast as the softer material on either side of the workhardened<br />
area, and it leaves a ridge of material as the rest of the coupling wears.<br />
The second rod body from the left is a flexing fatigue failure. Flexing fatigue failures occur from the<br />
motion of the rod string having a constant lateral or side movement during the pumping cycle. Stress fatigue<br />
cracks due to flexing will concentrate along the area of the rod where the greatest bending stresses occurred.<br />
The transverse, stress fatigue cracks will be on one half of the circumference of the rod body, closely spaced<br />
near the rod upsets and gradually spreading apart moving toward the middle of the rod body. Most flexing<br />
fatigue failures occur above the connection in the transition zone of the rod body-between the rigid coupling and<br />
upset area and the more flexible rod body. Flexing fatigue failures will not show permanent bends since this<br />
problem occurs while the rod string is in motion. The example on the far right is a unidirectional bending fatigue<br />
3
failure. This type of failure generally has two tips protruding above the fracture surface. These distinct failure<br />
characteristics indicate a double shear-lip tear. Double shear-lip tears are the direct result of unidirectional<br />
bending stresses, with fractures and the fatigue damage occurring under compressive rod loads. Compressive<br />
rod loads may be the result of large bore pumps with small diameter sucker rods or multiple tapers in shallow<br />
wells.<br />
The second rod body sample on the right (Figure 3) is a stress fatigue failure. Stress fatigue failures<br />
occur on highly stressed sucker rods as a result or worn out sucker rods, overloads, or extremely high rod loads<br />
for short periods of time. Stress fatigue failures may have closely spaces, fine, transverse secondary fatigue<br />
cracks that completely encircle the circumference of the rod body. The stress fatigue cracks may be on the<br />
wrench square and over the entire length of the rod body. With very old sucker rods, stress fatigue cracks and<br />
failure may occur within normal everyday operating loads.<br />
Figure 4 is an example of coupling-to-tubing slap.<br />
Coupling-to-tubing slap is the result of extremely<br />
aggressive angle contact to the tubing by the rod string.<br />
This aggressive contact is the direct result of severe fluid<br />
pound, unanchored (or improperly anchored) tubing,<br />
sticking (or stuck) pump plungers, or any combination of<br />
the preceding.<br />
Figure 5<br />
Figure 4<br />
Figure 5 is an example of rod guide related<br />
damage. The example on the left is a reconditioned, high<br />
tensile strength sucker rod. Turbulent fluid flow,<br />
associated with short, blunt-end injection molded rod<br />
guides, allowed crevice corrosion in the critical wash area<br />
around the end of the guide. Prior to inspecting the moldon<br />
rod guides were removed from the rod body for<br />
reconditioning. Class 1 reconditioned sucker rods cannot have discontinuities greater than 20 mils (0.020”) per<br />
API Specification 11BR. The crevice corrosion was under the 20 mils allowed for a Class 1 reconditioned<br />
sucker rod. However, the notch sensitivity (discontinuity intolerance) of a high tensile strength sucker rod is<br />
high. In other words, small pits can be detrimental to the high tensile stresses associated with the high strength<br />
sucker rod and reconditioned high strength sucker rods should be de-rated for load. The example in the middle<br />
is an erosion/corrosion failure resulting from short, blunt-end; field applied rod guides in small tubing with high<br />
fluid velocities. Erosion/corrosion pits will be “fluid cut” with very smooth bottoms. Pit shape characteristics may<br />
include sharp edges and steep sides if accompanied by CO 2 or broad smooth pits with beveled edges if<br />
accompanied by H 2 S. The example on the right is abrasion wear from a field-applied guide moving up and<br />
down on the rod body during the pumping cycle. Generally speaking, mold-on rod guides provide better laminar<br />
flow, a minimum of three to four times more bonding and holding power and are more cost-effective than are<br />
field applied rod guides.<br />
Mechanical <strong>Failure</strong>s<br />
Mechanical failures account for a large percentage of the total number of all rod string failures.<br />
Mechanical failures include every type except manufacturing defects and stress/corrosion fatigue. Mechanical<br />
damage to the rod string contributes to a stress raiser which will cause sucker rod failures. The time to failure<br />
will be influenced by many variables, of which maximum stress, operating environment, orientation of the<br />
damage, sucker rod chemistry, sucker rod heat treatment type, stress range and type of damage will be of the<br />
most important. Mechanical damage can be caused by inept artificial lift design, improper care and handling<br />
procedures, careless makeup and breakout procedures, out-of-date operating practices, or any combination of<br />
these elements.<br />
4
Bent <strong>Rod</strong> <strong>Failure</strong>s<br />
Bending fatigue failures account for a significant number of all mechanical failures. It is a fact that all<br />
bent sucker rods eventually fail. New sucker rods are manufactured to a body straightness of no less than 1/16<br />
inch in any twelve inches of rod body length. Sucker rods within this tolerance of straightness will roll easily on<br />
a level rack with five supports. Any degree of bend greater than this will cause an increase in local stress at the<br />
point of the bend during applied load. When the bent rod body is pulled straight during load, the fatigue strength<br />
of the material is quickly reached. The cycle of continually exceeding the ultimate material strength is repeated<br />
during the pumping cycle and causes stress fatigue cracks on the concave side of the bend. These stress<br />
fatigue cracks progress across the bar, during load, until not enough metal remains in the bar to support the<br />
load, and fracture occurs.<br />
Straightening the raw bar stock is the first step in the process of manufacturing sucker rods. Cold<br />
straightening the bar deforms the grain structure below its recrystallization temperature, putting a strain in the<br />
bar that is accompanied by a work hardening effect. During the manufacturing process, the function of heat<br />
treatment is to stress-relieve the residual and induced stresses caused by bar rolling, bar straightening<br />
processes and from forging the rod upsets. Heat treatment changes the metallurgical structure of the forged<br />
ends to match that of the rod body and also controls the mechanical properties of the sucker rod. Any rod body<br />
bend created after hear treatment causes work hardening, which creates an area of hardness different than the<br />
surrounding surfaces. This condition is referred to as a “hard spot” and is a stress raiser to load. Mechanical<br />
processing, such as passing the finished sucker rod through a system of rollers, will attempt to remove the bend<br />
so it appears to be straight. However, reconditioning processes are not capable of stress relieving bent sucker<br />
rods. A bent sucker rod is permanently damaged and should not be used because all bent sucker rods will<br />
eventually fail.<br />
Figure 6 (with inset of Figure 7) is an example of<br />
binding fatigue failures. Bending fatigue failures can be<br />
identified by the angled fracture surface, which will be at<br />
some angle other than 90ϒ to the axis of the rod body.<br />
The example on the left illustrates a fracture caused by a<br />
long radius bend, or gradual bow in the rod body (left<br />
example in Figure 7). The fracture surface shows fatigue<br />
damage, and has a slight angle when compared to the<br />
axis of the rod body. The middle example is a short<br />
radius bend (right example in Figure 7). The fracture<br />
surface is at a greater angle to the axis of the rod body<br />
with a small fatigue portion and a large tensile tear<br />
portion. The example on the right is the result of a<br />
Figure 6 Figure 7<br />
corkscrewed sucker rod. Notice how convoluted the fracture surface is in<br />
appearance. As a general rule, the greater the bend in the rod body, the more<br />
convoluted the fracture surfaces appear. In operation, the time for the rod to fracture<br />
is greatly shortened. Poor care and handling procedures usually cause bent rods.<br />
Surface Damage <strong>Failure</strong>s<br />
Everything possible should be done to prevent mechanical surface damage<br />
to sucker rods, pony rods and couplings. Surface damage increases stress during<br />
applied loads, potentially causing rod string failures. The type of damage, and its orientation, contributes to this<br />
increased stress effect. The orientation of the damage contributes to higher stresses with transverse damage<br />
having increased stresses over those associated with longitudinal damage. A sharp nick will create a higher<br />
stress concentration and would be more detrimental to load than a shallow, broad-based depression. Sucker<br />
rods with indications of surface damage must not be used and must be replaced. Care should be used to avoid<br />
all metal-to-metal contact that might result in dents, nicks, or scratches. To prevent potential sucker rod<br />
damage, place strips of wood between metal storage racks and between each layer of sucker rods so metal-tometal<br />
contact can be avoided. Use sucker rods for what they were designed for- to lift a load. Never use sucker<br />
rods as a walkway or workbench. Keep metal tools not intended for use on sucker rods and all other metal<br />
objects away from the rods. Make sure the tool you use is intended for the purpose and ensure that it is in<br />
proper working order.<br />
5
Figure 8 is an example of various surface<br />
damage failures. The example on the left shows a slight<br />
depression from a wrench, tool, or other metal object.<br />
The second example from the left is damage from a pipe<br />
wrench used in applying field-installed rod guides. The<br />
second example from the right has a small longitudinal<br />
scratch, through metal-to-metal contact, by allowing<br />
sucker rods to run down other rods in a rod bundle during<br />
installation. The example on the right exhibits transverse<br />
surface damage.<br />
Figure 8<br />
Figure 9 is an example of surface damage<br />
caused by sucker rod elevators. The bottom example is<br />
damage from worn or misaligned elevator seats. After an extended period of service, the elevator seats<br />
become so worn that they develop an oval shape rather than a round shape. As the oval shape grows, the<br />
tangency ring of the rod upset to the elevator seat face is<br />
lowered in the front half of the seat. As the seat continues<br />
to wear the seating position of the rod upset is moved<br />
forward of the elevator trunnion centerline. This causes<br />
an offset in the hook load and tilts the elevator body<br />
forward. When the elevator lifts the rod string load, the<br />
hook load will bend the sucker rod centerline to coincide<br />
with the elevator trunnion centerline. As the rod string<br />
weight increases, the hook load will bend every sucker<br />
rod engaged by this elevator. Bent sucker rod failures<br />
that occur below the surface upset bead may be from bad<br />
elevator seats. The top example is damage caused by<br />
the elevator latches. This type of damage normally<br />
occurs as a result of picking up or laying down in doubles.<br />
Never pick up or lay down anything more than one single sucker rod. Anything else causes the elevator latches<br />
to act as a fulcrum and allow bending stresses to concentrate in the transition zone of the rod body and the<br />
forged upset.<br />
Connection <strong>Failure</strong>s<br />
Figure 9<br />
The API sucker rod connection is designed as a shouldered, friction loaded connection. Since the<br />
fatigue endurance of the sucker rod connection is low when subjected to cyclic loads it is necessary to limit the<br />
cyclic loads with pin preload. If the pin preload is greater than the applied load the load in the connection<br />
remains constant and no fatigue occur from cyclic loads. The friction load that develops between the pin<br />
shoulder face and the coupling shoulder face, helps lock the connection together to prevent it from coming<br />
unscrewed downhole. However, if the preload is less than the applied load, the pin shoulder face and the<br />
coupling shoulder face will separate during the cyclic motion of the pumping unit. Once these faces separate<br />
the connection is cyclically loaded and will result in a loss of displacement, or loss of tightness, failure. Loss of<br />
displacement failures may result from improper lubrication, inadequate makeup, over-torque, tubing-slap wear,<br />
or any combination of these elements.<br />
Figure 10 is an example of pin failures due to a loss<br />
of displacement. The sample on the right is typical in<br />
appearance for a loss of displacement pin failure.<br />
Insufficient makeup, or the loss of tightness, caused the pin<br />
shoulder face and the coupling shoulder face to separate.<br />
When these faces separate, a bending moment is added to<br />
the tensile load in the pin. The threaded section of the pin<br />
is held rigid while the rest of the pin flexes. The motion of<br />
the rod string causes stress fatigue cracking to start in the<br />
first fully formed thread root above the undercut. Small<br />
fatigue cracks begin along the thread root and consolidate<br />
into a major stress fatigue crack. The fracture surface of a<br />
typical loss of displacement pin failure has a small fatigue<br />
Figure 10<br />
6
portion covering approximately one-third of the fracture surface with the tensile tear portion and final shear tear<br />
covering the remaining fracture surface. The examples on the left and in the middle will occur as a result of<br />
stress loading when stress-raising factors such as corrosion or mechanical damage is present on the surface of<br />
the pin undercut.<br />
Figure 11 is another example of two types of pin<br />
failures. The sample on the left is typical in appearance<br />
for a loss of displacement pin failure. However, this pin<br />
fracture was caused by the hydraulic rod tongs during<br />
makeup as is evidenced by the stair-stepped tensile tear.<br />
It is not uncommon for pin fractures to occur at makeup, if<br />
the pin has a pre-existing stress fatigue crack due to the<br />
high torque required during joint makeup, with large<br />
diameter Class D and all sizes of high tensile strength<br />
sucker rods. The sample on the right is an example of<br />
excessive torque on a soft pin. The fracture surface has a<br />
large fatigue portion, with multiple ratchet marks in the<br />
pin-thread root, and a small tensile portion.<br />
Figure 12 is an example of a loss of displacement<br />
coupling failure. The fracture initiated in the coupling<br />
thread-root opposite the first fully formed pin starting<br />
thread. One-third/two-third fracture halves, in length, with<br />
ratchet marks originating in the thread root indicate a loss<br />
of displacement coupling failure. The fracture surface of a<br />
typical loss of displacement coupling failure has a small<br />
fatigue portion and a large tensile tear portion. Loss of<br />
displacement coupling failures are primarily associated<br />
with Class D sucker rods and high tensile strength sucker<br />
rods.<br />
Figure 11<br />
Figure 12<br />
Mid-length coupling fractures, with ratchet marks<br />
leading from the outside, indicate another type of failure. The fatigue crack starts from the outside coupling<br />
surface, progressing inward toward the threads, then around the coupling wall to a tensile fracture. Mid-length<br />
fractures indicate coupling failures from mechanical damage to the coupling surface, exceeding the stress<br />
fatigue endurance limit of the material, or a manufacturing defect. Most mid-length coupling fractures are the<br />
result of mechanical damage or over load. Mid-length coupling fractures due to overload have a small fatigue<br />
portion and large tensile tear portion. This failure is common with high strength sucker rods and Class SM<br />
couplings. Use Class T couplings to avoid mid-length coupling failures with high tensile strength sucker rods.<br />
Figure 13 is an example of thread galling in the<br />
sucker rod connection. Thread galling is mechanical<br />
damage to the sucker rod and/or coupling threads.<br />
Thread galling is the result of damaged or contaminated<br />
threads causing the interference between the threads to<br />
be great enough to rip and tear the thread surfaces. The<br />
threads weld together during makeup and strip apart at<br />
breakout and the connection is damaged and destroyed<br />
beyond use. Hard stabbing damage to the leading<br />
thread, contaminated threads and cross threading on<br />
larger diameter rods are the primary causes of thread<br />
galling. Cleaning the threads prior to makeup, properly<br />
lubricating the threads and following careful makeup<br />
procedures will prevent thread galling.<br />
Figure 13<br />
Figure 14 is an example of wrench square failures. Wrench square failures are extremely rare and<br />
seldom occur unless from mechanical damage, corrosion, manufacturing defects or torsional stress causing<br />
fatigue damage. The example on the left is a wrench square failure from severe mechanical damage. A loose<br />
7
or sloppy backup on the hydraulic rod tongs has rounded<br />
the wrench square corner. The stress fatigue crack<br />
began in the corner of the wrench square and progressed<br />
to final rupture or fracture.<br />
Figure 14<br />
The example on the right is a wrench square<br />
failure from a manufacturing defect. The failure initiated<br />
in the die stamp mark and is an example of an excessive<br />
die stamp depth failure. Die stamp markings can become<br />
notches that serve as stress raisers if the depth of the die<br />
stamping, during the forging process, is not controlled and<br />
kept within API Specification 11B, allowable tolerances.<br />
Figure 15 is an example of the damage that<br />
occurs as a result of severely over-tightening the sucker<br />
rod connection. The example shown is an over-tightened<br />
coupling that has flared out or bulged near the contact<br />
face. Slim-hole couplings are more susceptible to this<br />
type of over-tightened damage than are full sized<br />
couplings. Over-tightened full size couplings on Class D<br />
and high strength sucker rods generally exhibit slight<br />
bulges and have the concentric deformation ridge of<br />
material on the coupling shoulder face from the<br />
impression of the pin shoulder face. Over-tightening with<br />
Figure 15<br />
hydraulic rod tongs will twist off soft pins resulting in a<br />
tensile failure appearance. The pin undercut will neck<br />
down and fracture occurs rapidly. With Class D sucker rods, an indication of over-tightening is the concentric<br />
deformation ridge of material on the pin shoulder face from the impression of the coupling shoulder face. Overtightening<br />
on normalized and tempered high tensile strength sucker rods will begin to pull the threads out of the<br />
coupling.<br />
Figure 16<br />
Figure 17<br />
Figure 16 is an example of impact cracks on<br />
couplings. The practice of “warming up,” or hammering,<br />
on couplings in order to loosen them should not be<br />
allowed. This example shows how impact damage to a<br />
Class T coupling causes stress fatigue cracks around the<br />
impact points and accelerated localized corrosion.<br />
Hammering on Class SM couplings causes stress fatigue<br />
cracks in the hard spray surface and results in a coupling<br />
failure due to stress/corrosion fatigue.<br />
Figure 17 is an example of polished rod failures.<br />
The majority of all polished rod failures occur either in the<br />
body, just below the polished rod clamp, or in the pin.<br />
Polished rod body failures below the polished rod clamp<br />
result from the addition of bending stresses. These<br />
bending stresses may be imposed by pumping units out<br />
of alignment, carrier bars that do not set level, worn<br />
carrier bars, misaligned load cells, or incorrect polished<br />
rod clamp installation. The polished rod failure on the left<br />
is an example of polished rod clamp on the sprayed<br />
portion of a Spraymetal polished rod. Spraymetal<br />
polished rods have an unsprayed portion for polished rod<br />
clamp placement. Never put a polished rod clamp on the<br />
sprayed portion of a Spraymetal polished rod. The<br />
polished rod failure on the right has small, longitudinal<br />
scratches caused from mishandling.<br />
8
Polished rod pin failures generally occur due to the installation of sucker rod couplings. Polished rod<br />
pins have a 9ϒ thread taper between the straight-threaded section and the shoulder. Sucker rod couplings have<br />
a 30ϒ starting thread and a deep recess that doesn’t engage all the polished rod pin threads. Polished rod<br />
couplings have a 9ϒ starting thread and a profile designed to properly fit the polished rod pin. The shallow<br />
recess to the first thread easily distinguishes polished rod couplings from sucker rod couplings and allows every<br />
polished rod pin thread to be engaged.<br />
Corrosion <strong>Failure</strong>s<br />
Corrosion is one of the greatest problems encountered with produced fluids and accounts for about onehalf<br />
of all sucker rod failures. Corrosion is the destructive result of an electrochemical reaction between the<br />
steel used in making sucker rods and the operating environment to which it is subjected. Simply put, corrosion<br />
is nature’s way of reverting a man-made material of a higher energy state (steel), back to its basic condition<br />
(native ore) as it is found in nature. The elemental iron in steel combines with moisture or acids, to form other<br />
compounds such as iron oxide, sulfide, carbonate, etc. Some form and concentration of water is present in all<br />
wells considered corrosive and most contain considerable quantities of dissolved impurities and gases. For<br />
instance, carbon dioxide (CO 2 ) and hydrogen sulfide (H 2 S) acid gases, common in most wells, are highly soluble<br />
and readily dissolve in water, which tends to lower its pH. The corrosivity of the water is a function of the<br />
amount of these two gases that are held in solution. All waters with low pH values are considered corrosive to<br />
steel, with lower values representing greater acidity, or corrosiveness.<br />
All downhole environments are corrosive to some degree. Some corrosive fluids may be considered<br />
non-corrosive if the corrosion penetration rate, recorded as mils of thickness lost per year (mpy), is low enough<br />
that it will not cause problems. However, most producing wells are plagued by corrosion problems and no<br />
currently manufactured sucker rod can successfully withstand the effects of this corrosion alone. While<br />
corrosion cannot be completely eliminated it is possible to control its reaction. All grades of sucker rods must be<br />
adequately protected through the use of effective chemical inhibition programs (reference current editions of API<br />
Specification 11BR and NACE Standard RPO195). Some sucker rod grades, due to different combinations of<br />
alloying elements, microstructures and hardness levels, are capable of longer service life in inhibited corrosive<br />
wells than other grades of either low or high tensile strength.<br />
Why do new sucker rods seem to corrode faster than older rods in the same string? Two sucker rods<br />
with the same chemical analysis will form a galvanic corrosion cell if the physical condition of one is different<br />
from the other. Physical differences in a sucker rod may be caused from poor care and handling practices (i.e.<br />
surface damage resulting in bruises, nicks, bends) and/or corrosion deposits. Since new sucker rods go into the<br />
well without corrosion deposits, they often corrode preferentially in relation to rods that are coated with corrosion<br />
deposits. Corrosion on steel starts very aggressively but often slows down as soon as an obstructive surface<br />
film of corrosion deposit (scale) is formed upon the metal surface. For example, CO 2 generates iron carbonate<br />
scale as a by-product of its corrosion. This scale coats the sucker rod and retards the corrosion penetration<br />
rate, which tends to slow down corrosion. However, if this deposit is continuously cracked by a bending<br />
movement or removed by abrasion, aggressive local corrosion continues on the area with the scale removed,<br />
and results in deep corrosion pitting.<br />
Can high tensile strength sucker rods be used in a corrosive environment? Generally soft rods tolerate<br />
corrosion better than hard rods and, as a rule of thumb; you should always use the softest rod that will handle<br />
the load. However, if load requirements dictate the use of high tensile strength rods than it is important to<br />
protect the rods with an effective surface film of corrosion inhibitor. In most cases, if you can adequately protect<br />
downhole equipment from corrosion, you should be able to adequately protect high tensile strength rods from<br />
corrosion by increasing the application frequency of the corrosion-inhibitor program. In other words, if you<br />
effectively batch treat once a week with 40 parts per million (ppm) of corrosion inhibitor for D class rods, you will<br />
need to batch treat twice weekly with 40 ppm of corrosion inhibitor for high tensile strength rods. Treatment<br />
volumes vary and are dependent upon many factors too numerous to list. Always consult with a corrosion<br />
control specialist prior to the installation of every rod string, especially when corrosion fatigue is suspected as<br />
the failure root cause.<br />
9
Figure 18<br />
Figure 18 is an example of corrosion fatigue from<br />
CO 2 corrosion. The size of the pit, as far as when it<br />
becomes detrimental to the rod, depends on two factorsmaterial<br />
type and hardness. Class K sucker rods may<br />
develop deeper and larger pits than a Class D sucker rod<br />
before it becomes detrimental to the rods. Class D sucker<br />
rods may develop deeper and large pits than a high<br />
tensile strength rod before it becomes detrimental to the<br />
rods. Softer materials with lower rod stress tolerate larger<br />
pits than do harder materials with higher rod stress.<br />
Therefore, small pits can be detrimental to higher tensile<br />
strength sucker rods as opposed to a softer rod that does<br />
not have as much rod stress.<br />
Figure 5<br />
Acid Corrosion<br />
Service companies use acids for well<br />
stimulation and cleanout work. All acid work should<br />
have an inhibitor mixed with the acid prior to injection<br />
into the well. Spent acids are still corrosive to steel and<br />
the well should be “flushed“ long enough to recover all<br />
acid. In rare instances, some produced waters contain<br />
organic acids that have formed downhole, such as<br />
acetic, hydrochloric and sulfuric acids. Corrosion from<br />
acid is a general thinning of metal, leaving the surface<br />
with the appearance of sharp, feathery or web-like<br />
residual metal nodules. Metallic scale will not be formed<br />
in the pits. The left sample in Figure 5 is an example of<br />
acid corrosion.<br />
Chloride Corrosion<br />
Chlorides contribute to the likelihood of an increase in corrosion related sucker rod failures. The<br />
corrosivity of water increases as the concentration of chlorides increase. Corrosion inhibitors have more<br />
difficulty reaching and protecting the steel surface of sucker rods in wells with high concentrations of chlorides.<br />
Corrosion, from waters with high concentrations of chlorides, has the tendency to be more aggressive to carbon<br />
steel sucker rods than to alloy steel sucker rods. Chloride corrosion tends to evenly pit the entire surface area<br />
of the sucker rod with shallow, flat-bottomed, irregular shaped pits. Pit shape characteristics include steep walls<br />
and sharp pit edges.<br />
CO 2 Corrosion<br />
CO 2 combines with water to form carbonic acid, which lowers the pH of the water. Carbonic acid is very<br />
aggressive to steel and results in large areas of rapid metal loss that can completely erode sucker rods and<br />
couplings. The corrosion severity increases with increasing CO 2 partial pressure and temperature. CO 2<br />
corrosion pits are round based, deep with steep walls and sharp edges. The pitting is usually interconnected in<br />
long lines but will occasionally be singular and isolated. The pit bases will be filled with iron carbonate scale, a<br />
loosely adhering gray deposit generated from CO 2 .<br />
Figures 19 and 20 show typical examples of CO 2 corrosion. Figure 19 is an example of CO 2 corrosion<br />
on couplings and Figure 20 is an example of CO 2 corrosion on rod bodies.<br />
10
Figure 19<br />
Figure 20<br />
H 2 S Corrosion<br />
Figure 21<br />
H 2 S pitting is round based, deep with steep walls<br />
and beveled edges. It is usually small, random, and<br />
scattered over the entire surface of the rod. A second<br />
corrodent generated by H 2 S is iron sulfide scale. The<br />
surfaces of both the sucker rod and the pit will be covered<br />
with the tightly adhering black scale. Iron sulfide scale is<br />
highly insoluble and cathodic to steel which tends to<br />
accelerate corrosion penetration rates. A third corroding<br />
mechanism is hydrogen embrittlement, which causes the<br />
fracture surface to have a brittle or granular appearance.<br />
A crack initiation point may or may not be visible and a<br />
fatigue portion may not be present on the fracture surface.<br />
The shear tear of a hydrogen embrittlement failure is<br />
immediate during fracture due to the absorption of<br />
hydrogen and the loss of ductility in the steel. Although a<br />
relatively weak acid, any measurable trace amount of H 2 S<br />
is considered justification for chemical inhibition programs<br />
when any measurable trace amount of water is also<br />
present.<br />
Figure 22<br />
Figure 21 and 22 are examples of H 2 S corrosion. The<br />
three rod body samples on the left are examples of<br />
localized corrosion (pitting) and the two rod body samples<br />
on the right are examples of general thinning corrosion<br />
from under-scale deposit corrosion. The sample in Figure<br />
22 is an example of a pin failure due to hydrogen<br />
embrittlement.<br />
Microbiologically Influenced Corrosion (MIC)<br />
Some amount of microscopic life form is present<br />
in essentially every producing well. Of primary concern to<br />
sucker rods are the single celled organisms capable of<br />
living in all sorts of conditions and multiplying with<br />
incredible speed-commonly referred to as bacteria or "bugs”. Suspect fluids should be monitored continuously<br />
for bacteria by sampling, identifying and counting the bacteria. The extinction dilution technique is commonly<br />
used to culture bacteria for an estimation of the number of bacteria present in the well. Bactericide should be<br />
11
used on all suspect fluids to control bacteria populations. Bacteria are classified according to their oxygen<br />
requirements: aerobic (requires oxygen), anaerobic (no oxygen), and facultative (either). Some bacteria<br />
generate H 2 S, produce organic acids or enzymes, oxidize soluble iron in produced waters, or any combination of<br />
the preceding. MIC has the same basic pit shape characteristics of H 2 S, often with multiple stress cracks in the<br />
pit base, tunneling around the pit edge and/or unusual<br />
anomalies (i.e. shiny splotches) on the rod surface. Figure 23<br />
Bacteria are very aggressive and all sucker rod grades<br />
corrode rapidly in downhole environments containing<br />
bacteria. Sulfate reducers (SRB’s), those that produce<br />
H 2 S, probably cause more problems to downhole artificial<br />
lift equipment than do any other bacteria type. Multiple<br />
cracking in the pit bases results from the hydrogen sulfide<br />
by-product of the bacterial lifestyle, which corrode and<br />
embrittle the surface of the steel under the colony. Figure<br />
23 show several examples of microbiologically influenced<br />
corrosion (bacteria) on sucker rod bodies.<br />
Oxygen Enhanced Corrosion<br />
Oxygen enhanced corrosion will be most<br />
prevalent on couplings, with a few instances found on rod<br />
upsets. Oxygen enhanced corrosion is rarely seen on the<br />
rod body. In fact, aggressive oxygen enhanced corrosion<br />
can erode couplings without harming the sucker rods on<br />
either side. The rate of oxygen enhanced corrosion is<br />
directly proportional to the dissolved oxygen<br />
concentration, chloride content of the produced water<br />
and/or presence of other acid gases. Dissolved oxygen<br />
can cause severe corrosion at extremely low<br />
concentration and evaporate large amounts of metal.<br />
Pitting is usually shallow, flat-bottomed, and broad-based<br />
with the tendency of one pit to combine with another. Pit<br />
shape characteristics may include sharp edges and steep<br />
sides if accompanied by CO 2 or broad, smooth craters<br />
with beveled edges if accompanied by H 2 S. Corrosion<br />
rates increase with increased concentrations of dissolved<br />
oxygen.<br />
Figure 24<br />
Figures 24 and 25 are examples of oxygen<br />
enhanced corrosion. The coupling sample on the left is<br />
an example of the effects of oxygen enhanced CO 2<br />
corrosion (left), H 2 S corrosion (middle), and chloride<br />
corrosion (right) while the rod samples in Figure 25 show<br />
the effects of oxygen enhanced CO 2 corrosion near the<br />
upset (left) and CO 2 corrosion on the rod body (right).<br />
Figure 25<br />
Scale Corrosion<br />
Scales such as barium sulfate, calcium<br />
carbonate, calcium sulfate, iron carbonate, iron oxide<br />
(rust), iron sulfide, and strontium sulfate should be prevented from forming on sucker rods. Although scale on a<br />
sucker rod slows down the corrosion penetration rate, it also reduces the effectiveness of chemical inhibitors.<br />
Severe localized corrosion in the form of pitting results any time the scale is cracked by a bending movement or<br />
removed by abrasion.<br />
12
Stray Current Corrosion<br />
Rarely seen in most producing wells, stray current corrosion refers to the induced, or stray, electrical<br />
currents that flow to or from the rod string. Stray current corrosion can be caused by grounding electrical<br />
equipment to the well casing or from nearby cathodic protection systems. Arcs originating from sucker rods<br />
leave a deep, irregular shaped pit with smooth sides, sharp edges and a small cone in the base of the pit. Arcs<br />
originating from the tubing leave deep pits with smooth sides and sharp edges that are random in dimension<br />
and irregular in shape. Stray current corrosion pits are usually singular and isolated in a row down one side of<br />
the sucker rod near the upsets.<br />
Manufacturing Defects<br />
<strong>Failure</strong>s due to manufacturing defects are rare<br />
and seldom occur. Manufacturing defects are easily<br />
recognized and it is important that you understand what<br />
these defects look like if you are to file accurate claims for<br />
warranty reimbursement. No manufacturer is excluded<br />
from the possibility of defects in material or workmanship<br />
and the following failure examples include defects from all<br />
manufactures.<br />
Figure 26<br />
Figure 26 is an example of mill defects. Mill<br />
defects occur along one side of the rod body and these<br />
discontinuities normally have longitudinally tapered, sharp<br />
“V” shaped bottoms with indications of the longitudinal seam in the base. The example on the far left is an<br />
example of a sliver. The rod body third from the left is also an example of a sliver. When fishing the rod failure,<br />
the sliver folded against the fracture surface. The rod body second from right is an example of a scab. A sliver<br />
is a small loose or torn segment and a scab is a large loose or torn segment of material longitudinally rolled into<br />
the surface of the bar. One end of the sliver or scab is normally metallurgically bonded into the rod body while<br />
the remaining end is rolled into the surface and physically attached. Fatigue failures, which result from slivers or<br />
scabs, will have a piece of loose material protruding over the fatigue portion of the fracture surface. The rod<br />
body second from the left is an example of rolled-in-scale. Rolled-in-scale is a surface discontinuity caused<br />
when scale (metal-oxide), formed during a prior heat, has not been removed prior to bar rolling. The rod body<br />
sample on the far right is an example of a rolling lap. Rolling laps are longitudinal surface discontinuities that<br />
have the appearance of a seam from rolling, with sharp corners folded over and rolled into the bar surface<br />
without metallurgical bonding.<br />
Figure 27 is an example of forging defects. The<br />
fracture begins internally below a forging crack in the<br />
upset area and is brittle or granular in appearance. A<br />
crack initiation site may or may not be visible and a<br />
fatigue portion may not be present on the fatigue fracture<br />
surface. The examples on the left and in the middle occur<br />
as a result of low forging temperatures. The example on<br />
the left is a failure from cold-shut and the example in the<br />
middle is a failure from a forging crack. The fracture on<br />
the right is a failure caused by a subsurface longitudinal<br />
seam located near the end of the raw bar. During the<br />
forging process the orientation of this discontinuity was<br />
changed transversely.<br />
Figure 27<br />
13
Figure 29 is an example of processing<br />
defects. The lower example is a casehardened<br />
sucker rod and the upper example is a coupling that<br />
has been processed through a grinding operation to<br />
reduce the diameter. In both examples, a difference<br />
in the material hardness has resulted in preferential<br />
corrosion attack.<br />
Figure 30 is an example of a mill defect and<br />
a machining defect. The lower example is a failure<br />
due to a large, internal, nonmetallic inclusion in the<br />
pin. The fracture began internally and is brittle or<br />
granular in appearance. A crack initiation site may or<br />
may not be visible and a fatigue portion may not be<br />
present on the fatigue fracture surface. The upper<br />
example is from rolling the pin threads twice. Rolling<br />
twice has flattened the pin thread crest and will not<br />
be capable of achieving the correct friction load<br />
required for makeup.<br />
Figure 29<br />
Figure 30<br />
Your initial investment in sucker rods is<br />
substantial. Moreover, the cost related to replacing<br />
damaged sucker rods generally out weights the<br />
original cost of the new rod string. Protecting your<br />
investment and getting the maximum service life out<br />
of your rod string just makes good sense. It is<br />
important to diagnose rod failures accurately and to implement corrective action measures to prevent future<br />
failure occurrences. This photo essay is intended for use as a reference guide in sucker rod failure analysis. It<br />
explains how rod failures occur and expounds methods for identifying the characteristics of the several failure<br />
mechanisms. Where sucker rod failures are concerned, there are no absolutes and no two fractures look<br />
exactly alike in appearance. But, by recognizing the visual clues and identifying characteristics of the different<br />
failure mechanisms, corrective action measures can be taken to prevent sucker rod failures, thus allowing the<br />
operator to produce marginally profitable wells more cost effectively.<br />
14
For further information please contact:<br />
<strong>Alberta</strong> <strong>Oil</strong> <strong>Tool</strong><br />
9530 – 60 th Avenue<br />
Edmonton <strong>Alberta</strong> T6E 0C1<br />
Phone: (780) 434-8566<br />
Fax: (780) 436-4329<br />
www.albertaoiltool.com<br />
Issue Date: 10/30/01


