Opperations Manual 5030a - Alberta Oil Tool
Opperations Manual 5030a - Alberta Oil Tool
Opperations Manual 5030a - Alberta Oil Tool

You also want an ePaper? Increase the reach of your titles
YUMPU automatically turns print PDFs into web optimized ePapers that Google loves.
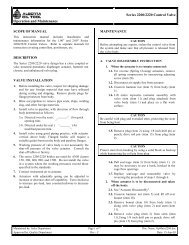
Series 5030A Pilot Light Safety Control<br />
Operation and Maintenance<br />
The Series 5030A Pilot Light Safety Control is a direct<br />
acting temperature controller. Thus, pilot output pressure<br />
increases with increasing temperature of the element. If the<br />
flame goes out, the output pressure drops to zero.<br />
For correct operation, only 1 to 3 inches of the probe end<br />
should be exposed to the pilot flame. The remainder of the<br />
probe should be positioned so as not to be heated directly by<br />
the main burner flame. Also, because pilot operation<br />
depends on heat loss from the unheated portion of the probe,<br />
this portion must not be closely confined or insulated.<br />
In hooking up the control, a pressure gauge must be installed<br />
to show the output pressure; proper adjustment of the device<br />
is not possible without it.<br />
Pilot supply pressure must not exceed 30 PSIG. Supply gas<br />
must be clean and free of foreign matter. After connecting<br />
pilot supply to the inlet, remove the cap (Item #1) and turn<br />
the adjusting screw (Item #3) until pressure shows on the<br />
output gauge (Item #11). Turning the screw to the right<br />
decreases output pressure and increases operating<br />
temperature. Turning it to the left increases output pressure<br />
and decreases operating temperature.<br />
On the original start up of an installation of the Norriseal<br />
Pilot Safety, the operating setting of the screw must be<br />
determined by the heater in operation.<br />
As the heater goes through a period of normal firing, "track"<br />
the setting of the safety control by turning the screw to<br />
maintain the output pressure just below the pilot supply<br />
pressure. If, during the firing, it is necessary to turn the<br />
screw to the left beyond the mark originally made for pilot<br />
light operation, this means that the original mark is for an<br />
operating temperature that is too high. If it is left on the<br />
original setting, the main burner fuel would be blocked<br />
while the pilot light still burned. For a safe setting, the<br />
screw must be turned to the left slightly past the setting<br />
necessary to keep the output pressure on control at the<br />
coolest part of the overall firing cycle.<br />
To insure the shortest possible time lag between a pilot<br />
flame outage and blocking of main burner, the screw setting<br />
must be checked after the heater has been in operation for a<br />
few days. This is to correct for the higher temperature of the<br />
surroundings of the probe, as compared to initial start up. If<br />
the pilot control is reset by "tracking" when the heater is hot,<br />
the actuation point will be higher than when the initial<br />
adjustment was made. If the heater is then shut down long<br />
enough to completely cool, the adjusting screw will have to<br />
be reset again at start up, because the pilot flame will not<br />
supply enough heat to bring the control output pressure up to<br />
the operating range.<br />
After the hook up has been completed and pilot supply<br />
connected to the control, turn the adjusting screw slowly<br />
until the output pressure is a few pounds below the pilot<br />
supply pressure; the setting is now on the control point.<br />
Light the pilot flame and the pressure on the output gauge<br />
will almost immediately rise to the input pilot pressure.<br />
Turn the adjusting screw slowly to the right until the output<br />
pressure drops a few pounds; the pressure will immediately<br />
start to rise again. By slowly turning the adjusting screw to<br />
the right, the element heats.<br />
The output pressure may be "tracked" so as to keep the<br />
setting of the pilot exactly on the control or actuation point.<br />
As the probe approaches the operating temperature, the rate<br />
of climb of the output pressure will slow. Heating of the<br />
probe from atmospheric temperature will take a few minutes.<br />
In general, the longer the probe, the longer it will be required<br />
to establish the equilibrium temperature gradient.<br />
After the probe has been heated to the point where there is<br />
not climb in output pressure for two or three minutes, mark<br />
the setting of the screw, open the main burner valve and let<br />
the heater operate under normal service conditions. Watch<br />
the output pressure closely; opening of the main burner<br />
valve may bring in a rush of secondary air so as to cause the<br />
pilot flame to flow on and off of the probe and thus lower<br />
the probe temperature.<br />
Maintained by: Sales Department Page 1 of 2 Doc. Name: OpMain5030A.doc<br />
Approved by: Quality Department Rev.: C Date: 24-Mar-04
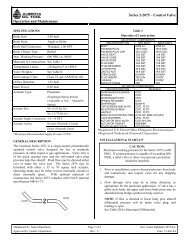
Series 5030A Pilot Light Safety Control<br />
Operation and Maintenance<br />
Maintained by: Sales Department Page 2 of 2 Doc. Name: OpMain5030A.doc<br />
Approved by: Quality Department Rev.: C Date: 24-Mar-04