Series 2200/2220 Control Valve - Alberta Oil Tool
Series 2200/2220 Control Valve - Alberta Oil Tool
Series 2200/2220 Control Valve - Alberta Oil Tool

You also want an ePaper? Increase the reach of your titles
YUMPU automatically turns print PDFs into web optimized ePapers that Google loves.
Operation and Maintenance<br />
SCOPE OF MANUAL<br />
This instruction manual includes installation and<br />
maintenance information for the 1.00" and 2.00" <strong>Series</strong><br />
<strong>2200</strong>/<strong>2220</strong> <strong>Control</strong> <strong>Valve</strong>s. Refer to separate manuals for<br />
instruction covering controllers, positioners, etc.<br />
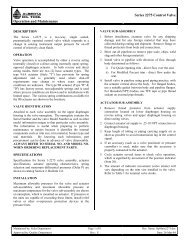
DESCRIPTION<br />
The <strong>Series</strong> <strong>2200</strong>/<strong>2220</strong> valve design has a close coupled or<br />
yoke mounted pneumatic diaphragm actuator, hammer nut<br />
closure, and unbalanced valve plug.<br />
VALVE INSTALLATION<br />
1. Before installing the valve, inspect for shipping damage<br />
and for any foreign material that may have collected<br />
during crating and shipping. Remove plastic plugs for<br />
flange protectors from body.<br />
2. Blow out pipelines to remove pipe scale, chips, welding<br />
slag, and other foreign materials.<br />
3. Install valve in pipeline, with direction of flow through<br />
body determined as follows:<br />
3.a. Directed over the seat (<br />
opening trim,<br />
3.b. Directed under the seat (<br />
modified percent trim.<br />
)for quick<br />
) for<br />
4. Install valve using good piping practice, with actuator<br />
vertical above body. Flanged bodies will require a<br />
suitable gasket between the body and pipeline flanges.<br />
5. Working pressure of valve body is not necessarily the<br />
shut-off pressure of the valve actuator. Consult the<br />
shut-off tables or factory.<br />
6. The series <strong>2200</strong>/<strong>2220</strong> bodies are rated for ANSI classes<br />
150, 300, 600, 900, and 1500. Do not install the valve<br />
in a system where the working pressures exceed those<br />
specified in the standards.<br />
7. Connect instrument air to actuator.<br />
8. Actuators with adjustable spring can be adjusted to<br />
increase or decrease shut-off capability. Turn clockwise<br />
to increase pre-load, turn counterclockwise to decrease<br />
pre-load.<br />
MAINTENANCE<br />
<strong>Series</strong> <strong>2200</strong>/<strong>2220</strong> <strong>Control</strong> <strong>Valve</strong><br />
CAUTION<br />
Before attempting any repairs, isolate the control valve from<br />
the system and make sure that all pressure is released from<br />
the valve body.<br />
A. VALVE DISASSEMBLY INSTRUCTION<br />
1. When the actuator is to remain connected:<br />
1.1. For reverse (Spring Closing) actuators, remove<br />
all spring compression by unscrewing adjusting<br />
screw (item 20).<br />
1.2. Disconnect air supply line from actuator.<br />
1.3. Unscrew hammer nut (item 5) from body (item<br />
1).<br />
1.4. Lift entire topworks (actuator assembly with<br />
valve stem (item 11) and plug attached) from<br />
valve body (item 1) and place on a flat work<br />
surface.<br />
CAUTION<br />
Be careful with plug and extended stem, protecting the stem<br />
from being bent.<br />
1.5. Remove plug (item 2) using 1/8 inch drift pin or<br />
punch, drive roll pin (item 15) from plug (item<br />
2).<br />
CAUTION<br />
Protect stem from bending by using a solid block as back-up<br />
while hammering the roll pin from plug.<br />
1.6. Pull seat/cage (item 3) from body (item 1). (It<br />
may be necessary to use a hook, hooked in the<br />
cage flow openings.<br />
1.7. Replace seat/cage and reassemble valve by<br />
reversing the procedure of steps 1 through 6.<br />
2. When actuator is to be disconnected and taken<br />
off the body:<br />
2.1. See "Actuator Disassembly"<br />
2.2. Unscrew hammer nut (item 5) and lift off over<br />
bonnet (item 10).<br />
2.3. Remove bonnet (item 10) from body (item 1)<br />
along with valve plug (item 2) and stem (item<br />
11).<br />
2.4. Remove valve plug (item 2) from stem (item<br />
11).Using 1/8 inch drift pin or punch, drive roll<br />
pin (item 15) from plug (item 2).<br />
Maintained by: Sales Department Page 1 of 7 Doc. Name: OpMain<strong>2200</strong>.doc<br />
Approved by: Quality Department Rev.: C Date: 15-Apr-03
<strong>Series</strong> <strong>2200</strong>/<strong>2220</strong> <strong>Control</strong> <strong>Valve</strong><br />
Operation and Maintenance<br />
CAUTION<br />
Protect stem from bending by using a solid block as back-up<br />
while hammering the roll pin from plug.<br />
2.5. Remove packing washer (item 7) and spring<br />
(item 8), and pull valve stem (item 11) out of<br />
bonnet (item 10).<br />
2.6. Remove packing (item 9A2) assembly by<br />
inserting drift pin or punch in top of bonnet (item<br />
10) and tapping on upper retainer (item 9A1)<br />
until packing (item 9A2) comes out the bottom.<br />
2.7. After any necessary replacement of parts, reassembly<br />
is accomplished by reversing the<br />
procedure of steps 1 though 6.<br />
B. ACTUATOR DISASSEMBLY<br />
1. Reverse Actuator (Spring Closing) close coupled<br />
or Yoke mounted.<br />
1.1. For reverse actuators, remove spring compression<br />
by unscrewing adjusting screw (item 20).<br />
1.2. Disconnect air supply line from actuator.<br />
1.3. Remove cap screw (item 29) from diaphragm<br />
housing (item 18), and remove upper housing<br />
(item 18) and actuator spring (item 23).<br />
1.4. Remove hex nuts (item 31) from top of stem<br />
(item 11).<br />
1.5. Remove lock washer (item 32), spring retainer<br />
(item 24), bearing washer (item 26), diaphragm<br />
plate (item 21) and diaphragm (item 17).<br />
1.6. Unscrew lower housing (item 16) from yoke<br />
(item 25) or bonnet (item 10).<br />
1.7. Loosen jam nut (item 38) that secures valve stem<br />
(item 11) to actuator stem (item 26) and unscrew<br />
the stems.<br />
1.8. Remove yoke (item 25) by unscrewing from<br />
bonnet (item 10).<br />
2. Direct Actuator (Spring Opening) close coupled<br />
or Yoke mounted.<br />
2.1. Disconnect air supply line from actuator.<br />
2.2. Loosen set screw (item 34 or 37) at base of<br />
spring cover (item 19) and remove cover, thus<br />
exposing spring (item 23).<br />
2.3. Unscrew and remove spring adjusting nut (item<br />
30 or 32) at top of actuator stem (item 20).<br />
2.4. Remove upper spring retainer (item 22), and<br />
spring (item 23).<br />
2.5. Remove cap screws (item 32 or 35) around<br />
diaphragm housing (item 18) and remove upper<br />
housing (item 18) by sliding it upward over the<br />
stem (item 20).<br />
2.6. Remove cotter pin (item 31 or 34) and unscrew<br />
upper stem (item 20) from lower stem (item 11<br />
or 25).<br />
2.7. Remove bearing washer (item 26 or 29),<br />
diaphragm (item 17) and diaphragm plate (item<br />
21).<br />
2.8. Unscrew lower housing (item 16) from yoke<br />
(item 24) or bonnet (item 10).<br />
2.9. Loosen jam nut (item 38) that secures valve stem<br />
to actuator stem (item 25) and unscrew the stem.<br />
2.10. Unscrew and remove yoke (item 24) from<br />
bonnet (item 10).<br />
C. ACTUATOR ASSEMBLY<br />
1. Reverse Actuator<br />
1.1. Reverse the procedure of "Actuator Disassembly"<br />
- Reverse Actuator.<br />
2. Direct Actuator<br />
2.1. Reverse the procedure of "Actuator<br />
Disassembly", - Direct Actuator.<br />
D. PREVENTIVE MAINTENANCE<br />
1. Seat<br />
1.1. Check every six (6) months if in normal service,<br />
i.e., no sand or abrasives and low pressure drop.<br />
If in severe service, i.e. high pressure drop and<br />
sanding condition, check every sixty (60) days.<br />
2. Inner <strong>Valve</strong><br />
2.1. Same as above.<br />
3. Bonnet<br />
3.1. Check packing every year.<br />
4. Actuator<br />
4.1. Check diaphragm and o-rings once a year.<br />
5. General Maintenance<br />
5.1. When disassembling any portion of valve, always<br />
check o-rings for damage or wear before re -<br />
assembly.<br />
6. Body<br />
6.1. Under normal conditions, body should last years.<br />
However, under severe conditions, i.e. corrosion,<br />
sand and high pressure drop, valve life could be<br />
numbered in days only. Inspect body every time<br />
actuator is removed.<br />
Maintained by: Sales Department Page 2 of 7 Doc. Name: OpMain<strong>2200</strong>.doc<br />
Approved by: Quality Department Rev.: C Date: 15-Apr-03
Operation and Maintenance<br />
<strong>Series</strong> <strong>2200</strong>/<strong>2220</strong> <strong>Control</strong> <strong>Valve</strong><br />
TROUBLE DIAGNOSIS<br />
WARNING SIGNAL IMMEDIATE CAUSE CORRECTIVE ACTION<br />
<strong>Valve</strong> leaks when in the<br />
closed position.<br />
Diaphragm housing leaks air<br />
from breather plug.<br />
<strong>Valve</strong> leaks. Flow under<br />
plug. <strong>Valve</strong> normally closed.<br />
Seat and plug O.K., nothing<br />
under plug.<br />
<strong>Valve</strong> will not open. Flow<br />
over plug. Normally closed<br />
valve.<br />
Something under plug or valve<br />
plug and seat are worn.<br />
Worn out diaphragm or<br />
diaphragm plates have worked<br />
loose and need tightening.<br />
Pressure drop across valve too<br />
great.<br />
Pressure drop across valve<br />
seat too great.<br />
Remove spring tension from valve if a spring closing valve.<br />
Remove valve top from body by turning hammer nut. By visual<br />
inspection you can see whether plug and seat are worn. Plug is<br />
usually the first to be replaced.<br />
Remove pressure form diaphragm housing and disassemble top.<br />
Replace diaphragm and o-ring. If nuts that hold diaphragm<br />
plates are loose, retighten.<br />
If spring is compressed all the way, then the actuator is too<br />
small or pressure drop across valve plug is too high. Check<br />
valve pressure drop table for limits on pressure drop and/or<br />
consult your Norriseal representative.<br />
Reduce spring tension. If this will not let valve open, then the<br />
actuator is too small or pressure drop across valve plug is too<br />
high. Consult pressure drop table and/or your Norriseal<br />
representative.<br />
CAUTION<br />
<strong>Valve</strong> globe body has this symbol ( ) cast on one side. Flowing ( ) indicates flow under plug. Flowing<br />
( ) indicates flow over plug. Flow under seat is for throttle service. Flow over plug can be used for on-off<br />
service. Flow under seat requires adjustment of the spring to be sufficient to keep plug on seat for tight shut off.<br />
Flow over seat requires sufficient air supply to raise plug from seat to open valve.<br />
CAUTION<br />
When flowing over plug and high pressure service is involved, slapping of plug on seat (Bath tub stopper theory) can occur and<br />
this will shorten the plug, seat/cage life.<br />
Reverse - normally closed valve: After applying spring compression to the actuator spring apply air to actuator and stroke valve<br />
to make sure of valve's travel.<br />
Direct - normally open valve: Air supply to actuator must be sufficient to hold plug on seat when flow is under plug. Flow over<br />
seat requires enough pre-load on spring to offset pressure over plug to pull plug off seat. Again you must have sufficient<br />
air pressure to force the plug into the seat.<br />
The 1" and 2" globe body has one inlet and one outlet port. The 1" "T" body has three ports, one inlet and one outlet with a pipe<br />
plug in the third port. <strong>Valve</strong> can be used for globe or angle flow by moving pipe plug to suit user. If customer moves pipe plug to<br />
another port after receiving from factory, customer should re-test valve body.<br />
Maintained by: Sales Department Page 3 of 7 Doc. Name: OpMain<strong>2200</strong>.doc<br />
Approved by: Quality Department Rev.: C Date: 15-Apr-03
Operation and Maintenance<br />
<strong>Series</strong> <strong>2200</strong>/<strong>2220</strong> <strong>Control</strong> <strong>Valve</strong><br />
SERIES 1” – 2” <strong>2200</strong> CONTROL VALVE<br />
Maintained by: Sales Department Page 4 of 7 Doc. Name: OpMain<strong>2200</strong>.doc<br />
Approved by: Quality Department Rev.: C Date: 15-Apr-03
Operation and Maintenance<br />
<strong>Series</strong> <strong>2200</strong>/<strong>2220</strong> <strong>Control</strong> <strong>Valve</strong><br />
SERIES 1” – 2” <strong>2200</strong> CONTROL VALVE<br />
Maintained by: Sales Department Page 5 of 7 Doc. Name: OpMain<strong>2200</strong>.doc<br />
Approved by: Quality Department Rev.: C Date: 15-Apr-03
Operation and Maintenance<br />
<strong>Series</strong> <strong>2200</strong>/<strong>2220</strong> <strong>Control</strong> <strong>Valve</strong><br />
SERIES 1” – 2” <strong>2220</strong> CONTROL VALVE<br />
Maintained by: Sales Department Page 6 of 7 Doc. Name: OpMain<strong>2200</strong>.doc<br />
Approved by: Quality Department Rev.: C Date: 15-Apr-03
Operation and Maintenance<br />
<strong>Series</strong> <strong>2200</strong>/<strong>2220</strong> <strong>Control</strong> <strong>Valve</strong><br />
SERIES 1” – 2” <strong>2220</strong> CONTROL VALVE<br />
Maintained by: Sales Department Page 7 of 7 Doc. Name: OpMain<strong>2200</strong>.doc<br />
Approved by: Quality Department Rev.: C Date: 15-Apr-03