IHS (GB) - Hwam
IHS (GB) - Hwam
IHS (GB) - Hwam

Create successful ePaper yourself
Turn your PDF publications into a flip-book with our unique Google optimized e-Paper software.
Table of contents, English<br />
Drawings .........................................................3-5<br />
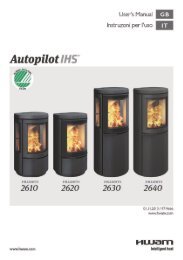
HWAM Autopilot <strong>IHS</strong>. .............................................. 6<br />
Installation. . . . . . . . . . . . . . . . . . . . . . . . . . . . . . . . . . . . . . . . . . . . . . . . . . . . . . . . . . 7<br />
Remote control. ................................................... 11<br />
Firing manual - wood. .............................................. 13<br />
Firing in general. ................................................... 15<br />
Maintenance. ...................................................... 16<br />
Operational problems .............................................. 17<br />
Declaration of Conformity. .......................................... 18<br />
2
E.<br />
F.<br />
6<br />
3<br />
4<br />
5<br />
2<br />
1<br />
4
G.<br />
3<br />
5<br />
4<br />
7<br />
12<br />
6<br />
13<br />
9<br />
1<br />
8<br />
11<br />
10<br />
6<br />
2 2<br />
1<br />
10<br />
5
Installation<br />
General information<br />
Installation of your HWAM woodburning stove must always comply with local building regulations. It is<br />
a good idea to consult your local chimney sweep before installing, since he will be the one to sweep the<br />
chimney and stove.<br />
Always follow the instructions of the manual carefully and make sure that the installation is carried out<br />
by a qualified professional.<br />
HWAM packaging material should always be handled in accordance with the local rules for waste handling.<br />
Room requirements<br />
There must be a constant supply of fresh air to the room in which the stove is to be installed. A window<br />
that opens or an adjustable air vent should be sufficient, but it is also possible to connect the stove to a<br />
HWAM combustion air system. The air inlet/grating must be placed so that they do not become blocked.<br />
Load-bearing capacity of floor<br />
Before installing the stove, you must ensure that the load-bearing capacity of the floor can withstand<br />
the weight of the stove and the chimney. The weight of the chimney should be calculated according to<br />
its dimensions and height.<br />
Technical data<br />
Model Weight Height Width Depth<br />
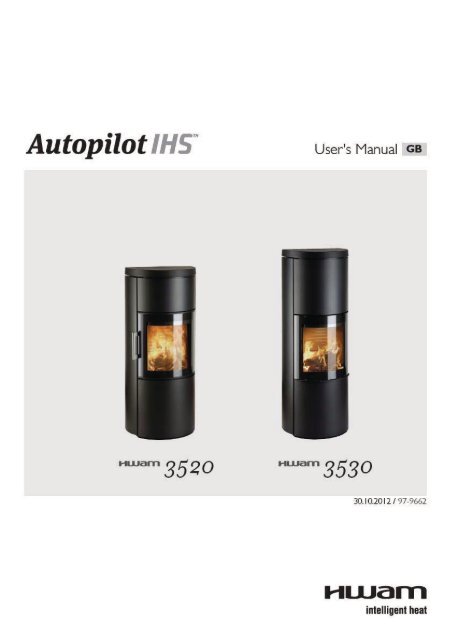
HWAM 3520 114 kg 125,8 cm 54,0 cm 37,1 cm<br />
HWAM 3520 w. soapstone cover 164 kg 135,8 cm 54,0 cm 37,1 cm<br />
HWAM 3530 124 kg 143,8 cm 54,0 cm 37,1 cm<br />
HWAM 3530 w. soapstone cover 184 kg 153,8 cm 54,0 cm 37,1 cm<br />
The stove is mainly made of sheet iron, with some items made of cast iron. The HWAM Autopilot <strong>IHS</strong> TM<br />
is an electronic product primarily consisting of plastic, a printed circuit board and wires.<br />
Test results from nominal test EN 13240<br />
Nominal heating effect<br />
4.5 kW<br />
Smoke temperature 219ºC<br />
Exhaust gas flow<br />
4.02 g/s<br />
Efficiency 83.1%<br />
Distance to inflammable materials<br />
Your HWAM woodburning stove should always be installed on a non-combustible hearth. If it is installed<br />
on a wooden floor or similar, the floor must be covered with a non-combustible material.<br />
HWAM 3520, HWAM 3530 (Drawing A)<br />
1. Recommended for brick wall 10 cm<br />
1. For inflammable back wall 10 cm<br />
2. For inflammable side wall 41 cm<br />
1.To inflammable wall,corner installation*<br />
25 cm<br />
3. Distance to furnishings in front 80 cm<br />
*All dimensions in connection with corner installation are only recommendations. Contact your chimney sweep<br />
for a clarification.<br />
7
Remember to pay attention to any regulations concerning the required distance between<br />
the wall and smoke pipe.<br />
Please be aware that not all glass parts are heat-resistant. For this reason, a glass wall should sometimes<br />
be treated as a flammable wall, in which case we ask you to contact your local chimney sweep or glass<br />
producer to hear at what distance the stove should be kept from glass.<br />
Requirements for chimney and smoke pipe<br />
The chimney must be of a sufficient height to enable an adequate draft and to prevent smoke problems.<br />
The stove requires a draft of at least 12 Pa.<br />
The chimney must have a minimum opening equivalent to Ø 150 mm. The chimney opening should always<br />
be at least the size of the outlet socket of the stove. The chimney must have an easily accessible soot door.<br />
Smoke pipe and chimney must always be suitable for a stove connection. Ask your HWAM dealer for<br />
more information.<br />
Smoke pipe and chimney must always be suitable for a stove connection. Ask your HWAM dealer for<br />
more information.<br />
Installing soapstone in the heat compartment (Drawing I)<br />
1. Lift one of the stove sides (1) about 10 mm and pull it away from the stove so that it disengages from<br />
the guide pins on the bottom plate of the stove. Repeat on the other side.<br />
2. Remove the four screws (2) (Torx Bit no. 30) beneath the top plate, two on each side, and lift the top<br />
plate (3) off.<br />
3. Remove the smoke ring (4) at the top of the stove by loosening the three screws (5) (Torx Bit no. 30).<br />
4. Remove the two pins (6) - one on each side - that lock the top plate of the heat storage compartment.<br />
Lift the top plate (7) slightly at the front and pull it away from the guide pins (8) found at the rear.<br />
5. Remove the smoke pipe (9) from the heat storage compartment.<br />
6. Loosen the two screws (10) on each side of the heat storage compartment that support the front<br />
plate of the heat storage compartment (11), and remove the front plate.<br />
7. Place soapstone slabs (12) in the heat storage compartment making sure that the hole in every slab<br />
is right above the smoke ring.<br />
8. Reattach the front plate of the heat storage compartment (11).<br />
9. Lead the smoke pipe (9) through the hole in the soapstone slabs and down into the smoke ring at the<br />
bottom of the heat storage compartment.<br />
10. Reposition the top plate of the heat storage compartment (7) in the guide pins (8) at the rear; once<br />
the top plate is correctly in place, lock it with the two pins (6).<br />
11 Mount the smoke ring (4) on top of the top plate of the heat storage compartment using the three<br />
screws. (5).<br />
12. Place the stove top plate (3) on the fittings (13) and secure it with the four screws (2), two in each side.<br />
13. Put one of the stove sides (1) on the guide pins in the bottom plate of the stove, and then press it<br />
in towards the stove. Lift the side and press it lightly downwards until it engages with the guide pins.<br />
Repeat with the other side.<br />
Connection to chimney<br />
All the stoves have both rear and top smoke outlet that can be connected to an approved steel chimney on<br />
top or directly out at the rear to a chimney.<br />
Make sure that the chimney is tight and that no false draft is caused around neither the cover plate, in<br />
connection with a covered smoke outlet, nor the cleanout door and pipe connections. Please note that<br />
bent and/or horizontal smoke pipes will reduce the effect of the chimney draft.<br />
8
Vertical cross-section of smoke flue (Drawing B and C)<br />
B: Top smoke outlet<br />
C: Rear smoke outlet<br />
• Steel chimney (9).<br />
• Flue gas elbow (10). Fits into smoke flue socket.<br />
• Brick-built jamb of flue (11).<br />
• Built-in pipe sleeve (12). Fits smoke flue.<br />
• Wall rosette (13). Covers disruption to wall around pipe sleeve.<br />
• Joint (14). Sealed with packing material.<br />
• Smoke outlets (15) of the HWAM stove.<br />
• Smoke flue regulating damper (16).<br />
• Soot door (17).<br />
Fitting the loose parts<br />
Before the stove is installed, you must ensure that all loose parts are fitted correctly.<br />
Vertical cross-section of the stoves (Drawing B):<br />
• The smoke shelf (5). To be placed on top of the steel rail and on the holders in the sides.<br />
• Two-piece smoke defector plate (6). Each half is hung on the hooks located beneath the top plate. The two<br />
halves join in the holders behind the air pipe. Once the stove has been installed, twist the protection off<br />
the two hooks by using pliers or a screwdriver.<br />
• Cover plate (7). Should always cover the grate.<br />
• Removable rear plate (2), covering automatic controls. This must always be mounted if the stove is<br />
placed next to a combustible wall.<br />
• Loose heat shield (8) under the ash pan. This can be used as a lid when the ash pan is removed for<br />
emptying.<br />
Connecting and preparing the HWAM Autopilot <strong>IHS</strong> TM<br />
1. Connect the plug<br />
a) to a normal 230V socket<br />
b) to the Air box in the wood section underneath the combustion chamber (lead the plug through<br />
the air slot at the bottom between the side and rear plates - on the left side of the wood-burning<br />
stove when seen from the front. There is a mark on the Air box where the plug should be let in. See<br />
the photo of the power supply on the Air box.<br />
Air box withour power supply<br />
Air box with power supply<br />
2. Insert three AA batteries in the remote control.<br />
3. Go through the self-test of the HWAM Autopilot <strong>IHS</strong> TM :<br />
The self-test of the electronic control is carried out before lighting the first fire in the stove. Press the<br />
remote control button for five seconds in order to enter the menu. Press the button until the cursor<br />
reaches “Self-test”. Wait a few seconds till the remote control enters the “Self-test” menu. Press the<br />
button till the cursor reaches “Engage”. A few seconds later the self-test begins.<br />
By going through a self-test you ensure that all basic operations function correctly.<br />
9
A self-test consists of four test types:<br />
• A software test<br />
• A test of the temperature sensor<br />
• A test of the lambda sensor<br />
• A test of the three motor valves<br />
The remote control will respond with the text ”Pass” if everything is OK or ”Fail” if there is a problem.<br />
4. The remote control should be placed in the same room as the wood-burning stove, and in a location<br />
where it is not exposed to direct heat radiation from the stove. The reason is that the remote<br />
control functions as a thermometer. The room temperature is transmitted wirelessly to the stove’s<br />
electronic control to support the intelligent regulation of the combustion. The remote control stand<br />
can be mounted on the wall.<br />
Cover plate (Drawing D)<br />
Your HWAM woodburning stove is supplied with a loose cover plate for the shaking grate. This is a 3<br />
mm thick iron plate. It is placed on top of the shaking grate and prevents the embers from falling into<br />
the ash pan. The cover plate is raised approx. 8 mm above the grate, thus ensuring that the automatically<br />
controlled primary combustion air is distributed evenly at the base of the combustion chamber.<br />
Chimney<br />
The chimney is the “engine” of the stove and it is crucial for the functioning of the woodburning stove.<br />
The chimney draft provides a partial vacuum in the stove. The partial vacuum removes the smoke from<br />
the stove, sucks air through the damper to the so-called pane flush mechanism, which keeps the window<br />
pane soot free, and sucks air into the combustion via the HWAM Autopilot <strong>IHS</strong> TM .<br />
The chimney draft is created by the differences in temperature inside and outside the chimney. A brick<br />
chimney takes longer to warm up than a steel chimney. On days where the weather and wind conditions<br />
create insufficient draught inside the chimney, it is even more important to warm up the chimney as quickly<br />
as possible. The trick is to quickly get some flames going. Split the wood into extra fine pieces, use an extra<br />
firelighter, etc.<br />
If the stove has not been used for a longer period, it is important to check that the chimney pipe is not blocked.<br />
It is possible to connect several devices to the same chimney. However, it is important to first check the<br />
applicable rules.<br />
Even a good chimney can function badly if it is not used correctly. Similarly, a bad chimney may function<br />
well if used correctly.<br />
Chimney sweeping<br />
To prevent the risk of chimney fires, the chimney must be cleaned every year. The flue duct and the smoke<br />
chamber above the baffle plate must be cleaned together with the chimney. If the chimney is too tall to<br />
be cleaned from above, it must be equipped with a soot door.<br />
In case of a chimney fire and overheating, the HWAM Autopilot <strong>IHS</strong> TM will enter a security mode and<br />
automatically adjust all dampers, effectively quenching the fire. Do not open the stove door, since that<br />
might cause the fire to rekindle. Contact the fire brigade. After a fire, the stove should be checked by a<br />
chimney sweep before use.<br />
10
Firing manual - wood<br />
When you light the stove for the first time it should not be stoked excessively as all the materials must<br />
be given time to adapt to the effects of heat. The lacquer will be fully hardened after the stove has been<br />
used, and the door and the ashpan should be opened very carefully as there will otherwise be a risk that<br />
the gaskets will stick to the lacquer. In addition the lacquer may initially give off an unpleasant odour, so<br />
make sure that the room is well ventilated.<br />
Tips about fuel<br />
Approved fuel types<br />
The wood burning stove is EN approved for combustion of wood only. It is recommended to use dried<br />
chopped wood with a water content of a maximum of 20%. Stoking a fire with wet wood results in soot,<br />
environmental problems, and a less efficient fuel economy.<br />
Recommended wood types<br />
All types of wood, for instance birch, beech, oak, elm, ash, conifers, and fruit trees can be used as fuel in your<br />
wood burning stove. The great difference is not in the fuel value, but in the weight of the wood types per<br />
cubic metre. Since beech weighs more per cubic metre than for instance common spruce, it will take more<br />
common spruce to produce the same amount of heat that you would get from a cubic metre of beech.<br />
Banned fuel types<br />
It is not allowed to stoke a fire with the following: printed matter, plywood, plastic, rubber, fluid fuels,<br />
and rubbish such as milk cartons, lacquered wood or impregnated wood and fossil fuels. The reason that<br />
you should not apply any of the above is that during combustion they develop substances that are health<br />
hazardous and harmful to the environment. These substances could also damage your wood burning stove<br />
and chimney, rendering the product warranty void.<br />
Storage of wood<br />
A water content of a maximum of 20% is achieved by storing the wood for a minimum of one year,<br />
preferably two years, outdoors under a lean-to. Wood stored indoors has a tendency to become too<br />
dry and combust too quickly. However, it might be advantageous to store fuel for lighting a fire indoors<br />
for a few days prior to use.<br />
Recommended dimensions<br />
The dimensions of the fuel are important to good combustion. The dimensions should be as follows:<br />
Fuel type Length in cm Diameter in cm<br />
Wood for kindling a fire (finely chopped) 25-30 2-5<br />
Chopped wood 25-30 7-9<br />
Special lighting guide for wood-burning stoves with soapstone cladding<br />
Soapstone is a natural product, which needs to get used to the changes in temperature. For this reason<br />
you should be very careful the first times you light up the stove. It is recommended that you follow the<br />
procedure outlined below:<br />
1. The First Stoking (Soapstone)<br />
Place split kindling with a diameter of 2-5 cm the equivalent of approx. two pieces of wood (a maximum<br />
of two kilos) in the stove. Place two fire-lighters in between the top layers of kindling. Press the remote<br />
control twice to activate the symbol of lighting up. Light up the fire-lighters and close the stove door.<br />
Adjust the temperature selection mechanism on the remote control to level one. Let the fire burn out<br />
and do not restoke even if there is a restoking alarm. When the fire has died out completely, the door<br />
must be opened and stay open while the stove cools down to room temperature.<br />
13
Firing in general<br />
Rapid or fierce heat<br />
Rapid or fierce heat is obtained by burning many small pieces of wood.<br />
Maximum amounts of fuel:<br />
The maximum allowed amount of fuel per hour is:<br />
Wood: 2.0 kg<br />
If these limits are exceeded, the stove will no longer be covered by the factory guarantee, and it may also<br />
become damaged due to excessive heat. The stove has been approved for intermittent use.<br />
Typical re-firing interval<br />
Typical re-firing interval at nominal performance<br />
Wood: 65 min<br />
Long burning times<br />
Basically, the HWAM Autopilot <strong>IHS</strong> TM will burn as slowly and as economically as possible. The slowest<br />
combustion is achieved by adjusting the thermostat on the remote control to level one.<br />
How to achieve the best combustion<br />
The HWAM Autopilot <strong>IHS</strong> TM is purposely designed to generate the cleanest and the most economical<br />
combustion. A good combustion is achieved when the fire gets the right amount of oxygen supply at the<br />
right time and place in the combustion chamber. The HWAM Autopilot <strong>IHS</strong> TM allows for variations in<br />
external circumstances. Nevertheless, it is important to use clean and dry wood (humidity approx. 16-20%).<br />
Cleaning the glass<br />
We recommend wiping the glass after a fire. This is best done using a paper towel.<br />
Types of fuel<br />
The stove may be damaged by very high temperatures and the glass may turn white, for example. This can<br />
be avoided by never allowing the stove to burn with the ashpan open and taking great care with types of<br />
fuel that develop excessive heat, such as briquettes. If the flue gas temperature exceeds 550 o Celsius, the<br />
HWAM Autopilot <strong>IHS</strong> TM will revert to safety adjustments and automatically turn down the air valves to<br />
avoid overheating. When the temperature is reduced to 450 o Celsius, the normal functions apply again.<br />
We recommend using birch or beechwood, which has been split and stored for at least one year outdoors<br />
under cover. Wood stored indoors tends to become too dry and burn too quickly.<br />
Briquettes give off a lot of heat. Certain types expand considerably, thus causing an uncontrollable combustion.<br />
Coal burns at a high temperature and makes a lot of soot.<br />
Coal must be burned using the coal insert. Not suitable for fuel in these models.<br />
Coke burns at a high temperature and makes a lot of soot. Coke must be burned using the coal insert.<br />
Coke causes severe wear and tear to stove and combustion chamber and, consequently, this considerably<br />
reduces the life expectancy of the stove and chimney. Not suitable for fuel in these models.<br />
The stove is EN 13240 approved for firing wood only. No particle board, lacquered, painted<br />
or treated wood, plastics, or rubber may be burned.<br />
15
Maintenance<br />
Cleaning<br />
Any maintenance of the stove should only be carried out when it is cold. Daily maintenance is limited to<br />
vacuum cleaning the stove externally, using the soft brush attachment. You can also dust the stove using a<br />
dry, soft cloth or brush. But remember, only when the stove is cold. Do not use water, spirit or any other<br />
kind of cleaner, as this will damage the lacquer.<br />
Once a year, the stove should be thoroughly serviced. The combustion chamber should be cleared of<br />
ashes and soot. Use copper grease for hinges and locking hooks (see drawing F).<br />
Service inspection<br />
Your stove should be given a thorough, preventive inspection once every two years. This includes:<br />
• Thorough cleaning of the stove.<br />
• Checking gaskets. Replace gaskets if they are not intact or have softened.<br />
• Checking of heat insulating material and possibly replacement.<br />
• Checking of the bottom/shaking grate.<br />
• Use copper grease for hinges and locking hooks (see drawing F).<br />
All service checks must be performed by an authorised fitter. Use only original spare parts.<br />
Inside cleaning<br />
The smoke shelf and baffle plate is to be removed from the stove before cleaning<br />
(Drawing E).<br />
• First lift the smoke shelf (1) out of the steel rail (2) at the back of the combustion chamber. Next, lower<br />
it beneath the holders (3) and slide it out.<br />
• Lift each half of the steel smoke plate (4) off the holder (5) behind the smoke pipe, and remove them<br />
from the hook (6) beneath the top plate.<br />
Ashes<br />
The ash pan is best emptied by pulling a waste bag over the pan, tipping it and then carefully pulling it out<br />
of the bag. Ashes are disposed of via the domestic waste collection.<br />
Please note that there may be embers in the ashes for up to 24 hours after the fire has<br />
gone out!<br />
Insulation<br />
The efficient, but porous insulation of the combustion chamber may, in time, become worn and damaged.<br />
Cracks in the insulation have no effect on the efficiency of the stove. The insulation should be replaced,<br />
however, when it is reduced to less than half the original thickness due to wear and tear.<br />
Door/glass<br />
A sooty glass door can easily be cleaned with a piece of moist kitchen roll dipped in ash. Go about it<br />
in vertical movements (up and down). Follow up with a dry piece of kitchen roll. Check frequently to<br />
ensure that seals in the door and ash pan are intact and not brittle. Failing this, they should be replaced.<br />
Use original seals only.<br />
Surface<br />
The surface normally requires no treatment. Any damage to the coating may be remedied using a Senotherm<br />
spray.<br />
Guarantee<br />
The guarantee does not cover damage due to insufficient maintenance!<br />
16
Maintenance Alarms<br />
If a maintenance alarm goes off, you can continue using the wood-burning stove, but contact your dealer<br />
as soon as possible. Your stove could be affected by impure combustion.<br />
Operational problems<br />
Blackened glass<br />
• The wood is too damp. Only use wood stored for at least 12 months under cover and with a<br />
moisture level not exceeding 20% RH.<br />
• Faulty seal in door. Fit new seal.<br />
Smoke in the room when opening door<br />
• The grate in the chimney may be closed. Open the grate.<br />
• Insufficient chimney draft. See section on chimney or contact chimney sweep.<br />
• Soot door leaking or dislodged. Replace or refit.<br />
• Never open the door when there are still flames on the wood.<br />
Uncontrollable combustion<br />
• Faulty seal in door or ash pan. Fit new seal.<br />
Safety Alarms<br />
In case the safety alarms go off, you must not use the stove. Contact your dealer as soon as possible.<br />
At interruptions that you cannot yourself rectify, you should contact the dealer.<br />
17
Declaration of Conformity<br />
Manufacturer:<br />
HWAM A/S<br />
Nydamsvej 53<br />
DK – 8362 Hørning<br />
Test institute (EN 13240):<br />
RRF - Rhein-Ruhr Feuerstättenprüfstelle<br />
Am Technologiepark 1<br />
D-45307 Essen<br />
hereby declares that:<br />
Product:<br />
Type:<br />
Wood-burning stove HWAM 3520<br />
HWAM 3530<br />
was manufactured in accordance with the provisions of the following directive:<br />
Reference no. Title:<br />
89/106/EEC<br />
Construction Products – CPD<br />
and the following harmonised standards:<br />
No: Title: Udgave:<br />
EN 13240 Roomheaters fired by solid fuel 2001<br />
EN 13240/A2 Roomheaters fired by solid fuel 2004<br />
and other standards and/or technical specifications<br />
No:<br />
Title:<br />
NS 3058<br />
Enclosed wood heaters - Smoke emission<br />
NS 3059<br />
Enclosed wood heaters - Smoke emission<br />
Hørning, 26.09.2012<br />
Torsten Hvam Sølund<br />
Factory and quality manager<br />
18
www.hwam.com