TT-RISER-KIT DAB-9 - Pentair Thermal Controls
TT-RISER-KIT DAB-9 - Pentair Thermal Controls
TT-RISER-KIT DAB-9 - Pentair Thermal Controls

You also want an ePaper? Increase the reach of your titles
YUMPU automatically turns print PDFs into web optimized ePapers that Google loves.
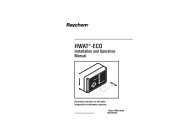
Assembly Instructions<br />
<strong>TT</strong>-<strong>RISER</strong>-<strong>KIT</strong> <strong>DAB</strong>-9<br />
General Instructions<br />
Please read these instructions and keep them for reference.<br />
These instructions provide guidance to support the installation<br />
of TraceTek leak detection cable inside a Dabico D9 Pit, using the<br />
parts included in this kit. Refer to the picture (at left) to identify<br />
the parts included in this kit.<br />
Additional Materials Required<br />
• <strong>TT</strong>-MBC-MC-TW (part# P000001206) is a branch connector used<br />
in rugged outdoor applications. It will be required if a branching<br />
circuit is utilized in the leak detection system.<br />
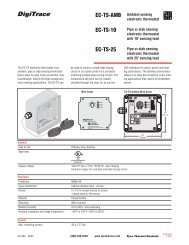
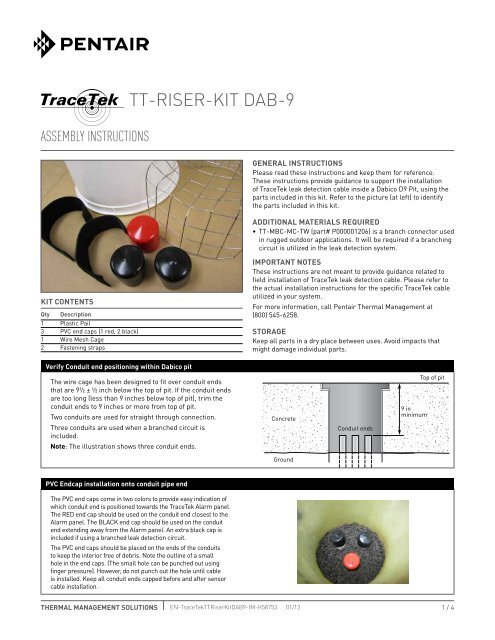
Kit Contents<br />
Qty Description<br />
1 Plastic Pail<br />
3 PVC end caps (1 red, 2 black)<br />
1 Wire Mesh Cage<br />
2 Fastening straps<br />
Important Notes<br />
These instructions are not meant to provide guidance related to<br />
field installation of TraceTek leak detection cable. Please refer to<br />
the actual installation instructions for the specific TraceTek cable<br />
utilized in your system.<br />
For more information, call <strong>Pentair</strong> <strong>Thermal</strong> Management at<br />
(800) 545-6258.<br />
Storage<br />
Keep all parts in a dry place between uses. Avoid impacts that<br />
might damage individual parts.<br />
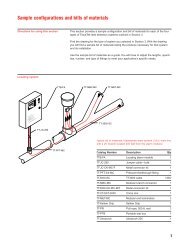
Verify Conduit end positioning within Dabico pit<br />
The wire cage has been designed to fit over conduit ends<br />
that are 9½ ± ½ inch below the top of pit. If the conduit ends<br />
are too long (less than 9 inches below top of pit), trim the<br />
conduit ends to 9 inches or more from top of pit.<br />
Two conduits are used for straight through connection.<br />
Three conduits are used when a branched circuit is<br />
included.<br />
Note: The illustration shows three conduit ends.<br />
Concrete<br />
Conduit ends<br />
9 in<br />
minimum<br />
Top of pit<br />
Ground<br />
PVC Endcap installation onto conduit pipe end<br />
The PVC end caps come in two colors to provide easy indication of<br />
which conduit end is positioned towards the TraceTek Alarm panel.<br />
The RED end cap should be used on the conduit end closest to the<br />
Alarm panel. The BLACK end cap should be used on the conduit<br />
end extending away from the Alarm panel. An extra black cap is<br />
included if using a branched leak detection circuit.<br />
The PVC end caps should be placed on the ends of the conduits<br />
to keep the interior free of debris. Note the outline of a small<br />
hole in the end caps. (The small hole can be punched out using<br />
finger pressure). However, do not punch out the hole until cable<br />
is installed. Keep all conduit ends capped before and after sensor<br />
cable installation.<br />
THERMAL MANAGEMENT SOLUTIONS EN-TraceTek<strong>TT</strong>RiserKit<strong>DAB</strong>9-IM-H58753 01/13<br />
1 / 4
Routing TraceTek cable through conduit pipe end during cable installation<br />
When installing TraceTek cable into the Dabico pit, the PVC<br />
end cap hole can be punched out using finger pressure.<br />
Push the TraceTek cable through the hole. You may need to<br />
bend the end cap to open the hole enough for the cable end<br />
to pass through.<br />
After TraceTek cable connectorization completed, place wire cage over conduit ends<br />
Carefully complete any TraceTek cable connectorization (if<br />
required). Route the cable through the openings in the wire<br />
cage, so that the wire cage can rest on the ground, and be<br />
positioned above the conduit end caps- without putting any<br />
lateral pressure on the cable. Center the wire cage so that it<br />
is not against the sidewall of the Dabico pit in order to provide<br />
clearance for the plastic pail to rest against the ground. If<br />
necessary, the wire cage can be bent/shaped to fit the needs of<br />
the conduit orientation within the Dabico pit.<br />
Making cable connections and securing the fastening straps<br />
Take up any loose slack in the connector wires and TraceTek<br />
cables by forming loops approximately 4 to 5 inches in<br />
diameter. Avoid tightly bent cable and kinks/pinch points<br />
that produce pressure that can lead to false alarms. Loop<br />
orientation should be vertical.<br />
TraceTek cable should not be secured with tie wraps, since<br />
the pressure could lead to false alarms. Fastening straps<br />
have been provided to maintain loop shape above the wire<br />
cage. Maintain vertical loop positioning while putting on the<br />
fastening straps.<br />
Note: For clarity, pictures of cable connections do not<br />
include the heat shrink tubing that is used in the TraceTek<br />
cable connectorization and installation process.<br />
THERMAL MANAGEMENT SOLUTIONS EN-TraceTek<strong>TT</strong>RiserKit<strong>DAB</strong>9-IM-H58753 01/13 2 / 4
If branching circuits are used:<br />
After making TraceTek cable connections, create loops<br />
approximately 4 to 5 inches in diameter. Avoid tightly bent cable<br />
and kinks/pinch points that produce pressure that can lead to<br />
false alarms. Loop orientation should be vertical. Secure the<br />
cable loops with the fastening straps, and place on the wire<br />
cage. Gently position within the center portion of the wire cagemaintaining<br />
vertical loop orientation and minimizing cable<br />
extension outside the wire cage.<br />
Note: For clarity, pictures of cable connections do not include the heat shrink tubing that is used in the TraceTek cable<br />
connectorization and installation process.<br />
Getting the pail to fit properly<br />
The key to getting the pail to fit is to first tilt the lip of the pail<br />
(about 30 degree angle) to fit it under one of the protruding<br />
metal posts on the Dabico pit sidewall. Pressing firmly on the<br />
pail side above the pail lip will allow the pail to be pushed down<br />
past the metal post. Gently push the pail down to the ground<br />
while avoiding the wire cage. If you sense any resistance from<br />
the cable and connectors, remove the pail- check that the wire<br />
cage and cables are positioned in the center of the pit. When<br />
properly positioned, the top of pail should be located below the<br />
level of the metal posts on the Dabico pit.<br />
THERMAL MANAGEMENT SOLUTIONS EN-TraceTek<strong>TT</strong>RiserKit<strong>DAB</strong>9-IM-H58753 01/13<br />
3 / 4
Installing the Dabico Pit cover<br />
There should be no interference from the pail when the<br />
cover is installed. If you sense interference when installing<br />
the cover, do not force the cover on. Instead remove the<br />
cover and inspect the pail position within the center of the<br />
pit, and relative to the metal posts. If necessary, remove the<br />
pail to inspect the positioning of the wire cage and cable<br />
loop wiring, making sure nothing is interfering with the pail<br />
lip resting evenly on the ground surface.<br />
Removing the pail<br />
If you need to remove the pail, you will need to raise one lip<br />
of the pail to a metal post, then push the pail wall firmly away<br />
from the post-while sliding the pail up and past the metal<br />
post. Once the pail lip has passed the metal post, the pail<br />
can be tilted at about a 30 degree angle to bring it out of the<br />
Dabico pit.<br />
WWW.THERMAL.PENTAIR.COM<br />
NORTH AMERICA<br />
Tel: +1.800.545.6258<br />
Fax: +1.800.527.5703<br />
Tel: +1.650.216.1526<br />
Fax: +1.650.474.7215<br />
thermal.info@pentair.com<br />
Europe, Middle East, Africa<br />
Tel: +32.16.213.511<br />
Fax: +32.16.213.603<br />
thermal.info@pentair.com<br />
Asia Pacific<br />
Tel: +86.21.2412.1688<br />
Fax: +86.21.5426.2917<br />
cn.thermal.info@pentair.com<br />
Latin America<br />
Tel: +55.11.2588.1400<br />
Fax: +55.11.2588.1410<br />
thermal.info@pentair.com<br />
<strong>Pentair</strong> and TraceTek are owned by <strong>Pentair</strong> or its global affiliates. All other trademarks are the property of their respective owners. <strong>Pentair</strong> reserves the<br />
right to change specifications without prior notice.<br />
© 2011-2013 <strong>Pentair</strong>. PN P000000717<br />
THERMAL MANAGEMENT SOLUTIONS EN-TraceTek<strong>TT</strong>RiserKit<strong>DAB</strong>9-IM-H58753 01/13<br />
4 / 4