Orbit WaterMaster 57926 ST2-RF Controller With ... - Irrigation Direct
Orbit WaterMaster 57926 ST2-RF Controller With ... - Irrigation Direct
Orbit WaterMaster 57926 ST2-RF Controller With ... - Irrigation Direct

Create successful ePaper yourself
Turn your PDF publications into a flip-book with our unique Google optimized e-Paper software.
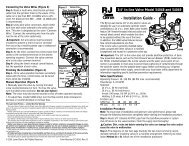
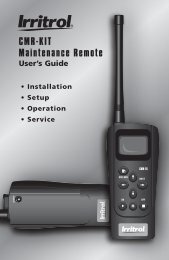
Activating the Batteries<br />
• Slide the docking port off the timer unit to gain access to the<br />
battery compartment door.<br />
• Slide the door off the battery compartment in the direction<br />
of the arrow.<br />
• Remove the black strip from the battery compartment.<br />
• Replace the battery compartment door.<br />
• Slide the docking port back onto the main controller unit.<br />
If no programming occurs after the RESET button has been<br />
pressed and the dial is left in the AUTO position the timer will<br />
assume a default program mode. In default mode, the timer will<br />
automatically water each station for 10 minutes, beginning at 5<br />
a.m. each day.<br />
Select the Preferred Language<br />
• Turn the selection dial to BUDGETING/LANGUAGE.<br />
ENGLISH<br />
• Press the RAIN DELAY button.<br />
• Press the NEXT<br />
shown in the display.<br />
button until the desired language is<br />
The display will show “LOW BATTERY” when it is time to<br />
replace the batteries.<br />
NOTE: Batteries alone will not operate the valves in your sprinkling<br />
system. The transformer must be plugged in and have power to operate<br />
your system normally.<br />
Reset the Timer<br />
If this is the first time the sprinkler timer has been programmed,<br />
you should press the small recessed button labeled<br />
RESET (located under the RAIN DELAY button). You will probably<br />
need a pen, pencil or similarly small object to push it.<br />
Do not press the RESET button again unless you want to completely<br />
remove all your programming, including time and date.<br />
• Exit the language selection mode by turning the selection dial<br />
or pressing the RAIN DELAY button.<br />
Set the Time of Day and Date<br />
If this is the first time the timer has been programmed, press<br />
the small recessed RESET button.<br />
• Turn the selection dial to TIME/DATE.<br />
• The top line of the display reads “SET TIME.” Set the current<br />
time by pressing either the or button.<br />
NOTE: To move faster through the time or other selections, hold the<br />
or buttons down, rather than merely pressing and releasing.<br />
• Press the ENTER button. The display now reads “SET<br />
YEAR.” Set the current year by pressing either the<br />
or button.<br />
5